Best Sweet Potato Recipe

sweet potato recipe

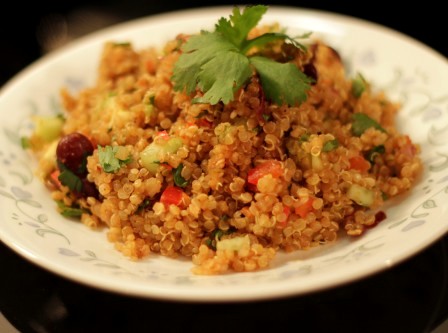
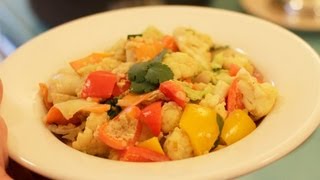
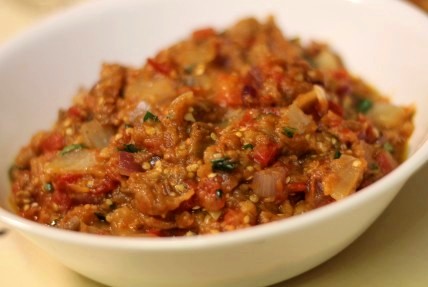
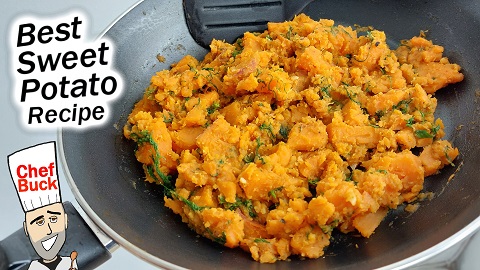
I love sweet potato and CG and I found a delicious savory sweet potato recipe at a local BBQ joint. Cumin and fresh cilantro add a tasty and surprising twist to this delicious sweet potato dish, so if you’re looking for an alternative to a classic candied sweet potato, then try this potato recipe out; it’s easy to cook and makes a versatile side dish.

Sweet Potato Recipe Ingredients

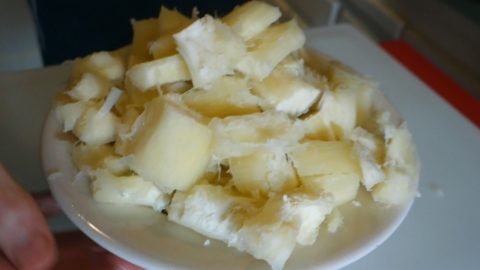
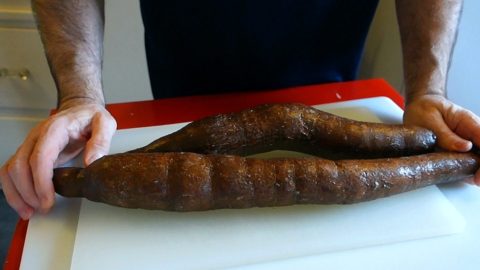
3 SWEET POTATOES rough cut
1 cup fresh CILANTRO chopped
2-3 cloves GARLIC minced
1 tsp CUMIN
½ CHILI POWDER
SALT to taste

Check current prices for a new non-stick skillet on Amazon.

sweet potato recipe
savory sweet potato with brussels sprouts and a sandwich

How to Make a Savory Sweet Potato Recipe

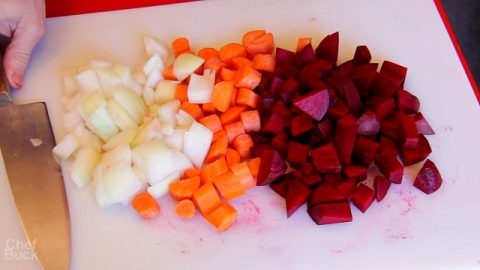
  • Cut most of your sweet potato into rustic sizes, but I like to cut about ½ cup of the potato into smaller sizes so it’ll cook down faster.
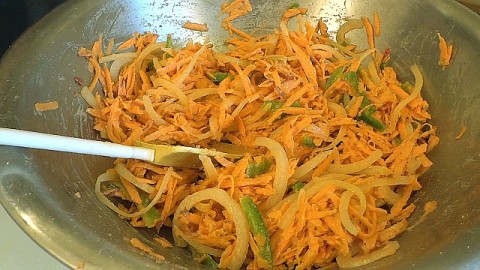
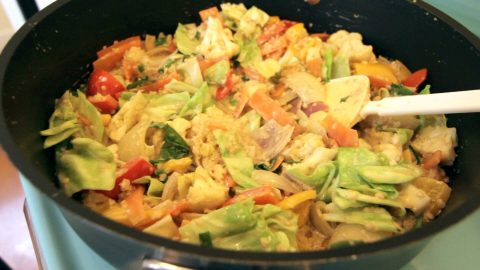
  • Heat oil in a skillet on medium heat and add in the potato and saute for a few minutes.
  • Add in the seasoning and garlic and cook for another 2 minutes. I added measurements in the recipe for seasoning, but really it’s all season to taste, especially the cumin; put a little more than you think you want, and you might be surprised how tasty it gets.
  • Add in 1 cup of water, cover your skillet and bring the dish to a simmer. Simmer until the potato becomes soft enough to smash with a fork and add a little more water if needed.
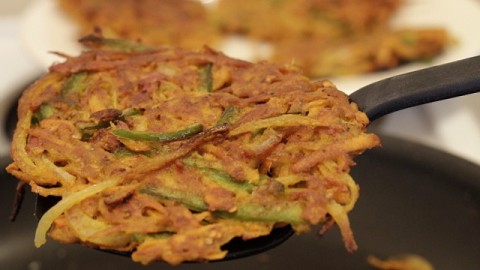
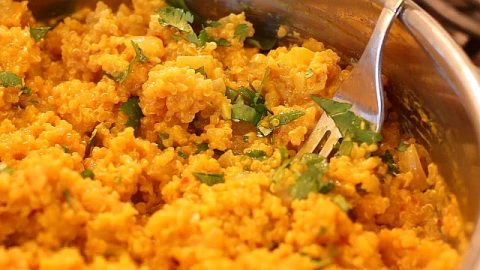
  • Smash about ⅓ of the potato in the skillet, adjust seasoning to taste, and continue to cook to the consistency you desire.
  • When the potato is done, turn off the heat and stir in the fresh cilantro.

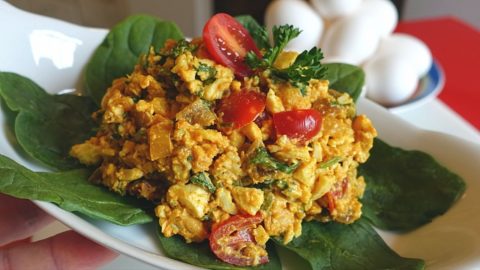
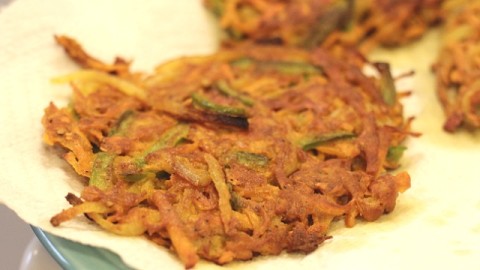
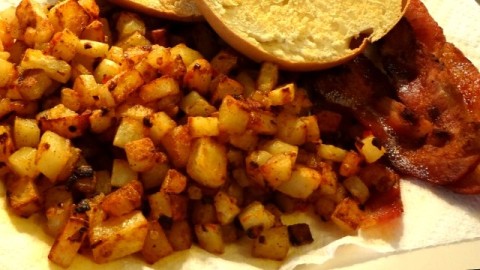
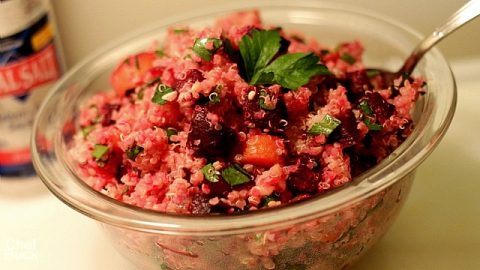
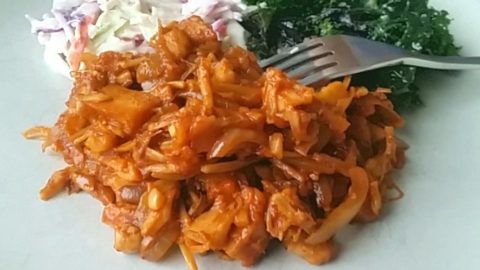
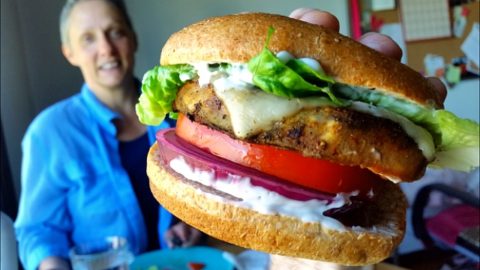
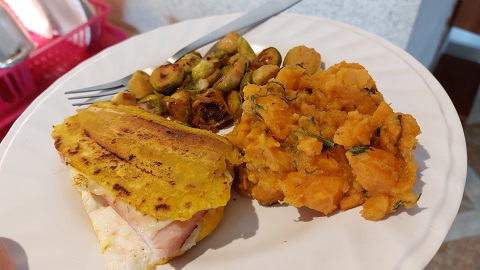
This savory sweet potato recipe makes a great side dish. We originally had it with BBQ ribs and it was a perfect pairing. Give this recipe a try and let us know what you think.

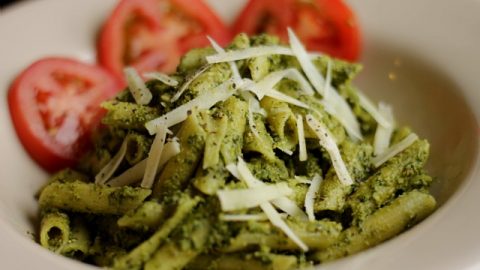
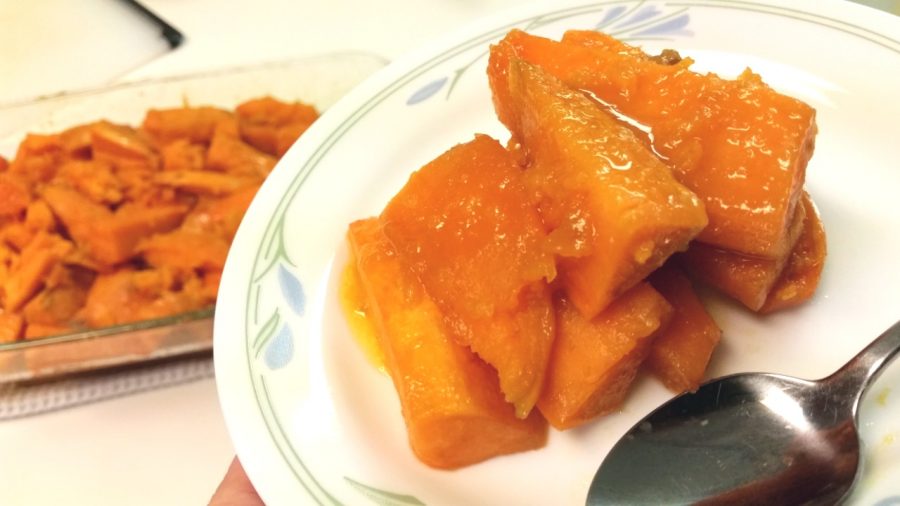
For a classic sweet potato dish, try a Candied Sweet Potato Recipe.

Thanks for Watching our Sweet Potato Recipe Video!

Click a button below and share the dishes with your friends. You can also follow Chef Buck on Youtube. We appreciate all the kind comments and support, and we’ll see you next time in the kitchen!

If you like what CG and I do, support us on Patreon, or throw us a tip in our Paypal Tip Jar. We’ll happily enjoy a coffee on the road – Thanks! We appreciate all the support, and we’ll see you next time in the kitchen!

We include affiliate links for products on our website. Making a purchase after clicking on our links and we may earn a commission which helps us produce more videos and drink more coffee :^) We participate in the Amazon Services LLC Associates Program, which is an affiliate advertising program. It provides a means for us to earn fees by linking to Amazon.com and affiliated sites, so we can make more videos.

If you’re new to home cooking, get a bunch of spices, pots and pans, and start experimenting with different recipes. It’s a healthy hobby that can save a lot of money in the long run. Check out current prices for Complete Kitchenware Sets on Amazon as well as Complete Starter Spice Kits. Or try a thrift store! I’ve found some of my favorite kitchen gear at second-hand stores.

Share and Enjoy !

Carrot Muffin Recipe – Tiny Carrot Bread

Try this carrot muffin recipe if you’re skeptical about veggies in dessert. But be warned, these carrot muffins are extremely addictive. Carrots make these muffins moist and delicious! And these carrot muffins freeze well, so you can make a big batch and tuck some perfect muffins away for another day.

carrot muffin recipe

Ingredients for a Carrot Muffin Recipe

2½ cup CARROTS freshly grated
1¼ cup All- PURPOSE FLOUR
¾ cup ROLLED OATS
1 cup SUGAR
1½ tsp BAKING SODA
1½ tsp CINNAMON
1 tsp SALT
3 EGGS
¾ cup OIL
¼ cup MILK
1 tsp VANILLA
1 cup WALNUTS chopped
Optional Topping:
Whipped cream cheese

How to Make Carrot Muffins

Most important – you do not want to overmix your batter. Once you’ve combined your dry and wet ingredients, you want to mix just long enough to gently distribute all the ingredients!

Check out current Muffin Pan prices on Amazon. And here are cupcake liners for your muffins.

  • Take eggs and milk out of the refrigerator – if they not already out. [You can just place the eggs in a bowl of warm water while you grate the carrots, chop the walnuts and mix dry ingredients.]
  • Grate carrots. We grate our carrots the large size of a manual grater. Set aside.
  • Chop walnuts. Set aside.
  • Preheat oven to 350 F.
  • Prepare your muffin tins using one of these methods: paper or foil cupcake liners, parchment paper (cut into squares, pressed into tins with the base of a glass), or grease tins with melted butter.
  • In a medium bowl, combine dry ingredients: flour, oats, sugar, baking soda, cinnamon, salt.
  • In a large bowl, whip eggs until bubbles appear. Add oil, milk, and vanilla.
  • Add the dry mixture into the wet mixture. Turn with a spoon just until most of the dry ingredients are moistened.
  • Add carrots and walnuts, then just mix until combined. Do not overmix.
  • Pour into prepared muffin tins and bake for 15-25 minutes, depending on the size of the muffins you pour. Check muffins after baking for about 15 minutes. Muffins are ready to come out when a toothpick poked into the center of the center muffin comes out clean.
  • When muffins have baked, as soon as safely possible, remove them from the muffin tin and place on a cooling rack.

Experiment with this Carrot Muffin Recipe

  • Instead of sugar, you use ¾ cup maple syrup AND do NOT add any milk (to balance the recipe’s total liquid)
  • Also, you can add ½ tsp of other spices like apple pie spice, pumpkin pie spice, cardamom.
  • Or, try another kind of nut – or no nuts at all.
  • Add ½ to ¾ cup of raisins, cranberries or coconut.
  • Make Carrot Bread! Instead of muffins, you can make a single 9×5 bread loaf. Use parchment paper or oil/flour for the bottom of the pan; this helps your loaf to come out in one piece. Bake loaf for 45-65 minutes; check after 45 minutes. The carrot bread will cut better once it’s cooled.

Want another recipe treat that goes great with coffee? Try this perfect Biscotti Recipe.

Thanks For Watching Our Recipe Videos!

Thanks for checking out this easy carrot muffin recipe, and all of our recipes. Sign up for our mailing list so you’ll never miss a new recipe. Also click a button below and share the dishes with your friends. You can also follow Chef Buck on Youtube. We appreciate all the kind comments and support, and we’ll see you next time in the kitchen!

If you like what CG and I do, support us on Patreon, or throw us a tip in our Paypal Tip Jar. We’ll happily enjoy a coffee on the road – Thanks! We appreciate all the support, and we’ll see you next time in the kitchen!

We include affiliate links for products on our website. Making a purchase after clicking on our links and we may earn a commission which helps us produce more videos and drink more coffee :^) We participate in the Amazon Services LLC Associates Program, which is an affiliate advertising program. It provides a means for us to earn fees by linking to Amazon.com and affiliated sites, so we can make more videos.

Share and Enjoy !

Easy Biscuits – No Butter Biscuit Recipe

easy biscuits

Bake easy biscuits in a matter of minutes and have hot, fresh biscuits on the table lickety split. This biscuit recipe has no butter and very little oil, so it’s a perfect comfort food if you’re cutting down on fats.

easy biscuits

Ingredients for Easy Biscuits

¾ cup MILK (we use almond milk in the video)
2 Tbsp OIL
up to 2 cups ALL PURPOSE FLOUR
2 tsp BAKING POWDER
1 tsp SALT
2-3 tsp SUGAR optional

Quick Biscuit Recipe

  • In a bowl, whisk together milk, oil, salt, and baking powder. You can also add a few tsp of sugar if you desire, but that’s optional.
  • Slowly add flour into the mix ¼ cup at a time. You’ll probably use between 1½ and 2 cups of flour. Turn the flour into the wet ingredients until a doughy ball forms, but do not overmix or overwork the dough.
  • Using your hand, pinch and divide the large dough ball into 6 equal sizes of dough and arrange on a lightly greased baking pan or parchment paper.
  • You can lightly flour your fingers while dividing the dough. Do not press or shape the dough more than needed. The biscuits might not win a beauty contest, but they’ll be light and fluffy if the biscuit dough is not handled overly much.
  • For darker biscuits, you can lightly brush the dough with milk, but this is optional.
  • Place the baking sheet in an oven preheated to 350˚F and bake for about 20 minutes.
  • Enjoy!

Stuff you might need for the Biscuit Recipe

Current prices for PARCHMENT PAPER on Amazon
Current prices for a BAKING PAN on Amazon
Current prices for BAKING POWDER

If you’re looking for a more decadent biscuit, then try this classic country Buttermilk Biscuit Recipe with plenty of butter and buttermilk.

Thanks For Watching Our Recipe Videos!

Thanks for checking out our easy biscuits recipe, and all of our recipes. Be sure and sign up for our mailing list so you’ll never miss a new recipe. Also click a button below and share the dishes with your friends. You can also follow Chef Buck on Youtube. We appreciate all the kind comments and support, and we’ll see you next time in the kitchen!

If you like what CG and I do, you can also support us on Patreon, or throw us a tip in our Paypal Tip Jar. We’ll happily enjoy a coffee on the road – Thanks! We appreciate all the support, and we’ll see you next time in the kitchen!

We include affiliate links for products on our website. So, if you make a purchase after clicking on our links, we may earn a commission which helps us produce more videos and drink more coffee :^) We participate in the Amazon Services LLC Associates Program, which is an affiliate advertising program. It provides a means for us to earn fees by linking to Amazon.com and affiliated sites, so we can make more videos.

Share and Enjoy !

Tuna Casserole Recipe – Creamy NOT Wet!

Is there a more classic comfort food than a Tuna Casserole Recipe? A creamy tuna noodle bake is one of the easiest, tastiest dishes that you can serve. It’s super affordable, very filling, and a versatile recipe for using up odds and ends in the fridge.

Tuna Casserole Ingredients

12 oz can of TUNA in water
8 oz SHELL PASTA (8 ounces before cooking)
4 oz CREAM CHEESE softened
1 can CREAM of MUSHROOM SOUP
1 small ONION chopped
1 Tbsp PIMIENTOS or substitute fresh chopped peppers
½ cup CELERY chopped
some GREEN PEAS
1 Tbsp fancy MUSTARD
½ sleeve of SALTINE CRACKERS or BREADCRUMBS
2 Tbsp BUTTER
SALT and PEPPER to taste

tuna casserole recipe

How to Make Tuna Casserole Recipe

  • In a large bowl, simply combine all of the ingredients. Check current price for canned tuna on Amazon.
  • Cook the shell pasta according to package directions and then stir into the mix, but prepare the pasta al dente, which means firm and chewy, do not overcook!
  • Pour mixture into a greased 8×8 baking dish.
  • Spread the mixture evenly in the dish and then top with buttered, crushed saltines, or breadcrumbs.
  • Bake in an oven preheated at 400˚F for 30 minutes or until the topping is golden brown.

And that’s it! Hope you love this easy tuna casserole recipe. For another easy casserole dish, check out this Squash Casserole Recipe.

squash casserole recipe

Thanks for checking out our tuna casserole recipe, and be sure and sign up for our mailing list so you’ll never miss a Chef Buck cooking video, and also click a button below and share the dishes with your friends. We appreciate all the kind comments and support, and we’ll see you next time in the kitchen!

We appreciate you watching our recipe videos!

We include affiliate links for products on our website, so if you make a purchase after clicking on our links, we may earn a commission which helps us produce more videos and drink more coffee :^) We are participants in the Amazon Services LLC Associates Program, which is an affiliate advertising program that provides a means for us to earn fees by linking to Amazon.com and affiliated sites.

Share and Enjoy !

Baked Bean Salad instead of Potato Salad?

If you’ve got a can of baked beans in the cabinet you can quickly jazz it up to create a baked bean salad. It’s kinda like a potato salad recipe, but with beans.

What you need for a Baked Bean Salad

15oz canned BAKED BEANS
1 BOILED EGG
1-2 Tbsp MAYONNAISE
2 Tbsp finely chopped PICKLES
1 Tbsp finely chopped JALAPENOS (optional)
Fresh cracked BLACK PEPPER

…you can also add fresh chopped onion if serving the salad right away, but I wouldn’t add onion if making the dish in advance.

baked bean salad

How to make this Bean Salad Recipe

Use whatever brand of baked beans you like. Canned baked beans already have a lot of seasoning and flavor, so this recipe requires few ingredients. Check here for current baked beans prices on Amazon.

  • Open and drain the canned beans. Do not rinse the beans.
  • In a large bowl, add 1 Tbsp of mayonnaise and egg yolk. Start with 1 Tbsp of mayo, you can always add more later if desired. Whisk until smooth.
  • Add in the beans, chopped egg whites, pickles, jalapenos, and cracked black pepper.
  • Toss the ingredients, and adjust to taste.

Garnish with a sprinkling of fresh chopped parsley or paprika. This baked bean salad is a perfect picnic side dish, and it travels very well.

baked bean salad

The recipe is a close cousin to potato salad, and I truly love potato salad, but over the years I’ve gotten addicted to this Mock Potato Salad made with cauliflower. It’s a great alternative if you’re looking for lower carbs. And for another classic picnic dish, try out this Easy Coleslaw Recipe.

cauliflower potato salad
low carb cauliflower “potato” salad recipe

Thanks for checking out our baked bean salad recipe, and all of our recipes. Be sure and sign up for our mailing list and never miss a new Chef Buck cooking video, and also click a button below and share the dishes with your friends. We appreciate all the kind comments and support, and we’ll see you next time in the kitchen!
–Chef Buck

Thanks for watching our recipe videos!

We include affiliate links for products on our website, so if you make a purchase after clicking on our links, we may earn a commission which helps us produce more videos and drink more coffee :^) We participate in the Amazon Services LLC Associates Program, which is an affiliate advertising program providing a means for us to earn fees by linking to Amazon.com and affiliated sites, so we can make more videos.

Share and Enjoy !

Garlic Bread Rolls – No Yeast Bread

Try this easy no-yeast bread recipe for baking delicious garlic bread rolls. These bite-sized garlic rolls are perfect with pastas and soups. Adding a bit of garlic and shredded cheese makes these fresh bread rolls irresistible, and the butter finish takes them over the top.

What You Need to Make Garlic Bread Rolls

1 cup ALL PURPOSE FLOUR (plus ¼ cup extra flour for working the dough)
1½ tsp BAKING POWDER
½ tsp SALT
1 cup plain GREEK YOGURT
1 Tbsp minced GARLIC
½ cup shredded CHEESE
2 Tbsp melted BUTTER
¼ tsp GARLIC POWDER
¼ tsp DRIED PARSLEY
(or use 1 Tbsp fresh chopped parsley)

garlic bread rolls
garlic bread bites served with zoodles

How to Bake Garlic Bread Bites

  • Preheat the oven to 475˚ Fahrenheit.
  • Place flour, baking powder, and salt in a large bowl and mix.
  • Add in yogurt and stir until the dry ingredients are just combined into the wet ingredients and begin to ball together.
  • Turn the dough ball out onto a floured surface.
  • Sprinkle lightly with flour and knead the dough just a couple of times and form into a ball. Don’t overwork the dough.
  • Flatten the dough ball slightly and top with the shredded cheese and minced garlic topping. Use whatever cheese or combos of cheese you like. A touch of Parmesan adds a great flavor.
  • Fold up the dough around the garlic and cheese and knead lightly to incorporate the ingredients throughout the dough.
  • Flatten dough again, then cut into 16 wedges. Roll each wedge into a ball and place on a parchment covered baking sheet. Check current pricing for parchment paper on Amazon.
  • If dough becomes sticky while forming the rolls and handling, just lightly dip your fingertips in oil, or dust lightly with flour.
  • Bake rolls at 475˚F for 10-14 minutes, until golden brown.
  • While the garlic rolls bake, mix together melted butter, garlic powder, and parsley.
  • When rolls have colored up and baked through, remove the bread from the oven and let the rolls cool for 10 minutes.
  • Then roll each garlic bread bite in the seasoned melted butter.
  • Serve with anything or nothing, because they are fantastic in every way.

For another easy no-yeast bread recipe, try this Classic Biscuit Recipe.

Thanks for checking out our garlic bread rolls recipe, and all of our recipes. Be sure and sign up for our mailing list and never miss a new Chef Buck cooking video, and also click a button below and share the dishes with your friends. We appreciate all the kind comments and support, and we’ll see you next time in the kitchen!
–Chef Buck

Thanks for watching our bread recipe video!

We include affiliate links for products on our website, so if you make a purchase after clicking on our links, we may earn a commission which helps us produce more videos and drink more coffee :^) We participate in the Amazon Services LLC Associates Program, which is an affiliate advertising program providing a means for us to earn fees by linking to Amazon.com and affiliated sites, so we can make more videos.

Share and Enjoy !

Egg in a Basket Recipe for Brunch

This Egg in a Basket Recipe is a fun way of serving up eggs and toast, and if you use fancy bread and colorful breakfast sides, you can even pass eggs in a basket off as an upscale brunch dish. I like to cook my egg toast with a lot of butter, because this makes the bread rich and crispy like a crouton.

What You Need for this Egg Recipe

1 large EGG
1 slice BREAD
1-2 Tbsp BUTTER

Egg in a basket is a super simple breakfast dish to prepare, and a fun way to cook up breakfast for kids. But if you jazz the egg recipe up a bit, it can easily transform into a fancy brunch meal for anytime of the day.

How to Make an Egg in a Basket

  • Use a nice bread. In the video, I use a Thyme and Olive loaf. It’s super tasty all on it’s own, so it’s naturally going to elevate a simple egg in a basket dish.
  • I like to buy a whole bread loaf and slice it myself. A nice rustic cut of bread makes a dish fancier.
  • Cut your bread slices about ½ an inch thick, and don’t cut the egg hole in the bread TOO BIG. You want the egg to fill the hole, and not stretch out too thin. And you want enough bread surface around the hole to toast up.
  • Heat a skillet on low-medium heat. Add butter and melt.
  • Add in the bread slice and coat butter on one side, then turn the slice and butter up the other side. Let the bread grill for a minute or so until it begins to brown, then flip and let the other side grill.
  • Break an egg into the hole in the toast. Let the egg cook long enough to set, then flip the toast and let the egg cook on the other side.
  • Once the egg is cooked to your desire, remove the egg bread from the skillet and serve hot.
egg in a basket

A good skillet is essential for this kind of egg dish. You can check current prices for a shiny new Non-Stick Skillet on Amazon.

This is a cool recipe to serve over a salad, or anything you like, especially if you’re like me and enjoy over-easy style eggs. A runny yolk makes a great sauce! Also garnish your egg bread with cilantro, parsley, or your favorite fresh herbs, and this simple childhood dish will instantly become a fancy treat.

Do you have a favorite salad dressing or sauce? Drizzle a bit over egg in a basket, because that’s what they’d do in a hipster restaurant, and then charge you $20 for “Eggs al Basquet”.

For another fancy egg and bread dish, try an Egg Bread Bake Recipe.

egg bread
Fancy baked eggs to impress friends and family

Thanks for checking out our Egg in a Basket brunch video, and all of our recipes. Be sure and sign up for our mailing list and never miss a new Chef Buck cooking video, and also click a button below and share the dishes with your friends. We appreciate all the kind comments and support, and we’ll see you next time in the kitchen!
–Chef Buck

We appreciate you watching our videos…Thanks!

We include affiliate links for products on our website, so if you make a purchase after clicking on our links, we may earn a commission which helps us produce more videos and drink more coffee :^) We are participants in the Amazon Services LLC Associates Program, which is an affiliate advertising program that provides a means for us to earn fees by linking to Amazon.com and affiliated sites, so we can make more videos.

Share and Enjoy !

Cracker Salad with Saltine Crackers …Really!

cracker salad

Saltine cracker salad is an old-timey Southern recipe that is unbelievably easy to make and ridiculously tasty. If you’ve never tried a cracker salad recipe before, it probably sounds like a bad idea, but definitely give this dish a try.

Ingredients for a Tomato Cracker Salad

1 sleeve of SALTINE CRACKERS
1 cup chopped, fresh TOMATO
2-3 chopped GREEN ONIONS
1 chopped, boiled EGG …or 2, if you love eggs
1 cup MAYONNAISE
SALT and PEPPER to taste
….ideally use fresh cracked black pepper, and be sure to give the salad a
taste test before adding salt, since the saltine crackers have lots of salt already.

How to Make This Southern Classic

If you have a degree in rocketry, it will not be needed for this salad. If you have a boiled egg already on hand, then this dish takes only moments to prepare, and check current prices for a Handy Egg Cooker if you’re the kinda person who likes having the odd boiled egg around.

cracker salad

In a bowl, empty one sleeve of saltine crackers, or unsalted crackers if you’re watching your sodium intake, then give crackers a rough crush by hand, but don’t overcrush! Now simply add the rest of the ingredients and toss until everything is combined. That’s all there is to the dish, which is like the opposite of rocket science.

This salad is extremely versatile and all ingredients can be adjusted for taste, but the
amounts I have listed are a good place to start.

If you want to jazz the dish up a bit, then try adding some creamy horseradish sauce, or a little chili pepper, paprika, or hot sauce.

Tips for a Better Cracker Salad

  • Do not overcrush the crackers!
  • Taste test and add in extra salt last, you might find that the saltines make the dish salty enough already.
  • Don’t make the tomato cracker salad until you’re ready to serve. It tastes best freshly made, although personally I don’t mind having leftover cracker salad, even though a tomato never comes out of the fridge as tasty as it went in.

Give this cracker salad a try and let me know what you think, and for another slightly unsettling southern recipe, take a look at this country canned pear salad recipe.

pear salad
classic Southern style pear salad dessert

Thanks for checking out our recipes, and be sure and sign up for our mailing list so you’ll never miss a Chef Buck cooking video, and also click a button below and share the dishes with your friends. We appreciate all the kind comments and support, and we’ll see you next time in the kitchen!
–Chef Buck

We appreciate you watching our videos…Thanks!

We include affiliate links for products on our website, so if you make a purchase after clicking on our links, we may earn a commission which helps us produce more videos and drink more coffee :^) We are participants in the Amazon Services LLC Associates Program, which is an affiliate advertising program that provides a means for us to earn fees by linking to Amazon.com and affiliated sites, so we can make more videos.

Share and Enjoy !

Pimiento Cheese Spread Southern Recipe

pimiento cheese spread

Do you say PIMENTO cheese or PIMIENTO cheese spread? It doesn’t matter, because whatever you call this classic southern cheese recipe, it’s plain delicious, and super easy to prepare. Mama Redbuck made a pimiento cheese spread, and then I made a jalapeno cheese spread, so check out both dishes and let us know which you like best.

Pimiento Cheese Spread Ingredients

8 oz freshly shredded YELLOW CHEDDAR CHEESE
4 oz jar of PIMIENTOS
2-4 Tbsp MAYONNAISE (to taste) …and yes, you can check prices for mayonnaise on Amazon
BLACK PEPPER (fresh ground pepper is nice)

How to Make Classic Pimento Cheese

  • Shred the yellow cheddar into a mixing bowl, and definitely use freshly shredded cheese for this spread!
  • Drain the pimientos and add them to the cheese.
  • Add mayonnaise one tablespoon at a time and mix until the spread reaches the consistency you prefer.
  • Add black pepper to taste. Freshly ground black pepper is ideal for pimento cheese spread.
pimiento cheese spread
what can’t pimento cheese spread do?

Jalapeno Cheese Spread Ingredients

8 oz freshly shredded WHITE CHEDDAR CHEESE
10-15 pickled JALAPENO slices (to taste)
MAYONNAISE (to taste)

How to make Jalapeno Cheese Spread

  • Shred the white cheddar into a mixing bowl. Use freshly shredded cheese for this spread! Check here for current prices for a Box Grater on Amazon.
  • Drain the jalapenos and add them to the cheese. I like to use whole jalapeno slices, but you can chop them if you like. It won’t make a difference, the pepper cheese spread will be just as spicy either way, so I suggest leaving the slices whole, because it makes the spread look better.
  • Add mayonnaise one tablespoon at a time and mix until the spread reaches the consistency you prefer.

And that’s it! Two very tasty and easy to make cheese spreads. These quick cheese dishes are great on crackers, in a sandwich, and as a dip for sliced veggies, so give each one a try and let me know which you prefer! And for another tasty spread idea, check out this Spicy Egg Salad Recipe.

egg salad recipe
Try a spicy egg salad recipe for a flavorful twist on a traditional boring, bland egg salad.

Thanks for checking out Mama Redbuck making a pimiento cheese spread, and be sure and sign up for our mailing list so you’ll never miss a Chef Buck cooking video, and also click a button below and share the dishes with your friends. We appreciate all the kind comments, and we’ll see you next time in the kitchen!
–Chef Buck

We appreciate you watching our videos…Thanks!

We include affiliate links for products on our website, so if you make a purchase after clicking on our links, we may earn a commission which helps us produce more videos and drink more coffee :^) We are a participant in the Amazon Services LLC Associates Program, which is an affiliate advertising program that provides a means for us to earn fees by linking to Amazon.com and affiliated sites.

Share and Enjoy !

Fig Jam Recipe Easy Homemade Jam

fig jam recipe

If you like homemade jam, then you’ll love this easy fig jam recipe. Whether you buy fresh figs at the store or have access to a fig tree in your neighborhood, this jam recipe is the perfect way to use up a bunch of figs. Fig jam is particularly good on biscuits and toast, and even as a warm topping on ice cream.

Easy Fig Jam with Just 3 Ingredients

About 40 medium-sized FRESH FIGS
½ cup SUGAR
¼ cup HONEY

How to make Quick Fig Jam

This recipe will work with all kinds of fruit (blueberries, blackberries, strawberries, etc.), but Mama Redbuck has a fig tree in her backyard, so she mostly uses figs when making this quick jam. If you don’t have fresh fruit handy in the neighborhood, just buy fresh fruit at the market.

fig jam recipe

Buy figs that are a little soft, color can be a good indication, but not always, sometimes even the greener figs can be soft enough, so give figs a squeeze to test for squishiness. Once picked, figs don’t last very long, maybe 2 days when ripe.

You can keep fresh figs in the fridge, but even refrigerated they won’t keep for very long after becoming soft, only a couple of days, so making a jam is an easy way to extend their life another 7-10 days. My mom seals extra fig jam in bags and freezes it for future use.

fig jam recipe
My mom uses a Foodsaver model 2100 for sealing and freezing extra jam.

Want to seal foods for freezing? My mom bakes and freezes a lot of breads and also freezes extra fig jam. My mom is happy using a Foodsaver model 2100 and you can check the current price on Amazon for this food sealing system.

  • Wash figs and remove the stem.
  • Quarter and then chop the figs as desired. We like a rustic, chunky jam.
  • Heat a medium-sized saucepan on low heat.
  • Add figs, sugar, and honey and bring the pot to a simmer, stirring regularly.
  • As the pot bubbles away, the figs will release water.
  • Let the pot simmer until the mixture reaches your desired “jamminess”, this might take 10 to 20 minutes depending on how wet the figs are and how thick you like your jam.
  • The jam will thicken even more off of the heat, so don’t overcook the fruit; you want a spreadable jam, not a clunky fig paste.
  • If the jam becomes overly thick, you can always add a wee little bit of water back into the pot.
  • Remove the Jam from the heat and allow to cool before adding into a container.
  • The jam will keep in the fridge for about a week to 10 days, although a pint of jam
  • disappears fairly quickly around our home, especially if we make some biscuits.
fig jam recipe

Give this easy fig jam recipe a try and let me and Mama Redbuck know what you think. Fig jam makes a perfect pairing with biscuits, so take a look at My Favorite Biscuit Recipe.

Buttermilk Biscuit Recipe
Easy Buttermilk Biscuit Recipe

Thanks for checking out Mama Redbuck’s jam recipe, and be sure and sign up for our mailing list so you’ll never miss a Chef Buck cooking video, and also click a button below and share the dishes with your friends. We appreciate all the kind comments, and we’ll see you next time in the kitchen!
–Chef Buck

We appreciate you watching our videos…Thanks!

We include affiliate links for products on our website, so if you make a purchase after clicking on our links, we may earn a commission which helps us produce more videos and drink more coffee :^) We are a participant in the Amazon Services LLC Associates Program, which is an affiliate advertising program that provides a means for us to earn fees by linking to Amazon.com and affiliated sites.

Share and Enjoy !

Rosemary Bread Recipe without a Mixer

rosemary bread

You can make a delicious homemade rosemary bread recipe following step-by-step with Mama Redbuck. It takes very few ingredients, and just a little time–mostly waiting for the bread to rise–but it’s well worth it. The recipe below is for one loaf of bread, but bake two at a time and then freeze one for later!

Ingredients for Rosemary Bread Recipe

2 cups sifted ALL-PURPOSE FLOUR
2 Tbsp softened BUTTER
1 Tbsp SUGAR
1 Tbsp dry active YEAST
2-3 Tbsp freshly chopped ROSEMARY
1 tsp SALT
1 cup of WATER

How to Make a Rosemary Bread Loaf

Set the butter out to soften and come to room temperature.

In a bowl, add 1 cup of warm tap water, about 130 degrees–not too hot! Stir in the sugar until dissolved, and then add in the yeast and stir lightly. Allow the dish to sit for about 10 minutes to bubble up.

Into a small dish, sift ½ cup flour and set aside.
In a larger mixing bowl, add 2 cups of sifted flour, salt, the finely chopped rosemary, and about ⅔ of the softened butter. Mix.

Stir the yeast mixture into the bowl and combine with the flour to form a loose ball.

Flour a flat surface with some of the flour from your sifted ½ cup of flour. You will use this flour for kneading your dough, but don’t use more than this amount, in fact, use as little of the flour as you can, only as needed for working the bread. The less flour you use, the lighter and airier your bread will be.

Roll the dough from your bowl onto the floured surface and knead for about 10 minutes, using only as much flour as you need to keep the dough from sticking as you work it. Kneading warms and stretches the gluten strands in the dough which will make for a light and airy loaf of bread instead of a dense bread brick. Nobody likes a bread brick.

rosemary bread
Light and airy rosemary bread!

My mom uses a bread proofing bowl, and you can check here current prices for a Dough Basket on Amazon. Or you can just use a regular bowl, but lightly coat the bowl with olive oil before adding in the dough ball, and be sure to roll the ball around in the bowl to coat the dough with oil as well.

Place the dough bowl in a warm place and let the dough rise for about an hour, until the dough has roughly doubled in size.

Once the dough has risen, flour your knuckles and punch the dough down, then remove the dough from the bowl and flatten and roll up by hand, then set aside for 5 more minutes.

You can bake the bread in any oiled pan or cooking sheet, but for a nice loaf, use a loaf pan. My mom likes to lightly oil the sides of the pan with olive oil and then cut a rectangle of parchment paper for the bottom of the pan.

After 5 minutes, the dough will have risen a bit, so press the dough down again and shape into a loaf that fits well into the loaf pan. Return the dough to a warm area and let it rise again for about 45 minutes, or until the dough has once more doubled in size.

After rising, bake the bread in an oven preheated to 375 degrees Fahrenheit for about 30 minutes, until lightly brown.

Remove the rosemary bread from the oven and then remove the bread from the loaf pan and place the bread on a cooling rack. If you turn the rosemary bread over and tap the crusty bottom, it will feel hollow inside, which is great, because that means you have baked a wonderfully light loaf of bread.

While the bread is still warm, brush it with the remaining butter you set out earlier.

And that’s it, you are now the proud owner of the most delicious, light and airy rosemary bread on the planet. If you bake this bread for someone, they will become your slave for life…just saying.

For another tasty Mama Redbuck bread recipe, try this extra-fancy loaf of Homemade Pesto Parmesan…it’s pretty stellar, so check it out.

parmesan pesto bread

Thanks for checking out this rosemary bread recipe, and be sure and sign up for our mailing list so you’ll never miss a Chef Buck cooking video, and also click a button below and share the dishes with your friends. We appreciate all the kind comments and support, and we’ll see you next time in the kitchen!
–Chef Buck

We really appreciate you watching our videos…Thanks for the support!

We include affiliate links for products on our website, so if you make a purchase after clicking on our links, we may earn a commission which helps us produce more videos and drink more coffee :^)

We are a participant in the Amazon Services LLC Associates Program, which is an affiliate advertising program that provides a means for us to earn fees by linking to Amazon.com and affiliated sites.

Share and Enjoy !

Cornbread Recipe for Sweet Skillet Cornbread

cornbread recipe

You’ll love this sweet cornbread recipe. It’s a tasty pairing for a savory meal, but this skillet cornbread feels like a real treat, especially if you finish it off by grilling sliced cornbread in a skillet with butter.

Ingredients for Cornbread Recipe

2¼ cups ALL-PURPOSE FLOUR
1 cup SUGAR
¾ cup CORNMEAL
2 tsp SALT
2 tsp BAKING POWDER
5 EGGS
¾ cup CANOLA OIL
1¼ cup BUTTERMILK
1 tsp VANILLA EXTRACT

cornbread recipe

How to Make Skillet Cornbread

First thing, pre-heat your oven to 350 degrees Fahrenheit, and place a heavy, oven-safe skillet in the oven to heat as the stove warms. You’ll want the skillet to be hot when you add in the batter later. Check Amazon for current prices for a 10 inch cast iron skillet similar to the one used in the recipe video.

In a bowl, combine the flour, sugar, cornmeal, salt, and baking powder, then mix the ingredients together well. This recipe is SO GOOD with 1 cup of sugar, but you can reduce that amount to ¾ cup sugar and it’s still pretty fantastic. If you desire a cornier cornbread, use a coarsely ground cornmeal, although I prefer using a finer grind.

In another bowl, crack the eggs and whisk them smooth, then add in the buttermilk, oil, and vanilla extract and whisk well, until slightly frothy. Mix the wet ingredients into the dry, but don’t over mix, just turn the ingredients together until everything is wet, but still lumpy.

Now carefully remove the skillet from the pre-heated oven and then carefully coat the entire inside of the skillet with about 1 Tbsp of canola oil. Pour in the batter, which should fill a 10 inch skillet about ¾ full, because you’ll want to leave room for the cornbread batter to rise.

cornbread recipe

Bake at 350 degrees Fahrenheit for 25 minutes, then reduce the oven temperature to 200 degrees F and allow the cornbread to bake for an additional 15 minutes. After that time, the cornbread should have risen and formed a firm, golden dome.

Carefully remove the skillet from the oven and pierce the center of the cornbread with a toothpick or knife, which should draw clean when removed. If wet batter is visible, then return to the cornbread to the oven for another 5 minutes and check once more.

Once the cornbread is baked through, allow it to rest in the skillet for 10 to 15 minutes, then remove the bread from the skillet and place on a cooling rack. If the cornbread sticks in the skillet, you can give the skillet a good shake to free the bread from the bottom of the pan.

It’s ready to eat, maybe with a slather of cold butter, or maybe not, you’ll just have to follow your cornbread instincts. I love slicing this bread and then grilling the sides in a buttery skillet to add an extra dimension of cornbread decadence, but do this at your own risk, because it will likely spoil you for life.

I hope you enjoy this sweet cornbread recipe. For another corny bread dish, try this beautiful cheese and jalapeno Corn Muffin Recipe.

corn muffin recipe
Corn muffins are delicious, but adding cheese and jalapeno makes them irresistible.

Thanks for checking out our sweet skillet cornbread recipe, and all of our recipes. Be sure and sign up for our mailing list and never miss a new cooking video. Click a button below and share the dishes with your friends, and follow Chef Buck on Youtube. We appreciate all the kind comments and support, and we’ll see you next time in the kitchen!

Thanks for watching our recipe videos! 

We include affiliate links for products on our website, so if you make a purchase after clicking on our links, we may earn a commission which helps us produce more videos and drink more coffee :^).   We participate in the Amazon Services LLC Associates Program, which is an affiliate advertising program providing a means for us to earn fees by linking to Amazon.com and affiliated sites, so we can make more videos.

Share and Enjoy !

Muffin Recipe with a Ginger Twist You’ll love

muffin recipe

Combine ginger, lemon, and cardamom to create an easy ginger muffin recipe that will blow your mind. Candied ginger is tasty all by itself, but baking it in a muffin is even better, and you’ll find it’s a perfect pairing with a nice cup of coffee or hot tea. Bake these muffins at home and feel like you’re lounging in your favorite coffee cafe, but without all those annoying hipsters. This muffin is chock full with the entire zest from 1 large lemon, which is a great accent to the ginger, and the ground cardamom adds a touch of the exotic that will transform these muffins a real bakery treat, so get out a muffin pan and get to work!

Ingredients for Ginger Muffin Recipe

(this recipe makes about 8 muffins)
Dry Ingredients:
2 cups ALMOND FLOUR
1 tbsp CINNAMON
1 Tbsp CARDAMOM
1 tsp BAKING SODA
¼ tsp SALT
‘Wet’ Ingredients:
3 regular EGGS
2 tsp VANILLA
1/3 cup MAPLE SYRUP
113g (3-4 oz) unsweetened APPLESAUCE
2 Tbsp refined melted COCONUT OIL

1 cup chopped CANDIED GINGER
zest of 1 large LEMON

Crumble Topping:
(this recipe makes enough for 2-3 batches of muffins)
5 Tbsp ALMOND FLOUR
3 Tbsp COCONUT SUGAR
1½ tsp CINNAMON
pinch of SALT
2 Tbsp refined COCONUT OIL (at temperature so oil is a solid consistency, cut into the other
ingredients like butter)
*Refined coconut oil does NOT have a coconut flavor; virgin coconut oil HAS a distinct coconut flavor

muffin recipe
Candied ginger is a terrific muffin ingredient; adds great texture, flavor, and zing.

How to make this Muffin Recipe

  • Prepare baking tins and have cooling rack ready.
  • Preheat oven to 375.
  • If using the crumble topping, make that first. The coconut oil should be in a solid state. Add coconut sugar, cinnamon, and salt into a small, sealable container and mix. Cut in the coconut oil like butter, and mix. This recipe will make enough crumble topping for 3-4 batches of muffins. Set crumble mix in the fridge until ready to use.
  • In a bowl, mix the other dry ingredients together and set aside.
  • Using another bowl for the wet ingredients, whisk the eggs together. Mix the vanilla, maple syrup, applesauce, and melted coconut oil in with the eggs.
  • Add the bowl of dry ingredients into the wet, mixing just until all ingredients are wet, no need to over mix.
  • Stir in the candied ginger and lemon zest and mix gently.
  • Divide the batter equally between muffin cups.
  • Top each muffin batter cup with some crumble topping, as much as you like.
  • Bake in preheated oven at 375 degrees for 10 minutes. Turn muffins around; bake for about another 10 minutes.
  • Test for doneness with a toothpick or knife. The muffins are ready to come out if have no batter on the toothpick. If not done, then test after 4 minute intervals of additional cooking, because there’s no reason to get this far and then burn your muffins!
  • Cool on rack for at least 5 minutes.

And that’s it!
Give this awesome gluten free candied ginger muffin recipe a try and let us know what you think.

muffin recipe
Add the zest of a lemon and ground cardamom to transform these muffins into a real treat.

More Great Gluten Free Options

For another muffin recipe, try this Gluten Free Cinnamon Apple Muffin. And for a crazy gluten free dessert option, check out this fantastic Chocolate Cake Recipe made from beans. what!? I know, it sounds crazy, but this cake made from garbanzo beans is super moist and one of my favorite desserts to bake, so take a chance and give it a try, I think you’ll be very happy with the results.

chocolate cake recipe
A flourless, gluten-free chocolate cake

Thanks for checking our recipe videos out, and if you like what you see, click a button or two below and share this muffin recipe with your friends and family. I appreciate it!
–Chef Buck

Share and Enjoy !


Corn Muffin Recipe with Jalapeno and Cheese

corn muffin recipe

Corn muffins are delicious, but adding cheese and jalapeno makes them irresistible. CG cooks up a tasty corn muffin recipe with whole kernel corn to make them super moist and flavorful. If you’re not a fan of hot jalapenos, then try substituting milder pickled jalapenos which are often sold right alongside jars of hotter peppers at the grocery store. Topping the muffins with sliced jalapeno makes them look so good!

What you need for this Corn Muffin Recipe

¾ cup CORNMEAL …we use a medium grind in this recipe
1¼ cup ALL-PURPOSE FLOUR
2½ tsp BAKING POWDER
½ tsp SMOKED PAPRIKA
½ tsp CHIPOTLE or regular chili powder
½ tsp SALT…unless the corn or butter already contains salt
1 cup MILK
2 Tbsp OIL or use melted butter instead
4 Tbsp HONEY
1 EGG
1 cup CANNED WHOLE KERNEL CORN drained
¼ cup PICKLED JALAPENOS, roughly chopped
¼ ONION, minced
1 cup freshly shredded CHEDDAR CHEESE plus ¼ cup for topping
fresh JALAPENO deseeded and sliced for topping…or you can use pickled slices for the topping

corn muffin recipe
Corn muffins are delicious, but adding cheese and jalapeno makes them irresistible.

How to make Corn Muffins

If you need a muffin tin for your kitchen, you can check current prices for a Cupcake and Muffin Pan on Amazon.

  • Place rack in middle of the oven.
  • Heat oven to 400 degrees Fahrenheit.
  • Grease 12 muffin pan cups or line with parchment paper baking cups and set aside.
  • Combine dry ingredients in bowl.
  • Combine remaining ingredients in another bowl and mix, but reserve fresh jalapeno slices and a little cheese for topping.
  • Add the dry ingredients to the wet and stir until ingredients are moistened.
  • Fill prepared muffin cups evenly.
  • Top with fresh jalapeno slices and a very light sprinkling of cheese.
  • Bake 20-30 minutes or until toothpick inserted into center comes out clean and muffins are golden brown.
  • Allow to cool for 5 minutes before removing from muffin tins.

And that’s it! Hope you like this cheesy jalapeno corn muffin recipe. You can serve them hot or cold for breakfast, lunch or dinner, and I especially love them in the morning with over easy eggs.

corn muffin recipe
broken eggs are less sad with corn muffins

Give this corn muffin recipe a try and let us know what you think, and for another bready treat, check out this perfect BUTTERMILK BISCUIT RECIPE. Both recipes go great with a big bowl of VEGETARIAN CHILI.

vegetarian chili
pot o’ meatless chili for good times

Thanks for checking out our corn muffin recipe, and all of our recipes. Be sure and sign up for our mailing list and never miss a new Chef Buck cooking video, and also click a button below and share the dishes with your friends. We appreciate all the kind comments and support, and we’ll see you next time in the kitchen!

Thanks for watching our recipe videos!

We include affiliate links for products on our website, so if you make a purchase after clicking on our links, we may earn a commission which helps us produce more videos and drink more coffee :^)                                                                                                We participate in the Amazon Services LLC Associates Program, which is an affiliate advertising program providing a means for us to earn fees by linking to Amazon.com and affiliated sites, so we can make more videos.

Share and Enjoy !

Gluten Free Muffins with Apple Cinnamon

gluten free muffins

Check out these moist and delicious gluten free muffins made with almond flour. CG has been baking muffins up the wazzoo lately, and apple-cinnamon almond flour muffins are some of my favorites, so give them a try. Don’t be put off by terms like gluten free and grain free, just focus on delicious. Also feel free to experiment with recipe substitutions as well, like maple syrup instead of coconut sugar, or ginger instead of apples, or using banana instead of apple sauce.  Muffins are great treats, and while gluten free options are generally underwhelming, this muffin recipe is a winner.

Ingredients for Gluten Free Muffins

Crumble Topping:
(this recipe makes enough for 2-3 batches of muffins)
5 Tbsp ALMOND FLOUR
3 Tbsp COCONUT SUGAR
1½ tsp CINNAMON
pinch of SALT
2 Tbsp refined COCONUT OIL

Dry Ingredients:
2 cups ALMOND FLOUR
1 heaping Tbsp CINNAMON
1 tsp BAKING SODA
¼ tsp SALT

‘Wet’ Ingredients:
3 regular EGGS
2 tsp VANILLA
4 Tbsp COCONUT SUGAR or use 1/3 cup maple syrup
113g (3-4 oz) unsweetened APPLESAUCE
2 Tbsp refined melted COCONUT OIL

1 medium APPLE, diced

(this recipe makes 6-8 muffins)

*Refined coconut oil does NOT have a coconut flavor; virgin coconut oil HAS a distinct coconut flavor

gluten free muffins
Gluten free apple-cinnamon muffins that are delicious? Oh, yeah.

How to Make Gluten Free Muffins with Apple Cinnamon

  • Prepare baking tins and have cooling rack ready.
  • Preheat oven to 375.
  • Combine crumble topping ingredients together. Coconut oil should be in a solid state in order to cut into the mixture like butter, then store the crumble in fridge while mixing together the rest of the batter.
  • Mix the dry ingredients together and set aside.
  • In a bowl, whisk eggs together. Add vanilla, coconut sugar, applesauce, and melted coconut oil, and mix well.
  • Then add dry ingredients to wet, combining just until all ingredients are wet, no need to over mix. Add apples and mix gently.
  • Divide batter equally between 6-8 muffin cups.
  • Top each muffin batter cup with crumble topping, as much as you like.
  • Bake in preheated oven at 375 degrees for 10 minutes. Turn muffins around; bake for another 10 minutes.
  • Test muffins with a toothpick or knife blade. The muffins are ready if no batter sticks on the toothpick or knife. If muffins need more cooking time, return to the oven and then test every 4 minutes, because there’s no reason to get this far and then burn your muffins!
  • When finished baking, cool muffins on rack for about 5 minutes, this will keep them from sticking to the muffin cup papers.

Muffin Time!

Now all you need is a hot cup of coffee or a cold glass of milk and you’ll be on your way to a perfect day! Give this gluten free muffins recipe a try and then let us know what you think. And for another dessert recipe, give this Gluten Free Chocolate Cake Recipe made from beans. wha!?

chocolate cake recipe
A flourless, gluten-free chocolate cake

Thanks for watching our recipe videos and then trying some out. If you like what you see, click a button or two below and share this gluten free muffins recipe with friends and family. I appreciate it!
–Chef Buck

Share and Enjoy !

Must Try Egg Bread Bake Recipe

egg bread

Egg bread is a fancy dish for breakfast or brunch, and it’s an easy recipe to prepare. The recipe is a cross between baked eggs, bread pudding, and stove top stuffing. It’s a great way to use up old and stale bread. I go light on the cheese in this egg bread recipe, but adding more cheese and making a cheese bread is super tasty. One thing you don’t want to do is go light on the seasoning, especially if you’re using a plain loaf of bread; the more seasoning the better–especially rosemary!

What You Need for an Egg Bread Bake

crusty BREAD cubed
6 EGGS
about 1 cup MILK
2 GREEN ONION chopped
HOT PEPPER finely chopped
shredded CHEESE
1-2 Tbsp dried ROSEMARY
1 tsp dried OREGANO
PAPRIKA
BLACK PEPPER
GARLIC POWDER
CHILI POWDER (optional)
BUTTER/OIL to grease the baking dish

egg bread
Fancy baked eggs to impress friends and family

How to Make Baked Egg Bread

Any bread will do, but ideally use a hard and crusty loaf. If you’ve got a loaf of bread you’re thinking is to stale to eat, then this is a perfect recipe to save it.

  • Slice the bread into cubes and place in a large mixing bowl. I like using larger cube sizes for a rustic looking dish.
  • In a bowl, whisk 2 eggs and milk.
  • Add the egg/milk mixture in with the bread and toss, coating the bread.
  • Add in the herbs and spices, onion, hot pepper, and cheese and toss until the bread is well coated.
  • Lightly grease an oven safe baking dish and add the bread mix, spreading out evenly. Check current prices on a Pyrex Baking Dish on Amazon.
  • With a spoon, make an impression on the top of the bread mix for each egg serving.
  • Crack an egg into each depression.
  • Slide into a preheated oven and bake at 350 degrees Fahrenheit for 30-40 minutes, until the eggs are baked to desired doneness.
  • Slice into servings and serve hot or cold.
egg bread
add extra bling for fancier egg bread, but don’t skimp on the seasoning

That’s it! Takes a little while to bake, but otherwise this egg bread is a fairly quick dish to prepare, and a fancy way to use up stale bread.

Give this baked egg bread recipe a try and let me know what you think, and bon appétit!

And for a less bready baked egg dish, try this Fancy Egg Bake Recipe.

egg bake recipe
sliced egg bake on a salad is yummy!

Thanks For Watching Our Recipe Videos!

Thanks for checking out this Egg Bread recipe, and all of our recipes. Sign up for our mailing list so you’ll never miss a new recipe. Also click a button below and share the dishes with your friends. You can also follow Chef Buck on Youtube. We appreciate all the kind comments and support, and we’ll see you next time in the kitchen!

If you like what CG and I do, support us on Patreon, or throw us a tip in our Paypal Tip Jar. We’ll happily enjoy a coffee on the road – Thanks! We appreciate all the support, and we’ll see you next time in the kitchen!

We include affiliate links for products on our website. Making a purchase after clicking on our links and we may earn a commission which helps us produce more videos and drink more coffee :^) We participate in the Amazon Services LLC Associates Program, which is an affiliate advertising program. It provides a means for us to earn fees by linking to Amazon.com and affiliated sites, so we can make more videos.

Share and Enjoy !

Apple Crisp Recipe with Oats and Ginger

apple crisp

If you like homemade apple pie, then you’ll love this easy apple crisp recipe. And if you’re a fan of fresh ginger, adding minced ginger to the apple crisp will make it even better. This is a terrific dessert recipe that makes a whole heap of sweet apple goodness. The recipe makes plenty of servings to feed the family, and this dessert travels well, so it’s a perfect party treat to bring to a family gathering or function. Definitely top with ice cream or a rich creamy topping for best results.

What You Need to Make an Apple Crisp

apple part of recipe:
¼ cup BUTTER melted, browned
½ cup SUGAR
1 large EGG
1 tsp VANILLA
4-5 APPLES chopped
1 tsp CINNAMON
1-2 Tbsp minced GINGER

crisp part of recipe:
1¼ cups all-purpose FLOUR
3 cups QUICK OATS
1½ BROWN SUGAR
1 cup BUTTER
2 tsp CINNAMON
1 cup toasted PECANS
1 tsp minced GINGER

apple crisp
This apple crisp is like an apple pie, but heavier…which is better, right?

How to Make an Apple Crisp Recipe

  • In a sauce pan, melt ¼ cup BUTTER and simmer over med-low heat until butter begins to color, then set aside to cool.
  • In a large bowl, beat 1 EGG and ½ cup SUGAR together until smooth.
  • Add in VANILLA, cooled BUTTER and chopped APPLES. Mix well and set bowl aside.
  • In another bowl, combine FLOUR, 2 cups of the OATS (reserve 1 cup oats for later), CINNAMON, GINGER, BROWN SUGAR, and mix well.
  • Add in 1 cup unsoftened BUTTER and cut into the mixture until about pea-sized.
  • Add reserved OATS and toasted PECANS and mix.
  • Spread half the crisp mixture out in an ungreased 9 X 13 baking dish. Spread the apple mixture evenly over the bottom crisp layer. Then spread the remainder of the crisp mixture over the apple layer; this will create three layers in the dish: crisp/apple/crisp. If desired, dress the top of the crisp with a few apple slices for decoration.
  • Place into an oven preheated to 350 degrees Fahrenheit and bake for 45-50 minutes, until the top of the apple crisp is toasty.
  • Serve with ice cream or creamy whipped topping.

If you need a decent oven-safe baking dish, check out some current pricing for a Pyrex dish on Amazon.

And that’s it! Give this Apple Crisp Recipe a try and let us know what you think. And for another knock-out recipe idea, check out my mama’s Lemon Meringue Pie Recipe.

lemon meringue pie
This meringue pie topping is tasty on all kinds of pies.

Thanks for checking our recipe videos out. If you like what you see, click a button or two below and share the apple crisp recipe with your friends and family. I appreciate it!
–Chef Buck

Share and Enjoy !


Tofu Recipe for Beginners – Breakfast Scramble

tofu recipe

Try a tofu recipe that makes a nice break from a typical breakfast egg scramble. This dish is a great introduction to tofu. I use firm tofu in this dish and lots of fresh greens. In this tofu scramble I’m using the leaves and stems of fresh kale, but we often use fresh spinach too, which will cook up quicker if you’re in a rush.

Ingredients for Tofu Recipe

6-8 oz Firm TOFU
2 cups chopped KALE
or substitute SPINACH
chopped GREEN ONIONS
chopped BELL PEPPER
finely chopped GARLIC
sliced CHERRY TOMATOES
and whatever seasonings
you like, like:
PAPRIKA, CURRY, dried HERBS,
CHILI POWDER, SALT, and PEPPER
OIL for cooking
….optional: SEEDS!…I use seeds in this video cause I had too much oil in my skillet and I wanted to take advantage of it. I added caraway seeds, but cumin or fennel seeds
would have added great flavor, too.

If you’re not used to using tofu in cooking, this tofu recipe is a good place to start. Tofu is a soy product and a meatless protein. It has almost no flavor, so tofu is very versatile. Tofu will take on whatever flavors you add, and it needs lots of flavor, so be generous. Bland tofu is terrible, but a well-seasoned tofu dish can be delicious. Give this version of a tofu scramble a try, or make your own with whatever fresh veggies you have on hand.

tofu recipe
Use firm tofu for this recipe

How to Make a Tofu Breakfast Scramble

  • Even firm tofu isn’t all that firm, so buy firm tofu.
  • Chop tofu into cubes or slices, but not too small.
  • Heat oil in a skillet on medium heat. Check here for current prices for a non-stick skillet on Amazon.
  • Season tofu well and saute about 5-10 minutes, turning as it cooks,until the tofu is browned on most sides.
  • In another skillet, heat oil on medium heat.
  • Add in chopped kale stems and cook 2-3 minutes.
  • Add onions, peppers, and garlic and continue sauteeing another 2-3 minutes.
  • Add seasoning and spices and mix ingredients well.
  • Add in the remaining ingredients–kale leaves, tomato, green onion tops–and continue cooking another 3-5 minutes.
  • Add in browned tofu. Mix well, and serve.

tofu recipe
this tofu recipe makes a perfect breakfast, lunch, or dinner

And that’s it. Experiment and use whatever ingredients you desire and have on hand. A breakfast scramble can be whatever you want, and tofu is a great way to add
protein to a meatless dish. And this tofu breakfast scramble makes a nice lunch and dinner, too!

And for another healthy breakfast dish, check out this Eggs Benedict on Salmon Recipe.

salmon cakes
use leftover salmon cakes to make a terrific variation of Eggs Benedict!

Thanks for checking the video and tofu recipe out. Be sure and sign up for our mailing list so you’ll never miss a Chef Buck cooking video, and click a button below and share the dishes with your friends. We appreciate all the kind comments and support, and we’ll see you next time in the kitchen!
–Chef Buck

Share and Enjoy !


Zoodles Recipe …handmade zucchini noodles

zoodles recipe

Make a healthy zucchini zoodles recipe without a fancy spiralizer. You can cook a low fat zoodles pasta substitute by simply slicing zucchini into faux noodles with a knife. It takes almost no time, in fact, the time you save cleaning up will likely make it just as fast as using a fancy kitchen gadget. This zucchini zoodles recipe is light and low-fat and provides a nice break from a heavy pasta dish, so definitely make some handmade zoodles and give this dish a go.

Healthy Zoodles Recipe with Zucchini Noddles

2 medium ZUCCHINI
10-15 CHERRY TOMATOES (halved)
¼ cup GARLIC
¼ cup ONION
some PARMESAN CHEESE
(or romano or asiago cheese)
½ LEMON …use the juice and zest (current price for a kitchen zester)
1 tsp ITALIAN SEASONING
SALT and PEPPER to taste
2-3 Tbsp OLIVE OIL
OIL for sauteing

zoodles recipe
Handmade zoodles are easy to make and a nice change from a heavy pasta dish.

How To Make Zucchini Noodles a.k.a Zoodles Recipe

This zoodles recipe cooks quickly, so have all of the ingredients prepared and on hand before you start cooking.

  • Buy zucchini that are firm and blemish free, also buy zucchini that are relatively straight, because they’re easier to slice into zoodles.
  • Wash the zucchini and, leaving the skin on, slice the zucchini lengthwise into thin planks.
  • Stack planks on one another in bundles of three and slice into thinner shoelace size “strings”; they
    don’t have to be too thin or uniform, just get as close to shoestring size as you can, they’ll cook up easily enough and get soft quickly on the stove top.
  • Heat oil in a skillet on medium heat and add in the onion and cook for about 1 minute.
  • Add in the garlic and cook for 1-2 minutes more. If you want a little heat, add in some rep pepper flakes as well.
  • Add salt, pepper, Italian seasoning, and lemon zest. Mix and cook another minute.
  • Add in the sliced zucchini and mix well with all the ingredients.
  • Once the zucchini is added, just cook 2-4 minutes or until the zucchini is heated through. Do not cook overly long or the zucchini will lose its texture and the dish will become too wet. If this
    happens. just drain off a bit of the water.
  • Stir in the olive oil and lemon juice.
  • If desired, add in a little grated Parmesan cheese to taste.
  • Remove the skillet from the stove top and serve immediately.

That’s all there is to this super easy and delicious zoodles dish. If you love kitchen gadgets you can check the current price for a Vegetable Spiralizer on Amazon. I might get one if I see it in the thrift store, and I’m feeling a bit richy-rich.
Give this healthy zucchini zoodles recipe a try and let me know what you think, and bon appétit.

And for another low-fat veggie entree alternative, check out this Spaghetti Squash Recipe.

best spaghetti squash
When cooked spaghetti squash pulls apart into “noodley strings”

Thanks for checking out our zoodles recipe, and all of our recipes. Be sure and sign up for our mailing list and never miss a new Chef Buck cooking video, and also click a button below and share the dishes with your friends. We appreciate the kind comments and support, and we’ll see you next time in the kitchen!
–Chef Buck

Thanks for watching our recipe videos!

We include affiliate links for products on our website, so if you make a purchase after clicking on our links, we may earn a commission which helps us produce more videos and drink more coffee :^) We participate in the Amazon Services LLC Associates Program, which is an affiliate advertising program providing a means for us to earn fees by linking to Amazon.com and affiliated sites, so we can make more videos.

Share and Enjoy !

Biscotti Recipe – Chocolate Biscotti with a Coffee Twist

biscotti recipe

A homemade biscotti recipe is easy to make, and adding a little cocoa powder and ground coffee makes a rich, tasty twist for this Italian twice-baked cookie treat. If you’re not in the mood for
chocolate biscotti just leave out the cocoa powder and coffee and make a simple almond biscotti; it’s a nice cookie either way you bake it. A biscotti is a twice-baked cookie that makes a perfect pairing with a nice cup of coffee or tea.

What You Need for Chocolate Biscotti Recipe

1 cup sliced ALMONDS
2 cups FLOUR
¼ COCOA POWDER
2 Tbsp GROUND COFFEE
1 cup SUGAR
1 tsp BAKING POWDER
1/8 tsp SALT
3 large EGGS
2 tsp VANILLA EXTRACT
1 tsp ALMOND EXTRACT
3 Tbsp RUM or COFFEE LIQUOR
or other BOOZE

biscotti recipe
This twice-baked chocolate biscotti is perfect for dunking.

How to Make Chocolate Biscotti Recipe

  • Preheat oven to 350 degrees Fahrenheit.
  • Toast almond slices; watch them closely, it only takes about 2 minutes to toast.
  • In a bowl, combine flour, sugar, cocoa powder, coffee, baking powder, and salt; mix and set aside.
  • In another bowl, Whisk the eggs, rum, and extracts until blended well.
  • Add the wet ingredients to the dry ingredients, including the toasted almond slices, and mix until combined.
    Dough will be sticky at this point.
  • Scrape the dough out onto a baking sheet lined with parchment paper.
  • Quickly shape into a long flat loaf.
  • Bake about 20-30 minutes at 350 degrees F.
  • Remove from the oven and cool 10-15 minutes.
  • Lower oven heat to 300 degrees F.
  • Slice loaf into 1/2″ wide slices.
  • Lay the slices cut side down on the baking sheet and bake another 10-15 minutes.
  • Turn the slices over and bake 10 minutes more.
  • Cool the biscotti on a rack.
    Cool completely before storing, or they’ll lose crunchiness!

Serve this biscotti recipe with coffee or hot tea for a tasty, dunkable cookie treat.
And that’s it, man.
Give this chocolate biscotti recipe a try and let me know what you think, and bon appétit!

And for another fancy pants baked treat, try this deadly SCONE RECIPE.

maple pecan scones
best scone ever…really

Thanks For Watching Our Biscotti Recipe!

Thanks for checking out our biscotti, and all of our recipes. Be sure and sign up for our mailing list so you’ll never miss a new recipe. Also click a button below and share the dishes with your friends. You can also follow Chef Buck on Youtube. We appreciate all the kind comments and support, and we’ll see you next time in the kitchen!

If you like what CG and I do, you can also support us on Patreon, or throw us a tip in our Paypal Tip Jar. We’ll happily enjoy a coffee on the road – Thanks! We appreciate all the support, and we’ll see you next time in the kitchen!

We include affiliate links for products on our website. So, if you make a purchase after clicking on our links, we may earn a commission which helps us produce more videos and drink more coffee :^) We participate in the Amazon Services LLC Associates Program, which is an affiliate advertising program. It provides a means for us to earn fees by linking to Amazon.com and affiliated sites, so we can make more videos.

Share and Enjoy !

Yuca Recipe – How to Cook Cassava Root

yuca recipe

Check out this easy yuca recipe. Yuca is a starchy root that makes a terrific change up from a potato dish. We have been cooking up yuca roots with garlic and onion for years, inspired by our favorite Cuban restaurants in Florida. The combo of yuca, with plenty of garlic, onion, and cumin will knock your socks off. So, check out the video and give this delicious yuca recipe a try.

Ingredients for this Cuban-Inspired Yuca Recipe

YUCA (about 1 lb.)   In the video we use fresh yuca, but you can use frozen in the same way.
1-2 large ONION (diced)
5-10 cloves GARLIC (finely chopped)
OIL for sauteing the onion and garlic
RED PEPPER FLAKES to taste
2-3 Tbsp CUMIN
½ cup OLIVE OIL total (1/4-1/2 to saute onion & garlic, rest to drizzle on top)
zest and juice of 1 LEMON
SALT to taste
CUMIN SEEDS (1 tsp, optional) I like using Badia seeds ’cause they’re a great buy, and you can check current prices for Cumin Seeds on Amazon.

I’ve got lots of yuca in the video, so I’m doubling this recipe.

yuca recipe
Yuca is a popular root that can be used much like a potato


How To Cook Yuca Recipe

  • Using a sharp knife, cut the yuca into manageable sizes to carefully cut away the outer skin of the yuca root. The skin is inedible and should be discarded. [One advantage of using frozen yuca is that the outer skin is already removed.]
  • Place yuca pieces into a pot of water and bring to a boil. Yuca should NEVER be eaten uncooked.
  • Reduce heat and simmer 15-20 minutes or until yuca root can be pierced easily with a fork. 
  • Do NOT overcook! Yuca pieces should not be mushy.
  • Zest lemon; squeeze lemon juice.
  • Drain yuca and cool with water.
  • Remove fibrous stem from center of root and cut into 1 inch chunks (or smaller, if you want to taste more of your seasonings).
  • Heat oil in a skilleton medium high heat.
  • Add cumin seeds for just a few moments, then add garlic and onion and let simmer for a several minutes. 
  • Turn down to medium heat. Add red pepper flakes, cumin powder, and salt to taste.
  • Next, add yuca.
  • Mix and allow all to simmer for 5 minutes. Give the yuca an occasional stir. Add a bit of water if needed, but not too much.
  • Remove from heat.
  • Finally, add lemon juice and zest. Drizzle a bit of oil on top (extra virgin olive oil is a great topping).

Have Fun with Yuca!

yuca recipe
Cook yuca by removing the skin and boiling the root in water

And that’s it!

Yuca is an excellent substitute for potato. It goes great with any meat entree and makes a great vegetarian meal when paired with stuffed peppers and a crisp green salad.
Give this yuca recipe a try and let me know what you think, and bon appetit!

And, if you wanna try out the stuffed peppers with yuca, check out this recipe as well.
Jalapeno Peppers Recipe
kick ass jalapeno poppers

Thanks for checking the yuca recipe and video out. If you liked it, click a few buttons below and share it with your friends and family. I appreciate it!
–Chef Buck

And here’s a LO-FI video version of this yuca recipe I made back before I knew what a haircut was.

We appreciate you watching our videos…Thanks!


We include affiliate links for products on our website, so if you make a purchase after clicking on our links, we may earn a commission which helps us produce more videos and drink more coffee :^)                                    Also, we are participants in the Amazon Services LLC Associates Program, which is an affiliate advertising program that provides a means for us to earn fees by linking to Amazon.com and affiliated sites, so we can make more videos.

Share and Enjoy !

Zucchini Noodles with Marinara Sauce Recipe

zucchini noodles

This zucchini noodles and marinara sauce recipe is super simple to cook. The marinara sauce will pair great with any pasta, even a gluten free faux zucchini pasta, which is really just raw zucchini cut into noodles, but your taste buds will trick your brain into believing otherwise. Thin sliced ribbons of zucchini will act just like egg noodles, except when it comes to racking up the calories.

What You Need To Make Zucchini Noodles with Marinara Sauce

2-3 ZUCCHINI
1 lb ground SAUSAGE
1 ONION
crazy amount of GARLIC
½ GREEN BELL PEPPER
1 15 oz can DICED TOMATO
1 15 oz can TOMATO SAUCE
2-3 tsp ITALIAN SEASONING
RED PEPPER FLAKES (to taste)
½ up PARSLEY (chopped, optional)
SALT and PEPPER (to taste)
OIL for sauteing

zucchini noodles
Add thin sliced raw zucchini to hot marinara for a great gluten free faux pasta

How To Make Marinara Sauce with Zucchini Noodles

  • In a large skillet, heat oil on medium heat.
  • When pan is hot, add sausage. Sometimes I’ll shape sausage into meatballs before adding to the skillet and other times I’ll just divide the sausage once it’s in the pan; whatever works for you is the right way.
  • Brown the sausage for a few minutes and then add the onion, garlic, and peppers.
  • Continue sauteing for 3-4 minutes.
  • Add herbs and salt and pepper to taste.
  • Add canned tomato and about ½ can of water.
  • Mix well and bring the skillet up to a bubble.
  • Reduce to a low simmer and cook 20-30 minutes. Add water as desired.
  • While sauce simmers, wash and peel 2-3 zucchini into thin noodles. I find a simple vegetable peeler to be the easiest method for slicing zucchini into thin, egg noodle like strips.
  • After sauce simmers, adjust seasoning as desired and stir in the chopped parsley. The parsley is optional, but adds a great color to the sauce, especially if you’re serving the marinara sauce over traditional noodles.
  • Remove the skillet from the heat and stir sliced zucchini noodles into the marinara sauce.
  • The thin zucchini will readily heat through in the hot marinara sauce and no more cooking is required.
  • Serve immediately (and top with Parmesan cheese if you like!)

zucchini noodles
raw ribbons of zucchini make a perfect pasta substutute

Give this very tasty marinara sauce with zucchini noodles recipe a try and let me know what you think, and bon appétit!

For another great noodle dish, check out this Gluten Free Tofu Lasagna
gluten free tofu lasagna

Thanks for checking out the recipes. If you like what you see, share it with your friends and family on social media, I appreciate it!
–Chef Buck

Share and Enjoy !


Fettuccine Alfredo Recipe …easy to make Alfredo Sauce

fettuccine alfredo recipe

A fettuccine alfredo recipe is an easy and delicious dish to cook at home. A thick alfredo sauce with rich cream and parmesan cheese is so satisfying and decadent. Shrimp fettuccine, chicken fettuccine, mushrooms –you can add anything you like to the noodles and alfredo sauce, but a simple and classic Fettuccine alfredo dish is one of my favorites …a classic Italian recipe so good it doesn’t need any bells and whistles.

What You Need To Make a Fettuccine Alfredo Recipe

10 oz FETTUCCINE NOODLES
4 Tbsp BUTTER
¼ cup OLIVE OIL
1½ cups CREAM
10-15 cloves GARLIC (finely chopped)
2 cups PARMESAN CHEESE (finely shredded)
SALT and PEPPER (to taste)
PARSLEY (if you like, chopped)

fettuccine alfredo recipe
Creamy fettuccine alfredo topped with fresh parsley and served with buttered bread.

How To Make Classic Fettuccine Alfredo

Heat a large skillet on medium heat and add the butter and oil.
When oil is hot, add garlic and saute for 20-30 seconds.
Add salt and pepper to taste.
Add cream and mix well.
Stir the parmesan cheese into the skillet.
Adjust the stove top temperature as needed.
Stir the sauce until it is smooth …the sauce will thicken even more after it is off of the stove.
Add chopped parsely if you like!
Prepare the fettuccine noodles according to package directions.
Drain and add the noodles to the alfredo sauce.
And that’s it …serve hot with a salad and buttered bread, and that’s about as good as life gets.

Tips for Fettuccine Alfredo

Use finely shredded Parmesan cheese, and if buying pre-grated cheese, buy cheese without a lot of additives listed in the ingredients. Too many additives can make the parmesan lumpy and less smooth when it is melted. Ideally, grate your own cheese.
To make more alfredo sauce, simply add additional cheese and cream to taste. I like lots of sauce, so too much is not enough.
Shrimp, grilled chicken, and mushrooms are great additions to this dish, even broccoli (although fettuccine alfredo is soooo good when it’s kept simple, I rarely make these additions.)
Cook the fettuccine noodles al dente, meaning NOT OVERDONE! Chewy noodles are best for Alfredo.
Do not rinse your noodles after cooking them, this will wash away a lot of the flavor; simply drain the noodles and then stir them slowly into the alfredo sauce.

Give this creamy Italian fettuccine alfredo recipe a try and let me know what you think, and bon appétit!

For another great noodle dish, check out this Spaghetti Carbonara recipe.

spaghetti carbonara
click pic for recipe

Thanks for checking out the recipes. If you like what you see, share it with your friends and family on social media, I appreciate it!
–Chef Buck

Share and Enjoy !


Best Southwestern Quinoa Salad Recipe

southwestern quinoa salad

Everywhere you turn, there’s a Southwestern quinoa salad, and for good reason.  It’s delicious, easy to make, and a great choice for a healthy meal. Since quinoa is a complete protein, this Southwestern inspired salad makes an ideal vegetarian recipe, doubly so since this quinoa is paired with black beans.

What you need to make a Southwestern Quinoa Salad

2 cups COOKED QUINOA (check current prices for quinoa on Amazon)
1 15 oz can BLACK BEANS
10-15 sliced CHERRY TOMATOES
1 AVOCADO
½ diced YELLOW BELL PEPPER
3-5 chopped GREEN ONIONS
¼ cup chopped, pickled JALAPENO
½ cup chopped CILANTRO
1 LEMON …juice and zest
2 Tbsp OLIVE OIL
SALT and PEPPER to taste

southwestern quinoa salad
southwest quinoa salad recipe

How to make a Southwest Quinoa Salad

Cook up the quinoa just like rice: 1 part quinoa to 2 parts water, bring to a boil, reduce heat, cover and simmer for 15 minutes or until the water is absorbed. Fluff the quinoa and then set aside uncovered to cool.

While the quinoa cools, prepare the veggies:

Dice ½ a yellow bell pepper, or any color pepper, but if you’re like me and you’re making a corn-free southwest quinoa salad, then using a yellow pepper will make your quinoa salad more lovely to look at. Slice some cherry tomatoes. Cherry tomatoes have a great flavor, and the hardiness of the tiny tomato makes it the perfect choice for a salad.

Remove and mince the zest from 1 small lemon, and then slice the lemon in half. Check current prices for a lemon zester on Amazon.

Chop up some green onions, and cilantro. If you like a little heat, chop up some pickled jalapeno, too, and reserve a Tbsp of the jalapeno pickling juice for added kick and flavor.

When the quinoa cools:

Add 2 cups of the cooked quinoa to a large mixing bowl.
Rinse and drain the black beans and add them to the bowl.
Add the yellow pepper, jalapeno pepper, onion, cilantro, lemon zest, olive oil, juice from half the lemon, and salt and pepper.
Mix ingredients thoroughly.
Add tomato.
Slice avocado and add to salad.
Take the remaining lemon half and squeeze its juice over the cut avocado, this will preserve the vibrancy of the avocado.

Gently mix the salad and serve.

This Southwestern quinoa tastes great on it’s own, as a healthy side dish, or served over a bed of fresh greens for a super salad topping.

Give healthy southwest quinoa salad recipe a try and let me know what you think, and bon appétit!

For another healthy option with a southwestern flair, check out out this meat-free Vegetarian Chili Recipe that even carnivores will love.

vegetarian chili
pot o’ meatless chili for good times

Thanks for checking out our Southwestern quinoa salad recipe, and all of our recipes. Be sure and sign up for our mailing list and never miss a new Chef Buck cooking video, and also click a button below and share the dishes with your friends. We appreciate all the kind comments and support, and we’ll see you next time in the kitchen!

Thanks for watching our cooking videos!

We include affiliate links for products on our website, so if you make a purchase after clicking on our links, we may earn a commission which helps us produce more videos and drink more coffee :^)                                                                                                We participate in the Amazon Services LLC Associates Program, which is an affiliate advertising program providing a means for us to earn fees by linking to Amazon.com and affiliated sites, so we can make more videos.

Share and Enjoy !

Banana Pancakes – Flourless Gluten Free Recipe

banana pancakes

This Banana Pancakes recipe tastes great! These banana pancakes are flourless and gluten free and cook up fluffy and filling for a healthy, easy to make breakfast alternative to traditional pancakes. And pancakes are especially tasty when you add in some nuts, chocolate chips, or fresh berries.

What You Need to Make Banana Pancakes

(makes 6 good-size pancakes or 8-10 sissy cakes)

2 BANANAS
2 EGGS
½ tsp BAKING POWDER
½ tsp CINNAMON POWDER
splash of VANILLA EXTRACT
sprinkle of WALNUTS and/or FRUIT if desired
SALT to taste (optional)

banana pancakes
Banana pancakes are flourless and gluten free and cook up fluffy and filling for a healthy, easy to make breakfast alternative to traditional pancakes.

How to Make Banana Pancakes

  • In a bowl, mash up 2 bananas; the riper the bananas, the more banana-ee your pancakes will be!
  • Add eggs.
  • Add cinnamon, baking powder, salt, and vanilla extract.
  • Mix ingredients well. The batter should be the consistency of a traditional pancake batter–add more mashed banana if needed.
  • Let batter sit for a few minutes.
  • Heat a greased skillet or griddle on medium low heat. In the video I use a Lodge cast iron skillet which works great and is pretty affordable for a cast iron skillet. Check the current price for a cast iron skillet on Amazon.
  • Once skillet is heated, spoon batter to form pancakes; whatever size you like.
  • Cook undisturbed about 3-4 minutes or until the pancake begins to brown.
  • If desired, sprinkle nuts or berries or chocolate chips on the cakes.
  • Flip pancakes with a spatula and cook on the other side until brown. Unlike traditional flour pancakes, you can flip these cakes over and over until they are cooked and colored to your liking.
  • Serve hot off the grill with maple syrup.
banana pancakes
Banana Pancake Recipe

Give these flourless banana pancakes a try and let me know what you think, and bon appétit!

And for another healthy breakfast idea, try a Tofu Scramble Recipe.

tofu recipe
this tofu recipe makes a perfect breakfast, lunch, or dinner

Thanks for checking out this banana pancakes recipe, and all of our recipe videos. Be sure and sign up for our mailing list and never miss a new Chef Buck cooking video, and also click a button below and share the dishes with your friends. We appreciate all the kind comments and support, and we’ll see you next time in the kitchen!

Thanks for watching our recipe videos!

We include affiliate links for products on our website, so if you make a purchase after clicking on our links, we may earn a commission which helps us produce more videos and drink more coffee :^) We participate in the Amazon Services LLC Associates Program, which is an affiliate advertising program providing a means for us to earn fees by linking to Amazon.com and affiliated sites, so we can make more videos.

Share and Enjoy !

Mediterranean Quinoa Salad Recipe

Mediterranean Quinoa salad

Mediterranean quinoa salad is easy to make, tastes great, and is a healthy choice for a better diet. This quinoa recipe is a perfect entree or side dish, either hot or cold. Quinoa cooks up similar to rice, in fact, you can substitute quinoa for rice in most recipes, so give quinoa a try.

Mediterranean Quinoa Salad Recipe Ingredients :

1 cup QUINOA
2 cups packed SPINACH
10-15 CHERRY TOMATOES (sliced in halves)
3 cloves chopped GARLIC
½-1 cup FETA cheese
¼ cup fresh BASIL
1 med chopped ONION
1 Tbsp OLIVE OIL for sautéing the onion
1-2 Tbsp mild VINEGAR
SALT and PEPPER to taste
1 tsp dried HERBS (thyme, basil, oregano, etc.)

mediterranean quinoa salad
Mediterranean Quinoa makes a great entrée or side dish.

How to Make Mediterranean Quinoa :

Bring 2 cups of salted water to a boil.
Add 1 cup of quinoa (at this time also add any dried herbs). Cover and let simmer 15 minutes, until the water is absorbed.
While the quinoa cooks, sauté the onions and garlic.
Once quinoa is cooked, remove from the heat and while the quinoa is still hot, stir in the spinach and basil until wilted, then add the onion and garlic.
Let Quinoa cool about 10 minutes, and then stir in the cherry tomatoes, vinegar, feta cheese, and extra salt and pepper as desired.
Serve warm or cold, it’s tasty either way.
Give this Mediterranean quinoa salad recipe a try and let me know what you think, and bon appétit!

Sometimes quinoa is pricey, but by shopping around, you can often find a better deal. See current prices for quinoa on Amazon. I like to buy quinoa in the bulk bins, or sometimes you can find a good deal on quinoa in the rice section. Quinoa in the “health” or “natural foods” section is often over-priced, so definitely look around for the better deal, because it’s out there!

For another flavor twist, try this Southwest inspired quinoa salad recipe.

southwestern quinoa salad
a southwestern quinoa salad makes a tasty and healthy dinner choice.

And for another more easy quinoa dishes, check out my quinoa recipe playlist on the Chef Buck Youtube Channel.

Thanks for checking out this Mediterranean quinoa recipe, and be sure and sign up for our mailing list so you’ll never miss a Chef Buck cooking video, and also click a button below and share the dishes with your friends. We appreciate all the kind comments and support, and we’ll see you next time in the kitchen!

We appreciate you watching our recipe videos!

We include affiliate links for products on our website, so if you make a purchase after clicking on our links, we may earn a commission which helps us produce more videos and drink more coffee :^) We are a participant in the Amazon Services LLC Associates Program, which is an affiliate advertising program that provides a means for us to earn fees by linking to Amazon.com and affiliated sites.

Share and Enjoy !

Potato Cake Recipe — How To Make Sweet Potato Latkes

potato cake recipe

Check out this simple potato cake recipe. Or do you call them potato pancakes? Or potato latkes? I like to use sweet potatoes because they are less starchy and cook up quicker than white potatoes, plus sweet potatoes just taste great, and they are a good nutrition and energy source.

Ingredients to Make A Sweet Potato Cake Recipe :

1 med SWEET POTATO
ONION (½ as much as potato)
Fresh HOT PEPPER (optional)
2 EGGS
2 Tbsp FLOUR
1 tsp CURRY POWDER
½ tsp CHILI POWDER (optional)
……or whatever seasonings you prefer!
SALT and PEPPER (to taste)
OIL for cooking

potato cake recipe
Are they potato latkes, potato pancakes, or potato cakes? What do you call them?

How to Make Sweet Potato Latkes :

    • Shred sweet potato into strings, and thinly slice onion into stringy lengths.
    • I like to also thinly slice a jalapeno pepper; the pepper adds a nice zing, flavor, and color, but you can skip the pepper if you’re a “fraidy cat”.
    • In a bowl, combine the potato, onion, and pepper with the flour until well coated.
    • Beat two eggs and add into the mix, stirring well.
    • Add seasonings as desired. I like a lot of seasoning, and the potato and onion like it, too, so be liberal with the salt, pepper, and flavors you prefer; it’ll make for tastier cakes.

potato cake recipe
thinly sliced sweet potato, onion, and pepper make for a sturdy, tasty, potato cake.

  • Heat oil in a skillet on medium-high heat and spoon the potato mixture into the skillet and press and shape into patties. The potato cakes should be about the size and thickness of a nice ¼lb burger, but not too thin.
  • Don’t crowd the skillet. I use a ten-inch skillet and get two batches of three patties each, which is a terrible sentence, and almost sounds like math, so sorry for that.
  • Cook patties for 3-4 minutes on each side, turning carefully.
  • Adjust the burner temperature as needed; reduce heat to cook each potato patty for 3-4 minutes without burning.
  • Cook until nicely colored, then remove potato cakes from the skillet and drain on a paper towel.

It’s a great dish for breakfast, lunch, or dinner.
Give this simple potato cakes recipe a try and let me know what you think, and bon appétit.

And for another yummy potato dish, check out this classic Home Fried Potatoes Recipe.

home fried potatoes recipe
home fried potatoes

Thanks for watching. If you like the potato cake recipe, use some of the share links below to share the dish with your friends and family.
I appreciate it!
–Chef Buck

Share and Enjoy !


Green Onion Pancake Korean Pajeon Recipe

korean pajeon

Pajeon is a Korean-style green onion pancake recipe. It is a savory, delicious pancake that can be prepared quick and easy. I’m using rice flour in this video, so it’s actually a gluten-free pancake recipe, but using all-purpose wheat flour is fine. You can use either chives or scallions for this recipe (or both).

What You Need To Make Pajeon

1 bunch GREEN ONIONS
1 EGG
¼ cup RED BELL PEPPER
HOT PEPPER (optional)
½ cup FLOUR
½ cup WATER
2-3 Tbsp OIL for cooking
SALT and PEPPER (to taste)
sauce:
¼ cup RICE VINEGAR
¼ cup SOY SAUCE
CHILI-GARLIC SAUCE (to taste, optional)

For a gluten-free pancake, check here for CURRENT RICE FLOUR PRICES on Amazon.

How to Make a Pajeon Green Onion Pancake

  • Combine flour and cold water and mix well, the batter should be thin.
  • Chop slender green onions into approx. 1 inch pieces and add into batter (thicker onions should be sliced lengthwise first).
  • Add red bell pepper and any hot pepper (optional) to batter and combine all until ingredients are well coated.
  • Heat oil in a non-stick skillet on medium high. Adjust temperature as needed through out cooking, but make sure the oil is hot before adding the batter.
  • Add batter to hot skillet and shape into a pancake shape. Make 1 big pancake, or 2 smaller pancakes; this recipe can serve 1 to 2 people, although I generally eat it all, since it’s quick and easy to prepare, and I often make it when I’m just cooking for myself.
  • Add salt and pepper to taste (remember that the sauce will have have soy sauce)
  • After 3 minutes, pour a beaten egg over the pancake top.
  • Cook until the cake is golden brown on bottom, about 4-6 minutes.
  • Turn the cake (or flip it–but with confidence!) and cook the eggy side for about 2 more minutes.
    And that’s it! Serve hot with a dipping sauce.

Dipping Sauce

Combine equal parts rice vinegar and soy sauce and mix well. Adding a little chili-garlic sauce is a nice touch, and and will provide a nice bite. For a sweeter sauce, add a little hoisin or plum sauce, or just 1-2 tsp sugar.

green onion pancake
A Korean style green onion pancake can be made quick and easy.

Give this pajeon green onion pancake recipe a try and let me know what you think, and bon appétit.

And for a Korean-style pancake, check out this Haemul Pajeon Seafood Pancake Recipe.

shrimp pancake
Korean style Haemul Pajeon seafood pancake

Thanks For Watching Our Recipe Videos!

Thanks for checking out this green onion pancake recipe, and all of our recipes. Sign up for our mailing list so you’ll never miss a new recipe. Also click a button below and share the dishes with your friends. You can also follow Chef Buck on Youtube. We appreciate all the kind comments and support, and we’ll see you next time in the kitchen!

If you like what CG and I do, support us on Patreon, or throw us a tip in our Paypal Tip Jar. We’ll happily enjoy a coffee on the road – Thanks! We appreciate all the support, and we’ll see you next time in the kitchen!

We include affiliate links for products on our website. Making a purchase after clicking on our links and we may earn a commission which helps us produce more videos and drink more coffee :^) We participate in the Amazon Services LLC Associates Program, which is an affiliate advertising program. It provides a means for us to earn fees by linking to Amazon.com and affiliated sites, so we can make more videos.

Share and Enjoy !

Best Cauliflower Pizza Crust Recipe That Won’t Fall Apart

cauliflower pizza crust

You can make the best cauliflower pizza crust recipe that will not fall apart after baking. Slice it, hold it, eat it–it keeps its shape–and it actually tastes like pizza! This cauliflower crust pizza is gluten free, healthier than bread dough, and definitely worth trying.  And this recipe freezes well too so why not make 2 crusts?

All You Need To Make a Cauliflower Crust Pizza

2 cups of grated CAULIFLOWER
1 cup of freshly grated PARMESAN CHEESE
1 EGG beaten
PARCHMENT PAPER to line your baking sheet
PIZZA SAUCE, your choice   [see below for an easy, delicious tomato-based pizza sauce recipe]
PIZZA TOPPINGS, your choice

gluten free pizza crust
The best and easiest cauliflower crust pizza recipe. This cauliflower crust is delicious, holds its shape, and will not fall apart.

How To Cook A Cauliflower Crust Pizza Recipe

Cut And Dry Out The Fresh Cauliflower:

  • Grate fresh cauliflower florets into granules resembling “poprocks”
  • Heat the grated cauliflower in a skillet.  Don’t add oil or water–use medium heat, not too hot. Stir until the cauliflower has dried out somewhat. It won’t dry completely, but the dryer, the better. Heat at least 10 minutes, just enough to evaporate the moisture, not enough to color or cook down.
  • Remove skillet from burner and set aside to allow cauliflower to slightly cool.

Prepare and Cook the Naked Crust:

  • In a bowl, beat 1 egg.
  • Add grated Parmesan cheese to the egg. You can substitute, asiago or romano cheeses, just be sure you use a hard cheese for best results.
  • Add the cauliflower to the bowl and mix well with the egg and cheese and form into a ball.
  • Spread parchment paper onto a baking sheet. DEFINITELY USE PARCHMENT PAPER, otherwise your crust may tear when you try to pick it up. If you’re out of paper, here’s some current parchment paper prices on amazon.
  • Place the balled cauliflower and cheese onto the parchment paper and spread out into a pizza shape about ¼ inch thick. The crust will be about 10″ across.
  • Do not make the edges of the crust too thin; keep the size of the crust uniform for even cooking. The cauliflower will darken quite rapidly around the edges if too thin.
  • Place crust into an oven preheated to 400 degrees Fahrenheit and cook approx. 15-20 minutes until the crust has colored and firmed up.

Add Your Favorite Pizza Toppings and Finish Cooking:

  • Remove cauliflower pizza crust from the oven and top with your favorite pizza sauce. Use a marinara sauce, pesto, white sauce, or whatever. Top with your favorite pizza toppings.
  • Return pizza to the oven and continue to cook at 400 F for about 10 minutes until the toppings are done, watch the edges of the cauliflower crust; the edges will darken too much if overcooked.
  • Remove the pizza from the oven and set on a cooling rack –or don’t– this step isn’t make or break.

And that’s it!  Eat and enjoy. Check here for current prices for a pizza pan on Amazon.

A cauliflower pizza crust will not rise since there is no yeast involved, and since the crust is entirely cauliflower, cheese, and egg, it will not achieve the same crispness as a thin dough pizza. But the pizza will stay together just fine, and will taste very much like a pizza.

cauliflower pizza crust
Cauliflower pizza crust after cooking about 20 mins. in a 400 F oven. Crust should be cooked firm with a nice, golden color.

Tips For Making A Cauliflower Pizza Crust That Will Not Fall Apart

  • Use fresh cauliflower, and only use the florets.
  • Don’t allow overly large pieces of cauliflower into the “dough” — keep the vegetable pieces reasonably uniform.
  • The dryer the cauliflower pieces the better, but don’t be obsessed!
  • Use only a hard cheese like Parmesan or Romano in the crust mixture, this helps make the crust stable.
  • Don’t make the crust too thick, around ¼” is ideal.
  • Make the crust a uniform size all the way to the edges so that it will cook evenly.
  • Cook the cauliflower crust on parchment paper! otherwise the crust will stick and break apart when you try to remove it from the pan.
  • Spread your pizza sauce almost to the outer edges of the crust; your pie will look better. The cauliflower pizza crust is a healthier choice, but it is not the prettiest pizza crust.
best cauliflower pizza crust
This cauliflower crust is healthier than a bread dough, with more nutrition and less empty calories.

Is A Cauliflower Pizza Crust Healthy ? …well

  • It provides more nutrition.
  • It adds less empty calories.
  • It’s gluten-free.
  • And it works. It’s a great alternative to a bready pizza crust that will satisfy your pizza needs.
pizza sauce recipe
Any pizza sauce will work with a cauliflower crust pizza, so use your favorite, but homemade is always best!

How to Make an easy Homemade Pizza Sauce

A good pizza needs a good sauce. It’s easy to make a simple pizza sauce at home that will suit your tastes exactly.

The key to a great homemade pizza sauce is making it at least a day in advance. Keep a jar of sauce in your fridge. You can use it on pizzas, but also on sandwiches, as a dip, or part of a marinara sauce for any Italian inspired dish.

You’ll need:
1 15oz can of TOMATO SAUCE
dried THYME dried OREGANO
dried BASIL
GARLIC POWDER or fresh chopped GARLIC
SALT and PEPPER
and for a little kick, add a little fresh or dried HOT PEPPER

Add the seasonings to taste. If you’re just getting started cooking at home, here are current prices for Spice Starter Sets on Amazon.

Are There Other Ways To Use A Cauliflower Pizza Crust?

For a tasty twist on this pizza crust variation, try using it as a Cauliflower Crust Burrito. Seriously, a burrito has tons of flavor, so it’s a great way to use this kind of recipe.

cauliflower pizza crust recipe
This is a nice variation on a burrito recipe and a great way to use a cauliflower crust.

Thanks For Checking out our Recipes

We hope you love this cauliflower pizza crust recipe! Sign up for our mailing list so you’ll never miss a new recipe. Also click a button below and share the dishes with your friends. You can also follow Chef Buck on Youtube. We appreciate all the kind comments and support, and we’ll see you next time in the kitchen!

If you like what CG and I do, support us on Patreon, or throw us a tip in our Paypal Tip Jar. We’ll happily enjoy a coffee on the road – Thanks! We appreciate all the support, and we’ll see you next time in the kitchen!

We include affiliate links for products on our website. Making a purchase after clicking on our links and we may earn a commission which helps us produce more videos and drink more coffee :^) We participate in the Amazon Services LLC Associates Program, which is an affiliate advertising program. It provides a means for us to earn fees by linking to Amazon.com and affiliated sites, so we can make more videos.

Share and Enjoy !

Popcorn : How To Cook Popcorn On The Stove Top

how to cook popcorn on the stove

90% of all U.S. households have a microwave oven, but we don’t, so when we make popcorn, it’s on the stove top. Generally we buy the store brand, it’s considerably cheaper than name brand popcorn, and we find it offers the same result.
We cook popcorn in coconut oil. Coconut oil has a high heat point and retains it’s nutritional value when heated.
We like to add flavorings, too. My favorite is grated Parmesan cheese. Of course we always add butter and salt, but I’ve found that fresh ground black pepper is a great addition as well.

How to Cook Popcorn on the Stove top:

1) On Medium Heat, add 2 Tbsp of coconut oil in a heavy bottomed pot.

2) Add a couple of test corn kernels into the pot.

3) When the oil heats through, and the test kernels have popped, add ½ cup of popcorn kernels.

4) Shake the pan to distribute the kernels along the bottom of the pan. They should form a single layer.

5) Cover the pot with a lid, but don’t cover tightly, leave the lid slightly ajar to allow steam to escape; this will keep the popcorn from tasting stale.

6) Allow the kernels to pop until the popping sound almost completely subsides.

7) Once popped, removed pot from burner and pour popcorn into a bowl.

8) While hot, add melted butter and salt and whatever seasonings you desire.

and that’s it!

Below is a video we made experimenting with bacon, but I think I prefer basic popcorn, although the fresh ground black pepper tasted awesome.

Fun Facts:

–Two tablespoons of unpopped corn kernels produce a quart of popcorn for about 25 cents.
–In movie theaters, for every dollar spent on popcorn, about 90 cents is profit.
–A cup of plain popcorn contains about 31 calories.
–Americans eat more popcorn than any other country.
–About 70% of popcorn sold in America is eaten in the home.
–By volume, popcorn is America’s most popular snack food.

For another tasty snack idea, check out these Cashew Coconut Lemon Bites

energy snack
power snack in a yummy treat!

Share and Enjoy !


Garlic Quinoa Recipe …instead of garlic rice

garlic quinoa

This garlic quinoa recipe makes a terrific side dish. I use quinoa often to provide the protein in vegetarian meals, but quinoa is also a smart choice to serve with other proteins. This garlic quinoa side is filling and tasty, and a great accompaniment for many meat and fish dishes.

Garlic Quinoa Recipe Ingredients:

2 cups QUINOA
3 cups WATER
3-4 cloves GARLIC (finely chopped)
2 Tbsp OLIVE OIL
SALT and PEPPER to taste
and add chopped PARSLEY …if you like, man

garlic quinoa
garlic quinoa makes a great side dish

Garlic Quinoa Recipe Directions:

In an oven proof dish, add 3 cups of water.
Add in the olive oil, or melted butter.
Add the quinoa.
Add finely chopped garlic. I find 3-4 cloves to be plenty (this is one of those rare dishes where I have found too much garlic to be too much).
Add salt and pepper to taste.
If you want to add a little heat, add some finely chopped red chilis (it adds a nice color, too), or just a little cayenne pepper.
Stir the ingredients together well and place top or foil covering over the baking dish.
Bake in an oven preheated to 350 degrees Fahrenheit for 90 minutes. No attention to the dish is required while baking.
After 90 minutes, remove the dish from the oven, uncover and let set for a few minutes.
Fluff with a fork and serve.
It’s a great side dish for meat, fish, and vegetarian meals.
Any leftovers can be used to make quick quinoa salads.
Give this Garlic Quinoa Recipe a try and let me know what you think, and bon appétit!

raw quinoa
uncooked quinoa…looks like a grain, but it’s a seed.

Quinoa is a terrific ingredient to incorporate into your diet for many reasons, here are a few:
1) It is a complete protein (provides all essential amino acids).
2) High in fiber and nutrition.
3) High in magnesium and iron.
4) Is low on the Glycemic Index, making it a good choice for blood sugar regulation.
5) it can easily be substituted for rice in many recipes

For more quinoa inspired recipes, check out my QUINOA PLAYLIST.
spanish quinoa

Share and Enjoy !


Roasted Garlic Recipe …and make a Fancy Crostini

roasted garlic

This roasted garlic recipe is easy to prepare and there are a zillion uses for roasted garlic, like a spread for bread, which I do in this video for a quick crostini idea.
Roasted garlic makes a great addition to rice, potato, and quinoa dishes, jams, salad dressings…most things are better with a little garlic.

Roasted Garlic Recipe Ingredients:

GARLIC
SALT
PEPPER
OLIVE OIL
…plus herbs and spices if you like

For Crostini:
BREAD
FETA CHEESE
CAPERS
KALAMATA OLIVES

roasted garlic recipe
use roasted garlic to make a quick crostini

Roasted Garlic Recipe Directions:

When buying, choose garlic bulbs that are firm and have an intact “papery” outer covering. Avoid soft bulbs, or bulbs that have give and seem overly dry and desiccated. Buy bigger bulbs with bigger cloves! Peeling garlic is a semi-pain, so make it easier on yourself and choose the largest cloves available.

Remove the papery outer covering and separate the cloves.
Do you have a secret tip (that really works!) for quickly peeling garlic cloves? If so, please let me know! I’ve found that the best way for me is the tried and true one-at-a-time method: just give each clove a gentle whack, enough to break the peel, and then remove the skin.
Place peeled cloves on a sheet of aluminum foil.

Drizzle with olive oil. It doesn’t have to be a lot, just enough to coat the cloves.
Add salt and pepper to taste, and any dried herbs or seasonings you like. I usually add a little thyme.
Stir and coat the cloves in the oil and seasonings and then close up the aluminum foil like a Hershey’s Kiss.
Place on a baking sheet and slide into an oven preheated to 400 degrees Fahrenheit.
Bake 30-40 minutes and they’ll be soft and ready for use.

Raw garlic is super strong with a burning bite, but roasting mellows out the bite and transforms the garlic into a tasty treat that can be popped into your mouth whole. I usually eat a handful of cloves when they’re right out of the oven–I can’t help myself!
Warm roasted garlic is great on a crostini, which is really just a fancy piece of toast.
Toast slices of French bread and smear on the warm garlic cloves like butter. Top with feta cheese, capers, and kalamata olives for a quick treat.

Use roasted garlic as a spread for sandwiches.
Mix into mashed potatoes or rice dishes (or quinoa).
Add roasted garlic to salads or mash into salad dressings.
Add to jams, and gravies, and guacamole.
Mix with butter for garlic bread.
Add roasted garlic to anything; it’s a great item to have in the fridge.
Store refrigerated and it will keep several days, store in a jar refrigerated and covered with oil, and it will keep a little longer,but there are so many uses for roasted garlic, it will be very easy to find ways to quickly use it up.
Give this roasted garlic recipe a try and let me know what you think, and bon appétit!

And for another simple and versatile recipe dish, try this Pickled Daikon and Carrot Relish.

Vietnamese Pickled Daikon and Carrot Relish
click pic for Vietnamese Pickled Daikon and Carrot recipe

Share and Enjoy !


Israeli Couscous Recipe for Pasta Salad

pasta salad

This Israeli couscous recipe, also called pearl couscous or ptitim, makes a great pasta salad. It’s called “couscous”, but isn’t what I think of when I think of couscous, because it boils up into tiny pasta balls about the size of a blueberry. Toss pearl couscous into a salad with your favorite dressing and some fresh veggies and it makes a quick and healthy side dish, or even a full meal if you throw it on a bed of greens.

Israeli Couscous Pasta Salad Ingredients

1 pkg ISRAELI COUSCOUS (8.8 oz)
1 lg ENGLISH CUCUMBER (sliced)
1 CARROT (strings?…whatever, man)
2 cups PARSLEY (chopped)
TOMATO (sliced)
….and whatever’s in the fridge you need to get rid of.
dressing:
¼ cup OLIVE OIL
3 Tbsp LEMON JUICE (or vinegar)
2 tsp LEMON ZEST
2 tsp GARLIC (minced)
2 tsp GINGER (minced)
SALT and PEPPER to taste
(plus whatever you want)

pasta salad
Israeli couscous is also called pearl couscous or ptimim.

Israeli Couscous Recipe

Bring 3 cups of water to a boil and add in the Israeli couscous. Check current prices for Israeli Couscous on Amazon. Salt and oil are not needed. Reduce heat down to a simmer, cover, and let cook for 10 minutes. After 10 minutes, remove the pot from the heat and strain the couscous. Rinse with cold water to halt the cooking process and to keep the pasta from becoming too soft.

Slice fresh veggies. Use the ones I have listed above or use your favorites; and especially use whatever veggies you have in the fridge that you need to get rid of. Whenever I make a big salad, it’s almost always to utilize ingredients that are gonna go bad if I don’t do something with them soon–it’s a win-win, I end up not wasting food and getting something healthy to eat.

pasta salad
uncooked Israeli couscous

In a small bowl, combine the dressing ingredients. I like to use fresh lemon juice because it’s awesome. but it’s also great to keep lemons on hand for the fresh zest–lemon zest adds a nice zing to salads and dressings. If you don’t have fresh lemon on hand, substitute vinegar.

In a bowl, toss together the couscous, veggies, and dressing. If you’re going to be serving and eating it all right away, go ahead and add tomato, but if you’re going to refrigerate some or all of the salad for later, just wait and add the tomato when you’re serving (refrigerated tomatoes are no fun).

Israeli (pearl) couscous is great in these kinda salads. I often use quinoa in these types of dishes, but this couscous makes a nice change of pace, so give it a go if you’re regularly eating salads and need to mix things up a bit.

Give this Israeli couscous recipe a try and let me know what you think, and bon appétit!

And for another tasty salad idea, try this Southwestern-Style Quinoa Salad Recipe.

southwestern quinoa salad
a southwestern quinoa salad makes a tasty and healthy dinner choice.

Thanks for Watching our Couscous Recipe Video!

Click a button below and share the dishes with your friends. You can also follow Chef Buck on Youtube. We appreciate all the kind comments and support, and we’ll see you next time in the kitchen!

If you like what CG and I do, support us on Patreon, or throw us a tip in our Paypal Tip Jar. We’ll happily enjoy a coffee on the road – Thanks! We appreciate all the support, and we’ll see you next time in the kitchen!

We include affiliate links for products on our website. Making a purchase after clicking on our links and we may earn a commission which helps us produce more videos and drink more coffee :^) We participate in the Amazon Services LLC Associates Program, which is an affiliate advertising program. It provides a means for us to earn fees by linking to Amazon.com and affiliated sites, so we can make more videos.

Share and Enjoy !

Thai Rice Recipe …but with Quinoa!

thai rice

What is more awesome than a Thai rice recipe? Thai quinoa! Quinoa provides a complete protein, so you’ll get more bang for your buck by substituting quinoa in this simple, yet delicious Thai-style dish.

>

Quinoa Thai Rice Recipe Ingredients:

1 cup QUINOA …check quinoa prices on Amazon
1 can COCONUT MILK
1 ONION (chopped)
2 Tbsp GINGER (minced)
1 Tbsp CHILI-GARLIC SAUCE
1-2 tsp LEMONGRASS (minced)
4-6 cloves GARLIC (finely chopped)
2 Tbsp OLIVE OIL
½ tsp TURMERIC
CILANTRO (chopped)
ENGLISH CUCUMBER (chopped)
ROMA TOMATO (chopped)
2-3 Tbsp RICE VINEGAR
SALT and PEPPER to taste

thai rice
Thai-Style Quinoa Recipe

Quinoa Thai Rice Recipe Directions:

Heat olive oil in a large skillet on medium high. Add chopped onion, garlic, and ginger. Saute for 3-4 minutes until ingredients begin to soften. Add chili-garlic sauce, turmeric, and salt to taste. Mix well and continue sautéing for another minute.
Add quinoa and stir well. Check here for current prices for quinoa on Amazon.

In a measuring cup, add one can of coconut milk, and then add additional water to bring the liquid to 2½ cups. Pour the coconut/water mixture into the skillet and mix well with the quinoa.
Stir in the minced lemongrass.

Raise the skillet temperature and bring ingredients to a boil.
Reduce heat to a simmer, cover, and let dish cook undisturbed for 15 minutes.

Thai rice
Pair a simple salad with Thai Quinoa for a complete meal.

While the quinoa cooks, chop cucumber and tomato into a bowl.  Use a cucumber with a thin, edible skin, it’s a great texture for this dish. Add fresh chopped ginger and cilantro, salt and pepper to taste, and a generous amount of rice vinegar; the tartness of the vinegar adds a great contrast to the coconut creaminess of the quinoa. Thoroughly mix the salad ingredients and set aside.

Once the quinoa has simmered for 15 minutes, remove from the heat and let sit 5 to 10 minutes. Fluff the quinoa with a fork and add fresh chopped cilantro; if you’re not a fan of cilantro, basil makes an excellent substitute.
Serve quinoa in a bowl with the cucumber/tomato salad.

It’s a crazy creamy and awesome recipe. So simple and delicious, and makes a great meal. Definitely give this Thai rice quinoa recipe a try and let me know what you think, and bon appétit!

And for another healthy Thai-inspired recipe, try this Quinoa Thai Curry Recipe.
quinoa thai curry

Thanks for Watching Thai-Style Quinoa Recipe

Click a button below and share the dishes with your friends. You can also follow Chef Buck on Youtube. We appreciate all the kind comments and support, and we’ll see you next time in the kitchen!

If you like what CG and I do, support us on Patreon, or throw us a tip in our Paypal Tip Jar. We’ll happily enjoy a coffee on the road – Thanks! We appreciate all the support, and we’ll see you next time in the kitchen!

We include affiliate links for products on our website. Making a purchase after clicking on our links and we may earn a commission which helps us produce more videos and drink more coffee :^) We participate in the Amazon Services LLC Associates Program, which is an affiliate advertising program. It provides a means for us to earn fees by linking to Amazon.com and affiliated sites, so we can make more videos.

Share and Enjoy !

French Toast with Cream Cheese Filling

french toast

Why have Plain French Toast when you can have French Toast with a cream cheese filling? A little creamy cheese and cinnamon ginger apples can transform your breakfast into a 10-year old’s dream breakfast.

French Toast Ingredients:

BREAD (sliced, stale)
1½ cups MILK
4 EGGS
BUTTER for frying, and apples
APPLES (peeled, sliced)
CANDIED GINGER (sliced)
WALNUTS (toasted)
8 oz CREAM CHEESE (soft)
15 oz RICOTTA CHEESE
CINNAMON (to taste)
optional: sugar and vanilla

french toast
Stale bread makes the best french toast! –slice ahead of time!

French Toast Directions:

Stale bread makes great French toast, so slicing bread ahead of time is a great idea; at least a few hours ahead of time, but ideally overnight. Stale bread will soak up the French toast batter without becoming overly soggy and falling apart, especially if you’re using thinner slices of bread, and the thinner or thicker the slices will depend on your particular tastes. This French toast recipe doesn’t need thicker slices, since you’re basically building a French toast sandwich; I’m using thicker slices of challa bread for this video, but I often use regular slices of Hawaiian sweet bread, which works great.

Mix the cream cheese and ricotta cheese together. Be sure to set your cream cheese out ahead of time to soften, this will make mixing it with the ricotta cheese much easier. I’ll often mix these ingredients ahead of time. If making a smaller amount, the cheese mix is about a 2 to 1 ratio of ricotta to cream cheese. I sometimes add a tsp. or two of sugar to the cheese mix, but this is optional; I prefer it without the added sugar, since the apple mix will be quite sweet.

Any leftover cream/ricotta mix can be used as dessert topping, and makes a tasty filling for omelets. I generally make too much apple mix, but that’s a good thing, too. I’m generous with the apple topping, and any leftover apple mix is a perfect topping for oatmeal or ice cream.

french toast
Creamy cheese filled French Toast

To make the apple mix, peel, slice, and remove the cores of the apples. Apples vary quite a bit in size, but I usually end up with about 4-6 cups of apple slices, and I generally use gala or Fuji apples, which take little time to cook down.

Melt about 2 Tbsp of butter in a pot and add apples. Mix with butter and cook over medium heat. Add candied ginger slices; I think ½ to 1 cup is a good amount of candied ginger, but there is no wrong amount, follow your gut. Add 1-2 Tbsp of sugar and cinnamon to taste, Mix and cover and cook about 20 minutes, until apples soften and get juicy. For extra liquidy goodness, stir in about ¼ cup water. You want the apples to be a little syrupy, that way you won’t have to use any maple syrup with the French toast. Once the apples are cooked to your liking, cover and set aside.

Mix the French toast batter. A basic batter is eggs and milk, and I’m also adding cinnamon, but often folks will add a little sugar or vanilla extract. I don’t add vanilla or sugar to the batter with this particular dish, because the creamy cheese center and apple-ginger topping will add more than enough flavor. In a bowl, combine the milk, eggs, and cinnamon to taste (½ tsp is a good amount). Whisk together well and then pour some into a shallow bowl–or all–it depend on the size of your shallow bowl; you don’t want the batter to be so deep that it runs into the cheesy part of your French toast sandwich.

To build the French toast sandwich, simply spread the cheese mixture onto a slice of bread and top with another slice, making a basic cheese sandwich.

You can also add toasted walnuts into the sandwich for a nice crunch, or simply top the toast later with toasted nuts, but definitely add nuts at some point, cause the crunchy contrast makes the dish perfect, and toasted walnuts are awesome.
To toast the walnuts: spread walnuts on a baking sheet and roast at 350 degrees Fahrenheit for 5-7 minutes. It won’t take long. As soon as the nuts begin to color up, remove them from the oven; they will burn if ignored, so set a timer and watch them closely. Taking the time to toast the walnuts is well worth the effort…it’s a great taste.

Once you’ve constructed the cheesy French toast sandwich, heat a little butter in a non-stick skillet on medium heat. Check current prices for a Non-Stick Skillet on Amazon.
Place the sandwich in the batter and let soak a moment and then turn and batter the other side.
Place sandwich in the skillet and cook on medium heat until golden brown, turn and cook other side and remove from the heat.
Slice French toast and then top with apples and walnuts (a dusting of powdered sugar is optional). For a splash of color, add fresh berries or mint.

Serve this cheese stuffed French toast with maple syrup, or without–I find the cooked apples to be syrupy enough, and the warm cheesy center keeps the French toast from being too dry.

It’s a super delicious dish and a great treat for company.

Give this fancy pants Cream Cheese French Toast recipe a try and let me know what you think, and bon appétit!

And for another fancy pants breakfast dish, try this Pancake Recipe.

Fancy pancakes are easy to make.
Fancy pancakes are easy to make, and better looking, too.

Thanks for Watching our French Toast Recipe Video!

Click a button below and share the dishes with your friends. You can also follow Chef Buck on Youtube. We appreciate all the kind comments and support, and we’ll see you next time in the kitchen!

If you like what CG and I do, support us on Patreon, or throw us a tip in our Paypal Tip Jar. We’ll happily enjoy a coffee on the road – Thanks! We appreciate all the support, and we’ll see you next time in the kitchen!

We include affiliate links for products on our website. Making a purchase after clicking on our links and we may earn a commission which helps us produce more videos and drink more coffee :^) We participate in the Amazon Services LLC Associates Program, which is an affiliate advertising program. It provides a means for us to earn fees by linking to Amazon.com and affiliated sites, so we can make more videos.

Share and Enjoy !

Cook Quinoa with Roasted Vegetables Recipe

how to cook quinoa

How to cook quinoa with beets; a simple recipe that pairs quinoa with delicious roasted root vegetables. For this quinoa recipe, I roasted beets, carrot, and onion, but any root vegetable will do. I also added a little RAW ginger and garlic, to provide a flavor punch along with excellent nutrition. A complete protein, quinoa makes this dish an ideal vegetarian recipe. It’s a perfect side dish or main course.

Quinoa and Root Vegetable Recipe Ingredients:

1 cup QUINOA
2 med. BEET ROOTS
1 med. ONION
1-2 Lg CARROTS
2 Tbsp GARLIC (minced)
2 Tbsp GINGER (minced)
½ cup PARSLEY (chopped)
HOT PEPPER (to taste)
2 Tbsp OLIVE OIL
4-6 Tbsp VINEGAR
SALT and PEPPER to taste

how to cook quinoa
Chop root veggies into bite-size pieces (but big bites!)

How to Cook Quinoa and Root Vegetable Recipe

Wash and then chop beet bulbs and carrots into roughly ½ inch pieces–bite size, but not too small.
Chop onion into similar sizes. Place chopped veggies in a bowl and toss with olive oil, salt and pepper.

On an ungreased baking sheet, spread veggies out into a single layer and then roast approx. 30 minutes in an oven pre-heated at 400 degrees Fahrenheit. Halfway through the roasting, give the veggies a stir and return to the oven.
While the root vegetables roast, prepare the quinoa.

If you’ve ever wondered how to cook quinoa …it’s just like rice: 1 part quinoa to 2 parts water. Most quinoa sold in stores throughout the USA has been pre-washed, but check packaging for details. (Check current prices for quinoa on Amazon.)

If desired, add a little chopped hot pepper in with the quinoa. Bring the pot to a boil, reduce heat, cover and simmer quinoa for about 15 minutes, or until all of the water is absorbed. Remove pot from the heat and set aside for 5 minutes. Fluff with a fork.

Transfer quinoa to a bowl and season with salt, pepper, and vinegar to taste. Mix well, and then add the roasted vegetables. Add the raw, minced ginger and garlic, and the parsley. Toss until all of the ingredients are well combined. Taste and adjust seasoning as needed.

This recipe makes an awesome side, but it also works well as an entree. Give this quinoa and beet recipe a try and let me know what you think, and bon appétit!

For another recipe featuring beets, Check out this Fresh Beet Greens Recipe.

beet greens recipe
Buy beet roots with the greens for two great ingredients.

Thanks For Watching Our Recipe Videos!

Thanks for checking out our beet and quinoa recipe, and all of our recipes. Be sure and sign up for our mailing list so you’ll never miss a new recipe. Also click a button below and share the dishes with your friends. You can also follow Chef Buck on Youtube. We appreciate all the kind comments and support, and we’ll see you next time in the kitchen!

If you like what CG and I do, you can also support us on Patreon, or throw us a tip in our Paypal Tip Jar. We’ll happily enjoy a coffee on the road – Thanks! We appreciate all the support, and we’ll see you next time in the kitchen!

We include affiliate links for products on our website. So, if you make a purchase after clicking on our links, we may earn a commission which helps us produce more videos and drink more coffee :^) We participate in the Amazon Services LLC Associates Program, which is an affiliate advertising program. It provides a means for us to earn fees by linking to Amazon.com and affiliated sites, so we can make more videos.

Share and Enjoy !

Biscuit Recipe – Best Southern Biscuits

It’s easy to make friends with this easy, awesome tasting biscuit recipe. You biscuits in all manner of meals. Serve them alone as a breakfast side, pile them up into the perfect breakfast sandwich, ladle them with gravy for a wholesome entree, or top them with whipped cream and strawberries for a decadent dessert!

Buttermilk Biscuit Recipe Ingredients

4 cups ALL PURPOSE FLOUR
1 Tbsp BAKING POWDER
1 tsp BAKING SODA
1 tsp SALT
1 Tbsp SUGAR
1 cup BUTTER (diced, chilled)
1½ cups BUTTERMILK (chilled)
(plus buttermilk for brushing biscuit tops)

Buttermilk Biscuit Recipe Directions

In a bowl, combine flour, baking powder, baking soda, salt, and sugar (optional). Mix ingredients together well. Add diced butter. For best results use chilled butter –keep the diced butter in the refrigerator until needed. Cut butter into the flour using a pastry cutter or knives. Check here for current prices for a pastry cutter on Amazon.

Butter should be cut into pea-sized bits, but there’s no reason to be militant about it…nice chunks of butter are nice. Once the butter is cut into the flour, add buttermilk. Keep the buttermilk chilled until you are ready to use it–cold butter and buttermilk are best for this recipe.

Pour the buttermilk into the bowl, and using a spatula (or your hand), roll the flour around the edge of the bowl until the buttermilk is absorbed and the dry flour begins sticking together. Roll until there is very little loose flour…add a drop more buttermilk if needed, but do so sparingly–you don’t want the flour to be “wet”.

On a lightly floured surface, empty the bowl and press the flour together, knead once or twice and then spread the dough out into a flat, ½ inch thickness. Do not knead or “handle” the dough too much.

Flour the edges of a biscuit cutter or drinking glass and cut out biscuits. I like my buttermilk biscuit about 2″-3″ across, but make whatever size you like. Giant biscuits can be fun :^) Cut the biscuits closely and get as many out of the first press as you can. Once all of the biscuits are cut from the first press, bring the dough together again and cut out remaining biscuits–again trying to handle the dough as little as possible.

Arrange the biscuits touching side by side on a lightly greased pan or on parchment paper. Lightly brush the tops of the biscuits with buttermilk or melted butter–this will help them to brown nicely. Place biscuits in the oven and bake at 425 degrees Fahrenheit for approximately 15 minutes, or until biscuits are golden brown to your liking.

Give these biscuit recipes a try and let me know what you think, and for another breakfast bread dish, try this Egg Bread Recipe.

egg bread
Fancy baked eggs to impress friends and family

Thanks for checking out our biscuit recipe, and all of our recipes. Be sure and sign up for our mailing list and never miss a new Chef Buck cooking video, and also click a button below and share the dishes with your friends. We appreciate all the kind comments and support, and we’ll see you next time in the kitchen!
–Chef Buck

Thanks for watching our recipe videos!

We include affiliate links for products on our website, so if you make a purchase after clicking on our links, we may earn a commission which helps us produce more videos and drink more coffee :^) We participate in the Amazon Services LLC Associates Program, which is an affiliate advertising program providing a means for us to earn fees by linking to Amazon.com and affiliated sites, so we can make more videos.

Share and Enjoy !

Pesto Recipe and Perfect Pesto Pasta

pesto recipe

This pesto recipe is crazy delicious, and makes a perfect sauce for pasta. I like my pesto pasta to have a thick sauce with lots of flavor!–a thin, watery pesto pasta is not for me; if you feel the same way, then give this pasta dish a go–and use a hearty pasta that will hold lots of pesto sauce, something like a penne or rotini pasta.

What You Need for Pesto Recipe

¾ cup PINE NUTS, toasted (or substitute almonds or walnuts)
2-3 cloves garlic
2 cups (packed) fresh BASIL leaves (or substitute 1 cup for SPINACH leaves)
[4oz grocery basil = approx 2 cups]
zest & juice from 1 small LEMON
½ – ¾ cup OLIVE OIL (darker the better)
½ tsp SALT and ¼ tsp PEPPER to taste
¼ tsp crushed RED PEPPER FLAKES
½ cup (to taste) freshly grated PARMESAN CHEESE (or asiago or Pecorino)

16oz PASTA (I prefer pene or rotini for this dish)

pesto recipe
Fresh ingredients make the best pesto

How to Make Pesto Recipe

Toast the pine nuts at 400 degrees Fahrenheit for approx 3 minutes–but watch them like a hawk!–they will toast fast and you DO NOT WANT TO OVER-TOAST OR BURN them ’cause they cost way TOO MUCH MONEY! Check here for current pine nut prices on Amazon.

Place pine nuts and garlic in a food processor and pulse/chop.
Season with salt and pepper and red pepper flakes.
Into the processor, add basil (when buying basil, choose basil that has NOT flowered yet–or only a little–basil loses sweetness as the plant flowers), spinach, lemon juice and zest.

Process until the greens are shredded.
Add olive oil incrementally and process until fully incorporated and to desired smoothness and consistency.

Transfer the pesto to a serving bowl and mix in the freshly grated Parmesan cheese.

And that’s it–your pesto sauce is complete! Use it however you see fit!

For pesto pasta:
In a pot, cook 16oz of pasta according to package directions.
I recommend a pasta that is thick and hearty, with lots of surface area for the pesto sauce to cling to; I lprefer a penne or rotini pasta.

When pasta is cooked to desired consistency–al dente is best, I think–reserve 1 cup of the pasta water, then drain the pasta–DO NOT RINSE!–this washes away flavor.

Immediately return drained pasta to the pot and add in the pesto. Mix with the noodles. Add some of the reserved pasta water until the sauce is as desired. Add pasta water SLOWLY! You DO NOT want to make your pesto sauce TOO THIN! Or at least I don’t–I like a lot of pesto flavor with my pasta.

Top with freshly grated Parmesan cheese and serve.

pesto recipe
Pesto Pasta Recipe

Give this pesto pasta recipe a go and let me know what you think, and bon appétit!

And for another fantastic pasta dish that’s incredibly healthy and NOT EVEN PASTA, try this Spaghetti Squash Pasta Recipe.

best spaghetti squash
just a few simple flavors and ingredients will make the best spaghetti squash recipe

Thanks for checking out the pesto pasta recipe. Be sure and sign up for our mailing list so you’ll never miss a Chef Buck cooking video, and click a button below and share the dishes with your friends. We appreciate all the kind comments and support, and we’ll see you next time in the kitchen!
–Chef Buck

Share and Enjoy !


Fried Quinoa Recipe — Quinoa Fried “Rice”

fried quinoa recipe

This fried quinoa recipe is a quick and tasty take on Chinese fried rice. Quinoa makes a great substitute for rice in many recipes, especially quinoa fried “rice”. Quinoa is a complete protein, which makes this dish a complete meal, even if you leave out the egg–which is an easy way to make this a vegetarian recipe. Of course you can go the other route and throw in a little diced pork chop or ham if you like, but I’m quite happy with just a couple scrambled eggs thrown in.

Fried Quinoa Recipe Ingredients:
1 cup QUINOA (before cooking)
1 cup PEAS
1 CARROT (diced)
4-6 GREEN ONIONS (chopped, tops separate)
3-5 cloves GARLIC (finely chopped)
2 Tbsp GINGER (finely chopped)
HOT PEPPERS (as desired, finely chopped)
2 EGGS (scrambled)
2-3 Tbsp OIL for sautéing
SOY SAUCE as desired
SESAME OIL 1-2 tsp
SALT and PEPPER to taste

fried quinoa recipe
Quinoa Fried “Rice”

Fried Quinoa Recipe Directions:
This is a great dish for leftover quinoa. The next time you’re making a pot of quinoa for another recipe, just make a little extra for this fried rice recipe knockoff! But if you don’t have any leftover
cooked quinoa handy, just prepare this quinoa a little ahead of time to give it time to cool down–this will keep the quinoa from easily overcooking and becoming mushy.

Quinoa is easy to prepare–just like rice, in fact! Rinse the quinoa if needed (many brands come pre-rinsed). In a pot, add 1 cup quinoa to 2 cups water. Bring the pot to a boil, reduce pot to a
simmer, and then cover and let cook 13 minutes (this will result in slightly al-dente quinoa, which is what you want for frying). Remove the quinoa from the heat and let sit for 10 minutes.
Then fluff with a fork and allow to cool completely (salt if desired).

For fried rice, I like to scramble my eggs first and then set aside. I Use two eggs for this recipe, but feel free to use 1, or 3, or none if you want a vegetarian fried quinoa. Whisk the eggs (add a
splash of milk if desired–makes scrambled eggs smoother). Heat oil in a skillet and quickly scramble eggs on med-high heat and then set aside for later.

In a large skillet, heat 2-3 Tbsp oil on medium.

Add raw, diced carrots (should be about pea size). Add chopped hot peppers, too–if desired. I like adding a little fresh red chili peppers for taste, but jalapenos would work just as well, or red
pepper flakes, or even just a little sriracha later, if desired–or no heat at all–it’s up to your tastes; follow your heart, but spicy food is good for you, right?

Sauté the carrot and peppers for a minute and then add the ginger, garlic, and chopped green onion bottoms (reserve the chopped tops for a flavorful garnish).

Continue sautéing another minute and then add in the quinoa. Stir fry until heated through, this won’t take very long.

Add sesame oil and peas. I like to use frozen peas (thawed), because they hold their texture better than canned peas. Stir until mixed. Add soy sauce to taste. Add fish sauce if desired. The
sauces will provide plenty of salt, but if you want a little black pepper, go ahead and throw that in now.

Mix up and then add the scrambled egg. Mix and fry for another minute and then remove from the heat.

That’s it.

This dish is ready pretty quick. Top the fried quinoa with chopped green onion, crushed peanuts, or both. Serve fried quinoa it’s own or with a veggie side (broccoli or bok choy or Thai eggplant
are nice).

Give this Fried Quinoa recipe a try and let me know what you think, and bon appétit!
And for more tasty quinoa dishes, check out my Quinoa Video Playlist.

quinoa salad

Share and Enjoy !


Buttermilk Biscuit Recipe with Country Gravy

Easy Homemade Buttermilk Biscuits Recipe

Buttermilk biscuit and gravy are pretty easy to make at home, and biscuits are great for any meal–not just for breakfast. I’m using mushrooms for this gravy recipe, but sausage can easily be substituted if you’re in a meaty mood.

What you need to make Biscuits

4 cups ALL PURPOSE FLOUR
1 Tbsp BAKING POWDER
1 tsp BAKING SODA
1 tsp SALT
1 Tbsp SUGAR
1 cup BUTTER (diced, chilled)
1½ cups BUTTERMILK (chilled)
(plus buttermilk for brushing biscuit tops)

Buttermilk Biscuit Recipe
Easy Buttermilk Biscuit Recipe

How to make a Buttermilk Biscuit

In a bowl, combine flour, baking powder, baking soda, salt, and sugar (optional). Mix ingredients together well.

Add diced butter. For best results use chilled butter –keep the diced butter in the refrigerator until needed. Cut butter into the flour using a pastry cutter or knives. Butter should be cut into pea-sized bits, but there’s no reason to be militant about it…nice chunks of butter are nice.

Once the butter is cut into the flour, add buttermilk. Keep the buttermilk chilled until you are ready to use it–cold butter and buttermilk are best for this recipe.

Pour the buttermilk into the bowl, and use a spatula (or your hand), roll the flour around the edge of the bowl until the buttermilk is absorbed and the dry flour begins sticking together. Roll until there is very little loose flour…add a drop more buttermilk if needed, but do so sparingly–you don’t want the flour to be “wet”.

On a lightly floured surface, empty the bowl and press the flour together, knead once or twice and then spread the dough out into a flat, ½ inch thickness.

Do not knead or “handle” the dough too much!

Flour the edges of a biscuit cutter or drinking glass and cut out biscuits. I like my buttermilk biscuit about 2″-3″ across, but make whatever size you like. Giant biscuits can be fun :^) Cut the biscuits closely and get as many out of the first press as you can.

Once all of the biscuits are cut from the first press, bring the dough together again and cut out remaining biscuits–again trying to handle the dough as little as possible.

Arrange the biscuits touching side by side on a lightly greased pan or on parchment paper. Check Parchment Paper prices on Amazon

Lightly brush the tops of the biscuits with buttermilk or melted butter–this helps them to brown nicely. Place biscuits in the oven and bake at 425 degrees Fahrenheit for approximately 15 minutes, or until biscuits are golden brown to your liking.

Easy Homemade Buttermilk Biscuits Recipe
Homemade Buttermilk Biscuits

Mushroom Gravy Recipe Ingredients

oil/butter for sauteeing onion/mushrooms
½ cup chopped ONION
8 oz sliced MUSHROOMS
½ cup BUTTER
½ cup ALL-PURPOSE FLOUR
2 cups MILK
about 2-3 tsp SALT (or to taste)
1 tsp BLACK PEPPER (or to taste)
½ tsp ground SAGE
2 tsp WORCESTERSHIRE SAUCE
1 tsp HOT SAUCE
1 tsp dried THYME
….experiment with whatever seasonings you like

Mushroom Gravy Recipe Directions

Heat 1-2 Tbsp oil in a skillet on medium high heat. Add onions and saute for 2 minutes. Add mushrooms and continue sauteeing until browned. Stir in a little salt and pepper. Remove onions and mushrooms from skillet and set aside for later.

Return skillet to the heat and add ½ cup butter and melt. Once melted, add in a little of the ½ cup flour. Stir until smooth, and then continue to slowly add and stir the flour into the butter until the entire ½ cup of butter and ½ cup of flour have been incorporated –this is a roux, a traditional thickener for sauces.

Continue stirring the roux and slowly add milk over several minutes until the the gravy is smooth and creamy. I use almond milk in this recipe, but most any kind of milk will work. Return the mushrooms and onion to the mix and continue stirring with the burner still on med to med-high heat.

Biscuits with Gravy
Biscuits with Mushroom Gravy

Add sage, thyme, worcestershire sauce, salt, pepper, and hot sauce –or anything else you’d like to try. Add more milk as needed to achieve the desired consistency. And that’s it.

If the gravy sits around for a bit, just heat and stir in more milk–you can do this the next day, too, if you have gravy leftover.

This gravy is great over a buttermilk biscuit, but it can also be used for many entrees.

This gravy is great on country fried steak or meatloaf. If you’d rather have sausage gravy than mushroom gravy, then make it exactly the same way, but substitute sausage for mushrooms, and be sure to thoroughly drain the grease from the cooked sausage before adding it back into the skillet.

Give this Buttermilk Biscuit and Gravy recipe a try and let me know what you think, and bon appétit!

And for another awesome breakfast dish, try this fancy-pants Omelet Recipe.

omelet recipe
Lamb and Cream Cheese Omelet

Thanks for Watching our Biscuit Recipe Video!

Click a button below and share the dishes with your friends. You can also follow Chef Buck on Youtube. We appreciate all the kind comments and support, and we’ll see you next time in the kitchen!

If you like what CG and I do, support us on Patreon, or throw us a tip in our Paypal Tip Jar. We’ll happily enjoy a coffee on the road – Thanks! We appreciate all the support, and we’ll see you next time in the kitchen!

We include affiliate links for products on our website. Making a purchase after clicking on our links and we may earn a commission which helps us produce more videos and drink more coffee :^) We participate in the Amazon Services LLC Associates Program, which is an affiliate advertising program. It provides a means for us to earn fees by linking to Amazon.com and affiliated sites, so we can make more videos.

Share and Enjoy !

Cashew Coconut Energy Balls — Power Bars in a Ball!

Cashew Coconut energy Balls

Cashew Coconut Lemon Bites! or Balls! A quick energy bar in a ball snack recipe! Very easy to make, and super flavorful.  These power balls are like a mini desert, but full of semi-healthy stuff that will put a little pep in your step.  And you get the extra energy without the drastic sugar crash.

Cashew Coconut Energy Balls Ingredients:

2 cups raw CASHEWS
1 cup pitted DATES
1 Tbsp COCONUT OIL
1 Tbsp MAPLE SYRUP
1 tsp VANILLA EXTRACT
¼ tsp SALT
½ cup SHREDDED COCONUT
juice and zest of 1 small LEMON

energy snack
power snack in a yummy treat!

Cashew Coconut Energy Balls Directions:

You’ll need a food processor for this recipe. In fact, you can do the entire recipe in a food processor.  However, my processor is pretty small, so I just use it for chopping up the cashews and dates.  I do the rest of the mixing in another bowl.

Place the raw cashews in a food processor and chop for a few moments. Your cashews should be chopped fine. Then, add pitted dates and chop to same size.
Add coconut oil, maple syrup, vanilla extract, and salt to the cashew/date mixture.
Zest one small lemon. Now, mince the zest and add it to the mixture.
Slice the lemon and squeeze all of the juice into the mix.
Mix thoroughly.
Shape the mixture into ball shapes. Make whatever size you like for snacking! I think grape size is best.
Next, roll the balls in shredded coconut to coat the outside.
And that’s it! Snack away!
The balls can be stored in the fridge until desired.  In fact, they taste best right out of the fridge!

This super easy recipe makes a tasty treat. And it’s a great alternative to sugary candy bars and ice cream.

Keep Checking Back For New Recipe Ideas:

So, give this Cashew Coconut Energy Balls recipe a try and let me know what you think, and bon appétit!

And for another tasty, sweet treat, try this semi-healthy and awesome BERRY COBBLER RECIPE

blackberry cobbler
blackberry cobbler

Share and Enjoy !

Toast Hawaii – How to Make this German Favorite

toast hawaii

Toast Hawaii is an open-faced sandwich popular in Germany. It is traditionally comprised of lightly toasted white bread which is then buttered and topped with thinly sliced ham, a pineapple slice, a cheese slice, and a maraschino cherry, so it’s really a deluxe toasted cheese sandwich. Check out the video below to see how me and CG first put together a traditional Toast Hawaii and then we build a fancy-pants version of the German favorite.

Both versions were alright…fancy-pants was definitely my favorite, but overall, pineapple plays too big a role in this sandwich for my tastes; I think pineapple should stay where it belongs –on the bottom of an upside down cake, or on a pizza; of course, there was a time when I didn’t think it belonged on a pizza…and then I ran into the right pineapple pizza. So give a version of Toast Hawaii a try and see what you think.

A traditional Toast Hawaii sandwich
A traditional German Toast Hawaii sandwich

I prefer a sandwich with a top and a bottom, something I can wrap my hands around, especially a pressed sandwich grilled on the top and the bottom, which is why a Cuban sandwich is so good. I often make sandwiches and then toast them in a skillet with a heavy pan on top pressing down, which is a great cheat for a toasted sandwich. A sandwich grill press is also a good option, and I’ve seen these often in thrift stores, or you can check current prices for a sandwich press on amazon.

How to Choose a Ripe Pineapple

  • 1) Just grab a top center leaf and pull–if the leaf comes out easily, then it’s looking good. (if you can’t find a pineapple with loose leaves…then pass ’em by and try again another day)
  • 2) If the pineapple has a little bit of give when you push on it, that’s a good sign…not too mushy, but not hard as a brick!
  • 3) if you put it to your nose, and it smells pineapple-y…that’s a good sign.
  • 4) And I like a nice golden color too, especially around the bottom…but that doesn’t guarantee ripeness…so bank on steps 1 through 3 first, but especially step 1 –loose leaves! If the leaves are stuck and the whole pineapple wants to be picked up when you pull on the top sprouts…then it’s not a keeper.

For a sandwich twist that I can get behind, try a banh mi style hamburger recipe. It’s a burger with a Vietnamese twist, but if want a sandwich with plenty of pizzazz and no pineapple, it fits the bill.

burger banh mi

Thanks for Watching our Pineapple Video!

Click a button below and share the dishes with your friends. You can also follow Chef Buck on Youtube. We appreciate all the kind comments and support, and we’ll see you next time in the kitchen!

If you like what CG and I do, support us on Patreon, or throw us a tip in our Paypal Tip Jar. We’ll happily enjoy a coffee on the road – Thanks! We appreciate all the support, and we’ll see you next time in the kitchen!

We include affiliate links for products on our website. Making a purchase after clicking on our links and we may earn a commission which helps us produce more videos and drink more coffee :^) We participate in the Amazon Services LLC Associates Program, which is an affiliate advertising program. It provides a means for us to earn fees by linking to Amazon.com and affiliated sites, so we can make more videos.

Share and Enjoy !

Pancake Recipe for Fancy-Pants Pancakes

pancakes!

Pancakes are easily made from scratch and can be transformed into a fancy pancake recipe by adding a few favorite fillings. Some of my favorite combos are cranberry / walnut, chocolate chip / pecan, and banana / walnut. Nuts are always a great addition – they make a great bite!

Pancake Recipe Ingredients

(makes 5 good-size cakes or 8-10 sissy cakes):
1 EGG
3 Tbsp BUTTER
1¼ cup MILK
1½ cups ALL PURPOSE FLOUR
3½ tsp BAKING POWDER
1 Tbsp SUGAR
1 tsp SALT
CRANBERRIES
CHOCOLATE CHIPS
WALNUTS
PECANS

pancake recipe
Fancy Pancakes are yummier than regular pancakes, and better looking, too.

How to Make Pancakes

In a bowl, combine melted butter, milk, and egg. Stir until well blended. In another bowl, combine and mix flour, baking powder, sugar, and salt. Add the dry ingredients to the wet, or the wet ingredients to the dry (who cares? it’s no big deal either way), and stir until smoothish…if there are a few lumps, it doesn’t matter.

Heat a lightly oiled skillet or griddle on medium to medium high heat. Pour or ladle batter onto the skillet. Try not to make the first pancake too big, since often the first cake is the least pretty–although it wil still taste pretty good. Add pancake toppings into the batter–as much or as little as you like–a lot of folks use blueberries, but I prefer cranberries, chocolate chips, or bananas with nuts. Nuts are a great addition to a pancake–makes for a much better bite.

It will only take a minute or two for the pancake to be ready to flip. Once air begins bubbling and opening tiny holes into the top of your cake, flip. It will only take half as much time for the other side to cook. Just peek under the cake and remove it when you’re happy. Serve with syrup and butter…and bacon is always a good idea, too.

Give this fancy-pants pancake recipe a try and let me know what you think, and bon appétit!

And if you enjoy this fancy pancake recipe, then try this fancy-pants Salmon and Poached Eggs Recipe.
poached egg salmon spinach
Thanks for checking out the video and recipe. If you liked it, why not share it? All the cool kids are!
Thanks.
–Chef Buck

Share and Enjoy !


Edamame Brown Rice Recipe –A Great Vegetarian Dish

edamame

This edamame brown rice recipe is super flavorful, filling, a great side dish, and delicious hot or cold. If you buy frozen soy beans for this dish, make sure they are thawed before using –and shelled!– shelled edamame is called mukimame.

Edamame Brown Rice Recipe

2 inch GINGER, finely chopped
4-5 cloves GARLIC, finely chopped
16 oz bag MUKIMAME (shelled edamame)
¾ cup LONG-GRAIN BROWN RICE
2Tbsp fresh LIME JUICE
2 Tbsp RICE VINEGAR
2 tsp SOY SAUCE
2 tsp SESAME OIL
½-1 tsp SUGAR
3-4 GREEN ONIONS
5 Tbsp CILANTRO, chopped
2 Tbsp SESAME SEEDS, toasted
SALT and PEPPER to taste

edamame
Mukimame with Brown Rice Recipe

How to make Make Edamame with Brown Rice

  • In a saucepan, heat olive oil over medium-high heat. Check current prices for a sauce pan on amazon.
  • Sauté ginger and garlic for 1-2 minutes until fragrant.
  • Remove garlic and ginger from pan and set aside (I’ve tried skipping this step, and just continued cooking the garlic and ginger along with the rice, but it’s not as flavorful, so it’s definitely worth setting the garlic and ginger aside to add to the dish later).
  • In same pan (without rinsing), bring 1½ cups lightly salted water to a boil. Add rice, reduce to a low simmer; cover and cook, 30 minutes.
  • After 30 minutes, stir in thawed, shelled edamame (mukimame!); cover and cook until rice is tender and mukimame is heated through, about 15 to 20 minutes.
  • In a small bowl, combine lime juice, vinegar, soy sauce, sesame oil, and sugar and stir until sugar is dissolved.
  • Remove rice and beans from the stove and add ginger, garlic, lime juice mixture, scallions, cilantro and sesame seeds.
  • Mix well and add additional salt and pepper as desired.


Give this edamame brown rice recipe a try and let me know what you think, and bon appétit!

edamame
Frozen Mukimame (shelled edamame)

And for another great vegetarian dish, try this easy, awesome Quinoa Salad Recipe.

southwestern quinoa salad
a southwestern quinoa salad makes a tasty and healthy dinner choice.

Thanks For Watching Our Recipe Videos!

Thanks for checking out this edamame recipe, and all of our recipes. Be sure and sign up for our mailing list so you’ll never miss a new recipe. Also click a button below and share the dishes with your friends. You can also follow Chef Buck on Youtube. We appreciate all the kind comments and support, and we’ll see you next time in the kitchen!

If you like what CG and I do, you can also support us on Patreon, or throw us a tip in our Paypal Tip Jar. We’ll happily enjoy a coffee on the road – Thanks! We appreciate all the support, and we’ll see you next time in the kitchen!

We include affiliate links for products on our website. So, if you make a purchase after clicking on our links, we may earn a commission which helps us produce more videos and drink more coffee :^) We participate in the Amazon Services LLC Associates Program, which is an affiliate advertising program. It provides a means for us to earn fees by linking to Amazon.com and affiliated sites, so we can make more videos.

Share and Enjoy !

Baked Quinoa with Celery Root

Quinoa Vegetable Gratin

This baked quinoa recipe is tasty and versatile, and an terrific way to use celery root. I use zucchini and carrots in this video, but I’ve made the same dish using broccoli as the main veggie, so experiment with whatever you have on hand, just make sure to cut the veggies into smaller pieces to spread evenly.

Baked Quinoa Recipe Ingredients

1 cup QUINOA
1 CELERY ROOT (thinly sliced)
1 cup CARROT (shredded)
1 cup ZUCHINNI (diced well)
1-2 tsp HOT PEPPER (finely chopped)
½ ONION (chopped)
3-4 cloves GARLIC (finely chopped)
1 cup BLUE CHEESE
2 Tbsp BUTTER
½ cup ALMOND MILK (or Half N Half)
2 Tbsp ITALIAN SEASONING
1 tsp MUSTARD SEEDS
½ cup BREAD CRUMBS
1-2 Tbsp OLIVE OIL
SALT and PEPPER (to taste)

Quinoa Vegetable Gratin

How to make a Quinoa Bake

In a pot, heat olive oil on med. high heat. Add mustard seeds, garlic, and a little hot pepper, if desired. Give these ingredients about a 30 second head start, and then add the onion. Stir and let cook for 2-3 minutes until onions begin to soften. Stir in salt.

Add quinoa and water and stir. Cover pot and allow the ingredients to come to a boil. Reduce the heat to a simmer, and allow the pot to cook for about 10 minutes.

Remove pot from the heat, if there is a little water left, that’s okay. Add Italian seasonings (or experiment with different seasonings!). Add in the zucchini and carrot (or experiment with different veggies!). Stir in the milk and mix all ingredients together well.

Butter a deep 1.5 quart baking dish. Check here to see current prices for a casserole baking dish on Amazon.

Spoon in and spread a layer of the quinoa/veggie mix along the bottom of the dish, about a ½” to 1″ thick. Top this layer with a single layer of thinly sliced celery root (celeriac). Add a sprinkling of cheese–as cheesey as you like it. I use blue cheese in the video, but try feta cheese and ricotta cheese, too (I’ve used all and any crumbly/melty white cheese is gonna work well with this dish).

Add and spread another layer of the quinoa mixture, and continue building the quinoa, celery root, cheese layers until the dish is almost full. Make the top layer quinoa/veggie.

In a small bowl, combine bread crumbs w/ olive oil, Italian seasoning, salt, and pepper. Mix, and spread over the top of the quinoa dish.
Cover with aluminium foil and bake for about 55 minutes in an oven pre-heated to 375 degrees F.

After 55 minutes, remove the foil and continue to cook another 5 minutes or until the bread crumb topping is golden brown.

The dish is finished when a knife can pass easily through the sliced celerey root layers.
Let rest for 5-10 minutes, and then serve.
Give this baked quinoa vegetable recipe a try and let me know what you think, and bon appétit!

And for another casserole-style recipe idea, try this Broccoli Cheese and Cauliflower Gratin Recipe.

broccoli cheese
An easy, semi-healthy broccoli and cauliflower gratin recipe.

Thanks for Watching our Baked Quinoa Recipe Video

Sign up for our mailing list so you’ll never miss a new recipe. Also click a button below and share the dishes with your friends. You can also follow Chef Buck on Youtube. We appreciate all the kind comments and support, and we’ll see you next time in the kitchen!

If you like what CG and I do, support us on Patreon, or throw us a tip in our Paypal Tip Jar. We’ll happily enjoy a coffee on the road – Thanks! We appreciate all the support, and we’ll see you next time in the kitchen!

We include affiliate links for products on our website. Making a purchase after clicking on our links and we may earn a commission which helps us produce more videos and drink more coffee :^) We participate in the Amazon Services LLC Associates Program, which is an affiliate advertising program. It provides a means for us to earn fees by linking to Amazon.com and affiliated sites, so we can make more videos.

Share and Enjoy !

Quinoa Salad Recipe – Vietnamese Bánh Mì Style

A quinoa salad recipe inspired by the tasty flavor combinations found in a Vietnamese bánh mì sandwich. Quinoa provides a complete protein, making this dish an ideal vegetarian recipe.

Quinoa Salad Recipe Ingredients

1 cup QUINOA (uncooked)
2 cups DAIKON/CARROT RELISH (chopped)
2-3 JALAPENOS (finely chopped)
2 cups SALAD CUCUMBER (diced)
1 cup chopped CILANTRO
3 Tbsp MAYONNAISE
1 small LEMON (zest and juice)
2 Tbsp rice VINEGAR
SALT and PEPPER to taste
SALAD GREENS (I use a combo of Spinach and Red Leaf Lettuce, but use your favorite)

How to make a Bánh Mì Quinoa Salad

Cook up the quinoa just like rice: 1 part quinoa to 2 parts water, bring to a boil, reduce heat, cover and simmer for 15 minutes or until the water is absorbed. Fluff the quinoa and then set aside uncovered to cool.

Prepare the veggies: Dice 1 large salad cucumber, also called an English cucumber; these are great in a salad because the skin is thin and quite enjoyable to eat, and also adds a nice texture. Finely chop 2-3 whole jalapeno peppers, seeds and all. Chop 1 bunch of cilantro, including the stems. Chop 2 cups of pickled daikon and carrot.

Quinoa Salad -- Banh Mi Style
Quinoa Salad — Banh Mi Style

Prepare the dressing: Remove and mince the zest from 1 small lemon and place in a small bowl. Add the juice from the lemon, rice vinegar, mayonnaise, and salt and pepper. Mix well until the dressing is smooth.

In a large bowl, place the cooled quinoa. Add ½ of the dressing, the jalapenos, cilantro, and daikon/carrot, and mix well. Add the diced cucumbers and toss. Add salt and pepper, and more dressing as desired. I also add a bit of the pickling solution from the daikon/carrot pickle.
Serve the quinoa salad over a bed of leafy greens and garnish with cilantro.

Give this banh mi quinoa salad recipe a try and let me know what you think!

If you’re new to home cooking, get a bunch of spices, pots and pans, and start experimenting with different recipes. It’s a healthy hobby that can save a lot of money in the long run. Check out current prices for Complete Kitchenware Sets on Amazon as well as Complete Starter Spice Kits. Or try a thrift store! I’ve found some of my favorite kitchen gear at second-hand stores.

For another Asian inspired vegetarian dish, try this Ramen Noodle Crunchy Slaw Recipe.

crunchy slaw
Crunchy coleslaw or noodle salad? What sounds tastier?

Thanks For Watching Our Recipe Videos!

Thanks for checking out this quinoa salad recipe, and all of our recipes. Be sure and sign up for our mailing list so you’ll never miss a new recipe. Also click a button below and share the dishes with your friends. You can also follow Chef Buck on Youtube. We appreciate all the kind comments and support, and we’ll see you next time in the kitchen!

If you like what CG and I do, you can also support us on Patreon, or throw us a tip in our Paypal Tip Jar. We’ll happily enjoy a coffee on the road – Thanks! We appreciate all the support, and we’ll see you next time in the kitchen!

We include affiliate links for products on our website. So, if you make a purchase after clicking on our links, we may earn a commission which helps us produce more videos and drink more coffee :^) We participate in the Amazon Services LLC Associates Program, which is an affiliate advertising program. It provides a means for us to earn fees by linking to Amazon.com and affiliated sites, so we can make more videos.

Share and Enjoy !

Artichoke Heart Recipe for Creamy Caper Pasta

canned artichoke hearts

This canned artichoke heart recipe is quick and tasty and easily prepared. And if you use quick-cook Chinese flat noodles, from start to finish–including prep time–this dish only takes about 10 minutes to make.

Ingredients for Artichoke Heart Recipe

14 oz can quartered ARTICHOKE HEARTS
¼ cup BUTTER
¼ cup OLIVE OIL
1 lg ONION (chopped)
5 cloves GARLIC (finely chopped)
2-3 Tbsp CAPERS
8 oz PASTA
2-3 Tbsp LEMON JUICE (optional)
SALT and PEPPER to taste

How to make Artichoke Heart Pasta

In a large skillet on medium-high heat, add olive oil and most of the butter. When oil is hot, add onion and garlic and saute until onions begin to soften (for a spicier dish, add a minced chili pepper in with the onion).

Add artichoke hearts, capers and salt to taste and continue sauteing for 2-3 minutes. Occasionally I’ll add the juice and zest of ½ a lemon, which is a pretty tasty option, so definitely give it a try sometime. Add any remaining butter to the skillet.

Add cooked pasta to the skillet. I like to use quick-cook Chinese flat noodles since it’s easy to time with the cooking of the sauce, but use any kind of pasta you like, just allow enough time for cooking. And for a wetter sauce, add a little bit of the pasta water to the skillet.

Mix pasta and sauce in skillet and then serve immediately. Garnish with fresh chopped parsley or thyme–or just add a few more capers. Serve with Parmesan cheese if desired. It’s a quick, easy artichoke heart recipe and a great use of canned artichoke hearts. Check on current prices for Canned Artichokes on Amazon.

Give the recipe a try and let me know what you think, and bon appetit!

artichoke hearts
canned artichoke hearts

For another super creamy and delicious pasta dish, Try this Decadent Pasta Carbonara Recipe.

spaghetti carbonara

Thanks for checking out the recipes. Be sure and sign up for our mailing list so you’ll never miss a Chef Buck cooking video, and click a button below and share the dishes with your friends. We
appreciate all the kind comments and support, and we’ll see you next time in the kitchen!
–Chef Buck

Share and Enjoy !


Rice Pudding –Try Quinoa Pudding instead

rice pudding

Quinoa for dessert? If you like rice pudding, then give this quinoa recipe version a try; it’s super sweet and easy to make and yet another great way to include quinoa in your diet. Quinoa cooks up just like rice: one part quinoa to two parts water, bring to a boil, reduce to a simmer, and then cook covered until water is absorbed. Quinoa acts like a grain, but it’s actually a seed–and a complete protein–so it’s a great addition to your diet if you’re trying to cut down on eating meats and rice.  Check current prices for quinoa on amazon.

Ingredients for Quinoa Rice Pudding

1 cup QUINOA
1 CINNAMON STICK
14oz can COCONUT MILK
2 tsp minced GINGER
¼ cup BROWN SUGAR
½ tsp CARDAMOM (or sub nutmeg)
1/3 cup RAISINS
1 tsp minced ORANGE PEEL
½ cup toasted COCONUT FLAKES and/or toasted ALMOND SLICES

rice pudding
Quinoa pudding makes a nice change-up from rice pudding–and it’s just as easy to make.

How to Make Rice Pudding with Quinoa

  • In a saucepan, combine 1 cup quinoa with 2 cups of water and a cinnamon stick.
  • Bring pot to a boil, then reduce heat to a simmer. Cover pot and let cook 12-15 minutes until the water is absorbed.
  • Fluff and remove cinnamon stick and set aside.
  • In a small saucepan, combine 14oz can coconut milk, minced ginger, and brown sugar.
  • Slowly bring contents to a bubble, then reduce heat and continue stirring 5 minutes.
  • Remove from heat.
  • Add raisins, orange peel, and cardamom to quinoa (can sub nutmeg for cardamom). Mix well and then add coconut milk mixture.  Stir, then cover and set aside to cool about 20-30 minutes.  
  • Serve warm or chill and serve cold. When serving, garnish with toasted almond slices or coconut, or both.  The crunchiness of the toasted topping adds a great texture and I highly recommend giving it a try.  

The next time you’re in the mood for rice pudding, make quinoa pudding instead.  Give this quinoa recipe a go and let me know what you think!

rice pudding
quinoa pudding recipe


Try another delicious quinoa recipe idea: Spanish-Style Quinoa Recipe

spanish quinoa

Thanks for trying our Quinoa Rice Pudding

Click a button below and share the quinoa recipe with your friends. You can also follow Chef Buck on Youtube. We appreciate all the kind comments and support, and we’ll see you next time in the kitchen!

If you like what CG and I do, support us on Patreon, or throw us a tip in our Paypal Tip Jar. We’ll happily enjoy a coffee on the road – Thanks! We appreciate all the support, and we’ll see you next time in the kitchen!

We include affiliate links for products on our website. Making a purchase after clicking on our links and we may earn a commission which helps us produce more videos and drink more coffee :^) We participate in the Amazon Services LLC Associates Program, which is an affiliate advertising program. It provides a means for us to earn fees by linking to Amazon.com and affiliated sites, so we can make more videos.

Share and Enjoy !

Quinoa Curry Recipe meets Thai Curry

quinoa curry recipe

Try this quinoa curry recipe with a tasty Thai influence. This is a helpful quinoa recipe to make when you’ve got a lot of vegetable odds and ends to out of the fridge.

Quinoa Curry Recipe Ingredients

½ cup QUINOA …check quinoa prices on Amazon
1 15 oz can COCONUT MILK
1 lg ONION (chopped)
1 inch GINGER (thinly sliced)
2 cloves GARLIC (finely chopped)
1 Hot Pepper (chopped, as desired)
1 RED BELL PEPPER (sliced)
¼ cup fresh BASIL (or CILANTRO) (chopped)
2 CARROTS (sliced)
½ small CAULIFLOWER (florets)
1 cup CABBAGE (chopped)
2 Tbsp OLIVE OIL
1 tsp CORIANDER POWDER
½ tsp CUMIN
½ tsp CHILI POWDER
½ tsp TURMERIC
OR, INSTEAD OF THE ABOVE SPICE COMBINATION, USE 1-2 Tbsp OF A PRE-MIXED CURRY
SALT and PEPPER, to taste
…and garnish with finely chopped PEANUTS

quinoa curry recipe

How to make a Quinoa Curry Recipe

  • In a small pot, bring 1/2 cup quinoa and 1 cup water to a boil.
  • Reduce heat and allow to simmer 13-15 minutes until water is absorbed.
  • Remove from heat, fluff with fork, and set aside. Check here for current prices for quinoa on Amazon.
  • In a large skillet, heat olive oil on medium high heat and then add onion, garlic, and hot pepper and saute for 3-4 minutes.
  • Add spices and mix well, and if you are a slave to the spice, don’t be afraid to add a little more.
  • Add a can of coconut milk and stir thoroughly, mixing completely with the spices and onion.
  • Let the coconut milk heat through, and then add ginger, carrot, cauliflower, and bell peppers. Continue stirring, adding salt and pepper to taste.
  • Bring the ingredients to a bubble, then reduce heat, cover, and allow skillet to simmer for 5 minutes.
  • After 5 minutes, uncover and add in the cabbage.
  • Add in the cooked quinoa.
  • Stir and allow another minute or two until veggies are cooked to your liking.
  • Add in fresh basil or cilantro and remove the skillet from heat.
  • Garnish with ground peanuts and serve immediately.

And that’s a quinoa curry recipe with a little taste of Thai thrown in for good measure. Give the recipe a try and let me know what you think, and bon appetit!

For another tasty twist on a Thai recipe, try this Pad Thai Recipe made with spaghetti squash.

pad thai recipe
pad thai recipe with spaghetti noodles

Thanks for Watching our Quinoa Curry Recipe

Click a button below and share the dishes with your friends. You can also follow Chef Buck on Youtube. We appreciate all the kind comments and support, and we’ll see you next time in the kitchen!

If you like what CG and I do, support us on Patreon, or throw us a tip in our Paypal Tip Jar. We’ll happily enjoy a coffee on the road – Thanks! We appreciate all the support, and we’ll see you next time in the kitchen!

We include affiliate links for products on our website. Making a purchase after clicking on our links and we may earn a commission which helps us produce more videos and drink more coffee :^) We participate in the Amazon Services LLC Associates Program, which is an affiliate advertising program. It provides a means for us to earn fees by linking to Amazon.com and affiliated sites, so we can make more videos.

Share and Enjoy !

Pesto Bread Recipe with Parmesan Cheese

parmesan pesto bread

Bake a delicious homemade Pesto Bread Recipe following this step-by-step instruction with Mama Redbuck. Mama bakes the best homemade bread from scratch and this is a fancy braided bread recipe that will wow your family.

What you need to make Pesto Parmesan Bread

5 ½ cups unbleached BREAD FLOUR
2 cups WARM WATER (approx. 130 degrees F)
2-4Tbsp OLIVE OIL
2 Tbsp SUGAR
½ cup SKIM MILK POWDER
1 Tbsp KOSHER SALT
1 Tbsp INSTANT YEAST
PESTO (approx. 1 cup divided between loaves)
1 cup PARMESAN CHEESE (shredded and divided)
a sprinkle of CORN MEAL ……………..recipe makes 2 loaves

How to this Pesto Bread Recipe

Sift 5 ½ cups of unbleached bread flour. Bread flour has a higher gluten count than all-purpose flour; gluten holds in the gases released by the yeast, enabling the bread to rise.

In a bowl, add 2 cups of warm water (approx 130 degrees F). Add 2 Tbsp olive oil, sugar, milk powder, salt, and yeast. Mix well.

1 cup at a time, add the sifted flour into the bowl until the dough thickens. Do not add all of the dough into the bowl. As soon as the dough in the bowl reaches a density forming a sticky ball, remove dough from the bowl and place onto a surface coated with flour. Continue adding the sifted flour to the ball, turning and folding the flour into the dough ball.

Continue this kneading process for 8-10 minutes, adding dough as needed (the entire 5 ½ cups may not be needed). Kneading transforms the dough into a more elastic consistency, enabling the gluten in the dough to better trap the gases from the yeast.

After kneading, place the dough into a bowl coated with 1 Tbsp of olive oil. The bowl should be at least twice the size of the dough ball. Cover bowl and set aside for 45-60 minutes to allow the dough to rise. The dough will expand to approx. double in size.

pesto Bread recipe

When dough has risen, push a floured fist into the top of the dough—this will release the gas. Remove dough from bowl and divide into equal halves. Mama Redbuck uses a kitchen scale to weigh her dough and divide equally; size is important because you want equal-sized loaves that will bake evenly. If you don’t have a scale, just estimate the size, but make sure the loaves are fairly close in size.

With a rolling pin, spread one of the dough halves into a square approx. 9 X 14 inches. Spread ½ cup of prepared pesto evenly over the flattened dough. Sprinkle top with ½ cup shredded, parmesan cheese.

Roll up the dough and toppings into a 14 inch “burrito” shape, folding and pinching the ends shut. With a sharp knife, cut lengthwise down the center of the rolled bread, creating halves. Cut gingerly, being mindful not crush the layers of dough, and leave one of the very ends attached so as to not separate the halves completely. Fold the bread halves into a braid. Keep the cut sides of dough facing upward.

Coat a loaf pan with olive oil and sprinkle the bottom of the pan with a light dusting of corn meal; this will help keep the bread from sticking to the bottom of the pan as it bakes. Transfer braided bread “face-up” into pan and cover. Repeat this processes with the other dough half and then set the 2 loaf pans aside for 1 hour to allow them to continue to rise.

After the loaves have risen, place them in an oven pre-heated to 375 degrees F and bake approx. 35-40 minutes.

Remove bread from oven. Parmesan cheese and pesto may be melted to the inside of the pan and you may need to cut around the edges of the pan with a knife. Remove loaves and place on a cooling rack, but don’t let the bread cool for too long before cutting off a slice—it’s delicious warm.

Getting into baking? My mom uses a Danish Whisk in this recipe, and you can check here for current prices for a Danish Whisk on Amazon.

Give this Parmesan Pesto Bread Recipe a try and let me know what you think, and for another tasty bread dish, watch Mama Redbuck cook up a beautiful Rosemary Bread Recipe.

rosemary bread

Thanks for checking out our non-alcoholic Bananas Foster Recipe, and all of our recipes. Be sure and sign up for our mailing list and never miss a new Chef Buck cooking video, and also click a button below and share the dishes with your friends. We appreciate all the kind comments and support, and we’ll see you next time in the kitchen!

Thanks for watching our recipe videos!

Should you even eat bread? Of course! But what does the New Yorker say about gluten?

We include affiliate links for products on our website, so if you make a purchase after clicking on our links, we may earn a commission which helps us produce more videos and drink more coffee :^)

We participate in the Amazon Services LLC Associates Program, which is an affiliate advertising program providing a means for us to earn fees by linking to Amazon.com and affiliated sites, so we can make more videos.

Share and Enjoy !

Banh Tet Rice Cake — Let’s Try Vietnamese Bánh Tét

banh tet

What is Banh Tet rice cake? Let’s try this traditional Vietnamese rice cake.

What is Banh Tet Rice Cake

Banh tet rice cake is a staple dish served to celebrate the Lunar New Year in Vietnam. It’s a very popular dish in Vietnamese culture, and if you live near a Vietnamese market or deli, you’ll probably be able to give it a try–and I recommend you do. It’s pretty tasty, kind of addictive, and a bargain dish in the International District in Seattle. I’ve eaten many bánh tét rice cake since shooting this video, and I see many more in my future.

banh tet rice cake
Banh tet sticky rice cake filled with pork and mung bean paste

Making a bánh tét rice cake often begins the day before Tét. The ingredients are prepared then cooked for at least six hours in a pot of boiling water. Glutinous rice, mung bean paste, and cooked pork fat are the main ingredients. The ingredients are layered on top of banana leaves and then wrapped tightly together with string. Bánh tét are generally wrapped several times with a string before boiling in a large pot of water to prevent the banana leaf from coming apart during cooking. The cake is savory, but sometimes sweetened, and tastes great with chili sauce.

If you liked this banh tet rice cake video, check out my Cool Foods Playlist

kiwano melon
kiwano has hints of citrus and cucumber

Ever Try a Banh Mi sandwich?


What is in a Banh Mi? Lets take one apart and see what we got.
This is the best Banh Mi, so far–thanks to eastsidegirl1977 for the great Seattle recommendation. I’ve been eating lots of these Vietnamese/French fusion sandwiches–maybe too many–but it’s too great a taste and value to pass up.

Thanks for checking out the videos. If you liked it, then click a button or two below and share it with your friends. I appreciate it!
–Buck

Share and Enjoy !


Scone Recipe — Pecan Maple Biscuit Treat

scone recipe

This is a delicious pecan maple scone recipe, but not a good idea for folks with sugar/carb addictions and questionable degrees of willpower…which is pretty much everyone.

The only reason I’m even putting this up is because The Devil assured me that if I did I would one day win an Oscar and live in a luxury beach house in Malibu (which IS going to happen ’cause I was smart enough to get the deal in writing).

Scone Recipe Ingredients

Scones:
2 cups FLOUR
1/2 cup SUGAR
1 Tbsp BAKING POWDER
1/2 tsp SALT
5 Tbsp BUTTER
1/2 cup PECANS (chopped)
1/4 cup RAISINS
1 cup SOUR CREAM
1/4 cup MAPLE SYRUP
1 tsp VANILLA

Icing for Scone Recipe

1 cup POWDERED SUGAR
splash of WATER
2 Tbsp MAPLE SYRUP

scone recipe
best scone ever…really

In a large bowl, combine flour, sugar, baking powder, and salt. Cut butter into flour mixture (freezing the butter and grating it into the mix is an easy trick to get this done). Add pecans and raisins into the mix.

In a separate bowl, combine sour cream, vanilla, and 1/4 cup maple syrup. Whisk together until smooth.
Pour the sour cream mixture into the flour mix and gently turn for a few minutes until the flour begins to form into clumps. Most of the loose flour will adhere into these clumps, but it’s okay if all of it doesn’t.

On a sheet of parchment paper or floured surface, pour the contents of the bowl. Press the clumps together into a mound–it’ll want to brake apart somewhat, but that’s okay. Flatten the mix into a circular cookie shape about 1 inch thick and cut like a pizza into 8 slices. Check here for current pricing for parchment paper on Amazon.

Arrange onto a flat baking sheet and bake in a 400 degree F oven for 20-25 minutes, until baked through and golden brown.

While scones cool, add powdered sugar into a small bowl. Add 1-2 Tbsp of warm tap water–add water slowly and whisk into a syrup; be conservative, it’s easy to add too much water. Then whisk 2 Tbsp of maple syrup into the powdered sugar syrup. Why? I don’t know, just crazy.

Drizzle the syrup glaze over the scones and allow the icing to harden (approx 10-15 min).

And there you go…a very sweet and healthy-free combo of questionable ingredients combined to put on the pounds and take potentially vibrant years off of the back-end of your life.
But this scone recipe is delicious.
Enjoy, if possible.
I usually really like the first two, and then I begin to question my motivations.

For a less decadent, less lethal treat, try this Homemade Biscotti Recipe.

biscotti recipe
Adding a little cocoa powder and ground coffee makes a nice biscotti twist.

Thanks For Watching Our Scone Recipe!

Thanks for checking out our scones, and all of our recipes. Be sure and sign up for our mailing list so you’ll never miss a new recipe. Also click a button below and share the dishes with your friends. You can also follow Chef Buck on Youtube. We appreciate all the kind comments and support, and we’ll see you next time in the kitchen!

If you like what CG and I do, you can also support us on Patreon, or throw us a tip in our Paypal Tip Jar. We’ll happily enjoy a coffee on the road – Thanks! We appreciate all the support, and we’ll see you next time in the kitchen!

We include affiliate links for products on our website. So, if you make a purchase after clicking on our links, we may earn a commission which helps us produce more videos and drink more coffee :^) We participate in the Amazon Services LLC Associates Program, which is an affiliate advertising program. It provides a means for us to earn fees by linking to Amazon.com and affiliated sites, so we can make more videos.

Share and Enjoy !

Tofu Lasagna Recipe — Gluten Free Edition

gluten free tofu lasagna

The only thing that sounds worse than a tofu lasagna recipe is a gluten-free tofu lasagna recipe. However, this recipe is actually pretty tasty, and still gluten-free.

Camera Girl whipped up this dish and it was damned tasty. I’m not ready to start driving the tofu train, but I am enjoying the ride.

Tofu Lasagna Recipe Ingredients

The sauce:
1 Tbsp OLIVE OIL
1/2 tsp RED PEPPER FLAKES (crushed)
1/2 large ONION (chopped)
3 cloves GARLIC (chopped)
15 oz can DICED TOMATOES
8 oz can TOMATO SAUCE
1 CARROT (chopped well)
1 stalk CELERY (chopped well)
2 tsp OREGANO
1/2 tsp BASIL
1 BAY LEAF
SALT & PEPPER, to taste
….or substitute 25 oz jar store-bought marinara sauce, but don’t do that :^(
The filling:
1 pkg gluten-free, rice LASAGNA NOODLES (you do not cook them prior to baking)
2 Tbsp extra-virgin OLIVE OIL
1/2 large ONION (chopped)
6 cloves GARLIC (minced)
16 ounce package EXTRA-FIRM, WATER-PACKED TOFU (not silken tofu)
3 cups fresh SPINACH (chopped)
1/2 cup PARMESAN CHEESE (shredded)
1/2 cup part-skim MOZZARELLA CHEESE (shredded)
2 Tbsp Kalamata OLIVES (finely chopped)
2 tsp dried OREGANO
1/2 tsp dried THYME
SALT & PEPPER, to taste

gluten free tofu lasagna

How to Make Tofu Lasagna

First thing, start making the sauce. Now, don’t buy pre-made sauce!–or do…maybe you’re busy, I don’t know.
Next, heat olive oil and red pepper in a saucepan over medium-high heat. Add onion and garlic and saute 2 to 4 minutes. Add carrot and celery and continue sauteing.
Mix in the remaining sauce ingredients and bring to a boil. Reduce heat to low and simmer 30 minutes or longer, until flavors are blended, stirring routinely.

While sauce is simmering, heat oil in a large skillet and saute garlic and onion for lasagna filling. Add tofu and spinach to skillet and stir until spinach wilts and the mixture is heated through (2 to 3 minutes). Transfer skillet contents to a bowl and stir in parmesan, olives, seasonings, and 2/3 of the marinara sauce.

Spread half of the remaining sauce on bottom of 9 x 13 baking pan. If you need a decent oven-safe baking dish, check out some current pricing for a Pyrex dish on Amazon. Next, place a layer of lasagna noodles over sauce–if using the gluten-free rice lasagna, the noodles will not have to be cooked before using. Spread half of the tofu mixture over noodles. Repeat layers of noodle and tofu mixture. Top with remaining marinara sauce and shredded mozzarella cheese.

Cover dish and bake in a 350 degree F oven for about an hour.
Remove from oven and allow to rest 10 minutes.

Give this tofu lasagna recipe a try and let me know what you think, and bon appetit!

If you like thinking outside of the box, try this vegetarian version of pulled pork Jackfruit BBQ Recipe

jackfruit pulled pork
Jackfruit BBQ is great over rice, on a sandwich, or all on its own.

Thanks for checking the recipes out! Click some of the buttons below and share it with your friends and family, I appreciate it.
–Buck

Share and Enjoy !


Cheese Biscuits with Bacon and Jalapeno

cheese biscuits

This Cheese Biscuits recipe makes four good-size biscuits, which is plenty for two folks for breakfast (maybe even 4 people, if one of them isn’t me).

Ingredients for Cheese Biscuits

1 cup ALL-PURPOSE FLOUR
2 tsp BAKING POWDER
1/4 tsp SALT
1/2 cup MILK
1 JALAPENO pepper (chopped)
4 slices BACON (cooked crispy, crumbled)
1/2 cup CHEDDAR CHEESE (shredded)

The recipe doubles quite easily if you want to make a bigger batch.

How to make Cheese Bacon Biscuits

First thing, fry up your bacon and set aside to cool. You’ll want it crisp enough to crumble. Slice your jalapeno (seeds and all) and saute for a minute or two in the bacon grease, this’ll flavor it up, start to cook it up, and knock off a little of the heat. Set pepper aside on a paper towel to drain.

In a mixing bowl, combine flour, baking powder, and salt. Mix well and then cut in the shortening. Add shredded cheese, sauted pepper, and crumbled bacon and mix. Slowly add milk, turning the mixture, getting the loose flour to come together into clumps. On a floured surface, turn the clumped dough out of the bowl and knead gently approx. a dozen times.

Form into biscuits–I just make a big pie shape and cut it into four pieces cause I’m lazy (or brilliant). Brush biscuit tops with melted butter, if desired. I can take of leave this move–the biscuits will have plenty of color from the bacon, cheese, and jalapenos.

Place biscuits on an ungreased sheet and bake at 425 degrees F for 13-15 minutes. Check here for current prices for baking sheets on Amazon.
And there you have it. Give this Cheese Biscuits recipe a try and let me know what you think, and bon appetit!

For another delicious bread, try my mama’s Picture Perfect Focaccia Bread Recipe.

focaccia bread

Thanks for checking out the recipes. Be sure and sign up for our mailing list so you’ll never miss a Chef Buck cooking video, and click a button below and share the dishes with your friends. We appreciate all the kind comments and support, and we’ll see you next time in the kitchen!
–Chef Buck

Share and Enjoy !


Biscotti Recipe – Big Almond Biscotti

biscotti

Wanna make some big biscotti? This twice-baked biscuit is an awesome accompaniment to your favorite hot beverage.

Biscotti is a twice-baked sweet biscuit that goes great with a hot cup of coffee or tea–it’s an easy way to start the day feeling like a real fancy-pants dude or dudette, especially if you’re drinking your hot beverage out of a tiny cup with a tiny spoon to stir in your milk and a cloth napkin to wipe your very satisfied mouth. And there is zero butter or oil in this recipe, just a little rummy goodness.

Biscotti Recipe Ingredients

1 cup ALMOND SLICES
2 cups all-purpose FLOUR
3/4 cup SUGAR
1 teaspoon BAKING POWDER
1/8 teaspoon SALT
3 large EGGS
2 tsp VANILLA EXTRACT
1 tsp ALMOND EXTRACT
2 Tbsp RUM

How to Make Almond Biscotti Recipe

Preheat oven to 350 degrees F.
Toast almond slices–watch them, it only takes about 2 minutes to toast, just want a few to begin turning.
Combine flour, sugar, baking powder, salt then mix and set aside.
Whisk the eggs, rum and extracts until blended well.
Add the dry ingredients, including nuts, and mix until combined.

Dough will be sticky at this point.
Scrape the dough out onto a parchment lined sheet pan.
Quickly shape with wooden spoon into a long flat loaf.

Bake about 30 minutes at 350 degrees F.
Remove from the oven and cool 10-15 minutes.
Lower oven heat to 300 degrees F.

Slice loaf into 1/2″ to 1″ wide slices.
Lay the slices cut side down on the baking sheet and bake another 15-20 minutes.
Turn the slices over and bake 15 minutes more, or until the cookies are a light golden brown.
Cool the biscotti on a rack.
Cool completely before storing.
And that’s it, man. Serve them up with some coffee or hot tea and you’ll feel
like a real fancy-pants Italian lawyer.
Give this big biscotti recipe a try and let me know what you think, and bon appetit!

And for another tasty breakfast treat, try this Deadly Scone Recipe.
maple pecan scones

Share and Enjoy !


Spicy Spanish Spaghetti Squash Recipe w/ Sausage

spaghetti squash spanish

Spaghetti squash tastes great with a little Spanish chorizo thrown into the mix.

When buying, choose a firm spaghetti squash that seems heavy for its size. Avoid squash with overly glossy or with greenish rinds–this may indicate the squash is not quite ripe enough. The stem of a spaghetti squash should be dry. Moisture around the stem may mean the squash is not fresh.

Ingredients:
1 SPAGHETTI SQUASH
4-5oz Spanish style CHORIZO (diced)
1 lg ONION (chopped)
4-5 cloves GARLIC (finely chopped)
1/2 cup PARMESAN or ASIAGO CHEESE (shredded)
1/2 cup CILANTRO (chopped)
2 Tbsp OLIVE OIL
SALT and PEPPER, to taste

Preheat oven to 350 degrees F.
Slice 1 spaghetti squash lengthwise into halves. Remove seeds and place cut side down in a baking pan. Pour a small amout of water in the pan to keep the squash from sticking. Place in the oven and bake for 45 minutes. The squash is ready when a fork will slide easily into the flesh.
In a skillet, heat oil on medium high heat. Add onions and saute a few minutes (add red pepper flakes for heat, if desired). Add garlic and chorizo and continue sauteing. Add salt and pepper to taste. You don’t need a lot of seasoning for this dish–the chorizo will add plenty of flavor. Take a fork and scrape the squash away fromm its skin and into the skillet; the squash will separate easily in spaghetti-like strands…which is why it’s called what it’s called. The squash is already cooked, so this is more about mixing the ingredients than cooking them. Add cilantro and cheese, mix well, and remove the skillet from the heat. It’s a delicious dish, and hearty enough to make a terric main course. Serve with a salad and bread and you’ll have a more than enough.
Enjoy!

And try this delicious vegetarian Mediterranean-Style Spaghetti Squash Recipe

mediterrean spaghetti squash

Share and Enjoy !


Chana Masala Recipe w/ Quinoa -a High-Protein Meal

chana masala quinoa

A Chana masala recipe with a quinoa twist! It’s already a great tasting chickpea curry, and adding quinoa into the mix will turn this Indian favorite into a complete protein. This dish is easy to prepare and a perfect vegetarian entree.

Ingredients:
15oz can CHICKPEAS
15oz can DICED TOMATOES
1 lg ONION (chopped)
½ cup QUINOA
1 HOT PEPPER (finely chopped)
4-5 cloves GARLIC (finely chopped)
½ cup CILANTRO (chopped)
1 tsp CUMIN SEEDS
1 tsp CUMIN
1 tsp CORIANDER
½ tsp CHILI POWDER
½ tsp TURMERIC
1 tsp GARAM MASALA
2 Tbsp OLIVE OIL
1/8 tsp ASAFOETIDA (optional–really OPTIONAL!!!–don’t NOT make this dish because you don’t have this ingredient.)
SALT and PEPPER, to taste
1½ cups WATER
Check out current prices for Indian Spices on Amazon.

In a skillet, heat your oil on med. high heat. Add cumin seeds and asafoetida–the asoafoetida (also called “hing”) is OPTIONAL. Stir until seeds brown and crack–this will happen really fast, so don’t walk away from the skillet. Add garlic and continue stirring. Add chopped onions and hot pepper. Saute ingredients for 3-5 minutes.
Add turmeric, coriander, cumin, and chili powder. Stir thoroughly into onion mix.
Add quinoa and diced tomatoes.
Stir and allow skillet to come to a simmer.
Add chickpeas (rinsed and drained), salt to taste, and 1½ cups water. Bring skillet to a boil, then reduce heat to a simmer, cover and let simmer for 15 minutes (without stirring).
After the 15 minutes, stir in the garam masala. Using a fork, smash half the chickpeas in the skillet–this will add a nice texture to the dish.
Stir in the chopped cilantro.
And that’s it. Chana Masala with a quinoa twist.
Hope you like it.

And for another tasty Indian inspired dish, try this Eggplant Curry Recipe.

baingan bharta eggplant

Share and Enjoy !


Best Caramel Oatmeal Squares Recipe

oatmeal squares

Caramel Oatmeal Squares make great dessert treats – or bribes, if you need to motivate someone.

What you need to make Oatmeal Squares

Bars:
1 3/4 cup OATS
1 1/2 cup FLOUR
3/4 cup BROWN SUGAR
1/2 tsp BAKING SODA
1/4 tsp SALT (optional)
3/4 cup BUTTER (melted)
1 tsp VANILLA EXTRACT
1 cup PEANUTS
1 cup CHOCOLATE CHIPS

Caramel Sauce*:
3/4 cup BUTTER
1 1/2 cups BROWN SUGAR (firmly packed)
2 Tbsp WATER
1/4 tsp SALT
3/4 cup EVAPORATED MILK
1 Tbsp VANILLA EXTRACT
1/4 cup FLOUR (added after caramel has cooled)

*In a hurry? Instead of making caramel sauce, you use a 12 oz jar of caramel ice cream topping.

How to make Caramel Oatmeal Squares

Preheat oven to 350 degrees F.

Make the caramel sauce:

  • Combine butter, brown sugar, water, and salt in a medium sauce pan, over medium heat, stirring constantly.
  • Bring to boil and continue to stir for 5 minutes depending upon thickness desired. The longer it boils, the thicker your caramel sauce will eventually be. If you don’t stir the pot while the caramel is cooking, it will be a disaster, not as bad as knocking over the cake at a wedding, but the caramel will burn, which will kinda suck.
  • After 5 minutes, remove sauce from the heat and stir in evaporated milk and vanilla. Set aside to allow caramel to cool and thicken.

Grease a 9 x 13 baking pan. If you need a decent oven-safe baking dish, check out some current pricing for a Pyrex dish on Amazon.

  • In a bowl, mix oats, flour, brown sugar, baking powder, vanilla extract, and salt.
  • Stir in butter until well blended.
  • Reserve one cup of mixture to use as a topping later.
  • Press remaining mixture into bottom of greased pan.
  • Bake 10-12 minutes until light brown. Let cool 10 minutes.
  • Top with peanuts and chocolate pieces.
    Take your caramel sauce and stir in 1/4 cup flour until smooth. Drizzle sauce over nuts and chocolate, keeping the sauce 1/4 inch away from pan edges (to avoid having a cooked caramel mess on your pan).
  • Sprinkle top with the reserved cup of oat mixture.
  • Bake an additional 18-22 minutes or until golden brown.
  • Let cool. Then cut into squares.

*In a hurry? Instead of making caramel sauce, you use a 12 oz jar of caramel ice cream topping. To help it pour, heat it just a little before adding the extra flour.

Enjoy! Chocolate, peanuts, caramel…what’s not to enjoy? Give this oatmeal squares recipe a try and let me know what you think.

For another tasty dessert bar recipe, try an almost No-Bake Marshmallow Bar Recipe. It’s super easy.

marshmallow bars

Thanks for Watching our Oatmeal Squares Video!

Click a button below and share the dishes with your friends. You can also follow Chef Buck on Youtube. We appreciate all the kind comments and support, and we’ll see you next time in the kitchen!

If you like what CG and I do, support us on Patreon, or throw us a tip in our Paypal Tip Jar. We’ll happily enjoy a coffee on the road – Thanks! We appreciate all the support, and we’ll see you next time in the kitchen!

We include affiliate links for products on our website. Making a purchase after clicking on our links and we may earn a commission which helps us produce more videos and drink more coffee :^) We participate in the Amazon Services LLC Associates Program, which is an affiliate advertising program. It provides a means for us to earn fees by linking to Amazon.com and affiliated sites, so we can make more videos.

Share and Enjoy !

Pizza Sauce and quick flatbread pizza recipe

pita pizza

You can make a delicious pita pizza with homemade pizza sauce super fast. Flatbread pizza is cheap, and healthier than store-bought pizza, and Movie Night wouldn’t be Movie Night without it. It’s easy to make and easy to clean up and tastes great, so that’s perfect, right?

Pizza Sauce Recipe Ingredients:

1 15oz can TOMATO SAUCE
2-3 Tbsp dried OREGANO
1 Tbsp dried BASIL
2 tsp dried THYME
2 tsp GARLIC POWDER (more if you love garlic)
SALT and PEPPER to taste (also, a little dried jalapeño can give the sauce a nice kick)

–The sauce you make at home will be tastier than the sauce you buy in the jar at the store; you can make it your own, add the herbs you like, as much or as little as you like.

PITA BREAD – Any kind of pita or flatbread will do, we use whole wheat. Rubbing olive oil around the edges of the pita will make a tasty edge (I like it that way!), but it isn’t necessary to do so. One pita makes a nice personal pizza size. For two people, we usually make 4 or 5 assorted pita pizzas, cut them in half, and have a mini-buffet.

TOPPINGS?…there’s no end to the possibilities. Pita pizzas are a great way to experiment with topping ideas.

Pour tomato sauce into a bowl and add oregano, thyme, basil, and garlic powder (salt and pepper can be added if desired…but check can to see if tomato sauce is already salted). For sauce with a kick, add some dried jalapeño. Mix ingredients well.

Rub olive oil around the edges of your pita for a tasty crust (optional). Spread sauce over pitas and then add toppings. It’s usually a good idea to start with a little cheese on the bottom and end with more cheese on the top –what goes in between is up to you (leftovers in the fridge often make great pizza toppings! Ever have a meatloaf pizza?).

Bake at 350 degrees for 15 to 20 minutes (this is a good cooking time if you like to pile on the toppings…for faster cooking, bake at 400 degrees for 10 minutes…it’s quicker, but quicker isn’t always better)

buffalo chicken pizza
buffalo chicken pizza recipe

Pizza Topping Ideas:

Chef Buck loves –
SPINACH (this topping should go on first, so it doesn’t dry out), FETA CHEESE, TOMATO SLICES, MOZARELLA CHEESE, and extra HERB topping.
Camera Girl loves –
MOZZARELLA CHEESE, RED PEPPERS, ARTICHOKES, PEPPERONI, and FAKE SAUSAGE.

ARTICHOKE is a great topping (just keep a can in the cabinet). SHRIMP makes a nice change-up. And trying different CHEESES is always a good idea. HAVARTI and RICOTTA are two cheeses we use often—they can bring a fresh taste to the PEPPERONI blues.
Keep a jar of PIZZA SAUCE in the fridge and some PITAS in the freezer and dinner is always only moments away.

Give this simple pizza sauce and pita pizza idea a try and let me know what you think, and bon appétit!
If you’re new to home cooking, get a bunch of spices, pots and pans, and start experimenting with different recipes. It’s a healthy hobby that will save you money in the long run. Check out current prices for Complete Kitchenware Sets on Amazon as well as Complete Starter Spice Kits. Or go to a thrift store! I’ve found some of my favorite kitchen gear at second-hand stores.

For another tasty movie night type dish, try this Ultimate Nachos Supreme Recipe.

best nachos recipe
This is a fantastic Nachos Supreme dish, and a giant pizza pan makes a great dish for cooking and serving.

Thanks for checking out the recipes, sharing, and commenting, I appreciate it!
–Chef Buck

Share and Enjoy !


Quinoa Salad Recipe for Vegetarian Protien

quinoa salad

Quinoa salad is vegetarian perfection. Quinoa is a versatile food, similar to rice, but with 9 essential amino acids, making it a complete protein. It’s easy to prepare and super tasty. The salad recipe below makes an excellent meal, a tasty side dish, or a light snack. Serves 2-4.

Quinoa Salad Ingredients:

1 cup QUINOA (check current prices for quinoa on Amazon)
3 medium TOMATOES (chopped)
¼ cup RED ONION (finely chopped)
3-5 GARLIC CLOVES (minced)
½ inch GINGER (minced)
1 CUCUMBER (chopped)
1/3 YELLOW BELL PEPPER (chopped)
1 CARROT (thinly sliced)
¼ cup PARSLEY or CILANTRO (chopped)
3 Tbsp APPLE CIDER VINEGAR
2-3 Tbsp OLIVE OIL
2 Tbsp LEMON JUICE
SALT (to taste)

Quinoa Salad Direections:

Add 1 cup quinoa to 2 cups water and bring to a boil. Reduce heat, cover, and simmer 10-15 minutes (I find it usually takes about 15 minutes). Place cooked quinoa in bowl and let cool—doesn’t have to cool completely—by the time you get your other ingredients prepped, the quinoa will be cool enough.

Add vinegar, olive oil, salt, and stir well. Add onion, ginger, and garlic. I usually chop the onion fine and MINCE the garlic and ginger VERY WELL. The raw garlic and ginger adds lots of flavor and nutrition. Give the bowl a good stir and get these ingredients mixed thoroughly.

Add yellow pepper (red pepper is fine, but yellow makes a nice color contrast), cucumber, carrot. Sometimes I also add green onions—or even diced jalapeños if I’m looking for a little kick—feel free to experiment with any vegetables you enjoy in a raw state.

Mix ingredients and then add the tomatoes. I like to add the tomatoes last so they don’t get too beat up by the spoon. If you’ve got some parsley or cilantro on hand, throw that in as well—I make sure I’ve got some cilantro on hand when I’m making this dish. A bit of lemon juice is a nice finish and will also help keep the colors of the dish vibrant.
Give this quinoa salad recipe a try and let me know what you think, and bon appetit!

We still use rice, but not nearly as often (if I have to choose between eating ribs and rice or ribs and quinoa, it’s really not a choice, I choose rice every time–and I’m talking white rice!) but for MANY dishes, I’m losing the rice and going with quinoa. White rice doesn’t stand a chance against quinoa, but even brown rice doesn’t provide as much nutritional value–plus with quinoa being a complete protein, it’s a lot less hassle to fashion a meatless meal.

I’ve always got quinoa on hand now, and before using rice in a dish, I ask myself “will quinoa work here?” Sometimes the answer is NO, because rice provides great texture for many dishes–but more often than not, I go with quinoa.

Thanks for checking the quinoa salad out. If you like it, click a button or two below and share it!
And for another delicious salad idea, try this Cauliflower Super Salad Recipe.

cauliflower salad
add sliced tomato for a quick splash of color

Share and Enjoy !


Easy Shrimp Linguine Recipe

shrimp linguine

A quick and tasty shrimp pasta dinner recipe for two!

Shrimp LinguineIngredients:

1 pound SHRIMP (20-30, peeled and deveined)
8oz LINGUINE (about ½ box)
1-2 cups BROCCOLI florets (or substitute ½ cup PARSLEY if you’re not into broccoli)
6-8 GARLIC cloves (minced)
½ large ONION (finely chopped)
½ stick BUTTER
3-5 Tbsp OLIVE OIL
SALT to taste
(add OREGANO or ITALIAN HERBS if desired–I like just the extra garlicky taste)
serve with PARMESAN CHEESE

Shrimp Linguine Directions

Prep your ingredients first, then get your pasta cooking.  I like to add a Tbsp of olive oil to my pasta water as well as a 2-4 tsp salt.  Cook the pasta according to the package directions and whatever firmness you desire.  I’m using whole grain wheat linguine for this recipe, which takes about 12 minutes to cook–a bit longer than most linguine.  The cooking time for the skillet ingredients should be around 7-9 minutes, so try to time your pasta to finish with the shrimp–overcooked shrimp is rubbery and overcooked pasta is mushy, so timing is everything!!!

In your skillet, heat 2 Tbsp olive oil and 1/4 butter on medium heat.  When hot, add garlic and cook for 1 minute.  Add onions and continue to cook a couple more minutes.  Add broccoli florets, and add more butter and oil as needed.  If you don’t want to add broccoli, substitute 1/2 cup chopped parsley instead.  Sauté  florets, garlic, and onions another 2 minutes and then add shrimp.  Throw in some Italian herbs if you want to get all herby.

The shrimp will be done when they turn pink–don’t overcook or they’ll turn rubbery!!  Remove the cooked pasta from water and add directly to the skillet.  Don’t drain or strain the pasta!!–you’re just throwing away good flavor.  Add the remainder of your original 1/2 stick butter.  Mix pasta and ingredients.  Add some pasta water to the mix (about 1/2 cup or so).  I find that the salt in the water and butter is plenty for me, but salt a little more if desired.  Remove the skillet from the heat and serve.  Fresh Parmesan cheese and toasted garlic bread are nice accompaniments!!  Maybe some wine?
Bon appétit!

Share and Enjoy !


Linguine with Clam Sauce Recipe – White Sauce

linguine with clam sauce

Throw together a quick linguine with clam sauce recipe. This dish is super flavorful and very easy to prepare. Give it a try–everyone will love you!

Linguine with White Clam Sauce Ingredients

1 pkg LINGUINE (about 13oz)
3 cans chopped CLAMS (approx. 20 oz., drain and reserve liquid)
½ stick BUTTER
½ cup OLIVE OIL
½ cup ONIONS (chopped)
4-6 cloves GARLIC (finely chopped)
1 cup WHITE WINE (dry, not sweet)
½ qt CHICKEN BROTH
RED PEPPER FLAKES to taste (2-3 tsp is what I use)
1 tsp dried OREGANO
1 tsp BLACK PEPPER
1 Tbsp PARSLEY (fresh chopped or dried)
¾ to 1 cup PARMESAN CHEESE (grated)

linguine with clam sauce

How to make Linguine with Clam Sauce

  • Open canned clams and separate liquid from clams. Check current prices for canned chopped clams on Amazon.
  • Heat a large skillet on medium and begin melting butter, add olive oil.
  • When all is melted, add onion and garlic. Cook until garlic begins to color, mind cooking temperature to avoid burning (lower temp if needed).
  • Add white wine and simmer 5-10 minutes to reduce.
  • Add chicken broth, clam juice reserved from cans (an additional 8oz bottle of clam juice can also be added, if extra clamminess is desired). Add red pepper flakes, oregano, parsley, and black pepper.
  • Reduce heat to low and simmer for 20 minutes.
  • While sauce is simmering, prepare linguine according to package directions.
  • After sauce has cooked for 20 minutes, stir in clams and turn off heat.
  • Add linguine noodles to sauce (don’t drain and rinse noodles, just take them right from the pot and mix them with the sauce).
  • Stir in the grated Parmesan cheese and serve. If desired, top with fresh parsley to add a little color.

And toast up some garlic bread, too.
Give this linguine with clam sauce recipe a try and let me know what you think, and bon appétit!

For another seafood dish, checkout this delicious Seafood Stew Recipe.

seafood stew

Thanks for Watching our Videos!

Thanks for checking out this puttanesca recipe, and all of our recipes. Sign up for our mailing list so you’ll never miss a new recipe. Also click a button below and share the dishes with your friends. You can also follow Chef Buck on Youtube. We appreciate all the kind comments and support, and we’ll see you next time in the kitchen!

If you like what CG and I do, support us on Patreon, or throw us a tip in our Paypal Tip Jar. We’ll happily enjoy a coffee on the road – Thanks! We appreciate all the support, and we’ll see you next time in the kitchen!

We include affiliate links for products on our website. Making a purchase after clicking on our links and we may earn a commission which helps us produce more videos and drink more coffee :^) We participate in the Amazon Services LLC Associates Program, which is an affiliate advertising program. It provides a means for us to earn fees by linking to Amazon.com and affiliated sites, so we can make more videos.

Share and Enjoy !

Spaghetti Carbonara Recipe w/ Chef Buck

spaghetti carbonara

A delicious super-simple spaghetti carbonara recipe.

Ingredients for Spaghetti Carbonara

13 oz SPAGHETTI
8 oz PANCETTA or thick cut BACON
1 EGG
3 EGG YOLKS
1/2 cup PECORINO ROMANO (grated)
(or just romano, what’s the big deal?)
(even a little parmesan won’t hurt)
PEPPER (as much as you can handle)
SALT (very little)
PARSLEY (optional)

How to Make a Spaghetti Carbonara Recipe

Combine 3 egg yolks and 1 whole egg into a bowl and mix well. Stir in ½ to ¾ cup grated Pecorino Romano cheese—a Romano cheese is “pecorino” if it is made from sheep milk—but if you use Romano made from the milk of a cow or a goat, it won’t be the end of the world (and parmesan wouldn’t kill you either—although the pecorino is nice). Set this mixture aside.
Prepare pasta according to package directions. Add a pinch of salt to the water, but sparingly—there will be plenty of salt in the other ingredients. While pasta cooks, prepare the meat.
Cut 8oz of pancetta or thick-cut bacon into small squares. Pancetta is Italian bacon that is not smoked—most other bacon you find at the market will be smoked; again, it’s not the end of the world choosing one over the other, the main difference will be in the “smokiness” of the dish. In a large skillet, prepare the bacon. Add a generous helping of fresh cracked pepper (generous is whatever amount you like). Make sure the bacon is cooked through, but do not cook it to a crisp! Remove skillet from the heat and pour off the excess bacon grease. When spaghetti is ready, remove directly from the water (do not rinse!) and mix the pasta with the bacon in the skillet. Add the cheese/egg mixture to the hot pasta and continue mixing thoroughly. Initially it will not look like a lot of sauce, but as you stir the mixture into the pasta, it will become quite creamy (and delicious). Add a splash of pasta water if needed. Throw in a little chopped parsley for color and serve immediately.
Give this spaghetti carbonara recipe a try and let me know what you think, and…
Bon appétit!

Want to try another fantastic pasta dish? Watch Chef Buck cook this Linguine w/ Clam Sauce Recipe.
linguine with clam sauce

Thanks for Watching our Videos!

Thanks for checking out this spaghetti carbonara recipe, and all of our recipes. Sign up for our mailing list so you’ll never miss a new recipe. Also click a button below and share the dishes with your friends. You can also follow Chef Buck on Youtube. We appreciate all the kind comments and support, and we’ll see you next time in the kitchen!

If you like what CG and I do, support us on Patreon, or throw us a tip in our Paypal Tip Jar. We’ll happily enjoy a coffee on the road – Thanks! We appreciate all the support, and we’ll see you next time in the kitchen!

We include affiliate links for products on our website. Making a purchase after clicking on our links and we may earn a commission which helps us produce more videos and drink more coffee :^) We participate in the Amazon Services LLC Associates Program, which is an affiliate advertising program. It provides a means for us to earn fees by linking to Amazon.com and affiliated sites, so we can make more videos.

Share and Enjoy !

Pita Chips Recipe for a baked, spicy, pita snack

spicy pita chips

Pita chips are easy to make and you can bake them up quickly using your favorite spices. You can’t have hummus without pita chips! I mean, you can, but…why? Pita chips go great with all kinds of dips and are excellent with salads or just as an alternative to your run-of-the-mill potato chip.

Pita Chips Ingredients:
1 pkg. PITA BREAD
OLIVE OIL
SALT
SPICES: curry powder, garlic powder, cajun seasonings, etc. (whatever you like)

Cut pitas into triangular chip shapes. Each pita will easily yield 12 chips. Soak one side of each pita triangle in olive oil and stack pitas so the soaked side of one is stacked against the unsoaked side of the next. Press stacked chips together—this will flatten the chips and suffuse the oil throughout.
Arrange chips on a flat baking sheet. Salt to taste. Add spices—the more the better, in my opinion. I usually bake three distinct batches. Curry is probably my favorite—just salt and lots of curry on a toasted pita chip, it’s delicious. Garlic is great, too. Try some Tony Chachere’s seasoning (or comparable cajun seasoning) on a chip—or simply add a sprinkle of cayenne pepper with Cumin. Whatever your favorite seasonings are, give them a try.
Bake the chips 8-10 minutes in a pre-heated oven at 350 degrees Fahrenheit. Oven cooking times vary, so keep an eye on your first batch to see how long it takes to toast them the way you like—they will burn quickly if forgotten. I like mine CRISP. One side of the pita will be thinner than the other side and some triangles may need to be removed from the oven before the other chips are done. You’ll figure it out.
Give this pita chips recipe a try and let me know what you think, and…
Bon appétit!

Want to make hummus right now? Check out this Classic Hummus Recipe.
spicy pita chips

Share and Enjoy !


Chana Masala Indian Chickpea Curry Recipe

chana masala chickpea curry

Chana masala is a delicious Indian chickpea curry. It’s easy to make and a great introduction to Indian cooking.

What You Need to Make the Best Chana Masala

1 15 oz can CHICK PEAS (or 2 cups)
1 15 oz can DICED TOMATOES (or 2 fresh diced)
1 tsp GARLIC (minced)
1 tsp GINGER (minced)
1 HOT PEPPER (minced)
1-2 Tbsp OLIVE OIL
1 Tbsp CHICK PEA FLOUR (also called besan)
1 tsp CUMIN SEEDS
1 tsp CHILI POWDER
1 tsp GARAM MASALA
1/8 tsp ASAFOETIDA (optional, also called hing)
½ tsp TUMERIC
SALT (to taste)
Check out current prices for Indian Spices on Amazon.

Many chana masala recipes include onion, but I think it’s fine with or without; I make so many Indian dishes with onions, it’s nice to have a few that are onion-free if desired. I do include asafoetida (hing) and besan (chick pea flour), but those can be optional, too.

Chana masala is a very flexible dish. If not using besan, just add ½ cup of water instead of 1 cup. The asafoetida is wonderful. It stinks, but it’s still wonderful. It’s also called “devil’s dung”, but that’s just when it’s raw, once you toss it into a simmering skillet, it transforms into a sharp, oniony weirdness that will pleasantly remind you of your favorite Indian restaurant.

I’ve only been able to find asafoetida at international food markets, but it’s worth acquiring—especially if you want to make a habit of cooking great Indian dishes at home. If skipping the asafoetida, try adding 1 finely chopped medium-sized onion between the cumin seeds and the tomatoes. Coriander powder is great in this dish, too. But the way I usually prepare it is like this:

chole masala
Make chana masala a side dish or your main meal

How to Make a Chana Masala Recipe

  1. In a skillet, heat oil on medium high heat.
  2. When the oil is heated, add the cumin seeds and asafoetida. Stir and allow to simmer for just a few moments.
  3. Once the seeds begin to crack, add the chick pea flour and continue stirring. The flour will absorb the oil.
  4. Stir for approx. 1 minute and then add the diced tomatoes. Mix well and allow the tomatoes to bubble.  As the tomatoes cook down, you can crush them with your stirrer for a smoother chana massala.
  5. Stir in the minced ginger and garlic and hot pepper.
  6. Add the chili powder and turmeric.
  7. After the tomatoes have cooked 4-5 minutes, add the chick peas, garam masala, and salt to taste.
  8. Mix well and add 1 cup of water. Bring the dish to a bubble, then reduce to a simmer, cover, and allow cooking for 10 minutes.
  9. After 10 minutes, the chick peas will be soft. Use a fork or potato masher to smash some of the chick peas, this will help thicken the chana masala along with the chick pea flour added earlier.
  10.  Simmer uncovered to the desired consistency, remove and serve.

Garnish with fresh coriander leaves. Serve with rice or on its own.
Give this chana masala recipe a try and let me know what you think, and bon appétit!

Want to make another easy Indian Recipe? Try Baingan Bharta, a delicious Eggplant Curry recipe.

baingan bharta eggplant

Thanks for checking out the chana masala recipe, and all of our recipes. Be sure and sign up for our mailing list to never miss a new cooking video, and also click a button below and share the dishes with your friends, and follow Chef Buck on Youtube. We appreciate all the kind comments and support, and we’ll see you next time in the kitchen!

If you like what CG and I do, support us on Patreon, or throw a tip in our Paypal Tip Jar We’ll happily enjoy a coffee on the road, or maybe even pay a bill or two!–Thanks! We appreciate all the support, and we’ll see you next time in the kitchen!

Thanks for watching our Chana Masala recipe

We include affiliate links for products on our website, so if you make a purchase after clicking on our links, we may earn a commission which helps us produce more videos and drink more coffee :^) We participate in the Amazon Services LLC Associates Program, which is an affiliate advertising program providing a means for us to earn fees by linking to Amazon.com and affiliated sites, so we can make more videos.

Share and Enjoy !

Spicy Couscous Recipe …how to make a quick side dish

spicy couscous

Anyone up for a spicy couscous recipe? Couscous is a quick and simple dish, so naturally I love it. It makes a great pairing with fish, and both can be cooked up quickly. I usually start with plain couscous and spice it up myself, it is simple to do and much yummier than any overpriced pre-made couscous mix you’ll buy at the market.

What You Need To Make This Spicy Couscous Recipe

1 cup COUSCOUS
2 Tbsp OLIVE OIL
1 medium ONION (chopped)
3 cloves GARLIC (finely chopped)
1 HOT PEPPER (finely chopped)
1 tsp MUSTARD SEEDS
1 tsp CHILI POWDER
1 tsp PAPRIKA
½ tsp TURMERIC POWDER
1 tsp TOMATO PASTE
1 ½ cup WATER (or broth)
SALT (to taste)

couscous recipe
Spicy couscous makes a tasty side dish, and it is fast and easy to prepare …and did I mention cheap?

How To Make Spicy Couscous

Heat olive oil on medium high heat and then add onions.
Stir for 1 minute and add mustard seeds, hot pepper, and garlic.
Continue sautéing for a couple more minutes.
Stir in chili powder, paprika, and turmeric.
Add salt and tomato paste and mix well.

Pour in 1 ½ cups of water, stir, cover pot and turn up the heat and bring the pot to a boil.
After ingredients come to a boil, stir in the couscous and mix well. Cover and remove from heat and allow pot to sit for 5 minutes.

After 5 minutes the couscous will have completely absorbed all the water.
Uncover and immediately fluff with a fork; this will keep the couscous for overcooking and becoming a sticky, starchy mess; couscous should be light and fluffy, and in this case, nice and spicy, too.
Give this spicy couscous recipe a try, and I hope you like it.
Bon appétit!

This couscous recipe goes great with this DELICIOUS BLACKENED FISH RECIPE!

blackened fish mahi mahi
Click image to watch this easy Blackened Fish recipe

Thanks for watching my couscous recipe video. If you liked it, then used the buttons below to share the recipe with your friends. Thanks!
-Chef Buck

Share and Enjoy !


Quinoa Recipe — Spicy Spanish Style Quinoa

spanish quinoa

Try this spicy Spanish-style quinoa recipe; it’s vegetarian heaven. Quinoa is a versatile ingredient and an excellent source of protein. Quinoa is a grain-like superfood and a great substitute for rice, and just as easy to prepare. I use it often as an alternative to rice–even in rice pudding. Give this quinoa recipe a try; I’m sure you’ll be eating a whole lot less rice in the future, and not missing it at all.

What You Need For This Quinoa Recipe

  • 1 Tbsp OLIVE OIL
  • 1 ½ cups QUINOA (check current prices for quinoa on Amazon)
  •  ½ cup RED ONION (minced, separated)
  • 3-5 cloves GARLIC (finely chopped)
  •  ½ large RED BELL PEPPER (minced, separated)
  • 1 14 oz can DICED TOMATO (reserve juice)
  • 1 15 oz can KIDNEY BEANS (drained, rinsed)
  • 1 tsp CUMIN powder
  • 1 tsp CHILI powder
  • 2 cups WATER, including drained tomato liquid
  • ½ cup CILANTRO (fresh, chopped)
  • 1 small CUCUMBER (diced, peeled if waxed)
  • 1 AVOCADO (seeded, peeled, diced)
  • 1/3 cup LIME JUICE (freshly squeezed)
  • SALT and PEPPER to taste

quinoa recipe
uncooked quinoa…looks like a grain, but it’s a seed.

How to Make Spanish Quinoa

  • Open the canned tomato and drain the tomato liquid into a measuring cup. Add enough water to equal 2 cups.
  • Heat oil on medium high. Saute garlic, 2/3 of the onion and 1/3 of the red pepper for 2-3 minutes. [the rest of the onion and red pepper will be added raw at the end.]
  • Add quinoa.
  • Stir in tomatoes with green chilies, kidney beans, cumin and chili powder and water/tomato juice mixture.  Bring the pot to a boil. Reduce to medium low and cook approx. 15 minutes. The liquid will be absorbed.
  • Remove from the heat and let sit for about 10 minutes and then fluff with a fork. Allow quinoa to cool some, you want it to be warm, not piping hot when you add the rest of the ingredients.
  • After quinoa has cooled some, add in the remaining onion and pepper pieces, and the chopped cilantro.  Mix. Then add cucumber and avocado and lime juice (or sub lemon juice). Toss gently.
  • And then serve.
  • Give this spicy Spanish quinoa recipe a try and let me know what you think, and…

Bon appétit!

For another tasty vegetarian recipe, try this Easy Eggplant Burger Recipe.

veggie burger recipe
Veggie burger recipe with blackened eggplant

Thanks for watching and subscribing –And hit those buttons below to share this recipe. I appreciate it!

Share and Enjoy !


Best Homemade Focaccia Bread Recipe Ever

focaccia bread

Nothing beats the taste of homemade focaccia bread, and my mama bakes the best bread. In this video we get to see her make focaccia step by step. Give this Italian flatbread a try, your family and friends will love you for it.

Focaccia Bread Ingredients:

3 ½ cups all-purpose FLOUR
1 ¼ tsp KOSHER SALT
1 Tbsp INSTANT YEAST
1 ½ cup warm WATER (approx. 130 degrees F)
1 ½ large sweet ONION (diced)
4-6 cloves GARLIC (finely chopped)
¼ cup JALAPENO (diced)
1 cup OLIVES –black, green, or both (chopped)
¼ cup PEPPERONCINI (chopped)
1 cup CHEESE (grated parmesan, asiago, and romano)
1-2 Tbsp fresh ROSEMARY (finely chopped)
approx. 6-7 Tbsp OLIVE OIL

focaccia bread

How to Make Homemade Focaccia Bread

Sift 3½ cups of ALL-PURPOSE FLOUR and combine in a mixing bowl with SALT and YEAST.  Add WARM WATER (approx. 130 degrees F) and mix contents of bowl for 1 minute in mixer.  Remove dough. 

In a 9 x 13 baking pan greased with 1-2 Tbsp OLIVE OIL, spread dough flat.  Cover and allow dough to rise for 45-60 minutes. Check current prices for 9 x 13 Baking Pan on Amazon.

While dough rises, chop and prep topping ingredients. Take time to sauté the onions and garlic well.  Feel free to use more or less ingredients—this combo is terrific—but experiment according to your tastes (I bet a little sundried tomato would be awesome).

After bread has risen, uncover and drizzle the top of the dough with 2 Tbsp OLIVE OIL.  My mama sticks the end of her thumb into the dough all along the top to create an interesting (or not quite interesting) pattern; this is something you can do, too, if you’re retired with a lot of free time on your hands, but it’s not necessary.

Sprinkle and spread toppings evenly over the dough.
Place the bread in an oven pre-heated to 375 degrees F and bake approx. 35-40 minutes.
Remove bread from oven and let rest 5 minutes before transferring to a cooling rack.
Take care not to eat it all right away because you’ll want some for later.

Give this Focaccia bread recipe a try and let me know what you think!

For another great Mama Redbuck bread recipe, try this crazy delicious Pesto Parmesan Bread Recipe.

parmesan pesto bread

Thanks for checking out the recipes. Be sure and sign up for our mailing list so you’ll never miss a Chef Buck cooking video, and click a button below and share the dishes with your friends. We appreciate all the kind comments and support, and we’ll see you next time in the kitchen!
–Chef Buck

Share and Enjoy !


Follow Me!