Muffin Recipe with a Ginger Twist You’ll love

muffin recipe

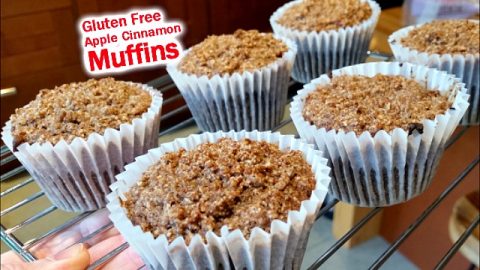
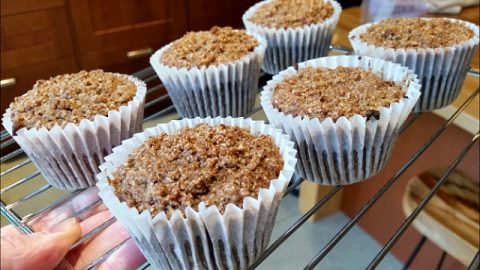
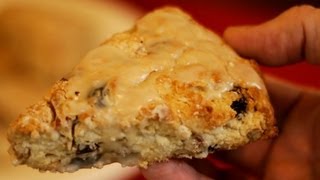
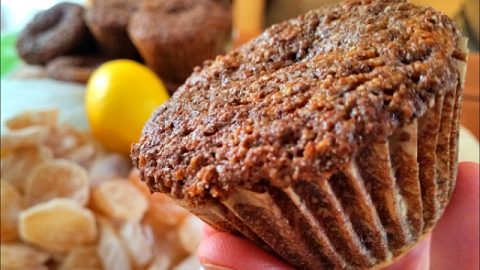
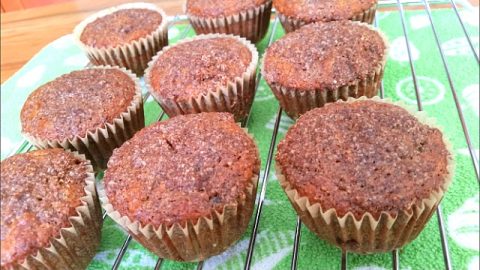
Combine ginger, lemon, and cardamom to create an easy ginger muffin recipe that will blow your mind. Candied ginger is tasty all by itself, but baking it in a muffin is even better, and you’ll find it’s a perfect pairing with a nice cup of coffee or hot tea. Bake these muffins at home and feel like you’re lounging in your favorite coffee cafe, but without all those annoying hipsters. This muffin is chock full with the entire zest from 1 large lemon, which is a great accent to the ginger, and the ground cardamom adds a touch of the exotic that will transform these muffins a real bakery treat, so get out a muffin pan and get to work!

Ingredients for Ginger Muffin Recipe

(this recipe makes about 8 muffins)
Dry Ingredients:
2 cups ALMOND FLOUR
1 tbsp CINNAMON
1 Tbsp CARDAMOM
1 tsp BAKING SODA
¼ tsp SALT
‘Wet’ Ingredients:
3 regular EGGS
2 tsp VANILLA
1/3 cup MAPLE SYRUP
113g (3-4 oz) unsweetened APPLESAUCE
2 Tbsp refined melted COCONUT OIL

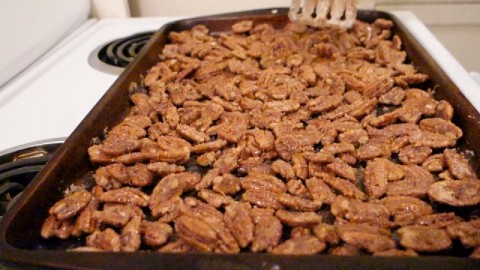
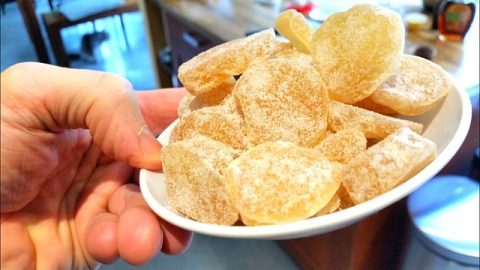
1 cup chopped CANDIED GINGER
zest of 1 large LEMON

Crumble Topping:
(this recipe makes enough for 2-3 batches of muffins)
5 Tbsp ALMOND FLOUR
3 Tbsp COCONUT SUGAR
1½ tsp CINNAMON
pinch of SALT
2 Tbsp refined COCONUT OIL (at temperature so oil is a solid consistency, cut into the other
ingredients like butter)
*Refined coconut oil does NOT have a coconut flavor; virgin coconut oil HAS a distinct coconut flavor

muffin recipe
Candied ginger is a terrific muffin ingredient; adds great texture, flavor, and zing.

How to make this Muffin Recipe

  • Prepare baking tins and have cooling rack ready.
  • Preheat oven to 375.
  • If using the crumble topping, make that first. The coconut oil should be in a solid state. Add coconut sugar, cinnamon, and salt into a small, sealable container and mix. Cut in the coconut oil like butter, and mix. This recipe will make enough crumble topping for 3-4 batches of muffins. Set crumble mix in the fridge until ready to use.
  • In a bowl, mix the other dry ingredients together and set aside.
  • Using another bowl for the wet ingredients, whisk the eggs together. Mix the vanilla, maple syrup, applesauce, and melted coconut oil in with the eggs.
  • Add the bowl of dry ingredients into the wet, mixing just until all ingredients are wet, no need to over mix.
  • Stir in the candied ginger and lemon zest and mix gently.
  • Divide the batter equally between muffin cups.
  • Top each muffin batter cup with some crumble topping, as much as you like.
  • Bake in preheated oven at 375 degrees for 10 minutes. Turn muffins around; bake for about another 10 minutes.
  • Test for doneness with a toothpick or knife. The muffins are ready to come out if have no batter on the toothpick. If not done, then test after 4 minute intervals of additional cooking, because there’s no reason to get this far and then burn your muffins!
  • Cool on rack for at least 5 minutes.

And that’s it!
Give this awesome gluten free candied ginger muffin recipe a try and let us know what you think.

muffin recipe
Add the zest of a lemon and ground cardamom to transform these muffins into a real treat.

More Great Gluten Free Options
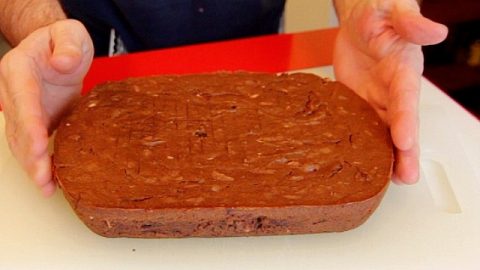
For another muffin recipe, try this Gluten Free Cinnamon Apple Muffin. And for a crazy gluten free dessert option, check out this fantastic Chocolate Cake Recipe made from beans. what!? I know, it sounds crazy, but this cake made from garbanzo beans is super moist and one of my favorite desserts to bake, so take a chance and give it a try, I think you’ll be very happy with the results.

chocolate cake recipe
A flourless, gluten-free chocolate cake

Thanks for checking our recipe videos out, and if you like what you see, click a button or two below and share this muffin recipe with your friends and family. I appreciate it!
–Chef Buck

Share and Enjoy !

Jackfruit Pulled Pork Recipe for Vegetarian BBQ

jackfruit pulled pork

Here is the easiest jackfruit pulled pork recipe ever. A faux pork vegetarian recipe made with canned young, green jackfruit will deliver the taste and texture of your favorite BBQ pork, and it’s a much healthier choice. This recipe is basically a BBQ sauce delivery system. Unripe canned jackfruit makes a perfect meat substitute that works well for either pork or chicken, so definitely give it a try.

Ingredients for Jackfruit Pulled Pork BBQ

1 20oz can young, green JACKFRUIT
1 medium ONION
2-4 cloves GARLIC
your favorite BBQ SAUCE
1 tsp CUMIN POWDER
½ tsp CHILI POWDER
some SALT and PEPPER
OIL for sautéing

jackfruit pulled pork
BBQ jackfruit makes a perfect vegetarian pulled “pork” sandwich.

How to Make Vegetarian Pulled Pork BBQ with Jackfruit

  • Rinse and drain the young, green jackfruit. Make sure to buy unripe jackfruit and NOT the
    yellow ripe jackfuit. You can buy jackfruit online. Check CURRENT CANNED JACKFRUIT PRICES on Amazon.
  • Shred the jackfruit. I do this by hand, it’s very easy, but you can use a knife, too.
  • Heat oil in a skillet on medium heat.
  • Add thinly sliced onion and finely chopped garlic and saute 3-4 minutes.
  • Add in seasoning.
  • Add jackfruit and a little BBQ sauce.
  • Raise the temperature and heat the jackfruit through, then reduce to a simmer and cook until the dish reduces as the water cooks out of the onion and jackfruit.
  • Add more BBQ sauce to desired sauciness, and then remove from heat.

This jackfruit pulled pork substitute is great all on its own, served over rice, or perfect on a soft roll or bun, so definitely give it a try. If you like pulled pork BBQ, you will be amazed at this vegetarian option and how easy it is to prepare.

jackfruit pulled pork
Jackfruit BBQ is great over rice, on a sandwich, or all on its own.

What is Jackfruit?

Jackfruit is exactly what it sounds like, a fruit, but it’s HUGE. A 50 pound jackfruit is not uncommon. This giant tropical fruit grows on trees and is very popular in Asia. Unripe jackfruit can be cooked and used in savory dishes. Ripened jackfruit can be eaten raw and, unlike young green jackfruit, is very juicy and sweet.

Buying and cleaning fresh jackfruit is quite an endevour, so canned jackfruit is a perfect alternative. I prefer the green jackfruit and find it to be a terrific ingredient to experiment with in a variety of vegetarian recipes. The mildness of its flavor allows young jackfruit to be incredibly versatile, and it will enhance a recipe without overpowering it.

I’ve used green jackfruit as a pulled pork BBQ, as a faux meat filling in tacos, in an Indian-style variation of Jackfruit Tikka Masala, and as a No-Potato Hash for breakfast.
Its super nutritious, readily available at Asian markets, and well worth giving a try, so seek it out.

jackfruit recipe
Seasoned and baked Jackfruit makes a convincing faux chicken when added to this rich Indian inspired tikka masala.

Thanks for watching our recipe videos!

Thanks for checking out the canned jackfruit pulled pork recipe, and all of our recipes. Be sure and sign up for our mailing list to never miss a new cooking video, and also click a button below and share the dishes with your friends, and follow Chef Buck on Youtube. We appreciate all the kind comments and support, and we’ll see you next time in the kitchen!

If you like what CG and I do, support us on Patreon, or throw a tip in our Paypal Tip Jar We’ll happily enjoy a coffee on the road, or maybe even pay a bill or two!–Thanks! We appreciate all the support, and we’ll see you next time in the kitchen!

We include affiliate links for products on our website, so if you make a purchase after clicking on our links, we may earn a commission which helps us produce more videos and drink more coffee :^) We participate in the Amazon Services LLC Associates Program, which is an affiliate advertising program providing a means for us to earn fees by linking to Amazon.com and affiliated sites, so we can make more videos.

Share and Enjoy !

Corn Muffin Recipe with Jalapeno and Cheese

corn muffin recipe

Corn muffins are delicious, but adding cheese and jalapeno makes them irresistible. CG cooks up a tasty corn muffin recipe with whole kernel corn to make them super moist and flavorful. If you’re not a fan of hot jalapenos, then try substituting milder pickled jalapenos which are often sold right alongside jars of hotter peppers at the grocery store. Topping the muffins with sliced jalapeno makes them look so good!

What you need for this Corn Muffin Recipe

¾ cup CORNMEAL …we use a medium grind in this recipe
1¼ cup ALL-PURPOSE FLOUR
2½ tsp BAKING POWDER
½ tsp SMOKED PAPRIKA
½ tsp CHIPOTLE or regular chili powder
½ tsp SALT…unless the corn or butter already contains salt
1 cup MILK
2 Tbsp OIL or use melted butter instead
4 Tbsp HONEY
1 EGG
1 cup CANNED WHOLE KERNEL CORN drained
¼ cup PICKLED JALAPENOS, roughly chopped
¼ ONION, minced
1 cup freshly shredded CHEDDAR CHEESE plus ¼ cup for topping
fresh JALAPENO deseeded and sliced for topping…or you can use pickled slices for the topping

corn muffin recipe
Corn muffins are delicious, but adding cheese and jalapeno makes them irresistible.

How to make Corn Muffins

If you need a muffin tin for your kitchen, you can check current prices for a Cupcake and Muffin Pan on Amazon.

  • Place rack in middle of the oven.
  • Heat oven to 400 degrees Fahrenheit.
  • Grease 12 muffin pan cups or line with parchment paper baking cups and set aside.
  • Combine dry ingredients in bowl.
  • Combine remaining ingredients in another bowl and mix, but reserve fresh jalapeno slices and a little cheese for topping.
  • Add the dry ingredients to the wet and stir until ingredients are moistened.
  • Fill prepared muffin cups evenly.
  • Top with fresh jalapeno slices and a very light sprinkling of cheese.
  • Bake 20-30 minutes or until toothpick inserted into center comes out clean and muffins are golden brown.
  • Allow to cool for 5 minutes before removing from muffin tins.

And that’s it! Hope you like this cheesy jalapeno corn muffin recipe. You can serve them hot or cold for breakfast, lunch or dinner, and I especially love them in the morning with over easy eggs.

corn muffin recipe
broken eggs are less sad with corn muffins

Give this corn muffin recipe a try and let us know what you think, and for another bready treat, check out this perfect BUTTERMILK BISCUIT RECIPE. Both recipes go great with a big bowl of VEGETARIAN CHILI.

vegetarian chili
pot o’ meatless chili for good times

Thanks for checking out our corn muffin recipe, and all of our recipes. Be sure and sign up for our mailing list and never miss a new Chef Buck cooking video, and also click a button below and share the dishes with your friends. We appreciate all the kind comments and support, and we’ll see you next time in the kitchen!

Thanks for watching our recipe videos!

We include affiliate links for products on our website, so if you make a purchase after clicking on our links, we may earn a commission which helps us produce more videos and drink more coffee :^)                                                                                                We participate in the Amazon Services LLC Associates Program, which is an affiliate advertising program providing a means for us to earn fees by linking to Amazon.com and affiliated sites, so we can make more videos.

Share and Enjoy !

Vegetarian Chili is not just for Vegetarians!

vegetarian chili

Here’s a satisfying and hearty vegetarian chili recipe that’ll put a little pep in your step. If you’re a die-hard carnivore, then your initial reaction is probably NOPE, but you should give meatless chili a try. I love a good meat chili, and when I get chili at a restaurant I generally order a meat and bean chili, but at home I’m vegetarian chili all the way. Vegetarian chili just tastes great, and I don’t miss the meat, plus it’s a perfect way to clean out all the veggie odds and ends in your fridge. The key to a hearty meatless chili is lots of seasoning, onions, and peppers. I like to add at least two kinds of beans, and the veggies can be whatever you like, so be creative!

What You Need to Make a Great Vegetarian Chili

15 oz can CHICK PEAS
15 oz can KIDNEY BEANS
1 BELL PEPPER (chopped)
Lg ONION (chopped)
JALAPENO PEPPER (diced, very optional)
2-3 cloves GARLIC (finely chopped)
1 ZUCHINNI (cut into large pieces)
1 cup CAULIFLOWER (chopped)
2 ROMA TOMATOES (chopped)
28 oz can CRUSHED TOMATOES
1 heaping Tbsp DRIED OREGANO
1 Tbsp CUMIN
1 tsp GARLIC POWDER
1 Tbsp CHILI POWDER
1 Tbsp SMOKED PAPRIKA
SALT and PEPPER, to taste
2 Tbsp OLIVE OIL for sauteing
WATER as needed…add slowly
I also add a little leftover RUTABAGA to this recipe, but that is very optional. A vegetarian chili is a great way to clean out the fridge of all those veggie odds and ends, so use what you have.

vegetarian chili
pot o’ meatless chili for good times

How to Make Easy Vegetarian Chili

  • Slice, dice, mince, and chop all your ingredients. Prepping this dish is the most labor intensive part of this recipe. Once your ingredients are ready, it’s pretty eazy peezy.
  • Heat some oil in a large pot on medium heat.
  • Add in the onion and hot pepper and saute for 4-5 minutes.
  • Add in the rest of the peppers, garlic, and seasoning, then mix and saute for another couple minutes.
  • Add in everything else, plus about ½ a can of water. Be conservative with the water. The dish might seem overly thick, but a lot of water will be released from the veggies as the chili cooks. You can always add more water later.
  • Cover and bring the pot to a bubble, reduce the heat down to a simmer, and cook covered for about 45 minutes, adding water as needed and desired.
  • After 45 minutes give the dish a taste test and adjust seasoning, but remember, the flavor of the chili will intensify on its own as it sits.

Like any soup or stew or chili, it’s ideal if you make the recipe ahead of time, because the dish will get exponentially better as the days pass, so be sure to make a big pot of chili so you’ll have plenty of leftovers.

vegetarian chili
hearty vegetarian chili recipe…try it!

That’s it! Hope you like it, and if you’ve got a bigger pot, CLICK HERE for a double-sized variation of this vegetarian chili recipe.

If you want jalapeno corn muffins to pair with chili, here’s a recipe that tastes great and is a breeze to make.

vegetarian chili
make a batch of corn muffins for a great chili sidedish

Jalapeno Corn Muffin Recipe

¾ cup cornmeal (whole, medium grind)
1¼ cup all-purpose flour
2½ tsp baking powder
½ tsp smoked paprika
½ tsp chipolte (or regular chili powder)
½ tsp salt…unless the corn or butter already contain salt
1 cup milk
2 Tbsp oil (alternative butter, melted)
3 Tbsp honey
1 large egg
1 cup canned corn kernels, drained
¼ cup pickled jalapenos, chopped
¼ onion, minced
1 cup shredded sharp cheddar cheese (plus ¼ cup for topping)
optional: 1 jalapeno (deseeded and sliced for topping)

Place rack in middle of the oven and preheat to 400°F.
Grease 12 muffin pan cups or line with parchment paper baking cups; set aside.
Combine dry ingredients in bowl.
Combine remaining ingredients in another bowl (minus topping, jalapeno). Add to dry ingredients and stir until ingredients are moistened.
Fill prepared muffin cups evenly.
Top with remaining jalapeno rings and cheese.
Bake 20-30 minutes or until toothpick inserted into center comes out clean and muffins are golden brown.
Allow to cool for 5 minutes before removing from muffin tins.
Serve warm or cold. Serve with butter or honey butter.
HONEY BUTTER:
½ cup butter, softened
2 Tbsp honey

I hope you like these recipe ideas. Give this healthy chili recipe a try and let me know what you think, and for more hearty meat-free options, try this very easy blackened eggplant Veggie Burger Recipe or this fantastic faux pasta made with Zucchini Zoodles.
Or visit my Vegetarian Recipe Playlist over on The Chef Buck Youtube Channel.

Thanks for Watching our Vegetarian Chli Recipe!

Click a button below and share the dishes with your friends. We appreciate all the kind comments and support, and we’ll see you next time in the kitchen!

If you like what CG and I do, support us on Patreon, or throw us a tip in our Paypal Tip Jar. We’ll happily enjoy a coffee on the road – Thanks! We appreciate all the support, and we’ll see you next time in the kitchen!

We include affiliate links for products on our website. Making a purchase after clicking on our links and we may earn a commission which helps us produce more videos and drink more coffee :^) We participate in the Amazon Services LLC Associates Program, which is an affiliate advertising program. It provides a means for us to earn fees by linking to Amazon.com and affiliated sites, so we can make more videos.

Share and Enjoy !

Gluten Free Muffins with Apple Cinnamon

gluten free muffins

Check out these moist and delicious gluten free muffins made with almond flour. CG has been baking muffins up the wazzoo lately, and apple-cinnamon almond flour muffins are some of my favorites, so give them a try. Don’t be put off by terms like gluten free and grain free, just focus on delicious. Also feel free to experiment with recipe substitutions as well, like maple syrup instead of coconut sugar, or ginger instead of apples, or using banana instead of apple sauce.  Muffins are great treats, and while gluten free options are generally underwhelming, this muffin recipe is a winner.

Ingredients for Gluten Free Muffins

Crumble Topping:
(this recipe makes enough for 2-3 batches of muffins)
5 Tbsp ALMOND FLOUR
3 Tbsp COCONUT SUGAR
1½ tsp CINNAMON
pinch of SALT
2 Tbsp refined COCONUT OIL

Dry Ingredients:
2 cups ALMOND FLOUR
1 heaping Tbsp CINNAMON
1 tsp BAKING SODA
¼ tsp SALT

‘Wet’ Ingredients:
3 regular EGGS
2 tsp VANILLA
4 Tbsp COCONUT SUGAR or use 1/3 cup maple syrup
113g (3-4 oz) unsweetened APPLESAUCE
2 Tbsp refined melted COCONUT OIL

1 medium APPLE, diced

(this recipe makes 6-8 muffins)

*Refined coconut oil does NOT have a coconut flavor; virgin coconut oil HAS a distinct coconut flavor

gluten free muffins
Gluten free apple-cinnamon muffins that are delicious? Oh, yeah.

How to Make Gluten Free Muffins with Apple Cinnamon

  • Prepare baking tins and have cooling rack ready.
  • Preheat oven to 375.
  • Combine crumble topping ingredients together. Coconut oil should be in a solid state in order to cut into the mixture like butter, then store the crumble in fridge while mixing together the rest of the batter.
  • Mix the dry ingredients together and set aside.
  • In a bowl, whisk eggs together. Add vanilla, coconut sugar, applesauce, and melted coconut oil, and mix well.
  • Then add dry ingredients to wet, combining just until all ingredients are wet, no need to over mix. Add apples and mix gently.
  • Divide batter equally between 6-8 muffin cups.
  • Top each muffin batter cup with crumble topping, as much as you like.
  • Bake in preheated oven at 375 degrees for 10 minutes. Turn muffins around; bake for another 10 minutes.
  • Test muffins with a toothpick or knife blade. The muffins are ready if no batter sticks on the toothpick or knife. If muffins need more cooking time, return to the oven and then test every 4 minutes, because there’s no reason to get this far and then burn your muffins!
  • When finished baking, cool muffins on rack for about 5 minutes, this will keep them from sticking to the muffin cup papers.

Muffin Time!

Now all you need is a hot cup of coffee or a cold glass of milk and you’ll be on your way to a perfect day! Give this gluten free muffins recipe a try and then let us know what you think. And for another dessert recipe, give this Gluten Free Chocolate Cake Recipe made from beans. wha!?

chocolate cake recipe
A flourless, gluten-free chocolate cake

Thanks for watching our recipe videos and then trying some out. If you like what you see, click a button or two below and share this gluten free muffins recipe with friends and family. I appreciate it!
–Chef Buck

Share and Enjoy !

Must Try Egg Bread Bake Recipe

egg bread

Egg bread is a fancy dish for breakfast or brunch, and it’s an easy recipe to prepare. The recipe is a cross between baked eggs, bread pudding, and stove top stuffing. It’s a great way to use up old and stale bread. I go light on the cheese in this egg bread recipe, but adding more cheese and making a cheese bread is super tasty. One thing you don’t want to do is go light on the seasoning, especially if you’re using a plain loaf of bread; the more seasoning the better–especially rosemary!

What You Need for an Egg Bread Bake

crusty BREAD cubed
6 EGGS
about 1 cup MILK
2 GREEN ONION chopped
HOT PEPPER finely chopped
shredded CHEESE
1-2 Tbsp dried ROSEMARY
1 tsp dried OREGANO
PAPRIKA
BLACK PEPPER
GARLIC POWDER
CHILI POWDER (optional)
BUTTER/OIL to grease the baking dish

egg bread
Fancy baked eggs to impress friends and family

How to Make Baked Egg Bread

Any bread will do, but ideally use a hard and crusty loaf. If you’ve got a loaf of bread you’re thinking is to stale to eat, then this is a perfect recipe to save it.

  • Slice the bread into cubes and place in a large mixing bowl. I like using larger cube sizes for a rustic looking dish.
  • In a bowl, whisk 2 eggs and milk.
  • Add the egg/milk mixture in with the bread and toss, coating the bread.
  • Add in the herbs and spices, onion, hot pepper, and cheese and toss until the bread is well coated.
  • Lightly grease an oven safe baking dish and add the bread mix, spreading out evenly. Check current prices on a Pyrex Baking Dish on Amazon.
  • With a spoon, make an impression on the top of the bread mix for each egg serving.
  • Crack an egg into each depression.
  • Slide into a preheated oven and bake at 350 degrees Fahrenheit for 30-40 minutes, until the eggs are baked to desired doneness.
  • Slice into servings and serve hot or cold.
egg bread
add extra bling for fancier egg bread, but don’t skimp on the seasoning

That’s it! Takes a little while to bake, but otherwise this egg bread is a fairly quick dish to prepare, and a fancy way to use up stale bread.

Give this baked egg bread recipe a try and let me know what you think, and bon appétit!

And for a less bready baked egg dish, try this Fancy Egg Bake Recipe.

egg bake recipe
sliced egg bake on a salad is yummy!

Thanks For Watching Our Recipe Videos!

Thanks for checking out this Egg Bread recipe, and all of our recipes. Sign up for our mailing list so you’ll never miss a new recipe. Also click a button below and share the dishes with your friends. You can also follow Chef Buck on Youtube. We appreciate all the kind comments and support, and we’ll see you next time in the kitchen!

If you like what CG and I do, support us on Patreon, or throw us a tip in our Paypal Tip Jar. We’ll happily enjoy a coffee on the road – Thanks! We appreciate all the support, and we’ll see you next time in the kitchen!

We include affiliate links for products on our website. Making a purchase after clicking on our links and we may earn a commission which helps us produce more videos and drink more coffee :^) We participate in the Amazon Services LLC Associates Program, which is an affiliate advertising program. It provides a means for us to earn fees by linking to Amazon.com and affiliated sites, so we can make more videos.

Share and Enjoy !

Pad Thai Recipe with Spaghetti Squash Noodles

pad thai recipe

Try a tasty Pad Thai recipe with a spaghetti squash twist. Spaghetti squash is a lowfat low carb ingredient with a terrific texture and a mild flavor that allows it to work well in a variety of recipes, including this easy Pad Thai Recipe. A few simple ingredients are all you need to cook this healthy faux noodle vegetarian recipe.

What You Need to Make Pad Thai Recipe w/ Spaghetti Squash

SPAGHETTI SQUASH
4-6 cloves GARLIC finely chopped
2-3 GREEN ONIONS chopped, bottoms separated from tops
1 RED BELL PEPPER chopped
2 Tbsp OLIVE OIL
1 Tbsp SESAME OIL
1-2 Tbsp RICE VINEGAR
1- 2 Tbsp SOY SAUCE
1-2 Tbsp PEANUT BUTTER
FISH SAUCE (optional) 1 or 2 EGGS
1 tsp CHILI PEPPER
SALT and PEPPER to taste

Garnishes:
chopped PEANUTS
chopped CILANTRO
BEAN SPROUTS

The measurements above are just loose suggestions, and really need to be adjusted to your own tastes. The size of the spaghetti squash and how much squash noodles you dig out will determine how much of the other ingredients you need; they are simple and fresh ingredients, so there really is no wrong way to make this dish.

best spaghetti squash
When cooked spaghetti squash pulls apart into “noodley strings”

How to Make Spaghetti Squash Make Pad Thai

  • When buying a spaghetti squash, choose one that seems heavy for its size.
  • Carefully slice the squash into halves. Cut the squash across instead of lengthwise; this will make for longer “noodles”.
  • Place cut sides down in shallow water in a roasting pan.
  • Bake for about 30-45 minutes at 350 degrees Fahrenheit. You can check on the squash after 30 minutes; the cooking time will vary according to the size of the squash. It’s important not to overcook the squash, slightly crunchy strands of squash add great texture to a dish, and overcooking the squash will make the ingredient mushy.
  • Remove squash from the oven and carefully turn halves over to check for doneness –the water will be hot and steam will be trapped under the squash, so be cautious.
  • Allow squash to sit 5-10 minutes to cool slightly for easier handling.
  • Insert a fork and twist out strands of “spaghetti”. Once the fork has done its job, use a spoon to scrape out the remaining squash; it’s edible all the way to the rind, so don’t waste any!

On the stove top…

  • Heat a skillet on medium heat and add sesame and olive oil. You can check here for current pricing for a non-stick skillet on Amazon.
  • Add chopped green onion bottoms, chopped garlic, and chopped bell pepper and saute cook 1-2 minutes. If you like a bit of heat with your dish, add some red pepper flakes or fresh chopped hot peppers.
  • Add in salt and chili pepper and continue sauteing.
  • Stir in rice vinegar, soy sauce, and peanut butter. Add fish sauce if you’re a hardcore pad Thai aficionado. Add a bit of water to thin the sauce, if desired.
  • Cook for 1 -2 minutes. Then, add in the spaghetti squash and mix well with the sauce.
  • Make a well in the center of the squash and add in the whisked eggs. Once the eggs set, give them a stir and scramble, then mix scrambled eggs in with the rest of the dish and get it off the heat.
  • Top with fresh chopped cilantro and chopped peanuts and serve.
  • Add fresh bean sprouts, too, if you be cray.
pad thai recipe
Pad Thai with spaghetti squash noodles

And that’s it.
This recipe makes a nice twist on a traditional pad Thai recipe.
Give this spaghetti squash recipe a try and let me know what you think, and bon appetit!

And for another healthy veggie noodle dish, try this handmade Zucchini Zoodles Recipe.

zoodles recipe
Handmade zoodles are easy to make and a nice change from a heavy pasta dish.

Thanks for checking out our spaghetti squash pad Thai recipe, and all of our recipes. Be sure and sign up for our mailing list and never miss a new Chef Buck cooking video, and also click a button below and share the dishes with your friends. We appreciate the kind comments and support, and we’ll see you next time in the kitchen!
–Chef Buck

Thanks for watching our recipe videos!

We include affiliate links for products on our website, so if you make a purchase after clicking on our links, we may earn a commission which helps us produce more videos and drink more coffee :^) We participate in the Amazon Services LLC Associates Program, which is an affiliate advertising program providing a means for us to earn fees by linking to Amazon.com and affiliated sites, so we can make more videos.

Share and Enjoy !

Egg Bake Italiano with Spinach and Tomato

egg bake

An egg bake recipe is one of the easiest and least expensive meals to prepare, and an Italian egg bake is one of the tastiest. I’ll often clean out the fridge and use odds and ends to make a random egg casserole recipe, but an egg bake doesn’t always have to be a random mishmash of ingredients. If I have fresh spinach and sun dried tomato on hand, then an Italian Egg Bake is a cinch to make. It’s almost like a lasagna, but a whole lot easier and less expensive to prepare. An egg bake is an easy way to feed a family or gathering, and a casserole travels very well, so it’s a perfect recipe for a potluck or dinner party or any event where you need to bring a dish.

What You Need to Make an Italian Egg Bake

(ideal ingredients for a 1½ quart baking dish)

7 EGGS
8-10 oz SPINACH
1 med ONION (chopped)
SUN DRIED TOMATOES (chopped) …smoked sun dried tomatoes are my favorite!
6-10 cloves GARLIC (minced)
½ tsp dried ITALIAN SEASONING
1 cup shredded PARMESAN
or ROMANO CHEESE
½ cup MILK or YOGURT
SALT and PEPPER and
seasonings to taste, like:
garlic powder
onion powder
chili powder
paprika
…add others, or leave some of
these out.
OIL for sauteing

egg bake
It’s like an easier, less expensive lasagna

How to Make an Italian Egg Bake

  • In a large bowl, crack the eggs, add milk and dried Italian seasonings, and whisk well. Set bowl aside.
  • Heat oil in a skillet on medium high heat.
  • Into the skillet add the onion, garlic, and sun dried tomatoes and saute 4-5 minutes.
  • Add in the seasoning and continue sauteing 3-4 minutes.
  • Add in spinach. Stir until spinach wilts and cooks down, which will happen quickly.
  • Lightly spray a 1½ quart baking dish and line the bottom with freshly shredded Romano or Parmesan cheese.
    You don’t need a lot of cheese, line the bottom of the dish and whatever is left reserve to melt on top of the dish later. Check here for current prices on a Pyrex Baking Dish set on Amazon.
  • Remove the sauteed skillet ingredients and spread them evenly over the cheese layer.
  • Gently pour over the whisked egg and milk.
  • Slide the baking dish into an oven preheated to 350 degrees Fahrenheit and bake about 20 minutes or until the egg is firm.
  • Remove from the oven. If desired, top with more shredded cheese and return dish to the oven for about 5 more minutes.
egg bake
I like to use smoked sundried tomatoes for this egg bake recipe…give them a try.

And that’s all there is to this egg casserole.
An Italian egg bake tastes great right out of the oven, but will taste even better the next day.
Serve hot or cold. I actually prefer it cold or at room temperature, so this egg bake recipe makes a great snack, or perfect breakfast, lunch, or dinner; or even brunch, if you’re one of those kinda people.

And that’s it! Give this easy Italian Egg Bake Recipe a try and let us know what you think. And for another breakfast or brunch recipe idea, check out this Fancy Oven-Baked Eggs Recipe.

baked eggs
Baked eggs are an easy way to impress folks for breakfast.

Thanks For Watching Our Recipe Videos!

Thanks for checking out this Egg Bake recipe, and all of our recipes. Sign up for our mailing list so you’ll never miss a new recipe. Also click a button below and share the dishes with your friends. You can also follow Chef Buck on Youtube. We appreciate all the kind comments and support, and we’ll see you next time in the kitchen!

If you like what CG and I do, support us on Patreon, or throw us a tip in our Paypal Tip Jar. We’ll happily enjoy a coffee on the road – Thanks! We appreciate all the support, and we’ll see you next time in the kitchen!

We include affiliate links for products on our website. Making a purchase after clicking on our links and we may earn a commission which helps us produce more videos and drink more coffee :^) We participate in the Amazon Services LLC Associates Program, which is an affiliate advertising program. It provides a means for us to earn fees by linking to Amazon.com and affiliated sites, so we can make more videos.

Share and Enjoy !

Apple Crisp Recipe with Oats and Ginger

apple crisp

If you like homemade apple pie, then you’ll love this easy apple crisp recipe. And if you’re a fan of fresh ginger, adding minced ginger to the apple crisp will make it even better. This is a terrific dessert recipe that makes a whole heap of sweet apple goodness. The recipe makes plenty of servings to feed the family, and this dessert travels well, so it’s a perfect party treat to bring to a family gathering or function. Definitely top with ice cream or a rich creamy topping for best results.

What You Need to Make an Apple Crisp

apple part of recipe:
¼ cup BUTTER melted, browned
½ cup SUGAR
1 large EGG
1 tsp VANILLA
4-5 APPLES chopped
1 tsp CINNAMON
1-2 Tbsp minced GINGER

crisp part of recipe:
1¼ cups all-purpose FLOUR
3 cups QUICK OATS
1½ BROWN SUGAR
1 cup BUTTER
2 tsp CINNAMON
1 cup toasted PECANS
1 tsp minced GINGER

apple crisp
This apple crisp is like an apple pie, but heavier…which is better, right?

How to Make an Apple Crisp Recipe

  • In a sauce pan, melt ¼ cup BUTTER and simmer over med-low heat until butter begins to color, then set aside to cool.
  • In a large bowl, beat 1 EGG and ½ cup SUGAR together until smooth.
  • Add in VANILLA, cooled BUTTER and chopped APPLES. Mix well and set bowl aside.
  • In another bowl, combine FLOUR, 2 cups of the OATS (reserve 1 cup oats for later), CINNAMON, GINGER, BROWN SUGAR, and mix well.
  • Add in 1 cup unsoftened BUTTER and cut into the mixture until about pea-sized.
  • Add reserved OATS and toasted PECANS and mix.
  • Spread half the crisp mixture out in an ungreased 9 X 13 baking dish. Spread the apple mixture evenly over the bottom crisp layer. Then spread the remainder of the crisp mixture over the apple layer; this will create three layers in the dish: crisp/apple/crisp. If desired, dress the top of the crisp with a few apple slices for decoration.
  • Place into an oven preheated to 350 degrees Fahrenheit and bake for 45-50 minutes, until the top of the apple crisp is toasty.
  • Serve with ice cream or creamy whipped topping.

If you need a decent oven-safe baking dish, check out some current pricing for a Pyrex dish on Amazon.

And that’s it! Give this Apple Crisp Recipe a try and let us know what you think. And for another knock-out recipe idea, check out my mama’s Lemon Meringue Pie Recipe.

lemon meringue pie
This meringue pie topping is tasty on all kinds of pies.

Thanks for checking our recipe videos out. If you like what you see, click a button or two below and share the apple crisp recipe with your friends and family. I appreciate it!
–Chef Buck

Share and Enjoy !


Jicama Recipe for Easy Breakfast Hash

jicama recipe

Try a tasty breakfast hash made from fresh jicama. Jicama makes an easy hash recipe because jicama is crunchy and can be eaten raw, just cook it long enough with the other ingredients to impart flavor and heat the jicama through. I like lots of onion and peppers in this jicama recipe, but experiment with other ingredients as well. A hash is a great dish for cleaning out the fridge. Jicama root is like the offspring of a potato and an apple; the root is white and crunchy and can be eaten raw, it has a very mild flavor, and is not too sweet, so it makes an ideal ingredient for many recipes. Give this jicama recipe a try and let me know what you think!

Ingredients for this Jicama Recipe

1 JICAMA diced into cubes
chopped ONION
chopped BELL PEPPERS
chopped HOT PEPPER
finely chopped GARLIC? why not.
seasonings:
SALT for jicama
PAPRIKA
CHIPOTLE
GARLIC POWDER
BLACK PEPPER
but use whatever
seasonings you like
…sometimes I use dried
ITALIAN SEASONING
…give it a try

jicama recipe
Jicama root is super mild and crunchy and can be eaten raw and used in many recipes. Give it a try!

How to make a Breakfast Hash with Jicama

  • Buy jicama with an unblemished, unbroken skin, one that seems
    heavy for its size since jicama is mostly water, just like you.
  • Wash and cut the skin of the jicama off with a knife.
  • Dice jicama into cubes and toss in a bowl with salt and set aside.
  • Heat oil in a skillet and add in the onion, peppers, and garlic.
  • Saute for 2-3 minutes and then add in seasonings to taste, but don’t be shy.
  • Continue sauteing another 2-3 minutes.
  • Dry salted jicama with a paper towel and add into the skillet.
  • Saute jicama with the other ingredients as desired.
  • Once the jicama is heated through, the dish is ready!

jicama recipe
Jicama hash with just onions and seasoning…make a super simple hash for a quick breakfast side dish.

Give this easy jicama recipe a try and let me know what you think, and bon appétit!

And for another vegetarian breakfast dish idea, try out this canned Jackfruit Hash Recipe.

Thanks for checking out the jicama recipe and video, if you liked this quick breakfast hash idea, click a button or two below and share it with your friends.
I appreciate it, thanks!
–Chef Buck

Share and Enjoy !


Jackfruit Recipe Meatless Chicken Tikka Masala

jackfruit recipe

Chicken tikka masala is one of the most popular Indian inspired dishes in the world, because it’s fantastic, but you can easily make a tasty and meatless version of a tikka masala using this canned jackfruit recipe. Young green jackfruit is versatile and very easy to use. Green jackfruit’s mild flavor and rich texture make young green jackfruit an excellent faux meat. It’s popular in mock BBQ pork dishes, and also a favorite of my own in a meatless breakfast hash. When seasoned and baked in the oven, jackfruit handily mimics the texture of baked chicken, and it makes an ideal substitute in this tikka masala recipe. I’m using as few ingredients as I can in order to make this jackfruit recipe super easy.

Ingredients for a Meatless Tikka Masala Jackfruit Recipe

1 20oz can JACKFRUIT (use only young green jackfruit! …don’t buy sweet ripe jackfruit in syrup!)
15oz can TOMATO SAUCE
15oz can CRUSHED TOMATO
½ cup PLAIN GREEK YOGURT
1 medium chopped ONION
6-8 cloves finely chopped GARLIC
1 tsp CUMIN SEEDS
2-3 Tbsp pre-mixed CURRY (or make your own!)
SALT to taste
½ tsp CHILI POWDER
1 tsp GARLIC POWDER
OIL for sauteing
CILANTRO or green onion

jackfruit recipe
When buying canned jackfruit, notice that there are often two types for sale: a ripe sweet jackfruit in syrup, and young green jackfruit. Use young green jackfruit for this mock chicken tikka masala recipe.

How to Make a Meatless Chicken Tikka Masala with Jackfruit

  • For this jackfruit recipe, rinse and drain the jackfruit and cut into smaller, bite-sizes. You can buy jackfruit online. Check current canned jackfruit prices on Amazon.
  • In a bowl, toss the jackfruit with chili and garlic powder.
  • Spread the seasoned jackfruit out on a lightly greased baking sheet and bake at 400 degrees Fahrenheit
    for about 20 minutes.
  • In a skillet, heat oil on medium high heat.
  • When the oil is heated, add the cumin seeds, stir and allow to simmer for just a few moments.
  • Once the seeds begin to crack, add the finely chopped garlic.
  • Saute for a few moments and add in the onion.
  • Reduce the heat to medium and stir for approx. 2-3 minutes and add the curry powder. Use a premixed curry, or your own mixture. Mix well and continue to saute for 1-2 more minutes.
  • Add in the canned tomatoes. Mix well, raise the temperature and allow the ingredients to come to a bubble.
    Reduce the pot to a simmer, cover, and allow cooking for 10 minutes.
  • After 10 minutes, turn the heat off.
  • Blend the ingedients in the pot smooth with a hand blender; this step isn’t crucial, but it will help give the dish the creaminess of a restaurant style chicken tikka masala.
  • Stir in yogurt and mix well.
  • Add in the baked jackfruit and mix well.
  • Serve with rice or on its own.
  • Garnish with fresh coriander leaves or chopped green onion tops.
jackfruit recipe
Use young green jackfruit for a tasty meatless “chicken” tikka masala recipe.

Give this easy meatless “chicken” tikka masala recipe a try and let me know what you think. If you’re a fan of chicken tikka masala, definitely try this jackfruit recipe version out.
The dish cooks up super quick with much less effort than you need to make a traditional chicken tikka masala, and I think you will be very happy with this meatless version. Cook it up and try it out on your friends and family–don’t tell them it’s jackfruit!–tell them it’s chicken tikka masala and see if they notice the difference.

For more easy Indian recipe ideas, check out my Complete Indian Meal Tutorial where I cook up an entire dinner.

how to cook indian food

Thanks for checking out the canned jackfruit recipe, and all of our recipes.

Be sure and sign up for our mailing list to never miss a new cooking video, and also click a button below and share the dishes with your friends, and follow Chef Buck on Youtube. We appreciate all the kind comments and support, and we’ll see you next time in the kitchen!

If you like what CG and I do, support us on Patreon, or throw a tip in our Paypal Tip Jar We’ll happily enjoy a coffee on the road, or maybe even pay a bill or two!–Thanks! We appreciate all the support, and we’ll see you next time in the kitchen!

We include affiliate links for products on our website, so if you make a purchase after clicking on our links, we may earn a commission which helps us produce more videos and drink more coffee :^) We participate in the Amazon Services LLC Associates Program, which is an affiliate advertising program providing a means for us to earn fees by linking to Amazon.com and affiliated sites, so we can make more videos.

Share and Enjoy !

Tofu Recipe for Beginners – Breakfast Scramble

tofu recipe

Try a tofu recipe that makes a nice break from a typical breakfast egg scramble. This dish is a great introduction to tofu. I use firm tofu in this dish and lots of fresh greens. In this tofu scramble I’m using the leaves and stems of fresh kale, but we often use fresh spinach too, which will cook up quicker if you’re in a rush.

Ingredients for Tofu Recipe

6-8 oz Firm TOFU
2 cups chopped KALE
or substitute SPINACH
chopped GREEN ONIONS
chopped BELL PEPPER
finely chopped GARLIC
sliced CHERRY TOMATOES
and whatever seasonings
you like, like:
PAPRIKA, CURRY, dried HERBS,
CHILI POWDER, SALT, and PEPPER
OIL for cooking
….optional: SEEDS!…I use seeds in this video cause I had too much oil in my skillet and I wanted to take advantage of it. I added caraway seeds, but cumin or fennel seeds
would have added great flavor, too.

If you’re not used to using tofu in cooking, this tofu recipe is a good place to start. Tofu is a soy product and a meatless protein. It has almost no flavor, so tofu is very versatile. Tofu will take on whatever flavors you add, and it needs lots of flavor, so be generous. Bland tofu is terrible, but a well-seasoned tofu dish can be delicious. Give this version of a tofu scramble a try, or make your own with whatever fresh veggies you have on hand.

tofu recipe
Use firm tofu for this recipe

How to Make a Tofu Breakfast Scramble

  • Even firm tofu isn’t all that firm, so buy firm tofu.
  • Chop tofu into cubes or slices, but not too small.
  • Heat oil in a skillet on medium heat. Check here for current prices for a non-stick skillet on Amazon.
  • Season tofu well and saute about 5-10 minutes, turning as it cooks,until the tofu is browned on most sides.
  • In another skillet, heat oil on medium heat.
  • Add in chopped kale stems and cook 2-3 minutes.
  • Add onions, peppers, and garlic and continue sauteeing another 2-3 minutes.
  • Add seasoning and spices and mix ingredients well.
  • Add in the remaining ingredients–kale leaves, tomato, green onion tops–and continue cooking another 3-5 minutes.
  • Add in browned tofu. Mix well, and serve.

tofu recipe
this tofu recipe makes a perfect breakfast, lunch, or dinner

And that’s it. Experiment and use whatever ingredients you desire and have on hand. A breakfast scramble can be whatever you want, and tofu is a great way to add
protein to a meatless dish. And this tofu breakfast scramble makes a nice lunch and dinner, too!

And for another healthy breakfast dish, check out this Eggs Benedict on Salmon Recipe.

salmon cakes
use leftover salmon cakes to make a terrific variation of Eggs Benedict!

Thanks for checking the video and tofu recipe out. Be sure and sign up for our mailing list so you’ll never miss a Chef Buck cooking video, and click a button below and share the dishes with your friends. We appreciate all the kind comments and support, and we’ll see you next time in the kitchen!
–Chef Buck

Share and Enjoy !


Canned Jackfruit and Potato Hash Recipe

canned jackfruit

Make a tasty breakfast potato hash with canned jackfruit. Young, green jackfruit is a great meat substitute that works well in this classic breakfast recipe of potato and peppers. Canned jackfruit is easy to use, inexpensive, and a extremely versatile ingredient. Unripe jackfruit adds a nice texture when pulled apart, and its neutral flavor makes it ideal for many recipes.

Ingredients for Canned Jackfruit Potato Hash

1 20oz can young, green JACKFRUIT
1 cup chopped POTATO (any kind you like, sweet potato makes a nice change-up)
½ cup chopped ONION
chopped PEPPERS (I like using a combo of jalapeno and bell peppers, but use whatever you prefer)
finely chopped GARLIC (optional, but always a good idea)
1 tsp CUMIN POWDER
1 tsp PAPRIKA
1 tsp TURMERIC
2 Tbsp WORCERSTERSHIRE
some SALT and PEPPER

canned jackfruit
Breakfast hash with young green jackfruit with potato

How to Make Jackfruit Potato Hash

  • Rinse and drain canned jackfruit. You can buy jackfruit online. Check current canned jackfruit prices on Amazon.
  • Shred it. I do this by hand, it’s very easy, but you can use a knife, too.
  • Heat oil in a skillet on medium high heat.
  • Add chopped onion and peppers and saute 3-4 minutes.
  • Add garlic and cook 1 minute.
  • Add seasoning and mix well, continue sauteing for another minute.
  • Add in shredded jackfruit and Worcestershire sauce and mix well.
  • Raise skillet heat and add in potato. Add 1 can of water and mix.
  • Cover skillet and allow ingredients to come to a bubble.
  • Reduce heat to a simmer and continue cooking until potatoes are near done.
  • Remove cover and continue cooking hash until potatoes are done.
  • Serve as a breakfast side or the main dish.
    Top with eggs, if desired.
canned jackfruit
Jackfruit and potato hash topped with fried egg; the yolk makes a nice sauce.

What is Jackfruit?

Jackfruit is exactly what it sounds like, a fruit, but it’s HUGE. A 50 pound jackfruit is not uncommon. This giant tropical fruit grows on
trees and is very popular in Asia. Unripe, jackfruit can be treated like a starch, cooked and used in savory dishes. Ripened jackfruit can be eaten raw and is very
juicy and sweet; quite a combo. Buying and cleaning a fresh jackfruit is quite an endevour. For me, canned jackfruit is a perfect ingredient.

I prefer unripe, young, green jackfruit and find it to be a terrific ingredient to experiment with in a variety of recipes. The texture of unripe jackfruit makes it a fantastic faux meat,
and the mildness of its flavor allows it to be incredibly versatile.

I’ve used it as a meatless pulled pork BBQ, as a faux meat filling in tacos, in an Indian-style variation of Jackfruit Tikka Masala, and as a potato hash for breakfast.
Its super nutritious, readily available at Asian markets, and well worth giving a try.

No canned jackfruit on hand, but still want a tasty potato dish for breakfast? Try this classic Crispy Potato Breakfast Recipe.

home fried potatoes recipe
home fried potatoes

Thanks for watching our recipe videos!

Thanks for checking out the canned jackfruit recipe, and all of our recipes. Be sure and sign up for our mailing list to never miss a new cooking video, and also click a button below and share the dishes with your friends, and follow Chef Buck on Youtube. We appreciate all the kind comments and support, and we’ll see you next time in the kitchen!

If you like what CG and I do, support us on Patreon, or throw a tip in our Paypal Tip Jar We’ll happily enjoy a coffee on the road, or maybe even pay a bill or two!–Thanks! We appreciate all the support, and we’ll see you next time in the kitchen!

We include affiliate links for products on our website, so if you make a purchase after clicking on our links, we may earn a commission which helps us produce more videos and drink more coffee :^) We participate in the Amazon Services LLC Associates Program, which is an affiliate advertising program providing a means for us to earn fees by linking to Amazon.com and affiliated sites, so we can make more videos.

Share and Enjoy !

Baked Fish Recipe for Cod with Tartar Sauce

baked fish recipe

Cod fillets make a great baked fish recipe. This recipe is great for all types of fish, especially cod or tilapia fish fillets, which are generally good buys at the supermarket. Cod and
tilapia are both low key fish with a mild flavor, so baking them in the oven with a homemade tartar sauce and panko breadcrumb topping adds a nice twist. This baked fish recipe cooks up quick and is
perfect for family meals.

What You Need for this Baked Fish Recipe

2 COD FILLETS (about 8oz each)
½ ONION (sliced)
½ cup PANKO BREADCRUMBS check current prices on Amazon
1 Tbsp melted BUTTER
½ tsp PAPRIKA (optional)
SALT and PEPPER to taste
chopped fresh DILL
spray cooking OIL for pan and onions
sauce:
½ cup MAYONNAISE
some chopped fresh DILL
1-2 Tbsp chopped PICKLES or PICKLE RELISH
spoonful or two of the pickling solution or
1 Tbsp fresh LEMON JUICE (add zest for extra lemony-ness)
(also…add a sqeeze of dijon mustard if desired)

baked fish recipe
cod is often a great buy at the supermarket

How to Make a Baked Fish Recipe

  • Pat the cod fillets dry and lightly season with salt and pepper
  • Heat a skillet on the stove top and melt butter.
  • Turn burner off, add breadcrumbs to the skillet and stir until butter is absorbed.
  • Add salt, pepper, any other spices desired, ½ of the chopped dill, and mix well.
  • To make the sauce, combine the remaining dill, mayonnaise, chopped pickles, and pickling solution or lemon juice, in a bowl, and stir until smooth.
  • Spray a baking pan or aluminium foil with cooking spray. If you need an oven-safe pan, you can check here for current prices for baking sheets on Amazon.
  • Lay onion slices in pan and place fillets over top the onions.
  • Evenly coat the tops of the fish with the tartar sauce mixture.
  • Sprinkle and press the seasoned panko crumbs into the sauce.
  • Place pan in oven and bake at 400 degrees F for 20-25 minutes until the crumb topping has turned a nice, golden brown.
  • Serve with rice and veggies.
    And enjoy!

And for another easy fish recipe, here’s a quick way to cook up a crispy skin Stove top Salmon Fillet Recipe.

how to cook salmon
Keep salmon skin-side up to preserve crispiness

Thanks for checking out our baked fish recipe, and all of our recipes. Be sure and sign up for our mailing list and never miss a new Chef Buck cooking video, and also click a button below and share the dishes with your friends. We appreciate all the kind comments and support, and we’ll see you next time in the kitchen!

Thanks for watching our recipe videos!

We include affiliate links for products on our website, so if you make a purchase after clicking on our links, we may earn a commission which helps us produce more videos and drink more coffee :^)                                                                                                We participate in the Amazon Services LLC Associates Program, which is an affiliate advertising program providing a means for us to earn fees by linking to Amazon.com and affiliated sites, so we can make more videos.

Share and Enjoy !

Zoodles Recipe …handmade zucchini noodles

zoodles recipe

Make a healthy zucchini zoodles recipe without a fancy spiralizer. You can cook a low fat zoodles pasta substitute by simply slicing zucchini into faux noodles with a knife. It takes almost no time, in fact, the time you save cleaning up will likely make it just as fast as using a fancy kitchen gadget. This zucchini zoodles recipe is light and low-fat and provides a nice break from a heavy pasta dish, so definitely make some handmade zoodles and give this dish a go.

Healthy Zoodles Recipe with Zucchini Noddles

2 medium ZUCCHINI
10-15 CHERRY TOMATOES (halved)
¼ cup GARLIC
¼ cup ONION
some PARMESAN CHEESE
(or romano or asiago cheese)
½ LEMON …use the juice and zest (current price for a kitchen zester)
1 tsp ITALIAN SEASONING
SALT and PEPPER to taste
2-3 Tbsp OLIVE OIL
OIL for sauteing

zoodles recipe
Handmade zoodles are easy to make and a nice change from a heavy pasta dish.

How To Make Zucchini Noodles a.k.a Zoodles Recipe

This zoodles recipe cooks quickly, so have all of the ingredients prepared and on hand before you start cooking.

  • Buy zucchini that are firm and blemish free, also buy zucchini that are relatively straight, because they’re easier to slice into zoodles.
  • Wash the zucchini and, leaving the skin on, slice the zucchini lengthwise into thin planks.
  • Stack planks on one another in bundles of three and slice into thinner shoelace size “strings”; they
    don’t have to be too thin or uniform, just get as close to shoestring size as you can, they’ll cook up easily enough and get soft quickly on the stove top.
  • Heat oil in a skillet on medium heat and add in the onion and cook for about 1 minute.
  • Add in the garlic and cook for 1-2 minutes more. If you want a little heat, add in some rep pepper flakes as well.
  • Add salt, pepper, Italian seasoning, and lemon zest. Mix and cook another minute.
  • Add in the sliced zucchini and mix well with all the ingredients.
  • Once the zucchini is added, just cook 2-4 minutes or until the zucchini is heated through. Do not cook overly long or the zucchini will lose its texture and the dish will become too wet. If this
    happens. just drain off a bit of the water.
  • Stir in the olive oil and lemon juice.
  • If desired, add in a little grated Parmesan cheese to taste.
  • Remove the skillet from the stove top and serve immediately.

That’s all there is to this super easy and delicious zoodles dish. If you love kitchen gadgets you can check the current price for a Vegetable Spiralizer on Amazon. I might get one if I see it in the thrift store, and I’m feeling a bit richy-rich.
Give this healthy zucchini zoodles recipe a try and let me know what you think, and bon appétit.

And for another low-fat veggie entree alternative, check out this Spaghetti Squash Recipe.

best spaghetti squash
When cooked spaghetti squash pulls apart into “noodley strings”

Thanks for checking out our zoodles recipe, and all of our recipes. Be sure and sign up for our mailing list and never miss a new Chef Buck cooking video, and also click a button below and share the dishes with your friends. We appreciate the kind comments and support, and we’ll see you next time in the kitchen!
–Chef Buck

Thanks for watching our recipe videos!

We include affiliate links for products on our website, so if you make a purchase after clicking on our links, we may earn a commission which helps us produce more videos and drink more coffee :^) We participate in the Amazon Services LLC Associates Program, which is an affiliate advertising program providing a means for us to earn fees by linking to Amazon.com and affiliated sites, so we can make more videos.

Share and Enjoy !

Biscotti Recipe – Chocolate Biscotti with a Coffee Twist

biscotti recipe

A homemade biscotti recipe is easy to make, and adding a little cocoa powder and ground coffee makes a rich, tasty twist for this Italian twice-baked cookie treat. If you’re not in the mood for
chocolate biscotti just leave out the cocoa powder and coffee and make a simple almond biscotti; it’s a nice cookie either way you bake it. A biscotti is a twice-baked cookie that makes a perfect pairing with a nice cup of coffee or tea.

What You Need for Chocolate Biscotti Recipe

1 cup sliced ALMONDS
2 cups FLOUR
¼ COCOA POWDER
2 Tbsp GROUND COFFEE
1 cup SUGAR
1 tsp BAKING POWDER
1/8 tsp SALT
3 large EGGS
2 tsp VANILLA EXTRACT
1 tsp ALMOND EXTRACT
3 Tbsp RUM or COFFEE LIQUOR
or other BOOZE

biscotti recipe
This twice-baked chocolate biscotti is perfect for dunking.

How to Make Chocolate Biscotti Recipe

  • Preheat oven to 350 degrees Fahrenheit.
  • Toast almond slices; watch them closely, it only takes about 2 minutes to toast.
  • In a bowl, combine flour, sugar, cocoa powder, coffee, baking powder, and salt; mix and set aside.
  • In another bowl, Whisk the eggs, rum, and extracts until blended well.
  • Add the wet ingredients to the dry ingredients, including the toasted almond slices, and mix until combined.
    Dough will be sticky at this point.
  • Scrape the dough out onto a baking sheet lined with parchment paper.
  • Quickly shape into a long flat loaf.
  • Bake about 20-30 minutes at 350 degrees F.
  • Remove from the oven and cool 10-15 minutes.
  • Lower oven heat to 300 degrees F.
  • Slice loaf into 1/2″ wide slices.
  • Lay the slices cut side down on the baking sheet and bake another 10-15 minutes.
  • Turn the slices over and bake 10 minutes more.
  • Cool the biscotti on a rack.
    Cool completely before storing, or they’ll lose crunchiness!

Serve this biscotti recipe with coffee or hot tea for a tasty, dunkable cookie treat.
And that’s it, man.
Give this chocolate biscotti recipe a try and let me know what you think, and bon appétit!

And for another fancy pants baked treat, try this deadly SCONE RECIPE.

maple pecan scones
best scone ever…really

Thanks For Watching Our Biscotti Recipe!

Thanks for checking out our biscotti, and all of our recipes. Be sure and sign up for our mailing list so you’ll never miss a new recipe. Also click a button below and share the dishes with your friends. You can also follow Chef Buck on Youtube. We appreciate all the kind comments and support, and we’ll see you next time in the kitchen!

If you like what CG and I do, you can also support us on Patreon, or throw us a tip in our Paypal Tip Jar. We’ll happily enjoy a coffee on the road – Thanks! We appreciate all the support, and we’ll see you next time in the kitchen!

We include affiliate links for products on our website. So, if you make a purchase after clicking on our links, we may earn a commission which helps us produce more videos and drink more coffee :^) We participate in the Amazon Services LLC Associates Program, which is an affiliate advertising program. It provides a means for us to earn fees by linking to Amazon.com and affiliated sites, so we can make more videos.

Share and Enjoy !

French Onion Soup Recipe – How to Make Onion Soup

french onion soup

French onion soup is a great way to use up a lot of onions, and it’s an easy soup to prepare. The key to great French onion soup is caramelizing the onions into a gooey, rich, golden sweetness. Avoid using a non-stick pan, since this will make caramelizing the onions take longer. Yellow or sweet onions are best for this recipe. Cook the onions down until they begin to release their sugars, turn golden, and stick to the pot. Sticking to the pot is good when it comes to caramelizing onions. And deglazing the pot with a bit of vinegar or white wine will add fantastic flavor to the French onion soup.

French Onion Soup Ingredients

4 lg ONIONS sliced into strips
1 Tbsp BUTTER
1 Tbsp OIL
3-5 cloves GARLIC finely chopped
½ tsp ITALIAN SEASONING
1 Tbsp WORCESTERSHIRE
dry WHITE WINE
or VINEGAR for de-glazing
2 cups BROTH
SALT and PEPPER (to taste)
toasted BREAD for crouton
creamy white CHEESE for topping

french onion soup
Impress family and friends with a fancy-pants French onion soup

How to Make This French Onion Soup Recipe

  • Don’t use a non-stick pan. Sticking is good for French onion soup. Check current prices for a stainless steel soup pot on amazon.
  • Use yellow or sweet onions for this recipe, they have lots of sugar and are best for caramelizing.
  • On medium heat, melt a combo of butter and oil.
  • Add sliced onions into the pot.
  • Add salt and mix the onions well with salt, butter, and oil.
  • Add garlic if you want to, it’s optional for you, but it’s not optional for me.
  • Cook, stirring occasionally, until the onions have cooked down and caramelized.
    Caramelization will take a while, you can’t rush the process.
    Keep the heat around medium. Never on high heat.
    You’re not just cooking the onions, you’re cooking the onions down, coaxing out the sugars and turning the onions into a rich goodness. Turning the heat up to high and searing the onions will not produce the same effect as caramelizing the onions, so be patient and give the onions time to caramelize…caramelization is the reason French onion soup tastes so good.
  • After 30-45 minutes, your onions will begin to brown and stick to the pan.
  • Once the onions turn gooey and have a nice color, add a bit of apple cider vinegar or a dry white wine to deglaze the pan and free any tasty onion flavor from the bottom of the pan.
    If nothing is stuck to the pan, still add a bit of vinegar or white wine; it’s just a good idea.
  • Add dried Italian seasoning, black pepper, and broth.
  • Add in a little Worcestershire sauce if you like, it’s optional, but another good idea.
  • Stir and bring the pot up to a bubble, reduce down to a simmer, and cook as long as you like, but at least 20-30 minutes.

And that’s it, the soup is ready.
Whenever you’re ready to serve the dish:

  • Fill a serving of soup in an oven safe bowl.
  • Top the soup with a toasted crouton; traditionally a large crouton is used, almost like a “raft” for the cheese, but this can be awkward to eat, so use smaller croutons, it will work just as well, and be less fuss for your spoon.
  • Heap a mound of freshly shredded cheese onto the crouton. Be generous with the cheese. You want to use enough cheese so that it will melt and cover the entire top of the soup in a toasty cheese crust. Gruyere cheese is a nice choice, but any creamy white cheese will work. I like a combo of Monterrey jack and Parmesan cheese. Swiss is good, too. Whatever cheese you choose, be generous with it.
  • Slide the soup bowl under a broiler until the cheese is melted and beginning to toast.
  • As soon as it cools to a temperature that won’t burn your taste buds, it’s ready.

Enjoy!
Give this French onion soup recipe a try and let me know what you think, and bon appétit!

And for another rich soup dish, check out this Parsnip Soup Recipe

french onion soup
parsnip soup

Thanks For Watching Our Recipe Videos!

Thanks for checking out this onion soup recipe, and all of our recipes. Be sure and sign up for our mailing list so you’ll never miss a new recipe. Also click a button below and share the dishes with your friends. You can also follow Chef Buck on Youtube. We appreciate all the kind comments and support, and we’ll see you next time in the kitchen!

If you like what CG and I do, you can also support us on Patreon, or throw us a tip in our Paypal Tip Jar. We’ll happily enjoy a coffee on the road – Thanks! We appreciate all the support, and we’ll see you next time in the kitchen!

We include affiliate links for products on our website. So, if you make a purchase after clicking on our links, we may earn a commission which helps us produce more videos and drink more coffee :^) We participate in the Amazon Services LLC Associates Program, which is an affiliate advertising program. It provides a means for us to earn fees by linking to Amazon.com and affiliated sites, so we can make more videos.

Share and Enjoy !

Chole Masala Recipe with the fewest ingredients!

chole masala

Chole masala is an Indian chickpea curry recipe. For this simple chole recipe, I’m using the fewest ingredients I can. I do add Garam masala and cilantro to this version of chickpea curry; for a super simple version of chole masala, these two ingredients can be optional, but certainly use them if you have them on hand. I’m leaving out the asoefetida and besan (chickpea flour), and also the onion, which I will often cook into a chana masala. Chickpea curry is a delicious Indian staple, and a great introduction to Indian cooking.

what you need to make Chole Masala

1 15oz can CHICKPEAS
1 15oz can DICED TOMATO
3-5 cloves GARLIC finely chopped
½ tsp CUMIN SEEDS
1 tsp CUMIN POWDER
½ tsp TURMERIC POWDER
1 tsp CORIANDER POWDER
1 tsp CHILI POWDER
SALT and PEPPER (to taste)
½ tsp GARAM MASALA (optional)
fresh chopped CILANTRO (optional)
OIL for sauteing
Check out current prices for Indian Spices on Amazon.

chole masala
Chana masala is a great introduction to Indian cooking

how to make Chole Masala

  • In a skillet, heat oil on medium high heat.
  • When the oil is heated, add the cumin seeds, stir and allow to simmer for about 20 seconds.
  • Once the seeds begin to crack, add the finely chopped garlic.
  • Stir for approx. 1 minute and then add the diced tomatoes. Mix well and allow the tomatoes to bubble.
    As the tomatoes cook down, you can crush them with your stirrer for a smoother chana massala.
  • Stir in the chili powder, turmeric, coriander, and cumin powders (or substitute a premade curry mix instead).
  • Mix in the chickpeas and add ½ can of water.
  • Bring the dish to a bubble, then reduce to a simmer, cover, and allow cooking for 10 minutes.
  • After 10 minutes, the chick peas will be soft. Use a fork or potato masher to smash some of the chick peas, this will help thicken the chana masala.
  • If desired, add garam masala and then simmer uncovered to the desired consistency, remove and serve.
  • Garnish with fresh coriander leaves.
    Serve with rice or on its own.

Give this easy chole masala recipe a try and let me know what you think, and bon appétit!

And for more easy Indian recipe ideas, check out my Indian Recipes Playlist.

chole masala
click pic for easy Indian cooking recipes

Thanks for checking the chole masala recipe out, if you like it, then click a button or two below and share the dish with your friends, I appreciate it.
Thanks,
–Chef Buck

Share and Enjoy !


Canned Herring Recipe …how to eat kippers

canned herring recipe

Here’s an easy canned herring recipe if you’ve ever wondered what to do with canned herring or kippers. Canned smoked fish can be used to make healthy snacks or dinner recipes with very little time and effort. Canned herring is a good source of omega-3 fatty acids and other beneficial fats, and also a cost effective way to get healthy fish into your diet.

Make a Canned Herring Recipe on a Crostini

canned HERRING …also called KIPPERS
thinly sliced and toasted BAGUETTE
CREAM CHEESE
RED ONION thinly sliced
MUSTARD (very optional…but I like it…as long as it’s not hot dog mustard!)
CAPERS …current caper prices online
fresh DILL

canned herring recipe
Make a quick crostini for a canned herring snack
  • A good bread is the start of a great crostini.
  • Slice the bread thinly, so as to not overwhelm your toppings.
  • Toast the bread lightly.
  • Smear with cream cheese.
  • Spread on a drop of mustard, too, this is optional, but quite nice with herring.
  • Add a bit on thinly sliced red onion.
  • Add capers and fresh dill.
  • Top with smoked herring …either canned in oil or water, whatever you prefer.

Shop for tins at your local grocer, or check current Canned Herring Prices on Amazon.

Enjoy!

canned herring recipe
…nothing to be afraid of in here.

Make a Healthy Salad with Kippers …aka smoked herring

Place an assortment of mixed greens in a salad bowl. No need to dress the salad greens; the salad toppings will be enough.
Add sliced carrot, bell pepper, or celery for a nice crunch, and added nutrition.
Top the greens with a kippered herring filet.
Spread whipped or softened cream cheese over the kipper, add a dash of Dijon or stone ground mustard, if desired.
Top with chopped red onion, capers, and fresh dill…and serve.

canned herring recipe
Kipper salad?…why not?

Canned herring is such a quick, easy, and healthy snack or dinner option.
Try these canned herring recipe ideas and let me know what you think…and bon appétit!

And for more Omega-3 Fatty Acid Fish options,
Take a look at this Canned Salmon Recipe for a healthier burger.

salmon burger recipe
Canned Pink Salmon …traditional style means skin and bones are still intact

Thanks for checking out these canned herring recipe dishes, and all of our recipes. Be sure and sign up for our mailing list and never miss a new Chef Buck cooking video, and also click a button below and share the dishes with your friends. We appreciate the kind comments and support, and we’ll see you next time in the kitchen!
–Chef Buck

Thanks for watching our recipe videos!

We include affiliate links for products on our website, so if you make a purchase after clicking on our links, we may earn a commission which helps us produce more videos and drink more coffee :^) We participate in the Amazon Services LLC Associates Program, which is an affiliate advertising program providing a means for us to earn fees by linking to Amazon.com and affiliated sites, so we can make more videos.

Share and Enjoy !

Easy Kale Recipe Idea — Mexican Kale

easy kale recipe

Here’s an easy kale recipe with a South of the border flair. We make a lot of dishes with fresh kale. Kale is a versatile, nutrient packed leafy green that we alternate often with spinach. Spinach and kale are interchangeable in most recipes. We call this recipe Mexican Kale since it has corn, beans, and cilantro, with spices that lend it a flavor you might find in a healthy restaurant featuring a Southwestern style menu.

Ingredients for Easy Kale Recipe

8-10 KALE leaves and stems
1 bunch CILANTRO chop and roughly divide leaves and stems
1 large ONION chopped
1 RED BELL PEPPER chopped
5 cloves GARLIC finely chopped
14oz can CORN rinsed and drained
15oz can BLACK BEANS rinsed and drained
1 tsp CHILI POWDER
2 tsp CUMIN POWDER
SALT and PEPPER to taste
OIL for sauteing

easy kale recipe
Steaming the kale at the end of the recipe preserves the nutrition

How to Make Mexican Kale

  • Wash kale thoroughly; kale leaves can hold a lot of dirt and grit in the leaves!
  • Separate the kale leaves from the stem.
  • Tear or chop the leaves into rough salad sizes, and chop the stems into ¼ inch pieces, or smaller.
  • Set stem pieces aside, and in a bowl, massage the kale leaves with about about a ¼ tsp of salt, or less.
  • Set kale aside.
  • Heat a skillet with oil on medium high heat.
  • When hot, add the onion, bell pepper, and kale stems and saute for 4-5 minutes.
  • Add in the corn, beans, cilantro stems, and garlic.
  • Add in the seasonings, but go lightly on the salt, since salt has already been added to the kale leaves.
  • Mix ingredients well, cover and continue cooking 3-4 minutes.
  • Remove the skillet lid and top the skillet mixture with the cilantro and kale leaves. Spread leaves evenly.
    Replace the lid, turn off the heat, and let the leaves steam for 3-5 minutes.
  • Uncover, mix well, and serve hot as a healthy side dish or entree.

easy kale recipe
Turn a simple kale side dish into a kale entree for a healthier dinner

That’s it, hope you like it.

Give this Mexican kale recipe a try and let me know what you think. For more easy kale recipe ideas, check out KALE RECIPE PLAYLIST.

easy kale recipe
click pic for more kale recipe ideas

Thanks for watching. If this easy kale recipe was helpful, please click a button or two below and share it with your friends, I appreciate it!
— Chef Buck

Share and Enjoy !


Pour Over Coffee is not complicated

pour over coffee

Pour over coffee is easy; not as easy as French Press coffee, or a Mr. Coffee type coffee maker, but it requires minimal equipment to get the job done. All you need to make pour over coffee is coffee, hot water, a filter, a funnel, and a coffee carafe or thermos. You don’t need a fancy pants pour over funnel, or spout, or a lab coat and a degree from Coffee College. The key to great coffee, no matter how you make it, is freshly ground coffee beans that you love.

What You Need To Make Pour Over Coffee

COFFEE buy whole beans and grind them at home, freshly ground coffee makes all the difference.
CARAFE or THERMOS or just a CUP, if you’re only making a cup…although you’ll probably need something deeper to accommodate the funnel when you pour the water over the grounds.
FUNNEL you can buy an overpriced hipster fancy pour over coffee thingy designed specifically for coffee…or you can just buy a funnel like mine
FILTER a coffee filter, duh
WATER …DON’T pour boiling water over your ground coffee! Heat cold water to a boil, then set aside for 1 minute, then return to the burner on low heat to maintain the temperature while you
pour.

When making pour over coffee, 2 Tbsp whole coffee beans to 6oz of water is a good ratio to start with…but coffee is subjective, so experiment and adjust to taste.

pour over coffee
grind beans, heat water, pour…ta-da!

How to Make Pour Over Coffee

Use your favorite coffee beans. Shop around. Experiment. The beans make all the difference.
Buy whole beans and grind them fresh at home.
Grind the beans coarsely.
Don’t over grind.
Finely ground coffee will thicken in the filter and the water will pass too slooooowly through the filter, ain’t nobody got time for that. If there a few chunks of larger bean in your grind, it’s not the end of the world…less is more…that’s coffee philosophy 101.
Place the funnel in a carafe or thermos. A carafe or thermos is handy whenever you brew extra coffee, even if you have an electric coffee maker; leaving it on a burner is a recipe for bitter, burnt coffee. It’s easy to find a carafe at the thrift store–I’ve never bought a new one!–but if you’re a buy-new kinda person, here are some current online prices at amazon for coffee carafes.
Line the funnel with a coffee filter and fill with freshly ground coffee.
Heat water to a boil, remove from burner and allow to cool 1 minute, then return to the burner and keep on low heat; this is just to maintain the heat between the pouring.
Slowly pour water over the coffee grounds. Do this in a circular motion. Cover all grounds evenly, don’t pour in a single concentrated area.
Once all the water is poured through, remove funnel and cap carafe or thermos.
That’s it, dude.

If that sounds a little too hot for your tastes, you can always try some Homemade Cold Brew Coffee.

cold brew coffee
cold brew for the best iced coffee

Thanks for checking out the videos. If you like what you see, share it with your friends and family on social media, I appreciate it!
–Chef Buck

Share and Enjoy !


Salmon Recipe – quick and easy cooked salmon fillet

salmon recipe

My favorite salmon recipe calls for crisping the fish skin on the stove top then finishing the salmon fillet in the oven under the broiler. This is a simple salmon dish with just a bit of oil and seasoning and a maple glaze to add a hint of sweetness. Honey can be substituted for the maple syrup, or this step can be skipped entirely. I often season salmon with just salt and pepper and then cook the salmon fillet in the same manner.

Ingredients for salmon recipe

SALMON FILLET w/ skin
OLIVE OIL
PAPRIKA
GARLIC POWDER
SALT and PEPPER
MAPLE SYRUP (optional, or substitute honey)
OIL for frying

salmon recipe
Crisp salmon skin on the stove top for added flavor and texture

How To Cook Salmon Recipe

  • Wash the salmon filet and pat dry with a paper towel.
  • Coat the salmon with olive oil, skin side as well.
  • Generously season fish.
  • Using an oven safe skillet, on med. high heat, heat a little oil on the stove top. Check current prices for a stove top and oven safe cast iron skillet on Amazon.
  • When oil is hot, add salmon fillet skin side down and cook about 3 minutes.
  • Transfer the skillet to the oven and continue cooking the salmon under the broiler for 2-3 minutes –adjust time depending on the size of the fillet.
  • When the salmon is almost finished cooking, apply a glaze of maple syrup, and continue broiling for final minute. If you don’t have a nice syrup
    on hand, substitute honey.
  • Remove skillet from the stove and transfer fish to a plate.
salmon recipe
Add a glaze of maple syrup or honey for a touch of sweetness

Hope you like the salmon dish. Ever try baked catfish? This recipe tastes like fried catfish, but better.

fried catfish recipe
Not Fried Catfish …tastes great, easy, and less mess.

Thanks for Watching our Salmon Recipe Video!

Click a button below and share the dishes with your friends. You can also follow Chef Buck on Youtube. We appreciate all the kind comments and support, and we’ll see you next time in the kitchen!

If you like what CG and I do, support us on Patreon, or throw us a tip in our Paypal Tip Jar. We’ll happily enjoy a coffee on the road – Thanks! We appreciate all the support, and we’ll see you next time in the kitchen!

We include affiliate links for products on our website. Making a purchase after clicking on our links and we may earn a commission which helps us produce more videos and drink more coffee :^) We participate in the Amazon Services LLC Associates Program, which is an affiliate advertising program. It provides a means for us to earn fees by linking to Amazon.com and affiliated sites, so we can make more videos.

Share and Enjoy !

Scrambled Eggs with Curry and Spinach

scrambled eggs

A little curry is a simple way to add a nice twist to scrambled eggs, and adding a bit of fresh greens into the mix will elevate the eggs to a slightly healthier plane. Scrambled eggs are always a good idea for a quick, hot breakfast, and this curry egg scramble cooks up quick. We often add spinach to egg dishes; it doesn’t effect the cooking time at all. I’m more of a runny yolk guy myself, and plain-jane scrambled eggs are never a good idea, but curry makes all things wonderful…and if the idea of mayonnaise on eggs sounds awful…well…just give this curry mayo a try.

What You Need for a Quick Scrambled Egg Curry

2-4 EGGS
2 cups fresh SPINACH
2 GREEN ONIONS
1 clove GARLIC
1 tsp DRIED ONION FLAKES
¼ tsp GARLIC POWDER
½ tsp CURRY POWDER
1 tsp BUTTER
SALT and PEPPER to taste
splash of OIL for cooking

2 Tbsp MAYONNAISE
½ tsp CURRY POWDER
(add additional CUMIN or TURMERIC if desired)

scrambled eggs
adding spinach to scrambled egg dishes is a quick way to add color and nutrition

How To Make a Scrambled Eggs Curry

In a bowl, whisk eggs with salt, pepper, onion flakes, garlic powder, and ½ the curry.
In a smaller dish, mix the rest of the curry with the mayonnaise (add additional seasonings as desired).
On a medium burner, heat oil in a skillet. Check here for current prices for a non-stick skillet on Amazon.
When oil is hot, add garlic and chopped green onion bottoms and saute for 1 minute.
Add butter and spread garlic and onion on the pan bottom.
Top with the spinach, spreading the leaves evenly across the pan.
Add in the egg mixture and let cook for about 2 minutes keeping the burner on medium heat.
Turn the eggs (or flip them…it’s more fun to flip) and turn off the heat.
The pan will be hot enough to finish the eggs.
Plate the eggs and top with a dollop of the Curry Mayonnaise.
And that’s it!

scrambled eggs
scrambled egg curry with curry mayo

Give this scrambled egg recipe a try and let me know what you think, and bon appétit!

For another quick breakfast recipe idea, try this easy Fancy Herb Omelet Recipe.

How to make an omelette
omelet recipe

Thanks for checking out the recipes. Be sure and sign up for our mailing list so you’ll never miss a Chef Buck cooking video, and click a button below and share the dishes with your friends. We appreciate all the kind comments and support, and we’ll see you next time in the kitchen!
–Chef Buck

Share and Enjoy !


Yuca Recipe – How to Cook Cassava Root

yuca recipe

Check out this easy yuca recipe. Yuca is a starchy root that makes a terrific change up from a potato dish. We have been cooking up yuca roots with garlic and onion for years, inspired by our favorite Cuban restaurants in Florida. The combo of yuca, with plenty of garlic, onion, and cumin will knock your socks off. So, check out the video and give this delicious yuca recipe a try.

Ingredients for this Cuban-Inspired Yuca Recipe

YUCA (about 1 lb.)   In the video we use fresh yuca, but you can use frozen in the same way.
1-2 large ONION (diced)
5-10 cloves GARLIC (finely chopped)
OIL for sauteing the onion and garlic
RED PEPPER FLAKES to taste
2-3 Tbsp CUMIN
½ cup OLIVE OIL total (1/4-1/2 to saute onion & garlic, rest to drizzle on top)
zest and juice of 1 LEMON
SALT to taste
CUMIN SEEDS (1 tsp, optional) I like using Badia seeds ’cause they’re a great buy, and you can check current prices for Cumin Seeds on Amazon.

I’ve got lots of yuca in the video, so I’m doubling this recipe.

yuca recipe
Yuca is a popular root that can be used much like a potato


How To Cook Yuca Recipe

  • Using a sharp knife, cut the yuca into manageable sizes to carefully cut away the outer skin of the yuca root. The skin is inedible and should be discarded. [One advantage of using frozen yuca is that the outer skin is already removed.]
  • Place yuca pieces into a pot of water and bring to a boil. Yuca should NEVER be eaten uncooked.
  • Reduce heat and simmer 15-20 minutes or until yuca root can be pierced easily with a fork. 
  • Do NOT overcook! Yuca pieces should not be mushy.
  • Zest lemon; squeeze lemon juice.
  • Drain yuca and cool with water.
  • Remove fibrous stem from center of root and cut into 1 inch chunks (or smaller, if you want to taste more of your seasonings).
  • Heat oil in a skilleton medium high heat.
  • Add cumin seeds for just a few moments, then add garlic and onion and let simmer for a several minutes. 
  • Turn down to medium heat. Add red pepper flakes, cumin powder, and salt to taste.
  • Next, add yuca.
  • Mix and allow all to simmer for 5 minutes. Give the yuca an occasional stir. Add a bit of water if needed, but not too much.
  • Remove from heat.
  • Finally, add lemon juice and zest. Drizzle a bit of oil on top (extra virgin olive oil is a great topping).

Have Fun with Yuca!

yuca recipe
Cook yuca by removing the skin and boiling the root in water

And that’s it!

Yuca is an excellent substitute for potato. It goes great with any meat entree and makes a great vegetarian meal when paired with stuffed peppers and a crisp green salad.
Give this yuca recipe a try and let me know what you think, and bon appetit!

And, if you wanna try out the stuffed peppers with yuca, check out this recipe as well.
Jalapeno Peppers Recipe
kick ass jalapeno poppers

Thanks for checking the yuca recipe and video out. If you liked it, click a few buttons below and share it with your friends and family. I appreciate it!
–Chef Buck

And here’s a LO-FI video version of this yuca recipe I made back before I knew what a haircut was.

We appreciate you watching our videos…Thanks!


We include affiliate links for products on our website, so if you make a purchase after clicking on our links, we may earn a commission which helps us produce more videos and drink more coffee :^)                                    Also, we are participants in the Amazon Services LLC Associates Program, which is an affiliate advertising program that provides a means for us to earn fees by linking to Amazon.com and affiliated sites, so we can make more videos.

Share and Enjoy !

Zucchini Noodles with Marinara Sauce Recipe

zucchini noodles

This zucchini noodles and marinara sauce recipe is super simple to cook. The marinara sauce will pair great with any pasta, even a gluten free faux zucchini pasta, which is really just raw zucchini cut into noodles, but your taste buds will trick your brain into believing otherwise. Thin sliced ribbons of zucchini will act just like egg noodles, except when it comes to racking up the calories.

What You Need To Make Zucchini Noodles with Marinara Sauce

2-3 ZUCCHINI
1 lb ground SAUSAGE
1 ONION
crazy amount of GARLIC
½ GREEN BELL PEPPER
1 15 oz can DICED TOMATO
1 15 oz can TOMATO SAUCE
2-3 tsp ITALIAN SEASONING
RED PEPPER FLAKES (to taste)
½ up PARSLEY (chopped, optional)
SALT and PEPPER (to taste)
OIL for sauteing

zucchini noodles
Add thin sliced raw zucchini to hot marinara for a great gluten free faux pasta

How To Make Marinara Sauce with Zucchini Noodles

  • In a large skillet, heat oil on medium heat.
  • When pan is hot, add sausage. Sometimes I’ll shape sausage into meatballs before adding to the skillet and other times I’ll just divide the sausage once it’s in the pan; whatever works for you is the right way.
  • Brown the sausage for a few minutes and then add the onion, garlic, and peppers.
  • Continue sauteing for 3-4 minutes.
  • Add herbs and salt and pepper to taste.
  • Add canned tomato and about ½ can of water.
  • Mix well and bring the skillet up to a bubble.
  • Reduce to a low simmer and cook 20-30 minutes. Add water as desired.
  • While sauce simmers, wash and peel 2-3 zucchini into thin noodles. I find a simple vegetable peeler to be the easiest method for slicing zucchini into thin, egg noodle like strips.
  • After sauce simmers, adjust seasoning as desired and stir in the chopped parsley. The parsley is optional, but adds a great color to the sauce, especially if you’re serving the marinara sauce over traditional noodles.
  • Remove the skillet from the heat and stir sliced zucchini noodles into the marinara sauce.
  • The thin zucchini will readily heat through in the hot marinara sauce and no more cooking is required.
  • Serve immediately (and top with Parmesan cheese if you like!)

zucchini noodles
raw ribbons of zucchini make a perfect pasta substutute

Give this very tasty marinara sauce with zucchini noodles recipe a try and let me know what you think, and bon appétit!

For another great noodle dish, check out this Gluten Free Tofu Lasagna
gluten free tofu lasagna

Thanks for checking out the recipes. If you like what you see, share it with your friends and family on social media, I appreciate it!
–Chef Buck

Share and Enjoy !


Roast Chicken Recipe – a complete meal

roast chicken

A roast chicken recipe is easy to prepare and makes a tasty one-pot meal when cooked up with your favorite root vegetables. I like to butter up a whole chicken and roast it at a higher heat for a tender chicken with a golden skin.

What You Need for this Roast Chicken Recipe

WHOLE CHICKEN (about 5 lb)
2-3 Tbsp BUTTER (melted)
OLIVE OIL
2-3 bulbs GARLIC
2 PARSNIPS
3 CARROTS
1-2 ONIONS
1 lb POTATOES
some HOT PEPPERS (optional)
1 big LEMON
Fresh HERBS like ROSEMARY, SAGE, and THYME, or use a dried Italian herb mix
1-2 Tbsp PAPRIKA
1-2 Tbsp GARLIC POWDER
SALT and PEPPER (to taste)
…but really, use whatever seasonings you like
(just make sure you use lots of them)

roast chicken
Coat the chicken in butter for a golden roast chicken

How To Make Roast Chicken Dinner

  • Buy a 5 pound chicken, or larger…might as well make it worth your while!
  • Remember to wash your hands frequently and clean your kitchen prep areas thoroughly before and after handling raw chicken.
  • Before cooking the chicken, remove it from the fridge for about an hour, this will help the chicken cook more evenly.
  • Wash the bird and then pat dry with paper towels.
  • Place the bird in a cooking pan and coat it with butter. I like to use melted butter, cause it’s easier, the butter will add great flavor and color; also, be sure to use a pan that’s large enough to accommodate the chicken and all the root veggies.
  • Season the bird well, inside and out, with salt and pepper; be generous with the seasonings!
  • For this recipe, I also coat the chicken with garlic powder and paprika, but use whatever seasonings you desire. If you’re just getting into home cooking and don’t have a lot of seasoning choices, you can check out current pricing for a Complete Starter Spice Set on Amazon.
  • Placing fresh produce in the chicken cavity will add flavor and moisture as the bird roasts.
  • I’m using onion, garlic cloves, and lemon to stuff the chicken, but add fresh herbs as well if you have them on hand; rosemary, thyme, and sage are flavorful choices.
  • Using cooking twine, tie the legs together to close up the cavity; this will keep the stuffing inside and also prevent the legs from sticking out and becoming overcooked during the roast.
  • Remove the chicken from the pan and set it aside.
roast chicken
Roasting a whole chicken with potatoes and root vegetables makes a perfect one-pot meal.
  • Chop up your root vegetables and potatoes and place in the pan. Chop the veggies into larger sizes since they will be roasting for a long time.
  • Season the veggies as desired and then coat the veggies generously with olive oil. Using your hands, mix the seasonings, olive oil, and veggies together until they are well coated.
  • Spread the vegetables evenly along the bottom of the pan and then place the chicken on top in the center, with the breasts and legs up. Bring the wings against the chicken and tuck them under the body, this will keep them close and ensure even cooking.
  • Bake in an oven pre-heated to 425 degrees Fahrenheit for about 90 minutes, a bit more of less depending on the size of the chicken and the amount of veggies.
  • If desired, roast with a thermometer inserted to check for doneness. Insert a thermometer into the meat between the leg and thigh (avoiding the bone) and cook until a temperature of 165-170
    degrees F. If not using a thermometer, you can check for doneness by cutting between the thigh and leg; the juices should run clear of blood and the chicken should not be pink. Check current roasting thermometer prices on Amazon.
  • After 90 minutes at 425 F, remove the chicken from the oven.
  • Move the chicken off of the veggies and onto a separate plate; do not cut the chicken except to check for doneness.
  • Allowing the chicken to rest 10-15 minutes before carving will ensure that the juices inside the chicken are not lost.
  • Carefully remove the twine from the chicken legs and remove the stuffing from the cavity. Mix the stuffing into the pan of roasted veggies.

And that’s it.
This roast chicken recipe makes a great dish for a holiday or family meal. I always make roasted chicken with root vegetables and potato; it’s the perfect pairing with the juicy deliciousness of a whole chicken roasted in the oven.

Give this roast chicken recipe a try and let me know what you think, and bon appétit!

And for another family meal, try my mama’s fantastic Stove Top Pot Roast Recipe.

pot roast recipe
Throw your chuck roast in a pot on the stove and it practically cooks itself.

Thanks for watching our recipe videos!

I hope you enjoy this roast chicken dish! Sign up for our mailing list so you’ll never miss a new recipe. Also click a button below and share the dishes with your friends. You can also follow Chef Buck on Youtube. We appreciate all the kind comments and support, and we’ll see you next time in the kitchen!

If you like what CG and I do, support us on Patreon, or throw us a tip in our Paypal Tip Jar. We’ll happily enjoy a coffee on the road – Thanks! We appreciate all the support, and we’ll see you next time in the kitchen!

We include affiliate links for products on our website. Making a purchase after clicking on our links and we may earn a commission which helps us produce more videos and drink more coffee :^) We participate in the Amazon Services LLC Associates Program, which is an affiliate advertising program. It provides a means for us to earn fees by linking to Amazon.com and affiliated sites, so we can make more videos.

Share and Enjoy !

Ginger Chicken Recipe Chinese Restaurant Style

Ginger Chicken

This Ginger Chicken Recipe will remind you of a delicious dish from your favorite Chinese restaurant. The key to a tasty ginger chicken dish is fresh ginger, and lots of it. You won’t need hard to find ingredients, just a little soy sauce, sesame oil, and some fresh produce will make all of the difference.

What You Need To Make This Ginger Chicken Recipe

1 lbs. CHICKEN
1 Tbsp CORN STARCH
1 Tbsp SESAME OIL
1 Tbsp SOY SAUCE
SALT and PEPPER (to taste)
4-6 cloves GARLIC
½ cup GINGER
½ cup ONION
½ to 1 cup CARROTS
½ to 1 cup CASHEWS
1 cup chopped Zucchini or other veggies (optional)
some OIL for sauteing
HOT PEPPER (optional)

Sauce Ingredients:
1 Tbsp SESAME OIL
2 Tbsp SOY SAUCE
2 Tbsp RICE VINEGAR
2-3 Tbsp JAM (or substitute sugar)
1 Tbsp CORN STARCH
½ to 1 cup WATER

Ginger Chicken
Best Ginger Chicken Recipe

How To Make Ginger Chicken

  • Use skinless and boneless white or dark meat chicken, whichever you prefer.
  • Chop chicken into bite-sized pieces and place into a bowl.
  • Add 1 Tbsp sesame oil, 1 Tbsp soy sauce, 1 Tbsp corn starch, and salt and pepper to taste.
    Mix well with the chicken and then set the bowl aside.
  • In another bowl, combine sauce ingredients and set aside.
  • Prepare the veggies; this dish will cook fast, so have all the veggies chopped before beginning to cook the chicken.
  • Chop fresh ginger into matchstick sizes; fresh ginger and lots of it make this recipe delicious,so don’t be shy with the ginger.
  • Cut carrots into matchstick sizes.
  • Finely chop the garlic.
  • Chop onions (I prefer green onions if I have them on hand, but any onion will work.
  • Chop hot pepper if desired; the fresh ginger will add a bit of bite to the dish,
    so skip the pepper if you prefer a milder recipe.
  • Heat a skillet and oil on medium high heat. Add chicken and cook, stirring occasionally for 5 minutes, and adjust heat as needed. If you need a nice skillet, you can check here for current pricing for a non-stick skillet on Amazon.
  • After 5 minutes, add onion, garlic, ginger, and hot peppers.
  • Cook another 5 minutes, then add carrots and any other veggies; add sauce and mix well and continue to cook for 5 more minutes.
  • Add more water if desired. The sauce will be thicker or thinner depending on the amount of water added.
  • To finish the dish, stir in cashew nuts and remove from the heat.
  • And that’s it! Serve over rice.

    Give this this super simple and flavorful ginger chicken recipe a try and let me know what you think, and bon appétit!

    And for another Chinese favorite, check out this General Tso’s Chicken Recipe.

    general tso chicken

    Thanks for checking out the recipes and videos. If you like what you see, share it with your friends and family on social media, I appreciate it!
    –Chef Buck

    Share and Enjoy !


    Chicken Tenders – Oven Baked Chicken Strips

    chicken tenders

    Try this very tasty baked chicken tenders recipe. You can easily bake chicken tenders in the oven that you’ll enjoy just as much as deep fried tenders, the trick is to add butter to the breadcrumbs.

    Ingredients For Baked Chicken Tenders Recipe

    1½ lbs. CHICKEN
    2 EGGS
    3 cups PANKO BREADCRUMBS
    1 cup FLOUR
    1/3 cup BUTTER (I say 3/4 cup in the video, but I misspoke)
    1-2 tsp TURMERIC POWDER
    1-2 tsp TURMERIC POWDER
    1 tsp CHILI POWDER
    1 tsp GARLIC POWDER
    1 tsp ONION POWDER
    1 tsp PAPRIKA
    HOT SAUCE (to taste)
    SALT and PEPPER (to taste)
    …but really, use whatever seasonings you like
    (just make sure you use lots of them)

    chicken tenders
    Oven-baked Chicken Tender Recipe …or do you call them chicken fingers?

    How To Make This Chicken Tenders Recipe

    Buy white chicken breasts already cut into strips, or buy breasts and cut them yourself, just make
    sure to cut them into reasonably uniform sizes so that they will cook evenly.

    • In a bowl, season the chicken strips generously, and set aside. If you’re just getting into home cooking and don’t have a lot of seasoning choices, you can check out current pricing for a
      Complete Starter Spice Set on Amazon.
    • In a skillet, melt butter and then turn the stove burner off.
    • Add panko breadcrumbs to the butter and mix well. The breadcrumbs will quickly soak up the butter like it was never there.
    • Break eggs into a bowl and whisk.
    • In another bowl, add flour. Season the flour. Seasoning the flour and the chicken and adding the butter to the breadcrumbs all combine to make these oven baked tenders so awesome.
    • Line a large baking sheet with aluminium foil and lightly coat with oil.
    • Take a chicken strip and dredge it in the flour, then coat it in the egg, and then roll it in the breadcrumbs until the chicken strip is well breaded.
    • Place the chicken strip onto the lightly oiled pan and repeat until all of the chicken strips have been prepared.
    • The strips should be arranged on the pan with a slight space between each one.
    • Bake in an oven at 425 degrees F for 20-25 minutes, turning once about halfway through the cooking time.
    • Serve chicken tenders while hot, right out of the oven.

    Chicken tenders go great with a dipping sauce. Ranch dressing is a favorite, along with blue cheese dressing, BBQ sauce, and honey mustard.

    Chicken fingers make a great salad topping, too –it’s a decadent way to incorporate a nice salad into your day.

    Give this oven-bake chicken tender recipe a try and let me know what you think, and bon appétit!

    And for another faux fried oven-baked dish, check out this Onion Ring Recipe.

    onion rings recipe
    How to make an Onion Rings recipe in the Oven.

    Thanks for checking out the recipes and videos If you like what you see, share it with your friends and family on social media, I appreciate it!
    –Chef Buck

    Share and Enjoy !


    Cocktail Recipes for Breakfast or Anytime

    cocktail recipes

    Here are a few easy cocktail recipes for breakfast or anytime you feel like a nice libation. Coldbrew coffee can make a great mixer for a morning pick-me-up, but if you’re not a coffee person, then root beer will do in a pinch. Check out the video for quick and easy cocktail ideas, and look a bit farther below for tips on making coldbrew coffee at home.

    Easy Cocktail Recipes

    COLDBREW COFFEE COCKTAIL
    6oz Coldbrew Coffee
    1oz Vodka
    1oz Irish Cream
    …also add a splash of half ‘n half if you like

    ROOTBEER FLOAT COCKTAIL
    4-5oz Rootbeer
    1oz Vodka
    1oz Irish Cream
    …also add a splash of half ‘n half if you like

    cocktail recipes
    Coffee ice cubes are ideal for cold coffee cocktail recipes.

    MIMOSA:
    equal parts chilled
    Champagne and orange juice

    SCREWDRIVER:
    1-2oz Vodka to
    5oz Orange Juice

    GREYHOUND:
    1-2oz Vodka to
    5oz Grapefruit Juice

    BLOODY MARY:
    2oz Vodka
    4oz Tomato Juice
    Lemon Juice
    …and then just a little bit of everything else in your refrigerator

    SHOT OF JAMESON:
    shot of Jameson

    Want to Know How to Make Coldbrew Coffee?

    What You Need To Make Cold Brew Coffee

    COFFEE …Buy whole beans and grind them at home, fresh-ground coffee makes all the difference.
    WATER …We use cold tap water, ’cause we’re savages (I mean eco-friendly / cheap)
    TIME …This is the hardest part, allow at least 12-24 hours. My wife prefers 36 hours…it’s pretty subjective.

    cold brew coffee
    cold brew for the best iced coffee

    How to Make Cold Brew Coffee for the Best Iced Coffee

    Use your favorite coffee beans. Shop around. Experiment. The beans make all the difference.
    Buy whole beans and grind them fresh at home.
    Grind the beans coarsley.
    Place the ground beans in a sealable pitcher or jar and add water.
    We like a ratio of 1½ cups whole beans to 4 cups water, but experiment and adjust to your taste…nothing is more subjective than a cup of coffee.
    Stir.
    Seal the container and place in the refrigerator for 12 to 24 hours (or more, if you like).
    When the time is up, simply strain the mixture through a coffee filter and it’s ready to drink.
    Make multiple batches of cold brew coffee at one time, then you won’t have to wait.
    Make extra batches of cold brew for coffee ice cubes: just pour coffee into an ice tray and freeze it…coffee ice cubes are fantastic for iced-coffee …it’ll keep the coffee chill without diluting the flavor.

    Why Cold Brew?

    • Cold brew coffee is super smooth, and can be less acidic than coffee brewed hot, so it might be a better choice for sensitive tummies.
    • Cold brew stays fresher longer than hot brewed coffee, so you can make bigger batches at a time without
      the coffee growing old and stale to taste.
    • It’ll put pep in your step.

    Give cold brew coffee a try and let me know what you think, and bon appétit!

    Feel like a Redneck Martini Recipe

    Thanks for checking out the videos and recipes. If you like what you see, click some of the buttons below and share it with your friends and family on social media, I appreciate it!
    –Chef Buck

    Share and Enjoy !


    Salmon Cakes Benedict w/ Hollandaise Sauce

    salmon cakes

    Canned salmon is perfect for making delicious salmon cakes. You can use salmon cakes for a variety of dishes, including salmon burgers. I generally make extra patties when I cook up salmon cakes, and one of my favorite uses for these leftover salmon cakes is in a variation of Eggs Benedict. Check out the recipe video below to see how to make this super tasty breakfast recipe.

    Ingredients for Salmon Cakes Eggs Benedict

    leftover SALMON CAKES
    fresh SPINACH
    thick sliced TOMATO
    EGGS
    HOLLANDAISE SAUCE

    How to Make Salmon Cakes Eggs Benedict

    This is a terrific way to use leftover salmon cakes (detailed salmon cake recipe below), in fact, it’s best to use leftover salmon cakes for this recipe; no sane person wants to open a can of salmon first thing in the morning.
    On a plate, arrange a bed of spinach and top with a thick slice of tomato.
    In a skillet, re-heat a leftover salmon cake.
    While the salmon cake heats through, whip together a quick blender Hollandaise sauce (recipe below).
    In another skillet, fry an over easy egg (or poach an egg, if you prefer).
    Top the sliced tomato with the heated salmon cake, and then top the salmon with the fried egg.
    Cover the egg with Hollandaise sauce and serve immediately.

    salmon cakes
    use leftover salmon cakes to make a terrific variation of Eggs Benedict!

    How to Make a Quick Hollandaise Sauce

    ¼ cup melted BUTTER
    2 EGG YOLKS
    1 Tbsp LEMON JUICE (or substitute vinegar)
    ½ tsp DIJON MUSTARD (or substitute creamy wasabi or a little hot sauce)

    In a bowl, combine two egg yolks, lemon juice, and mustard…also add a sprinkling of black pepper if you like. Melt the butter until it is bubbling, then slowly add the butter into the egg mixture while blending the eggs with a hand blender. Be sure to add the hot butter slowly, so the eggs don’t harden.
    Blend for about 5-10 seconds. Use the sauce immediately, or hold in a bath of hot water until ready to use. This recipe makes just enough for two servings; when I want lots of Hollandaise sauce, I’ll double this recipe, with the exception of the egg yolks…instead of 4 yolks, I’ll just use 3 yolks.

    Salmon Cakes Ingredients:

    14oz canned SALMON (red or pink)
    ¼ – ½ cup ONION (finely chopped)
    HOT PEPPER (finely chopped, to taste)
    1 to 2 EGGS (beaten) …I generally use 1 egg for a fancy salmon cake entree and 2 eggs when
    making salmon cakes for sandwiches.
    SALT and PEPPER to taste
    OIL for sauteing (3-4 Tbsp…salmon will soak up the oil)
    1 Tbsp CURRY POWDER (optional)

    salmon cakes
    I make 4 salmon cakes from one can of salmon, and often prepare 8 cakes at a time so that I’ll have leftover salmon cakes for sandwiches and salmon Benedicts.

    How to Make Salmon Cakes:

    Traditional canned salmon will come with skin and bones still intact . The skin and bones are soft and edible. You can remove the skin and bones if you like; I used to remove them, but now I’m too cheap, and I don’t want to miss out on the extra nutrition, either.

    • Place drained salmon in a bowl.
    • Add ¼ – ½ cup onion depending on how much you like onion. Make sure the onion is finely chopped; smaller pieces will help keep the patties from falling apart. If desired, add some finely chopped hot pepper. If you don’t have fresh pepper, add a little chili powder or hot sauce.
    • Add salt and pepper to taste.
    • Add one or two beaten eggs. I like to use two beaten eggs because it helps to keep the patties together better; I don’t like my burgers to fall apart while I’m eating them.
    • Mix all the ingredients together well.
    • Shape into patties. I usually get 4 patties out of a 14oz can, but make as many as you like–bigger or smaller–depending on how big you want your burger to be. Here’s some current prices for canned salmon if you like to do your fishing on the internet.
    • Heat oil in a skillet. I like medium heat. You want the oil to be hot enough to sizzle when you add the patties, but not so hot that the patties will cook too quickly; you want the patties to get a nice cooked side before turning them, this will keep then from breaking apart.
    • Cook 5-7 minutes and then turn gently when the patties are golden brown.
    • Cook another 3-4 minutes and then remove from skillet and drain salmon patties on a paper towel.

    I like to serve salmon patties on a toasted bun with sliced tomato, onion, lettuce and mayo.
    It’s a nice break from hamburgers, and just as tasty.
    Sometimes I’ll add a Tbsp of curry powder into the mix to make Curried Salmon Burgers, which you should definitely try sometime.

    Give this canned salmon recipe a try and let me know what you think, and bon appétit!

    And for another canned salmon recipe, check out this Salmon Meatballs Recipe.

    canned salmon
    Salmon meatballs in a rich curry sauce.

    Thanks for checking out our salmon cakes recipe, and all of our recipes. Be sure and sign up for our mailing list to never miss a new cooking video, and also click a button below and share the dishes with your friends, and follow Chef Buck on Youtube. We appreciate all the kind comments and support, and we’ll see you next time in the kitchen!

    If you like what CG and I do, support us on Patreon, or throw a tip in our Paypal Tip Jar We’ll happily enjoy a coffee on the road, or maybe even pay a bill or two!–Thanks! We appreciate all the support, and we’ll see you next time in the kitchen!

    Thanks for watching our recipe videos!

    We include affiliate links for products on our website, so if you make a purchase after clicking on our links, we may earn a commission which helps us produce more videos and drink more coffee :^) We participate in the Amazon Services LLC Associates Program, which is an affiliate advertising program providing a means for us to earn fees by linking to Amazon.com and affiliated sites, so we can make more videos.

    Share and Enjoy !

    Cold Brew Coffee for the Best Iced Coffee

    cold brew coffee

    If you want to know how to make cold brew coffee it’s easy: Coffee + Water + Time = Cold Brew
    Even if you’re bad at math, you can make a smooth batch of the best iced coffee you’ll ever drink, and you won’t have to pay $4 a cup for it like you’ll spend at Starbucks.

    What You Need To Make Cold Brew Coffee

    COFFEE Buy whole beans and grind them at home, fresh-ground coffee makes all the difference.
    WATER We use cold tap water, ’cause we’re savages …I mean eco-friendly/cheap.
    TIME This is the hardest part, allow at least 12-24 hours to brew. CG prefers 36 hours, but it’s pretty subjective.
    CARAFE You don’t need a fancy-pants carafe, but if you wanna go fancy-pants, you can check the current price for a Takeya Cold Brew Coffee Maker on amazon.

    cold brew coffee
    cold brew for the best iced coffee

    How to Make Cold Brew Coffee for the Best Iced Coffee

    Use your favorite coffee beans. Shop around. Experiment. The beans make all the difference.
    Buy whole beans and grind them fresh at home.
    Grind the beans coarsely.
    Place the ground beans in a sealable pitcher or jar and add water.
    We like a ratio of 1½ cups whole beans to 4 cups water, but experiment and adjust to your taste…nothing is more subjective than a cup of coffee.
    Stir.
    Seal the container and place in the refrigerator for 12 to 24 hours (or more, if you like).
    When the time is up, simply strain the mixture through a coffee filter and it’s ready to drink.
    Make multiple batches of cold brew coffee at one time, then you won’t have to wait.
    Make extra batches of coffee for ice cubes: just pour coffee into an ice tray and freeze it…coffee ice cubes are fantastic for iced-coffee …it’ll keep the coffee chill without diluting the flavor.

    Why Cold Brew?

    • Cold brew is super smooth, and can be less acidic than coffee brewed hot, so it might be a better choice for sensitive tummies.
    • Cold brew stays fresher longer than hot brewed coffee, so you can make bigger batches at a time without
      the coffee growing old and stale to taste.
    • It’ll put pep in your step.

    And if iced coffee is too chilly for you, see how to make Hot Coffee with a Moka Pot.

    moka pot
    Brew great coffee on the stove top with a moka pot.

    Thanks for checking out our recipes. You can check out my complete Coffee Video Playlist on Youtube. Be sure and sign up for our mailing list and never miss a new Chef Buck cooking video, and also click a button below and share the dishes with your friends. We appreciate all the kind comments and support, and we’ll see you next time in the kitchen!

    If you like what CG and I do, support us on Patreon, or throw a tip in our Paypal Tip Jar We’ll happily enjoy a coffee on the road, or maybe even pay a bill or two!–Thanks! We appreciate all the support, and we’ll see you next time in the kitchen!

    Thanks for watching our recipe videos!

    We include affiliate links for products on our website, so if you make a purchase after clicking on our links, we may earn a commission which helps us produce more videos and drink more coffee :^) We participate in the Amazon Services LLC Associates Program, which is an affiliate advertising program providing a means for us to earn fees by linking to Amazon.com and affiliated sites, so we can make more videos.

    Share and Enjoy !

    Fettuccine Alfredo Recipe …easy to make Alfredo Sauce

    fettuccine alfredo recipe

    A fettuccine alfredo recipe is an easy and delicious dish to cook at home. A thick alfredo sauce with rich cream and parmesan cheese is so satisfying and decadent. Shrimp fettuccine, chicken fettuccine, mushrooms –you can add anything you like to the noodles and alfredo sauce, but a simple and classic Fettuccine alfredo dish is one of my favorites …a classic Italian recipe so good it doesn’t need any bells and whistles.

    What You Need To Make a Fettuccine Alfredo Recipe

    10 oz FETTUCCINE NOODLES
    4 Tbsp BUTTER
    ¼ cup OLIVE OIL
    1½ cups CREAM
    10-15 cloves GARLIC (finely chopped)
    2 cups PARMESAN CHEESE (finely shredded)
    SALT and PEPPER (to taste)
    PARSLEY (if you like, chopped)

    fettuccine alfredo recipe
    Creamy fettuccine alfredo topped with fresh parsley and served with buttered bread.

    How To Make Classic Fettuccine Alfredo

    Heat a large skillet on medium heat and add the butter and oil.
    When oil is hot, add garlic and saute for 20-30 seconds.
    Add salt and pepper to taste.
    Add cream and mix well.
    Stir the parmesan cheese into the skillet.
    Adjust the stove top temperature as needed.
    Stir the sauce until it is smooth …the sauce will thicken even more after it is off of the stove.
    Add chopped parsely if you like!
    Prepare the fettuccine noodles according to package directions.
    Drain and add the noodles to the alfredo sauce.
    And that’s it …serve hot with a salad and buttered bread, and that’s about as good as life gets.

    Tips for Fettuccine Alfredo

    Use finely shredded Parmesan cheese, and if buying pre-grated cheese, buy cheese without a lot of additives listed in the ingredients. Too many additives can make the parmesan lumpy and less smooth when it is melted. Ideally, grate your own cheese.
    To make more alfredo sauce, simply add additional cheese and cream to taste. I like lots of sauce, so too much is not enough.
    Shrimp, grilled chicken, and mushrooms are great additions to this dish, even broccoli (although fettuccine alfredo is soooo good when it’s kept simple, I rarely make these additions.)
    Cook the fettuccine noodles al dente, meaning NOT OVERDONE! Chewy noodles are best for Alfredo.
    Do not rinse your noodles after cooking them, this will wash away a lot of the flavor; simply drain the noodles and then stir them slowly into the alfredo sauce.

    Give this creamy Italian fettuccine alfredo recipe a try and let me know what you think, and bon appétit!

    For another great noodle dish, check out this Spaghetti Carbonara recipe.

    spaghetti carbonara
    click pic for recipe

    Thanks for checking out the recipes. If you like what you see, share it with your friends and family on social media, I appreciate it!
    –Chef Buck

    Share and Enjoy !


    Tzatziki Sauce Recipe – Greek cucumber yogurt dressing

    Tzatziki Sauce recipe

    It’s super easy to make a healthy Greek tzatziki sauce recipe. It’s fairly quick to prepare tzatziki sauce, but it takes a little time to reach it’s full flavor potential, so make it a few hours ahead of time before serving. Tzatziki is a mild cucumber yogurt dressing that pairs very well with spicy falafel or lamb. The sauce can be used as a dressing or dip, especially for stuffed pitas, pita chips, or fresh veggies.

    Ingredients You’ll Need for Tzatziki Sauce Recipe:

    2 cups GREEK YOGURT
    2 cups fresh CUCUMBER
    3-4 cloves GARLIC (finely chopped)
    1 small LEMON zest and juice
    or substitute 1-2 Tbsp
    WHITE WINE VINEGAR
    ½ cup (or more) chopped HERBS
    …like dill, mint, or parsley
    1-2 Tbsp OLIVE OIL
    SALT and PEPPER (to taste)

    tzatziki sauce recipe
    Greek Tzatziki Sauce, a cucumber yogurt dressing

    How To Make a Greek Tzatziki Sauce Recipe:

    I prefer using English cucumbers (also called hothouse cucumbers), or using smaller, japanese cucumbers.
    These cucumber types have a lot of flavor, are less watery, and the skin is thin enough to be eaten and enjoyed (although I generally peel them when making tzatziki).
    When making a tzatziki sauce, start by preparing the cucumber; this will give the cucumber time to drain while you prepare the rest of the sauce ingredients.
    Peel your cucumber and grate with a hand grater, or use a food processor if you enjoy cleaning appliances.
    Chop the cucumber into smaller pieces, if desired, but don’t over-process, since chunks of cucumber make a tzatziki quite nice.
    Place the grated cucumber into a strainer over a bowl to allow the cucumber to drain.
    Mix a bit of salt to help draw out the water. Set bowl aside and prep the other ingredients.
    Into a mixing bowl, add Greek yogurt, minced garlic, lemon zest and juice, and fresh chopped herbs.
    If you don’t have a lemon on hand, substitute a mild rice or wine vinegar.
    Mix ingredients well.
    Return to the cucumber. Quite a bit of water will have drained into the straining bowl. Use a spatula or spoon to press out more water, and then add the strained cucumber to the yogurt mixture.
    Mix well, and add additional salt and pepper to taste.
    Cover and place in the fridge for at least 2+ hours before serving; this will give the flavors time to maximize.
    Serve as a dip or dressing/sauce.
    it’s great with pita chips or fresh sliced veggies; or serve with spicy lamb–especially as a sauce in stuffed pitas, or as a condiment on lamb burgers.
    Or as a dressing for a fresh salad.
    Greek tzatziki is healthy, versatile, and an easy recipe worth giving a go.
    Give this Greek tzatziki sauce recipe try and let me know what you think, and bon appétit!
    For another Greek inspired dish, check out this Hummus Recipe

    hummus
    click pic for video recipe

    Or this very tasty Pita Chips Recipe …that goes great with tzatiki
    spicy pita chips
    Thanks for checking out the recipes. If you like what you see, share these dishes with your friends and family on social media, I appreciate it!
    –Chef Buck

    Share and Enjoy !


    Cook Spaghetti Squash for a Healthy, Low-fat Diet

    best spaghetti squash

    Cook spaghetti squash for a healthy addition to a low-fat diet. It’s mild flavor and hardy texture makes spaghetti squash ideal for a variety of recipes.

    How to cook Spaghetti Squash

    This is a basic spaghetti squash recipe :
    Slice squash into halves.
    Place cut sides down in shallow water in a roasting pan.
    Bake for about 45 minutes at 350 degrees Fahrenheit.
    Remove squash from the oven and carefully turn halves over to check for doneness –the water will be hot and steam will be trapped under the squash, so be cautious.
    Allow squash to sit 5-10 minutes to cool slightly for easier handling.
    With a fork or spoon, remove the meat of the squash.
    The squash will pull away into strands that resemble spaghetti, although this squash will taste nothing like spaghetti.

    cook spaghetti squash
    When cooked spaghetti squash pulls apart into “noodley strings”

    Here’s one of my favorite spaghetti squash recipes —

    Mediterranean Spaghetti Squash Recipe

    This dish is super tasty, and I can eat way too much without feeling too guilty. Watch the video and learn how to easily cook this squash. It’s a terrific ingredient; delicious and healthy. This Mediterranean style recipe is just one of many ways to use this versatile vegetable. Give it a try!

    Spaghetti Squash Recipe Ingredients:

    1 medium SPAGHETTI SQUASH
    1 Tbsp OLIVE OIL
    1 large ONION (chopped)
    4-6 cloves GARLIC (finely chopped)
    ½ RED BELL PEPPER (sliced)
    1 14 oz can ARTICHOKE HEARTS in water (chopped)
    1 cup OLIVES, and olive juice to taste (chopped)
    ¾ to 1 cup PARMESAN CHEESE (shredded or grated)
    1 tsp OREGANO
    ½ tsp THYME
    1 tsp BASIL
    SALT and PEPPER to taste

    How to Make this Spaghetti Squash Recipe

    Preheat oven to 350.
    Cut spaghetti squash in half, lengthwise (a good, sharp knife will be nice).  Place each side, cut side down, in a shallow pan with about ¾ c water. Cook spaghetti squash uncovered for 45 minutes. Set aside to cool squash halves–enough to handle without causing death to the handler–but not completely cool.
    You have time to chop up all your ingredients while the squash cooks.   For the artichoke, you may want to remove some of the outer, tougher leaves.
    For each half, use a spoon to scrape out and discard the seeds and dark center strings.  Use a fork to scrape out the squash into ‘spaghetti-like’ strands.
    Heat oil over medium high heat.  Saute onion and garlic 4-6 minutes.  Add bell pepper. Turn heat to low, stir and cover for 2-4 minutes.  Uncover, stir in spaghetti squash and remaining ingredients.  Cover and cook til all ingredients are warm, about 7-10 minutes
    Add 1 Tbsp of olive juice and any other seasonings to taste. Serve warm. And a little toasted bread on the side won’t hurt.
    Give this spaghetti squash recipe a try and let me know what you think, and…
    Bon appétit!
    And for another great spaghetti squash recipe, try this Spanish-style Spaghetti Squash.

    spaghetti squash recipe
    click image to check out this recipe

    Thanks for watching, sharing, and subscribing to my videos, I appreciate it!

    Share and Enjoy !


    Crispy Salmon Recipe – How to Cook Salmon

    crispy salmon recipe

    This crispy salmon recipe is delicious. Cooking salmon with a crispy skin adds great texture and flavor. Keep it simple; all you need is a little oil, salt, and pepper to cook up this tasty fish dinner. Give this super easy crispy salmon dish a try…it’s a winner.

    How to Cook A Crispy Salmon Recipe

    SALMON FILET w/ skin on
    OLIVE OIL
    SALT and PEPPER to taste
    OIL for frying

    crispy salmon recipe
    Keep salmon skin-side up to preserve crispiness
    • Wash the salmon filet and pat dry with a paper towel.
    • If your cut of fish has pin bones, remove them.
    • Coat the salmon with olive oil, skin side as well.
    • Generously season fish with salt and pepper.
    • Using an oven safe skillet, on medium high heat, heat a little oil on the stove top. Check current prices for a stove top and oven safe cast iron skillet on Amazon.
    • When the oil is hot, add the salmon fillet skin side down and cook for 2-4 minutes –adjust time depending on the size of the fillet.
    • Transfer the skillet to the oven and continue cooking the salmon under the broiler for 1-3 minutes.
    • Remove the skillet from the stove and transfer salmon fillet to a plate, skin-side up …resting the fish skin-side down will cause the skin to lose it’s crispiness!

    Give this simple crispy salmon recipe a try and let me know what you think, and bon appétit!

    And don’t just cook salmon this way! Any tasty fillet of fish with skin on can be prepared in this manner. To appreciate fresh fish, keep it simple.

    And for another tasty fish dish, try this healthy baked cod recipe.

    baked fish recipe
    oven baked fish fillets

    Thanks for Watching our Videos!

    Thanks for checking out our crispy salmon recipe. Sign up for our mailing list so you’ll never miss a new recipe. Also click a button below and share the dishes with your friends. You can also follow Chef Buck on Youtube. We appreciate all the kind comments and support, and we’ll see you next time in the kitchen!

    If you like what CG and I do, support us on Patreon, or throw us a tip in our Paypal Tip Jar. We’ll happily enjoy a coffee on the road – Thanks! We appreciate all the support, and we’ll see you next time in the kitchen!

    We include affiliate links for products on our website. Making a purchase after clicking on our links and we may earn a commission which helps us produce more videos and drink more coffee :^) We participate in the Amazon Services LLC Associates Program, which is an affiliate advertising program. It provides a means for us to earn fees by linking to Amazon.com and affiliated sites, so we can make more videos.

    Share and Enjoy !

    Best Southwestern Quinoa Salad Recipe

    southwestern quinoa salad

    Everywhere you turn, there’s a Southwestern quinoa salad, and for good reason.  It’s delicious, easy to make, and a great choice for a healthy meal. Since quinoa is a complete protein, this Southwestern inspired salad makes an ideal vegetarian recipe, doubly so since this quinoa is paired with black beans.

    What you need to make a Southwestern Quinoa Salad

    2 cups COOKED QUINOA (check current prices for quinoa on Amazon)
    1 15 oz can BLACK BEANS
    10-15 sliced CHERRY TOMATOES
    1 AVOCADO
    ½ diced YELLOW BELL PEPPER
    3-5 chopped GREEN ONIONS
    ¼ cup chopped, pickled JALAPENO
    ½ cup chopped CILANTRO
    1 LEMON …juice and zest
    2 Tbsp OLIVE OIL
    SALT and PEPPER to taste

    southwestern quinoa salad
    southwest quinoa salad recipe

    How to make a Southwest Quinoa Salad

    Cook up the quinoa just like rice: 1 part quinoa to 2 parts water, bring to a boil, reduce heat, cover and simmer for 15 minutes or until the water is absorbed. Fluff the quinoa and then set aside uncovered to cool.

    While the quinoa cools, prepare the veggies:

    Dice ½ a yellow bell pepper, or any color pepper, but if you’re like me and you’re making a corn-free southwest quinoa salad, then using a yellow pepper will make your quinoa salad more lovely to look at. Slice some cherry tomatoes. Cherry tomatoes have a great flavor, and the hardiness of the tiny tomato makes it the perfect choice for a salad.

    Remove and mince the zest from 1 small lemon, and then slice the lemon in half. Check current prices for a lemon zester on Amazon.

    Chop up some green onions, and cilantro. If you like a little heat, chop up some pickled jalapeno, too, and reserve a Tbsp of the jalapeno pickling juice for added kick and flavor.

    When the quinoa cools:

    Add 2 cups of the cooked quinoa to a large mixing bowl.
    Rinse and drain the black beans and add them to the bowl.
    Add the yellow pepper, jalapeno pepper, onion, cilantro, lemon zest, olive oil, juice from half the lemon, and salt and pepper.
    Mix ingredients thoroughly.
    Add tomato.
    Slice avocado and add to salad.
    Take the remaining lemon half and squeeze its juice over the cut avocado, this will preserve the vibrancy of the avocado.

    Gently mix the salad and serve.

    This Southwestern quinoa tastes great on it’s own, as a healthy side dish, or served over a bed of fresh greens for a super salad topping.

    Give healthy southwest quinoa salad recipe a try and let me know what you think, and bon appétit!

    For another healthy option with a southwestern flair, check out out this meat-free Vegetarian Chili Recipe that even carnivores will love.

    vegetarian chili
    pot o’ meatless chili for good times

    Thanks for checking out our Southwestern quinoa salad recipe, and all of our recipes. Be sure and sign up for our mailing list and never miss a new Chef Buck cooking video, and also click a button below and share the dishes with your friends. We appreciate all the kind comments and support, and we’ll see you next time in the kitchen!

    Thanks for watching our cooking videos!

    We include affiliate links for products on our website, so if you make a purchase after clicking on our links, we may earn a commission which helps us produce more videos and drink more coffee :^)                                                                                                We participate in the Amazon Services LLC Associates Program, which is an affiliate advertising program providing a means for us to earn fees by linking to Amazon.com and affiliated sites, so we can make more videos.

    Share and Enjoy !

    Banana Pancakes – Flourless Gluten Free Recipe

    banana pancakes

    This Banana Pancakes recipe tastes great! These banana pancakes are flourless and gluten free and cook up fluffy and filling for a healthy, easy to make breakfast alternative to traditional pancakes. And pancakes are especially tasty when you add in some nuts, chocolate chips, or fresh berries.

    What You Need to Make Banana Pancakes

    (makes 6 good-size pancakes or 8-10 sissy cakes)

    2 BANANAS
    2 EGGS
    ½ tsp BAKING POWDER
    ½ tsp CINNAMON POWDER
    splash of VANILLA EXTRACT
    sprinkle of WALNUTS and/or FRUIT if desired
    SALT to taste (optional)

    banana pancakes
    Banana pancakes are flourless and gluten free and cook up fluffy and filling for a healthy, easy to make breakfast alternative to traditional pancakes.

    How to Make Banana Pancakes

    • In a bowl, mash up 2 bananas; the riper the bananas, the more banana-ee your pancakes will be!
    • Add eggs.
    • Add cinnamon, baking powder, salt, and vanilla extract.
    • Mix ingredients well. The batter should be the consistency of a traditional pancake batter–add more mashed banana if needed.
    • Let batter sit for a few minutes.
    • Heat a greased skillet or griddle on medium low heat. In the video I use a Lodge cast iron skillet which works great and is pretty affordable for a cast iron skillet. Check the current price for a cast iron skillet on Amazon.
    • Once skillet is heated, spoon batter to form pancakes; whatever size you like.
    • Cook undisturbed about 3-4 minutes or until the pancake begins to brown.
    • If desired, sprinkle nuts or berries or chocolate chips on the cakes.
    • Flip pancakes with a spatula and cook on the other side until brown. Unlike traditional flour pancakes, you can flip these cakes over and over until they are cooked and colored to your liking.
    • Serve hot off the grill with maple syrup.
    banana pancakes
    Banana Pancake Recipe

    Give these flourless banana pancakes a try and let me know what you think, and bon appétit!

    And for another healthy breakfast idea, try a Tofu Scramble Recipe.

    tofu recipe
    this tofu recipe makes a perfect breakfast, lunch, or dinner

    Thanks for checking out this banana pancakes recipe, and all of our recipe videos. Be sure and sign up for our mailing list and never miss a new Chef Buck cooking video, and also click a button below and share the dishes with your friends. We appreciate all the kind comments and support, and we’ll see you next time in the kitchen!

    Thanks for watching our recipe videos!

    We include affiliate links for products on our website, so if you make a purchase after clicking on our links, we may earn a commission which helps us produce more videos and drink more coffee :^) We participate in the Amazon Services LLC Associates Program, which is an affiliate advertising program providing a means for us to earn fees by linking to Amazon.com and affiliated sites, so we can make more videos.

    Share and Enjoy !

    Candied Pecans – Easy Pecan Candy Treats

    candied pecans

    You can make a super simple and tasty candied pecan treat. This sugar pecan recipe
    is an easy way to impress friends and family. My mom gives tins of pecan candy out
    as gifts for the holidays, and it’s a sure hit for any party or get-together.
    CG especially likes these nuts as ice cream toppings.

    What You Need to Make Candied Pecans

    1 lb. PECANS
    1 cup SUGAR
    1 tsp CINNAMON
    ½ tsp SALT
    1 EGG WHITE
    1 Tbsp WATER

    candied pecans
    Place pecans on a large ungreased baking sheet and bake 30 minutes at 300 degrees F. Turn pecans every 10 minutes while baking.

    How to make Pecan Candies

    Buy a pound of pecan halves. When buying, be sure to choose pecans that are in good shape
    …a bag of broken and busted up pecans doesn’t look as pretty in a dish.  Pecans can be pretty pricey, but check here for current pecan prices on Amazon.           

    In a bowl, combine the cinnamon, sugar, and salt, and then mix well.
    Set that bowl aside, and in another bowl, combine 1 egg white and 1 Tbsp. of water.
    Whisk the egg white and water into a frothy foam.
    Add the pecan halves into the egg white mix.
    By hand, mix the pecans until coated thoroughly.
    Once the pecans are coated completely, transfer then into the dry mix bowl. Still using your hand,
    mix the pecans in the cinnamon sugar until they are coated well.

    On an ungreased baking sheet, spread the coated pecans into a single layer.
    Place the baking sheet in an oven preheated to 300 degrees Fahrenheit. You can check here for current prices for baking sheets on Amazon.

    Remove the baking sheet every 10 minutes to give the pecans a stir and spread them out again; this will let the pecans bake evenly and keep from sticking together.

    After a total of 30 minutes baking time, remove the pecans for a final stir, then set aside to cool.
    That’s it. As soon as they’re cool enough to eat, then eat away.
    Be sure to allow the pecans to cool completely before sealing in a container.

    candied pecans
    My mom sends out tins of candied pecans to her favorite children, which sometimes includes me.

    These sugar pecan candies make a great holiday treat or anytime treat. My mom makes them all the time for family gatherings and they’re
    a sure fire hit.

    Give this candied pecans recipe a try and let me know what you think, and bon appétit!

    For another quick tasty treat idea, try this classic Peanut Butter Candy Recipe.

    peanut butter candy recipe

    Thanks for checking out this candied pecans recipe, and all of our recipe videos. Be sure and sign up for our mailing list and never miss a new Chef Buck cooking video, and also click a button below and share the dishes with your friends. We appreciate all the kind comments and support, and we’ll see you next time in the kitchen!
    –Chef Buck

    Thanks for watching our recipe videos!

    We include affiliate links for products on our website, so if you make a purchase after clicking on our links, we may earn a commission which helps us produce more videos and drink more coffee :^) We participate in the Amazon Services LLC Associates Program, which is an affiliate advertising program providing a means for us to earn fees by linking to Amazon.com and affiliated sites, so we can make more videos.

    Share and Enjoy !

    Potato Cake Recipe — How To Make Sweet Potato Latkes

    potato cake recipe

    Check out this simple potato cake recipe. Or do you call them potato pancakes? Or potato latkes? I like to use sweet potatoes because they are less starchy and cook up quicker than white potatoes, plus sweet potatoes just taste great, and they are a good nutrition and energy source.

    Ingredients to Make A Sweet Potato Cake Recipe :

    1 med SWEET POTATO
    ONION (½ as much as potato)
    Fresh HOT PEPPER (optional)
    2 EGGS
    2 Tbsp FLOUR
    1 tsp CURRY POWDER
    ½ tsp CHILI POWDER (optional)
    ……or whatever seasonings you prefer!
    SALT and PEPPER (to taste)
    OIL for cooking

    potato cake recipe
    Are they potato latkes, potato pancakes, or potato cakes? What do you call them?

    How to Make Sweet Potato Latkes :

      • Shred sweet potato into strings, and thinly slice onion into stringy lengths.
      • I like to also thinly slice a jalapeno pepper; the pepper adds a nice zing, flavor, and color, but you can skip the pepper if you’re a “fraidy cat”.
      • In a bowl, combine the potato, onion, and pepper with the flour until well coated.
      • Beat two eggs and add into the mix, stirring well.
      • Add seasonings as desired. I like a lot of seasoning, and the potato and onion like it, too, so be liberal with the salt, pepper, and flavors you prefer; it’ll make for tastier cakes.

    potato cake recipe
    thinly sliced sweet potato, onion, and pepper make for a sturdy, tasty, potato cake.

    • Heat oil in a skillet on medium-high heat and spoon the potato mixture into the skillet and press and shape into patties. The potato cakes should be about the size and thickness of a nice ¼lb burger, but not too thin.
    • Don’t crowd the skillet. I use a ten-inch skillet and get two batches of three patties each, which is a terrible sentence, and almost sounds like math, so sorry for that.
    • Cook patties for 3-4 minutes on each side, turning carefully.
    • Adjust the burner temperature as needed; reduce heat to cook each potato patty for 3-4 minutes without burning.
    • Cook until nicely colored, then remove potato cakes from the skillet and drain on a paper towel.

    It’s a great dish for breakfast, lunch, or dinner.
    Give this simple potato cakes recipe a try and let me know what you think, and bon appétit.

    And for another yummy potato dish, check out this classic Home Fried Potatoes Recipe.

    home fried potatoes recipe
    home fried potatoes

    Thanks for watching. If you like the potato cake recipe, use some of the share links below to share the dish with your friends and family.
    I appreciate it!
    –Chef Buck

    Share and Enjoy !


    Frozen Yogurt Banana Pops – make a healthy treat

    frozen yogurt banana

    Try a healthy Frozen Yogurt Banana Treat. It’s easy to make, and a nice dessert option instead of ice cream when you’re trying not to be too bad. Crushed peanuts and coconut flakes make this yogurt banana popsicle extra tasty, and a chocolate chip or two won’t hurt, especially if you’re making it as a ghostly Halloween treat for some lucky kid.

    What You Need to make a Frozen Yogurt Banana Pop

    Banana
    Crushed Peanuts
    Coconut Flakes
    Chocolate Chips
    Greek Yogurt
    (or melt
    white chocolate
    instead of yogurt)
    and some Wax Paper

    How to make a frozen Yogurt Banana Pop

    • Peel a banana!
    • You can use 1 banana to make 2 popsicles, or 4 popsicles.
    • For two frozen treats, just cut the banana in two. This size makes a yummy pop, but can be a bit much if frozen for a loooong time; for easier to eat frozen banana popsicles, cut the halves into lengthwise halves.
    • Poke a stick into the center of the banana. A thin stick will be needed for smaller popsicles, otherwise the banana will split.
    • Roll or dip the banana stick in yogurt and coat thoroughly. Thick, Greek yogurt is ideal for a nice coating.
    • Place pops on wax paper and Freeze AT LEAST 1 hour. The longer it freezes, the more like a popsicle they will become, but it will take at least 1 hour for minimum frozen popsicle satisfaction.
    • For fancy popsicles, roll the banana sticks in crushed peanuts and coconut flakes. This can be done before or after the pops are coated in yogurt.
    • For extra coconut flavor, toast the coconut flakes.
    • For a more decadent dessert, sprinkle the yogurt covered pops with chocolate chips before freezing. Or M&M’s…or any kind of sprinkles you like.
    • And for a spooky treat for the children, use chocolate chips to shape eyes and a mouth to make a yogurt/banana ghost. This is an easy and healthy low-calorie treat to make around Halloween.
    • And if you’re not counting calories, use white (or dark) chocolate instead of yogurt; simply melt chocolate in a skillet and roll the banana sticks to coat.

    frozen yogurt banana
    You can fancy up a frozen yogurt banana recipe with chocolate chips, coconut flakes , peanuts, peanut butter, M&M’s…whatever you like!

    Give this frozen yogurt covered banana recipe a try and let me know what you think, and bon appétit!

    And for another tasty (and healthier) dessert idea, check out this Chocolate Cake made with garbanzo beans.

    gluten free cake
    Gluten-free Garbanzo Bean Cake

    THANKS FOR WATCHING! If you enjoyed the post, share it with your friends …be a cool kid and hit some of the share links below. I appreciate it!
    –Chef Buck

    Share and Enjoy !


    Easiest Fruit Fly Trap to get rid of Fruit Flies

    fruit fly trap

    5 Simple Ways to control fruit flies:

    How to get rid of fruit flies? Just build a simple fruit fly trap. All you need is a bottle, paper to make a funnel, a piece of tape, and some bait. The bait can be anything that draws fruit flies; a little vinegar or just a slice of fruit are the easiest things to use.

    Fruit flies are not pretty. No one wants fruit flies in the kitchen, but they love kitchens! Or at least they love things in the kitchen. What kinda things? Anything sweet, or rotten, or fermented; basically anything smelly. Even if you can’t smell it, they can.

    1) Make a fruit fly trap! Don’t wait until there are lots of fruit flies. Make a fruit fly trap right away. Fruit flies reproduce quickly, so nip the problem in the bud.

    2) Keep over-ripe fruit and vegetables in the fridge.

    3) Wipe down food prep areas after every use.

    4) Empty your garbage regularly, and keep perishable garbage bagged and in the fridge.

    5) Keep your recyclables clean. Dirty cans and bottles attract flies, especially soda and alcohol containers.

    fruit fly trap
    doesn’t a wine bottle make a classier trap?

    How to Make a Fruit Fly Trap

    To make a fruit fly trap, you’ll need a bottle. Any bottle will do, but I prefer a darker bottle; it just looks classier.

    fruit fly trap
    Use a little vinegar or slice of fruit to draw fruit flies.

    Place a little vinegar in the bottle, just enough to cover the bottom.
    Construct a funnel using a magazine page. Put a piece of tape at the bottom of the funnel to hold it in place.

    fruit fly trap
    Make a loooong funnel to go deeeeep into the bottle, this will prevent fruit flies from escaping.

    The funnel should be long and narrow. You want the end of the funnel to go deep into the bottle; this will prevent the flies from getting out.
    Push the funnel into the bottle and set the bottle in a corner out of the way.
    Fruit Flies will be drawn to the vinegar and become trapped in the bottle.
    It’s simple and effective.
    Once you’ve caught some fruit flies, you can do whatever you want with them, cause that’s the law of the jungle.

    And check out another kitchen tip: 5 Common Uses For Baking Soda

    Share and Enjoy !


    Egg Bake Recipe … or giant oven omelette!

    egg bake recipe

    Give this easy Egg Bake Recipe a try. Or is it an oven omelette recipe? Or just a fancy-pants egg casserole? Whatever you want to call it, it’s delicious and nutritious and super easy to prepare.
    The leftovers make a terrific breakfast on the go, and it’s a great recipe for using up odds and ends in your refrigerator, so definitely give this brunch / breakfast dish a try.

    Egg Bake Recipe Ingredients:

    10 EGGS
    1 cup MILK
    1 cup GREEN ONION chopped
    3-5 cloves GARLIC finely chopped
    1-2 cups shredded CHEESE …I like gruyere and monterey jack best
    1 cup MUSHROOMS sliced
    ½ cup BELL PEPPERS chopped
    ½ cup ARTICHOKE HEARTS chopped
    ½ cup TOMATOES
    HOT PEPPERS chopped, to taste
    SALT and PEPPER to taste
    OIL for cooking
    add CILANTRO, PARSLEY,
    or any chopped HERBS
    you like!

    Egg Bake Recipe Directions:

    My favorite part of this dish is the leftovers. It’s great cold for a tasty and nutritious breakfast on the go, so make a batch at the beginning of your week, and you’ll have a quick snack whenever you like.

    Step 1:
    Saute your veggies. Use the suggestions in my recipe, or better yet, use whatever you have on hand. I NEVER make this dish with the same ingredients, because it’s the perfect opportunity to clean out the refrigerator. Add salt and pepper as desired.

    egg bake recipe
    use lots of fresh veggies –and ham or cooked sausage if you’re feeling carnivorous.

    Step 2:
    In a bowl, whisk together the eggs and milk. Add some fresh herbs if you like. Chives and basil are awesome in this mix.

    Step 3:
    Lightly grease an oven safe baking dish, about 8 X 10. Check here for current prices on a Pyrex Baking Dish on Amazon.

    Step 4:
    Line the bottom of the dish with freshly shredded cheese. I like gruyere and monterey jack the best, but use your favorite cheese.

    egg bake recipe
    layer a lightly greased baking dish with cheese

    Step 5:
    Evenly spread the sauteed veggies over the cheesy bottom. If you have extra cheese, sprinkle on top.

    egg bake recipe
    spread sauteed veggies evenly over cheesy bottom.

    Step 6:
    Pour the egg/milk mix gently over the veggies. The egg will soak to the bottom and cover the top.

    egg bake recipe
    Completely cover dish with egg mix.

    Step 7:
    Bake in an oven preheated to 350 degrees Fahrenheit for 40-50 minutes. Add a sprinkling of cheese to the top during the last 10 minutes, if desired.
    Remove from the oven and allow the egg bake to rest 10 minutes before slicing.

    egg bake recipe
    Serve hot or cold, and make a bunch, because the leftovers are twice as good!

    This dish makes a terrific breakfast for a family gathering, it’s awesome over salad greens, and the leftovers are perfect for a quick snack or breakfast on the go.

    Give this easy egg bake recipe a try and let me know what you think…and bon appétit!

    And for another tasty breakfast recipe, check out this Complete Huevos Rancheros from Scratch Recipe.

    huevos rancheros
    Huevos Rancheros is a flavorful, classic mexican dish…delicious!

    Thanks for checking out the recipes. Be sure and sign up for our mailing list so you’ll never miss a Chef Buck cooking video, and click a button below and share the dishes with your friends. We appreciate all the kind comments and support, and we’ll see you next time in the kitchen!
    –Chef Buck

    Share and Enjoy !


    Popcorn : How To Cook Popcorn On The Stove Top

    how to cook popcorn on the stove

    90% of all U.S. households have a microwave oven, but we don’t, so when we make popcorn, it’s on the stove top. Generally we buy the store brand, it’s considerably cheaper than name brand popcorn, and we find it offers the same result.
    We cook popcorn in coconut oil. Coconut oil has a high heat point and retains it’s nutritional value when heated.
    We like to add flavorings, too. My favorite is grated Parmesan cheese. Of course we always add butter and salt, but I’ve found that fresh ground black pepper is a great addition as well.

    How to Cook Popcorn on the Stove top:

    1) On Medium Heat, add 2 Tbsp of coconut oil in a heavy bottomed pot.

    2) Add a couple of test corn kernels into the pot.

    3) When the oil heats through, and the test kernels have popped, add ½ cup of popcorn kernels.

    4) Shake the pan to distribute the kernels along the bottom of the pan. They should form a single layer.

    5) Cover the pot with a lid, but don’t cover tightly, leave the lid slightly ajar to allow steam to escape; this will keep the popcorn from tasting stale.

    6) Allow the kernels to pop until the popping sound almost completely subsides.

    7) Once popped, removed pot from burner and pour popcorn into a bowl.

    8) While hot, add melted butter and salt and whatever seasonings you desire.

    and that’s it!

    Below is a video we made experimenting with bacon, but I think I prefer basic popcorn, although the fresh ground black pepper tasted awesome.

    Fun Facts:

    –Two tablespoons of unpopped corn kernels produce a quart of popcorn for about 25 cents.
    –In movie theaters, for every dollar spent on popcorn, about 90 cents is profit.
    –A cup of plain popcorn contains about 31 calories.
    –Americans eat more popcorn than any other country.
    –About 70% of popcorn sold in America is eaten in the home.
    –By volume, popcorn is America’s most popular snack food.

    For another tasty snack idea, check out these Cashew Coconut Lemon Bites

    energy snack
    power snack in a yummy treat!

    Share and Enjoy !


    Garlic Quinoa Recipe …instead of garlic rice

    garlic quinoa

    This garlic quinoa recipe makes a terrific side dish. I use quinoa often to provide the protein in vegetarian meals, but quinoa is also a smart choice to serve with other proteins. This garlic quinoa side is filling and tasty, and a great accompaniment for many meat and fish dishes.

    Garlic Quinoa Recipe Ingredients:

    2 cups QUINOA
    3 cups WATER
    3-4 cloves GARLIC (finely chopped)
    2 Tbsp OLIVE OIL
    SALT and PEPPER to taste
    and add chopped PARSLEY …if you like, man

    garlic quinoa
    garlic quinoa makes a great side dish

    Garlic Quinoa Recipe Directions:

    In an oven proof dish, add 3 cups of water.
    Add in the olive oil, or melted butter.
    Add the quinoa.
    Add finely chopped garlic. I find 3-4 cloves to be plenty (this is one of those rare dishes where I have found too much garlic to be too much).
    Add salt and pepper to taste.
    If you want to add a little heat, add some finely chopped red chilis (it adds a nice color, too), or just a little cayenne pepper.
    Stir the ingredients together well and place top or foil covering over the baking dish.
    Bake in an oven preheated to 350 degrees Fahrenheit for 90 minutes. No attention to the dish is required while baking.
    After 90 minutes, remove the dish from the oven, uncover and let set for a few minutes.
    Fluff with a fork and serve.
    It’s a great side dish for meat, fish, and vegetarian meals.
    Any leftovers can be used to make quick quinoa salads.
    Give this Garlic Quinoa Recipe a try and let me know what you think, and bon appétit!

    raw quinoa
    uncooked quinoa…looks like a grain, but it’s a seed.

    Quinoa is a terrific ingredient to incorporate into your diet for many reasons, here are a few:
    1) It is a complete protein (provides all essential amino acids).
    2) High in fiber and nutrition.
    3) High in magnesium and iron.
    4) Is low on the Glycemic Index, making it a good choice for blood sugar regulation.
    5) it can easily be substituted for rice in many recipes

    For more quinoa inspired recipes, check out my QUINOA PLAYLIST.
    spanish quinoa

    Share and Enjoy !


    Coleslaw Recipe a Classic Southern Dish

    crunchy slaw

    Here’s a simple, no-frills coleslaw recipe, which means it’s delicious, because nothing tastes great like a classic coleslaw, especially if you’re pairing it with catfish or fried chicken. Coleslaw can also be used as a sandwich topping, perfect for burgers, or anything BBQ.

    Coleslaw Recipe Ingredients:

    1 sm. CABBAGE (shredded)
    3 med. CARROTS (shredded)
    ¼ cup ONION (minced…or chopped if using green onion)
    1 cup MAYONNAISE
    1-2 Tbsp fancy MUSTARD
    2-3 Tbsp LEMON JUICE (or vinegar)
    LEMON ZEST (if using fresh lemon, why not!)
    1 Tbsp CELERY SEED check current celery seed price on Amazon
    1 tsp SALT (or to taste, man)
    1 tsp BLACK PEPPER

    fried catfish recipe
    Catfish tastes best with tartar sauce (and coleslaw!)

    Coleslaw Recipe Directions:

    Shred the cabbage and carrot and combine in a large bowl.  Sometimes, for a more rustic coleslaw, I’ll chop the cabbage with a knife for chunkier pieces, like in this slaw video, but that’s a different kinda dish, and not what I think of when I want a basic coleslaw to pair with traditional southern-style dishes.
    Add onion to the bowl. I’m using about 3 chopped green onions, but use any kinda onion you like.
    For the dressing, combine the rest of the ingredients in a smaller bowl and mix until smooth and creamy.

    crunchy slaw
    classic coleslaw recipe

    I like using fresh lemon juice and zest, but use vinegar if you prefer; I like a mild rice vinegar with coleslaw.
    My measurements for salt and pepper are only suggestions, so definitely adjust to taste.
    And don’t use plain-Jane yellow mustard, spring for a fancy dijon or grey poupon!
    Combine the dressing with the cabbage, carrot, and onion and toss well.
    And that’s it.
    Coleslaw is a must-have for fried catfish or chicken. Gotta have it with ribs! And coleslaw makes an excellent sandwich topping, too; add to hamburgers, sloppyjoes, or any kind of BBQ sandwich.

    For an Asian twist on slaw. try this Crunchy Ramen Noodle Slaw Recipe.

    crunchy slaw
    Crunchy coleslaw or noodle salad? What sounds tastier?

    Have fun in the kitchen. Get a bunch of spices, pots and pans, and begin experimenting with different recipes. home cooking is a healthy hobby that will save you tons of money in the long run.
    Check out current prices for Complete Kitchenware Sets on Amazon. Or go to a thrift store! I’ve found some of my favorite kitchen gear at second-hand stores.

    Thanks for checking out our coleslaw recipe, and all of our recipes. Be sure and sign up for our mailing list and never miss a new Chef Buck cooking video, and also click a button below and share the dishes with your friends. We appreciate all the kind comments and support, and we’ll see you next time in the kitchen!
    –Chef Buck

    Thanks for watching our recipe videos!

    We include affiliate links for products on our website, so if you make a purchase after clicking on our links, we may earn a commission which helps us produce more videos and drink more coffee :^) We participate in the Amazon Services LLC Associates Program, which is an affiliate advertising program providing a means for us to earn fees by linking to Amazon.com and affiliated sites, so we can make more videos.

    Share and Enjoy !

    Roasted Garlic Recipe …and make a Fancy Crostini

    roasted garlic

    This roasted garlic recipe is easy to prepare and there are a zillion uses for roasted garlic, like a spread for bread, which I do in this video for a quick crostini idea.
    Roasted garlic makes a great addition to rice, potato, and quinoa dishes, jams, salad dressings…most things are better with a little garlic.

    Roasted Garlic Recipe Ingredients:

    GARLIC
    SALT
    PEPPER
    OLIVE OIL
    …plus herbs and spices if you like

    For Crostini:
    BREAD
    FETA CHEESE
    CAPERS
    KALAMATA OLIVES

    roasted garlic recipe
    use roasted garlic to make a quick crostini

    Roasted Garlic Recipe Directions:

    When buying, choose garlic bulbs that are firm and have an intact “papery” outer covering. Avoid soft bulbs, or bulbs that have give and seem overly dry and desiccated. Buy bigger bulbs with bigger cloves! Peeling garlic is a semi-pain, so make it easier on yourself and choose the largest cloves available.

    Remove the papery outer covering and separate the cloves.
    Do you have a secret tip (that really works!) for quickly peeling garlic cloves? If so, please let me know! I’ve found that the best way for me is the tried and true one-at-a-time method: just give each clove a gentle whack, enough to break the peel, and then remove the skin.
    Place peeled cloves on a sheet of aluminum foil.

    Drizzle with olive oil. It doesn’t have to be a lot, just enough to coat the cloves.
    Add salt and pepper to taste, and any dried herbs or seasonings you like. I usually add a little thyme.
    Stir and coat the cloves in the oil and seasonings and then close up the aluminum foil like a Hershey’s Kiss.
    Place on a baking sheet and slide into an oven preheated to 400 degrees Fahrenheit.
    Bake 30-40 minutes and they’ll be soft and ready for use.

    Raw garlic is super strong with a burning bite, but roasting mellows out the bite and transforms the garlic into a tasty treat that can be popped into your mouth whole. I usually eat a handful of cloves when they’re right out of the oven–I can’t help myself!
    Warm roasted garlic is great on a crostini, which is really just a fancy piece of toast.
    Toast slices of French bread and smear on the warm garlic cloves like butter. Top with feta cheese, capers, and kalamata olives for a quick treat.

    Use roasted garlic as a spread for sandwiches.
    Mix into mashed potatoes or rice dishes (or quinoa).
    Add roasted garlic to salads or mash into salad dressings.
    Add to jams, and gravies, and guacamole.
    Mix with butter for garlic bread.
    Add roasted garlic to anything; it’s a great item to have in the fridge.
    Store refrigerated and it will keep several days, store in a jar refrigerated and covered with oil, and it will keep a little longer,but there are so many uses for roasted garlic, it will be very easy to find ways to quickly use it up.
    Give this roasted garlic recipe a try and let me know what you think, and bon appétit!

    And for another simple and versatile recipe dish, try this Pickled Daikon and Carrot Relish.

    Vietnamese Pickled Daikon and Carrot Relish
    click pic for Vietnamese Pickled Daikon and Carrot recipe

    Share and Enjoy !


    Hearts of Palm Recipe with Beans …healthy and tasty!

    hearts of palm

    Hearts of palm are often used in salad recipes. Heart of palm is literally the edible core of a palm tree stem. It’s easily found sold in cans, but CG scored a fresh heart of palm, so we’ll take a look at this weirdo veggie and make a simple, but very tasty salad. Canned hearts of palm are not as crunchy as fresh heart, so be sure and add CELERY to this recipe when using canned hearts of palm.

    Hearts of Palm Recipe Ingredients:

    1 heaping cup sliced HEART OF PALM
    15oz can MIXED BEANS
    1 tsp GINGER (minced)
    ½ cup CILANTRO
    ½ cup GREEN ONIONS (chopped)
    dressing:
    2 Tbsp LEMON JUICE
    ½ tsp LEMON ZEST
    1 Tbsp RICE VINEGAR
    1 Tbsp heavy OLIVE OIL
    2 tsp SOY SAUCE
    SALT and PEPPER to taste
    if using canned hearts of palm, add ½ cup chopped CELERY
    (and toasted nuts are never a bad idea, either)

    hearts of palm
    Fresh heart of palm and salad.

    Hearts of Palm Recipe Directions:

    If using fresh heart of palm, slice away the bamboo-like outer hull and remove the heart. fresh heart of palm has a great texture, a little crunchy with a creamy after taste; this slight crunch makes fresh heart of palm ideal for salad–canned hearts of palm are not as firm, so be sure to add ½ cup celery to this recipe if using canned hearts of palm.
    In a bowl, combine the beans, heart of palm, cilantro, ginger, and green onion. A mix of beans is ideal…different beans will add a variety of textures.
    In a smaller bowl, combine the dressing ingredients and whisk well–super well!
    Add the dressing to the salad and toss.
    And that’s it.
    We found this simple combo to be quite tasty. You can always add more ingredients, but sometimes simple is best.
    Be sure to add celery for crunch if using canned hearts, and toasted nuts are always a great crunchy element for salads–plus they add protein to the dish as well.

    Hearts of palm
    Hearts of palm in a can

    Give this heart of palm recipe a try and let me know what you think, and bon appétit!

    And for another tasty salad idea, check out this Black-eyed Pea Salad.
    black eyed pea salad
    Click on Pic for Recipe

    Share and Enjoy !


    Cream Cheese Frosting Recipe for Cakes…and cupcakes

    cream cheese frosting recipe

    Need an easy, super tasty cake frosting? This cake frosting recipe is ready in minutes and makes the perfect icing for cake (and cupcake!) perfection! It’s an especially great balance for a chocolate cake. You can make this frosting as thick or thin as you like, just add more powdered sugar to thicken, and more milk to thin, but add the milk just a wee little at a time–it doesn’t take much.

    Cream Cheese Frosting Recipe Ingredients:

    8oz CREAM CHEESE, softened
    ¼ cup unsalted BUTTER, softened
    2 cups POWDERED SUGAR
    1 tsp VANILLA EXTRACT
    1 Tbsp MILK

    cream cheese frosting recipe
    Make this tasty frosting super quick!

    Cream Cheese Frosting Recipe Directions:

    About an hour ahead of time, set out the cream cheese and butter to soften.
    In a bowl, combine cream cheese, butter, and vanilla extract and blend with hand mixer.
    Once ingredients begin to come together, add in the powdered sugar. Add the sugar a bit at a time to avoid a sugary blending mess.
    Mix until the frosting is smooth. To thin the frosting add a small amount of milk–no more than a Tablespoon at a time! For a thicker frosting,
    just add more powdered sugar.
    And that’s it.
    Spread on your dessert and eat away!

    cream cheese frosting recipe
    Add milk to thin, or more powdered sugar to thicken the frosting.

    Give this cream cheese frosting recipe a go and let me know what you think, and bon appétit!

    And for more tasty dessert ideas, check out these tasty treats:

    baked pears
    click the pic for more desserts!

    “Life is uncertain. Eat dessert first.” ~Ernestine Ulmer
    “If you want to make an apple pie from scratch, you must first create the universe.” ~Carl Sagan
    “Seize the moment. Remember all those women on the Titanic who waved off the dessert cart.” ~Erma Bombeck

    Share and Enjoy !


    French Toast with Cream Cheese Filling

    french toast

    Why have Plain French Toast when you can have French Toast with a cream cheese filling? A little creamy cheese and cinnamon ginger apples can transform your breakfast into a 10-year old’s dream breakfast.

    French Toast Ingredients:

    BREAD (sliced, stale)
    1½ cups MILK
    4 EGGS
    BUTTER for frying, and apples
    APPLES (peeled, sliced)
    CANDIED GINGER (sliced)
    WALNUTS (toasted)
    8 oz CREAM CHEESE (soft)
    15 oz RICOTTA CHEESE
    CINNAMON (to taste)
    optional: sugar and vanilla

    french toast
    Stale bread makes the best french toast! –slice ahead of time!

    French Toast Directions:

    Stale bread makes great French toast, so slicing bread ahead of time is a great idea; at least a few hours ahead of time, but ideally overnight. Stale bread will soak up the French toast batter without becoming overly soggy and falling apart, especially if you’re using thinner slices of bread, and the thinner or thicker the slices will depend on your particular tastes. This French toast recipe doesn’t need thicker slices, since you’re basically building a French toast sandwich; I’m using thicker slices of challa bread for this video, but I often use regular slices of Hawaiian sweet bread, which works great.

    Mix the cream cheese and ricotta cheese together. Be sure to set your cream cheese out ahead of time to soften, this will make mixing it with the ricotta cheese much easier. I’ll often mix these ingredients ahead of time. If making a smaller amount, the cheese mix is about a 2 to 1 ratio of ricotta to cream cheese. I sometimes add a tsp. or two of sugar to the cheese mix, but this is optional; I prefer it without the added sugar, since the apple mix will be quite sweet.

    Any leftover cream/ricotta mix can be used as dessert topping, and makes a tasty filling for omelets. I generally make too much apple mix, but that’s a good thing, too. I’m generous with the apple topping, and any leftover apple mix is a perfect topping for oatmeal or ice cream.

    french toast
    Creamy cheese filled French Toast

    To make the apple mix, peel, slice, and remove the cores of the apples. Apples vary quite a bit in size, but I usually end up with about 4-6 cups of apple slices, and I generally use gala or Fuji apples, which take little time to cook down.

    Melt about 2 Tbsp of butter in a pot and add apples. Mix with butter and cook over medium heat. Add candied ginger slices; I think ½ to 1 cup is a good amount of candied ginger, but there is no wrong amount, follow your gut. Add 1-2 Tbsp of sugar and cinnamon to taste, Mix and cover and cook about 20 minutes, until apples soften and get juicy. For extra liquidy goodness, stir in about ¼ cup water. You want the apples to be a little syrupy, that way you won’t have to use any maple syrup with the French toast. Once the apples are cooked to your liking, cover and set aside.

    Mix the French toast batter. A basic batter is eggs and milk, and I’m also adding cinnamon, but often folks will add a little sugar or vanilla extract. I don’t add vanilla or sugar to the batter with this particular dish, because the creamy cheese center and apple-ginger topping will add more than enough flavor. In a bowl, combine the milk, eggs, and cinnamon to taste (½ tsp is a good amount). Whisk together well and then pour some into a shallow bowl–or all–it depend on the size of your shallow bowl; you don’t want the batter to be so deep that it runs into the cheesy part of your French toast sandwich.

    To build the French toast sandwich, simply spread the cheese mixture onto a slice of bread and top with another slice, making a basic cheese sandwich.

    You can also add toasted walnuts into the sandwich for a nice crunch, or simply top the toast later with toasted nuts, but definitely add nuts at some point, cause the crunchy contrast makes the dish perfect, and toasted walnuts are awesome.
    To toast the walnuts: spread walnuts on a baking sheet and roast at 350 degrees Fahrenheit for 5-7 minutes. It won’t take long. As soon as the nuts begin to color up, remove them from the oven; they will burn if ignored, so set a timer and watch them closely. Taking the time to toast the walnuts is well worth the effort…it’s a great taste.

    Once you’ve constructed the cheesy French toast sandwich, heat a little butter in a non-stick skillet on medium heat. Check current prices for a Non-Stick Skillet on Amazon.
    Place the sandwich in the batter and let soak a moment and then turn and batter the other side.
    Place sandwich in the skillet and cook on medium heat until golden brown, turn and cook other side and remove from the heat.
    Slice French toast and then top with apples and walnuts (a dusting of powdered sugar is optional). For a splash of color, add fresh berries or mint.

    Serve this cheese stuffed French toast with maple syrup, or without–I find the cooked apples to be syrupy enough, and the warm cheesy center keeps the French toast from being too dry.

    It’s a super delicious dish and a great treat for company.

    Give this fancy pants Cream Cheese French Toast recipe a try and let me know what you think, and bon appétit!

    And for another fancy pants breakfast dish, try this Pancake Recipe.

    Fancy pancakes are easy to make.
    Fancy pancakes are easy to make, and better looking, too.

    Thanks for Watching our French Toast Recipe Video!

    Click a button below and share the dishes with your friends. You can also follow Chef Buck on Youtube. We appreciate all the kind comments and support, and we’ll see you next time in the kitchen!

    If you like what CG and I do, support us on Patreon, or throw us a tip in our Paypal Tip Jar. We’ll happily enjoy a coffee on the road – Thanks! We appreciate all the support, and we’ll see you next time in the kitchen!

    We include affiliate links for products on our website. Making a purchase after clicking on our links and we may earn a commission which helps us produce more videos and drink more coffee :^) We participate in the Amazon Services LLC Associates Program, which is an affiliate advertising program. It provides a means for us to earn fees by linking to Amazon.com and affiliated sites, so we can make more videos.

    Share and Enjoy !

    Baked Pears Recipe … An Easy Dessert Idea!

    baked pears

    This Ginger Baked Pears recipe is a simple and delicious dessert idea. It’s easy to prep and put together. Just throw it together, throw it in the oven, and forget about it…well, almost forget about it–you’ll need to baste the pears a couple of times while they bake. This baked pear dish will be a crowd pleaser for any fancy meal.

    What you need for Baked Pears

    3-4 ANJOU PEARS (or bosc pears)
    BUTTER for greasing baking dish
    1½ cup HEAVY CREAM
    ¼ cup BAKER’S SUGAR (superfine ground sugar)
    ½ tsp CINNAMON
    ½ tsp VANILLA EXTRACT
    1 heaping Tbsp grated GINGER
    ORANGE ZEST
    optional:
    top with toasted nuts
    and whipped cream!

    baked pears
    Use firm pears for baking, ideally and anjou or bosc pear.

    How to make this Baked Pears Recipe

    Use a firm pear ideal for baking, like an anjou or bosc pear.
    Peel the pears and slice in half lengthwise and remove the core–use 3-4 pears, depending on need and the size of your baking dish. If you need a decent oven-safe baking dish, check out some current pricing for a Pyrex dish on Amazon.
    Lightly butter the bottom of your baking dish and place the pears sliced side down.

    In a bowl, combine the cream, sugar (use superfine baker’s sugar, or regular sugar that has been ground in a food processor), cinnamon, vanilla, ginger, and orange zest. Whisk ingredients together and pour over the pears. The top half of the pears should still be sticking out of the cream.

    Slide the dish into an oven preheated to 375 degrees Fahrenheit.
    Remove the dish every 15-20 minutes and baste the tops of the pears with the cream.
    Cook 45-55 minutes or until the pear tops are a golden brown.

    baked pears
    Baked pears with Cream Sauce!

    The cream will be thin when hot, but as it cools it will thicken. Serve pears with a topping of the cream sauce.
    For a crunch, add toasted nuts–and a little whipped cream on top would be quite decadent.
    I threw maraschino cherries on top for color, but a little more orange zest on top would work, too.
    Give this Baked Pears recipe a try and let me know what you think!

    And for another tasty dessert, check out this Easy Apple Crisp Recipe.

    Thanks for Watching our Baked Pear Recipe!

    Click a button below and share the dishes with your friends. You can also follow Chef Buck on Youtube. We appreciate all the kind comments and support, and we’ll see you next time in the kitchen!

    If you like what CG and I do, support us on Patreon, or throw us a tip in our Paypal Tip Jar. We’ll happily enjoy a coffee on the road – Thanks! We appreciate all the support, and we’ll see you next time in the kitchen!

    We include affiliate links for products on our website. Making a purchase after clicking on our links and we may earn a commission which helps us produce more videos and drink more coffee :^) We participate in the Amazon Services LLC Associates Program, which is an affiliate advertising program. It provides a means for us to earn fees by linking to Amazon.com and affiliated sites, so we can make more videos.

    Share and Enjoy !

    How to Eat Pomegranate Fruit — great nutrition!

    how to eat pomegranate

    How to eat pomegranate. First off, Pomegranate is a weird, messy fruit.

    When selecting a pomegranate, choose a fruit that is heavy for its size; like with most fruits, this signifies that it is fresh and juicy. The skin should be firm.

    How to Eat Pomegranate

    Pomegranate juice can be quite messy, and will easily stain clothing. It is a good idea to slice and prepare pomegranate in a large bowl or kitchen sink where the juice splatter can be contained.

    The edible part of the pomegranate are the red “seeds” within the fruit. These seeds are called arils. Inside the arils you’ll find an inner seed that is a little gritty, but it is edible and contributes to the overall texture of the pomegranate, which is…interesting. Pomegranate is a food folks tend to love or hate, but whichever camp you fall into, pomegranate will provide an attractive and nutritious experience. Pomegranate is high in fiber, antioxidants, vitamins C, and potassium.

    pomegranate
    arils from pomegranate

    To remove the arils, slice the pomegranate in half, and then into wedges. The arils are held firm by a membranous inside that is bitter and not to be eaten. The arils can be easily pulled away from the membrane. There are quite a lot of arils in a pomegranate, so this can take a little time…playing some cool jazz will help.

    Some folks like to remove the seeds while holding the pomegranate beneath a bowl of water…this will cut down on the splatter, but it will also dilute any of the juice within the fruit.

    How to eat pomegranate? Pomegranate can be eaten raw, juiced, or cooked.

    Pomegranates keep for a week at room temperature, or up to 3 weeks if refrigerated.

    Pomegranate is often referred to as “the food of the Gods”. Give ’em a go. You’ll either love it or hate it.

    And for another interesting fruit experience, give DRAGON FRUIT a try.

    Share and Enjoy !


    Salmon Burger Recipe Using Canned Salmon

    salmon Burger recipe

    Use canned salmon to create this simple and satisfying salmon burger recipe. Canned salmon is perfect for making salmon patties, and salmon patties are an ideal stand-in for a hamburger when you’re hamburgered out –plus it’s a healthier choice.

    Salmon Burger Recipe Ingredients:

    14oz canned SALMON (red or pink)
    ¼ – ½ cup ONION (finely chopped)
    HOT PEPPER (finely chopped, to taste)
    2 EGGS (beaten)
    SALT and PEPPER to taste
    OIL for sauteing (3-4 Tbsp…salmon will soak up the oil)
    1 Tbsp CURRY POWDER (optional, check current curry prices online)

    salmon Burger recipe
    Canned Salmon makes tasty burgers!

    Salmon Burger Recipe Directions:

    I love canned salmon–red or pink–although I prefer pink canned salmon when making burgers since the pink salmon is much cheaper to buy. I use the more expensive red salmon for making salmon salad.

    Salmon in the can is already cooked–in fact it is part of the canning process that cooks the salmon.
    Open the the can and drain off the liquid–you don’t want the salmon patties to be too wet when you form them.

    salmon burger recipe
    Canned Pink Salmon …traditional style means skin and bones are still intact

    Traditional canned salmon will come with skin and bones still intact . The skin and bones are soft and edible. You can remove the skin and bones if you like; I used to remove them, but now I’m too cheap, and I don’t want to miss out on the extra nutrition, either.

    • Place drained salmon in a bowl.
    • Add ¼ – ½ cup onion depending on how much you like onion. Make sure the onion is finely chopped; smaller pieces will help keep the patties from falling apart. If desired, add some finely chopped hot pepper. If you don’t have fresh pepper, add a little chili powder or hot sauce.
    • Add salt and pepper to taste.
    • Add one or two beaten eggs. I like to use two beaten eggs because it helps to keep the patties together better; I don’t like my burgers to fall apart while I’m eating them.
    • Mix all the ingredients together well.
    • Shape into patties. I usually get 4 patties out of a 14oz can, but make as many as you like–bigger or smaller–depending on how big you want your burger to be. Here’s some current prices for canned salmon if you like to do your fishing on the internet.
    • Heat oil in a skillet. I like medium heat. You want the oil to be hot enough to sizzle when you add the patties, but not so hot that the patties will cook too quickly; you want the patties to get a nice cooked side before turning them, this will keep then from breaking apart.
    • Cook 5-7 minutes and then turn gently when the patties are golden brown.
    • Cook another 3-4 minutes and then remove from skillet and drain salmon patties on a paper towel.

    I like to serve salmon patties on a toasted bun with sliced tomato, onion, lettuce and mayo.
    It’s a nice break from hamburgers, and just as tasty.
    Sometimes I’ll add a Tbsp of curry powder into the mix to make Curried Salmon Burgers, which you should definitely try sometime.

    Give this salmon burger recipe a try and let me know what you think, and bon appétit!

    And for another alternative take on a burger dish, try one of my favorite vegetarian burger ideas, A Super Eggplant Burger Recipe.

    veggie burger recipe
    Best veggie burger? Looks like it.

    Thanks For Checking out our Recipes

    We hope this info is helpful for the next time you’re out buying crab meat at the supermarket. Sign up for our mailing list so you’ll never miss a new recipe. Also click a button below and share the dishes with your friends. You can also follow Chef Buck on Youtube. We appreciate all the kind comments and support, and we’ll see you next time in the kitchen!

    If you like what CG and I do, support us on Patreon, or throw us a tip in our Paypal Tip Jar. We’ll happily enjoy a coffee on the road – Thanks! We appreciate all the support, and we’ll see you next time in the kitchen!

    We include affiliate links for products on our website. Making a purchase after clicking on our links and we may earn a commission which helps us produce more videos and drink more coffee :^) We participate in the Amazon Services LLC Associates Program, which is an affiliate advertising program. It provides a means for us to earn fees by linking to Amazon.com and affiliated sites, so we can make more videos.

    Share and Enjoy !

    Biscuit Recipe – Best Southern Biscuits

    It’s easy to make friends with this easy, awesome tasting biscuit recipe. You biscuits in all manner of meals. Serve them alone as a breakfast side, pile them up into the perfect breakfast sandwich, ladle them with gravy for a wholesome entree, or top them with whipped cream and strawberries for a decadent dessert!

    Buttermilk Biscuit Recipe Ingredients

    4 cups ALL PURPOSE FLOUR
    1 Tbsp BAKING POWDER
    1 tsp BAKING SODA
    1 tsp SALT
    1 Tbsp SUGAR
    1 cup BUTTER (diced, chilled)
    1½ cups BUTTERMILK (chilled)
    (plus buttermilk for brushing biscuit tops)

    Buttermilk Biscuit Recipe Directions

    In a bowl, combine flour, baking powder, baking soda, salt, and sugar (optional). Mix ingredients together well. Add diced butter. For best results use chilled butter –keep the diced butter in the refrigerator until needed. Cut butter into the flour using a pastry cutter or knives. Check here for current prices for a pastry cutter on Amazon.

    Butter should be cut into pea-sized bits, but there’s no reason to be militant about it…nice chunks of butter are nice. Once the butter is cut into the flour, add buttermilk. Keep the buttermilk chilled until you are ready to use it–cold butter and buttermilk are best for this recipe.

    Pour the buttermilk into the bowl, and using a spatula (or your hand), roll the flour around the edge of the bowl until the buttermilk is absorbed and the dry flour begins sticking together. Roll until there is very little loose flour…add a drop more buttermilk if needed, but do so sparingly–you don’t want the flour to be “wet”.

    On a lightly floured surface, empty the bowl and press the flour together, knead once or twice and then spread the dough out into a flat, ½ inch thickness. Do not knead or “handle” the dough too much.

    Flour the edges of a biscuit cutter or drinking glass and cut out biscuits. I like my buttermilk biscuit about 2″-3″ across, but make whatever size you like. Giant biscuits can be fun :^) Cut the biscuits closely and get as many out of the first press as you can. Once all of the biscuits are cut from the first press, bring the dough together again and cut out remaining biscuits–again trying to handle the dough as little as possible.

    Arrange the biscuits touching side by side on a lightly greased pan or on parchment paper. Lightly brush the tops of the biscuits with buttermilk or melted butter–this will help them to brown nicely. Place biscuits in the oven and bake at 425 degrees Fahrenheit for approximately 15 minutes, or until biscuits are golden brown to your liking.

    Give these biscuit recipes a try and let me know what you think, and for another breakfast bread dish, try this Egg Bread Recipe.

    egg bread
    Fancy baked eggs to impress friends and family

    Thanks for checking out our biscuit recipe, and all of our recipes. Be sure and sign up for our mailing list and never miss a new Chef Buck cooking video, and also click a button below and share the dishes with your friends. We appreciate all the kind comments and support, and we’ll see you next time in the kitchen!
    –Chef Buck

    Thanks for watching our recipe videos!

    We include affiliate links for products on our website, so if you make a purchase after clicking on our links, we may earn a commission which helps us produce more videos and drink more coffee :^) We participate in the Amazon Services LLC Associates Program, which is an affiliate advertising program providing a means for us to earn fees by linking to Amazon.com and affiliated sites, so we can make more videos.

    Share and Enjoy !

    Whipped Cream -how to make dessert topping

    whipped cream

    Give up the cool whip, ’cause whipped cream is super easy to make at home. If you’ve got heavy whipping cream and a little powdered sugar, you can whip up your own topping –and if you’ve got some leftover biscuits, then you’re just one step away from a fantastic dessert –that one step being fresh fruit– ideally strawberries; Biscuits topped with strawberries and homemade whipped cream make a helluva tasty treat!

    Homemade Whipped Cream Recipe Ingredients:

    1 cup HEAVY WHIPPING CREAM
    ½ to 1 tsp VANILLA EXTRACT (to taste, really…it’s semi-optional, but do it)
    1 Tbsp POWDERED SUGAR

    whipped cream
    Heavy Whipping Cream

    Homemade whipped Cream is best made in a chilled, metal bowl–and if you’re using a hand mixer–chill the mixing paddles as well! –for scientific reasons involving temperature transference and passive ambient cooling, chilling these tools will assist in the “whippification”.
    Into the chilled bowl, add cream.
    Using a smoothie or hand mixer–or even a hand whisk!–whip the cream until it begins to thicken (but before it begins to peak). Once the cream begins to thicken, add in the powdered sugar and the vanilla.
    Continue whipping until the cream thickens and forms “peaks”, i.e., turns into whipped cream.
    At this point, it’s ready to use (if you refrigerate the topping, the cream will eventually break down and have to be re-whipped).

    whipped cream
    Strawberry Shortcake knock-off using leftover biscuits

    Strawberry Biscuit Dessert Directions:

    We like to pair this whipped topping with leftover biscuits to create a faux strawberry shortcake:
    Take 1lb. of fresh strawberries and slice them into a bowl, add 1 to 2 Tbsp Sugar and mix. Refrigerate for 2-3 hours or overnight.
    Slice biscuits in half and toast under a broiler.
    Spoon the chilled strawberries over the toasted biscuits and top with homemade whipped topping.
    Boom. It’s perfecto.

    Give this homemade whipped Cream and strawberry biscuit dessert recipe a go and let me know what you think, and bon appétit!

    And for a quick biscuit tutorial, check out the Buttermilk Biscuit Recipe.

    Buttermilk Biscuit Recipe
    Easy Buttermilk Biscuit Recipe

    Share and Enjoy !


    Watermelon Salad Recipe –or how to save a sad melon

    watermelon salad

    Watermelon Salad is simple to throw together and a tasty way to save a crappy melon. CG loves watermelon, but once in a while she brings home a dud that just doesn’t make the cut; so what does one do with an unsweet, flavorless melon? Turn it into a savory salad dish!

    Watermelon Salad Recipe Ingredients:
    6 cups crappy, unsweet, seedless WATERMELON
    1-2 Tbsp fresh MINT (chopped)
    ¼ cup RED ONION (chopped)
    ¼ cup FETA CHEESE crumbles
    ½ cup toasted ALMOND SLIVERS

    dressing:
    ¼ cup BALSAMIC VINEGAR
    2 Tbsp OLIVE OIL
    1 Tbsp DIJON MUSTARD
    1 Tbsp MAPLE SYRUP (or substitute honey)
    1 clove GARLIC (minced)
    SALT and PEPPER to taste

    watermelon salad
    Turn crappy watermelon into happy watermelon! (sorry)

    Watermelon Salad Directions:
    This salad works best with a seedless melon–’cause it’s a salad–and no one wants to dig seeds out of a salad.
    Wash your melon and cut away the rind. Slice the red flesh into hearty, but mouth-sized pieces. If it’s sweet–then you’re set! Chow down, because that’s what a melon is for! –but if it’s not sweet, if it’s a flavorless lump that sits in your mouth like play-doh, then don’t despair…it’s salad time.
    First thing, make the dressing.
    In a small bowl, combine the balsamic vinegar, olive oil, dijon mustard, maple syrup (or substitue honey), garlic, salt, and pepper. Mix together and set aside.
    In a larger bowl combine cut watermelon pieces, mint, red onion, feta cheese, and almond slivers. I’ve suggested some ingredient measurements–but that’s just a loose guildeline, man. It’s a salad…follow your heart (and taste buds).
    Add salad dressing to taste and toss.
    Boom.
    That’s it, dude.
    Your crappy melon has been transformed into a delicious salad.

    Give this Watermelon Salad recipe a try and let me know what you think, and bon appétit!

    And for another tasty salad recipe, try this Black-eyed Pea Salad Recipe.

    black eyed pea salad

    Share and Enjoy !


    Bok Choy Recipe for Healthy Bok Choy Soup

    bok choy recipe

    This bok choy recipe is one of my favorites. Bok choy is a type of cabbage, and quite versatile. It’s easily found in markets and is sold in several shapes and sizes under the name bok choy ranging from dinky baby bok choy to the larger size cabbages that I like to use for soups.

    Bok Choy Recipe Ingredients

    1 large BOK CHOY (rough chopped)
    2 medium SWEET POTATOES (cubed)
    1 medium ONION (chopped)
    CHILI PEPPERS (to taste)
    2 Tbsp GINGER (sliced, minced)
    5-7 cloves GARLIC (chopped)
    1 Tbsp CORIANDER POWDER
    1 tsp MANGO POWDER
    1 tsp LEMONGRASS POWDER (or fresh lemongrass)
    1 can COCONUT MILK
    ½ cup fresh BASIL (chopped)
    SALT and PEPPER to taste
    WATER enough to cover ingredients

    bok choy recipe
    bok choy cabbage

    How to make Bok Choy Soup

    If you need a nice soup pot for your kitchen, you can check here for current pricing for a soup pot on Amazon.

    In a soup pot, heat oil on medium high heat and add the ginger, garlic, chili peppers (or jalepenos, or whatever your favorite heat is–or no heat if you wanna skip the bite), and onion.
    Saute for a minute or two and then add in the coriander, mango powder, and lemongrass powder (if using fresh lemongrass, add in with onions). Mix well and saute for another minute.

    Add in sweet potatoes, skinned and cubed into ½ inch peices.
    Add one 13.5 oz can of coconut milk and 1 can of water.
    Bring pot to a boil, then reduce to a simmer and let cook for 5-6 minutes.

    While pot simmers, separate the bok choy stalks from the leaves and wash well.
    When the 5-6 minutes are up, add in the bok choy stalk bottoms and mix well. Add more water if needed. The water should be just enough to cover the soup ingredients, add sparingly.
    Bring pot back to a simmer, cover and let cook for another 2 minutes.

    Add salt and pepper to taste.
    Stir in the bok choy leaves and cook for 1 minute.
    Stir in the fresh chopped basil and remove from the heat.
    And that’s it.

    Soup is a great opportunity to clean out the fridge, so experiment with adding other veggies. I often add carrots and bell pepper. Give this bok choy recipe a try and let me know what you think, and bon appétit!

    And for another Asian inspired dish, try this Spicy Chinese Eggplant Recipe.

    Chinese Eggplant Recipe with Sweet Sauce
    Chinese Eggplant Recipe with Sweet Sauce

    Thanks for checking the recipes out! Subscribe to our mailing list and never miss a new recipe video, we appreciate it.
    –Chef Buck

    Share and Enjoy !


    Fried Quinoa Recipe — Quinoa Fried “Rice”

    fried quinoa recipe

    This fried quinoa recipe is a quick and tasty take on Chinese fried rice. Quinoa makes a great substitute for rice in many recipes, especially quinoa fried “rice”. Quinoa is a complete protein, which makes this dish a complete meal, even if you leave out the egg–which is an easy way to make this a vegetarian recipe. Of course you can go the other route and throw in a little diced pork chop or ham if you like, but I’m quite happy with just a couple scrambled eggs thrown in.

    Fried Quinoa Recipe Ingredients:
    1 cup QUINOA (before cooking)
    1 cup PEAS
    1 CARROT (diced)
    4-6 GREEN ONIONS (chopped, tops separate)
    3-5 cloves GARLIC (finely chopped)
    2 Tbsp GINGER (finely chopped)
    HOT PEPPERS (as desired, finely chopped)
    2 EGGS (scrambled)
    2-3 Tbsp OIL for sautéing
    SOY SAUCE as desired
    SESAME OIL 1-2 tsp
    SALT and PEPPER to taste

    fried quinoa recipe
    Quinoa Fried “Rice”

    Fried Quinoa Recipe Directions:
    This is a great dish for leftover quinoa. The next time you’re making a pot of quinoa for another recipe, just make a little extra for this fried rice recipe knockoff! But if you don’t have any leftover
    cooked quinoa handy, just prepare this quinoa a little ahead of time to give it time to cool down–this will keep the quinoa from easily overcooking and becoming mushy.

    Quinoa is easy to prepare–just like rice, in fact! Rinse the quinoa if needed (many brands come pre-rinsed). In a pot, add 1 cup quinoa to 2 cups water. Bring the pot to a boil, reduce pot to a
    simmer, and then cover and let cook 13 minutes (this will result in slightly al-dente quinoa, which is what you want for frying). Remove the quinoa from the heat and let sit for 10 minutes.
    Then fluff with a fork and allow to cool completely (salt if desired).

    For fried rice, I like to scramble my eggs first and then set aside. I Use two eggs for this recipe, but feel free to use 1, or 3, or none if you want a vegetarian fried quinoa. Whisk the eggs (add a
    splash of milk if desired–makes scrambled eggs smoother). Heat oil in a skillet and quickly scramble eggs on med-high heat and then set aside for later.

    In a large skillet, heat 2-3 Tbsp oil on medium.

    Add raw, diced carrots (should be about pea size). Add chopped hot peppers, too–if desired. I like adding a little fresh red chili peppers for taste, but jalapenos would work just as well, or red
    pepper flakes, or even just a little sriracha later, if desired–or no heat at all–it’s up to your tastes; follow your heart, but spicy food is good for you, right?

    Sauté the carrot and peppers for a minute and then add the ginger, garlic, and chopped green onion bottoms (reserve the chopped tops for a flavorful garnish).

    Continue sautéing another minute and then add in the quinoa. Stir fry until heated through, this won’t take very long.

    Add sesame oil and peas. I like to use frozen peas (thawed), because they hold their texture better than canned peas. Stir until mixed. Add soy sauce to taste. Add fish sauce if desired. The
    sauces will provide plenty of salt, but if you want a little black pepper, go ahead and throw that in now.

    Mix up and then add the scrambled egg. Mix and fry for another minute and then remove from the heat.

    That’s it.

    This dish is ready pretty quick. Top the fried quinoa with chopped green onion, crushed peanuts, or both. Serve fried quinoa it’s own or with a veggie side (broccoli or bok choy or Thai eggplant
    are nice).

    Give this Fried Quinoa recipe a try and let me know what you think, and bon appétit!
    And for more tasty quinoa dishes, check out my Quinoa Video Playlist.

    quinoa salad

    Share and Enjoy !


    Boiled Peanut Recipe – A Southern Tradition

    boiled peanut recipe

    This boiled peanut recipe is a southern tradition and a delicious mess. You can readily find boiled peanuts sold along roadsides throughout the Southern USA. Boiled peanuts are a messy treat–and a little bit of work to eat–they’re kinda like eating pistachios in a soggy shell (not taste-wise, just work-wise). I love ’em–I don’t make them, ’cause I’m too lazy–but I’m always happy to eat them when CG boils up a batch, especially if she’s digging them out of the shells for me.

    Boiled Peanut Recipe Ingredients

    3 lbs RAW “green” PEANUTS
    ½ cup SALT
    optional:
    BAY LEAVES
    CHILI POWDER
    GARLIC fresh or dried
    HOT PEPPERS fresh or dried
    HOT SAUCE
    flavored BOULLION (broth)
    …pretty much any seasoning that you like!

    southern boiled peanuts
    southern style boiled peanuts

    How to make a Boiled Peanut Recipe

    Ideally you want to use raw “green” peanuts. Green peanuts are not green, that just means they’re minimally processed–pretty much just out of the ground. Use green peanuts quickly, because they will not keep long and are prone to mold. Green peanuts are ideal because they will more quickly and most readily absorb the seasonings during the boil. You can use peanuts that have been dried in the shell, but don’t use roasted peanuts.

    Wash and rinse the peanuts thoroughly, and then place them in a large pot and cover with plenty of water.

    Place on the stovetop, cover and bring the pot to a boil, then reduce the heat to medium and allow the peanuts to cook for 2 hours. Add more water to the pot as needed. The peanuts should always be covered in plenty of water. At first the peanuts will float, but after time, the peanuts will sink.

    After 2 hours, add seasonings (it’s in the latter part of the boil that the peanuts absorb the most flavor). Add salt, which is the primary ingredient–in fact salt is all you need; many folks JUST USE SALT–they’re plenty tasty that way, but we prefer to add other seasonings as well, which is generally called “cajun boiled peanuts”. For this batch we added several cloves of raw garlic, dried chili peppers, and ½ cup chili powder. But you can add whatever seasonings you like.

    If you’re just getting into home cooking and don’t have a lot of seasoning choices, you can check out current pricing for a Complete Starter Spice Set on Amazon.

    Cover, and allow the peanuts to continue bubbling on medium heat for 30 more minutes.

    After thirty minutes, remove the peanuts from the heat and allow to sit in the seasoned water until they reach the desired flavor, anywhere from 2-5 hours. The longer they sit cooling in the pot, the more seasoned they will become. Give them a try every half hour until you’re happy with the flavor.

    They are a mess to eat, but delicious and addictive. Once you start eating them, it’s hard to stop–they will go quickly! If you have leftovers, just drain them and store them in the fridge in ziplock bags. You can also freeze them in ziplocks for longer storage.

    Give this Boiled Peanut Recipe a try and let me know what you think, and bon appétit!

    Thanks for watching! Click a button or two and share the dish if you like it.
    And for another tasty southern style treat, try this Country Fried Steak Recipe.

    country fried steak
    Cube steak is a hammered and tenderized cut of round or top sirloin steak

    Share and Enjoy !


    Cashew Coconut Energy Balls — Power Bars in a Ball!

    Cashew Coconut energy Balls

    Cashew Coconut Lemon Bites! or Balls! A quick energy bar in a ball snack recipe! Very easy to make, and super flavorful.  These power balls are like a mini desert, but full of semi-healthy stuff that will put a little pep in your step.  And you get the extra energy without the drastic sugar crash.

    Cashew Coconut Energy Balls Ingredients:

    2 cups raw CASHEWS
    1 cup pitted DATES
    1 Tbsp COCONUT OIL
    1 Tbsp MAPLE SYRUP
    1 tsp VANILLA EXTRACT
    ¼ tsp SALT
    ½ cup SHREDDED COCONUT
    juice and zest of 1 small LEMON

    energy snack
    power snack in a yummy treat!

    Cashew Coconut Energy Balls Directions:

    You’ll need a food processor for this recipe. In fact, you can do the entire recipe in a food processor.  However, my processor is pretty small, so I just use it for chopping up the cashews and dates.  I do the rest of the mixing in another bowl.

    Place the raw cashews in a food processor and chop for a few moments. Your cashews should be chopped fine. Then, add pitted dates and chop to same size.
    Add coconut oil, maple syrup, vanilla extract, and salt to the cashew/date mixture.
    Zest one small lemon. Now, mince the zest and add it to the mixture.
    Slice the lemon and squeeze all of the juice into the mix.
    Mix thoroughly.
    Shape the mixture into ball shapes. Make whatever size you like for snacking! I think grape size is best.
    Next, roll the balls in shredded coconut to coat the outside.
    And that’s it! Snack away!
    The balls can be stored in the fridge until desired.  In fact, they taste best right out of the fridge!

    This super easy recipe makes a tasty treat. And it’s a great alternative to sugary candy bars and ice cream.

    Keep Checking Back For New Recipe Ideas:

    So, give this Cashew Coconut Energy Balls recipe a try and let me know what you think, and bon appétit!

    And for another tasty, sweet treat, try this semi-healthy and awesome BERRY COBBLER RECIPE

    blackberry cobbler
    blackberry cobbler

    Share and Enjoy !

    Best Burrito Recipe – Family Style

    Cheesy baked burritos

    Try this family-style burrito recipe–it’s enough for a family or perfect for anyone who loves leftovers. We like to use roasted peppers in the filling, which is optional, but well worth the effort.

    What You Need To Make The Best Burrito Recipe

    TORTILLAS (about 7″ diameter)
    2 cups SHREDDED CHEESE
    ¾ lb GROUND BEEF
    1 can KIDNEY BEANS (15oz)
    1 can REFRIED BEANS (15oz)
    3 Lg ROASTED PEPPERS (chopped)
    2 cups ONION (chopped)
    4-5 cloves GARLIC (finely chopped)
    1 Tbsp CHILI POWDER
    2 Tbsp CUMIN
    SALT and PEPPER (to taste)
    OIL (for greasing pans)
    1 cup SALSA for topping
    and some HOT SAUCE (optional)

    Is this the best burrito recipe ever? It sure looks like it!

    Baked burrito recipe
    Family-Style Baked Burritos

    How to Make A Family-Style Burrito Recipe

    You don’t HAVE TO roast peppers for this recipe–but it’s tasty if you do.

    We like to use 3 large peppers, get whatever kind you like–we usually use two poblano and one green bell pepper for a mix of flavors. Slice the peppers in half lengthwise and remove the ribs and seeds. Place the peppers cut side down on a greased pan and bake uncovered in the oven at 400 degrees F for 30 minutes. As the peppers roast, they will darken and begin to bubble.

    After half an hour, remove the peppers from the oven and cover the pan while the peppers are still hot. Let the peppers steam in their own heat for 10-15 minutes–this will loosen the skin and make it easy to peel away. Once the skin is removed you’ll have roasted peppers! They’re a tasty ingredient for many dishes; since we’re using all three peppers for the burrito filling, dice them all and set aside.

    Heat a large skillet on medium heat and brown the ground beef. As the beef begins to cook and release it’s fat, add the onion and garlic (if it’s too fatty, drain a little of the grease). Stir until the beef is lightly browned–no need to overcook, ’cause the beef will continue to cook in the oven.

    Remove the skillet from the heat and add the kidney beans and re-fried beans. Add ¾ of the diced roasted peppers and reserve ¼ to use later as a topping.

    Add the salt, pepper, cumin and chili powder–and if you want some heat, throw in a little hot sauce to taste.

    Mix ingredients well, and that’s the burrito filling!

    Cheesy baked burritos
    Awesome Burrito Recipe

    Grease an oven safe baking dish.  If you don’t have a good-sized dish, here are some current prices for Pyrex baking dishes on Amazon.

    We use medium size tortillas, about 7″. Put as much filling as you think is appropriate–we like two heaping spoonfuls–top the filling with cheese and roll the burrito up and place in the baking dish; repeat until the baking dish is full.

    If you have any filling remaining, spoon it thinly over the top of the burritos. Spoon hearty salsa over the top of the dish–chunky salsa!–not too wet. Sprinkle the top with the remaining roasted peppers and some shredded cheese (a mix of monterey jack and cheddar is best).

    Bake uncovered in a 400 degree F oven for 30-40 minutes, or until the edges of the burritos begin to brown.

    Turn the oven to broil and finish by toasting the top of dish for 3-5 minutes–be careful not to burn it!–keep an eye on the dish and remove it when it reaches toasty-cheesy perfection.

    Spoon burritos onto a plate and serve with sides of sour cream, guacamole, and salsa. It pairs great with rice!

    Give this burrito recipe a try and let me know what you think.

    If you enjoyed the dish, hit some of the buttons below and share this slice of burrito heaven with friends and family. Thanks for watching, and bon appétit!

    And for another tasty Mexican inspired recipe, why not try the best Nachos Grande Recipe in the world.

    nachos supreme
    World’s Best Nachos Recipe

    Thanks for checking out the recipes. Be sure and sign up for our mailing list so you’ll never miss a Chef Buck cooking video, and click a button below and share the dishes with your friends. We
    appreciate all the kind comments and support, and we’ll see you next time in the kitchen!
    –Chef Buck

    Share and Enjoy !


    Pancake Recipe for Fancy-Pants Pancakes

    pancakes!

    Pancakes are easily made from scratch and can be transformed into a fancy pancake recipe by adding a few favorite fillings. Some of my favorite combos are cranberry / walnut, chocolate chip / pecan, and banana / walnut. Nuts are always a great addition – they make a great bite!

    Pancake Recipe Ingredients

    (makes 5 good-size cakes or 8-10 sissy cakes):
    1 EGG
    3 Tbsp BUTTER
    1¼ cup MILK
    1½ cups ALL PURPOSE FLOUR
    3½ tsp BAKING POWDER
    1 Tbsp SUGAR
    1 tsp SALT
    CRANBERRIES
    CHOCOLATE CHIPS
    WALNUTS
    PECANS

    pancake recipe
    Fancy Pancakes are yummier than regular pancakes, and better looking, too.

    How to Make Pancakes

    In a bowl, combine melted butter, milk, and egg. Stir until well blended. In another bowl, combine and mix flour, baking powder, sugar, and salt. Add the dry ingredients to the wet, or the wet ingredients to the dry (who cares? it’s no big deal either way), and stir until smoothish…if there are a few lumps, it doesn’t matter.

    Heat a lightly oiled skillet or griddle on medium to medium high heat. Pour or ladle batter onto the skillet. Try not to make the first pancake too big, since often the first cake is the least pretty–although it wil still taste pretty good. Add pancake toppings into the batter–as much or as little as you like–a lot of folks use blueberries, but I prefer cranberries, chocolate chips, or bananas with nuts. Nuts are a great addition to a pancake–makes for a much better bite.

    It will only take a minute or two for the pancake to be ready to flip. Once air begins bubbling and opening tiny holes into the top of your cake, flip. It will only take half as much time for the other side to cook. Just peek under the cake and remove it when you’re happy. Serve with syrup and butter…and bacon is always a good idea, too.

    Give this fancy-pants pancake recipe a try and let me know what you think, and bon appétit!

    And if you enjoy this fancy pancake recipe, then try this fancy-pants Salmon and Poached Eggs Recipe.
    poached egg salmon spinach
    Thanks for checking out the video and recipe. If you liked it, why not share it? All the cool kids are!
    Thanks.
    –Chef Buck

    Share and Enjoy !


    Edamame Brown Rice Recipe –A Great Vegetarian Dish

    edamame

    This edamame brown rice recipe is super flavorful, filling, a great side dish, and delicious hot or cold. If you buy frozen soy beans for this dish, make sure they are thawed before using –and shelled!– shelled edamame is called mukimame.

    Edamame Brown Rice Recipe

    2 inch GINGER, finely chopped
    4-5 cloves GARLIC, finely chopped
    16 oz bag MUKIMAME (shelled edamame)
    ¾ cup LONG-GRAIN BROWN RICE
    2Tbsp fresh LIME JUICE
    2 Tbsp RICE VINEGAR
    2 tsp SOY SAUCE
    2 tsp SESAME OIL
    ½-1 tsp SUGAR
    3-4 GREEN ONIONS
    5 Tbsp CILANTRO, chopped
    2 Tbsp SESAME SEEDS, toasted
    SALT and PEPPER to taste

    edamame
    Mukimame with Brown Rice Recipe

    How to make Make Edamame with Brown Rice

    • In a saucepan, heat olive oil over medium-high heat. Check current prices for a sauce pan on amazon.
    • Sauté ginger and garlic for 1-2 minutes until fragrant.
    • Remove garlic and ginger from pan and set aside (I’ve tried skipping this step, and just continued cooking the garlic and ginger along with the rice, but it’s not as flavorful, so it’s definitely worth setting the garlic and ginger aside to add to the dish later).
    • In same pan (without rinsing), bring 1½ cups lightly salted water to a boil. Add rice, reduce to a low simmer; cover and cook, 30 minutes.
    • After 30 minutes, stir in thawed, shelled edamame (mukimame!); cover and cook until rice is tender and mukimame is heated through, about 15 to 20 minutes.
    • In a small bowl, combine lime juice, vinegar, soy sauce, sesame oil, and sugar and stir until sugar is dissolved.
    • Remove rice and beans from the stove and add ginger, garlic, lime juice mixture, scallions, cilantro and sesame seeds.
    • Mix well and add additional salt and pepper as desired.


    Give this edamame brown rice recipe a try and let me know what you think, and bon appétit!

    edamame
    Frozen Mukimame (shelled edamame)

    And for another great vegetarian dish, try this easy, awesome Quinoa Salad Recipe.

    southwestern quinoa salad
    a southwestern quinoa salad makes a tasty and healthy dinner choice.

    Thanks For Watching Our Recipe Videos!

    Thanks for checking out this edamame recipe, and all of our recipes. Be sure and sign up for our mailing list so you’ll never miss a new recipe. Also click a button below and share the dishes with your friends. You can also follow Chef Buck on Youtube. We appreciate all the kind comments and support, and we’ll see you next time in the kitchen!

    If you like what CG and I do, you can also support us on Patreon, or throw us a tip in our Paypal Tip Jar. We’ll happily enjoy a coffee on the road – Thanks! We appreciate all the support, and we’ll see you next time in the kitchen!

    We include affiliate links for products on our website. So, if you make a purchase after clicking on our links, we may earn a commission which helps us produce more videos and drink more coffee :^) We participate in the Amazon Services LLC Associates Program, which is an affiliate advertising program. It provides a means for us to earn fees by linking to Amazon.com and affiliated sites, so we can make more videos.

    Share and Enjoy !

    Home Fried Potatoes Crispy Breakfast Recipe

    home fried potatoes recipe

    This crispy home fried potatoes recipe makes a tasty breakfast side. I use onion and hot pepper in this video/recipe, but a little added green bell pepper is nice, too.

    Home Fried Potatoes Recipe Ingredients

    1 large POTATO
    2-3 Tbsp BACON FAT
    1/3 cup ONION (finely chopped)
    ¼ cup GREEN BELL PEPPER (finely chopped, optional)
    HOT PEPPER (to taste, finely chopped)
    1 tsp SMOKED PAPRIKA
    SALT and PEPPER to taste

    How to Make Home Fried Potatoes

    • In a skillet, fry up 4-5 pieces of fatty bacon, this will give you enough grease to cook up your potatoes.
    • Peel your potato, which is something I hate to say, ’cause potato skin is so delicious, but the breakfast home fries I grew up with were peeled, so that’s how I gotta roll.
    • Dice your potato into dinky cubes; they don’t have to be exactly the same same, but mostly they do, so cut them as uniformly as possible.
    • Add your diced potato to the skillet of hot grease–and by hot, I mean that your potatoes start to sizzle and cook when they hit the pan–but not overly hot, ’cause it will take 20-25 minutes to cook these potatoes up just right. Medium-low heat is a good temp, keep the potatoes sizzling, they need to crisp on the outside, but they also need to cook through on the inside, otherwise you’ll end up with a bunch of crispy, raw potato; so go slow, amigo.
    • Mix your potatoes with the grease and spread them out in the skillet and let them brown for about 5 minutes.
    • Add finely chopped onion and hot peppers; if desired, also add a little finely chopped green bell pepper for taste and color…I usually do, but if I don’t have it on hand, it’s not the end of the world–it’s just breakfast, man.
    • Mix the ingredients well and spread out in the skillet and let cook another 5 minutes.  If you don’t have a good pan, here are some current prices for cast iron skillets on Amazon.
    • Add paprika, stir and continue to cook for another 10 minutes, stirring occasionally, until the potatoes are cooked through and done to the desired crispness.
      The key is to not cook the potatoes too fast.

    Give this home fried potatoes recipe a try and let me know what you think, and bon appétit!

    And for a fancy pants breakfast dish, try this Baked Eggs Recipe.

    baked eggs
    Baked eggs are an easy way to impress folks for breakfast.

    Thanks for checking out the home fried potatoes recipe, and all of our recipes. Be sure and sign up for our mailing list to never miss a new cooking video, and also click a button below and share the dishes with your friends, and follow Chef Buck on Youtube. We appreciate all the kind comments and support, and we’ll see you next time in the kitchen!

    If you like what CG and I do, support us on Patreon, or throw a tip in our Paypal Tip Jar We’ll happily enjoy a coffee on the road, or maybe even pay a bill or two!–Thanks! We appreciate all the support, and we’ll see you next time in the kitchen!

    Thanks for watching our recipe videos!

    We include affiliate links for products on our website, so if you make a purchase after clicking on our links, we may earn a commission which helps us produce more videos and drink more coffee :^) We participate in the Amazon Services LLC Associates Program, which is an affiliate advertising program providing a means for us to earn fees by linking to Amazon.com and affiliated sites, so we can make more videos.

    Share and Enjoy !

    Spinach Salad Recipe with Pear and Cheese

    Best Spinach Salad

    This is the easiest, best spinach salad recipe in the world. We first had one of these spinach, pear, blue cheese, walnut, raspberry dressing salads years ago at a little tapas place in Key West, and we’ve been making them ever since–especially if we have a pear on the edge–the riper, softer, and juicier the pear, the better the salad is gonna taste.

    What You need for the Best Spinach Salad

    SPINACH
    1 PEAR (ripe, diced)
    WALNUTS (toasted) current WALNUT prices on Amazon
    BLUE CHEESE (crumbled)
    dressing:
    2 Tbsp OLIVE OIL
    1 Tbsp RASBERRY JAM
    1 Tbsp VINEGAR
    ½ tsp ITALIAN SEASONING
    SALT and PEPPER to taste

    Best Spinach Salad
    Best Spinach Salad

    How to Make a Pear Spinach Salad

    Crumble and spread your walnut pieces on a baking sheet and toast at 300 degrees F for 5-10 minutes until the nuts are toasted to your liking. Keep an eye on them–nuts are easy to over-toast and it’s usually worth setting a timer so they’re not forgotten.
    While your nuts toast, throw together your salad dressing–basically and oil and vinegar dressing with a little jam added for flavor.

    I make this dressing with all kinds of jams, but raspberry and strawberry are my favorites–although definitely give raspberry a try with this recipe. Combine your oil, vinegar, jam, salt, and Italian seasonings. Mix well. Taste and adjust as needed to your liking. A little sugar can be added if desired, but I usually find that the jam adds plenty of sweetness, plus the pear will add sweetness to the salad as well.

    Toss the dressing with your spinach leaves until all are well-coated. Divide spinach into serving bowls. Chop pear into nice chunks and add to salad. An overly-ripe pear works best. Sprinkle the toasted walnuts over the salad, then sprinkle with blue cheese crumbles. Lots of blue cheese. Or less. I like blue cheese. There are no ratios with this salad. Check prices for WALNUTS on amazon

    And that’s it. This is the best spinach salad in the world. So it is written, so it shall be done.
    Give this Spinach Salad recipe a try and let me know what you think, and bon appétit!

    For another tasty salad idea, try this Kale and Beet Dish!

    kale beet salad

    Thanks for Checking Out Our Spinach Salad

    Click a button below and share the dishes with your friends. You can also follow Chef Buck on Youtube. We appreciate all the kind comments and support, and we’ll see you next time in the kitchen!

    If you like what CG and I do, support us on Patreon, or throw us a tip in our Paypal Tip Jar. We’ll happily enjoy a coffee on the road – Thanks! We appreciate all the support, and we’ll see you next time in the kitchen!

    We include affiliate links for products on our website. Making a purchase after clicking on our links and we may earn a commission which helps us produce more videos and drink more coffee :^) We participate in the Amazon Services LLC Associates Program, which is an affiliate advertising program. It provides a means for us to earn fees by linking to Amazon.com and affiliated sites, so we can make more videos.

    Share and Enjoy !

    Baked Eggs Recipe with Spinach and Tomato

    baked eggs

    This baked eggs recipe is a delicious treat for breakfast or brunch, and it’s easy to prepare even though it looks super fancy. I’m throwing spinach, tomato, and Roman cheese in this baked eggs recipe, but it’s a versatile dish, and anything that’ll work in an omelet will work in this preparation. For a spicier version, add a dash or two of hot sauce as the tomatoes cook.

    What you need for a Baked Eggs Recipe

    (this recipe serves 2)
    4 EGGS
    OIL for sauteing
    2 cup fresh SPINACH
    2-4 GREEN ONIONS (chopped)
    2 small ROMA TOMATOES (chopped)
    3-4 GARLIC cloves (finely chopped)
    1-2 tsp dried ITALIAN SEASONING
    chopped JALAPENO (optional)
    freshly grated PARMESAN or ROMANO CHEESE
    4 Tbsp HALF N HALF
    SALT and PEPPER to taste
    ½ cup chopped PARSLEY (optional)
    sprinkle of PAPRIKA and fresh herb for GARNISH (optional)

    baked eggs
    Baked eggs are an easy way to impress folks for breakfast.

    How to Make Oven Baked Eggs

    • Heat oil on medium high heat in a small saute pan.
    • Add garlic and chopped bottoms of the green onion. Saute for 1 minute and then add the tomato.
    • Continue to saute for 2 minutes and then add salt, pepper, and Italian seasoning. Mix and cook for 1 minute.
    • Add green onion tops and spinach, and any fresh herbs you desire.
    • Saute until spinach is wilted.
    • Lightly grease an oven-safe dish. If you like the dishes I used in the video, you can check out current prices for au gratin baking dishes on Amazon.
    • Add a layer of cheese to bottom of the if you like, but this is optional.
    • Spoon and spread the spinach and tomato mixture into the bottom of the dish.
    • Drizzle Half n Half or cream over top and then sprinkle shredded Parmesan or Romano cheese.
    • Carefully crack eggs and top the dish with them.
    • Place in an oven preheated to 375 degrees Fahrenheit. If the baking dish/ramekins are small, place on a baking sheet for easy handling
    • Bake 15-20 minutes, or until the eggs are set and cooked as desired.
    • When eggs are finished baking, top with additional cheese if desired. Sprinkle with paprika or garnish with fresh parsley, or basil, or cilantro, or whatever, but a touch of freshly chopped green will make this dish quite lovely.

    Serve right away, because eggs are best hot, dude.
    Give this baked eggs recipe a try and let me know what you think, and bon appétit!

    For another fancy pants breakfast dish, try this tasty Huevos Rancheros Recipe.

    huevos rancheros
    Huevos Rancheros is a flavorful, classic mexican dish…delicious!

    Thanks for checking out his baked eggs recipe. If you liked it, then click a button or two below and share it with friends and family. I appreciate it!
    –Chef Buck

    Share and Enjoy !


    Broccoli Recipe – Best Blue Cheese Broccoli

    Broccoli with Blue Cheese

    Try this super-quick and awesome broccoli recipe. If you like blue cheese then you’ll love this dish, in fact, you’ll actually love broccoli if you only just liked it before …I know, kinda confusing, but trust me, this is a pretty damn tasty broccoli dish–and healthy, too. So make it.

    Bad-ass Blue Cheese Broccoli Recipe Ingredients:
    5 cups BROCCOLI FLORETS
    ¼ cup CARROT strings
    2-3 oz BLUE CHEESE crumbled
    ¼ cup SUNFLOWER SEEDS (shelled and toasted)
    SALT and PEPPER to taste

    Broccoli with Blue Cheese
    Broccoli with Blue Cheese Recipe

    directions:
    Toast the sunflower seeds (already shelled). This can be done quite quickly in a hot pan or skillet. Heat pan or skillet on medium/med-low heat; not too hot or seeds will burn. Add sunflower seeds and spread them into a single layer. Do not use any oil or spray in the pan. Stir the seeds in the skillet for a couple of minutes until they begin to brown, lightly browned is perfect; they’re easy to over-toast, so don’t leave them too long. It will only take 2 minutes on medium heat.
    Remove seeds from heat and set aside.

    Cover the bottom of a pot with about ¼ inch of water, just enough for steaming the broccoli and carrots. Add The broccoli florets to the pot and top with the carrot strings. Raise the heat, cover the pot, and allow the veggies to steam for approx. 5 minutes; ideally the florets will be cooked through, soft but not soggy!

    Turn off the heat and drain any remaining water in the sink. Add salt, pepper, the toasted sunflower seeds, and 2-3 ounces of crumbled blue cheese.
    Lightly toss ingredients together and serve while hot.
    This dish is super-simple and amazingly delicious –as long as you like blue cheese.
    Give this broccoli recipe a try and let me know what you think, and bon appétit!

    And for another great veggie dish, try this tasty Beet Greens Recipe.
    beet greens saute

    Share and Enjoy !


    Pickled Daikon and Carrot Relish –Vietnamese Style

    Vietnamese Pickled Daikon and Carrot Relish

    Vietnamese-style pickled daikon and carrot make a handy relish than can be used with salads, sandwiches, and all kinds of recipes. It’s a must have for making a banh mi sandiwich and I use it quite often as a salad topper and also dice it up to add to tuna, chicken, and quinoa salads. Keep a jar of pickled daikon and carrot in your fridge and experiment adding it to some of your favorite dishes.

    Pickled Daikon and Carrot Ingredients:
    2 cups cut DAIKON
    2 Cups Cut CARROT
    1-2 tsp SALT
    ¼ SUGAR
    ½ cup WATER (hot from tap)
    ½ cup VINEGAR

    pickled daikon
    Pickled daikon and carrot is a tasty and versatile relish to have in the fridge–awesome on sandwiches and salads.

    directions:
    Daikon is a BIG radish. When buying, choose one that is firm–if the daikon has green tops attached, choose one without wilted leaves, but often the tops are not attached. The skin is thin and can be peeled off with a simple vegetable peeler. The same is true for carrots, although I generally leave the skin on the carrots, but follow your heart. Slice and cut the daikon and carrot into matchstick sizes and place into a bowl. Add salt to the bowl and mix well with the daikon and carrot so that the veggies are coated. This will draw water out of the vegetables and soften them. Set bowl aside.
    In a smaller bowl, prepare the pickling solution. Combine warm tap water and sugar. Stir until dissolved and then add the vinegar. And that’s it!
    In the larger bowl, the salt will have started drawing moisture from the daikon and carrot matchsticks. When they have softened enough, cram them into a storage container and add the pickling solution.
    This pickled combo will keep in your fridge for 2-3 weeks. It’s a must have topping for Vietnamese banh mi sandwiches and works well in all kinds of sandwiches. Use this relish as a topping for salads or chop it up to incorporate in whatever dish you desire (it’s great in a coleslaw or quinoa salad).
    Give this pickled daikon and carrot relish a try and let me know what you think, and bon appetit!

    And if you wanna see this relish in action, check out this deconstruction of a Banh Mi Sandwich.
    bahn mi

    Share and Enjoy !


    Stamppot Boerenkool Dutch Meat and Potatoes

    kale and potato hash

    This kale hash recipe is a hearty and healthy way to get a tasty kale dish on the table for dinner. It’s based on a Dutch dish called Stamppot Boerenkool.

    Kale Hash Ingredients

    1½ bunches KALE
    3 lbs POTATOES
    1 lb SMOKED SAUSAGE (sliced)
    1 bunch GREEN ONIONS (chopped)
    2-3 cloves GARLIC (finely chopped)
    2 Tbsp BUTTER
    ½ cup MILK
    1 tsp CELERY SEEDS
    1 BAY LEAF
    SALT and PEPPER to taste

    How to make Stamppot Boerenkool

    Clean your potatoes and get them cooking. I like to use red potatoes since it’s a nice contrast with the kale, and the skin is thin and tasty (but if you’re not a fan of potato skin, you can peel them). In a large pot, cover the potatoes with cool tap water (about an inch over the potatoes).

    stamppot boerenkool
    Use lots of kale! –And red potatoes work great for this dish.

    Add salt and a bay leaf and bring potatoes to a boil until they are cooked through–cooking time will vary depending on the size of the potatoes–the potatoes I used in the video took approx. 25 minutes to cook; potatoes are cooked through once you can pierce them easily with a fork and the
    potato slides off. While the potatoes cook, wash and cut the kale. Remove the kale stems and cut or tear the leaves into bite-size pieces. For three pounds of potatoes, use 1 to 2 bunches of kale, the kale will cook down quite a bit, so don’t be shy with it–ideally, you want an even kale/potato ratio.

    Heat a large skillet on med. high heat and add the sausage (or for a vegetarian dish–just leave the sausage out…isn’t that genius?) . Saute for a a few minutes until the sausage begins to color. Add finely chopped garlic and chopped green onion bottoms. Mix with sausage and continue cooking 2 minutes. Add kale to the skillet. This will be a lot of kale, so don’t bother mixing the kale in at this point–just add ½ cup water and cover and allow the kale greens to wilt for 2 minutes.

    kale and potato hash
    Kale Hash Recipe (boerenkool)

    Once the kale has began reducing and softening, add salt to taste and then mix with sausage, garlic, and onion. Add a little more water if needed, but be conservative, as the kale will continue to release water of it’s own. Cover and continue steaming 3-5 minutes, or until it is cooked to your taste.

    When the potatoes are cooked through, drain off the hot water (reserve a small amount). Remove the bay leaf and mash the potatoes. Add butter, celery seeds, milk (optional–you can use the reserved hot potato water instead, or a mixture of the two), and add salt and black pepper to taste.

    Mash the potatoes as smooth or chunky as desired and then add the kale/sausage mix. Add the green onion tops. Combine well…and that’s it, dinner is ready! We serve stamppot boerenkool with a side of mustard and it is fantastico!

    Try new dishes! Get a bunch of spices, pots and pans, and begin experimenting with different recipes. Home cooking is a healthy hobby that will save you tons of money in the long run.
    Check out current prices for Complete Kitchenware Sets on Amazon as well as Complete Starter Spice Kits. Or go to a thrift store! I’ve found some of my favorite kitchen gear at second-hand stores.

    For a classic meat and potato dish, try this Hearty Beef Stew Recipe.

    beef stew recipe

    Thanks for checking out the recipes and I hope you give this stamppot boerenkool a try. Be sure and sign up for our mailing list so you’ll never miss a Chef Buck cooking video, and click a button below and share the dishes with your friends. We appreciate all the kind comments and support, and we’ll see you next time in the kitchen!
    –Chef Buck

    Share and Enjoy !


    Cook Chinese Eggplant Recipe with General Tso’s Sauce

    Chinese Eggplant Recipe with Sweet Sauce

    Cook Chinese Eggplant for a terrific vegetarian meal that will not having you missing the meat. For this Chinese eggplant dish, I use a sauce similar to one I use making General Tso’s Chicken, so it’s a rich and filling eggplant dish, hearty and vegetarian at the same time.

    ingredients to cook Chinese Eggplant Recipe

    1½ lbs CHINESE EGGPLANT
    4-6 Tbsp OLIVE OIL
    3 cloves GARLIC (finely chopped)
    1-2 RED CHILIES (thinly sliced)
    ½ cup whole CASHEW NUTS
    1 bunch GREEN ONIONS
    1 Tbsp SESAME OIL
    sauce ingredients:
    1/3 cup SOY SAUCE
    2 Tbsp HOISIN SAUCE
    1 tsp SESAME OIL
    2 Tbsp RICE VINEGAR
    2-3 Tbsp BROWN SUGAR
    1 Tbsp GINGER (minced)
    2 Tbsp CORN STARCH
    1½ cups WATER

    cook Chinese Eggplant
    Chinese Eggplant with Cashew Nuts and Sweet Sauce

    how to cook Chinese Eggplant Recipe with General Tso’s Sauce

    In a small bowl, combine all of the sauce ingredients. The fresh minced ginger is optional, but if you love ginger, why not? I also use 2 heaping Tbsp of brown sugar, but you can use more or less sugar depending on how much sweet you like–but the sweet is good with this recipe. Mix the sauce ingredients well and then set aside.
    Cut your Chinese eggplant. You should buy firm eggplant with glossy, unblemished skins. Cut into pieces approx. 2″ long and ½” wide.
    In a skillet or wok, heat olive oil on med. high heat. When the oil is hot, add eggplant. Saute eggplant 5-7 minutes. The eggplant will soak up the oil, so add more oil as needed or desired. Saute until the eggplant colors and begins to soften and then remove eggplant from the skillet. In the same hot skillet, add sesame oil and heat. Add garlic, hot pepper, and cashew nuts (or sub peanuts). Saute for 1 minute or until garlic colors. Add sauce and green onion bottoms. Stir sauce slowly. Because of the added corn starch, the sauce will quickly heat through, darken, and thicken. When the sauce has thicken to a a gravy/syrup consistency, return the eggplant to the skillet. Mix well, then cover the skillet and allow to simmer until the eggplant has finished cooking, 3-5 minutes depending on the size of the eggplant pieces. Stir in green onion tops. Fresh chopped cilantro also adds an excellent taste and garnish.
    And that’s a very tasty way to cook Chinese eggplant.
    Serve with rice, or without rice…and enjoy.
    And for a tasty General Tso’s Chicken Recipe, click the pic below.

    general tso chicken
    click pic for recipe

    Thanks for checking the recipe out. If you liked it, click a few buttons below and share it with your friends, I appreciate it.
    –Chef Buck

    Share and Enjoy !


    Chorizo Recipe — Cazuela de Chorizo!

    Chorizo Sausage recipe

    This spicy chorizo sausage recipe is a Spanish inspired meat and potato stew that is super-flavorful and delicious–and hearty, too.

    What you need for this Chorizo Sausage Recipe

    1 lb CHORIZO LINKS
    3-4 Tbsp OLIVE OIL
    1 lg ONION (chopped well)
    4-5 cloves GARLIC (thinly sliced)
    3 ROMA TOMATOES (diced)
    3 lg POTATOES (cut into approx 1″ pieces)
    14 oz can BROTH (add water as needed)
    1 BAY LEAF
    1 tsp SMOKED PAPRIKA
    1 Tbsp CHILI POWDER
    ¼ tsp CAYENNE PEPPER
    ½ tsp ground THYME
    SALT and PEPPER to taste

    Chorizo Sausage recipe
    Fresh Chorizo Sausage Links

    How to make Cazuela de Chorizo

    • Heat olive oil on medium high heat in a deep skillet or wide-bottom pot.
    • Add onion and garlic and saute.
    • As the onion begins to soften, add bay leaf, salt, chili powder, cayene pepper, and paprika.
    • Stir well and continue sauteing ingredients for 4-5 minutes.
    • Add chorizo sausage–use UNCOOKED chorizo links; slice the links in the casing, about ½ inch wide pieces.
    • Cook the sausage with the onions for 5 minutes and then add tomato (3 diced roma tomatoes or 14oz can diced tomatoes).
    • Mix tomato with onion and then add potato. I like to leave the skin on the potato mainly because it tastes GOOD. And then you don’t have to peel the potatoes either, which is good, too. The potato should be cut up into good sizes, about 1″ pieces, so that you’ll have some good chunks of potato after the dish stews.
    • Cover the skillet and bring the dish up to a bubble.
    • Reduce the heat to a simmer and add dried thyme.
    • Cover, and let simmer for about 30 minutes or until the potatoes are cooked through–stirring occasionally as needed.

    Give it a taste and add a little more salt and seasoning as desired. Garnish this chorizo recipe with fresh chopped parsley, cilantro, or green onion…and enjoy!

    Chorizo Sausage recipe
    Spicy Chorizo Sausage Stew

    If you don’t have a big skillet or pot, here’s a link to check out check out current prices for a BIG STEW POT on Amazon.

    For another great stew idea, check out this vegetarian alternative, a Meatless Chili Recipe that even meat lovers will love.

    vegetarian chili
    pot o’ meatless chili for good times

    Thanks for Watching our Chorizo Sausage Recipe Video!

    Click a button below and share the dishes with your friends. You can also follow Chef Buck on Youtube. We appreciate all the kind comments and support, and we’ll see you next time in the kitchen!

    If you like what CG and I do, support us on Patreon, or throw us a tip in our Paypal Tip Jar. We’ll happily enjoy a coffee on the road – Thanks! We appreciate all the support, and we’ll see you next time in the kitchen!

    We include affiliate links for products on our website. Making a purchase after clicking on our links and we may earn a commission which helps us produce more videos and drink more coffee :^) We participate in the Amazon Services LLC Associates Program, which is an affiliate advertising program. It provides a means for us to earn fees by linking to Amazon.com and affiliated sites, so we can make more videos.

    Share and Enjoy !

    Creamy Shrimp Curry Recipe –quick and easy with a yogurt sauce

    creamy shrimp curry

    Try this quick, creamy shrimp curry recipe for a change of taste. It’s super fast to prepare and kinda/sorta healthy–I usually serve this shrimp curry with rice and top with fresh chopped cilantro. Don’t be shy adding hot peppers, since the yogurt sauce and rice will absorb a lot of any heat added.

    SHRIMP CURRY RECIPE
    ingredients:
    1 to 1½ lbs SHRIMP (peeled/deveined)
    2-3 Tbsp OLIVE OIL
    2 tsp MUSTARD SEEDS
    2 chili peppers (chopped, or sub red pepper flakes)
    1 cup plain Greek YOGURT
    ¼ tsp ground CINNAMON
    ¼ tsp ground CLOVE
    ½ tsp CARDAMOM
    1½ tsp MANGO POWDER
    2 tsp CORIANDER
    ½ tsp CORN STARCH
    SALT to taste
    CILANTRO (chopped)
    serve w/ RICE

    shrimp curry recipe
    Creamy Shrimp Curry Recipe

    In a small bowl, combine Greek yogurt with cinnamon, clove, cardamom, mango powder, coriander, and corn starch. Mix ingredients well until the yogurt is smooth. Heat olive oil in a skillet and add mustard seeds and finely chopped peppers. Use as much or little pepper as you like–if you’ve got fresh peppers that’s great, but red pepper flakes make a decent substitute. After 1 minute, add yogurt sauce to the skillet. Stir well and bring to a light bubble and let simmer 2 minutes. Adjust stovetop temperature as needed. Add shrimp, already peeled and deveined. Mix with sauce and return skillet to a simmer. Let cook 4-5 minutes, stirring as needed, until shrimp are pink and done–try not to overcook your shrimp ’cause that’s sad.
    Salt dish as desired and remove from heat. Garnish with fresh chopped cilantro and serve with rice. It’s best to cook your rice ahead of time, since this creamy shrimp curry takes very little time to prepare. Give it a try and let me know what you think, and bon appetit!

    For another tasty shrimp dish, give SPICY FRIED SHRIMP a try.

    Share and Enjoy !


    Thai Beef Salad Recipe Quick and Easy

    thai beef salad

    Thai Beef Salad is an easy recipe to prepare with lots of room for nuance, i.e., using whatever the hell you have in the fridge. I like to use sirloin steak since it’s a good piece of meat that doesn’t cost an arm and a leg and you can generally buy a nice cut that makes for good slicing. Season your steak up well, don’t overcook it, and let it rest well before slicing–these 3 steps are key for a great steak salad.

    Ingredients for Thai Beef Salad

    ¾ lb SIRLOIN STEAK
    1 Tbsp OLIVE OIL
    2-3 cups SALAD GREENS (don’t use so much green that the steak is lost!)
    3 GREEN ONIONS (chopped)
    ½ CUCUMBER (matchstick cuts are nice)
    ½ CARROT (thin cut–cut into strings is nice, dude)
    1 Tbsp CHILI PASTE (more or less, depending on desire for heat)
    1 tsp LEMON GRASS (minced) (sub extra ginger if lemon grass is not used)
    1 tsp GINGER (minced)
    1 LIME JUICE
    ½ cup CILANTRO (chopped) …thai basil and mint leaves are nice, too.
    1 tsp CHILI POWDER
    SALT and PEPPER to taste

    How to Make a Thai Beef Salad

    I’ve never bought lemon grass online, but it’s apparently a thing. Look here if you want to check current prices for fresh lemon grass on Amazon.

    First, mix up your dressing. Lemon grass is a key component in many Thai dishes and makes a nice addition to this steak salad. Cut off the upper leaves of the stalk and the very bottom,leaving about 5-6 inches. This is generally the only part of the lemon grass used in recipes and is sometimes sold already cut into these sections in grocery stores. The outer part of the stalk is often very tough, so cut away the outer layers to reveal the softer core.

    Mince about an inch of the lemon grass core and add it into a bowl. Add finely chopped ginger, chili paste, lime juice, salt, and mix ingredients well. Set dressing aside and season sirloin steak.

    Season both sides of the steak well–I like salt, pepper, and chili powder–but use whatever seasonings you desire (and season it well!).

    Heat oil in a skillet and cook the steak quickly on high heat, turning once and sealing the juices inside. Do not overcook the steak or puncture it with a knife or fork. Set the steak aside to rest at least 10-15 minutes, this will keep the juices from running when the steak is sliced.

    While the steak rests, preare the salad. Use whatever greens you desire, but don’t use so much salad that the steak becomes just another component–allow the steak to be the star of the dish.
    Tear salad greens into a bowl and add thinly cut carrots, cucumber matchsticks, chopped green onions, and chopped cilantro (also try fresh chopped basil and mint). Add salad dressing and toss.

    Cutting against the grain of the meat, slice steak into thin strips and add to the salad. Add any juices from the steak and toss salad.
    Garnish with toasted sesame seeds. Enjoy!

    thai beef salad
    thai beef salad recipe

    If you’re new to home cooking, just get a bunch of spices, pots and pans, and start experimenting with different ingredients and recipes. It’s a healthy hobby that can save a lot of money in the long run. You can check out current prices for Complete Kitchenware Sets on Amazon as well as Complete Starter Spice Kits. Or just go to a thrift store! I’ve found some of my favorite kitchen gear at second-hand stores.

    For another great healthy meal, try this Vietnamese Bánh Mì Style Quinoa Salad Recipe.

    Quinoa Salad -- Banh Mi Style
    Quinoa Salad — Banh Mi Style

    Thanks for taking a peek at the video and recipes. If you like it, click a button or two below and share with your friends! I appreciate it!
    –Chef Buck

    Share and Enjoy !


    Spicy Crispy Chickpea Recipe -great salad topping!

    Here’s a quick, spicy chickpea recipe that makes a great salad topping and a so-so snack; it’s a lot easier on your teeth than baked chickpea snacks, which I find to be almost inedible (they tend to turn into tiny rocks).

    ingredients:
    15 oz can CHICKPEAS
    2-3 Tbsp OLIVE OIL
    ½ tsp CURRY POWDER
    ½ tsp CUMIN
    ½ tsp PAPRIKA
    dash CAYENNE PEPPER
    SALT to taste

    chickpea recipe

    Rinse and drain a 15oz can of chickpeas (garbanzo beans). In a skillet, heat olive oil on medium heat. When the oil is hot, add chickpeas–be sure that they are drained well, since water and hot oil definitely do not mix. Saute chickpeas for 10-15 minutes; obviously, the longer they’re in the skillet, the crispier they will get, but it’ll take about 15 minutes to get them “crispy”. Once the chickpeas get near the doneness you desire, add salt, pepper, and spices. The spice combo in the recipe works well, but experiment with whatever spices you have–and don’t be shy with the spices–spice really makes this recipe work, and a good deal of the spice you use will remain in the skillet when you remove the chickpeas. Saute chickpeas and spices another 2-3 minutes and then remove from the heat.
    Use them as a salad topping instead of croutons for a healthy crunch, or a just tasty snack, something to nibble on besides potato chips.
    Enjoy!

    Ever try Chickpea Curry(chana masala)? It’s a terrific Indian chickpea dish.

    Share and Enjoy !


    Tilapia Recipe –Easy Baked Panko-Crusted Fish

    This easy, baked tilapia recipe will make even those big boring bags of tilapia fillets taste great –or any other less than stellar fillet of fish. Tilapia is not an exciting fish, but it’s often a pretty good buy relative to everything else in the seafood department. This recipe will turn tilapia–or any bargain fillet–into a super tasty, super moist side of aquatic splendor (too much?). Breading and frying always helps tilapia, but breading and baking will do the same, and it’s a lot less messy and a lot more moist–and healthier, too.

    Tilapia Recipe Ingredients

    2 FISH FILLETS (about 8oz each)
    ½ ONION (sliced or chopped)
    ½ cup PANKO BREADCRUMBS
    ½ tsp GARLIC POWDER
    SALT and PEPPER to taste
    2 Tbsp fresh DILL (or 2 tsp dried dill)
    ¼ cup MAYONNAISE
    1 tsp DIJON MUSTARD
    1 clove GARLIC (minced)
    1 Tbsp fresh LEMON JUICE (add zest for extra lemony-ness)

    How to Bake Tilapia

    Preheat oven to 450 degrees F.
    In a small cup, combine panko crumbs (or any breadcrumbs–panko just happens to be best, I think) with garlic powder, salt, pepper and 1/2 of the dill and mix.
    In a separate bowl, combine the remaining dill, mayonnaise, Dijon mustard (not yellow mustard!) and lemon juice and stir until smooth.
    Rinse and pat the fish fillets dry with paper towels. Spray a baking pan with cooking spray. Lay onion slices in pan and place fillets over
    onions. Evenly brush the tops and sides of the fish with the mayonnaise mixture. Sprinkle and press the crumbs into the mayonnaise.
    Place pan in oven and bake about 15 minutes until the crumb topping has turned a nice, golden brown. Serve with rice and veggies.
    Give this tilapia recipe a try and let me know what you think, and bon appetit!

    For another tasty fish dish, try this Crispy Skin Salmon Recipe.

    crispy salmon recipe
    For the best fresh fish recipes…keep it simple

    Have fun in the kitchen. Get a bunch of spices, pots and pans, and begin experimenting with different recipes. home cooking is a healthy hobby that will save you tons of money in the long run. Check out current prices for Complete Kitchenware Sets on Amazon as well as Complete Starter Spice Kits. Or go to a thrift store! I’ve found some of my favorite kitchen gear at second-hand stores.

    Thanks for checking out the recipes. Be sure and sign up for our mailing list so you’ll never miss a Chef Buck cooking video, and click a button below and share the dishes with your friends. We
    appreciate all the kind comments and support, and we’ll see you next time in the kitchen!
    –Chef Buck

    Share and Enjoy !


    Edamame Recipe –Roasted Snack and Salad Topping

    Try this roasted edamame recipe for a quick semi-healthy snack. The toasted Parmesan cheese will almost make you forget that you’re eating soybeans.

    Roasted Edamame Recipe Ingredients:
    10 oz frozen shelled EDAMAME (green soybeans)
    1 Tbsp OLIVE OIL
    1 tsp GARLIC POWDER (also add or substitute onion powder, chili powder)
    SALT and PEPPER to taste
    ¼ cup shredded PARMESAN CHEESE

    directions:
    Preheat oven to 425 degrees F.
    Mix frozen edamame beans (no need to thaw), olive oil, fresh-cracked black pepper, salt, garlic powder, and Parmesan cheese together in a large bowl. Try experimenting with different seasonings; substitute onion powder or chili powder for the garlic–or add them all–this is an easy snack food to change up for a little variety.
    Spread mixture onto an ungreased baking sheet.
    Place in oven and bake for 8-10 minutes and then remove from oven and stir. Spread edamame out again and cook another 8-10 minutes, until the cheese is toasted crispy and golden.
    Add additional salt or garlic powder if desired.

    Roasted edamame makes a great salad topping.
    Roasted edamame makes a great salad topping.

    Eat as a quick snack–it is delicious hot out of the oven–or use as a topping for salads and whatnot.

    Tastes great hot out of the oven--perfect for snacking.  Try it as a movie treat instead of popcorn.
    Tastes great hot out of the oven–perfect for snacking. Try it as a movie treat instead of popcorn.

    Give this roasted edamame recipe a try and let me know what you think, and bon appetit!

    And for another quick and healthy salad topper, try this Spicy Chickpea Recipe.

    chickpea snack recipe
    chickpea snack recipe

    Roasted edamame or chickpeas are both great components in a salad. A super-flavorful and healthy salad ingredient is kale. It’s extremely versatile and can be eaten raw or cooked. Click on the video link below to discover some simple tips on using raw kale in your next salad.

    avocado kale w/ chickpeas
    raw avocado kale salad

    Share and Enjoy !


    Asparagus Recipe — Tangy Lemon Ginger Asparagus

    Asparagus is one of those veggies you cook when you’re trying to impress–and this asparagus recipe will do the job. The lemon adds a nice zing while the whole fennel/mustard seeds add flavor and texture without overpowering the great taste of asparagus.

    Asparagus Recipe Ingredients:
    1½ lb. ASPARAGUS
    1 small LEMON (zest and juice)
    2 Tbsp OLIVE OIL
    ½ tsp FENNEL SEEDS
    ½ tsp MUSTARD SEEDS
    3-4 cloves GARLIC (or more…go for it, dude)
    1 inch GINGER (which should end up being between 1-2 Tbsp thinly sliced)
    SALT and PEPPER to taste

    When buying asparagus, thin is better than thick. Choose firm spears. Avoid asparagus that have a wrinkled skin, or tips that are wet and greasy looking. Rinse and drain the asparagus spears, then chop into 1 inch pieces. When slicing, leave the tops of the spears intact so they don’t fall apart while cooking. Heat olive oil on medium heat in a skillet. When oil is hot, add mustard and fennel seeds and stir for 20-30 seconds–not long at all. Add garlic and ginger–a lot of ginger; I use about 1 inch, thinly sliced–about the size of a fish scale. Stir skillet 1 minute, lower heat if necessary.
    Stir in asparagus. Add salt and pepper to taste. I like my asparagus to retain a bit of crunch–who likes mushy asparagus?–so this dish doesn’t take long to cook. Saute for about 4 minutes and the dish will be done. From the time you add the seeds to completion, the cooking time will only be about 5 minutes–of course you can extend the cooking time if YOU DO like softer asparagus (crazy!)–but everybody likes what they like, so namaste, man. About a minute before the dish is done, add the lemon zest. When the asparagus is crunchy or soft the way you like it, and you’re ready to get it off the heat, add the lemon juice, stir, and serve.
    It’s a tasty asparagus dish and a perfect side for a nice steak (or whatever).
    Give this asparagus recipe a try and let me know what you think, and bon appétit!

    If you enjoy asparagus, you likely love this Brussels Sprouts Recipe.
    brussels sprouts

    Share and Enjoy !


    Chinese Eggplant Recipe – healthy, low-fat dish

    chinese eggplant

    This Chinese eggplant recipe is awesome because it’s purple–not purple like a black eye–but purple like Barney the Dinosaur, which is nice.

    Choose eggplants that are firm and have a glossy skin. The skin is thin and tasty, and Chinese eggplants have smaller seeds than the black, bowling ball eggplant you might be used to preparing. They’re a great ingredient for a stir-fry and can stand in for meat without being as awful as tofu. So give ’em a try.

    What you need for this Chinese Eggplant Recipe

    3 small CHINESE EGGPLANTS
    3-4 Tbsp OLIVE OIL
    5 cloves GARLIC (finely chopped)
    1 inch GINGER (thinly sliced)
    2 tsp MUSTARD SEEDS
    1 Tbsp ground CORIANDER
    1 bunch GREEN ONIONS (chopped)
    1 JALEPENO or other hot pepper (sliced)
    SALT to taste
    — optional garnishes —
    SOY SAUCE or CHILI GARLIC SAUCE

    How to cook Chinese Eggplant

    Heat oil in a skillet on medium high heat. If you need a nice skillet, you can check here for current pricing for a non-stick skillet on Amazon.

    When oil is hot, add garlic and ginger. Add mustard seeds and coriander powder and sauté 2 minutes.

    Add chopped green onion bottoms and reserve the chopped green onion tops for later. Add hot pepper and continue sautéing for a couple minutes.

    Add sliced eggplant (with skin). Choose eggplants that are firm, glossy skinned, and heavy for their size. Slice into rounds no more than 1/4 inch thick. Add salt and stir eggplant. Stir for a few minutes.

    Add water as needed, but not too much, the eggplant will release water as it cooks. Reduce heat, cover and cook 10-12 minutes, stiring as needed. The eggplant will be ready when it is soft, but not falling apart. Mix in green onion tops and remove from heat.

    Add soy sauce or chili garlic sauce if desired. Serve as a main dish over pasta or rice (or on it’s own as a side dish). Give this Chinese eggplant recipe a try and let me know what you think, and bon appétit!

    And for another Asian inspired recipe, try this Japanese-style Teriyaki Chicken Recipe.

    chicken teriyaki recipe
    teriyaki chicken recipe

    Thanks for checking out the recipe, if you liked it, then click a button or two below and share it with your friends.
    I really appreciate it, thanks!
    –Chef Buck

    Share and Enjoy !


    Daikon Salad Recipe (mild, white radish)

    daikon salad

    This daikon salad recipe is crisp with loads natural flavors. Daikon radish has a mild flavor and adds great texture and crunch to a salad.

    Daikon Salad Recipe Ingredients:
    1 DAIKON RADISH (matchstick cuts, about 2 cups)
    1 large CARROT (shredded)
    3 salad CUCUMBERS (sliced)
    1/2 SMALL CABBAGE (chopped)
    1/2 cup rice wine VINEGAR
    1/2 cup WATER
    2-3 Tbsp SUGAR
    3 GREEN ONIONS (chopped)
    1 inch GINGER (finely chopped)
    1/4 cup CILANTRO (chopped)
    1 hot PEPPER (jalapeno, diced)
    1/2 cup SLICED ALMONDS (toasted)
    1 package RAMEN NOODLES (toasted)
    SALT and PEPPER, to taste

    Chop vegetables and place in 1 gallon size ziplock (except cilantro). Mix water, vinegar, sugar, and salt and pour over chopped veggies in ziplock. Seal and shake and then place in fridge, occasionally turning. On a baking sheet, spread out almond slices and broken ramen. Bake at 350 degrees F until toasted–watch carefully to avoid burning. Remove from oven and allow to cool. Remove ziplock from fridge and place vegetables in bowl. Toss with toasted nuts, ramen, and cilantro.

    For another awesome Asian-inspired salad, try this Thai Beef Salad Recipe.

    thai beef salad
    thai beef salad recipe

    Share and Enjoy !


    Best Stuffed Squash Recipe –looks fancy, tastes great!

    squash recipe

    This stuffed squash recipe is easy to cook, yummy as hell, and looks pretty fancy-pants when you stuff it full of delectable goodies.

    Try out the recipe below and let me know what you think. Hope you like it!

    Stuffed Squash Recipe Ingredients:

    2 ACORN SQUASH (halved, seeds removed)
    2 tsp OLIVE OIL
    3 cloves GARLIC (minced)
    1/2 inch fresh GINGER (minced)
    1 CARROT (peeled and chopped)
    1 cup GARBANZO BEANS (drained)
    1/3 cup RAISINS (or dried currants)
    1 tsp ground CUMIN
    1/2 tsp ground CINNAMON
    [1/4 tsp ground GINGER, if didn’t use fresh]
    SALT and freshly GROUND PEPPER, to taste
    1 cup BROTH
    3/4 cup instant COUSCOUS
    1/2 cup SLIVERED ALMONDS (toasted)
    2-3 GREEN ONIONS (white and green parts, chopped)
    1/2 golden delicious APPLE (cored and chopped)

    squash recipe
    A squash recipe to impress!.

    How to Make Stuffed Squash:

    Preheat the oven to 400.
    Toast the almonds.
    Place the squash halves, cut side down, on a shallow pan with ¼ inch of water. Roast until the squash is easily pierced with a fork, about 30 – 40 minutes.
    In a medium saucepan, heat the olive oil over medium heat. Stir in the garlic, ginger, and carrots, and cook 5 minutes. Mix in the garbanzo beans and raisins. Season with cumin, cinnamon, salt, and pepper, and continue stirring for another minute.
    Add broth, simmer 5 minutes.
    Stir in couscous, cover pot, and turn off heat. Allow couscous to absorb liquid for 5 minutes.
    Stir in the almonds, green onions, and apple. Spoon the filling into the roasted squash, mounding generously and serve.
    You can freeze leftovers (or make extras). Freeze by mashing the squash on the bottom of the container then adding the couscous mixture on top.
    And that’s that.
    Give this stuffed squash recipe a try and let me know what you think, and bon appétit!

    Also, try this TERRIFIC SPAGHETTI SQUASH RECIPE!
    stuffed squash recipe

    Thanks for watching and sharing and subscribing, I appreciate it!

    Share and Enjoy !


    Cha Lua — Let’s Try Vietnamese Ham

    cha lua vietnamese ham

    Cha Lua, or Vietnamese ham, is a staple of the Vietnamese diet and often found on the table during Tét–the celebration of the New Year.

    During a recent trip down to Little Saigon (on a bánh mi run), we randomly picked up a cha lua and brought it home to give it a try. It was pretty bland right out of the banana leaves, with a rubbery consistency–but these characteristics make it a pretty versatile ingredient in many dishes–much the same as tofu, but a meat version. I ended up slicing and marinating the ham in chili and soy sauce with curry and garlic powder and frying up the slices to make an awesome bánh mi burger–which was delicious; I will definitely be making again in the near future.

    Take a look at the exceptionally delicious Bánh Mì Hamburger made with cha lua.

    Take a look at a traditional Bánh Mì Sandwich.
    bahn mi

    Share and Enjoy !


    Vegetarian Chili Recipe EVERYONE Will Love

    vegetarian chili

    Try this vegetarian chili recipe for folks who don’t like vegetarian chili!

    It’s tatsy and easy to make, too; once you’ve chopped up the ingredients, you’re 90% done. Or at least 85% done. Give it a try and let me know what you think.

    What You Need For This Vegetarian Chili Recipe

    2 15 oz cans CHICK PEAS
    2 15 oz cans KIDNEY BEANS
    2 BELL PEPPERS (chopped)
    1 ONION (chopped)
    1 HOT PEPPER (diced)
    6 cloves GARLIC (finely chopped)
    2 SQUASH (cut into large pieces)
    1 ZUCHINNI (cut into large pieces)
    2 lg or 4 sm TOMATOES (chopped)
    1 28 oz can CRUSHED TOMATOES
    3-6 oz TOMATO PASTE
    1/2 cup CILANTRO (chopped)
    1 heaping Tbsp OREGANO
    2 Tbsp OLIVE OIL
    1 Tbsp CUMIN
    1/2 tsp CAYENNE PEPPER
    2 Tbsp CHILI POWDER
    SALT and PEPPER, to taste
    WATER as needed…add slowly

    Vegetarian Chili Recipe
    Don’t let the word “vegetarian” keep you from trying this recipe!

    How To Make Vegetarian Chili

    Heat olive oil in large pot on medium high heat. Add onions, hot pepper, and garlic and saute 4-5 minutes. Add bell peppers and continue sauteing. Add chili powder, cumin, salt, and cayenne pepper. Mix ingredients well. Add beans and continue cooking. Add zuchinni and squash and oregano. Continue cooking 2-3 minutes and then add fresh tomatoes. Add canned crushed tomatoes. Slowly add water–not too much–as the vegetables will begin to release water as they cook. Cover and bring pot to a boil. Reduce heat and stir in the cilantro. Cover and allow to simmer approx. 45 minutes.
    That’s it man. If you can make it a day ahead, then you’re lucky–chili aways taste best on the day after! But it’s good right away, too. Top with shredded cheese, or a dollop of sourcream, or a handful of corn chips–or all three–it’s gonna be delicioso!
    Give this vegetarian chili recipe a try and I bet you’re gonna love it–and it’s a healthy chili choice, too.
    Bon appetit!

    For more vegetarian comfort food, try this Gluten-Free Tofu Lasagna.
    gluten free tofu lasagna

    Thanks for checking this vegetarian chili recipe out! If you liked it, click some of the buttons below and share it with your friends and family, I appreciate it.
    –Buck

    Share and Enjoy !


    Scone Recipe — Pecan Maple Biscuit Treat

    scone recipe

    This is a delicious pecan maple scone recipe, but not a good idea for folks with sugar/carb addictions and questionable degrees of willpower…which is pretty much everyone.

    The only reason I’m even putting this up is because The Devil assured me that if I did I would one day win an Oscar and live in a luxury beach house in Malibu (which IS going to happen ’cause I was smart enough to get the deal in writing).

    Scone Recipe Ingredients

    Scones:
    2 cups FLOUR
    1/2 cup SUGAR
    1 Tbsp BAKING POWDER
    1/2 tsp SALT
    5 Tbsp BUTTER
    1/2 cup PECANS (chopped)
    1/4 cup RAISINS
    1 cup SOUR CREAM
    1/4 cup MAPLE SYRUP
    1 tsp VANILLA

    Icing for Scone Recipe

    1 cup POWDERED SUGAR
    splash of WATER
    2 Tbsp MAPLE SYRUP

    scone recipe
    best scone ever…really

    In a large bowl, combine flour, sugar, baking powder, and salt. Cut butter into flour mixture (freezing the butter and grating it into the mix is an easy trick to get this done). Add pecans and raisins into the mix.

    In a separate bowl, combine sour cream, vanilla, and 1/4 cup maple syrup. Whisk together until smooth.
    Pour the sour cream mixture into the flour mix and gently turn for a few minutes until the flour begins to form into clumps. Most of the loose flour will adhere into these clumps, but it’s okay if all of it doesn’t.

    On a sheet of parchment paper or floured surface, pour the contents of the bowl. Press the clumps together into a mound–it’ll want to brake apart somewhat, but that’s okay. Flatten the mix into a circular cookie shape about 1 inch thick and cut like a pizza into 8 slices. Check here for current pricing for parchment paper on Amazon.

    Arrange onto a flat baking sheet and bake in a 400 degree F oven for 20-25 minutes, until baked through and golden brown.

    While scones cool, add powdered sugar into a small bowl. Add 1-2 Tbsp of warm tap water–add water slowly and whisk into a syrup; be conservative, it’s easy to add too much water. Then whisk 2 Tbsp of maple syrup into the powdered sugar syrup. Why? I don’t know, just crazy.

    Drizzle the syrup glaze over the scones and allow the icing to harden (approx 10-15 min).

    And there you go…a very sweet and healthy-free combo of questionable ingredients combined to put on the pounds and take potentially vibrant years off of the back-end of your life.
    But this scone recipe is delicious.
    Enjoy, if possible.
    I usually really like the first two, and then I begin to question my motivations.

    For a less decadent, less lethal treat, try this Homemade Biscotti Recipe.

    biscotti recipe
    Adding a little cocoa powder and ground coffee makes a nice biscotti twist.

    Thanks For Watching Our Scone Recipe!

    Thanks for checking out our scones, and all of our recipes. Be sure and sign up for our mailing list so you’ll never miss a new recipe. Also click a button below and share the dishes with your friends. You can also follow Chef Buck on Youtube. We appreciate all the kind comments and support, and we’ll see you next time in the kitchen!

    If you like what CG and I do, you can also support us on Patreon, or throw us a tip in our Paypal Tip Jar. We’ll happily enjoy a coffee on the road – Thanks! We appreciate all the support, and we’ll see you next time in the kitchen!

    We include affiliate links for products on our website. So, if you make a purchase after clicking on our links, we may earn a commission which helps us produce more videos and drink more coffee :^) We participate in the Amazon Services LLC Associates Program, which is an affiliate advertising program. It provides a means for us to earn fees by linking to Amazon.com and affiliated sites, so we can make more videos.

    Share and Enjoy !

    Brussels Sprouts Recipe That Everyone Will Love

    brussels sprouts

    This is my absolute favorite Brussels Sprouts recipe. it’s super tasty, simple to make, and a healthy choice, too, so definitely give it a try.

    Brussels Sprouts Recipe Ingredients

    1½ lbs BRUSSELS SPROUTS
    3-4 Tbsp OLIVE OIL
    ½ ONION (chopped)
    4-5 cloves GARLIC (finely chopped)
    1 LEMON zest and juice …current prices online for Kitchen Zesters
    ½ cup WATER
    SALT and PEPPER, to taste

    brussels sprouts recipe
    Sear Brussels sprouts in a hot skillet for exceptional taste!

    How to Cook Brussels Sprouts

    • Wash 1½ lbs sprouts. Cut off the ends and discard outer leaves. Slice sprouts into halves, or larger sprouts into 3rds.
    • Heat 3-4 Tbsp oil in a skillet on high heat–you want the skillet to be hot to sear the sprouts–and don’t be shy with the olive oil.
    • Add Brussels sprouts. They should start to sizzle and pop right away. Let set before stirring to get a seared edge. Turn sprouts and continue to sear.
    • After 4-5 minutes, stir in onion and garlic and continue to cook on high to med. high heat, searing and turning another 3-4 minutes.
    • Then reduce heat to medium and add water. Add seasoning.
    • Stir, cover, and let cook 4-5 minutes.
    • Then turn off heat, stir in lemon zest and lemon juice, and serve.

    Need a nice skillet? Check current prices for skillets on Amazon.

    Give this Brussels Sprouts Recipe a try and let me know what you think, and if you’re still in the mood for foods that start with “B”, try this Beet Recipe.
    brussel sprouts recipe

    Brussels Sprouts Fun Facts

    • 89% of all children despise Brussels Sprouts.
    • 3/4 of all convicted felons do not eat Brussels sprouts.
    • Albert Einstein considered the Brussels Sprout to be the most compact cabbage, relatively speaking.
    • Even children who dislike the taste of Brussels sprouts appreciate the vegetable for it’s “slingshotability”
    • Every U.S. president has loved Brussels sprouts and eaten them routinely.

    Thanks for checking out our Brussels sprouts recipe, and all of our recipes. Be sure and sign up for our mailing list and never miss a new Chef Buck cooking video, and also click a button below and share the dishes with your friends. We appreciate the kind comments and support, and we’ll see you next time in the kitchen!
    –Chef Buck

    Thanks for watching our recipe videos!

    We include affiliate links for products on our website, so if you make a purchase after clicking on our links, we may earn a commission which helps us produce more videos and drink more coffee :^) We participate in the Amazon Services LLC Associates Program, which is an affiliate advertising program providing a means for us to earn fees by linking to Amazon.com and affiliated sites, so we can make more videos.

    Share and Enjoy !

    Tofu Lasagna Recipe — Gluten Free Edition

    gluten free tofu lasagna

    The only thing that sounds worse than a tofu lasagna recipe is a gluten-free tofu lasagna recipe. However, this recipe is actually pretty tasty, and still gluten-free.

    Camera Girl whipped up this dish and it was damned tasty. I’m not ready to start driving the tofu train, but I am enjoying the ride.

    Tofu Lasagna Recipe Ingredients

    The sauce:
    1 Tbsp OLIVE OIL
    1/2 tsp RED PEPPER FLAKES (crushed)
    1/2 large ONION (chopped)
    3 cloves GARLIC (chopped)
    15 oz can DICED TOMATOES
    8 oz can TOMATO SAUCE
    1 CARROT (chopped well)
    1 stalk CELERY (chopped well)
    2 tsp OREGANO
    1/2 tsp BASIL
    1 BAY LEAF
    SALT & PEPPER, to taste
    ….or substitute 25 oz jar store-bought marinara sauce, but don’t do that :^(
    The filling:
    1 pkg gluten-free, rice LASAGNA NOODLES (you do not cook them prior to baking)
    2 Tbsp extra-virgin OLIVE OIL
    1/2 large ONION (chopped)
    6 cloves GARLIC (minced)
    16 ounce package EXTRA-FIRM, WATER-PACKED TOFU (not silken tofu)
    3 cups fresh SPINACH (chopped)
    1/2 cup PARMESAN CHEESE (shredded)
    1/2 cup part-skim MOZZARELLA CHEESE (shredded)
    2 Tbsp Kalamata OLIVES (finely chopped)
    2 tsp dried OREGANO
    1/2 tsp dried THYME
    SALT & PEPPER, to taste

    gluten free tofu lasagna

    How to Make Tofu Lasagna

    First thing, start making the sauce. Now, don’t buy pre-made sauce!–or do…maybe you’re busy, I don’t know.
    Next, heat olive oil and red pepper in a saucepan over medium-high heat. Add onion and garlic and saute 2 to 4 minutes. Add carrot and celery and continue sauteing.
    Mix in the remaining sauce ingredients and bring to a boil. Reduce heat to low and simmer 30 minutes or longer, until flavors are blended, stirring routinely.

    While sauce is simmering, heat oil in a large skillet and saute garlic and onion for lasagna filling. Add tofu and spinach to skillet and stir until spinach wilts and the mixture is heated through (2 to 3 minutes). Transfer skillet contents to a bowl and stir in parmesan, olives, seasonings, and 2/3 of the marinara sauce.

    Spread half of the remaining sauce on bottom of 9 x 13 baking pan. If you need a decent oven-safe baking dish, check out some current pricing for a Pyrex dish on Amazon. Next, place a layer of lasagna noodles over sauce–if using the gluten-free rice lasagna, the noodles will not have to be cooked before using. Spread half of the tofu mixture over noodles. Repeat layers of noodle and tofu mixture. Top with remaining marinara sauce and shredded mozzarella cheese.

    Cover dish and bake in a 350 degree F oven for about an hour.
    Remove from oven and allow to rest 10 minutes.

    Give this tofu lasagna recipe a try and let me know what you think, and bon appetit!

    If you like thinking outside of the box, try this vegetarian version of pulled pork Jackfruit BBQ Recipe

    jackfruit pulled pork
    Jackfruit BBQ is great over rice, on a sandwich, or all on its own.

    Thanks for checking the recipes out! Click some of the buttons below and share it with your friends and family, I appreciate it.
    –Buck

    Share and Enjoy !


    Baked Falafel Recipe – healthy and delicious

    baked falafel

    This baked falafel recipe is a tasty and nutritious way to enjoy chickpeas (garbanzo beans).

    Falafel is traditionally fried, but a baked falafel can make a tasty, healthy, and easy alternative to the tried and true oil-splatter-fest.

    Baked Falafel Recipe Ingredients:
    1 15oz can CHICKPEAS
    1/4 cup CILANTRO
    1/4 cup PARSLEY
    1/4 cup ONION
    2-3 cloves GARLIC
    2 Tbsp OLIVE OIL
    CAYENNE PEPPER, to taste
    1 tsp CORIANDER
    1 tsp CUMIN
    1/4 tsp BAKING POWDER
    1 Tbsp BREAD CRUMBS (or flour)
    1 Tbsp LEMON JUICE
    SALT, to taste
    — Optional garnishes —
    HUMMUS, YOGURT, VEGGIES, PITA SLICES

    Drain and rinse 15oz can of chickpeas (garbanzo beans). Combine in a food processor with all ingredients (except 1 Tbsp olive oil and bread crumbs). Mix roughly–pulse–DO NOT puree into a smooth consistency. Place mixture into a bowl and combine with dried bread crumbs (or substitute flour). Form into discs–I like to get 10 out of this recipe because they cook up well and fit nicely into a pita pocket–but make them as big as you like, and adjust the cooking time accordingly.
    (Refrigerate 1-2 hours before cooking if you have the time–they’ll bake better, maybe, but it’s not the end of the world if you don’t. I actually prefer putting them in the fridge for a bit, but sometimes I don’t, and the difference is negligible.)
    Place on a flat baking sheet and lightly drizzle or brush with olive oil.
    Bake at 400 degrees F for 20 minutes, then turn falafel and bake for 10 more minutes to brown each side (a total cooking time of 30 minutes).
    Serve with hummus, yogurt, veggies, and pita slices–or stuff inside a pita to make a delicious falafel sandwich.
    And that’s it, man. Give this baked falafel recipe a try and let me know what you think and bon appetit!

    And if you wanna make your own hummus try this Easy Hummus Recipe.
    hummus

    Share and Enjoy !


    Biscotti Recipe – Big Almond Biscotti

    biscotti

    Wanna make some big biscotti? This twice-baked biscuit is an awesome accompaniment to your favorite hot beverage.

    Biscotti is a twice-baked sweet biscuit that goes great with a hot cup of coffee or tea–it’s an easy way to start the day feeling like a real fancy-pants dude or dudette, especially if you’re drinking your hot beverage out of a tiny cup with a tiny spoon to stir in your milk and a cloth napkin to wipe your very satisfied mouth. And there is zero butter or oil in this recipe, just a little rummy goodness.

    Biscotti Recipe Ingredients

    1 cup ALMOND SLICES
    2 cups all-purpose FLOUR
    3/4 cup SUGAR
    1 teaspoon BAKING POWDER
    1/8 teaspoon SALT
    3 large EGGS
    2 tsp VANILLA EXTRACT
    1 tsp ALMOND EXTRACT
    2 Tbsp RUM

    How to Make Almond Biscotti Recipe

    Preheat oven to 350 degrees F.
    Toast almond slices–watch them, it only takes about 2 minutes to toast, just want a few to begin turning.
    Combine flour, sugar, baking powder, salt then mix and set aside.
    Whisk the eggs, rum and extracts until blended well.
    Add the dry ingredients, including nuts, and mix until combined.

    Dough will be sticky at this point.
    Scrape the dough out onto a parchment lined sheet pan.
    Quickly shape with wooden spoon into a long flat loaf.

    Bake about 30 minutes at 350 degrees F.
    Remove from the oven and cool 10-15 minutes.
    Lower oven heat to 300 degrees F.

    Slice loaf into 1/2″ to 1″ wide slices.
    Lay the slices cut side down on the baking sheet and bake another 15-20 minutes.
    Turn the slices over and bake 15 minutes more, or until the cookies are a light golden brown.
    Cool the biscotti on a rack.
    Cool completely before storing.
    And that’s it, man. Serve them up with some coffee or hot tea and you’ll feel
    like a real fancy-pants Italian lawyer.
    Give this big biscotti recipe a try and let me know what you think, and bon appetit!

    And for another tasty breakfast treat, try this Deadly Scone Recipe.
    maple pecan scones

    Share and Enjoy !


    Spicy Spanish Spaghetti Squash Recipe w/ Sausage

    spaghetti squash spanish

    Spaghetti squash tastes great with a little Spanish chorizo thrown into the mix.

    When buying, choose a firm spaghetti squash that seems heavy for its size. Avoid squash with overly glossy or with greenish rinds–this may indicate the squash is not quite ripe enough. The stem of a spaghetti squash should be dry. Moisture around the stem may mean the squash is not fresh.

    Ingredients:
    1 SPAGHETTI SQUASH
    4-5oz Spanish style CHORIZO (diced)
    1 lg ONION (chopped)
    4-5 cloves GARLIC (finely chopped)
    1/2 cup PARMESAN or ASIAGO CHEESE (shredded)
    1/2 cup CILANTRO (chopped)
    2 Tbsp OLIVE OIL
    SALT and PEPPER, to taste

    Preheat oven to 350 degrees F.
    Slice 1 spaghetti squash lengthwise into halves. Remove seeds and place cut side down in a baking pan. Pour a small amout of water in the pan to keep the squash from sticking. Place in the oven and bake for 45 minutes. The squash is ready when a fork will slide easily into the flesh.
    In a skillet, heat oil on medium high heat. Add onions and saute a few minutes (add red pepper flakes for heat, if desired). Add garlic and chorizo and continue sauteing. Add salt and pepper to taste. You don’t need a lot of seasoning for this dish–the chorizo will add plenty of flavor. Take a fork and scrape the squash away fromm its skin and into the skillet; the squash will separate easily in spaghetti-like strands…which is why it’s called what it’s called. The squash is already cooked, so this is more about mixing the ingredients than cooking them. Add cilantro and cheese, mix well, and remove the skillet from the heat. It’s a delicious dish, and hearty enough to make a terric main course. Serve with a salad and bread and you’ll have a more than enough.
    Enjoy!

    And try this delicious vegetarian Mediterranean-Style Spaghetti Squash Recipe

    mediterrean spaghetti squash

    Share and Enjoy !


    Chana Masala Recipe w/ Quinoa -a High-Protein Meal

    chana masala quinoa

    A Chana masala recipe with a quinoa twist! It’s already a great tasting chickpea curry, and adding quinoa into the mix will turn this Indian favorite into a complete protein. This dish is easy to prepare and a perfect vegetarian entree.

    Ingredients:
    15oz can CHICKPEAS
    15oz can DICED TOMATOES
    1 lg ONION (chopped)
    ½ cup QUINOA
    1 HOT PEPPER (finely chopped)
    4-5 cloves GARLIC (finely chopped)
    ½ cup CILANTRO (chopped)
    1 tsp CUMIN SEEDS
    1 tsp CUMIN
    1 tsp CORIANDER
    ½ tsp CHILI POWDER
    ½ tsp TURMERIC
    1 tsp GARAM MASALA
    2 Tbsp OLIVE OIL
    1/8 tsp ASAFOETIDA (optional–really OPTIONAL!!!–don’t NOT make this dish because you don’t have this ingredient.)
    SALT and PEPPER, to taste
    1½ cups WATER
    Check out current prices for Indian Spices on Amazon.

    In a skillet, heat your oil on med. high heat. Add cumin seeds and asafoetida–the asoafoetida (also called “hing”) is OPTIONAL. Stir until seeds brown and crack–this will happen really fast, so don’t walk away from the skillet. Add garlic and continue stirring. Add chopped onions and hot pepper. Saute ingredients for 3-5 minutes.
    Add turmeric, coriander, cumin, and chili powder. Stir thoroughly into onion mix.
    Add quinoa and diced tomatoes.
    Stir and allow skillet to come to a simmer.
    Add chickpeas (rinsed and drained), salt to taste, and 1½ cups water. Bring skillet to a boil, then reduce heat to a simmer, cover and let simmer for 15 minutes (without stirring).
    After the 15 minutes, stir in the garam masala. Using a fork, smash half the chickpeas in the skillet–this will add a nice texture to the dish.
    Stir in the chopped cilantro.
    And that’s it. Chana Masala with a quinoa twist.
    Hope you like it.

    And for another tasty Indian inspired dish, try this Eggplant Curry Recipe.

    baingan bharta eggplant

    Share and Enjoy !


    Jalapeno Poppers Recipe on the Stove Top

    kick ass jalapeno poppers

    This is a kick-ass Jalapeno Poppers Recipe! Follow along with Chef Buck and he’ll show you how to whip up this tasty popper dish right on the stove top.

    Jalapeno Poppers Recipe Ingredients

    6-8 JALAPENO PEPPERS
    4oz CREAM CHEESE
    2 ONIONS (chopped)
    1-2 tsp CUMIN
    HERBS e.g. cilantro, dill, cilantro, to taste (minced)
    SALT, to taste
    ¼ cup BREAD CRUMBS
    2-3 Tbsp OLIVE OIL

    How to Make Stove Top Jalapeno Poppers

    Remove cream cheese from fridge to soften (about 30 min. early).
    Slice off pepper tops and de-seed (a hand peeler makes this easy).
    Mix cream cheese, herbs, cumin, and salt together.
    Stuff peppers with cream cheese mixture. Dab the ends of the peppers into the bread crumbs to help seal the cream cheese inside.
    Heat olive oil in skillet to med heat.
    Add chopped onions (also add chopped red bell peppers if desired).
    Gently add stuffed jalapenos to the skillet.
    Stir onions and turn the peppers gently to cook on all sides. Some cream cheese may leak out, but it only makes the dish taste better.
    Cook 10-15 minutes until peppers are sauteed to liking.
    Give this jalapeno poppers recipe a go and let me know what you think, and bon appetit!

    If you’re just getting into home cooking and your kitchen is lacking in the pots and pan department, you can check out some current Complete Cookware Set prices on Amazon.

    Thanks for watching! Click a button or two and share the dish if you like it.
    And for another tasty treat, Try this semi-healthy Baked Onion Rings Recipe.

    onion rings recipe
    How to make an Onion Rings recipe in the Oven.

    Share and Enjoy !


    Salmon Cake Recipe Quick and Easy

    salmon cakes

    Can you get a fancy-pants dinner out of a can of cheap pink salmon? Sure you can! This salmon cake recipe is easy to make and ready any time you like by using convenient canned salmon from the cupboard. Mmmmmm, I likes me some salmon cakes!

    Salmon Cake Recipe Ingredients:
    Patties:
    1 can PINK SALMON (or red salmon, if you’re feeling luxurious)
    1 large EGG
    1/4 cup ONION (diced)
    1/4 cup RED PEPPER (diced)
    BLACK PEPPER, to taste
    CREOLE PEPPER, to taste
    GARLIC POWDER, to taste

    Sauce (optional):
    CREOLE MUSTARD (or any kind of fancy-pants mustard…check online prices)
    YOGURT (plain Greek-style)
    DILL WEED
    LEMON JUICE (optional)

    For the cakes, mix ingredients and shape into cakes. Fry in oil –I usually use extra light olive oil, but any will do. Cook on medium heat 4-5 minutes each side until golden brown).  Allow the cakes to cook well on one side before you turn, this will keep them from falling apart.
    If you are making the sauce, mix ingredients to taste. I tend to go a little ‘mustardy’. Also, you might try adding a little lemon juice to the sauce.
    Give this salmon cake recipe a try and let me know what you think. Check current prices for canned salmon online.

    And for another tasty, nutrition-packed fish recipe, try Mackerel Stew.

    fish stew recipe
    canned mackerel stew

    Thanks for checking out our salmon cake recipe, and all of our recipes. Be sure and sign up for our mailing list and never miss a new Chef Buck cooking video, and also click a button below and share the dishes with your friends. We appreciate all the kind comments and support, and we’ll see you next time in the kitchen!

    Thanks for watching our recipe videos!

    We include affiliate links for products on our website, so if you make a purchase after clicking on our links, we may earn a commission which helps us produce more videos and drink more coffee :^)                                                                                                We participate in the Amazon Services LLC Associates Program, which is an affiliate advertising program providing a means for us to earn fees by linking to Amazon.com and affiliated sites, so we can make more videos.

    Share and Enjoy !

    Maki Sushi – Step-by-Step How to Make Sushi

    sushi

    Maki sushi is my favorite sushi (makizushi), or sushi wrapped in dried seaweed (nori). Check out the video for step-by-step instructions on how to make sushi quick and easy.

    Maki sushi is one of the healthiest and most entertaining foods you can put on the table…and pretty easy to prepare. You will need a SUSHI ROLLER to easily make this recipe. They are available at many supermarkets, most health food stores and every Asian market. You can get one for around $2 to $4.

    Maki Sushi Ingredients:
    6 to 7 NORI (dried seaweed sheets)
    2 cups RICE (do not use long grain rice! Japanese sushi rice can be used, but I prefer short-grain brown rice.)
    1/2 cup VINEGAR (apple cider or rice)
    SALT (to taste, I use very little)
    Assortment of SLICED VEGETABLES, FISH, etc
    Feel free to experiment with your choices. I generally use a mix of the following: AVOCADO, CUCUMBER, CARROT, GREEN ONIONS, RED PEPPERS, SALMON (I buy 3oz pre-packaged smoked salmon for convenience, since I use so little). I’ve also used SHRIMP, CRAB, CREAM CHEESE and ASPARAGUS (lightly steamed). Mix and match and find combos you enjoy. I find that I almost always use avocado.
    Desired condiments e.g. SOY SAUCE, WASABI, PICKED GINGER SLICES
    Optional: I like to sprinkle TOASTED SESAME SEEDS over my finished sushi—it adds a great taste and looks nice, too.

    Prepare rice according to directions. Remove from stove and add vinegar. Gently mix and set aside to cool. Slice desired ingredients for filling. For a full dinner for two, I generally use 6-7 nori. Place nori shiny side down on your sushi roller. When rice is cool, spread desired amount over nori. I like heaps of rice in my maki sushi, approx. ¾ to1 cup. Spread so that the rice covers the nori leaving ¼ inch on the two sides and on the end closest to you. Leave 1 inch open on the far end of the seaweed sheet. Pull the nori flush with the back end of the roller. Lay the sliced fillings across the rice and, holding the ingredients in check with your fingers, use the roller to roll the seaweed over the ingredients and then press gently along the top and sides. The seaweed should form a nice wrap around the ingredients. Pull the seaweed roll to the back of the roller and roll forward once more until the nori is shaped entirely around the fillings. Use a sharp knife to slice into sushi, and wipe the knife frequently for a cleaner cut. I usually get 6-7 pieces per roll.
    After I plate my sushi, I sprinkle lightly with toasted sesame seeds (optional) and serve with wasabi, soy sauce, plum sauce, and pickled ginger slices.
    It’s an amazingly easy dish to prepare and a great way to impress a date or get yourself out of the doghouse (if you’re at that stage in your relationship). It kicks ass at parties and your friends will think you are more hip than you probably are –but only if you USE CHOPSTICKS!!!

    For a great maki sushi recipe side, try a Calamari Salad Recipe.
    calamari salad squid

    Share and Enjoy !


    Kale Beet Salad – Healthy Super Food Recipe

    kale beet salad

    Doesn’t Kale Beet Salad sound like a dream come true? Beets are fun, kale is cool…very exciting stuff. Kale is a slightly rough and tough cabbagee-thingy that’s a little less than friendly in it’s natural state, but massaging salt into the raw leaves can turn Kale into a delicious salad green. Here’s a very tasty and nutritionally jam-packed raw kale recipe with beets.

    What you need for Kale Beet Salad

    8-10 KALE (leaves)
    2 BEET ROOTS (medium-sized)
    2 TOMATOES (small…I use plum tomatoes)
    2 CARROTS
    1/2 cup GOLDEN RAISINS
    SALT (to taste…I use approx. 1 tsp.)
    PEPPER (to taste)
    1 Tbsp OLIVE OIL
    2 tsp BALSAMIC VINEGAR

    How to make a Kale and Beet Salad

    Pre-heat oven to 350 degrees.
    Remove greens from beets and cut root bulbs into smaller pieces, about 1/2 inch squares. Spread the beet pieces onto a baking pan and add enough water to cover the bottom of the pan. Cook for 25-35 minutes, remove and allow to cool.

    While beets are cooking, remove the spine from the center of the kale leaves and tear kale into salad pieces. Kale is rough, but adding salt to the greens will draw out moisture and soften the leaves, making them darker. Gently massage salt into the kale until it achieves a desirable consistency, this may take several minutes.

    Grate carrots into the greens, add raisins, then toss and divide portions into salad bowls. In a separate bowl, add diced tomatoes and cooled beets, then add olive oil, balsamic vinegar, and black pepper and mix together. Spoon beet/tomato mixture over kale greens and serve.

    kale beet salad

    This is a delicious way to enjoy and optimize the benefits of raw kale. I’m not usually a big raisin fan, but I find the raisins work really well in this salad. I’ve contemplated tossing minced ginger into the mix, but haven’t gotten around to doing so, although I might next time I whip this dish up. If you give it a try, let me know what you think.

    This is one of the healthiest dishes I routinely prepare, but be aware, eating beets can cause some rosy changes when you answer “the call of nature”. (Don’t be alarmed, you probably won’t be dying…in fact, you’ll probably be doing a lot better.)
    Give this kale beet salad a try and let me know what you think, and bon appétit!

    Have fun in the kitchen. Get a bunch of spices, pots and pans, and begin experimenting with different recipes. home cooking is a healthy hobby that will save you tons of money in the long run.
    Check out current prices for Complete Kitchenware Sets on Amazon as well as Complete Starter Spice Kits. Or go to a thrift store! I’ve found some of my favorite kitchen gear at second-hand stores.

    And for another tasty salad idea, try this Black Eyed Pea Salad Recipe.

    black eyed pea salad

    Thanks for Checking Out Our Kale Beet Salad

    Click a button below and share the dishes with your friends. You can also follow Chef Buck on Youtube. We appreciate all the kind comments and support, and we’ll see you next time in the kitchen!

    If you like what CG and I do, support us on Patreon, or throw us a tip in our Paypal Tip Jar. We’ll happily enjoy a coffee on the road – Thanks! We appreciate all the support, and we’ll see you next time in the kitchen!

    We include affiliate links for products on our website. Making a purchase after clicking on our links and we may earn a commission which helps us produce more videos and drink more coffee :^) We participate in the Amazon Services LLC Associates Program, which is an affiliate advertising program. It provides a means for us to earn fees by linking to Amazon.com and affiliated sites, so we can make more videos.

    Share and Enjoy !

    Waldorf Salad Recipe

    waldorf salad

    Chef Buck is back with a fancy, but easy waldorf salad recipe.

    Ingredients:

    1 cup diced CELERY
    1-2 cups diced APPLES
    ½ cup chopped WALNUTS or PECANS
    ¾ cup MAYONNAISE
    Optional: PICKLE, for redneck version

    Mix and serve on lettuce bed.

    Hell…it doesn’t get any easier than that.

    Bon appetite!

    Share and Enjoy !


    Quinoa Salad Recipe for Vegetarian Protien

    quinoa salad

    Quinoa salad is vegetarian perfection. Quinoa is a versatile food, similar to rice, but with 9 essential amino acids, making it a complete protein. It’s easy to prepare and super tasty. The salad recipe below makes an excellent meal, a tasty side dish, or a light snack. Serves 2-4.

    Quinoa Salad Ingredients:

    1 cup QUINOA (check current prices for quinoa on Amazon)
    3 medium TOMATOES (chopped)
    ¼ cup RED ONION (finely chopped)
    3-5 GARLIC CLOVES (minced)
    ½ inch GINGER (minced)
    1 CUCUMBER (chopped)
    1/3 YELLOW BELL PEPPER (chopped)
    1 CARROT (thinly sliced)
    ¼ cup PARSLEY or CILANTRO (chopped)
    3 Tbsp APPLE CIDER VINEGAR
    2-3 Tbsp OLIVE OIL
    2 Tbsp LEMON JUICE
    SALT (to taste)

    Quinoa Salad Direections:

    Add 1 cup quinoa to 2 cups water and bring to a boil. Reduce heat, cover, and simmer 10-15 minutes (I find it usually takes about 15 minutes). Place cooked quinoa in bowl and let cool—doesn’t have to cool completely—by the time you get your other ingredients prepped, the quinoa will be cool enough.

    Add vinegar, olive oil, salt, and stir well. Add onion, ginger, and garlic. I usually chop the onion fine and MINCE the garlic and ginger VERY WELL. The raw garlic and ginger adds lots of flavor and nutrition. Give the bowl a good stir and get these ingredients mixed thoroughly.

    Add yellow pepper (red pepper is fine, but yellow makes a nice color contrast), cucumber, carrot. Sometimes I also add green onions—or even diced jalapeños if I’m looking for a little kick—feel free to experiment with any vegetables you enjoy in a raw state.

    Mix ingredients and then add the tomatoes. I like to add the tomatoes last so they don’t get too beat up by the spoon. If you’ve got some parsley or cilantro on hand, throw that in as well—I make sure I’ve got some cilantro on hand when I’m making this dish. A bit of lemon juice is a nice finish and will also help keep the colors of the dish vibrant.
    Give this quinoa salad recipe a try and let me know what you think, and bon appetit!

    We still use rice, but not nearly as often (if I have to choose between eating ribs and rice or ribs and quinoa, it’s really not a choice, I choose rice every time–and I’m talking white rice!) but for MANY dishes, I’m losing the rice and going with quinoa. White rice doesn’t stand a chance against quinoa, but even brown rice doesn’t provide as much nutritional value–plus with quinoa being a complete protein, it’s a lot less hassle to fashion a meatless meal.

    I’ve always got quinoa on hand now, and before using rice in a dish, I ask myself “will quinoa work here?” Sometimes the answer is NO, because rice provides great texture for many dishes–but more often than not, I go with quinoa.

    Thanks for checking the quinoa salad out. If you like it, click a button or two below and share it!
    And for another delicious salad idea, try this Cauliflower Super Salad Recipe.

    cauliflower salad
    add sliced tomato for a quick splash of color

    Share and Enjoy !


    Easy Shrimp Linguine Recipe

    shrimp linguine

    A quick and tasty shrimp pasta dinner recipe for two!

    Shrimp LinguineIngredients:

    1 pound SHRIMP (20-30, peeled and deveined)
    8oz LINGUINE (about ½ box)
    1-2 cups BROCCOLI florets (or substitute ½ cup PARSLEY if you’re not into broccoli)
    6-8 GARLIC cloves (minced)
    ½ large ONION (finely chopped)
    ½ stick BUTTER
    3-5 Tbsp OLIVE OIL
    SALT to taste
    (add OREGANO or ITALIAN HERBS if desired–I like just the extra garlicky taste)
    serve with PARMESAN CHEESE

    Shrimp Linguine Directions

    Prep your ingredients first, then get your pasta cooking.  I like to add a Tbsp of olive oil to my pasta water as well as a 2-4 tsp salt.  Cook the pasta according to the package directions and whatever firmness you desire.  I’m using whole grain wheat linguine for this recipe, which takes about 12 minutes to cook–a bit longer than most linguine.  The cooking time for the skillet ingredients should be around 7-9 minutes, so try to time your pasta to finish with the shrimp–overcooked shrimp is rubbery and overcooked pasta is mushy, so timing is everything!!!

    In your skillet, heat 2 Tbsp olive oil and 1/4 butter on medium heat.  When hot, add garlic and cook for 1 minute.  Add onions and continue to cook a couple more minutes.  Add broccoli florets, and add more butter and oil as needed.  If you don’t want to add broccoli, substitute 1/2 cup chopped parsley instead.  Sauté  florets, garlic, and onions another 2 minutes and then add shrimp.  Throw in some Italian herbs if you want to get all herby.

    The shrimp will be done when they turn pink–don’t overcook or they’ll turn rubbery!!  Remove the cooked pasta from water and add directly to the skillet.  Don’t drain or strain the pasta!!–you’re just throwing away good flavor.  Add the remainder of your original 1/2 stick butter.  Mix pasta and ingredients.  Add some pasta water to the mix (about 1/2 cup or so).  I find that the salt in the water and butter is plenty for me, but salt a little more if desired.  Remove the skillet from the heat and serve.  Fresh Parmesan cheese and toasted garlic bread are nice accompaniments!!  Maybe some wine?
    Bon appétit!

    Share and Enjoy !


    Cornish Hen Recipe – Easy One-Pot Meal

    cornish game hen

    Give this Cornish hen recipe a try. A Cornish hen is a classy bird, and a complete meal for two when cooked up with potatoes and carrots.

    What you need for this Cornish Hen Recipe

    1 CORNISH HEN …for this recipe I’m using a 1.5 lb. size hen, adjust cooking time for a smaller bird
    2 POTATOES cut into 1 inch pieces
    4 CARROTS chopped into ½-1 inch pieces
    1 ONION large onion, cut into large pieces
    1 GARLIC BULB chopped
    4-5 sprigs ROSEMARY finely chopped
    ¼ cup BUTTER melted–substitute olive oil, if desired
    SALT and PEPPER to taste
    This is a great dish to load up with extra seasonings…try CUMIN, SEASONING SALT, CAYENNE PEPPER, CAJUN SEASONINGS, etc.

    How to Cook Cornish Hen

    • If you’re using a frozen hen, allow the bird to thaw overnight in the fridge.
    • Cut hen through the breast and into two halves.
    • Rub both sides of hen with salt, pepper, garlic, and rosemary.
    • Lightly oil a baking dish and place the hen halves skin side up. Check current prices for a baking dish on Amazon.
    • Cover hens with potatoes and carrot and additional seasoning.
    • Top with chopped onion and melted butter and cover dish.
    • Cook in 400 degree F oven for 30 minutes.
    • Remove dish, mix ingredients, cover and return to the oven for 15 minutes more.
    • Remove dish and uncover. Mix ingredients, place hen halves on top of vegetables and return to the oven and cook for an additional 10 minutes.
    • At this point (dish has cooked 55 minutes total) I like to turn on the broiler and broil each side of the hen for 2-3 minutes, making the skin crispy and tasty. Keep an eye on the hens and do not overbroil!
    • Remove the dish from the oven and serve. I like to rub dried oregano between my palms and coat the plate and serve with sliced tomatoes.

    For another poultry dish, try this crispy Baked Chicken Recipe that you’ll love more than fried chicken.
    baked curry chicken

    Thanks for checking out our Cornish hen recipe, and all of our recipes. Be sure and sign up for our mailing list and never miss a new Chef Buck cooking video, and also click a button below and share the dishes with your friends. We appreciate all the kind comments and support, and we’ll see you next time in the kitchen!
    –Chef Buck

    Thanks for watching our recipe videos!

    We include affiliate links for products on our website, so if you make a purchase after clicking on our links, we may earn a commission which helps us produce more videos and drink more coffee :^) We participate in the Amazon Services LLC Associates Program, which is an affiliate advertising program providing a means for us to earn fees by linking to Amazon.com and affiliated sites, so we can make more videos.

    Share and Enjoy !

    Sausage Tomato Pie Recipe

    sausage tomato pie

    This sausage tomato pie might look like a pizza, but it’s definitely not a pizza! The crust has a flaky pastry quality and the onions act the part of a pie filling. This is a rich dish, bordering on decadent; it’s super filling and super flavorful. For a meatless alternative, try faux sausage—or no sausage at all—this dish works well just as a Tomato Pie.

    Ingredients:
    3 large ONIONS
    2 medium TOMATOES
    8-10 oz SAUSAGE
    8 oz MOZZARELLA CHEESE (shredded)
    5-7 GARLIC CLOVES (finely chopped)
    2 cups ALL PURPOSE FLOUR
    ¾ stick BUTTER (soft)
    DIJON MUSTARD
    ¼ VEGETABLE OIL (plus oil for sauteing)
    2 Tbsp OLIVE OIL
    2 Tbsp TOMATO SAUCE
    2 Tbsp PARSLEY (chopped)
    CHILI POWDER, CUMIN, SALT (for sausage seasoning, to taste)
    DRIED ITALIAN HERBS (thyme, oregano, basil, etc.)

    Heat 2 Tbsp oil in a skillet and add GARLIC. Sauté for 1 minute and add SAUSAGE. Continue cooking, adding CHILI POWDER, CUMIN, and SALT for seasoning. Cook meat to completion and set aside in a bowl. Slice 3 large ONIONS into strips. Add oil to pan and add onions. Cook onions down until soft and caramelized; this may take some time, but the more completely the onions are cooked down, the tastier the final dish will be! Remove onions from heat and set aside.

    In a bowl, combine 2 cups ALL PURPOSE FLOUR and ¾ stick softened BUTTER. Mix butter into flour thoroughly. Add ¼ cup VEGETABLE OIL and continue to mix. Add ½ cup Water. Mix until the dough is smooth. Spoon onto ungreased pizza pan and spread (use the spoon!). Spread evenly into the size of a large pizza and leave a raised edge for the crust. Place in pre-heated oven and cook at 375 F for 10 minutes. Remove dough from oven and top with DIJON MUSTARD. Spread a layer of mustard evenly and cover dough completely except for the outer edge—just like spreading mustard on a sandwich. Add cooked onions and spread evenly over the mustard. Top with SEASONED MEAT and MOZZARELLA CHEESE. Top dish with sliced TOMATOES and sprinkle liberally with dried ITALIAN HERBS: oregano, thyme, basil, etc..

    In a small bowl, combine 2 Tbsp OLIVE OIL, 2 Tbsp TOMATO SAUCE, and 1-2 Tbsp fresh chopped PARSLEY. Brush mixture over each tomato slice. Return pie to the oven and continue to bake at 375 F for 30-40 minutes until edge of crust is brown.

    Bon appétit!

    Share and Enjoy !


    Asian Jicama Salad Recipe

    asian jicama salad

    Jicama is a root vegetable that can be served raw. It is similar in appearance to a potato, but tastes more like an apple, although not quite as sweet; I find it has an “earthier” taste. Many folks compare the crisp texture of Jicama to that of a water chestnut. Jicama is especially good in this recipe because it takes on the flavor of the dressing very well.

    Ingredients:
    1 cup JICAMA (cut into 1 inch sticks)
    1 cup SNOW PEAS (cut into ¼ inch widths)
    1 cup NAPA CABBAGE (torn into salad-size pieces)
    2 CARROTS
    ¼ cup SESAME SEEDS (toasted)
    2 Tbsp VINEGAR (wine or rice)
    2 Tbsp SOY SAUCE
    4 tsp HONEY (or 2 tsp sugar)
    1 tsp SESAME OIL
    1-2 Tbsp WATER

    Peel jicama root and cut into matchstick shapes. Tear cabbage into salad-sized pieces (substitute romaine lettuce if preferred, but I find the cabbage holds up better in the dressing). Slice snow peas into ¼ inch widths. Shred carrots. Combine all in a bowl and mix.

    In a smaller bowl, add vinegar (red or white wine vinegar or rice vinegar can be used), soy sauce, honey, sesame oil, and water (start with 1 Tbsp of water and add another if desired). Mix ingredients.

    Combine dressing and vegetables and toss thoroughly. Serve as a side dish to add Asian flair to any meal—and it’s great with fish.

    Bon Appétit!

    Share and Enjoy !


    Fried Shrimp Recipe with spicy tempura

    spicy fried shrimp

    I love a tasty fried shrimp recipe, and “tempura” is just a fancy pants word for “fried”. This dish is a knock-off of a dish I love to order at a Chinese restaurant when I’m down in Tampa, but since I don’t live in Tampa, I had to figure out how to make this fried shrimp recipe for myself—and I’ve done it!

    The key is cilantro, and lots of it—also lots of garlic and a little hot pepper, too! Be sure to use a non-stick pan to cook up the spicy pepper mix, otherwise you’ll be setting yourself up for a headache and burned garlic!

    What you need for Spicy Fried Shrimp

    1 lb SHRIMP (peeled and deveined, tail on)
    1 bunch CILANTRO (1 to 2 cups chopped)
    10-12 cloves GARLIC (chopped)
    1 or 2 hot PEPPERS (chopped)
    1/2 cup GREEN ONION (chopped)
    1 tsp RED PEPPER FLAKES (or two tsp!—optional)
    1 cup ALL PURPOSE FLOUR
    1 EGG
    1 cup ice-cold WATER
    frying OIL
    SALT (to taste)

    How to make Spicy Fried Shrimp

    • Chop up 1 bunch of cilantro, stems AND leaves.
    • Chop 2 green onions and dice peppers, I like to use 2 green chili peppers, but use whatever peppers you like depending on how much heat you want in the dish.
    • Chop 10-12 cloves of garlic.
    • Heat a non-stick skillet with 2 Tbsp of oil—definitely use a non-stick skillet! If you don’t have a decent skillet, here’s a link to check out some current skillet prices on Amazon.
    • Add peppers to skillet and allow to cook 1 minute, then add garlic and red pepper flakes (adjust pepper flakes to taste).
    • Cook for 1 minute and then add green onions. Be sure to keep ingredients stirring, reduce heat as necessary to prevent garlic from burning.
    • As garlic browns, add the cilantro and continue to stir ingredients, cooking out the moisture. It’s okay if the garlic browns well, as long as it’s not burned; the dryer the ingredients get the better. Cook the ingredients down and then remove the skillet from the heat and set aside.
    • Heat up the oil for the shrimp.
    • While the oil heats, prepare the tempura batter. It’s best not to prepare the batter ahead of time. In a bowl, beat 1 egg, add 1 cup of ice-cold water, then add 1 cup of all purpose flour.
    • Mix together into a thin batter, but don’t over mix—it’s okay if there are some lumps.
    • Test the batter in the frying oil; the batter will sizzle and float if it is ready.
    • Use peeled and deveined shrimp with the tail still attached—the tail makes a perfect handle.
    • Dip shrimp in batter and then shake off the excess.
    • Lay shrimp in the hot oil and cook 3-4 minutes, turning once. DO NOT cook too many shrimp at the same time because they will stick together and not crisp and brown evenly.
    • When the shrimp are golden, remove from oil and drain on a paper towel (the 1st batch I put into the pepper mix to drain).
    • When all the shrimp are fried, add them to the pepper mix and return the skillet to the burner on low heat.
    • Salt to taste and toss the shrimp GENTLY and thoroughly with the spice mix.
    • Remove from heat and serve immediately.

    I like to serve this dish with sticky rice and a sautéed green, something like cabbage or bok choy. Give fried shrimp recipe a try a let me know what you think, and bon appétit!

    If you want another tasty shrimp idea, one of my favorite is this fancy Shrimp Pancake Recipe.

    shrimp pancake
    Korean style Haemul Pajeon with shrimp

    Thanks for checking out our shrimp recipe, and all of our recipes. Be sure and sign up for our mailing list and never miss a new Chef Buck cooking video, and also click a button below and share the dishes with your friends. We appreciate all the kind comments and support, and we’ll see you next time in the kitchen!
    –Chef Buck

    Thanks for watching our recipe videos!

    We include affiliate links for products on our website, so if you make a purchase after clicking on our links, we may earn a commission which helps us produce more videos and drink more coffee :^) We participate in the Amazon Services LLC Associates Program, which is an affiliate advertising program providing a means for us to earn fees by linking to Amazon.com and affiliated sites, so we can make more videos.

    Share and Enjoy !

    Follow Me!