Tofu Chocolate Pudding – Simple and Delicious

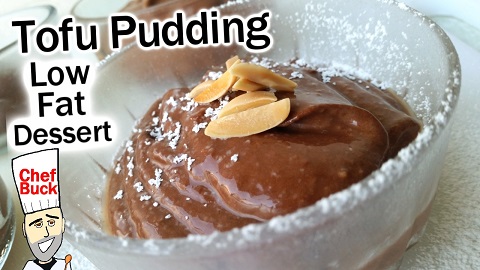
Does tofu and chocolate seem like strange bedfellows for pudding? I was skeptical too but, with a bit of experimenting, I’ve found a simple, delicious chocolate pudding recipe in which tofu provides a great creamy texture. And if you use a plant-based milk, it’s a non-dairy, vegan treat. Lastly, if you don’t have much soy in your diet, with this treat, you can pat yourself on the back that you’re serving your body some different nutrients. After all, food variety is the spice of life!

Intrigued?  Then let’s whip it up!

WHAT YOU NEED TO MAKE ORANGE COGNAC CHOCOLATE PUDDING

We suggest a MIXER (or FOOD PROCESSOR) to thoroughly blend the ingredients, to avoid a grainy feel (and tired arms).  Check current prices for a Kitchen Mixer on Amazon.

To make plain, but delicious, chocolate pudding: Use 2 Tbsp VANILLA EXTRACT instead of the COGNAC, ORANGE JUICE and ORANGE ZEST

16 oz SILKEN TOFU, drained and gently patted dry

2/3 cup unsweetened COCOA  ( I have NOT tried dark chocolate cocoa)

1 cup LIGHT BROWN SUGAR  

1/2 Cup MILK (I use unsweetened ALMOND MILK)

1 Tbsp COGNAC (we use Courvoisier in the video)

1 Tbsp ORANGE JUICE (we use freshly squeezed in the video)

1 Tbsp minced ORANGE ZEST

Potential Garnishes

Homemade crème fraîche or cool whip

Nuts (like toasted almond slivers or fancy-pants pistachios)

Berries

tofu chocolate pudding

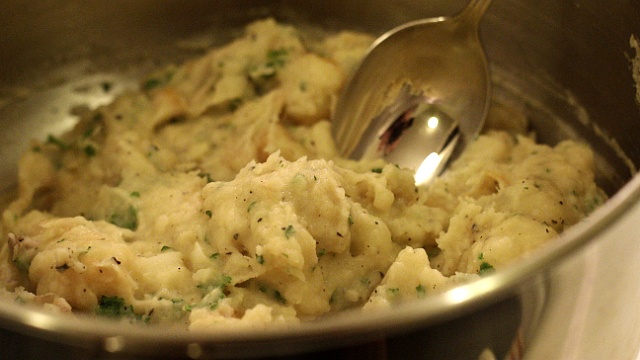
HOW TO MAKE TOFU CHOCOLATE PUDDING

Drain your tofu, and gently pat dry.

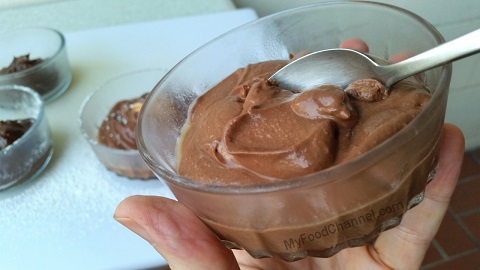
Combine all your ingredients in a medium to large bowl. Mix at medium to high speed for 3-5 minutes, careful not to spatter precious pudding mix all over. Stir occasionally. When ready, it will still be soupy. And it’s okay that there are tiny tofu grains still visible in your pudding. Check out the video for a sample of what you can expect.

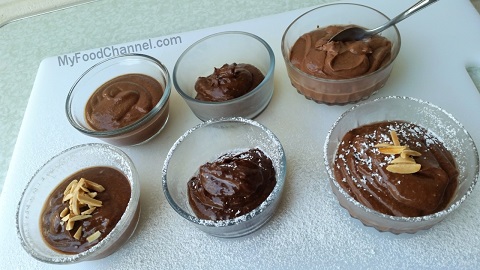
Spoon about 1/2 cup in small dishes – a full recipe makes 8 servings. I know, I know, a half a cup seems like a small serving. Trust me, this recipe is very chocolaty. Even if you are a chocoholic, you will want small portions.  Don’t add toppings to your pudding now, because they will become soggy.

Cover and chill overnight; a minimum of 4 hours. You are waiting for the tofu to ‘re-solidify’ to a pudding-y texture.

Enjoy your pudding ‘straight’, or with your favorite garnishes.

tofu chocolate pudding

EXPERIMENT WITH YOUR TOFU PUDDING RECIPE

Use the pudding to make a trifle!  Also, you can experiment with different flavor combinations.  We’ve divided a 16 oz container of SILKEN TOFU in half, then experimented with one half of the recipe.  That way, if your experiment results don’t excite you, you know you still have some delicious chocolate pudding. For easy reference, here is the recipe for 8 oz of tofu:

8 oz SILKEN TOFU, drained and gently patted dry

1/3 cup unsweetened COCOA

1/2 cup LIGHT BROWN SUGAR

1/2 cup ALMOND MILK

2 Tbsp of liquid flavoring

Here are some other things we have added to HALF the chocolate pudding recipe successfully:

1/4 cup PEANUT BUTTER, OR

1 tsp MARASCHINO CHERRY JUICE (subtract 1 tsp of the VANILLA EXTRACT), OR

1/2 tsp ESPRESSO POWDER, OR

Juice and minced zest from 1/2 large ORANGE, OR

1 Tbsp COGNAC, instead of 1 Tbsp of VANILLA EXTRACT

Remember, as you experiment, keep the liquid amount constant (no more than 1/2 cup + 2 Tbsp) so that it can set. Who wants soupy pudding?

Also, you will need a strong flavor combination to overcome the tofu flavor. We’ve tried lemon and berry varieties, but couldn’t quite disguise the tofu flavor. Of course, for those that enjoy the tofu flavor anyway, you will not have such worries. For the rest of us, it’s like using yogurt instead of mayo in a recipe – it sets up different expectations for your taste buds.
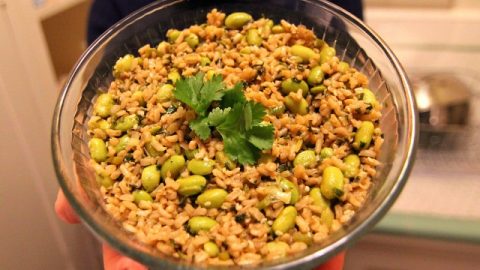
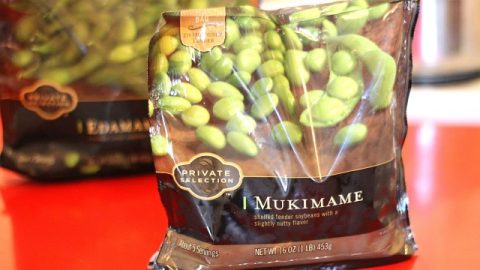
More Tofu Recipes!

And if tofu pudding has got you wanting to experiment with other soy options, take a look at our recipes for tofu scramble, garlic brown rice with mukimame, miso soup, and tofu lasagna (yep, you read that right!).

How healthy is Tofu? Check what institutions of higher learning have to say on the health benefits of soy.

tofu recipe
this tofu recipe makes a perfect breakfast, lunch, or dinner

Thanks for watching our recipe videos!

Be sure and sign up for our mailing list and never miss a new Chef Buck cooking video, and also click a button below and share the dishes with your friends. We appreciate all the kind comments and support, and we’ll see you next time in the kitchen!

We include affiliate links for products on our website, so if you make a purchase after clicking on our links, we may earn a commission which helps us produce more videos and drink more coffee :^) We participate in the Amazon Services LLC Associates Program, which is an affiliate advertising program providing a means for us to earn fees by linking to Amazon.com and affiliated sites, so we can make more videos.

Share and Enjoy !

Miso Soup Recipe – Vegetable Soup with Yellow Miso

Miso is a fermented soybean paste perfect for a quick miso soup recipe. I find this popular Asian seasoning in a refrigerated case at my local big box grocery. There are 3 main varieties of miso: white, yellow, and red miso. White miso has the mildest flavor while red miso is the strongest; I generally choose yellow miso which is in the middle and use it primarily for making soups and dressings.

Ingredients for this Miso Soup Recipe

3 tsp YELLOW MISO
2 cups WATER
1 CARROT sliced
1 small ONION chopped (or use green onions)
1 stick CELERY chopped
handful of fresh SPINACH roughly chopped
dried SEAWEED to taste (we use versatile seaweed sheets)
1 Tbsp OIL
¼ tsp BLACK PEPPER
RED PEPPER FLAKES

miso soup recipe

How to Make Miso Soup with Vegetables

  • Heat a pot with oil on medium heat.
  • When oil is hot, add in the onions and red pepper flakes and sauté for 2-3 minutes.
  • Add in the carrots and celery and continue to sauté another 2 minutes.
  • Season with black pepper then pour in the water, cover the pot and let it come to a boil.
  • Once the pot is boiling, turn off the heat and stir in the miso until it dissolves.
  • Add in the remaining ingredients, stir, and serve hot.

We generally buy seaweed sheets, which is what I use in the video recipe. Dried seaweed sheets are versatile and easily used for making sushi rolls or simply adding to salads and soups. Check current prices for DRIED SEAWEED on Amazon.

miso soup recipe

Interested in a heartier soup? One of my favorite and easiest recipes is for this Healthy Mackerel Stew. Any time of year is great for a hearty, healthy soup or stew, but like miso soup, this dish is especially tasty when the cool weather arrives.

fish stew recipe

Thanks for checking out this vegetable miso soup recipe, and all of our recipe videos. Miso has a Wikipedia page if you’d like to discover more details about this Japanese soybean paste.

Be sure and sign up for our mailing list and never miss a new Chef Buck cooking video, and also click a button below and share the dishes with your friends. We appreciate all the kind comments and support, and we’ll see you next time in the kitchen!

Thanks for watching our recipe videos!

We include affiliate links for products on our website, so if you make a purchase after clicking on our links, we may earn a commission which helps us produce more videos and drink more coffee :^) We participate in the Amazon Services LLC Associates Program, which is an affiliate advertising program providing a means for us to earn fees by linking to Amazon.com and affiliated sites, so we can make more videos.

Share and Enjoy !

Surinam Cherry – Edible Yard Plants

Do you have a Surinam cherry tree in your yard? Surinam cherry hedges and shrub trees are often planted as ornamentals, but the fruit is edible and quite tasty when ripe.

When is a Surinam Cherry Ripe?

In some areas, the Surinam cherry is a nuisance plant, but the tiny pumpkin shaped cherries are tangy and tasty when eaten at the right moment. You can find cherries on the tree ranging from pale green to rich orange to ruby red, all at the same time. Surinam cherries are ripest and most tasty when VERY red. Do not eat cherries that are green, and you’ll probably want to avoid orange and less red cherries as well, since they can be quite tart.

surinam cherry

To enjoy ripe Surinam cherries, pick them only if they are a deep red or even darker. And do not tug the fruit off of the tree. The cherries pull away easily when ripe. The taste of ripe surinam cherry is tangy, sweet, and refreshing.

A Surinam cherry looks like a miniature pumpkin the size of a regular cherry. The skin and fruit are edible, but in the center is a roundish pit you do not eat. You can plant the pit and grow another Surinam tree. The trees bear fruit in the spring and fall seasons.

surinam cherry

Use Surinam cherries the same as your favorite berries, in pies, jams, jellies, sauces, syrups, and ice cream, or just pluck them from the tree and enjoy. The fruit contains healthy antioxidants, and is a good source of vitamins C and A.

Where Do You Find Surinam Cherries?

Surinam cherry plants grow readily, are hardy, and require little care. Mature trees can reach to over 20’ tall. They are grown into hedges and used as a decoration or as a natural privacy border. The plants grow so easily, that in some areas they are classified as a nuisance plant. Plants popped up in Florida around the 1930’s and over the decades became a popular yard feature, but by the 1980’s they lost favor, seen as out-of-control, and viewed as an invasive species. Many plants were eradicated in Florida, but many survive. I’m glad there’s one in my Mother-in-Law’s yard, because it’s a nice treat to plop in my mouth when I stroll out to the back porch.

surinam cherry

The Surinam cherry tree is native to South America and named after the country of Suriname. They are also called a Brazilian, Cayenne, or Florida cherry, depending on where you ask. You can find the cherries in the Caribbean islands, as well as Florida, Bermuda, and many tropical areas around the globe. If you live in a tropical climate, maybe there’s a tree near you. Surinam cherries are not often available commercially, so being in an area where the trees grow naturally might be your best chance of sampling this fruit.

It’s a hardy plant that loves a tropical climate, so if you live in a place that doesn’t get too cold, you might plant your own tree in a pot or a patch in the yard. You can look at current prices for Surinam Cherry Plants on Amazon.

Look here if you want more sciencey info about Surinam cherry trees.

Another fruit we enjoy eating during our travels is fresh tropical papaya.

how to eat papaya

Thanks for checking out our Surinam cherry video, and all of our recipe and food blogs. Sign up for our mailing list to never miss a new Chef Buck cooking video, and click a button below and share the dishes with your friends. We appreciate all the kind comments and support, and we’ll see you next time in the kitchen!
–Chef Buck

Thanks watching our food videos!

We include affiliate links for products on our website, so if you make a purchase after clicking on our links, we might earn a commission which helps us produce more videos and drink more coffee :^) We participate in the Amazon Services LLC Associates Program, which is an affiliate advertising program that provides a means for us to earn fees by linking to Amazon.com and affiliated sites, so we can make more videos.

Share and Enjoy !

Mamey Fruit – How to Eat Mamey Sapote

What is mamey fruit? Mamey sapote is a tasty tropical fruit we often see at local markets here in Mexico. The fruit is native to South and Central America, but it is also grown in south Florida, so you might be able to find it at a grocery in the USA. It is much like an avocado in the way you slice and eat it.

Ripe mamey is creamy and delicious, with a texture similar to avocado. It is sweet, but not overly so. At it’s best, I think mamey tastes like a creamier version of a baked sweet potato. The taste may vary, with hints of apricot, peach, and pumpkin.

How to tell When Mamey Fruit is Ripe

Mamey fruit varieties are shaped from round to football-shaped sizes with dull, sandpapery skins. The mamey we find here at markets in Mexico range from “hard as a rock” to “so soft it looks like a flat tire”. If eating mamey soon, you want to buy fruit somewhere in between these two stages. The mamey should give slightly when pressed.

Mamey fruit grows on trees and is cut away when harvested, so pick a mamey that still has a nub of stem where it was taken from the tree. If the crown of stem is missing, the fruit can dry out, and may spoil prematurely.

If you buy firm mamey, just let it sit unrefrigerated until it softens. Firm, raw mamey is not edible. It’s hard to cut, semi-starchy, and bitter.

mamey fruit

Cut ripe mamey just as you would an avocado. Run a sharp knife through the skin and around the pit to divide the mamey into two halves. There will likely be only a single pit at the center, but there may be up to four pits. The pits are slightly toxic, so do not consume them in any way, and the skin is inedible, as well.

The meat of the fruit ranges from a light salmon color, to orange, to a deeper reddish hue. Any membrane you find in the fruit from around the pit can easily be scraped away with a spoon.

How to Use Mamey Sapote

Fresh, ripe, raw mamey is delicious. It’s a creamy, desserty fruit you can spoon right into your mouth like a pudding.

We really enjoy mamey ice cream, and we also love “paletas” made from mamey. A paleta is like a creamsicle or frozen fruit bar on a stick. Because it’s creamy, mamey is perfect for a smoothie. But whatever kind of smoothie you like, if you’re a smoothie person, you can check out current prices for a Personal Smoothie Maker on Amazon.

Creamy mamey fruit can also be whipped into a batter and used for baking cakes, muffins, or used as a pastry filling.

mamey fruit

Is Mamey Fruit Good for You?

Is there a fruit that’s not good for you? Like with many natural fruits, you’ll find a bounty of health benefits. Similar to bananas, Mamey is a good source of potassium. It is high in dietary fiber, vitamins B6, C, and E. Plus other B vitamins, and even manganese.

Mamey fruit also contains carotenoids, which gives the ripe fruit its rich color similar to pumpkin and carrot. Carotenoids may help to protect the body from certain cancers.

And did I mention it’s delicious? If you’re an egghead and wish to read more, here’s some detailed, sciency info about pouteria sapota a.k.a. Mamey fruit.

Another fruit we’ve enjoyed eating during our travels is fresh tropical papaya.

how to eat papaya

We’ve found so many things to love south of the border, and you can see them over at our video travels in Mexico.

We appreciate you checking out our mamey fruit video, and all of our recipe and food blogs. Be sure and sign up for our mailing list and never miss a new Chef Buck cooking video, and also click a button below and share the dishes with your friends. We appreciate all the kind comments and support, and we’ll see you next time in the kitchen!
–Chef Buck

Thanks for watching our recipe videos!

We include affiliate links for products on our website, so if you make a purchase after clicking on our links, we may earn a commission which helps us produce more videos and drink more coffee :^) We participate in the Amazon Services LLC Associates Program, which is an affiliate advertising program that provides a means for us to earn fees by linking to Amazon.com and affiliated sites, so we can make more videos.

Share and Enjoy !

Fresh Artichoke …Nutritious But Plenty Of Work

If you’re curious about fresh artichoke, Buck and I will provide two different perspectives on this vegetable. We’ll walk you through the pros and cons of cooking a fresh artichoke, how to pick a good one, tips to prepare and microwave-steam an artichoke, and some dip/sauce ideas to compliment your cooked, warm veggie.

Fresh artichoke is one of those foods I toss into the same category as crab legs and crayfish; fancy and delicious foods, and usually a bit expensive. And with each of these foods, you have to work hard for your bites and there are few edible parts compared to the discarded/inedible parts.  And if you haven’t watched the video, spoiler alert, Buck has very little use for a fresh artichoke. 😉

Why Eat Fresh Artichoke?

So why eat fresh artichokes when there are other delicious foods that don’t require so much work? 

Variety is the spice of life. Our bodies appreciate getting nutrition from a variety of natural sources.  Artichokes are packed with potassium, vitamin C, vitamin K, folate, magnesium and dietary fiber. And according to Webmd.com, artichokes are number 7 on the USDA’s top 20 antioxidant-rich foods list.

Maybe you want to impress someone who’s favorite food is fresh artichoke. Maybe preparing and eating fresh artichoke can be an effective part of your mindfulness practice. 

Plus, despite what Buck thinks, every mouthful of food does not have to be a big one to be satisfying.

Tips To Pick The Best Artichoke.

Just to be clear, we are talking about globe artichokes in this article.  If you are unfamiliar with artichokes and see a reference to a Jerusalem or Chinese artichoke, just know that those are very different vegetables.

Ever see a globe artichoke growing? It looks like what it is – the flower on a tall thistle plant. Keep that in mind when you’re trying to remember how to pick the freshest artichokes. You want THiStleS.…..

  • Tight. The leaves are still pretty tight or close together, they haven’t opened up too much.
  • Heavy. A lighter artichoke can indicate a more dried out veggie.
  • Squeaky.  If you gently squeeze a fresh artichoke, it will ‘squeak’ slightly.
  • Stemmy. It’s a nice bonus when you have 1-2 inches of stem. The stem’s interior is almost as yummy as the artichoke heart.
fresh artichoke

Want To Avoid A Long Cooking Process?

As with many foods, you can prepare artichokes in a variety of ways.  What’s the quickest, and one of the most nutritious ways to prepare fresh artichokes?  Well, let’s compare some cooking times.

Stuff and Bake.  You can add some great flavors but expect an hour of cooking time.

Grill.  Great grill taste but you need 45 minutes of cooking time.

Boil or Steam on the Stove.   After the water comes to a boil, it takes another 20-35 minutes, depending on artichoke’s size

Use a Pressure Cooker.  Cooks faster, but you need a pressure cooker. And, it’s harder to tell when the artichokes are done.

Microwave Steaming. Generally will take about 6-10 minutes to microwave steam an entire artichoke, depending on your microwave’s power settings, and the size of the artichoke.  DING, DING, DING – WE HAVE A WINNER!

Tips For The Best Steamed Artichokes In The Microwave.

So, you’ve decided to steam an artichoke in the microwave. Here’s how to make the most of it.

Prep The Artichoke. 

Before microwaving, cut the top third of each artichoke off. This is going to be the toughest, inedible artichoke leaves so don’t be sad.  You can always make your compost pile a little happier with inedible artichoke parts. A sharp, serrated knife helps cut through the top. Even better, use an electric knife, if you got it.

To keep it from browning before you eat it, once you cut it, sprinkle with some lemon or lime. Some types of fresh artichokes brown more easily than other. One good thing – if it does brown, it doesn’t impact the taste.

Find The Right Dish.  

You want a dish where you can place the artichoke(s) cut side down, with about ¼ – ½  cup of water in the bottom, and that can be tightly covered. The cover can be the microwavable lid, a dinner plate, or plastic wrap.

Add Some Seasoning Before You Cook.  

Add a bay leaf and/or some lemon to the water. Sprinkle some herbs over the artichokes before you cook it.

To increase the cooking time even more, cut your artichoke into 4-6 parts. This way, you have more surface area to season, and you will reduce your cooking time even more.

Avoid Overcooking Your Artichoke.  

Although the microwave makes cooking the artichokes fast and easy, you don’t want to overcook your artichoke.  And different sized artichokes will cook differently. Check a whole artichoke after 7 minutes to get an idea how fast your microwave is cooking. If you cut your artichoke in halves or quarters, check it after 4 minutes. You know the artichoke is done when you can pull an outer leaf off with ease.

Serve Warm. 

Let the artichoke cool slightly, but serve warm.

Serve With One or Two Dipping Sauces.  

There are endless possibilities for dipping sauces.  You can buy or make something ahead of time. Some favorite homemade choices that complement the artichoke’s taste include:

  • Sauteed garlic and melted butter.   Saute 2 Tbsp of minced garlic in 1 Tbsp of butter, then melt 4 Tbsp more of butter.
  • Mayo with balsamic vinegar.   Mix together 3 Tbsp mayo with 2 tsp of balsamic vinegar.  Alternatives: Yogurt for the mayo; soy sauce or tamari for the balsamic vinegar.
  • Pesto.  You don’t have to use fancy pants and expensive pine nuts either.  You can substitute walnuts or almonds. Check out our Pesto Recipe. 

Buck ONLY buys canned or jarred artichoke…because he thinks you’d be crazy not to. This is one of the best prices I found on Amazon for Canned Artichokes but mostly the artichoke prices are pretty over the top online…so definitely check your local grocery store first for canned or jarred artichoke.

artichoke hearts
canned artichoke hearts

What’s Edible on an Artichoke …and what’s not

Remember I said there is plenty of the artichoke that is not edible?  The video shows you what you can eat. Here’s a summary of what is edible and not.  Artichoke Trivia: The fuzzy hairs found at the center of the veggie, on top of the artichoke heart, are called the ‘choke’.

Not Edible:
  • The outer layer(s) of leaves. Each artichoke is different – sometimes you have to pull away 2-3 layers of leaves before you find one whose base is tender enough to scrape out with your teeth.
  • Leaf ends. In fact, there is just a small part at the base of each internal leaf that is edible.
  • End of central flower. These are the thinner leaves found in the center of the artichoke, that are touch. Depending on the variety of globe artichoke you have, the flower may be white or purple.
  • Fuzzy hairs found on the top of the artichoke heart. One exception: In baby artichokes, the fuzzy hairs are edible because they aren’t formed enough to be a distraction. 
  • Stem’s exterior.
Edible:
  • White/lighter colored base of each inner leaf. So how do you eat it? You pull a leaf off, dunk it in your favorite dipping sauce, then use your teeth to squeeze out the interior. The closer you get to the center, the tender/edible part of the leave gets bigger. Um, well, relatively speaking. Don’t ever expect a big mouthful of taste from the artichoke leaves. It’s one of the reason Buck grumbles so much about fresh artichokes.
  • Base of the inner leaves (purple or white flower). Similar to the individual leaves, the base of the artichoke’s central purple flowers are edible.  Just pull off the whole cluster of central, thin flower petals and use your teeth to tear off the tender base.   
  • Artichoke heart. Don’t forget to pull out/spoon out the fuzzy top first. You also can use a spoon to scoop out the heart. Now you can buy jars of plain or marinated artichoke hearts; can you believe there was a time when folks threw that away? Guess the fuzzy part threw them off?
  • Stem’s interior.  If you look at the stem from the end, you will see that about ⅔ of the stem are darker and more fibrous. You want to cut out the inner, lighter part of the stem. Again, the amount of edible stem depending on the type of artichoke you have, and its age.

For another interesting vegetable, here’s all you need to know about Chayote.

chayote
You can eat the entire chayote: skin, flesh, and center seed.

Thanks for checking out our Fresh Artichoke video, and all of our recipes. Be sure and sign up for our mailing list and never miss a new Chef Buck cooking video, and also click a button below and share the dishes with your friends. We appreciate all the kind comments and support, and we’ll see you next time in the kitchen!
–Chef Buck

We appreciate you watching our videos…Thanks!

We include affiliate links for products on our website, so if you make a purchase after clicking on our links, we may earn a commission which helps us produce more videos and drink more coffee :^) We are participants in the Amazon Services LLC Associates Program, which is an affiliate advertising program that provides a means for us to earn fees by linking to Amazon.com and affiliated sites, so we can make more videos.

Share and Enjoy !

Mole Sauce from the Grocery Store… is it Good?

mole sauce

Mole sauce is a traditional recipe used in Mexican dishes. You know how bullfighters yell out olé? Put an “m” in front of it, and that’s how you say “mole”. But no matter how you say it, mole is delicious, and you have to try it.

What’s in a Mole Sauce?

We’ve been traveling in Mexico for over two months and one of the best things about our trip is sampling great Mexican cuisine. Some of the best dishes we’ve eaten have been mole dishes. Mole is a slow simmered sauce, reddish to brown in color, rich and thick, kinda like a smooth gravy with attitude. Mole open to many interpretations. There are all kinds of mole sauce, and whenever we get a chance to sample one, we do.

mole sauce

Potential Mole Ingredients

CHILI PEPPERS
CHICKEN BROTH
TOMATOES
TOMATILLOS
ONION
GARLIC
SUGAR
All kinds of NUTS
CHOCOLATE
SALT
CUMIN
DRIED FRUIT
BREAD
TORTILLAS
ANISE
CLOVES
SESAME SEEDS
PUMPKIN SEEDS
SQUASH SEEDS
CILANTRO
…and the list goes on

Make Mole at Home or Buy a Pre-made Mole Sauce or Paste

A key ingredient in a mole are chili peppers. A variety of chili peppers are roasted and ground into a powder or paste. This paste is added to broth or water along with a selection of other ground ingredients. This concoction is stirred and simmered and blended until smooth. Moles vary from region to region, and even house to house in Mexico.

Making a mole sauce from scratch can be fun, but pre-made mole powders and pastes are readily available for purchase at public markets in Mexico, grocery stores, and even online. Check links for current mole sauce prices on Amazon: Xiqueño Mole Paste, or Dona Maria Mole Sauce, and Dona Maria Mole Paste

Mole can be served with anything. My favorite mole dish is the traditional pairing of chicken and mole with rice, also called chicken mole, or pollo con mole. I love mole in the morning for breakfast. Mole sauce served with fried eggs and potatoes is the best, and of course toast to sop up the extra sauce is a must have.

We tried store-bought mole and found it to be a pretty serviceable base. You can buy a premade mole or paste and add you own ingredients and flavors.

If you want to try making your own mole at home, check out this complete written Homemade Mole Sauce Recipe.

Thanks for checking out our store bought mole video, and all of our recipes. Be sure and sign up for our mailing list and never miss a new Chef Buck cooking video, and also click a button below and share the dishes with your friends. We appreciate all the kind comments and support, and we’ll see you next time in the kitchen!
–Chef Buck

We appreciate you watching our videos…Thanks!

We include affiliate links for products on our website, so if you make a purchase after clicking on our links, we may earn a commission which helps us produce more videos and drink more coffee :^) We are participants in the Amazon Services LLC Associates Program, which is an affiliate advertising program that provides a means for us to earn fees by linking to Amazon.com and affiliated sites, so we can make more videos.

Share and Enjoy !

How To Eat Papaya – Ripe Papaya 101

how to eat papaya

Here is all you need to know to choose a ripe papaya and how to eat papaya. Cutting and eating a papaya is super simple because you can eat the entire tropical fruit including the skin, seeds, and flesh. This makes it an ideal ingredient in smoothies, especially if the papaya is a little on the over-ripe side. Papaya is packed with nutrients and great for digestive health. I found the papaya seeds really tasty, and the seeds added a nice texture, too.

Two Major Papaya Varieties We’ve Tried

There are many varieties of papaya available.  Before arriving in Mexico we were most familiar with the smaller Solo variety of papaya grown in Hawaii. We are currently in central Mexico and have had yummy maradol papaya at local restaurants.  The street vendors here sell gorgeous fruit cups of papaya, watermelon, jicama and pineapple – YUM!

In Central Mexico, the maradol papaya is popularly grown.  Both the Maradol and the Solo varieties are easy to peel and the fruit has a mild sweet flavor. The Maradol papaya can get up to 20 inches long and weigh several pounds. It is generally not as sweet as the Solo, but still has a great taste and, when ripe, has a texture similar to a soft honeydew or cantaloupe. Its mild flavor profile means it’s a great compliment for a variety of foods.

If you can’t find fresh papaya where you live, you can try dried papaya. Dried papaya is easy to find in most big box groceries, or you can check Amazon for current prices on dried papaya.

Papaya Is Packed With Nutrition

Papaya is nutrition-rich.  This tropical fruit is high in vitamin C and a great source of vitamin A and folate.  You also get plenty of fiber, magnesium, and potassium when you eat a serving of papaya. The digestive health benefits papaya are considerable because of an enzyme called papain that helps with the digestion of proteins. Papain is extracted from papaya and used as a main ingredient in powdered meat tenderizers.

how to eat papaya

How To Pick A Ripe Papaya

To pick a ripe papaya, look for mostly yellow to orange skin. You want the papaya to give a bit when you press it, but it should still be hard at the stem-end. As with any produce, you do not want a lot of soft or moldy spots. 

IF you have a few days to wait for the sweet taste, you can pick a papaya that has just started to turn yellow. Just leave it on your kitchen counter to ripen OR put it in a paper bag with a banana and set it in the fridge.

One more thing, a good papaya can have a slightly musky aroma. Wait! Don’t run away…try it first. One of Buck’s favorite ways to eat raw papaya is with a generous amount of fresh lime juice. If the smell turns you off, that’s one of many ways you can overcome the musky aroma.

How To Eat Papaya

When you’re ready to use your papaya, as with any fruit, wash the skin with soap and water before cutting. Cut off the stem end, then cut it lengthwise. For this type of papaya, the fruit will be a yellow/orange color. Generally folks scoop out and discard the seeds and membrane…but see our related thoughts at the end of this post. The texture will be similar to a ripe cantaloupe or honeydew melon.

Once a papaya is ripe, you want to store it in the fridge and use it within a day or two. Skinned papaya chunks can be frozen for later use. But like any fruit with a high water content, you don’t want to leave it frozen for too long.

Ripe papaya is soft enough that you can easily scoop our spoonfuls and eat it right out of the skin.  Or, just squeeze a generous amount of lime juice over it just before you eat it. That simple combination is fantastic! Feeling adventurous but lazy? Add a bit of chipotle chili or cayenne to your papaya/lime mixture.  What about some grated ginger, mint and a scoop of yogurt?  Raw papaya is especially friendly with citrus and creamy accompaniments.

how to eat papaya

More Things To Do With Papaya

You can make all kinds of salsas and cold salads with papaya. Just remember one thing when you make any cold dishes: the same enzyme that allows papayas to help you digest proteins, softens other fruits was well. That means that you want to eat your cold papaya creations within a day of mixing.

Use papaya to make a nutrient-packed beverage. Make a papaya smoothie mixing fruit chunks with some coconut milk, honey and a pinch of cinnamon. Try blending in a few seeds and a piece of skin for added nutrition. 

What about using papaya in a cake topping? Puree papaya with seeds and mix into lemon curd and use as a topping on a cake. Just pour on the top and drizzle down the sides over a whipped cream frosting.

The possibilities for including ripe papaya in your diet are endless, and your body will appreciate it. 

How To Use Green Papaya

Got a totally green, unripe papaya? Don’t despair! Folks purposely choose a TOTALLY green papaya (usually smaller than the ripe one) for some scrumptious meals. Shred it up and make a tart cold salad. A Vietnamese friend has served us a green papaya salad – OMG! Green papaya has a firmer texture than a ripe one, and can be added to hot dishes. Add it to soup, stews, and curries.

Don’t forget, a green papaya has a bit less of the papain enzyme than a ripe one. But still, you want to use it within a couple of days of cutting it.

You Can Eat ALL The Papaya

Yep, you can eat the seeds, central membrane and the skin.

You can eat the black seeds raw with the papaya. The seeds have a peppery and oh-so slightly bitter taste. You can also wash and dry the seeds, then use them as you would peppercorns. Try grinding up a few fresh or dried seeds and add to a salad dressing or a cocktail.  Some studies suggest papaya seeds help keep intestinal parasites out the body or as a treatment for heartburn.

See that light-colored membrane under the seeds? That can be the sweetest part of the papaya. In terms of texture, that may not be your thing but, like other fruit membranes, it packs some nutrition.

Eat the skin? Your choice. It doesn’t have much flavor but a little can add some additional fiber to your smoothie. Don’t knock it until you try it!

And that’s about all you need to know to eat and enjoy a papaya. We hope this info has been helpful, and for another tropical fruit treat, check out All You Need To Know About Mango!

mango smoothie

Be sure and sign up for our mailing list and never miss a new Chef Buck cooking video, and also click a button below and share the dishes with your friends. If you enjoyed this How To Eat Papaya video, check out my Cool Fruit Playlist on Youtube. We appreciate all the kind comments and support, and we’ll see you next time in the kitchen!
–Chef Buck

We appreciate you watching our videos…Thanks!

We include affiliate links for products on our website, so if you make a purchase after clicking on our links, we may earn a commission which helps us produce more videos and drink more coffee :^) We are participants in the Amazon Services LLC Associates Program, which is an affiliate advertising program that provides a means for us to earn fees by linking to Amazon.com and affiliated sites, so we can make more videos.

Share and Enjoy !

Cochayuyo Recipes – Healthy Kelp Seaweed

cochayuyo recipes

Two Easy Ways To Prepare Cochayuyo

Cochayuyo is a versatile, tubular kelp seaweed that is packed with nutrition and can be used in a variety of dishes. It’s a great vegetarian option high in protein, so it’s ideal for meat-free meals.

cochayuyo recipes

Cochayuyo is generally sold in dried bundles, so it needs to be rehydrated before being used in a recipe. I’ve tried cochayuyo that is light tan in color, and cochayuyo that is much darker, bordering on black. I find the darker seaweed to be less tender and to have a stronger flavor, so I prefer to use it in cooked cochayuyo recipes, and because it is more mild, the lighter cochayuyo is perfect for salads.

Easy Way To Rehydrate Cochayuyo

Place the dried cochayuyo in a large pot of cold water and then soak overnight.  That’s it. You don’t have to salt the water or anything, and after the cochayuyo has rehydrated, simply rinse well and then slice into strips, rings, or whatever shape is ideal for the dish you are creating.

cochayuyo seaweed recipes

How to make a Cochayuyo Salad Recipe

ingredients:
2 cups diced COCHAYUYO (use the lighter cochayuyo)
1-3 cloves minced GARLIC
1 Tbsp minced GINGER
3 Tbsp OLIVE OIL
2 Tbsp LIME JUICE
SALT and PEPPER to taste

In a bowl, combine the oil and lime juice and then mix well, and if you don’t have fresh lime juice, just use fresh lemon juice, or you can substitute a bottled citrus juice or vinegar. Add the minced ginger and garlic, and then salt and pepper to taste.  Mix well, and after that toss the chopped cochayuyo with the dressing.

Serve this garlicky cochayuyo as a salad topping, or as a topping for any dish that can benefit from a little pizzazz and chewiness, and since it’s packed with nutrition, the added health benefits are a nice bonus!

cochayuyo salad recipe

Skillet Cochayuyo Recipe

Cochayuyo pairs well with black beans in a skillet saute.  Here is one of my favorite ways to use this hearty seaweed in a hot dish, and this is also a good recipe for cleaning out the fridge, so substitute whatever veggies you have on hand.

ingredients:
3 cups sliced COCHAYUYO
1 15 oz can BLACK BEANS
½ cup sliced RED PEPPER
1 chopped ONION
4-5 cloves minced GARLIC
2 Tbsp minced GINGER
½ can diced TOMATO
3 cups SPINACH
½ cup CELERY
2-3 Tbsp COOKING OIL

And lots of SEASONINGS…in this video recipe I use
1 tsp CUMIN
1 Tbsp CURRY POWDER
1 tsp CHILI POWDER
1 tsp PAPRIKA
ROSEMARY
SALT and PEPPER to taste
But experiment with different flavors!

How to Cook Cochayuyo with Black Beans

  • In a large skillet, heat cooking oil.
  • Add onions and saute 2-3 minutes.
  • Add garlic, ginger, red pepper and saute another minute.
  • Stir in the seasonings.
  • Add in the celery, black beans, and tomato.
  • Mix well, cover, and simmer for 15 minutes.
  • Add in the spinach and cochayuyo.
  • Cover and simmer another 5 minutes, until the spinach is wilted and the cochayuyo is heated through.

And that’s it, an easy and very flavorful way to use this great ingredient, so if you can get your hands on cochayuyo, give it a try. I bet it would be a great conversation starter at a dinner party, but that’s for you to find out.

Another super versatile ingredient for cooking is chick peas, aka garbanzo beans, because like cochayuyo, it has a mild flavor, so check out this version of an Indian Chana Masala Recipe, which is one of my favorite chickpea dishes, and a very economical dish to prepare, as well.

chana masala chickpea curry

Thanks for checking out the cochayuyo recipes, and all of our recipes. Be sure and sign up for our mailing list to never miss a new cooking video, and also click a button below and share the dishes with your friends, and follow Chef Buck on Youtube. We appreciate all the kind comments and support, and we’ll see you next time in the kitchen!

If you like what CG and I do, support us on Patreon, or throw a tip in our Paypal Tip Jar We’ll happily enjoy a coffee on the road, or maybe even pay a bill or two!–Thanks! We appreciate all the support, and we’ll see you next time in the kitchen!

Thanks for watching our Cuchayuyo recipes!

We include affiliate links for products on our website, so if you make a purchase after clicking on our links, we may earn a commission which helps us produce more videos and drink more coffee :^) We participate in the Amazon Services LLC Associates Program, which is an affiliate advertising program providing a means for us to earn fees by linking to Amazon.com and affiliated sites, so we can make more videos.

Share and Enjoy !

Cola de Mono Recipe – Chilean Holiday Drink

cola de mono recipe

Cola de Mono is a traditional Chilean holiday drink that you can make anywhere you live. In Chile, they use a very strong aguardiente liquor that packs a punch, but you can make a version of this tasty drink with any neutral flavored alcohol, or a virgin cocktail by simply leaving out the alcohol all together. A cola de mono is super tasty, and in many ways reminds me of a lighter variation of a white Russian cocktail.

Ingredients for a Cola de Mono Recipe

This version makes 3-5 small (1/2 cup) portions

1/4 cup granulated SUGAR
1/4 cup WATER
.5 oz CINNAMON STICKS
3 tablespoons INSTANT COFFEE, medium to dark roast
2 cups WHOLE MILK
1 teaspoon VANILLA EXTRACT
1/2 cup CHILEAN AGUARDIENTE …but definitely adjust according to taste. Alternatives: Chilean pisco, white rum, brandy, or vodka. Chilean pisco is exported, Chilean aguardiente is not.

Other Traditional Spices….that we left out
5 whole cloves
1/8 teaspoon finely ground nutmeg
orange peel (e.g. 1″ wide by 2″ long)

cola de mono recipe

How to make a Cola de Mono

  • Combine the water, sugar and cinnamon stick in a medium saucepan and bring to a boil.
  • Reduce the heat and simmer for 5 minutes.
  • Remove from heat and stir in instant coffee. Instead of instant coffee, you can use finely ground espresso powder. Or you can use 1/2 cup strongly brewed coffee per teaspoon of instant coffee that has cooled. If you use brewed coffee, reduce the amount of milk you add, and add it AFTER the syrup has cooled, along with the milk, vanilla and alcohol.
  • Set aside to cool to room temperature.
  • Remove cinnamon stick and cloves
  • Add milk, vanilla, and aguardiente or desired alcohol to taste.
  • Pour the mix into a container and refrigerate until chilled, at least 4 hours, but overnight is ideal.

Serve very, very cold.
A couple ways to help keep it cold: make a 1/2 recipe without alcohol and make cola de mono ice cubes, or use coffee ice cubes instead, or place the prepared pitcher of cola de mono in the freezer for 10-30 minutes before serving.

Serve the drinks in fancy-pants glasses to be more festive, and enjoy! Salud!
Cocktails always taste better in a fancy glass, so check here for current prices on amazon for Fancy-pants Glassware for Cocktails.

And for more adult beverage ideas, check out these Fancy-pants Cocktail Recipes.

cocktail recipes
Coffee ice cubes are ideal for cold coffee cocktail recipes.

Thanks for checking out our version of a cola de mono recipe. Be sure and sign up for our mailing list so you’ll never miss a Chef Buck cooking video, and click a button below and share the dishes with your friends. We appreciate all the kind comments and support, and we’ll see you next time in the kitchen!
–Chef Buck

We appreciate you watching our videos!

We include affiliate links for products on our website. If you make a purchase after clicking on our links, we may earn a commission which helps us produce more videos and drink more coffee :^)
We are a participant in the Amazon Services LLC Associates Program, an affiliate advertising program designed to provide a means for us to earn fees by linking to Amazon.com and affiliated sites.

Share and Enjoy !


Jackfruit Pulled Pork Recipe for Vegetarian BBQ

jackfruit pulled pork

Here is the easiest jackfruit pulled pork recipe ever. A faux pork vegetarian recipe made with canned young, green jackfruit will deliver the taste and texture of your favorite BBQ pork, and it’s a much healthier choice. This recipe is basically a BBQ sauce delivery system. Unripe canned jackfruit makes a perfect meat substitute that works well for either pork or chicken, so definitely give it a try.

Ingredients for Jackfruit Pulled Pork BBQ

1 20oz can young, green JACKFRUIT
1 medium ONION
2-4 cloves GARLIC
your favorite BBQ SAUCE
1 tsp CUMIN POWDER
½ tsp CHILI POWDER
some SALT and PEPPER
OIL for sautéing

jackfruit pulled pork
BBQ jackfruit makes a perfect vegetarian pulled “pork” sandwich.

How to Make Vegetarian Pulled Pork BBQ with Jackfruit

  • Rinse and drain the young, green jackfruit. Make sure to buy unripe jackfruit and NOT the
    yellow ripe jackfuit. You can buy jackfruit online. Check CURRENT CANNED JACKFRUIT PRICES on Amazon.
  • Shred the jackfruit. I do this by hand, it’s very easy, but you can use a knife, too.
  • Heat oil in a skillet on medium heat.
  • Add thinly sliced onion and finely chopped garlic and saute 3-4 minutes.
  • Add in seasoning.
  • Add jackfruit and a little BBQ sauce.
  • Raise the temperature and heat the jackfruit through, then reduce to a simmer and cook until the dish reduces as the water cooks out of the onion and jackfruit.
  • Add more BBQ sauce to desired sauciness, and then remove from heat.

This jackfruit pulled pork substitute is great all on its own, served over rice, or perfect on a soft roll or bun, so definitely give it a try. If you like pulled pork BBQ, you will be amazed at this vegetarian option and how easy it is to prepare.

jackfruit pulled pork
Jackfruit BBQ is great over rice, on a sandwich, or all on its own.

What is Jackfruit?

Jackfruit is exactly what it sounds like, a fruit, but it’s HUGE. A 50 pound jackfruit is not uncommon. This giant tropical fruit grows on trees and is very popular in Asia. Unripe jackfruit can be cooked and used in savory dishes. Ripened jackfruit can be eaten raw and, unlike young green jackfruit, is very juicy and sweet.

Buying and cleaning fresh jackfruit is quite an endevour, so canned jackfruit is a perfect alternative. I prefer the green jackfruit and find it to be a terrific ingredient to experiment with in a variety of vegetarian recipes. The mildness of its flavor allows young jackfruit to be incredibly versatile, and it will enhance a recipe without overpowering it.

I’ve used green jackfruit as a pulled pork BBQ, as a faux meat filling in tacos, in an Indian-style variation of Jackfruit Tikka Masala, and as a No-Potato Hash for breakfast.
Its super nutritious, readily available at Asian markets, and well worth giving a try, so seek it out.

jackfruit recipe
Seasoned and baked Jackfruit makes a convincing faux chicken when added to this rich Indian inspired tikka masala.

Thanks for watching our recipe videos!

Thanks for checking out the canned jackfruit pulled pork recipe, and all of our recipes. Be sure and sign up for our mailing list to never miss a new cooking video, and also click a button below and share the dishes with your friends, and follow Chef Buck on Youtube. We appreciate all the kind comments and support, and we’ll see you next time in the kitchen!

If you like what CG and I do, support us on Patreon, or throw a tip in our Paypal Tip Jar We’ll happily enjoy a coffee on the road, or maybe even pay a bill or two!–Thanks! We appreciate all the support, and we’ll see you next time in the kitchen!

We include affiliate links for products on our website, so if you make a purchase after clicking on our links, we may earn a commission which helps us produce more videos and drink more coffee :^) We participate in the Amazon Services LLC Associates Program, which is an affiliate advertising program providing a means for us to earn fees by linking to Amazon.com and affiliated sites, so we can make more videos.

Share and Enjoy !

Rutabaga Recipe for a Low Carb Diet

rutabaga recipe

Here’s an easy Roasted Rutabaga Recipe that you will love, and it’s a great alternative to potato. Rutabaga is a low-carb root vegetable you can use just like a potato, but with less than half the calories and carbs of potato. In appearance rutabaga is like a larger version of a turnip, but it tastes a bit sweeter. It’s related to cabbage, so it has a very mild cabbage taste. It’s great baked in the oven, cooked in soups, and I love it shredded and cooked into breakfast hash browns. Like most produce, when buying rutabaga choose one that’s firm and seems heavy for it’s size. Give this rutabaga recipe a try and let me know what you think.

What You Need for a Roasted Rutabaga Recipe

RUTABAGA cubed
OLIVE OIL
SALT
CHILI PEPPER
BLACK PEPPER
ROSEMARY

rutabaga recipe
Roasted rutabaga makes a great alternative to a potato side dish.

How to Roast Rutabaga in the Oven

  • Buy a rutabaga that’s heavy for it’s size and not dried out.
  • Slice the end off the rutabaga and cut away the outer skin with a knife.
  • Cut into roughly 1/2″ square cubes.
  • Toss the rutabaga cubes in a bowl with olive oil.
  • Add seasoning and toss until cubes are well coated
  • Spread rutabaga on an ungreased baking sheet. Aluminium foil is a good idea.
  • Bake in a preheated oven at 400 degrees Fahrenheit for approximately 45 minutes.
  • Halfway through the cooking process, you can check on the rutabaga and give them a turn to prevent overcooking on one side.

And that’s it!
Roast some rutabaga in the oven let me know what you think.

rutabaga recipe
Don’t be scared of da rutabaga

Is Rutabaga Healthier than Potato?

  • Rutabaga has LESS THAN HALF the calories of potato.
  • It has 60% FEWER CARBS than potato.
  • Rutabaga contains about the same amount of Dietary Fiber as potato.
  • Potato wins the vitamin count; rutabaga provides more Vitamin C than potato,
    but overall, is less nutrient rich than potato.

So, don’t give up on potatoes, but add a rutabaga recipe into your menu rotation, it’ll make a great change-up from the regular potato routine. One of my favorite faux potato dishes is this Mock Potato Salad made with cauliflower.
And for another tasty rutabaga recipe idea, try Rutabaga Hash Browns.

hash browns recipe
click pic for recipe

Thanks for checking out this baked rutabag recipe and video, if you liked the dish, click a button or two below and share it with your friends.
I appreciate it, thanks!
–Chef Buck

Share and Enjoy !


Jackfruit Recipe Meatless Chicken Tikka Masala

jackfruit recipe

Chicken tikka masala is one of the most popular Indian inspired dishes in the world, because it’s fantastic, but you can easily make a tasty and meatless version of a tikka masala using this canned jackfruit recipe. Young green jackfruit is versatile and very easy to use. Green jackfruit’s mild flavor and rich texture make young green jackfruit an excellent faux meat. It’s popular in mock BBQ pork dishes, and also a favorite of my own in a meatless breakfast hash. When seasoned and baked in the oven, jackfruit handily mimics the texture of baked chicken, and it makes an ideal substitute in this tikka masala recipe. I’m using as few ingredients as I can in order to make this jackfruit recipe super easy.

Ingredients for a Meatless Tikka Masala Jackfruit Recipe

1 20oz can JACKFRUIT (use only young green jackfruit! …don’t buy sweet ripe jackfruit in syrup!)
15oz can TOMATO SAUCE
15oz can CRUSHED TOMATO
½ cup PLAIN GREEK YOGURT
1 medium chopped ONION
6-8 cloves finely chopped GARLIC
1 tsp CUMIN SEEDS
2-3 Tbsp pre-mixed CURRY (or make your own!)
SALT to taste
½ tsp CHILI POWDER
1 tsp GARLIC POWDER
OIL for sauteing
CILANTRO or green onion

jackfruit recipe
When buying canned jackfruit, notice that there are often two types for sale: a ripe sweet jackfruit in syrup, and young green jackfruit. Use young green jackfruit for this mock chicken tikka masala recipe.

How to Make a Meatless Chicken Tikka Masala with Jackfruit

  • For this jackfruit recipe, rinse and drain the jackfruit and cut into smaller, bite-sizes. You can buy jackfruit online. Check current canned jackfruit prices on Amazon.
  • In a bowl, toss the jackfruit with chili and garlic powder.
  • Spread the seasoned jackfruit out on a lightly greased baking sheet and bake at 400 degrees Fahrenheit
    for about 20 minutes.
  • In a skillet, heat oil on medium high heat.
  • When the oil is heated, add the cumin seeds, stir and allow to simmer for just a few moments.
  • Once the seeds begin to crack, add the finely chopped garlic.
  • Saute for a few moments and add in the onion.
  • Reduce the heat to medium and stir for approx. 2-3 minutes and add the curry powder. Use a premixed curry, or your own mixture. Mix well and continue to saute for 1-2 more minutes.
  • Add in the canned tomatoes. Mix well, raise the temperature and allow the ingredients to come to a bubble.
    Reduce the pot to a simmer, cover, and allow cooking for 10 minutes.
  • After 10 minutes, turn the heat off.
  • Blend the ingedients in the pot smooth with a hand blender; this step isn’t crucial, but it will help give the dish the creaminess of a restaurant style chicken tikka masala.
  • Stir in yogurt and mix well.
  • Add in the baked jackfruit and mix well.
  • Serve with rice or on its own.
  • Garnish with fresh coriander leaves or chopped green onion tops.
jackfruit recipe
Use young green jackfruit for a tasty meatless “chicken” tikka masala recipe.

Give this easy meatless “chicken” tikka masala recipe a try and let me know what you think. If you’re a fan of chicken tikka masala, definitely try this jackfruit recipe version out.
The dish cooks up super quick with much less effort than you need to make a traditional chicken tikka masala, and I think you will be very happy with this meatless version. Cook it up and try it out on your friends and family–don’t tell them it’s jackfruit!–tell them it’s chicken tikka masala and see if they notice the difference.

For more easy Indian recipe ideas, check out my Complete Indian Meal Tutorial where I cook up an entire dinner.

how to cook indian food

Thanks for checking out the canned jackfruit recipe, and all of our recipes.

Be sure and sign up for our mailing list to never miss a new cooking video, and also click a button below and share the dishes with your friends, and follow Chef Buck on Youtube. We appreciate all the kind comments and support, and we’ll see you next time in the kitchen!

If you like what CG and I do, support us on Patreon, or throw a tip in our Paypal Tip Jar We’ll happily enjoy a coffee on the road, or maybe even pay a bill or two!–Thanks! We appreciate all the support, and we’ll see you next time in the kitchen!

We include affiliate links for products on our website, so if you make a purchase after clicking on our links, we may earn a commission which helps us produce more videos and drink more coffee :^) We participate in the Amazon Services LLC Associates Program, which is an affiliate advertising program providing a means for us to earn fees by linking to Amazon.com and affiliated sites, so we can make more videos.

Share and Enjoy !

Shrimp Bread …let’s try Banh Mi Tom Chien

shrimp bread

I finally tried Vietnamese fried shrimp bread, or bahn mi tom chien, or is it banh mi chien tom? Whatever you call it, it was a very tasty shrimp recipe. I have since made several different versions of shrimp bread at home, trying to make a healthy baked shrimp recipe that I can prepare in the oven instead of frying. I made a few duds, but finally settled on a baked version of Vietnamese shrimp toast using an English muffin, egg white, garlic, and Italian seasoning. I’m pretty happy with the recipe, although I might tinker with it a bit more. As soon as I get a video edited of the recipe, I’ll put it up, but until then, maybe experiment yourself with some versions of shrimp bread or shrimp toast. I love using the whole shrimp in the recipe, it looks very tasty, but in my own versions of Vietnamese shrimp bread, I peeled the shrimp and removed the head and tail. Unpeeled shrimp might be yummy when deep fried, but I don’t think baking will have as tasty an effect.

Baked Shrimp Bread Recipe Ingredients

SHRIMP peeled and deveined
ENGLISH MUFFIN
EGG WHITE
minced GARLIC
dried ITALIAN SEASONING
PAPRIKA
SALT and PEPPER to taste
OLIVE OIL

shrimp bread
homemade baked shrimp bread

How to Make Baked Shrimp Bread

  • Peel and devein shrimp.
  • In a bowl, lightly toss shrimp with olive oil and minced garlic and then season with salt, pepper, and paprika and set bowl aside.
  • Lightly coat English muffin halves with olive oil and slightly toast face down in a skillet.
  • Then place muffin halves face-up on a baking pan.
  • In a small bowl, whisk 1 or 2 egg whites with dried Italian seasoning.
  • Place a spoonful of this egg white mix on each muffin face.
  • Place shrimp over the egg white and cover the muffin face. Use whole shrimp, or chop them, or use a combo. I like using some chopped and whole shrimp, that way I can entirely cover the muffin with shrimp, but also have a whole shrimp on top so it looks extra cool and tasty.
  • Top the shrimp with another spoonful of the egg white mix. This will bake and form a seal to hold the muffin and shrimp together.
  • Bake in an oven at 400 degrees Fahrenheit for about 20 minutes, or until toasted golden.

That’s it. A healthier version of shrimp bread that really works. Give it a try and let me know what you think. I’m still tinkering with the recipe a bit, but I’m pretty happy with this version of a twist on Vietnamese baked banh mi tom chien. If you find a tasty twist of your own, let me know! It’s an interesting recipe to experiment with.

For another shrimp dish, check out this Super Garlicky Shrimp Recipe

Thanks for watching the video recipes and checking out these versions of Vietnamese Shrimp Bread. If you liked it, then click a button or two below and share the recipe with your friends, I appreciate it!
–Chef Buck

Share and Enjoy !


Canned Jackfruit and Potato Hash Recipe

canned jackfruit

Make a tasty breakfast potato hash with canned jackfruit. Young, green jackfruit is a great meat substitute that works well in this classic breakfast recipe of potato and peppers. Canned jackfruit is easy to use, inexpensive, and a extremely versatile ingredient. Unripe jackfruit adds a nice texture when pulled apart, and its neutral flavor makes it ideal for many recipes.

Ingredients for Canned Jackfruit Potato Hash

1 20oz can young, green JACKFRUIT
1 cup chopped POTATO (any kind you like, sweet potato makes a nice change-up)
½ cup chopped ONION
chopped PEPPERS (I like using a combo of jalapeno and bell peppers, but use whatever you prefer)
finely chopped GARLIC (optional, but always a good idea)
1 tsp CUMIN POWDER
1 tsp PAPRIKA
1 tsp TURMERIC
2 Tbsp WORCERSTERSHIRE
some SALT and PEPPER

canned jackfruit
Breakfast hash with young green jackfruit with potato

How to Make Jackfruit Potato Hash

  • Rinse and drain canned jackfruit. You can buy jackfruit online. Check current canned jackfruit prices on Amazon.
  • Shred it. I do this by hand, it’s very easy, but you can use a knife, too.
  • Heat oil in a skillet on medium high heat.
  • Add chopped onion and peppers and saute 3-4 minutes.
  • Add garlic and cook 1 minute.
  • Add seasoning and mix well, continue sauteing for another minute.
  • Add in shredded jackfruit and Worcestershire sauce and mix well.
  • Raise skillet heat and add in potato. Add 1 can of water and mix.
  • Cover skillet and allow ingredients to come to a bubble.
  • Reduce heat to a simmer and continue cooking until potatoes are near done.
  • Remove cover and continue cooking hash until potatoes are done.
  • Serve as a breakfast side or the main dish.
    Top with eggs, if desired.
canned jackfruit
Jackfruit and potato hash topped with fried egg; the yolk makes a nice sauce.

What is Jackfruit?

Jackfruit is exactly what it sounds like, a fruit, but it’s HUGE. A 50 pound jackfruit is not uncommon. This giant tropical fruit grows on
trees and is very popular in Asia. Unripe, jackfruit can be treated like a starch, cooked and used in savory dishes. Ripened jackfruit can be eaten raw and is very
juicy and sweet; quite a combo. Buying and cleaning a fresh jackfruit is quite an endevour. For me, canned jackfruit is a perfect ingredient.

I prefer unripe, young, green jackfruit and find it to be a terrific ingredient to experiment with in a variety of recipes. The texture of unripe jackfruit makes it a fantastic faux meat,
and the mildness of its flavor allows it to be incredibly versatile.

I’ve used it as a meatless pulled pork BBQ, as a faux meat filling in tacos, in an Indian-style variation of Jackfruit Tikka Masala, and as a potato hash for breakfast.
Its super nutritious, readily available at Asian markets, and well worth giving a try.

No canned jackfruit on hand, but still want a tasty potato dish for breakfast? Try this classic Crispy Potato Breakfast Recipe.

home fried potatoes recipe
home fried potatoes

Thanks for watching our recipe videos!

Thanks for checking out the canned jackfruit recipe, and all of our recipes. Be sure and sign up for our mailing list to never miss a new cooking video, and also click a button below and share the dishes with your friends, and follow Chef Buck on Youtube. We appreciate all the kind comments and support, and we’ll see you next time in the kitchen!

If you like what CG and I do, support us on Patreon, or throw a tip in our Paypal Tip Jar We’ll happily enjoy a coffee on the road, or maybe even pay a bill or two!–Thanks! We appreciate all the support, and we’ll see you next time in the kitchen!

We include affiliate links for products on our website, so if you make a purchase after clicking on our links, we may earn a commission which helps us produce more videos and drink more coffee :^) We participate in the Amazon Services LLC Associates Program, which is an affiliate advertising program providing a means for us to earn fees by linking to Amazon.com and affiliated sites, so we can make more videos.

Share and Enjoy !

Best Spaghetti Squash low-fat, low-carb recipe

best spaghetti squash

It doesn’t take a lot to make the best spaghetti squash recipe. A few simple ingredients are all you will need to cook this healthy, low fat spaghetti squash dish. This squash is a lowfat low carb ingredient with a wonderful texture and a mild flavor that allows it to work very well in a variety of recipes.

What you need for this Squash Recipe

1 SPAGHETTI SQUASH
GARLIC (5-10 cloves, finely chopped)
LEMON zest and juice (current price for a kitchen zester)
BUTTER (1-2 Tbsp)
OLIVE OIL (¼ cup)
PARSLEY (½ cup, chopped)
SALT and PEPPER to taste

The measurements above are just loose suggestions, and really need to be adjusted to your own tastes. The size of the spaghetti squash and how much squash you dig out will determine how much of the other ingredients you need. This recipe calls for simple and fresh ingredients, so there really is no wrong way to make this dish. The best spaghetti squash doesn’t get more super simple than this!

best spaghetti squash
spaghetti squash makes a healthy, low fat, low carb pasta alternative

Best Spaghetti Squash …simple, low fat, low carb recipe

  • When buying a spaghetti squash, choose one that seems heavy for its size.
  • Carefully slice the squash into halves. Cut the squash across instead of lengthwise, this will make for longer “noodles”.
  • Place cut sides down in shallow water in a roasting pan.
  • Bake for about 30-45 minutes at 350 degrees Fahrenheit. You can check on the squash after 30 minutes; the cooking time will vary according to the size of the squash.
  • It’s important not to overcook the squash, slightly crunchy strands of squash add great texture to a dish, and overcooking the squash will make the ingredient mushy.
  • Remove squash from the oven and carefully turn halves over to check for doneness –the water will be hot and steam will be trapped under the squash, so be cautious.
  • Allow squash to sit 5-10 minutes to cool slightly for easier handling.
  • Insert a fork and twist out strands of “spaghetti”. Once the fork has done its job, use a spoon to scrape out the remaining squash; it’s edible all the way to the rind, so don’t waste any!

On the Stove Top

  • Heat a skillet and melt cooking oil on medium heat.
  • Add finely chopped garlic and cook 1-2 minutes until it begins to color up. If you like a bit of heat with your dish, add some red pepper flakes as well.
  • Add a bit of butter for extra flavor (this is optional).
  • Add the spaghetti squash to the skillet and mix with the garlic.
  • Add salt and pepper to taste, add lemon zest and juice, and stir. Check current price for a lemon zester on Amazon.
  • Turn off the heat and add in a bit of dark, flavorful olive oil.
  • You can also stir in a bit of freshly grated Parmesan Cheese if desired, but this is optional.
  • Add fresh chopped parsley for bright flavor and color, and mix well.

And that’s it.  Enjoy!

If you’re new to home cooking, just get a bunch of spices, pots and pans, and start experimenting with different ingredients and recipes. It’s a healthy hobby that can save a lot of money in the long run. You can check out current prices for Complete Kitchenware Sets on Amazon as well as Complete Starter Spice Kits. Or just go to a thrift store! I’ve found some of my favorite kitchen gear at second-hand stores.

For another tasty veggie ingredient to experiment with, try some tasty Rutabaga Recipes. It’s a great potato substitute!

vegetable soup
rutabaga is like a turnip on steroids, but sweeter

Thanks for checking out our best spaghetti squash recipe, and all of our recipes. Be sure and sign up for our mailing list and never miss a new Chef Buck cooking video, and also click a button below and share the dishes with your friends. We appreciate the kind comments and support, and we’ll see you next time in the kitchen!
–Chef Buck

Thanks for watching our recipe videos!

We include affiliate links for products on our website, so if you make a purchase after clicking on our links, we may earn a commission which helps us produce more videos and drink more coffee :^) We participate in the Amazon Services LLC Associates Program, which is an affiliate advertising program providing a means for us to earn fees by linking to Amazon.com and affiliated sites, so we can make more videos.

Share and Enjoy !

Kiwano Melon – How to eat a Horned Melon

kiwano melon

What is kiwano melon? ….it’s a fruit, also known as a horned melon and an African horned cucumber; it originated in Africa, but is becoming popular around the globe, mostly because of it’s interesting appearance. Check out the video to see how to eat a kiwano and, if today is payday, go ahead and pick one up at the market …it’s a pricey piece of fruit.

How to Eat Kiwano Melon

  • Kiwano Melon will last several months when stored at room temperature.
  • Kiwano is also called a horned melon, and an African horned cucumber.
    Its taste is mild to slightly citrus with comparisons to lemon, kiwi, and cucumber.
  • Kiwano is a variety of melon, and grows on the ground from a vine.
  • Buy a kiwano melon that is orange in color, the more orange the better.
  • Unripe kiwano is hard and green, but as it ripens, it colors to yellow and then to orange.
  • It is edible at any stage as it ripens. When overripe, it will burst.
  • Kiwano can be sliced open and eaten raw.
  • The inner pulp and seeds are edible. Kiwano has a high water content, and lots of seeds.
  • Eat the fruit directly from the gourd or remove the pulp to use in a recipe.
  • The decorative kiwano gourd can be incorporated in kiwano dishes.

kiwano melon
Kiwano is filled with an edible, seedy pulp

Kiwano Melon Fun Facts

  • Kiwano was used as a prop in an episode of Star Trek Deep Space Nine, staring as a “Golana Melon” from planet Golana.
  • Kiwano is sometimes called “blowfish fruit” because it looks like …a blowfish.
  • Because of its high water content, kiwano is prized in African desert regions.
  • Some varieties of kiwano have smooth skin (also known as “boring kiwano”).
  • Kiwano can be tied to the end of a stick and used to kill your enemies.

kiwano melon
kiwano has hints of citrus and cucumber

In the Northwest USA where I currently live, kiwano melon is found quite readily in local markets, but it is expensive.
At the local grocery in my neighborhood, this horned melon sells for $7.99 each. Yikes!
It’s a bit pricey, but if you have expensive tastes and like a piece of fruit that looks cool, give kiwano a try.

Or try Dragon Fruit …an equally cool and potentially overpriced piece of produce.

Thanks for checking out our videos. If you like what you see, share it with your friends and family on social media, I appreciate it!
–Chef Buck

Share and Enjoy !


How to Eat Pomegranate Fruit — great nutrition!

how to eat pomegranate

How to eat pomegranate. First off, Pomegranate is a weird, messy fruit.

When selecting a pomegranate, choose a fruit that is heavy for its size; like with most fruits, this signifies that it is fresh and juicy. The skin should be firm.

How to Eat Pomegranate

Pomegranate juice can be quite messy, and will easily stain clothing. It is a good idea to slice and prepare pomegranate in a large bowl or kitchen sink where the juice splatter can be contained.

The edible part of the pomegranate are the red “seeds” within the fruit. These seeds are called arils. Inside the arils you’ll find an inner seed that is a little gritty, but it is edible and contributes to the overall texture of the pomegranate, which is…interesting. Pomegranate is a food folks tend to love or hate, but whichever camp you fall into, pomegranate will provide an attractive and nutritious experience. Pomegranate is high in fiber, antioxidants, vitamins C, and potassium.

pomegranate
arils from pomegranate

To remove the arils, slice the pomegranate in half, and then into wedges. The arils are held firm by a membranous inside that is bitter and not to be eaten. The arils can be easily pulled away from the membrane. There are quite a lot of arils in a pomegranate, so this can take a little time…playing some cool jazz will help.

Some folks like to remove the seeds while holding the pomegranate beneath a bowl of water…this will cut down on the splatter, but it will also dilute any of the juice within the fruit.

How to eat pomegranate? Pomegranate can be eaten raw, juiced, or cooked.

Pomegranates keep for a week at room temperature, or up to 3 weeks if refrigerated.

Pomegranate is often referred to as “the food of the Gods”. Give ’em a go. You’ll either love it or hate it.

And for another interesting fruit experience, give DRAGON FRUIT a try.

Share and Enjoy !


Parsnip Recipe — Creamy Mashed Parsnips

Parsnips are delicious and can be cooked into a great mash, just like potatoes. You can make this parsnip recipe as smooth or chunky as you like; I like it a little chunky–and I throw in a potato, too, with the skin on! The skin adds a great texture. Mashed parsnips make a nice change from the same old potato dish.

What You Need For This Parsnip Recipe

2 lbs. PARSNIPS
1 lb. POTATOES
3-4 Tbsp BUTTER
3-4 Tbsp OLIVE OIL
HALF N HALF, CREAM, or MILK as desired
SALT and PEPPER to taste
½ cup PARSLEY (chopped)
and enough water or broth to
cover the simmering parsnips

parsnip recipe
A delicious and creamy parsnip recipe. It’s a perfect side for a meaty entree or a filling addition to a vegetarian meal.

If you’re new to home cooking, get a bunch of spices, pots and pans, and start experimenting with different recipes. It’s a healthy hobby that can save a lot of money in the long run. Check out current prices for Complete Kitchenware Sets on Amazon as well as Complete Starter Spice Kits. Or try a thrift store! I’ve found some of my favorite kitchen gear at second-hand stores.

How to Make a Mashed Parsnip Recipe

Wash the parsnips and potato.
I don’t peel either!–the skin adds great texture and nutrition (but you can follow your own heart).
In a mid-size pot, heat butter and oil.
Chop the parsnips and potatoes into chunks roughly ½ inch in size–they don’t have to be perfect, close
is close enough.
Add chopped parsnips and potato to the pot, mix with butter and oil and let cook 2-3 minutes, stirring as needed.
Add water to the pot, just enough to cover the parsnips. Sometimes I use broth instead of water–give it a go sometimes,
but it’s delicious either way. Add salt and pepper to taste. Bring the pot to a simmer, cover, and let simmer about 5 minutes.
Uncover and continue simmering until the liquid is reduced and parsnips are soft and break apart.
Add a little milk, cream, or half n half. This will make the dish super creamy; add to taste, but don’t add so much that the dish becomes soupy.
Stir over heat a minute or two until the dish reaches desired consistency; you can use a hand blender to puree the mix or leave it chunky
like a home-style mashed potato dish…it’s great both ways.

parsnip recipe
Here I’m serving parsnips with a country fried steak and fresh veggies.

Give this Mashed Parsnip recipe a go and let me know what you think, and bon appétit!

And for another delicious parsnip dish, try this Parsnip Curry Soup Recipe.
curry parsnip soup

Thanks For Watching Our Parsnip Recipe Videos!

Thanks for checking out this quinoa salad recipe, and all of our recipes. Be sure and sign up for our mailing list so you’ll never miss a new recipe. Also click a button below and share the dishes with your friends. You can also follow Chef Buck on Youtube. We appreciate all the kind comments and support, and we’ll see you next time in the kitchen!

If you like what CG and I do, you can also support us on Patreon, or throw us a tip in our Paypal Tip Jar. We’ll happily enjoy a coffee on the road – Thanks! We appreciate all the support, and we’ll see you next time in the kitchen!

We include affiliate links for products on our website. So, if you make a purchase after clicking on our links, we may earn a commission which helps us produce more videos and drink more coffee :^) We participate in the Amazon Services LLC Associates Program, which is an affiliate advertising program. It provides a means for us to earn fees by linking to Amazon.com and affiliated sites, so we can make more videos.

Share and Enjoy !

How to Pick a Ripe Pineapple Every time

how to pick a ripe pineapple

Here’s how to pick a ripe pineapple every time! We use a lot of fresh pineapple and buy them often. The first thing I look for is a pineapple with loose leaves at the top.

  • 1) Just grab a top center leaf and pull–if the leaf comes out easily, then it’s looking good. (if you can’t find a pineapple with loose leaves…then pass ’em by and try again another day)
  • 2) If the pineapple has a little bit of give when you push on it, that’s a good sign…not too mushy, but not hard as a brick!
  • 3) if you put it to your nose, and it smells pineapple-y…that’s a good sign.
  • 4) And I like a nice golden color too, especially around the bottom…but that doesn’t guarantee ripeness…so bank on steps 1 through 3 first, but especially step 1 –loose leaves! If the leaves are stuck and the whole pineapple wants to be picked up when you pull on the top sprouts…then it’s not a keeper.

A pineapple will not ripen and mature after it is picked, so buying an unripe pineapple at the store and bringing it home to ripen will not work–choosing the best pineapple when you buy it is key to pineapple success. A pineapple will get softer as it gets old, but old isn’t the same as ripe!

Fresh pineapple is great in fruit salads and as a refreshing snack, it’s super healthy and well worth bringing home every now and then. We still used canned pineapple –especially on pizzas! –but for freshness and flavor, a nice ripe pineapple from the produce section can’t be beat!

Hope those tips help you pick a ripe pineapple, and for some practical pineapple application, here’s a Pineapple Sandwich that is popular in Germany: Toast Hawaii

Fancy Toast Hawaii
Fancy Toast Hawaii made with a bagel and Gruyere cheese

Thanks for Watching our Pineapple Video!

Click a button below and share the dishes with your friends. You can also follow Chef Buck on Youtube. We appreciate all the kind comments and support, and we’ll see you next time in the kitchen!

If you like what CG and I do, support us on Patreon, or throw us a tip in our Paypal Tip Jar. We’ll happily enjoy a coffee on the road – Thanks! We appreciate all the support, and we’ll see you next time in the kitchen!

We include affiliate links for products on our website. Making a purchase after clicking on our links and we may earn a commission which helps us produce more videos and drink more coffee :^) We participate in the Amazon Services LLC Associates Program, which is an affiliate advertising program. It provides a means for us to earn fees by linking to Amazon.com and affiliated sites, so we can make more videos.

Share and Enjoy !

Toast Hawaii – How to Make this German Favorite

toast hawaii

Toast Hawaii is an open-faced sandwich popular in Germany. It is traditionally comprised of lightly toasted white bread which is then buttered and topped with thinly sliced ham, a pineapple slice, a cheese slice, and a maraschino cherry, so it’s really a deluxe toasted cheese sandwich. Check out the video below to see how me and CG first put together a traditional Toast Hawaii and then we build a fancy-pants version of the German favorite.

Both versions were alright…fancy-pants was definitely my favorite, but overall, pineapple plays too big a role in this sandwich for my tastes; I think pineapple should stay where it belongs –on the bottom of an upside down cake, or on a pizza; of course, there was a time when I didn’t think it belonged on a pizza…and then I ran into the right pineapple pizza. So give a version of Toast Hawaii a try and see what you think.

A traditional Toast Hawaii sandwich
A traditional German Toast Hawaii sandwich

I prefer a sandwich with a top and a bottom, something I can wrap my hands around, especially a pressed sandwich grilled on the top and the bottom, which is why a Cuban sandwich is so good. I often make sandwiches and then toast them in a skillet with a heavy pan on top pressing down, which is a great cheat for a toasted sandwich. A sandwich grill press is also a good option, and I’ve seen these often in thrift stores, or you can check current prices for a sandwich press on amazon.

How to Choose a Ripe Pineapple

  • 1) Just grab a top center leaf and pull–if the leaf comes out easily, then it’s looking good. (if you can’t find a pineapple with loose leaves…then pass ’em by and try again another day)
  • 2) If the pineapple has a little bit of give when you push on it, that’s a good sign…not too mushy, but not hard as a brick!
  • 3) if you put it to your nose, and it smells pineapple-y…that’s a good sign.
  • 4) And I like a nice golden color too, especially around the bottom…but that doesn’t guarantee ripeness…so bank on steps 1 through 3 first, but especially step 1 –loose leaves! If the leaves are stuck and the whole pineapple wants to be picked up when you pull on the top sprouts…then it’s not a keeper.

For a sandwich twist that I can get behind, try a banh mi style hamburger recipe. It’s a burger with a Vietnamese twist, but if want a sandwich with plenty of pizzazz and no pineapple, it fits the bill.

burger banh mi

Thanks for Watching our Pineapple Video!

Click a button below and share the dishes with your friends. You can also follow Chef Buck on Youtube. We appreciate all the kind comments and support, and we’ll see you next time in the kitchen!

If you like what CG and I do, support us on Patreon, or throw us a tip in our Paypal Tip Jar. We’ll happily enjoy a coffee on the road – Thanks! We appreciate all the support, and we’ll see you next time in the kitchen!

We include affiliate links for products on our website. Making a purchase after clicking on our links and we may earn a commission which helps us produce more videos and drink more coffee :^) We participate in the Amazon Services LLC Associates Program, which is an affiliate advertising program. It provides a means for us to earn fees by linking to Amazon.com and affiliated sites, so we can make more videos.

Share and Enjoy !

Edamame Brown Rice Recipe –A Great Vegetarian Dish

edamame

This edamame brown rice recipe is super flavorful, filling, a great side dish, and delicious hot or cold. If you buy frozen soy beans for this dish, make sure they are thawed before using –and shelled!– shelled edamame is called mukimame.

Edamame Brown Rice Recipe

2 inch GINGER, finely chopped
4-5 cloves GARLIC, finely chopped
16 oz bag MUKIMAME (shelled edamame)
¾ cup LONG-GRAIN BROWN RICE
2Tbsp fresh LIME JUICE
2 Tbsp RICE VINEGAR
2 tsp SOY SAUCE
2 tsp SESAME OIL
½-1 tsp SUGAR
3-4 GREEN ONIONS
5 Tbsp CILANTRO, chopped
2 Tbsp SESAME SEEDS, toasted
SALT and PEPPER to taste

edamame
Mukimame with Brown Rice Recipe

How to make Make Edamame with Brown Rice

  • In a saucepan, heat olive oil over medium-high heat. Check current prices for a sauce pan on amazon.
  • Sauté ginger and garlic for 1-2 minutes until fragrant.
  • Remove garlic and ginger from pan and set aside (I’ve tried skipping this step, and just continued cooking the garlic and ginger along with the rice, but it’s not as flavorful, so it’s definitely worth setting the garlic and ginger aside to add to the dish later).
  • In same pan (without rinsing), bring 1½ cups lightly salted water to a boil. Add rice, reduce to a low simmer; cover and cook, 30 minutes.
  • After 30 minutes, stir in thawed, shelled edamame (mukimame!); cover and cook until rice is tender and mukimame is heated through, about 15 to 20 minutes.
  • In a small bowl, combine lime juice, vinegar, soy sauce, sesame oil, and sugar and stir until sugar is dissolved.
  • Remove rice and beans from the stove and add ginger, garlic, lime juice mixture, scallions, cilantro and sesame seeds.
  • Mix well and add additional salt and pepper as desired.


Give this edamame brown rice recipe a try and let me know what you think, and bon appétit!

edamame
Frozen Mukimame (shelled edamame)

And for another great vegetarian dish, try this easy, awesome Quinoa Salad Recipe.

southwestern quinoa salad
a southwestern quinoa salad makes a tasty and healthy dinner choice.

Thanks For Watching Our Recipe Videos!

Thanks for checking out this edamame recipe, and all of our recipes. Be sure and sign up for our mailing list so you’ll never miss a new recipe. Also click a button below and share the dishes with your friends. You can also follow Chef Buck on Youtube. We appreciate all the kind comments and support, and we’ll see you next time in the kitchen!

If you like what CG and I do, you can also support us on Patreon, or throw us a tip in our Paypal Tip Jar. We’ll happily enjoy a coffee on the road – Thanks! We appreciate all the support, and we’ll see you next time in the kitchen!

We include affiliate links for products on our website. So, if you make a purchase after clicking on our links, we may earn a commission which helps us produce more videos and drink more coffee :^) We participate in the Amazon Services LLC Associates Program, which is an affiliate advertising program. It provides a means for us to earn fees by linking to Amazon.com and affiliated sites, so we can make more videos.

Share and Enjoy !

Stewed Prunes with Orange and Ginger

Stewed prunes are a tasty breakfast side or snack, and even a passable dessert. Orange and ginger make this stewed prune recipe naturally sweet and flavorful.

Ingredients for Stewing Prunes

2 cups pitted PRUNES
1 Tbsp ORANGE ZEST (minced)
juice from 1 large ORANGE
1-2 tsp minced fresh GINGER

stewed prunes

How to Make Stewed Prunes

Check current prices for prunes on Amazon.

  • Zest 1 large orange. Use approx. 1 tbsp of minced zest for this recipe.
  • Juice the orange.
  • In a small saucepan on medium heat, add the prunes and orange juice. Add just enough water to cover the tops of the prunes; don’t use too much water.
  • Stir in the orange zest and minced ginger. Some folks like to add a little brown sugar or maple syrup for added sweetness, but I don’t think it’s needed; prunes are sweet enough and the orange juice will add plenty of natural sugar.
  • Cover and allow the saucepan to come to a bubble. Reduce heat to low, and simmer gently for 25-30 minutes. The liquid will cook down and the prunes will plump up.

Eat them plain or serve stewed prunes with yogurt or cereals. They make a great breakfast side. Some people like to treat them like a dessert, even serving them with ice cream.

Stewed prunes make a tasty treat and are a great source of fiber and nutrition.
Prunes can be stewed up with all manner of flavors. Some popular additions to stewed prunes are cinnamon, cardamom, cloves, brown sugar, and maple syrup.
Pitted prunes make a great snack all on their own, and stewing them up makes them a little more versatile. Give this stewed prunes recipe a try and let me know what you think…and bon appétit!

stewed prunes

Prune Fun Facts

  • Prunes are high in fiber and a natural laxative.
  • The word “laxative” is not very appetizing.
  • Ounce for ounce, prunes contain more potassium than bananas.
  • Prunes are fat free.
  • Prunes can reverse bone loss and preserve bone structure, reducing the risk of brittle bone fracture.

Serve stewed prunes as a side for this healthy Tofu Breakfast Scramble.

tofu recipe
Delicious and Nutritious way to start the day

Thanks For Watching Our Recipe Videos!

Thanks for checking out this stewed prunes recipe, and all of our recipes. Sign up for our mailing list so you’ll never miss a new recipe. Also click a button below and share the dishes with your friends. You can also follow Chef Buck on Youtube. We appreciate all the kind comments and support, and we’ll see you next time in the kitchen!

If you like what CG and I do, support us on Patreon, or throw us a tip in our Paypal Tip Jar. We’ll happily enjoy a coffee on the road – Thanks! We appreciate all the support, and we’ll see you next time in the kitchen!

We include affiliate links for products on our website. Making a purchase after clicking on our links and we may earn a commission which helps us produce more videos and drink more coffee :^) We participate in the Amazon Services LLC Associates Program, which is an affiliate advertising program. It provides a means for us to earn fees by linking to Amazon.com and affiliated sites, so we can make more videos.

Share and Enjoy !

Banh Tet Rice Cake — Let’s Try Vietnamese Bánh Tét

banh tet

What is Banh Tet rice cake? Let’s try this traditional Vietnamese rice cake.

What is Banh Tet Rice Cake

Banh tet rice cake is a staple dish served to celebrate the Lunar New Year in Vietnam. It’s a very popular dish in Vietnamese culture, and if you live near a Vietnamese market or deli, you’ll probably be able to give it a try–and I recommend you do. It’s pretty tasty, kind of addictive, and a bargain dish in the International District in Seattle. I’ve eaten many bánh tét rice cake since shooting this video, and I see many more in my future.

banh tet rice cake
Banh tet sticky rice cake filled with pork and mung bean paste

Making a bánh tét rice cake often begins the day before Tét. The ingredients are prepared then cooked for at least six hours in a pot of boiling water. Glutinous rice, mung bean paste, and cooked pork fat are the main ingredients. The ingredients are layered on top of banana leaves and then wrapped tightly together with string. Bánh tét are generally wrapped several times with a string before boiling in a large pot of water to prevent the banana leaf from coming apart during cooking. The cake is savory, but sometimes sweetened, and tastes great with chili sauce.

If you liked this banh tet rice cake video, check out my Cool Foods Playlist

kiwano melon
kiwano has hints of citrus and cucumber

Ever Try a Banh Mi sandwich?


What is in a Banh Mi? Lets take one apart and see what we got.
This is the best Banh Mi, so far–thanks to eastsidegirl1977 for the great Seattle recommendation. I’ve been eating lots of these Vietnamese/French fusion sandwiches–maybe too many–but it’s too great a taste and value to pass up.

Thanks for checking out the videos. If you liked it, then click a button or two below and share it with your friends. I appreciate it!
–Buck

Share and Enjoy !


Bánh Mì –what is in a Bánh mì Sandwich?

bahn mi

What is in a Banh Mi? Lets take one apart and see what we got.

Best Banh Mi, so far–thanks to eastsidegirl1977 for the great Seattle recommendation. I’ve been eating a lot of these sandwiches crammed with spicy, fresh ingredients–maybe too many sandwiches–but it’s too great a taste and value to pass up.

Bánh mì are a fusion of French and Vietnamese culture. Spicy peppers and daikon mix with cooling carrot and cucumber to create a a real treat for your tongue, and a little BBQ pork added makes it irresistible; wrap it up in a crunchy French baguette and it’s heaven.

Basic Banh Mi Ingredients:
Baguette
Sliced Pork
Pickled Daikon
Pickled Carrots
Cucumber
Cilantro
Hot Pepper
Mayonnaise
Black Pepper
Salt (if desired)

What is Bánh tét?

banh tet

Share and Enjoy !


Cha Lua — Let’s Try Vietnamese Ham

cha lua vietnamese ham

Cha Lua, or Vietnamese ham, is a staple of the Vietnamese diet and often found on the table during Tét–the celebration of the New Year.

During a recent trip down to Little Saigon (on a bánh mi run), we randomly picked up a cha lua and brought it home to give it a try. It was pretty bland right out of the banana leaves, with a rubbery consistency–but these characteristics make it a pretty versatile ingredient in many dishes–much the same as tofu, but a meat version. I ended up slicing and marinating the ham in chili and soy sauce with curry and garlic powder and frying up the slices to make an awesome bánh mi burger–which was delicious; I will definitely be making again in the near future.

Take a look at the exceptionally delicious Bánh Mì Hamburger made with cha lua.

Take a look at a traditional Bánh Mì Sandwich.
bahn mi

Share and Enjoy !


Maki Sushi – Step-by-Step How to Make Sushi

sushi

Maki sushi is my favorite sushi (makizushi), or sushi wrapped in dried seaweed (nori). Check out the video for step-by-step instructions on how to make sushi quick and easy.

Maki sushi is one of the healthiest and most entertaining foods you can put on the table…and pretty easy to prepare. You will need a SUSHI ROLLER to easily make this recipe. They are available at many supermarkets, most health food stores and every Asian market. You can get one for around $2 to $4.

Maki Sushi Ingredients:
6 to 7 NORI (dried seaweed sheets)
2 cups RICE (do not use long grain rice! Japanese sushi rice can be used, but I prefer short-grain brown rice.)
1/2 cup VINEGAR (apple cider or rice)
SALT (to taste, I use very little)
Assortment of SLICED VEGETABLES, FISH, etc
Feel free to experiment with your choices. I generally use a mix of the following: AVOCADO, CUCUMBER, CARROT, GREEN ONIONS, RED PEPPERS, SALMON (I buy 3oz pre-packaged smoked salmon for convenience, since I use so little). I’ve also used SHRIMP, CRAB, CREAM CHEESE and ASPARAGUS (lightly steamed). Mix and match and find combos you enjoy. I find that I almost always use avocado.
Desired condiments e.g. SOY SAUCE, WASABI, PICKED GINGER SLICES
Optional: I like to sprinkle TOASTED SESAME SEEDS over my finished sushi—it adds a great taste and looks nice, too.

Prepare rice according to directions. Remove from stove and add vinegar. Gently mix and set aside to cool. Slice desired ingredients for filling. For a full dinner for two, I generally use 6-7 nori. Place nori shiny side down on your sushi roller. When rice is cool, spread desired amount over nori. I like heaps of rice in my maki sushi, approx. ¾ to1 cup. Spread so that the rice covers the nori leaving ¼ inch on the two sides and on the end closest to you. Leave 1 inch open on the far end of the seaweed sheet. Pull the nori flush with the back end of the roller. Lay the sliced fillings across the rice and, holding the ingredients in check with your fingers, use the roller to roll the seaweed over the ingredients and then press gently along the top and sides. The seaweed should form a nice wrap around the ingredients. Pull the seaweed roll to the back of the roller and roll forward once more until the nori is shaped entirely around the fillings. Use a sharp knife to slice into sushi, and wipe the knife frequently for a cleaner cut. I usually get 6-7 pieces per roll.
After I plate my sushi, I sprinkle lightly with toasted sesame seeds (optional) and serve with wasabi, soy sauce, plum sauce, and pickled ginger slices.
It’s an amazingly easy dish to prepare and a great way to impress a date or get yourself out of the doghouse (if you’re at that stage in your relationship). It kicks ass at parties and your friends will think you are more hip than you probably are –but only if you USE CHOPSTICKS!!!

For a great maki sushi recipe side, try a Calamari Salad Recipe.
calamari salad squid

Share and Enjoy !


Spring Rolls with Peanut Dipping Sauce

spring rolls dipping sauces

Spring rolls are a nice appetizer when you go out to eat at a fancy-pants restaurant, and they’re just as nice when you eat them at home, and they’re easy to make. Briefly wetting the rice paper and placing it on a damp towel makes the delicate rice paper easier to handle. The rice paper softens while you place your filling–makes the process much easier–definitely give this technique a try!

All you need to make spring rolls are rice paper and some tasty ingredients to roll up inside. You can buy rice paper at any Asian food store, most health food markets, and in the ethnic foods section of many local grocery stores. It’s an economical buy. The last batch I bought was a package of 20 for $2.25 U.S. dollars. It comes in sheets, like paper, but usually round in shape; it doesn’t feel like paper, though—it feels more like plastic, almost like something you’d find at the hardware store, but don’t let that put you off, it softens quickly when wet. Despite its initial “plasticky” appearance, it’s not bad for you, or particularly good for you either—rice, tapioca, salt, and water are the prime components. How your spring rolls taste will be determined by the ingredients you roll up inside, and any dipping sauce you might like to serve them with. It’s a great vehicle for getting raw vegetables into your diet; I like to think of a spring roll as a cigar-shaped salad, but many pre-cooked meats and seafood work well in spring rolls, too.

What You Need to make Spring Rolls

Rice Paper and
Whatever the hell you wanna roll up in the rice paper.
Here are a few options I like to use:
cilantro (I ALWAYS USE CILANTRO), cucumber, basil leaves, lettuce, carrots, sprouts, rice noodles, steamed shrimp, stir-fried spicy pork, bell pepper, green onions, cabbage, and on and on and on…
there’s no end to what you can use.

spring rolls
Spring rolls make a great appetizer or entree

How to Make a Fresh Spring Roll

Prepare your filling ingredients—mainly making sure the ingredients are chopped or sliced in a manner which will make them rice paper-wrapping friendly—this is especially true if you plan on slicing the spring rolls in half—your filling ingredients will tumble out easily if they’re too loose and tiny.
Wet the rice paper with warm tap water. Just a few seconds under a warm tap is plenty. Place the rice paper on a damp towel and gently press down. The rice paper will quickly soften and become pliable. Arrange your filling ingredients at one end of the sheet and roll them up in the rice paper like a burrito. Using basil or lettuce or cabbage leaves as your base ingredient will make the rolls structurally sound and easier to roll. It’s very important that the first rollover be tight—compact the ingredients as much as possible—a loosely rolled spring roll is a sad sight, and will quickly fall apart if sliced. The rice paper will be your friend. It will help. It is very sticky and will seal almost like an envelope around your stuffings. If you want a tasty spring roll, it’s as easy as rolling up a tasty combo of ingredients—a yummy dipping sauce will help, and here are two:

Peanut Dipping Sauce:
1 Tbsp Peanut Butter
1 Tbsp Rice Wine Vinegar
1 Tbsp Toasted Sesame Oil

Chili Dipping Sauce:
2 Tbsp Chili-Garlic sauce
2 Tbsp Soy Sauce
1 tsp Sesame Seeds

And just plain old soy sauce works fine, too. Or maybe some hot mustard—I’ve never tried that, but it just popped into my head, so maybe next time I’ll give it a go.
Alright, that’s enough blabbing.
Give these spring rolls a try and bon appétit!

For another delicious Asian inspired dish, try a Seafood Pancake Recipe.
seafood pancake dipping sauce

Share and Enjoy !


Pita Chips Recipe for a baked, spicy, pita snack

spicy pita chips

Pita chips are easy to make and you can bake them up quickly using your favorite spices. You can’t have hummus without pita chips! I mean, you can, but…why? Pita chips go great with all kinds of dips and are excellent with salads or just as an alternative to your run-of-the-mill potato chip.

Pita Chips Ingredients:
1 pkg. PITA BREAD
OLIVE OIL
SALT
SPICES: curry powder, garlic powder, cajun seasonings, etc. (whatever you like)

Cut pitas into triangular chip shapes. Each pita will easily yield 12 chips. Soak one side of each pita triangle in olive oil and stack pitas so the soaked side of one is stacked against the unsoaked side of the next. Press stacked chips together—this will flatten the chips and suffuse the oil throughout.
Arrange chips on a flat baking sheet. Salt to taste. Add spices—the more the better, in my opinion. I usually bake three distinct batches. Curry is probably my favorite—just salt and lots of curry on a toasted pita chip, it’s delicious. Garlic is great, too. Try some Tony Chachere’s seasoning (or comparable cajun seasoning) on a chip—or simply add a sprinkle of cayenne pepper with Cumin. Whatever your favorite seasonings are, give them a try.
Bake the chips 8-10 minutes in a pre-heated oven at 350 degrees Fahrenheit. Oven cooking times vary, so keep an eye on your first batch to see how long it takes to toast them the way you like—they will burn quickly if forgotten. I like mine CRISP. One side of the pita will be thinner than the other side and some triangles may need to be removed from the oven before the other chips are done. You’ll figure it out.
Give this pita chips recipe a try and let me know what you think, and…
Bon appétit!

Want to make hummus right now? Check out this Classic Hummus Recipe.
spicy pita chips

Share and Enjoy !


Follow Me!