Scone Recipe — Pecan Maple Biscuit Treat

scone recipe

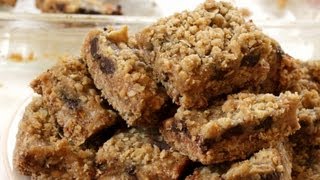
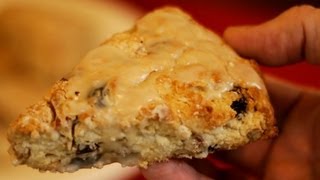
This is a delicious pecan maple scone recipe, but not a good idea for folks with sugar/carb addictions and questionable degrees of willpower…which is pretty much everyone.

The only reason I’m even putting this up is because The Devil assured me that if I did I would one day win an Oscar and live in a luxury beach house in Malibu (which IS going to happen ’cause I was smart enough to get the deal in writing).

Scone Recipe Ingredients

Scones:
2 cups FLOUR
1/2 cup SUGAR
1 Tbsp BAKING POWDER
1/2 tsp SALT
5 Tbsp BUTTER
1/2 cup PECANS (chopped)
1/4 cup RAISINS
1 cup SOUR CREAM
1/4 cup MAPLE SYRUP
1 tsp VANILLA

Icing for Scone Recipe

1 cup POWDERED SUGAR
splash of WATER
2 Tbsp MAPLE SYRUP

scone recipe
best scone ever…really

In a large bowl, combine flour, sugar, baking powder, and salt. Cut butter into flour mixture (freezing the butter and grating it into the mix is an easy trick to get this done). Add pecans and raisins into the mix.

In a separate bowl, combine sour cream, vanilla, and 1/4 cup maple syrup. Whisk together until smooth.
Pour the sour cream mixture into the flour mix and gently turn for a few minutes until the flour begins to form into clumps. Most of the loose flour will adhere into these clumps, but it’s okay if all of it doesn’t.

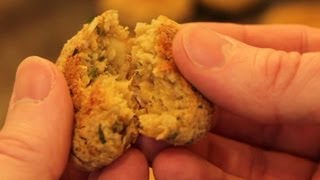
On a sheet of parchment paper or floured surface, pour the contents of the bowl. Press the clumps together into a mound–it’ll want to brake apart somewhat, but that’s okay. Flatten the mix into a circular cookie shape about 1 inch thick and cut like a pizza into 8 slices. Check here for current pricing for parchment paper on Amazon.

Arrange onto a flat baking sheet and bake in a 400 degree F oven for 20-25 minutes, until baked through and golden brown.

While scones cool, add powdered sugar into a small bowl. Add 1-2 Tbsp of warm tap water–add water slowly and whisk into a syrup; be conservative, it’s easy to add too much water. Then whisk 2 Tbsp of maple syrup into the powdered sugar syrup. Why? I don’t know, just crazy.

Drizzle the syrup glaze over the scones and allow the icing to harden (approx 10-15 min).

And there you go…a very sweet and healthy-free combo of questionable ingredients combined to put on the pounds and take potentially vibrant years off of the back-end of your life.
But this scone recipe is delicious.
Enjoy, if possible.
I usually really like the first two, and then I begin to question my motivations.

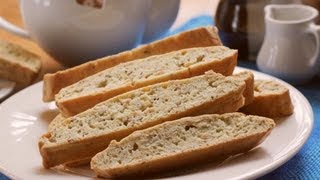
For a less decadent, less lethal treat, try this Homemade Biscotti Recipe.

biscotti recipe
Adding a little cocoa powder and ground coffee makes a nice biscotti twist.

Thanks For Watching Our Scone Recipe!

Thanks for checking out our scones, and all of our recipes. Be sure and sign up for our mailing list so you’ll never miss a new recipe. Also click a button below and share the dishes with your friends. You can also follow Chef Buck on Youtube. We appreciate all the kind comments and support, and we’ll see you next time in the kitchen!

If you like what CG and I do, you can also support us on Patreon, or throw us a tip in our Paypal Tip Jar. We’ll happily enjoy a coffee on the road – Thanks! We appreciate all the support, and we’ll see you next time in the kitchen!

We include affiliate links for products on our website. So, if you make a purchase after clicking on our links, we may earn a commission which helps us produce more videos and drink more coffee :^) We participate in the Amazon Services LLC Associates Program, which is an affiliate advertising program. It provides a means for us to earn fees by linking to Amazon.com and affiliated sites, so we can make more videos.

Share and Enjoy !

Brussels Sprouts Recipe That Everyone Will Love

brussels sprouts

This is my absolute favorite Brussels Sprouts recipe. it’s super tasty, simple to make, and a healthy choice, too, so definitely give it a try.

Brussels Sprouts Recipe Ingredients

1½ lbs BRUSSELS SPROUTS
3-4 Tbsp OLIVE OIL
½ ONION (chopped)
4-5 cloves GARLIC (finely chopped)
1 LEMON zest and juice …current prices online for Kitchen Zesters
½ cup WATER
SALT and PEPPER, to taste

brussels sprouts recipe
Sear Brussels sprouts in a hot skillet for exceptional taste!

How to Cook Brussels Sprouts

  • Wash 1½ lbs sprouts. Cut off the ends and discard outer leaves. Slice sprouts into halves, or larger sprouts into 3rds.
  • Heat 3-4 Tbsp oil in a skillet on high heat–you want the skillet to be hot to sear the sprouts–and don’t be shy with the olive oil.
  • Add Brussels sprouts. They should start to sizzle and pop right away. Let set before stirring to get a seared edge. Turn sprouts and continue to sear.
  • After 4-5 minutes, stir in onion and garlic and continue to cook on high to med. high heat, searing and turning another 3-4 minutes.
  • Then reduce heat to medium and add water. Add seasoning.
  • Stir, cover, and let cook 4-5 minutes.
  • Then turn off heat, stir in lemon zest and lemon juice, and serve.

Need a nice skillet? Check current prices for skillets on Amazon.

Give this Brussels Sprouts Recipe a try and let me know what you think, and if you’re still in the mood for foods that start with “B”, try this Beet Recipe.
brussel sprouts recipe

Brussels Sprouts Fun Facts

  • 89% of all children despise Brussels Sprouts.
  • 3/4 of all convicted felons do not eat Brussels sprouts.
  • Albert Einstein considered the Brussels Sprout to be the most compact cabbage, relatively speaking.
  • Even children who dislike the taste of Brussels sprouts appreciate the vegetable for it’s “slingshotability”
  • Every U.S. president has loved Brussels sprouts and eaten them routinely.

Thanks for checking out our Brussels sprouts recipe, and all of our recipes. Be sure and sign up for our mailing list and never miss a new Chef Buck cooking video, and also click a button below and share the dishes with your friends. We appreciate the kind comments and support, and we’ll see you next time in the kitchen!
–Chef Buck

Thanks for watching our recipe videos!

We include affiliate links for products on our website, so if you make a purchase after clicking on our links, we may earn a commission which helps us produce more videos and drink more coffee :^) We participate in the Amazon Services LLC Associates Program, which is an affiliate advertising program providing a means for us to earn fees by linking to Amazon.com and affiliated sites, so we can make more videos.

Share and Enjoy !

Tofu Lasagna Recipe — Gluten Free Edition

gluten free tofu lasagna

The only thing that sounds worse than a tofu lasagna recipe is a gluten-free tofu lasagna recipe. However, this recipe is actually pretty tasty, and still gluten-free.

Camera Girl whipped up this dish and it was damned tasty. I’m not ready to start driving the tofu train, but I am enjoying the ride.

Tofu Lasagna Recipe Ingredients

The sauce:
1 Tbsp OLIVE OIL
1/2 tsp RED PEPPER FLAKES (crushed)
1/2 large ONION (chopped)
3 cloves GARLIC (chopped)
15 oz can DICED TOMATOES
8 oz can TOMATO SAUCE
1 CARROT (chopped well)
1 stalk CELERY (chopped well)
2 tsp OREGANO
1/2 tsp BASIL
1 BAY LEAF
SALT & PEPPER, to taste
….or substitute 25 oz jar store-bought marinara sauce, but don’t do that :^(
The filling:
1 pkg gluten-free, rice LASAGNA NOODLES (you do not cook them prior to baking)
2 Tbsp extra-virgin OLIVE OIL
1/2 large ONION (chopped)
6 cloves GARLIC (minced)
16 ounce package EXTRA-FIRM, WATER-PACKED TOFU (not silken tofu)
3 cups fresh SPINACH (chopped)
1/2 cup PARMESAN CHEESE (shredded)
1/2 cup part-skim MOZZARELLA CHEESE (shredded)
2 Tbsp Kalamata OLIVES (finely chopped)
2 tsp dried OREGANO
1/2 tsp dried THYME
SALT & PEPPER, to taste

gluten free tofu lasagna

How to Make Tofu Lasagna

First thing, start making the sauce. Now, don’t buy pre-made sauce!–or do…maybe you’re busy, I don’t know.
Next, heat olive oil and red pepper in a saucepan over medium-high heat. Add onion and garlic and saute 2 to 4 minutes. Add carrot and celery and continue sauteing.
Mix in the remaining sauce ingredients and bring to a boil. Reduce heat to low and simmer 30 minutes or longer, until flavors are blended, stirring routinely.

While sauce is simmering, heat oil in a large skillet and saute garlic and onion for lasagna filling. Add tofu and spinach to skillet and stir until spinach wilts and the mixture is heated through (2 to 3 minutes). Transfer skillet contents to a bowl and stir in parmesan, olives, seasonings, and 2/3 of the marinara sauce.

Spread half of the remaining sauce on bottom of 9 x 13 baking pan. If you need a decent oven-safe baking dish, check out some current pricing for a Pyrex dish on Amazon. Next, place a layer of lasagna noodles over sauce–if using the gluten-free rice lasagna, the noodles will not have to be cooked before using. Spread half of the tofu mixture over noodles. Repeat layers of noodle and tofu mixture. Top with remaining marinara sauce and shredded mozzarella cheese.

Cover dish and bake in a 350 degree F oven for about an hour.
Remove from oven and allow to rest 10 minutes.

Give this tofu lasagna recipe a try and let me know what you think, and bon appetit!

If you like thinking outside of the box, try this vegetarian version of pulled pork Jackfruit BBQ Recipe

jackfruit pulled pork
Jackfruit BBQ is great over rice, on a sandwich, or all on its own.

Thanks for checking the recipes out! Click some of the buttons below and share it with your friends and family, I appreciate it.
–Buck

Share and Enjoy !


Baked Falafel Recipe – healthy and delicious

baked falafel

This baked falafel recipe is a tasty and nutritious way to enjoy chickpeas (garbanzo beans).

Falafel is traditionally fried, but a baked falafel can make a tasty, healthy, and easy alternative to the tried and true oil-splatter-fest.

Baked Falafel Recipe Ingredients:
1 15oz can CHICKPEAS
1/4 cup CILANTRO
1/4 cup PARSLEY
1/4 cup ONION
2-3 cloves GARLIC
2 Tbsp OLIVE OIL
CAYENNE PEPPER, to taste
1 tsp CORIANDER
1 tsp CUMIN
1/4 tsp BAKING POWDER
1 Tbsp BREAD CRUMBS (or flour)
1 Tbsp LEMON JUICE
SALT, to taste
— Optional garnishes —
HUMMUS, YOGURT, VEGGIES, PITA SLICES

Drain and rinse 15oz can of chickpeas (garbanzo beans). Combine in a food processor with all ingredients (except 1 Tbsp olive oil and bread crumbs). Mix roughly–pulse–DO NOT puree into a smooth consistency. Place mixture into a bowl and combine with dried bread crumbs (or substitute flour). Form into discs–I like to get 10 out of this recipe because they cook up well and fit nicely into a pita pocket–but make them as big as you like, and adjust the cooking time accordingly.
(Refrigerate 1-2 hours before cooking if you have the time–they’ll bake better, maybe, but it’s not the end of the world if you don’t. I actually prefer putting them in the fridge for a bit, but sometimes I don’t, and the difference is negligible.)
Place on a flat baking sheet and lightly drizzle or brush with olive oil.
Bake at 400 degrees F for 20 minutes, then turn falafel and bake for 10 more minutes to brown each side (a total cooking time of 30 minutes).
Serve with hummus, yogurt, veggies, and pita slices–or stuff inside a pita to make a delicious falafel sandwich.
And that’s it, man. Give this baked falafel recipe a try and let me know what you think and bon appetit!

And if you wanna make your own hummus try this Easy Hummus Recipe.
hummus

Share and Enjoy !


Cheese Biscuits with Bacon and Jalapeno

cheese biscuits

This Cheese Biscuits recipe makes four good-size biscuits, which is plenty for two folks for breakfast (maybe even 4 people, if one of them isn’t me).

Ingredients for Cheese Biscuits

1 cup ALL-PURPOSE FLOUR
2 tsp BAKING POWDER
1/4 tsp SALT
1/2 cup MILK
1 JALAPENO pepper (chopped)
4 slices BACON (cooked crispy, crumbled)
1/2 cup CHEDDAR CHEESE (shredded)

The recipe doubles quite easily if you want to make a bigger batch.

How to make Cheese Bacon Biscuits

First thing, fry up your bacon and set aside to cool. You’ll want it crisp enough to crumble. Slice your jalapeno (seeds and all) and saute for a minute or two in the bacon grease, this’ll flavor it up, start to cook it up, and knock off a little of the heat. Set pepper aside on a paper towel to drain.

In a mixing bowl, combine flour, baking powder, and salt. Mix well and then cut in the shortening. Add shredded cheese, sauted pepper, and crumbled bacon and mix. Slowly add milk, turning the mixture, getting the loose flour to come together into clumps. On a floured surface, turn the clumped dough out of the bowl and knead gently approx. a dozen times.

Form into biscuits–I just make a big pie shape and cut it into four pieces cause I’m lazy (or brilliant). Brush biscuit tops with melted butter, if desired. I can take of leave this move–the biscuits will have plenty of color from the bacon, cheese, and jalapenos.

Place biscuits on an ungreased sheet and bake at 425 degrees F for 13-15 minutes. Check here for current prices for baking sheets on Amazon.
And there you have it. Give this Cheese Biscuits recipe a try and let me know what you think, and bon appetit!

For another delicious bread, try my mama’s Picture Perfect Focaccia Bread Recipe.

focaccia bread

Thanks for checking out the recipes. Be sure and sign up for our mailing list so you’ll never miss a Chef Buck cooking video, and click a button below and share the dishes with your friends. We appreciate all the kind comments and support, and we’ll see you next time in the kitchen!
–Chef Buck

Share and Enjoy !


Biscotti Recipe – Big Almond Biscotti

biscotti

Wanna make some big biscotti? This twice-baked biscuit is an awesome accompaniment to your favorite hot beverage.

Biscotti is a twice-baked sweet biscuit that goes great with a hot cup of coffee or tea–it’s an easy way to start the day feeling like a real fancy-pants dude or dudette, especially if you’re drinking your hot beverage out of a tiny cup with a tiny spoon to stir in your milk and a cloth napkin to wipe your very satisfied mouth. And there is zero butter or oil in this recipe, just a little rummy goodness.

Biscotti Recipe Ingredients

1 cup ALMOND SLICES
2 cups all-purpose FLOUR
3/4 cup SUGAR
1 teaspoon BAKING POWDER
1/8 teaspoon SALT
3 large EGGS
2 tsp VANILLA EXTRACT
1 tsp ALMOND EXTRACT
2 Tbsp RUM

How to Make Almond Biscotti Recipe

Preheat oven to 350 degrees F.
Toast almond slices–watch them, it only takes about 2 minutes to toast, just want a few to begin turning.
Combine flour, sugar, baking powder, salt then mix and set aside.
Whisk the eggs, rum and extracts until blended well.
Add the dry ingredients, including nuts, and mix until combined.

Dough will be sticky at this point.
Scrape the dough out onto a parchment lined sheet pan.
Quickly shape with wooden spoon into a long flat loaf.

Bake about 30 minutes at 350 degrees F.
Remove from the oven and cool 10-15 minutes.
Lower oven heat to 300 degrees F.

Slice loaf into 1/2″ to 1″ wide slices.
Lay the slices cut side down on the baking sheet and bake another 15-20 minutes.
Turn the slices over and bake 15 minutes more, or until the cookies are a light golden brown.
Cool the biscotti on a rack.
Cool completely before storing.
And that’s it, man. Serve them up with some coffee or hot tea and you’ll feel
like a real fancy-pants Italian lawyer.
Give this big biscotti recipe a try and let me know what you think, and bon appetit!

And for another tasty breakfast treat, try this Deadly Scone Recipe.
maple pecan scones

Share and Enjoy !


Spicy Spanish Spaghetti Squash Recipe w/ Sausage

spaghetti squash spanish

Spaghetti squash tastes great with a little Spanish chorizo thrown into the mix.

When buying, choose a firm spaghetti squash that seems heavy for its size. Avoid squash with overly glossy or with greenish rinds–this may indicate the squash is not quite ripe enough. The stem of a spaghetti squash should be dry. Moisture around the stem may mean the squash is not fresh.

Ingredients:
1 SPAGHETTI SQUASH
4-5oz Spanish style CHORIZO (diced)
1 lg ONION (chopped)
4-5 cloves GARLIC (finely chopped)
1/2 cup PARMESAN or ASIAGO CHEESE (shredded)
1/2 cup CILANTRO (chopped)
2 Tbsp OLIVE OIL
SALT and PEPPER, to taste

Preheat oven to 350 degrees F.
Slice 1 spaghetti squash lengthwise into halves. Remove seeds and place cut side down in a baking pan. Pour a small amout of water in the pan to keep the squash from sticking. Place in the oven and bake for 45 minutes. The squash is ready when a fork will slide easily into the flesh.
In a skillet, heat oil on medium high heat. Add onions and saute a few minutes (add red pepper flakes for heat, if desired). Add garlic and chorizo and continue sauteing. Add salt and pepper to taste. You don’t need a lot of seasoning for this dish–the chorizo will add plenty of flavor. Take a fork and scrape the squash away fromm its skin and into the skillet; the squash will separate easily in spaghetti-like strands…which is why it’s called what it’s called. The squash is already cooked, so this is more about mixing the ingredients than cooking them. Add cilantro and cheese, mix well, and remove the skillet from the heat. It’s a delicious dish, and hearty enough to make a terric main course. Serve with a salad and bread and you’ll have a more than enough.
Enjoy!

And try this delicious vegetarian Mediterranean-Style Spaghetti Squash Recipe

mediterrean spaghetti squash

Share and Enjoy !


Chana Masala Recipe w/ Quinoa -a High-Protein Meal

chana masala quinoa

A Chana masala recipe with a quinoa twist! It’s already a great tasting chickpea curry, and adding quinoa into the mix will turn this Indian favorite into a complete protein. This dish is easy to prepare and a perfect vegetarian entree.

Ingredients:
15oz can CHICKPEAS
15oz can DICED TOMATOES
1 lg ONION (chopped)
½ cup QUINOA
1 HOT PEPPER (finely chopped)
4-5 cloves GARLIC (finely chopped)
½ cup CILANTRO (chopped)
1 tsp CUMIN SEEDS
1 tsp CUMIN
1 tsp CORIANDER
½ tsp CHILI POWDER
½ tsp TURMERIC
1 tsp GARAM MASALA
2 Tbsp OLIVE OIL
1/8 tsp ASAFOETIDA (optional–really OPTIONAL!!!–don’t NOT make this dish because you don’t have this ingredient.)
SALT and PEPPER, to taste
1½ cups WATER
Check out current prices for Indian Spices on Amazon.

In a skillet, heat your oil on med. high heat. Add cumin seeds and asafoetida–the asoafoetida (also called “hing”) is OPTIONAL. Stir until seeds brown and crack–this will happen really fast, so don’t walk away from the skillet. Add garlic and continue stirring. Add chopped onions and hot pepper. Saute ingredients for 3-5 minutes.
Add turmeric, coriander, cumin, and chili powder. Stir thoroughly into onion mix.
Add quinoa and diced tomatoes.
Stir and allow skillet to come to a simmer.
Add chickpeas (rinsed and drained), salt to taste, and 1½ cups water. Bring skillet to a boil, then reduce heat to a simmer, cover and let simmer for 15 minutes (without stirring).
After the 15 minutes, stir in the garam masala. Using a fork, smash half the chickpeas in the skillet–this will add a nice texture to the dish.
Stir in the chopped cilantro.
And that’s it. Chana Masala with a quinoa twist.
Hope you like it.

And for another tasty Indian inspired dish, try this Eggplant Curry Recipe.

baingan bharta eggplant

Share and Enjoy !


Jalapeno Poppers Recipe on the Stove Top

kick ass jalapeno poppers

This is a kick-ass Jalapeno Poppers Recipe! Follow along with Chef Buck and he’ll show you how to whip up this tasty popper dish right on the stove top.

Jalapeno Poppers Recipe Ingredients

6-8 JALAPENO PEPPERS
4oz CREAM CHEESE
2 ONIONS (chopped)
1-2 tsp CUMIN
HERBS e.g. cilantro, dill, cilantro, to taste (minced)
SALT, to taste
¼ cup BREAD CRUMBS
2-3 Tbsp OLIVE OIL

How to Make Stove Top Jalapeno Poppers

Remove cream cheese from fridge to soften (about 30 min. early).
Slice off pepper tops and de-seed (a hand peeler makes this easy).
Mix cream cheese, herbs, cumin, and salt together.
Stuff peppers with cream cheese mixture. Dab the ends of the peppers into the bread crumbs to help seal the cream cheese inside.
Heat olive oil in skillet to med heat.
Add chopped onions (also add chopped red bell peppers if desired).
Gently add stuffed jalapenos to the skillet.
Stir onions and turn the peppers gently to cook on all sides. Some cream cheese may leak out, but it only makes the dish taste better.
Cook 10-15 minutes until peppers are sauteed to liking.
Give this jalapeno poppers recipe a go and let me know what you think, and bon appetit!

If you’re just getting into home cooking and your kitchen is lacking in the pots and pan department, you can check out some current Complete Cookware Set prices on Amazon.

Thanks for watching! Click a button or two and share the dish if you like it.
And for another tasty treat, Try this semi-healthy Baked Onion Rings Recipe.

onion rings recipe
How to make an Onion Rings recipe in the Oven.

Share and Enjoy !


Salmon Cake Recipe Quick and Easy

salmon cakes

Can you get a fancy-pants dinner out of a can of cheap pink salmon? Sure you can! This salmon cake recipe is easy to make and ready any time you like by using convenient canned salmon from the cupboard. Mmmmmm, I likes me some salmon cakes!

Salmon Cake Recipe Ingredients:
Patties:
1 can PINK SALMON (or red salmon, if you’re feeling luxurious)
1 large EGG
1/4 cup ONION (diced)
1/4 cup RED PEPPER (diced)
BLACK PEPPER, to taste
CREOLE PEPPER, to taste
GARLIC POWDER, to taste

Sauce (optional):
CREOLE MUSTARD (or any kind of fancy-pants mustard…check online prices)
YOGURT (plain Greek-style)
DILL WEED
LEMON JUICE (optional)

For the cakes, mix ingredients and shape into cakes. Fry in oil –I usually use extra light olive oil, but any will do. Cook on medium heat 4-5 minutes each side until golden brown).  Allow the cakes to cook well on one side before you turn, this will keep them from falling apart.
If you are making the sauce, mix ingredients to taste. I tend to go a little ‘mustardy’. Also, you might try adding a little lemon juice to the sauce.
Give this salmon cake recipe a try and let me know what you think. Check current prices for canned salmon online.

And for another tasty, nutrition-packed fish recipe, try Mackerel Stew.

fish stew recipe
canned mackerel stew

Thanks for checking out our salmon cake recipe, and all of our recipes. Be sure and sign up for our mailing list and never miss a new Chef Buck cooking video, and also click a button below and share the dishes with your friends. We appreciate all the kind comments and support, and we’ll see you next time in the kitchen!

Thanks for watching our recipe videos!

We include affiliate links for products on our website, so if you make a purchase after clicking on our links, we may earn a commission which helps us produce more videos and drink more coffee :^)                                                                                                We participate in the Amazon Services LLC Associates Program, which is an affiliate advertising program providing a means for us to earn fees by linking to Amazon.com and affiliated sites, so we can make more videos.

Share and Enjoy !

Maki Sushi – Step-by-Step How to Make Sushi

sushi

Maki sushi is my favorite sushi (makizushi), or sushi wrapped in dried seaweed (nori). Check out the video for step-by-step instructions on how to make sushi quick and easy.

Maki sushi is one of the healthiest and most entertaining foods you can put on the table…and pretty easy to prepare. You will need a SUSHI ROLLER to easily make this recipe. They are available at many supermarkets, most health food stores and every Asian market. You can get one for around $2 to $4.

Maki Sushi Ingredients:
6 to 7 NORI (dried seaweed sheets)
2 cups RICE (do not use long grain rice! Japanese sushi rice can be used, but I prefer short-grain brown rice.)
1/2 cup VINEGAR (apple cider or rice)
SALT (to taste, I use very little)
Assortment of SLICED VEGETABLES, FISH, etc
Feel free to experiment with your choices. I generally use a mix of the following: AVOCADO, CUCUMBER, CARROT, GREEN ONIONS, RED PEPPERS, SALMON (I buy 3oz pre-packaged smoked salmon for convenience, since I use so little). I’ve also used SHRIMP, CRAB, CREAM CHEESE and ASPARAGUS (lightly steamed). Mix and match and find combos you enjoy. I find that I almost always use avocado.
Desired condiments e.g. SOY SAUCE, WASABI, PICKED GINGER SLICES
Optional: I like to sprinkle TOASTED SESAME SEEDS over my finished sushi—it adds a great taste and looks nice, too.

Prepare rice according to directions. Remove from stove and add vinegar. Gently mix and set aside to cool. Slice desired ingredients for filling. For a full dinner for two, I generally use 6-7 nori. Place nori shiny side down on your sushi roller. When rice is cool, spread desired amount over nori. I like heaps of rice in my maki sushi, approx. ¾ to1 cup. Spread so that the rice covers the nori leaving ¼ inch on the two sides and on the end closest to you. Leave 1 inch open on the far end of the seaweed sheet. Pull the nori flush with the back end of the roller. Lay the sliced fillings across the rice and, holding the ingredients in check with your fingers, use the roller to roll the seaweed over the ingredients and then press gently along the top and sides. The seaweed should form a nice wrap around the ingredients. Pull the seaweed roll to the back of the roller and roll forward once more until the nori is shaped entirely around the fillings. Use a sharp knife to slice into sushi, and wipe the knife frequently for a cleaner cut. I usually get 6-7 pieces per roll.
After I plate my sushi, I sprinkle lightly with toasted sesame seeds (optional) and serve with wasabi, soy sauce, plum sauce, and pickled ginger slices.
It’s an amazingly easy dish to prepare and a great way to impress a date or get yourself out of the doghouse (if you’re at that stage in your relationship). It kicks ass at parties and your friends will think you are more hip than you probably are –but only if you USE CHOPSTICKS!!!

For a great maki sushi recipe side, try a Calamari Salad Recipe.
calamari salad squid

Share and Enjoy !


Pear Salad Recipe — a Classic Southern Pear Dessert

pear salad

A pear salad recipe might be a dish you’re familiar with if you grew up in the South, but maybe not. Is this pear dessert familiar throughout the USA and abroad? My mom made canned pear salad quite often when I was a kid. It’s an super simple and surprisingly tasty pear dessert. This pear treat is cheap and quick, so ideal for kids. In this pear recipe video we’re matching a classic southern pear salad up against a fancy-pants hipster version of pear salad. Both pear recipes are winners in my book, but since I grew up eating the canned pear version, I have a slight bias. If you’ve never tried a pear salad, it might seem like a weird combination of ingredients, but trust me, it’s delicious.

Classic Southern Pear Salad Recipe

canned PEAR HALVES
a dollop of real MAYONNAISE
shredded CHEDDAR CHEESE
MARASCHINO CHERRIES
optional:
top with toasted nuts

pear salad
classic Southern style pear salad dessert

How to Make a Classic Pear Salad Recipe

  • Crack open a can of pear halves.
  • If your inner engineer craves stability, you can shave off the bottom of each pear so that the
    halves will sit flat on a plate.
  • Arrange pear halves on a plate.
  • Place a dollop of mayonnaise in the hollow of each pear half.
  • Sprinkle shedded cheese over the mayonnaise.
  • Top each pear with a maraschino cherry.
  • Serve immediately, or chill before serving. There’s never a wrong time to eat pear salad.

Is that too quick and easy? Are you a hipster? Or a fancy Wall Street big shot? Need something fancier?

How to Make a Pretentious Pear Salad Recipe

fresh PEARS (ripe, but firm; any kind of pear will do)
fancy-pants CREME FRAICHE
expensive CHEESE
toasted WALNUTS or PECANS
but still use MARASCHINO CHERRIES (because they’re easy, and perfect)

pear salad
pretentious pear salad with attitutde

  • Any pears will do for this dish, as long as they’re ripe, but firm. I don’t like my pears mushy, and I like to bake them with the skin on.
  • Halve the pears and remove the core.
  • Lightly grease a baking dish and place the pears cut side down.
  • Bake pears in a preheated oven at 350 degrees Fahrenheit for approximately 30 minutes.
  • Remove pears from oven and allow to cool.
  • Arrange pears on a plate and place a dollop of crème fraîche or small-batch vegan yogurt in each pear hollow.
  • Top each pear with finely shredded artisinal cheese.
  • Add a sprinkling of toasted walnuts of pecans.
  • And crown each with a maraschino cherry.

And Voilà! You’re a snob, but at least you’re a snob with a very tasty pear salad.

If you’ve never tried a pear salad recipe, definitely give one of these a go, there’s a 95% chance you will love it.

If you prefer pears with a European flair, try this French inspired creamy Baked Pears Recipe

pear salad
click pic for French-style baked pear dessert

Thanks for checking out the video and recipes. If you liked it, then click a button or two below and share it with your friends. I appreciate it!
–Chef Buck

Share and Enjoy !


Waldorf Salad Recipe

waldorf salad

Chef Buck is back with a fancy, but easy waldorf salad recipe.

Ingredients:

1 cup diced CELERY
1-2 cups diced APPLES
½ cup chopped WALNUTS or PECANS
¾ cup MAYONNAISE
Optional: PICKLE, for redneck version

Mix and serve on lettuce bed.

Hell…it doesn’t get any easier than that.

Bon appetite!

Share and Enjoy !


Quinoa Salad Recipe for Vegetarian Protien

quinoa salad

Quinoa salad is vegetarian perfection. Quinoa is a versatile food, similar to rice, but with 9 essential amino acids, making it a complete protein. It’s easy to prepare and super tasty. The salad recipe below makes an excellent meal, a tasty side dish, or a light snack. Serves 2-4.

Quinoa Salad Ingredients:

1 cup QUINOA (check current prices for quinoa on Amazon)
3 medium TOMATOES (chopped)
¼ cup RED ONION (finely chopped)
3-5 GARLIC CLOVES (minced)
½ inch GINGER (minced)
1 CUCUMBER (chopped)
1/3 YELLOW BELL PEPPER (chopped)
1 CARROT (thinly sliced)
¼ cup PARSLEY or CILANTRO (chopped)
3 Tbsp APPLE CIDER VINEGAR
2-3 Tbsp OLIVE OIL
2 Tbsp LEMON JUICE
SALT (to taste)

Quinoa Salad Direections:

Add 1 cup quinoa to 2 cups water and bring to a boil. Reduce heat, cover, and simmer 10-15 minutes (I find it usually takes about 15 minutes). Place cooked quinoa in bowl and let cool—doesn’t have to cool completely—by the time you get your other ingredients prepped, the quinoa will be cool enough.

Add vinegar, olive oil, salt, and stir well. Add onion, ginger, and garlic. I usually chop the onion fine and MINCE the garlic and ginger VERY WELL. The raw garlic and ginger adds lots of flavor and nutrition. Give the bowl a good stir and get these ingredients mixed thoroughly.

Add yellow pepper (red pepper is fine, but yellow makes a nice color contrast), cucumber, carrot. Sometimes I also add green onions—or even diced jalapeños if I’m looking for a little kick—feel free to experiment with any vegetables you enjoy in a raw state.

Mix ingredients and then add the tomatoes. I like to add the tomatoes last so they don’t get too beat up by the spoon. If you’ve got some parsley or cilantro on hand, throw that in as well—I make sure I’ve got some cilantro on hand when I’m making this dish. A bit of lemon juice is a nice finish and will also help keep the colors of the dish vibrant.
Give this quinoa salad recipe a try and let me know what you think, and bon appetit!

We still use rice, but not nearly as often (if I have to choose between eating ribs and rice or ribs and quinoa, it’s really not a choice, I choose rice every time–and I’m talking white rice!) but for MANY dishes, I’m losing the rice and going with quinoa. White rice doesn’t stand a chance against quinoa, but even brown rice doesn’t provide as much nutritional value–plus with quinoa being a complete protein, it’s a lot less hassle to fashion a meatless meal.

I’ve always got quinoa on hand now, and before using rice in a dish, I ask myself “will quinoa work here?” Sometimes the answer is NO, because rice provides great texture for many dishes–but more often than not, I go with quinoa.

Thanks for checking the quinoa salad out. If you like it, click a button or two below and share it!
And for another delicious salad idea, try this Cauliflower Super Salad Recipe.

cauliflower salad
add sliced tomato for a quick splash of color

Share and Enjoy !


Easy Shrimp Linguine Recipe

shrimp linguine

A quick and tasty shrimp pasta dinner recipe for two!

Shrimp LinguineIngredients:

1 pound SHRIMP (20-30, peeled and deveined)
8oz LINGUINE (about ½ box)
1-2 cups BROCCOLI florets (or substitute ½ cup PARSLEY if you’re not into broccoli)
6-8 GARLIC cloves (minced)
½ large ONION (finely chopped)
½ stick BUTTER
3-5 Tbsp OLIVE OIL
SALT to taste
(add OREGANO or ITALIAN HERBS if desired–I like just the extra garlicky taste)
serve with PARMESAN CHEESE

Shrimp Linguine Directions

Prep your ingredients first, then get your pasta cooking.  I like to add a Tbsp of olive oil to my pasta water as well as a 2-4 tsp salt.  Cook the pasta according to the package directions and whatever firmness you desire.  I’m using whole grain wheat linguine for this recipe, which takes about 12 minutes to cook–a bit longer than most linguine.  The cooking time for the skillet ingredients should be around 7-9 minutes, so try to time your pasta to finish with the shrimp–overcooked shrimp is rubbery and overcooked pasta is mushy, so timing is everything!!!

In your skillet, heat 2 Tbsp olive oil and 1/4 butter on medium heat.  When hot, add garlic and cook for 1 minute.  Add onions and continue to cook a couple more minutes.  Add broccoli florets, and add more butter and oil as needed.  If you don’t want to add broccoli, substitute 1/2 cup chopped parsley instead.  Sauté  florets, garlic, and onions another 2 minutes and then add shrimp.  Throw in some Italian herbs if you want to get all herby.

The shrimp will be done when they turn pink–don’t overcook or they’ll turn rubbery!!  Remove the cooked pasta from water and add directly to the skillet.  Don’t drain or strain the pasta!!–you’re just throwing away good flavor.  Add the remainder of your original 1/2 stick butter.  Mix pasta and ingredients.  Add some pasta water to the mix (about 1/2 cup or so).  I find that the salt in the water and butter is plenty for me, but salt a little more if desired.  Remove the skillet from the heat and serve.  Fresh Parmesan cheese and toasted garlic bread are nice accompaniments!!  Maybe some wine?
Bon appétit!

Share and Enjoy !


Cornish Hen Recipe – Easy One-Pot Meal

cornish game hen

Give this Cornish hen recipe a try. A Cornish hen is a classy bird, and a complete meal for two when cooked up with potatoes and carrots.

What you need for this Cornish Hen Recipe

1 CORNISH HEN …for this recipe I’m using a 1.5 lb. size hen, adjust cooking time for a smaller bird
2 POTATOES cut into 1 inch pieces
4 CARROTS chopped into ½-1 inch pieces
1 ONION large onion, cut into large pieces
1 GARLIC BULB chopped
4-5 sprigs ROSEMARY finely chopped
¼ cup BUTTER melted–substitute olive oil, if desired
SALT and PEPPER to taste
This is a great dish to load up with extra seasonings…try CUMIN, SEASONING SALT, CAYENNE PEPPER, CAJUN SEASONINGS, etc.

How to Cook Cornish Hen

  • If you’re using a frozen hen, allow the bird to thaw overnight in the fridge.
  • Cut hen through the breast and into two halves.
  • Rub both sides of hen with salt, pepper, garlic, and rosemary.
  • Lightly oil a baking dish and place the hen halves skin side up. Check current prices for a baking dish on Amazon.
  • Cover hens with potatoes and carrot and additional seasoning.
  • Top with chopped onion and melted butter and cover dish.
  • Cook in 400 degree F oven for 30 minutes.
  • Remove dish, mix ingredients, cover and return to the oven for 15 minutes more.
  • Remove dish and uncover. Mix ingredients, place hen halves on top of vegetables and return to the oven and cook for an additional 10 minutes.
  • At this point (dish has cooked 55 minutes total) I like to turn on the broiler and broil each side of the hen for 2-3 minutes, making the skin crispy and tasty. Keep an eye on the hens and do not overbroil!
  • Remove the dish from the oven and serve. I like to rub dried oregano between my palms and coat the plate and serve with sliced tomatoes.

For another poultry dish, try this crispy Baked Chicken Recipe that you’ll love more than fried chicken.
baked curry chicken

Thanks for checking out our Cornish hen recipe, and all of our recipes. Be sure and sign up for our mailing list and never miss a new Chef Buck cooking video, and also click a button below and share the dishes with your friends. We appreciate all the kind comments and support, and we’ll see you next time in the kitchen!
–Chef Buck

Thanks for watching our recipe videos!

We include affiliate links for products on our website, so if you make a purchase after clicking on our links, we may earn a commission which helps us produce more videos and drink more coffee :^) We participate in the Amazon Services LLC Associates Program, which is an affiliate advertising program providing a means for us to earn fees by linking to Amazon.com and affiliated sites, so we can make more videos.

Share and Enjoy !

Sausage Tomato Pie Recipe

sausage tomato pie

This sausage tomato pie might look like a pizza, but it’s definitely not a pizza! The crust has a flaky pastry quality and the onions act the part of a pie filling. This is a rich dish, bordering on decadent; it’s super filling and super flavorful. For a meatless alternative, try faux sausage—or no sausage at all—this dish works well just as a Tomato Pie.

Ingredients:
3 large ONIONS
2 medium TOMATOES
8-10 oz SAUSAGE
8 oz MOZZARELLA CHEESE (shredded)
5-7 GARLIC CLOVES (finely chopped)
2 cups ALL PURPOSE FLOUR
¾ stick BUTTER (soft)
DIJON MUSTARD
¼ VEGETABLE OIL (plus oil for sauteing)
2 Tbsp OLIVE OIL
2 Tbsp TOMATO SAUCE
2 Tbsp PARSLEY (chopped)
CHILI POWDER, CUMIN, SALT (for sausage seasoning, to taste)
DRIED ITALIAN HERBS (thyme, oregano, basil, etc.)

Heat 2 Tbsp oil in a skillet and add GARLIC. Sauté for 1 minute and add SAUSAGE. Continue cooking, adding CHILI POWDER, CUMIN, and SALT for seasoning. Cook meat to completion and set aside in a bowl. Slice 3 large ONIONS into strips. Add oil to pan and add onions. Cook onions down until soft and caramelized; this may take some time, but the more completely the onions are cooked down, the tastier the final dish will be! Remove onions from heat and set aside.

In a bowl, combine 2 cups ALL PURPOSE FLOUR and ¾ stick softened BUTTER. Mix butter into flour thoroughly. Add ¼ cup VEGETABLE OIL and continue to mix. Add ½ cup Water. Mix until the dough is smooth. Spoon onto ungreased pizza pan and spread (use the spoon!). Spread evenly into the size of a large pizza and leave a raised edge for the crust. Place in pre-heated oven and cook at 375 F for 10 minutes. Remove dough from oven and top with DIJON MUSTARD. Spread a layer of mustard evenly and cover dough completely except for the outer edge—just like spreading mustard on a sandwich. Add cooked onions and spread evenly over the mustard. Top with SEASONED MEAT and MOZZARELLA CHEESE. Top dish with sliced TOMATOES and sprinkle liberally with dried ITALIAN HERBS: oregano, thyme, basil, etc..

In a small bowl, combine 2 Tbsp OLIVE OIL, 2 Tbsp TOMATO SAUCE, and 1-2 Tbsp fresh chopped PARSLEY. Brush mixture over each tomato slice. Return pie to the oven and continue to bake at 375 F for 30-40 minutes until edge of crust is brown.

Bon appétit!

Share and Enjoy !


Asian Jicama Salad Recipe

asian jicama salad

Jicama is a root vegetable that can be served raw. It is similar in appearance to a potato, but tastes more like an apple, although not quite as sweet; I find it has an “earthier” taste. Many folks compare the crisp texture of Jicama to that of a water chestnut. Jicama is especially good in this recipe because it takes on the flavor of the dressing very well.

Ingredients:
1 cup JICAMA (cut into 1 inch sticks)
1 cup SNOW PEAS (cut into ¼ inch widths)
1 cup NAPA CABBAGE (torn into salad-size pieces)
2 CARROTS
¼ cup SESAME SEEDS (toasted)
2 Tbsp VINEGAR (wine or rice)
2 Tbsp SOY SAUCE
4 tsp HONEY (or 2 tsp sugar)
1 tsp SESAME OIL
1-2 Tbsp WATER

Peel jicama root and cut into matchstick shapes. Tear cabbage into salad-sized pieces (substitute romaine lettuce if preferred, but I find the cabbage holds up better in the dressing). Slice snow peas into ¼ inch widths. Shred carrots. Combine all in a bowl and mix.

In a smaller bowl, add vinegar (red or white wine vinegar or rice vinegar can be used), soy sauce, honey, sesame oil, and water (start with 1 Tbsp of water and add another if desired). Mix ingredients.

Combine dressing and vegetables and toss thoroughly. Serve as a side dish to add Asian flair to any meal—and it’s great with fish.

Bon Appétit!

Share and Enjoy !


Fried Shrimp Recipe with spicy tempura

spicy fried shrimp

I love a tasty fried shrimp recipe, and “tempura” is just a fancy pants word for “fried”. This dish is a knock-off of a dish I love to order at a Chinese restaurant when I’m down in Tampa, but since I don’t live in Tampa, I had to figure out how to make this fried shrimp recipe for myself—and I’ve done it!

The key is cilantro, and lots of it—also lots of garlic and a little hot pepper, too! Be sure to use a non-stick pan to cook up the spicy pepper mix, otherwise you’ll be setting yourself up for a headache and burned garlic!

What you need for Spicy Fried Shrimp

1 lb SHRIMP (peeled and deveined, tail on)
1 bunch CILANTRO (1 to 2 cups chopped)
10-12 cloves GARLIC (chopped)
1 or 2 hot PEPPERS (chopped)
1/2 cup GREEN ONION (chopped)
1 tsp RED PEPPER FLAKES (or two tsp!—optional)
1 cup ALL PURPOSE FLOUR
1 EGG
1 cup ice-cold WATER
frying OIL
SALT (to taste)

How to make Spicy Fried Shrimp

  • Chop up 1 bunch of cilantro, stems AND leaves.
  • Chop 2 green onions and dice peppers, I like to use 2 green chili peppers, but use whatever peppers you like depending on how much heat you want in the dish.
  • Chop 10-12 cloves of garlic.
  • Heat a non-stick skillet with 2 Tbsp of oil—definitely use a non-stick skillet! If you don’t have a decent skillet, here’s a link to check out some current skillet prices on Amazon.
  • Add peppers to skillet and allow to cook 1 minute, then add garlic and red pepper flakes (adjust pepper flakes to taste).
  • Cook for 1 minute and then add green onions. Be sure to keep ingredients stirring, reduce heat as necessary to prevent garlic from burning.
  • As garlic browns, add the cilantro and continue to stir ingredients, cooking out the moisture. It’s okay if the garlic browns well, as long as it’s not burned; the dryer the ingredients get the better. Cook the ingredients down and then remove the skillet from the heat and set aside.
  • Heat up the oil for the shrimp.
  • While the oil heats, prepare the tempura batter. It’s best not to prepare the batter ahead of time. In a bowl, beat 1 egg, add 1 cup of ice-cold water, then add 1 cup of all purpose flour.
  • Mix together into a thin batter, but don’t over mix—it’s okay if there are some lumps.
  • Test the batter in the frying oil; the batter will sizzle and float if it is ready.
  • Use peeled and deveined shrimp with the tail still attached—the tail makes a perfect handle.
  • Dip shrimp in batter and then shake off the excess.
  • Lay shrimp in the hot oil and cook 3-4 minutes, turning once. DO NOT cook too many shrimp at the same time because they will stick together and not crisp and brown evenly.
  • When the shrimp are golden, remove from oil and drain on a paper towel (the 1st batch I put into the pepper mix to drain).
  • When all the shrimp are fried, add them to the pepper mix and return the skillet to the burner on low heat.
  • Salt to taste and toss the shrimp GENTLY and thoroughly with the spice mix.
  • Remove from heat and serve immediately.

I like to serve this dish with sticky rice and a sautéed green, something like cabbage or bok choy. Give fried shrimp recipe a try a let me know what you think, and bon appétit!

If you want another tasty shrimp idea, one of my favorite is this fancy Shrimp Pancake Recipe.

shrimp pancake
Korean style Haemul Pajeon with shrimp

Thanks for checking out our shrimp recipe, and all of our recipes. Be sure and sign up for our mailing list and never miss a new Chef Buck cooking video, and also click a button below and share the dishes with your friends. We appreciate all the kind comments and support, and we’ll see you next time in the kitchen!
–Chef Buck

Thanks for watching our recipe videos!

We include affiliate links for products on our website, so if you make a purchase after clicking on our links, we may earn a commission which helps us produce more videos and drink more coffee :^) We participate in the Amazon Services LLC Associates Program, which is an affiliate advertising program providing a means for us to earn fees by linking to Amazon.com and affiliated sites, so we can make more videos.

Share and Enjoy !

Chocolate Candy Recipe – Quick Party Treats

chocolate salty treats

This is a quick chocolate candy recipe treat idea for lazy hosts and lazier guests. Need to provide a tasty dish for a party, but don’t have the time? Need it to look homemade even though you don’t want to actually make anything? If you’re going to a party or having a party, this is an easy dish to whip together with almost zero effort. The most annoying part is unwrapping the candies.

To make this chocolate candy recipe you will need:
MINI PRETZELS
MINI PEANUT BUTTER CUPS
CHOCOLATE CARAMELS (we use Rolos)
PECAN HALVES

Preheat oven to 300 degrees Fahrenheit.
Arrange pretzels on a baking sheet (putting wax paper underneath will make cleanup a breeze). Top each pretzel with a peanut butter cup or chocolate caramel (if it was just me, I’d use only peanut butter cups, but Camera Girl likes the caramels, and it makes for a better variety if you’re making the dish for guests). Place baking sheet in oven for 4 minutes to soften chocolates. Remove baking sheet from oven and top softened chocolates with pecan halves. For variety, top some of the chocolates with pretzels. Allow chocolate to cool before removing treats from baking sheet.
That’s it! Pretzels, chocolate, and nuts…who doesn’t like that? It’s easy peezey and a great treat to serve when you don’t feel like making a fuss.
So give this quick chocolate candy recipe treat a try and let me know what you think, and…
Bon appétit!

(I like pretzels on the bottom and top with a peanut butter cup in between. Camera girl likes the pretzel on the bottom with pecan half on top and a chocolate caramel in between; she says it’s like one of those “turtle” candies. Pecans are okay, but they’re too expensive…pretzels and peanut butter cups are all you really need, but get the rest if you’re tryin’ to be fancy pants.)

And for another yummy dessert, try these Caramel Oatmeal Squares.
caramel oatmeal squares

Share and Enjoy !


Linguine with Clam Sauce Recipe – White Sauce

linguine with clam sauce

Throw together a quick linguine with clam sauce recipe. This dish is super flavorful and very easy to prepare. Give it a try–everyone will love you!

Linguine with White Clam Sauce Ingredients

1 pkg LINGUINE (about 13oz)
3 cans chopped CLAMS (approx. 20 oz., drain and reserve liquid)
½ stick BUTTER
½ cup OLIVE OIL
½ cup ONIONS (chopped)
4-6 cloves GARLIC (finely chopped)
1 cup WHITE WINE (dry, not sweet)
½ qt CHICKEN BROTH
RED PEPPER FLAKES to taste (2-3 tsp is what I use)
1 tsp dried OREGANO
1 tsp BLACK PEPPER
1 Tbsp PARSLEY (fresh chopped or dried)
¾ to 1 cup PARMESAN CHEESE (grated)

linguine with clam sauce

How to make Linguine with Clam Sauce

  • Open canned clams and separate liquid from clams. Check current prices for canned chopped clams on Amazon.
  • Heat a large skillet on medium and begin melting butter, add olive oil.
  • When all is melted, add onion and garlic. Cook until garlic begins to color, mind cooking temperature to avoid burning (lower temp if needed).
  • Add white wine and simmer 5-10 minutes to reduce.
  • Add chicken broth, clam juice reserved from cans (an additional 8oz bottle of clam juice can also be added, if extra clamminess is desired). Add red pepper flakes, oregano, parsley, and black pepper.
  • Reduce heat to low and simmer for 20 minutes.
  • While sauce is simmering, prepare linguine according to package directions.
  • After sauce has cooked for 20 minutes, stir in clams and turn off heat.
  • Add linguine noodles to sauce (don’t drain and rinse noodles, just take them right from the pot and mix them with the sauce).
  • Stir in the grated Parmesan cheese and serve. If desired, top with fresh parsley to add a little color.

And toast up some garlic bread, too.
Give this linguine with clam sauce recipe a try and let me know what you think, and bon appétit!

For another seafood dish, checkout this delicious Seafood Stew Recipe.

seafood stew

Thanks for Watching our Videos!

Thanks for checking out this puttanesca recipe, and all of our recipes. Sign up for our mailing list so you’ll never miss a new recipe. Also click a button below and share the dishes with your friends. You can also follow Chef Buck on Youtube. We appreciate all the kind comments and support, and we’ll see you next time in the kitchen!

If you like what CG and I do, support us on Patreon, or throw us a tip in our Paypal Tip Jar. We’ll happily enjoy a coffee on the road – Thanks! We appreciate all the support, and we’ll see you next time in the kitchen!

We include affiliate links for products on our website. Making a purchase after clicking on our links and we may earn a commission which helps us produce more videos and drink more coffee :^) We participate in the Amazon Services LLC Associates Program, which is an affiliate advertising program. It provides a means for us to earn fees by linking to Amazon.com and affiliated sites, so we can make more videos.

Share and Enjoy !

Deviled Egg Recipe – Indian Style with Curry

curried deviled eggs

This deviled egg recipe is a tasty treat, and preparing eggs with Indian inspired spices will make a nice change from the average awesomeness of a traditional deviled egg recipe.

Deviled Egg Recipe Ingredients

6 EGGS
2-3 Tbsp MAYONNAISE
1 clove GARLIC (finely chopped)
¼ tsp CUMIN SEEDS
OLIVE OIL (1-2 tsp)
SALT and PEPPER (to taste)
CURRY POWDER (to taste)

How to Make Deviled Eggs

Boil and peel 6 eggs.
You can boil them perfectly, if you boil them this way: (Overly-long egg boiling description follows)
Use older eggs. As an egg ages, it shrinks within the shell and separates from the inner membrane, making the egg easier to peel after boiling. Fresher eggs will have a stronger membranous attachment to the shell and are more difficult to peel (yawn). Eggs 10 days to 2 weeks old will work well.
Prepare the eggs in a pot large enough to keep them from jostling together and cracking. Heating the eggs gradually will also prevent cracking. Place eggs in a pot and fill with cold tap water so the eggs are completely covered and there is an extra 1 inch of water above the eggs. Add a pinch of salt. (Some folks add a tablespoon of vinegar to prevent the eggs from leaking should they crack, but I never do this because I don’t think James Dean would). Uncovered, bring the pot to a boil.
As soon as the pot begins to boil, turn off the heat, cover and allow eggs to sit 12 minutes.
After 12 minutes, exchange the hot water for cold under the tap and allow eggs to cool; exchange the water several times if needed.
When eggs have cooled, peel them under the water in the pot. (Peeling them under running water is kind of a waste of water, so why do dat?)
Okay. Now you’ve got 6 boiled and peeled eggs.

Slice them into halves lengthwise and plop out the yellow yolks into a mixing bowl. And one of the egg white halves to the mixing bowl as well, or two halves if you like a lot of filling. Add salt and pepper to taste.
In a skillet, heat a splash of olive oil on med-high heat and sauté ¼ tsp cumin seeds and 1 clove of finely chopped garlic until garlic is lightly browned—do not burn: the garlic will cook quickly.
Add the garlic and cumin seeds to the yolk mixture. Add mayonnaise gradually and mix the ingredients to desired smoothness (AGAIN—add the mayonnaise gradually! If the mixture is too soft it will not set up properly in the egg white!)
Which brings us back to the egg white.
Spoon the yolk mixture into the egg whites and arrange nicely onto a serving dish.
Sprinkle as desired with curry powder (or substitute cumin powder).

Thanks for watching! Share this post, comment, and make eggs for dinner, dude.

For another tasty appetizer recipe, try Asian-Style Spring Rolls w/ Sauce.
Deviled Egg Recipe

Share and Enjoy !


Kale Recipe -Ginger Stir-fry w/ Tahini Sauce

sauted ginger kale

Try this easy stir-fry kale recipe. Kale is a cool cabbage that kicks broccoli’s ass (or at least in this recipe it does).

Kale Recipe Ingredients:
1 bunch KALE
1 inch piece fresh GINGER
1 medium ONION (cut into slices)
½ cup CARROT (thin cut or string cut)
1 hot PEPPER (finely chopped, optional)
1 Tbsp SESAME OIL
SALT (to taste)
1 Tbsp TAHINI
3-4 Tbsp SOY SAUCE

Divide a 1” piece of ginger into two halves. Finely chop one half to use in the sauce and thinly slice the other half and set aside to cook with the stir fry. In a small bowl, mix together the tahini and soy sauce until a thin peanut-buttery consistency is achieved. Mix the finely chopped ginger into the sauce and set aside.
Wash kale, remove spine, and cut or tear into mouth-manageable pieces. Heat the sesame oil on medium high and sauté onion slices and finely chopped pepper for 1 minute. Add a pinch of salt (not much salt will be needed because of the salt in the soy sauce). Add Ginger slices and cook for another minute. Reduce heat to medium and add the kale and carrots. Mix thoroughly with the onion, pepper, and ginger. Cover and allow to cook for 2 minutes. Turn off heat and add sauce. Toss well and serve hot (and it goes great with rice).
Give this healthy kale Recipe a try and let me know what you think, and…
Bon appétit!

Kale Fun Facts:
Kale belongs to the same family as cabbage, Brussels sprouts, and collards.
Kale is packed with antioxidants, which help neutralize harmful free radicals in the body.
One cup of chopped raw kale provides more than 100% of the daily value of vitamins A, C, and K.
Free Radicals are something scientists made up to sound smart.

Want more kale recipe ideas? Try this Kale and Beet Superfood salad Recipe.
kale beet salad

Share and Enjoy !


Spaghetti Carbonara Recipe w/ Chef Buck

spaghetti carbonara

A delicious super-simple spaghetti carbonara recipe.

Ingredients for Spaghetti Carbonara

13 oz SPAGHETTI
8 oz PANCETTA or thick cut BACON
1 EGG
3 EGG YOLKS
1/2 cup PECORINO ROMANO (grated)
(or just romano, what’s the big deal?)
(even a little parmesan won’t hurt)
PEPPER (as much as you can handle)
SALT (very little)
PARSLEY (optional)

How to Make a Spaghetti Carbonara Recipe

Combine 3 egg yolks and 1 whole egg into a bowl and mix well. Stir in ½ to ¾ cup grated Pecorino Romano cheese—a Romano cheese is “pecorino” if it is made from sheep milk—but if you use Romano made from the milk of a cow or a goat, it won’t be the end of the world (and parmesan wouldn’t kill you either—although the pecorino is nice). Set this mixture aside.
Prepare pasta according to package directions. Add a pinch of salt to the water, but sparingly—there will be plenty of salt in the other ingredients. While pasta cooks, prepare the meat.
Cut 8oz of pancetta or thick-cut bacon into small squares. Pancetta is Italian bacon that is not smoked—most other bacon you find at the market will be smoked; again, it’s not the end of the world choosing one over the other, the main difference will be in the “smokiness” of the dish. In a large skillet, prepare the bacon. Add a generous helping of fresh cracked pepper (generous is whatever amount you like). Make sure the bacon is cooked through, but do not cook it to a crisp! Remove skillet from the heat and pour off the excess bacon grease. When spaghetti is ready, remove directly from the water (do not rinse!) and mix the pasta with the bacon in the skillet. Add the cheese/egg mixture to the hot pasta and continue mixing thoroughly. Initially it will not look like a lot of sauce, but as you stir the mixture into the pasta, it will become quite creamy (and delicious). Add a splash of pasta water if needed. Throw in a little chopped parsley for color and serve immediately.
Give this spaghetti carbonara recipe a try and let me know what you think, and…
Bon appétit!

Want to try another fantastic pasta dish? Watch Chef Buck cook this Linguine w/ Clam Sauce Recipe.
linguine with clam sauce

Thanks for Watching our Videos!

Thanks for checking out this spaghetti carbonara recipe, and all of our recipes. Sign up for our mailing list so you’ll never miss a new recipe. Also click a button below and share the dishes with your friends. You can also follow Chef Buck on Youtube. We appreciate all the kind comments and support, and we’ll see you next time in the kitchen!

If you like what CG and I do, support us on Patreon, or throw us a tip in our Paypal Tip Jar. We’ll happily enjoy a coffee on the road – Thanks! We appreciate all the support, and we’ll see you next time in the kitchen!

We include affiliate links for products on our website. Making a purchase after clicking on our links and we may earn a commission which helps us produce more videos and drink more coffee :^) We participate in the Amazon Services LLC Associates Program, which is an affiliate advertising program. It provides a means for us to earn fees by linking to Amazon.com and affiliated sites, so we can make more videos.

Share and Enjoy !

Spring Rolls with Peanut Dipping Sauce

spring rolls dipping sauces

Spring rolls are a nice appetizer when you go out to eat at a fancy-pants restaurant, and they’re just as nice when you eat them at home, and they’re easy to make. Briefly wetting the rice paper and placing it on a damp towel makes the delicate rice paper easier to handle. The rice paper softens while you place your filling–makes the process much easier–definitely give this technique a try!

All you need to make spring rolls are rice paper and some tasty ingredients to roll up inside. You can buy rice paper at any Asian food store, most health food markets, and in the ethnic foods section of many local grocery stores. It’s an economical buy. The last batch I bought was a package of 20 for $2.25 U.S. dollars. It comes in sheets, like paper, but usually round in shape; it doesn’t feel like paper, though—it feels more like plastic, almost like something you’d find at the hardware store, but don’t let that put you off, it softens quickly when wet. Despite its initial “plasticky” appearance, it’s not bad for you, or particularly good for you either—rice, tapioca, salt, and water are the prime components. How your spring rolls taste will be determined by the ingredients you roll up inside, and any dipping sauce you might like to serve them with. It’s a great vehicle for getting raw vegetables into your diet; I like to think of a spring roll as a cigar-shaped salad, but many pre-cooked meats and seafood work well in spring rolls, too.

What You Need to make Spring Rolls

Rice Paper and
Whatever the hell you wanna roll up in the rice paper.
Here are a few options I like to use:
cilantro (I ALWAYS USE CILANTRO), cucumber, basil leaves, lettuce, carrots, sprouts, rice noodles, steamed shrimp, stir-fried spicy pork, bell pepper, green onions, cabbage, and on and on and on…
there’s no end to what you can use.

spring rolls
Spring rolls make a great appetizer or entree

How to Make a Fresh Spring Roll

Prepare your filling ingredients—mainly making sure the ingredients are chopped or sliced in a manner which will make them rice paper-wrapping friendly—this is especially true if you plan on slicing the spring rolls in half—your filling ingredients will tumble out easily if they’re too loose and tiny.
Wet the rice paper with warm tap water. Just a few seconds under a warm tap is plenty. Place the rice paper on a damp towel and gently press down. The rice paper will quickly soften and become pliable. Arrange your filling ingredients at one end of the sheet and roll them up in the rice paper like a burrito. Using basil or lettuce or cabbage leaves as your base ingredient will make the rolls structurally sound and easier to roll. It’s very important that the first rollover be tight—compact the ingredients as much as possible—a loosely rolled spring roll is a sad sight, and will quickly fall apart if sliced. The rice paper will be your friend. It will help. It is very sticky and will seal almost like an envelope around your stuffings. If you want a tasty spring roll, it’s as easy as rolling up a tasty combo of ingredients—a yummy dipping sauce will help, and here are two:

Peanut Dipping Sauce:
1 Tbsp Peanut Butter
1 Tbsp Rice Wine Vinegar
1 Tbsp Toasted Sesame Oil

Chili Dipping Sauce:
2 Tbsp Chili-Garlic sauce
2 Tbsp Soy Sauce
1 tsp Sesame Seeds

And just plain old soy sauce works fine, too. Or maybe some hot mustard—I’ve never tried that, but it just popped into my head, so maybe next time I’ll give it a go.
Alright, that’s enough blabbing.
Give these spring rolls a try and bon appétit!

For another delicious Asian inspired dish, try a Seafood Pancake Recipe.
seafood pancake dipping sauce

Share and Enjoy !


Seafood Stew Recipe for Winners

seafood stew

A simple and delicious seafood stew recipe for winners*.
*also appropriate for non-winners

Seafood Stew Recipe Ingredients

1 lb MIXED SEAFOOD
1 HOT PEPPER (finely chopped)
3-4 cloves GARLIC (finely chopped)
1 medium ONION (chopped)
½ cup CELERY (sliced)
2 Tbsp TOMATO PASTE
1 13 oz can DICED TOMATOES
1 cup CHICKEN STOCK
2 cups WATER (substitute 1 cup CLAM JUICE if desired)
1 cup WHITE WINE
2 Tbsp LEMON JUICE
1 BAY LEAF
1 Tbsp OREGANO
1 tsp THYME
1 tsp BASIL
SALT/PEPPER to taste
1 Tbsp OLIVE OIL

How to make this Seafood Stew

Heat olive oil on medium heat and add onion and celery and hot pepper.
Give these ingredients a minute head start and then add the garlic and salt.

Cook until the onion begins to soften and then add the tomato paste. Push the paste around with the vegetables—spread it around the bottom of the pan and let it cook up a minute or two—if the paste sticks a little, that’s cool—because now we’ll add white wine which will deglaze any stuck on paste.

Add a bay leaf, oregano, thyme, basil—throw some red pepper flakes in as well if you like it hot. Let the mix simmer for about 5 minutes.

Add diced tomatoes, 1 cup of broth (I use chicken broth, but any broth will do), and 2 cups of water—you can substitute 1 cup of clam juice for 1 of the cups of water, if desired. Bring to a boil and then reduce to a simmer, cover, and allow to cook 30 minutes.

After 30 minutes, add 1 lb. of miscellaneous seafood—a variety of big-bite pieces make a nice presentation. Cover and simmer for another 7-8 minutes. Stir in some lemon juice and remove from heat and serve.

It looks tasty in a bowl with a nice pyramid of rice in the middle.
it’s easy peezey and puts a nice glow in your belly, so give this seafood stew recipe a try.

Bon appétit!

Hey!!!  ….what about a Beef Stew Recipe?

beef stew

Thanks for checking the seafood stew recipe out! Click some of the buttons below and share it with your friends and family, I appreciate it.
–Buck

Share and Enjoy !


Baked Chicken Recipe better than fried chicken

baked curry chicken

It’s not fried chicken, but just barely. This is a simple and delicious recipe for folks who like juicy chicken more than greasy chicken, so give this baked chicken recipe a try.

What you need for this Baked Chicken Recipe

2½ lbs. CHICKEN (skin removed)
1 cup MILK (I use almond milk, but buttermilk is cool)
HOT SAUCE (to taste)
1 cup BREAD CRUMBS
3 tsp CURRY POWDER
1 tsp GARLIC POWDER
1 tsp ONION POWDER
1 tsp ONION SALT (or regular salt, adjust to taste)
½ tsp GROUND MUSTARD
1 tsp PAPRIKA
*add ½ tsp red pepper if you want a kick

baked curry chicken

How to “Bake” Fried Chicken

Buy skinless or remove the skin and clean and rinse 2-2½ lbs. of chicken pieces. I love the dark meat, so I usually use thighs, but use whatever cuts you like and adjust the cooking time accordingly.

Spread the chicken out in a shallow bowl and dash with hot sauce to taste. Add one cup of milk. I like to use almond milk, but my mama always used buttermilk. Allow the chicken to soak 30-60 minutes.

In a ziplock bag, add the remainder of ingredients and mix.

2 pieces at a time, add chicken to the ziplock bag and turn until coated. Sealing plenty of air in the bag will help coat the chicken pieces easily and evenly.

Place pieces on a non-stick or lightly-oiled baking pan and bake at 350 degrees Fahrenheit for about 30 minutes.
Periodically check on the pieces as oven cooking times will vary.
After 30 minutes, or when the pieces are well on their way to cooking, turn them, and continue cooking for another 15-20 minutes.

Curry gives the chicken a wonderful color, and it looks very much like fried chicken, although not as crunchy as fried chicken. For extra crunchiness, broil the pieces for 1-2 minutes on each side.

Give this baked chicken recipe a go and let me know what you think!

If you’re new to home cooking, just get a bunch of spices, pots and pans, and start experimenting with different ingredients and recipes. It’s a healthy hobby that can save a lot of money in the long run. You can check out current prices for Complete Kitchenware Sets on Amazon. Or just go to a thrift store! I’ve found some of my favorite kitchen gear at second-hand stores.

And when you’re tired of chicken, try this Juicy Pork Loin Recipe.

pork loin chop

Thanks for checking out our baked chicken recipe, and all of our recipes. Be sure and sign up for our mailing list and never miss a new Chef Buck cooking video, and also click a button below and share the dishes with your friends. We appreciate all the kind comments and support, and we’ll see you next time in the kitchen!
–Chef Buck

Thanks for watching our recipe videos!

We include affiliate links for products on our website, so if you make a purchase after clicking on our links, we may earn a commission which helps us produce more videos and drink more coffee :^) We participate in the Amazon Services LLC Associates Program, which is an affiliate advertising program providing a means for us to earn fees by linking to Amazon.com and affiliated sites, so we can make more videos.

Share and Enjoy !

Lentil Soup Recipe with Ginger

lentil ginger soup

A lentil soup recipe! Doesn’t that sound like all of your dreams are coming true? Pick up some brightly colored lentils and give this lentil soup recipe a try.

What you Need for this Lentil Soup Recipe:

1 ½ cups LENTILS
5-6 cups WATER (or ½ water ½ broth)
1 large ONION (finely chopped)
2 Tbsp fresh GINGER (finely chopped)
1 hot PEPPER (finely chopped)
2 Tbsp OLIVE OIL
1 tsp CUMIN SEEDS
½ tsp TUMERIC POWDER
1 tsp CORIANDER POWDER
1 14 oz can DICED TOMATOES (or 2 Lg tomatoes, diced)
SALT and BLACK PEPPER to taste
CILANTRO LEAVES for garnish (coriander leaves)

How to Make the Soup:

If you need a nice soup pot for your kitchen, you can check here for current pricing for a soup pot on Amazon.

  • In a large pot, heat olive oil on medium heat. When oil is hot, add the cumin seeds and allow cooking for about 1 minute. After a minute the seeds will begin to open, at this point add the onion and hot pepper and allow cooking until the onions soften and become translucent.
  • Now, add ginger, coriander, and turmeric and continue mixing ingredients over medium heat.
    Add tomatoes, mix, and cook with ingredients for 2 minutes.
  • Add lentils (be sure to wash and rinse first). Red or yellow lentils will make this dish look extra yummy. Darker lentils will taste equally as good—the dish just won’t win a beauty contest—but use whatever kind you have, ultimately, your stomach won’t know the difference.
  • Add water, or a combination of water/broth.
  • Next, bring the pot to a boil, reduce heat, then cover the pot loosely and allow ingredients to simmer for 30 minutes.
  • After 30 minutes, add salt and pepper to taste. Add more water as needed, but sparingly—you don’t want your soup to be too thin. Cover pot loosely and continue cooking another 15-20 minutes.

Final Steps:

  • When the lentils are soft and completely cooked, lightly blend the soup to add a creamy consistency. A hand-held stick blender works great—a few quick pulses and voilà! If a stick blender is not handy (rim shot), simply remove a few cups of the soup to a table top blender, smooth, and return to the pot. This step isn’t necessary, but do it; just do it.
  • If the soup is thinner than you like, continue to simmer briefly—but remember, the lentils, like rice, will continue to absorb water and thicken the soup on their own.
  • Garnish with cilantro (coriander leaves) and serve with French bread for optimal taste satisfaction.

Keep Coming Back To See What’s New!

Bon appétit!

And, if you like bread with your soup, you might love trying this Fancy Egg Bread Recipe, it’s one of my favorites.

egg bread
baked egg bread with rosemary seasoning

Thanks for checking the recipes out! If you liked it, click some of the buttons below and share it with your friends and family, I appreciate it.
–Buck

Share and Enjoy !

Calamari Salad Recipe …easy squid dish!

calamari salad squid

Calamari salad makes a great addition to any potluck! Also, Dr. Freud theorized the squid to be the unconscious driver underlying all human action. This recipe builds on that theory, and adds carrots.

What you need for a Calamari Salad

1 lb SQUID
½ cup CARROT (strings)
½ cup CUCUMBER (sticks)
1/3 cup CILANTRO or BASIL LEAVES (chopped)
1 tsp GINGER (minced)
1 tsp SESAME OIL
1 Tbsp extra virgin OLIVE OIL
1 Tbsp RICE WINE VINEGAR
1 tsp CHILI GARLIC SAUCE (or sub hot sauce to taste)
1 Tbsp LEMON JUICE
SOY SAUCE (to taste)
½ tsp SESAME SEEDS
SALT (to taste)

How to make Calamari Salad

Start with 1 lb. of cleaned squid. I’ve used fresh and frozen squid for this recipe and both work well—and smaller squid work best for salad—which is something to think about when choosing your squid; buying them frozen and already cleaned is much nicer than cleaning a dozen dinky cephalopods.

Cut squid into thin rings (1/4 inch max) and boil in salted water for 25 seconds (yep—they’ll cook up that fast). Drain, then rinse under cold water to prevent overcooking (over-boiled squid can be quite rubbery).

In a large bowl, combine sesame oil, olive oil, vinegar, chili garlic sauce, and ginger (also salt to taste—or dress with soy sauce). Mix well.

Add squid, carrot, cucumber, and cilantro and toss with dressing.
Add lemon juice (or substitute lime juice). Add soy sauce to taste.

Mix all, top with sesame seeds, and serve over a bed of mixed greens.
It’s light, tasty, and suctioncupalicious.

Wanna try squid in another dish? One of my favorite uses for calamari is in a Seafood Pancake Recipe, which sounds weird, but try it, you’ll like it.

shrimp pancake
Korean style Haemul Pajeon seafood pancake

Thanks for checking out the calamari salad recipe. If you enjoyed it, click some of the clickables below to share the recipe with your friends. I appreciate it!
–Chef Buck

Share and Enjoy !


Pita Chips Recipe for a baked, spicy, pita snack

spicy pita chips

Pita chips are easy to make and you can bake them up quickly using your favorite spices. You can’t have hummus without pita chips! I mean, you can, but…why? Pita chips go great with all kinds of dips and are excellent with salads or just as an alternative to your run-of-the-mill potato chip.

Pita Chips Ingredients:
1 pkg. PITA BREAD
OLIVE OIL
SALT
SPICES: curry powder, garlic powder, cajun seasonings, etc. (whatever you like)

Cut pitas into triangular chip shapes. Each pita will easily yield 12 chips. Soak one side of each pita triangle in olive oil and stack pitas so the soaked side of one is stacked against the unsoaked side of the next. Press stacked chips together—this will flatten the chips and suffuse the oil throughout.
Arrange chips on a flat baking sheet. Salt to taste. Add spices—the more the better, in my opinion. I usually bake three distinct batches. Curry is probably my favorite—just salt and lots of curry on a toasted pita chip, it’s delicious. Garlic is great, too. Try some Tony Chachere’s seasoning (or comparable cajun seasoning) on a chip—or simply add a sprinkle of cayenne pepper with Cumin. Whatever your favorite seasonings are, give them a try.
Bake the chips 8-10 minutes in a pre-heated oven at 350 degrees Fahrenheit. Oven cooking times vary, so keep an eye on your first batch to see how long it takes to toast them the way you like—they will burn quickly if forgotten. I like mine CRISP. One side of the pita will be thinner than the other side and some triangles may need to be removed from the oven before the other chips are done. You’ll figure it out.
Give this pita chips recipe a try and let me know what you think, and…
Bon appétit!

Want to make hummus right now? Check out this Classic Hummus Recipe.
spicy pita chips

Share and Enjoy !


Spicy Couscous Recipe …how to make a quick side dish

spicy couscous

Anyone up for a spicy couscous recipe? Couscous is a quick and simple dish, so naturally I love it. It makes a great pairing with fish, and both can be cooked up quickly. I usually start with plain couscous and spice it up myself, it is simple to do and much yummier than any overpriced pre-made couscous mix you’ll buy at the market.

What You Need To Make This Spicy Couscous Recipe

1 cup COUSCOUS
2 Tbsp OLIVE OIL
1 medium ONION (chopped)
3 cloves GARLIC (finely chopped)
1 HOT PEPPER (finely chopped)
1 tsp MUSTARD SEEDS
1 tsp CHILI POWDER
1 tsp PAPRIKA
½ tsp TURMERIC POWDER
1 tsp TOMATO PASTE
1 ½ cup WATER (or broth)
SALT (to taste)

couscous recipe
Spicy couscous makes a tasty side dish, and it is fast and easy to prepare …and did I mention cheap?

How To Make Spicy Couscous

Heat olive oil on medium high heat and then add onions.
Stir for 1 minute and add mustard seeds, hot pepper, and garlic.
Continue sautéing for a couple more minutes.
Stir in chili powder, paprika, and turmeric.
Add salt and tomato paste and mix well.

Pour in 1 ½ cups of water, stir, cover pot and turn up the heat and bring the pot to a boil.
After ingredients come to a boil, stir in the couscous and mix well. Cover and remove from heat and allow pot to sit for 5 minutes.

After 5 minutes the couscous will have completely absorbed all the water.
Uncover and immediately fluff with a fork; this will keep the couscous for overcooking and becoming a sticky, starchy mess; couscous should be light and fluffy, and in this case, nice and spicy, too.
Give this spicy couscous recipe a try, and I hope you like it.
Bon appétit!

This couscous recipe goes great with this DELICIOUS BLACKENED FISH RECIPE!

blackened fish mahi mahi
Click image to watch this easy Blackened Fish recipe

Thanks for watching my couscous recipe video. If you liked it, then used the buttons below to share the recipe with your friends. Thanks!
-Chef Buck

Share and Enjoy !


Shrimp Remoulade Recipe …Best Shrimp Salad Ever!

shrimp remoulade salad
Shrimp remoulade salad is one of my all-time favorite dishes.  I used to eat this all the time when I lived in New Orleans—and I never go back without making a stop at the Gumbo Shop for a taste.  I don’t know exactly how the Gumbo Shop prepares shrimp remoulade sauce, but this recipe is how I throw it together.   A lot of ingredients go into the sauce, but it’s worth the effort.  Give it a try!

What You Need to Make Shrimp Remoulade

TOMATO PUREE (½ cup)
MUSTARD (¼ cup –creole, stone ground, or dijon)
HORSERADISH (2 tsp –prepared)
GREEN ONION (1 tsp, minced)
PARSLEY (1 Tbsp, finely chopped)
WORCESTERSHIRE SAUCE (½ tsp)
MAYONNAISE (3-5 Tbsp)
CELERY (1 Tbsp, minced)
GARLIC (1 clove, minced)
CHILI POWDER (1 tsp)
PAPRIKA (1 tsp, smoked)
SUGAR (1 tsp, optional
SALT (to taste)
HOT SAUCE (½ tsp)
LEMON JUICE (1 Tbsp)
OLIVE OIL (1 Tbsp)
VINEGAR (1 tsp)
Salad Ingredients:
SHRIMP (1 lb, boiled)
SALAD GREENS
TOMATO SLICES
GREEN ONION (chopped, optional)

shrimp remoulade
Shrimp Remoulade is a New Orleans classic

How to Make Shrimp Remoulade

The Remoulade Sauce:

To make the sauce, just mix all the sauce ingredients together (really?!).  I’m using tomato puree in this version, but I’ve also made this dish using ketchup or tomato sauce; it will be thinner if you use those two, but that can be a good thing, especially if you want to toss the greens in the remoulade sauce.  Sugar is optional and definitely not needed if you’re using ketchup, which is usually sweet enough.  Sometimes I’ll add a teaspoon of onion powder.  This is a great recipe to play with, but be judicious with the mayonnaise!  Using fresh ingredients like parsley, garlic, green onion, and celery will really make this sauce shine.  You can definitely make and serve the sauce immediately, but making it hours ahead or even the day before will embolden the flavors.  Embolden the flavors?  I’m not sure if that’s the right way to say that, but you know what I mean.

The Shrimp:

I’m using 1 pound of deveined shrimp in the shell. For this salad, the bigger the shrimp the better, but I usually get whatever’s on sale—any kind of shrimp is gonna be delish in this dish. Before boiling, prepare a bowl of ice water to cool the shrimp after cooking—this will keep the shrimp from becoming overdone (tough and rubbery).
Put a pot of water on the stove and add 2 bay leaves and a generous amount of salt. Bring the pot to a boil and add the shrimp. I find a pound of shrimp takes about 2 minutes, but this will vary depending on the size of the shrimp and the amount of water in the pot. For sure, they will cook fast. Do not ignore them—it’s not a good time to multi-task. When the shrimp turn pink, they’re done. Get ’em out of the hot water and into the ice bath—this will halt the cooking process, and your shrimp will be perfecto (and now that they’re cooked, they’ll be super easy to peel).
Toss the shrimp in the remoulade sauce and serve over a bed of fresh greens. I like to garnish the salad with green onion and fresh tomato. Serve with saltines or a loaf of French bread and soft butter. Let the salivating begin.
And bon appétit!

calamari salad squid
Be adventurous and TRY A CALAMARI SALAD!

Thanks for checking out the recipe. To never miss a video, subscribe to Chef Buck! Click some of the buttons below and share this awesome Shrimp Remoulade with your friends. Thanks!
–Chef Buck

Share and Enjoy !


Quinoa Recipe — Spicy Spanish Style Quinoa

spanish quinoa

Try this spicy Spanish-style quinoa recipe; it’s vegetarian heaven. Quinoa is a versatile ingredient and an excellent source of protein. Quinoa is a grain-like superfood and a great substitute for rice, and just as easy to prepare. I use it often as an alternative to rice–even in rice pudding. Give this quinoa recipe a try; I’m sure you’ll be eating a whole lot less rice in the future, and not missing it at all.

What You Need For This Quinoa Recipe

  • 1 Tbsp OLIVE OIL
  • 1 ½ cups QUINOA (check current prices for quinoa on Amazon)
  •  ½ cup RED ONION (minced, separated)
  • 3-5 cloves GARLIC (finely chopped)
  •  ½ large RED BELL PEPPER (minced, separated)
  • 1 14 oz can DICED TOMATO (reserve juice)
  • 1 15 oz can KIDNEY BEANS (drained, rinsed)
  • 1 tsp CUMIN powder
  • 1 tsp CHILI powder
  • 2 cups WATER, including drained tomato liquid
  • ½ cup CILANTRO (fresh, chopped)
  • 1 small CUCUMBER (diced, peeled if waxed)
  • 1 AVOCADO (seeded, peeled, diced)
  • 1/3 cup LIME JUICE (freshly squeezed)
  • SALT and PEPPER to taste

quinoa recipe
uncooked quinoa…looks like a grain, but it’s a seed.

How to Make Spanish Quinoa

  • Open the canned tomato and drain the tomato liquid into a measuring cup. Add enough water to equal 2 cups.
  • Heat oil on medium high. Saute garlic, 2/3 of the onion and 1/3 of the red pepper for 2-3 minutes. [the rest of the onion and red pepper will be added raw at the end.]
  • Add quinoa.
  • Stir in tomatoes with green chilies, kidney beans, cumin and chili powder and water/tomato juice mixture.  Bring the pot to a boil. Reduce to medium low and cook approx. 15 minutes. The liquid will be absorbed.
  • Remove from the heat and let sit for about 10 minutes and then fluff with a fork. Allow quinoa to cool some, you want it to be warm, not piping hot when you add the rest of the ingredients.
  • After quinoa has cooled some, add in the remaining onion and pepper pieces, and the chopped cilantro.  Mix. Then add cucumber and avocado and lime juice (or sub lemon juice). Toss gently.
  • And then serve.
  • Give this spicy Spanish quinoa recipe a try and let me know what you think, and…

Bon appétit!

For another tasty vegetarian recipe, try this Easy Eggplant Burger Recipe.

veggie burger recipe
Veggie burger recipe with blackened eggplant

Thanks for watching and subscribing –And hit those buttons below to share this recipe. I appreciate it!

Share and Enjoy !


Spaghetti Squash Recipe — Mediterranean Style

mediterrean spaghetti squash

I love this Mediterranean spaghetti squash recipe; its super tasty, and I can eat way too much without feeling too guilty. Watch the video and learn how to easily cook this squash. It’s a terrific ingredient; delicious and healthy. This Mediterranean style recipe is just one of many ways to use this versatile vegetable. Give it a try!

Spaghetti Squash Recipe Ingredients:

1 medium SPAGHETTI SQUASH
1 Tbsp OLIVE OIL
1 large ONION (chopped)
4-6 cloves GARLIC (finely chopped)
½ RED BELL PEPPER (sliced)
1 14 oz can ARTICHOKE HEARTS in water (chopped)
1 cup OLIVES, and olive juice to taste (chopped)
¾ to 1 cup PARMESAN CHEESE (shredded or grated)
1 tsp OREGANO
½ tsp THYME
1 tsp BASIL
SALT and PEPPER to taste

Mediterranean spaghetti squash recipe
Mediterranean spaghetti squash makes a great vegetarian meal

How to Make this Spaghetti Squash Recipe

Preheat oven to 350.
Cut spaghetti squash in half, lengthwise (a good, sharp knife will be nice).  Place each side, cut side down, in a shallow pan with about ¾ c water. Bake, uncovered for 45 minutes. Set aside to cool squash halves–enough to handle without causing death to the handler–but not completely cool.
You have time to chop up all your ingredients while the squash cooks.   For the artichoke, you may want to remove some of the outer, tougher leaves.
For each half, use a spoon to scrape out and discard the seeds and dark center strings.  Use a fork to scrape out the squash into ‘spaghetti-like’ strands.
Heat oil over medium high heat.  Saute onion and garlic 4-6 minutes.  Add bell pepper. Turn heat to low, stir and cover for 2-4 minutes.  Uncover, stir in spaghetti squash and remaining ingredients.  Cover and cook til all ingredients are warm, about 7-10 minutes
Add 1 Tbsp of olive juice and any other seasonings to taste. Serve warm. And a little toasted bread on the side won’t hurt.
Give this spaghetti squash recipe a try and let me know what you think, and…
Bon appétit!
And for another great spaghetti squash recipe, try this Spanish-style Spaghetti Squash.

spaghetti squash recipe
click image to check out this recipe

Thanks for watching, sharing, and subscribing to my videos, I appreciate it!

Share and Enjoy !


Try the Best Moroccan Chicken Stew Recipe

moroccan chicken tagine

Wow! This is super flavorful Moroccan chicken stew recipe. The combo of lemon and olive add a tangy richness to the broth and add a nice twist to your expectations of a chicken stew. Chef Bill cooked up this wonderful Chicken tagine and we had the camera running to catch it all. Give this delicious recipe a try and you will not be disappointed.

Ingredients for Chicken Stew:

2 1/2 lbs CHICKEN Pieces (skinned)
1 Tbsp OLIVE OIL
1 cup ONION (chopped)
2-3 cloves GARLIC (finely chopped)
1 cup CHICKEN BROTH
2 cups pitted WHOLE GREEN OLIVES
1 tsp ground CINNAMON
1/2 tsp CUMIN
1/2 inch GINGER (minced–or substitute 1/2 teaspoon ground ginger)
1-2 tsp LEMON ZEST
1/4 cup LEMON JUICE
1 Tbsp CILANTRO (chopped)
SALT and PEPPER to taste

chicken stew
Moroccan inspired Chicken Stew

How to Make This Chicken Tagine

Heat olive oil in a pot over high heat. Season chicken with salt and pepper and then place in pot. Brown chicken appox. 3 minutes each side and then remove from pot.
Add onion and garlic and saute in juices for a couple of minutes. Return chicken to pot and add Chicken Broth.
Add olives. Add cinnamon, cumin, and ginger. Stir, and bring pot to a boil. Reduce heat, cover, and simmer for 45 minutes.
After 45 minutes, uncover, turn chicken, and let cook 15 more minutes.
Using a slotted spoon, remove chicken and olives from pot and place in a serving dish. To the broth in the pot, add lemon juice, zest, and cilantro.
Serve the chicken and olives over rice or couscous and top with broth as desired. The olives are fantastic.
And the chicken is, too!
Give this terrific chicken stew a try and let me know what you think, and…
Bon Appétit!

And try this tasty Cornish Hen Recipe, too.

cornish game hen

Share and Enjoy !


Quick Salad Recipe Ideas for Spicy Foods

tomato cucumber salads

Two quick and cool salad recipe ideas: tomato and cucumber salad. These salads make perfect sides for a spicy meal. The tomato basil goes great with any blackened fish, and I love the creamy cucumber with spicy Indian fare. No cooking is required; simply combine the raw ingredients for an easy accompaniment to your favorite spicy dishes.

Tomato Basil Salad Recipe

Ingredients:
2 fresh TOMATOES (diced)
½ cup BASIL (chopped)
¼ cup FETA CHEESE (crumbled)
1 Tbsp OLIVE OIL
1 tsp BALSAMIC VINEGAR
SALT and PEPPER, to taste

Creamy Cucumber Salad Recipe

Ingredients:
2 SALAD CUCUMBERS (diced)
½ LEMON (juice and zest)
¼ cup GREEK YOGURT
1 tsp DILL
SALT and PEPPER, to taste

Give these salad ideas a go and let me know what you think, and bon appétit!

Want another salad idea? Try this Jicama Salad Recipe.
salad recipe

Share and Enjoy !


Beet Greens Recipe — Easy, healthy Dish!

beet greens

This is a super simple beet greens recipe. If you purchase beets with the greens intact, don’t throw those greens away! You can cook up a tasty dish using the beet greens (and if you don’t buy beets with the greens, then you need to make an adjustment in your shopping habit).

Beet Greens Recipe Ingredients:

1 bunch BEET GREENS
½ RED ONION (chopped)
1/3 RED BELL PEPPER (chopped)
2 cloves GARLIC (thinly sliced)
2 Tbsp OLIVE OIL
SALT (to taste)
PEPPER (to taste)
LEMON JUICE or VINEGAR (optional)

beet greens recipe
Buy beet roots with the greens for two great ingredients.

How to make Beet Greens

Remove the greens from the root and wash thoroughly because greens always seem to need a good washing, especially beet greens. I like to separate the green leaf from the thicker stem since the leafy greens will need far less time to cook. Heat 2 Tbsp of olive oil on med-med high heat. When the oil is hot, add onions and garlic.

I chop the onion big and the garlic thin. Stir for a minute and then add the red bell pepper and stir for a few minutes more. I use about a third of a red pepper, not too much, because it’s more for color than to influence the taste of the dish. The stems are a nice contrast to the dark greens.

Add a little water if needed, but not too much, the greens will release plenty of water.
Add the beet green stems. These will soften pretty fast, so a minute or two will be plenty of time Remember, overcooked veggies are a drag, man! Add the leafy greens.

Initially, I don’t mix the greens with the ingredients. I just cover the skillet for a minute or two and give the greens time to wilt. Remove the lid and stir, then add salt and pepper to taste and stir a minute more. That’s about when they’re ready. Camera Girl likes to add a splash of lemon, and vinegar goes great with greens, too.
Remove from heat and serve hot.

Beet greens make a great side, especially with chicken or a cheap cut of meat. I like to serve greens as a main dish over quinoa, which is a seed that acts like a grain and is an excellent source of protein. (Check current prices for quinoa on Amazon.)

These quick beet greens make a perfect side dish for all kinds of meals, especially quick cook dishes like fish and kielbasa, or if you want to be a little less carnivorous, pair these greens with a side of beans and top with a soft-yolk egg. The yolk makes a great sauce!

Give these healthy beet greens recipes a try and let me know what you think, and bon appétit!

For another beet dish, try this Roasted Beet and Quinoa Recipe.

how to cook quinoa
Quinoa with roasted root vegetables.

Thanks For Watching Our Recipe Videos!

Thanks for checking out our beet green recipes, and all of our recipes. Be sure and sign up for our mailing list so you’ll never miss a new recipe. Also click a button below and share the dishes with your friends. You can also follow Chef Buck on Youtube. We appreciate all the kind comments and support, and we’ll see you next time in the kitchen!

If you like what CG and I do, you can also support us on Patreon, or throw us a tip in our Paypal Tip Jar. We’ll happily enjoy a coffee on the road – Thanks! We appreciate all the support, and we’ll see you next time in the kitchen!

We include affiliate links for products on our website. So, if you make a purchase after clicking on our links, we may earn a commission which helps us produce more videos and drink more coffee :^) We participate in the Amazon Services LLC Associates Program, which is an affiliate advertising program. It provides a means for us to earn fees by linking to Amazon.com and affiliated sites, so we can make more videos.

Share and Enjoy !

Follow Me!