Lemon Meringue Pie Recipe … Best Pie Ever

lemon meringue pie

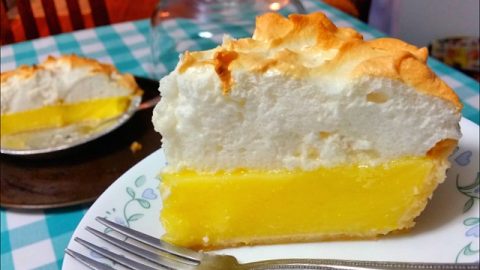
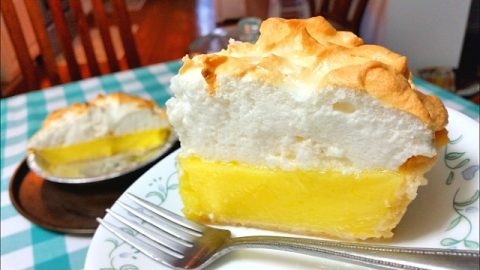
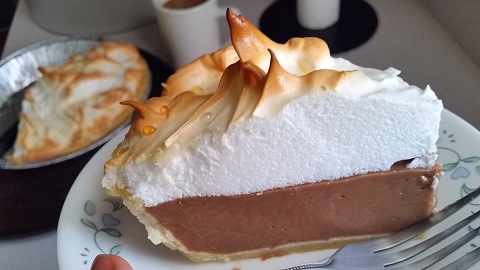
If you love fresh-baked homemade pie, you’ll want to try Mama Redbuck’s best lemon meringue pie recipe. The meringue recipe for this lemon pie is truly impressive and piles high and holds its shape and makes a great topping for any kind of pie you bake. My mom uses this perfect meringue recipe for chocolate cream pie as well, and I love it. This lemon pie is full of fresh lemon goodness, so give this dessert recipe a try, and you’ll be glad you did.

Lemon Meringue Pie Recipe

pie filling ingredients:
9″ DEEP DISH PIE CRUST
1 cup SUGAR
½ cup CORN STARCH …check cornstarch price on Amazon
¼ tsp SALT
2¼ cup WATER
1 Tbsp LEMON ZEST …current prices online for Kitchen Zesters
4 EGG YOLKS
3 Tbsp BUTTER
½ cup LEMON JUICE

meringue ingredients:
2 Tbsp SUGAR
1 Tbsp CORNSTARCH
½ cup WATER
4 EGG WHITES
1 tsp VANILLA
pinch of SALT
then another 4 Tbsp SUGAR

lemon meringue pie
Try Mama Redbuck’s best lemon meringue pie recipe ever!

How To Make Lemon Meringue Pie

Make your own pie crust from scratch, or to make the recipe super easy, just bake up a pre-made frozen pie crust.
Firstly, bake the crust and have it cooled and ready before beginning to make the pie filling.
Then break 4 eggs and separate the yolks from the whites in two separate bowls.
Zest two lemons, and then squeeze the juice to fill ½ cup.

To Make The Lemon Pie Filling:

In a saucepan, add the sugar, cornstarch, salt, and zest of two large lemons.
On medium heat, stir water into the saucepan and continue stirring the pan 15-20 minutes, or until the mixture thickens and begins to bubble.
Slowly spoon 5-6 Tbsp of the heated, thickened mixture in with the eggs yolks, stirring constantly so as not to cook the eggs.
Then stir the egg yolk mixture into the saucepan with the rest of the heated filling.
Stir in the lemon juice and butter and continue stirring until the butter is melted and the mixture is smooth.
Pour the filling into the pre-baked pie shell and set aside to cool.

To Make The Meringue:

In a small saucepan add 1 Tbsp of cornstarch, 2 Tbsp sugar, and ½ cup water.
Mix the three ingredients well and on the stovetop heat over medium heat, stirring until the mixture thickens and clears slightly.
Set saucepan aside to cool.
In a mixing bowl, beat the egg whites until frothy.  My mom uses a plain old hand held electric mixer.  You can check here for current hand mixer prices on Amazon if you need one for your kitchen.
Add in vanilla and a pinch of salt and beat again to mix.
Gradually beat in 4 Tbsp of sugar, 1 Tbsp at a time.
Then beat in the cooled cornstarch mixture.
Continue beating until stiff peaks form.

To Finish The Pie:

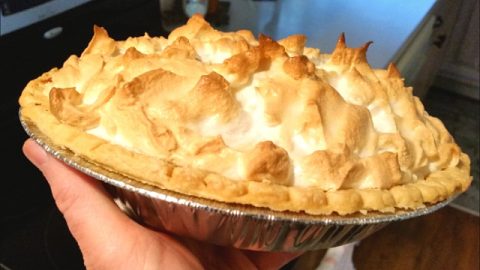
Take a spatula and spread the meringue evenly over the pie filling.
Lightly chop the top of the meringue to form peaks on top of the pie.
Slide the pie into an oven preheated to 400 degrees Fahrenheit and bake meringue for 10-12 minutes,
or until the top of the top of the meringue sets and shows a nice color.
Remove the pie from the oven and allow to cool completely before slicing.
When cooled, store pie in the refrigerator beneath a pie dome, do not wrap meringue in plastic wrap or foil.

lemon meringue pie
This meringue pie topping is tasty on all kinds of pies.

And that’s it! Give Mama Redbuck’s Lemon Meringue Pie Recipe a try and let us know what you think.

Or try Mama Redbuck’s step-by-step CHOCOLATE PIE RECIPE.

chocolate pie recipe


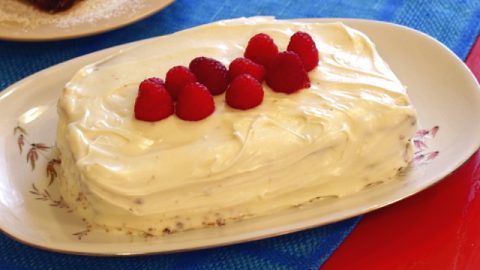
And for another simple dessert recipe idea, try this easy Chocolate Cake Recipe.

lemon meringue pie
Try this easy chocolate cake recipe…made with beans…wha!!!?

We appreciate you watching  our videos!

I hope you enjoy this lemon meringue pies recipe. Sign up for our mailing list so you’ll never miss a new recipe. Also click a button below and share the dishes with your friends. You can also follow Chef Buck on Youtube. We appreciate all the kind comments and support, and we’ll see you next time in the kitchen!

If you like what CG and I do, support us on Patreon, or throw us a tip in our Paypal Tip Jar. We’ll happily enjoy a coffee on the road – Thanks! We appreciate all the support, and we’ll see you next time in the kitchen!

We include affiliate links for products on our website. Making a purchase after clicking on our links and we may earn a commission which helps us produce more videos and drink more coffee :^) We participate in the Amazon Services LLC Associates Program, which is an affiliate advertising program. It provides a means for us to earn fees by linking to Amazon.com and affiliated sites, so we can make more videos.

Share and Enjoy !

Apple Crisp Recipe with Oats and Ginger

apple crisp

If you like homemade apple pie, then you’ll love this easy apple crisp recipe. And if you’re a fan of fresh ginger, adding minced ginger to the apple crisp will make it even better. This is a terrific dessert recipe that makes a whole heap of sweet apple goodness. The recipe makes plenty of servings to feed the family, and this dessert travels well, so it’s a perfect party treat to bring to a family gathering or function. Definitely top with ice cream or a rich creamy topping for best results.

What You Need to Make an Apple Crisp

apple part of recipe:
¼ cup BUTTER melted, browned
½ cup SUGAR
1 large EGG
1 tsp VANILLA
4-5 APPLES chopped
1 tsp CINNAMON
1-2 Tbsp minced GINGER

crisp part of recipe:
1¼ cups all-purpose FLOUR
3 cups QUICK OATS
1½ BROWN SUGAR
1 cup BUTTER
2 tsp CINNAMON
1 cup toasted PECANS
1 tsp minced GINGER

apple crisp
This apple crisp is like an apple pie, but heavier…which is better, right?

How to Make an Apple Crisp Recipe

  • In a sauce pan, melt ¼ cup BUTTER and simmer over med-low heat until butter begins to color, then set aside to cool.
  • In a large bowl, beat 1 EGG and ½ cup SUGAR together until smooth.
  • Add in VANILLA, cooled BUTTER and chopped APPLES. Mix well and set bowl aside.
  • In another bowl, combine FLOUR, 2 cups of the OATS (reserve 1 cup oats for later), CINNAMON, GINGER, BROWN SUGAR, and mix well.
  • Add in 1 cup unsoftened BUTTER and cut into the mixture until about pea-sized.
  • Add reserved OATS and toasted PECANS and mix.
  • Spread half the crisp mixture out in an ungreased 9 X 13 baking dish. Spread the apple mixture evenly over the bottom crisp layer. Then spread the remainder of the crisp mixture over the apple layer; this will create three layers in the dish: crisp/apple/crisp. If desired, dress the top of the crisp with a few apple slices for decoration.
  • Place into an oven preheated to 350 degrees Fahrenheit and bake for 45-50 minutes, until the top of the apple crisp is toasty.
  • Serve with ice cream or creamy whipped topping.

If you need a decent oven-safe baking dish, check out some current pricing for a Pyrex dish on Amazon.

And that’s it! Give this Apple Crisp Recipe a try and let us know what you think. And for another knock-out recipe idea, check out my mama’s Lemon Meringue Pie Recipe.

lemon meringue pie
This meringue pie topping is tasty on all kinds of pies.

Thanks for checking our recipe videos out. If you like what you see, click a button or two below and share the apple crisp recipe with your friends and family. I appreciate it!
–Chef Buck

Share and Enjoy !


Creme Fraiche – Great Homemade Sour Cream

creme fraiche recipe

This Crème Fraîche recipe is like a homemade sour cream but less tangy, and it’s easy to make, just heavy cream mixed with live cultures. Crème Fraîche is easy to make and can be 3-4 times cheaper than store-bought crème fraîche. It’s is a thickened cream, similar in consistency to sour cream, but without the sharp tanginess. 

Homemade Crème Fraîche Recipe

All you need to make crème fraîche is
HEAVY CREAM also called Heavy Whipping Cream
YOGURT or BUTTERMILK with live cultures A crème fraîche made with buttermilk has more tang.

A Crème Fraîche recipe practically makes itself. All you have to do is introduce the two parties, put them together in a warm environment around 70F, and then let them hang out for 12-24 hours. How long it takes for the cream to thicken will mostly depend on the room temperature; if it’s a bit warmer or cooler in the room, it might take a bit shorter or longer time to make crème fraîche.

I generally make 16oz of crème fraîche at a time. This is a convenient size for heavy whipping cream. Heavy whipping cream and heavy cream are similarly used names for the exact same product, so whichever label you buy will work fine. Heavy cream is cream with a milkfat content greater than 35%, by contrast, half and half is ½ milk and ½ cream, with a milkfat content around 12%. This higher fat content allows crème fraîche be added to simmering dishes without curdling, adding creaminess to soups and sauces, eggs, etc..

In a jar, combine 16oz of heavy cream with 2 Tbsp of cultured buttermilk or yogurt. It is essential that the yogurt or buttermilk contain live cultures, since this is the agent that will allow the heavy cream to thicken.

Need a jar? Check current prices for Mason Jars on Amazon.

Stir the ingredients together, and then top the jar with a loose fitting lid or mesh, a coffee filter works great. Set jar aside and allow to rest at room temperature for 12-24 hours.
The cream will thicken over time, stir occasionally if desired. Once the cream thickens to the consistency of yogurt, place the crème fraîche in the refrigerator. It will continue to thicken and
will keep 8 to 10 days in the refrigerator.

creme fraiche recipe
Delicious crème fraîche can be made at home simply and inexpensively.

What can you do with Crème Fraîche?

It makes an ideal topping for desserts; it is rich and velvety smooth and can transform whatever it tops into a dessert, especially fruit. Or it can add creaminess to savory dishes as well. Crème fraîche has a high fat content, so it can be added into dishes as they cook and the cream will resist curdling. Add crème fraîche to soups and sauces to create a smooth, creamy richness. Crème fraîche can be used in any way you might use a whipped topping or sour cream, but the simplicity and richness of this thickened cream can elevate a dish to something special.

Love Mexican food? You can use this recipe to make a fresh, delicious Mexican crema that is better than what you buy in the stores. Mexican crema is basically crème fraîche with a bit of lime juice and salt added after it has sat in the frig for a day. And for an extra tang, use cultured buttermilk instead of the yogurt. What you will get is thick, creamy goodness that is a great topping for chilaquiles, pozole, tacos …. the list is endless!

My Favorite Ways To Use Crème Fraîche

Use crème fraîche as a fruit topping. It turns fruit into dessert. An actual dessert if you top with powdered sugar as well.
Saute apples in butter and cinnamon and then top with crème fraîche. Holy cow it’s good.
Or just drop a dollop of crème fraîche on pie or cake.
Stir crème fraîche into pasta to add a decadent creaminess. Mac ‘n cheese!
Stir crème fraîche into soups and sauces, it will add creaminess without curdling.
Top oatmeal with crème fraîche to turn a bland breakfast into a better breakfast.
Add crème fraîche to scrambled eggs for the creamiest eggs ever.

If you’ve never tried crème fraîche then give it a go. And if you’ve only previously bought it from the store, definitely try this homemade crème fraîche recipe.

Here’s some desserts that would look nice under a dollop of crème fraîche!
Try a homemade Fruit Cobbler Recipe.

creme fraiche
homemade fruit cobbler

Or try crème fraîche on a fancy French Baked Pear Recipe.

pear salad

Thanks for checking out the crème fraîche recipe. If you liked the video, then click a button or two below and share it with your friends.

Thanks for watching our recipe videos!

We include affiliate links for products on our website, so if you make a purchase after clicking on our links, we may earn a commission which helps us produce more videos and drink more coffee :^) We participate in the Amazon Services LLC Associates Program, which is an affiliate advertising program providing a means for us to earn fees by linking to Amazon.com and affiliated sites, so we can make more videos.

Share and Enjoy !

Candied Pecans – Easy Pecan Candy Treats

candied pecans

You can make a super simple and tasty candied pecan treat. This sugar pecan recipe
is an easy way to impress friends and family. My mom gives tins of pecan candy out
as gifts for the holidays, and it’s a sure hit for any party or get-together.
CG especially likes these nuts as ice cream toppings.

What You Need to Make Candied Pecans

1 lb. PECANS
1 cup SUGAR
1 tsp CINNAMON
½ tsp SALT
1 EGG WHITE
1 Tbsp WATER

candied pecans
Place pecans on a large ungreased baking sheet and bake 30 minutes at 300 degrees F. Turn pecans every 10 minutes while baking.

How to make Pecan Candies

Buy a pound of pecan halves. When buying, be sure to choose pecans that are in good shape
…a bag of broken and busted up pecans doesn’t look as pretty in a dish.  Pecans can be pretty pricey, but check here for current pecan prices on Amazon.           

In a bowl, combine the cinnamon, sugar, and salt, and then mix well.
Set that bowl aside, and in another bowl, combine 1 egg white and 1 Tbsp. of water.
Whisk the egg white and water into a frothy foam.
Add the pecan halves into the egg white mix.
By hand, mix the pecans until coated thoroughly.
Once the pecans are coated completely, transfer then into the dry mix bowl. Still using your hand,
mix the pecans in the cinnamon sugar until they are coated well.

On an ungreased baking sheet, spread the coated pecans into a single layer.
Place the baking sheet in an oven preheated to 300 degrees Fahrenheit. You can check here for current prices for baking sheets on Amazon.

Remove the baking sheet every 10 minutes to give the pecans a stir and spread them out again; this will let the pecans bake evenly and keep from sticking together.

After a total of 30 minutes baking time, remove the pecans for a final stir, then set aside to cool.
That’s it. As soon as they’re cool enough to eat, then eat away.
Be sure to allow the pecans to cool completely before sealing in a container.

candied pecans
My mom sends out tins of candied pecans to her favorite children, which sometimes includes me.

These sugar pecan candies make a great holiday treat or anytime treat. My mom makes them all the time for family gatherings and they’re
a sure fire hit.

Give this candied pecans recipe a try and let me know what you think, and bon appétit!

For another quick tasty treat idea, try this classic Peanut Butter Candy Recipe.

peanut butter candy recipe

Thanks for checking out this candied pecans recipe, and all of our recipe videos. Be sure and sign up for our mailing list and never miss a new Chef Buck cooking video, and also click a button below and share the dishes with your friends. We appreciate all the kind comments and support, and we’ll see you next time in the kitchen!
–Chef Buck

Thanks for watching our recipe videos!

We include affiliate links for products on our website, so if you make a purchase after clicking on our links, we may earn a commission which helps us produce more videos and drink more coffee :^) We participate in the Amazon Services LLC Associates Program, which is an affiliate advertising program providing a means for us to earn fees by linking to Amazon.com and affiliated sites, so we can make more videos.

Share and Enjoy !

Cream Cheese Frosting Recipe for Cakes…and cupcakes

cream cheese frosting recipe

Need an easy, super tasty cake frosting? This cake frosting recipe is ready in minutes and makes the perfect icing for cake (and cupcake!) perfection! It’s an especially great balance for a chocolate cake. You can make this frosting as thick or thin as you like, just add more powdered sugar to thicken, and more milk to thin, but add the milk just a wee little at a time–it doesn’t take much.

Cream Cheese Frosting Recipe Ingredients:

8oz CREAM CHEESE, softened
¼ cup unsalted BUTTER, softened
2 cups POWDERED SUGAR
1 tsp VANILLA EXTRACT
1 Tbsp MILK

cream cheese frosting recipe
Make this tasty frosting super quick!

Cream Cheese Frosting Recipe Directions:

About an hour ahead of time, set out the cream cheese and butter to soften.
In a bowl, combine cream cheese, butter, and vanilla extract and blend with hand mixer.
Once ingredients begin to come together, add in the powdered sugar. Add the sugar a bit at a time to avoid a sugary blending mess.
Mix until the frosting is smooth. To thin the frosting add a small amount of milk–no more than a Tablespoon at a time! For a thicker frosting,
just add more powdered sugar.
And that’s it.
Spread on your dessert and eat away!

cream cheese frosting recipe
Add milk to thin, or more powdered sugar to thicken the frosting.

Give this cream cheese frosting recipe a go and let me know what you think, and bon appétit!

And for more tasty dessert ideas, check out these tasty treats:

baked pears
click the pic for more desserts!

“Life is uncertain. Eat dessert first.” ~Ernestine Ulmer
“If you want to make an apple pie from scratch, you must first create the universe.” ~Carl Sagan
“Seize the moment. Remember all those women on the Titanic who waved off the dessert cart.” ~Erma Bombeck

Share and Enjoy !


Baked Pears Recipe … An Easy Dessert Idea!

baked pears

This Ginger Baked Pears recipe is a simple and delicious dessert idea. It’s easy to prep and put together. Just throw it together, throw it in the oven, and forget about it…well, almost forget about it–you’ll need to baste the pears a couple of times while they bake. This baked pear dish will be a crowd pleaser for any fancy meal.

What you need for Baked Pears

3-4 ANJOU PEARS (or bosc pears)
BUTTER for greasing baking dish
1½ cup HEAVY CREAM
¼ cup BAKER’S SUGAR (superfine ground sugar)
½ tsp CINNAMON
½ tsp VANILLA EXTRACT
1 heaping Tbsp grated GINGER
ORANGE ZEST
optional:
top with toasted nuts
and whipped cream!

baked pears
Use firm pears for baking, ideally and anjou or bosc pear.

How to make this Baked Pears Recipe

Use a firm pear ideal for baking, like an anjou or bosc pear.
Peel the pears and slice in half lengthwise and remove the core–use 3-4 pears, depending on need and the size of your baking dish. If you need a decent oven-safe baking dish, check out some current pricing for a Pyrex dish on Amazon.
Lightly butter the bottom of your baking dish and place the pears sliced side down.

In a bowl, combine the cream, sugar (use superfine baker’s sugar, or regular sugar that has been ground in a food processor), cinnamon, vanilla, ginger, and orange zest. Whisk ingredients together and pour over the pears. The top half of the pears should still be sticking out of the cream.

Slide the dish into an oven preheated to 375 degrees Fahrenheit.
Remove the dish every 15-20 minutes and baste the tops of the pears with the cream.
Cook 45-55 minutes or until the pear tops are a golden brown.

baked pears
Baked pears with Cream Sauce!

The cream will be thin when hot, but as it cools it will thicken. Serve pears with a topping of the cream sauce.
For a crunch, add toasted nuts–and a little whipped cream on top would be quite decadent.
I threw maraschino cherries on top for color, but a little more orange zest on top would work, too.
Give this Baked Pears recipe a try and let me know what you think!

And for another tasty dessert, check out this Easy Apple Crisp Recipe.

Thanks for Watching our Baked Pear Recipe!

Click a button below and share the dishes with your friends. You can also follow Chef Buck on Youtube. We appreciate all the kind comments and support, and we’ll see you next time in the kitchen!

If you like what CG and I do, support us on Patreon, or throw us a tip in our Paypal Tip Jar. We’ll happily enjoy a coffee on the road – Thanks! We appreciate all the support, and we’ll see you next time in the kitchen!

We include affiliate links for products on our website. Making a purchase after clicking on our links and we may earn a commission which helps us produce more videos and drink more coffee :^) We participate in the Amazon Services LLC Associates Program, which is an affiliate advertising program. It provides a means for us to earn fees by linking to Amazon.com and affiliated sites, so we can make more videos.

Share and Enjoy !

Whipped Cream -how to make dessert topping

whipped cream

Give up the cool whip, ’cause whipped cream is super easy to make at home. If you’ve got heavy whipping cream and a little powdered sugar, you can whip up your own topping –and if you’ve got some leftover biscuits, then you’re just one step away from a fantastic dessert –that one step being fresh fruit– ideally strawberries; Biscuits topped with strawberries and homemade whipped cream make a helluva tasty treat!

Homemade Whipped Cream Recipe Ingredients:

1 cup HEAVY WHIPPING CREAM
½ to 1 tsp VANILLA EXTRACT (to taste, really…it’s semi-optional, but do it)
1 Tbsp POWDERED SUGAR

whipped cream
Heavy Whipping Cream

Homemade whipped Cream is best made in a chilled, metal bowl–and if you’re using a hand mixer–chill the mixing paddles as well! –for scientific reasons involving temperature transference and passive ambient cooling, chilling these tools will assist in the “whippification”.
Into the chilled bowl, add cream.
Using a smoothie or hand mixer–or even a hand whisk!–whip the cream until it begins to thicken (but before it begins to peak). Once the cream begins to thicken, add in the powdered sugar and the vanilla.
Continue whipping until the cream thickens and forms “peaks”, i.e., turns into whipped cream.
At this point, it’s ready to use (if you refrigerate the topping, the cream will eventually break down and have to be re-whipped).

whipped cream
Strawberry Shortcake knock-off using leftover biscuits

Strawberry Biscuit Dessert Directions:

We like to pair this whipped topping with leftover biscuits to create a faux strawberry shortcake:
Take 1lb. of fresh strawberries and slice them into a bowl, add 1 to 2 Tbsp Sugar and mix. Refrigerate for 2-3 hours or overnight.
Slice biscuits in half and toast under a broiler.
Spoon the chilled strawberries over the toasted biscuits and top with homemade whipped topping.
Boom. It’s perfecto.

Give this homemade whipped Cream and strawberry biscuit dessert recipe a go and let me know what you think, and bon appétit!

And for a quick biscuit tutorial, check out the Buttermilk Biscuit Recipe.

Buttermilk Biscuit Recipe
Easy Buttermilk Biscuit Recipe

Share and Enjoy !


Cashew Coconut Energy Balls — Power Bars in a Ball!

Cashew Coconut energy Balls

Cashew Coconut Lemon Bites! or Balls! A quick energy bar in a ball snack recipe! Very easy to make, and super flavorful.  These power balls are like a mini desert, but full of semi-healthy stuff that will put a little pep in your step.  And you get the extra energy without the drastic sugar crash.

Cashew Coconut Energy Balls Ingredients:

2 cups raw CASHEWS
1 cup pitted DATES
1 Tbsp COCONUT OIL
1 Tbsp MAPLE SYRUP
1 tsp VANILLA EXTRACT
¼ tsp SALT
½ cup SHREDDED COCONUT
juice and zest of 1 small LEMON

energy snack
power snack in a yummy treat!

Cashew Coconut Energy Balls Directions:

You’ll need a food processor for this recipe. In fact, you can do the entire recipe in a food processor.  However, my processor is pretty small, so I just use it for chopping up the cashews and dates.  I do the rest of the mixing in another bowl.

Place the raw cashews in a food processor and chop for a few moments. Your cashews should be chopped fine. Then, add pitted dates and chop to same size.
Add coconut oil, maple syrup, vanilla extract, and salt to the cashew/date mixture.
Zest one small lemon. Now, mince the zest and add it to the mixture.
Slice the lemon and squeeze all of the juice into the mix.
Mix thoroughly.
Shape the mixture into ball shapes. Make whatever size you like for snacking! I think grape size is best.
Next, roll the balls in shredded coconut to coat the outside.
And that’s it! Snack away!
The balls can be stored in the fridge until desired.  In fact, they taste best right out of the fridge!

This super easy recipe makes a tasty treat. And it’s a great alternative to sugary candy bars and ice cream.

Keep Checking Back For New Recipe Ideas:

So, give this Cashew Coconut Energy Balls recipe a try and let me know what you think, and bon appétit!

And for another tasty, sweet treat, try this semi-healthy and awesome BERRY COBBLER RECIPE

blackberry cobbler
blackberry cobbler

Share and Enjoy !

Scone Recipe — Pecan Maple Biscuit Treat

scone recipe

This is a delicious pecan maple scone recipe, but not a good idea for folks with sugar/carb addictions and questionable degrees of willpower…which is pretty much everyone.

The only reason I’m even putting this up is because The Devil assured me that if I did I would one day win an Oscar and live in a luxury beach house in Malibu (which IS going to happen ’cause I was smart enough to get the deal in writing).

Scone Recipe Ingredients

Scones:
2 cups FLOUR
1/2 cup SUGAR
1 Tbsp BAKING POWDER
1/2 tsp SALT
5 Tbsp BUTTER
1/2 cup PECANS (chopped)
1/4 cup RAISINS
1 cup SOUR CREAM
1/4 cup MAPLE SYRUP
1 tsp VANILLA

Icing for Scone Recipe

1 cup POWDERED SUGAR
splash of WATER
2 Tbsp MAPLE SYRUP

scone recipe
best scone ever…really

In a large bowl, combine flour, sugar, baking powder, and salt. Cut butter into flour mixture (freezing the butter and grating it into the mix is an easy trick to get this done). Add pecans and raisins into the mix.

In a separate bowl, combine sour cream, vanilla, and 1/4 cup maple syrup. Whisk together until smooth.
Pour the sour cream mixture into the flour mix and gently turn for a few minutes until the flour begins to form into clumps. Most of the loose flour will adhere into these clumps, but it’s okay if all of it doesn’t.

On a sheet of parchment paper or floured surface, pour the contents of the bowl. Press the clumps together into a mound–it’ll want to brake apart somewhat, but that’s okay. Flatten the mix into a circular cookie shape about 1 inch thick and cut like a pizza into 8 slices. Check here for current pricing for parchment paper on Amazon.

Arrange onto a flat baking sheet and bake in a 400 degree F oven for 20-25 minutes, until baked through and golden brown.

While scones cool, add powdered sugar into a small bowl. Add 1-2 Tbsp of warm tap water–add water slowly and whisk into a syrup; be conservative, it’s easy to add too much water. Then whisk 2 Tbsp of maple syrup into the powdered sugar syrup. Why? I don’t know, just crazy.

Drizzle the syrup glaze over the scones and allow the icing to harden (approx 10-15 min).

And there you go…a very sweet and healthy-free combo of questionable ingredients combined to put on the pounds and take potentially vibrant years off of the back-end of your life.
But this scone recipe is delicious.
Enjoy, if possible.
I usually really like the first two, and then I begin to question my motivations.

For a less decadent, less lethal treat, try this Homemade Biscotti Recipe.

biscotti recipe
Adding a little cocoa powder and ground coffee makes a nice biscotti twist.

Thanks For Watching Our Scone Recipe!

Thanks for checking out our scones, and all of our recipes. Be sure and sign up for our mailing list so you’ll never miss a new recipe. Also click a button below and share the dishes with your friends. You can also follow Chef Buck on Youtube. We appreciate all the kind comments and support, and we’ll see you next time in the kitchen!

If you like what CG and I do, you can also support us on Patreon, or throw us a tip in our Paypal Tip Jar. We’ll happily enjoy a coffee on the road – Thanks! We appreciate all the support, and we’ll see you next time in the kitchen!

We include affiliate links for products on our website. So, if you make a purchase after clicking on our links, we may earn a commission which helps us produce more videos and drink more coffee :^) We participate in the Amazon Services LLC Associates Program, which is an affiliate advertising program. It provides a means for us to earn fees by linking to Amazon.com and affiliated sites, so we can make more videos.

Share and Enjoy !

Chocolate Candy Recipe – Quick Party Treats

chocolate salty treats

This is a quick chocolate candy recipe treat idea for lazy hosts and lazier guests. Need to provide a tasty dish for a party, but don’t have the time? Need it to look homemade even though you don’t want to actually make anything? If you’re going to a party or having a party, this is an easy dish to whip together with almost zero effort. The most annoying part is unwrapping the candies.

To make this chocolate candy recipe you will need:
MINI PRETZELS
MINI PEANUT BUTTER CUPS
CHOCOLATE CARAMELS (we use Rolos)
PECAN HALVES

Preheat oven to 300 degrees Fahrenheit.
Arrange pretzels on a baking sheet (putting wax paper underneath will make cleanup a breeze). Top each pretzel with a peanut butter cup or chocolate caramel (if it was just me, I’d use only peanut butter cups, but Camera Girl likes the caramels, and it makes for a better variety if you’re making the dish for guests). Place baking sheet in oven for 4 minutes to soften chocolates. Remove baking sheet from oven and top softened chocolates with pecan halves. For variety, top some of the chocolates with pretzels. Allow chocolate to cool before removing treats from baking sheet.
That’s it! Pretzels, chocolate, and nuts…who doesn’t like that? It’s easy peezey and a great treat to serve when you don’t feel like making a fuss.
So give this quick chocolate candy recipe treat a try and let me know what you think, and…
Bon appétit!

(I like pretzels on the bottom and top with a peanut butter cup in between. Camera girl likes the pretzel on the bottom with pecan half on top and a chocolate caramel in between; she says it’s like one of those “turtle” candies. Pecans are okay, but they’re too expensive…pretzels and peanut butter cups are all you really need, but get the rest if you’re tryin’ to be fancy pants.)

And for another yummy dessert, try these Caramel Oatmeal Squares.
caramel oatmeal squares

Share and Enjoy !


Follow Me!