Dash Egg Cooker Review and 3 ways to make Eggs

dash egg cooker

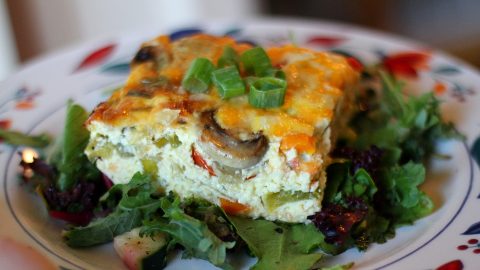
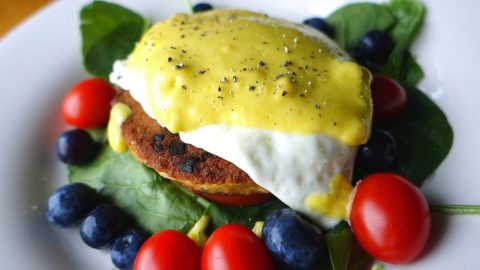
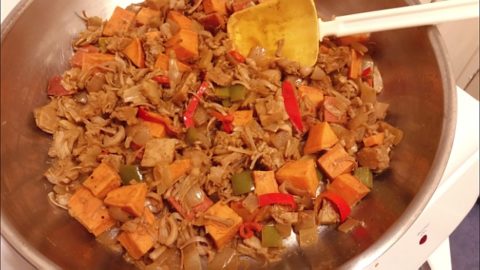
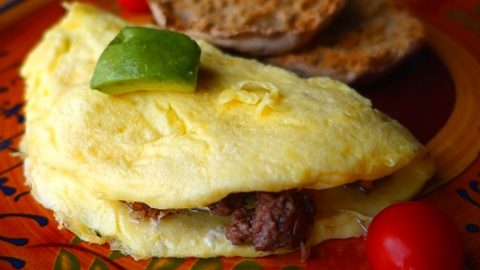
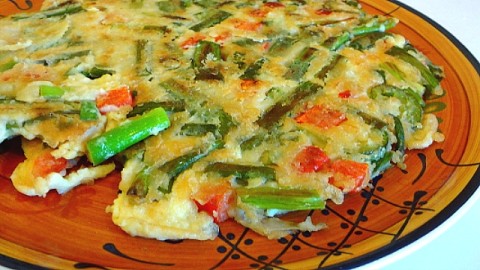
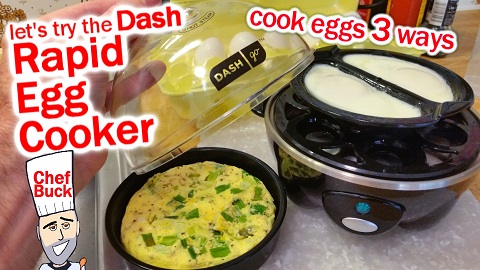
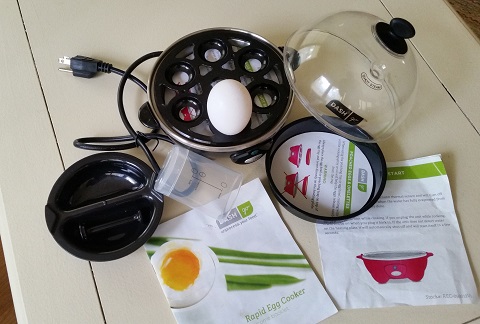
We tried the Dash Egg Cooker, which is basically an egg steamer. The rapid egg cooker model we reviewed can “boil” 1-6 eggs at a time. In addition to cooking soft, medium, or hard-boiled eggs, you can also make an easy omelet, which was really more like an egg scramble. The best feature of the egg cooker was its use as an egg poacher, since it can poach two perfect eggs faster than you can boil a pot of water.

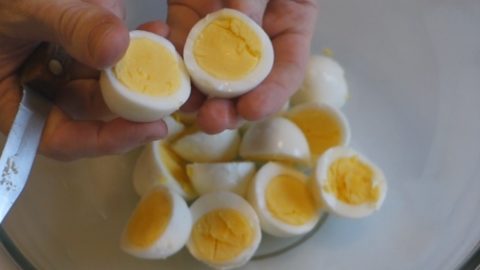
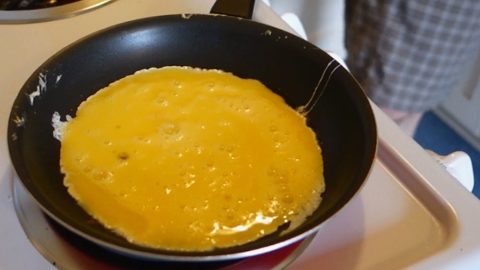
Trying Out the Egg Cooker for the 1st Time

The Dash Go Egg Cooker model I tried didn’t have an alarm, but the newer model Dash egg cookers do, and they are also rated pretty well over on Amazon. Check out the current prices for a Rapid Egg Cooker on Amazon.

dash egg cooker
Complete Egg Cooker includes 3 distinct trays for different egg styles

Why buy this egg cooker?

  • Good for a quick egg dish for 1 to 2 people.
  • Great for poaching 2 eggs pretty fast.
  • Sturdy build for a kitchen gadget, and not too expensive.
  • No muss, no fuss boiled eggs soft, medium, or hard.
  • Easy clean up.

Why you don’t need this egg cooker:

  • Not practical for preparing eggs for more than 2 people at a time.
  • The omelets are more like egg scrambles.
  • Other than poaching 2 eggs, it’s not particularly “rapid”.
  • How hard is it to cook eggs? If you currently have a stove, a pot, and a pan, then you can already cook eggs any way you want…so do you need a new gadget taking up space in the kitchen?
dash egg cooker
Well constructed and pretty cheap last time I looked on amazon.

Cleaning Up the Dash Egg Cooker

It’s a pretty hassle free clean up. The base of the Dash Egg Cooker is electric and not safe to put in a dishwasher or submerge under water. You might get some stains on the heating pad from egg residue, but just add a splash of vinegar and it wipes right off. The plastic omelet tray, poaching tray, boiled-egg holder, and steaming dome are all dishwasher and sink safe, so wash accordingly.

Dash Egg Cooker Conclusion

I’m not a kitchen gadget guy, because I’d rather have free counter and cabinet space, but overall I have to give the Dash egg cooker a thumbs up. It’s not TOO big, it’s not overly junky in its construction, and it does a good job cooking eggs. If you like gadgets, then this device is not a total rip-off. I can see where it would be useful to someone wanting a quick egg without a lot of hassle. Here’s our affiliate link if you want to check out the egg cooker on Amazon.

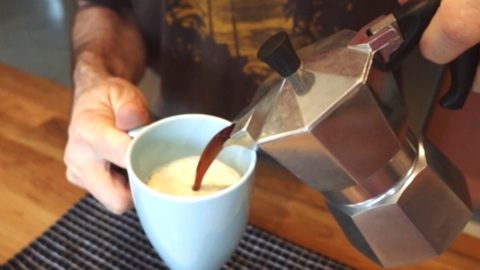
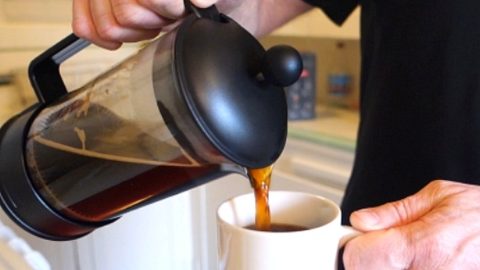
And for a kitchen gadget that is a definite MUST-HAVE, see how easy it is to make Perfect Coffee with a French Press.

pour over coffee

Thanks for all the support!

We include affiliate links for products. If you make a purchase after clicking on our links, we may earn a commission which helps us produce more videos and drink more coffee.
We are a participant in the Amazon Services LLC Associates Program, an affiliate advertising program designed to provide a means for us to earn fees by linking to Amazon.com and affiliated sites.

Share and Enjoy !

Skillet Asparagus Quick and Healthy Recipe

easy asparagus

Try this easy skillet asparagus recipe. Asparagus is super healthy and quick to prepare, in fact, the quicker the better! Asparagus is best not overcooked, and even served plain and simple, it just tastes terrific.

What You Need for this Asparagus Recipe

1 lb. ASPARAGUS
SALT and BLACK PEPPER to taste
A little OIL for cooking
optional:
3-4 cloves GARLIC (finely chopped)
1 small ONION (chopped)

How to Cook a Quick Skillet Asparagus

When buying asparagus, thin is better than thick.  Choose firm spears. Avoid asparagus that has a wrinkled skin, or tips that are wet and greasy looking.

Rinse and drain asparagus stalks, then snap off the bottoms of the spears to leave only the tenderest parts of the asparagus.

Heat oil on medium heat in a skillet.

If you need a skillet, you can check current prices on Amazon for a versatile cast iron skillet.

easy-asparagus

Add asparagus, spreading the spears out so that they lay flat on the bottom of the pan.  Leave alone for a couple of minutes to sear, then turn and sear all around. Add salt and pepper to taste.

Cook for 5 to 6 minutes, or until desired doneness, but asparagus tastes great if it’s not overcooked. Soggy asparagus = sad asparagus, right?

You can serve skillet asparagus as a side cooked simply with salt and pepper, or jazz it up with a little sauteed onion and garlic.  Remove the cooked spears from the skillet and set aside. Add a wee bit more oil to the pan, and then add one small, chopped onion.  Saute onion for 3-4 minutes, then add finely chopped garlic and saute for 1 minute more.

Return the asparagus to the skillet and toss with the onion garlic mix, then serve hot.

Give this easy asparagus recipe a try and let me know what you think. And for another tasty take on healthy asparagus, try this Indian inspired Asparagus Curry Recipe.

asparagus curry
Easy Asparagus Curry Recipe

Thanks for all the support!  

We include affiliate links for products. If you make a purchase after clicking on our links, we may earn a commission which helps us produce more videos and drink more coffee.

We are a participant in the Amazon Services LLC Associates Program, an affiliate advertising program designed to provide a means for us to earn fees by linking to Amazon.com and affiliated sites.


Share and Enjoy !

Boneless Pork Chops – Super Easy Recipe

boneless pork chops

This boneless pork chops recipe is super fast and flavorful and a perfect dish to prepare when you don’t have a ton of time to spend in the kitchen. If you’ve ever wondered the best way to cook up a thick pork chop, then give this technique a try, you’ll end up with a juicy delicious pork chop every time.

What You Need to Cook Boneless Pork Chops

BONELESS PORK LOIN CHOPS
SEASONING to taste…but use lots of it!
SALT and BLACK PEPPER for sure
And I also like:
GARLIC POWDER
ONION POWDER
PAPRIKA
HOT PEPPER
….but use whatever you prefer
OIL for cooking (not too much)

How to Cook a Boneless Pork Loin Chop

Remove the boneless pork loin chops from the fridge about 30 minutes before cooking, this will allow the pork to cook more evenly.

Preheat your oven to 350 degrees Fahrenheit.

Season both sides of chops before cooking–and don’t be timid with the seasoning–it’ll make all the difference! I often use just salt and pepper (black pepper AND cayenne), but experiment with your favorite seasonings, too.

Heat the oil in a skillet. The skillet should be suitable for cooking on the stove top and in the oven. Check current prices on Amazon for a Cast Iron Skillet like the one used in the recipe video.

When the skillet is hot enough, add the boneless pork chops. The chops should sizzle and begin to cook immediately because you want to sear the pork and seal in the flavor.

boneless pork chops

Cook chops 3-4 minutes on one side and then turn. This is for chops approx. 1″ thick, so adjust cooking times according to the size of the chop you use, but definitely use a thick chop for this cooking technique.

Cook chops 2-3 minutes on second side, then remove skillet from stove top and slide skillet into oven preheated to 350 degrees Fahrenheit and cook another 5-7 minutes, or until desired doneness.

Once done, remove the chops from the oven and then from the hot skillet. Place chops on a plate to rest the meat for 5-10 minutes. Chops hot from the oven are still cooking inside, and the juices are thin, so avoid cutting the chops too soon, or juices and flavor will be lost from inside the meat.

That’s all there is to cooking up a super quick and flavorful boneless pork loin chop. These pork chops make a great entree when you want a hearty meal, but don’t have a lot of free time for making dinner.

Give these boneless pork chops try and let me know what you think, and for a beefy version of this recipe, take a peek at How to Cook a Perfect Steak.

american kobe top sirloin steak
Cook a thick steak filet on high heat. Sear the outside for awesome taste and color, and then finish to desired doneness in the oven.

Thanks for checking out this pork chop recipe, and be sure and sign up for our mailing list so you’ll never miss a Chef Buck cooking video, and also click a button below and share the dishes with your friends.  We appreciate all the kind comments and support, and we’ll see you next time in the kitchen!

We appreciate you watching our videos…Thanks for the support!

We include affiliate links for products on our website. So, if you make a purchase after clicking on our links, we may earn a commission. That helps us produce more videos and drink more coffee :^)  We are a participant in the Amazon Services LLC Associates Program.It is an affiliate advertising program that provides a means for us to earn fees by linking to Amazon.com and affiliated sites.

Share and Enjoy !

Best Cheeseburger Pie Recipe

cheeseburger pie recipe

Do you like cheeseburgers? Do you like pie? Then I have great news for you, because this cheeseburger pie recipe tastes terrific, and it’s just like eating a cheeseburger, but way fancier, so now you can serve cheeseburgers for dinner even if you have a high-powered CEO over as a dinner guest.

Ingredients for a Cheeseburger Pie Recipe

1 lb. GROUND BEEF
½ cup chopped ONION
3 EGGS
½ cup MILK
¼ cup softened CREAM CHEESE
1½ cup freshly shredded CHEESE
1-2 Tbsp chopped PICKLES
HAMBURGER PICKLE slices to top the pie
1 tsp WORCESTERSHIRE SAUCE
Squeezable YELLOW MUSTARD to taste
½ tsp SALT (or to taste)
½ tsp BLACK PEPPER
1 tsp GARLIC POWDER
9” DEEP DISH PIE CRUST

How to Make a Cheeseburger Pie

Preheat oven to 375 degrees Fahrenheit. Thaw a 9” deep dish pie crust and then score along the bottom and sides of the crust with a fork. Partially bake 10-12 minutes until the crust begins to lightly color, then remove crust from the oven to cool.

In a skillet, brown the ground beef. Add in the chopped onion and continue to cook. Add salt, pepper, garlic powder, and other seasonings, if desired. Once onions begin to soften, drain the skillet of any excess fat. Return the skillet to the heat, and stir in the cream cheese and milk. Turn off the heat.

In a bowl, beat the eggs. Add cheese, Worcestershire sauce, and the chopped pickles, and mix well.

cheeseburger pie recipe

Add the beaten egg mixture into the cooled pie crust, then add and level the skillet beef and onion mixture into the crust, then top with a swirling squeeze of yellow mustard, to taste.  Top the pie with the sliced pickles and press mix down with a spoon to level.

Bake pie in the oven at 375 degrees Fahrenheit for 30-35 minutes. If desired, top with an additional sprinkle of cheddar cheese for the final minute in the oven. Remove and let stand for 10-15 minutes before slicing.

cheeseburger pie recipe

Give this cheeseburger pie a try and let me know what you think, and for another savory pie recipe, take a look at this Chicken Pecan Pie Recipe which is simply incredible–trust me!

chicken pecan quiche

Thanks for checking out this fancy version of a simple cheeseburger recipe, and be sure and sign up for our mailing list so you’ll never miss a Chef Buck cooking video, and also click a button below and share the dishes with your friends.  We appreciate all the kind comments and support, and we’ll see you next time in the kitchen!

If you’re just getting into home cooking and your kitchen is lacking in the pots and pan department, you can check out some current Complete Cookware Set prices on Amazon.

Thanks for Watching our Videos!

Thanks for checking out this cheeseburger pie recipe, and all of our recipes. Sign up for our mailing list so you’ll never miss a new recipe. Also click a button below and share the dishes with your friends. You can also follow Chef Buck on Youtube. We appreciate all the kind comments and support, and we’ll see you next time in the kitchen!

If you like what CG and I do, support us on Patreon, or throw us a tip in our Paypal Tip Jar. We’ll happily enjoy a coffee on the road – Thanks! We appreciate all the support, and we’ll see you next time in the kitchen!

We include affiliate links for products on our website. Making a purchase after clicking on our links and we may earn a commission which helps us produce more videos and drink more coffee :^) We participate in the Amazon Services LLC Associates Program, which is an affiliate advertising program. It provides a means for us to earn fees by linking to Amazon.com and affiliated sites, so we can make more videos.

Share and Enjoy !

Rosemary Bread Recipe without a Mixer

rosemary bread

You can make a delicious homemade rosemary bread recipe following step-by-step with Mama Redbuck. It takes very few ingredients, and just a little time–mostly waiting for the bread to rise–but it’s well worth it. The recipe below is for one loaf of bread, but bake two at a time and then freeze one for later!

Ingredients for Rosemary Bread Recipe

2 cups sifted ALL-PURPOSE FLOUR
2 Tbsp softened BUTTER
1 Tbsp SUGAR
1 Tbsp dry active YEAST
2-3 Tbsp freshly chopped ROSEMARY
1 tsp SALT
1 cup of WATER

How to Make a Rosemary Bread Loaf

Set the butter out to soften and come to room temperature.

In a bowl, add 1 cup of warm tap water, about 130 degrees–not too hot! Stir in the sugar until dissolved, and then add in the yeast and stir lightly. Allow the dish to sit for about 10 minutes to bubble up.

Into a small dish, sift ½ cup flour and set aside.
In a larger mixing bowl, add 2 cups of sifted flour, salt, the finely chopped rosemary, and about ⅔ of the softened butter. Mix.

Stir the yeast mixture into the bowl and combine with the flour to form a loose ball.

Flour a flat surface with some of the flour from your sifted ½ cup of flour. You will use this flour for kneading your dough, but don’t use more than this amount, in fact, use as little of the flour as you can, only as needed for working the bread. The less flour you use, the lighter and airier your bread will be.

Roll the dough from your bowl onto the floured surface and knead for about 10 minutes, using only as much flour as you need to keep the dough from sticking as you work it. Kneading warms and stretches the gluten strands in the dough which will make for a light and airy loaf of bread instead of a dense bread brick. Nobody likes a bread brick.

rosemary bread
Light and airy rosemary bread!

My mom uses a bread proofing bowl, and you can check here current prices for a Dough Basket on Amazon. Or you can just use a regular bowl, but lightly coat the bowl with olive oil before adding in the dough ball, and be sure to roll the ball around in the bowl to coat the dough with oil as well.

Place the dough bowl in a warm place and let the dough rise for about an hour, until the dough has roughly doubled in size.

Once the dough has risen, flour your knuckles and punch the dough down, then remove the dough from the bowl and flatten and roll up by hand, then set aside for 5 more minutes.

You can bake the bread in any oiled pan or cooking sheet, but for a nice loaf, use a loaf pan. My mom likes to lightly oil the sides of the pan with olive oil and then cut a rectangle of parchment paper for the bottom of the pan.

After 5 minutes, the dough will have risen a bit, so press the dough down again and shape into a loaf that fits well into the loaf pan. Return the dough to a warm area and let it rise again for about 45 minutes, or until the dough has once more doubled in size.

After rising, bake the bread in an oven preheated to 375 degrees Fahrenheit for about 30 minutes, until lightly brown.

Remove the rosemary bread from the oven and then remove the bread from the loaf pan and place the bread on a cooling rack. If you turn the rosemary bread over and tap the crusty bottom, it will feel hollow inside, which is great, because that means you have baked a wonderfully light loaf of bread.

While the bread is still warm, brush it with the remaining butter you set out earlier.

And that’s it, you are now the proud owner of the most delicious, light and airy rosemary bread on the planet. If you bake this bread for someone, they will become your slave for life…just saying.

For another tasty Mama Redbuck bread recipe, try this extra-fancy loaf of Homemade Pesto Parmesan…it’s pretty stellar, so check it out.

parmesan pesto bread

Thanks for checking out this rosemary bread recipe, and be sure and sign up for our mailing list so you’ll never miss a Chef Buck cooking video, and also click a button below and share the dishes with your friends. We appreciate all the kind comments and support, and we’ll see you next time in the kitchen!
–Chef Buck

We really appreciate you watching our videos…Thanks for the support!

We include affiliate links for products on our website, so if you make a purchase after clicking on our links, we may earn a commission which helps us produce more videos and drink more coffee :^)

We are a participant in the Amazon Services LLC Associates Program, which is an affiliate advertising program that provides a means for us to earn fees by linking to Amazon.com and affiliated sites.

Share and Enjoy !

Cornbread Recipe for Sweet Skillet Cornbread

cornbread recipe

You’ll love this sweet cornbread recipe. It’s a tasty pairing for a savory meal, but this skillet cornbread feels like a real treat, especially if you finish it off by grilling sliced cornbread in a skillet with butter.

Ingredients for Cornbread Recipe

2¼ cups ALL-PURPOSE FLOUR
1 cup SUGAR
¾ cup CORNMEAL
2 tsp SALT
2 tsp BAKING POWDER
5 EGGS
¾ cup CANOLA OIL
1¼ cup BUTTERMILK
1 tsp VANILLA EXTRACT

cornbread recipe

How to Make Skillet Cornbread

First thing, pre-heat your oven to 350 degrees Fahrenheit, and place a heavy, oven-safe skillet in the oven to heat as the stove warms. You’ll want the skillet to be hot when you add in the batter later. Check Amazon for current prices for a 10 inch cast iron skillet similar to the one used in the recipe video.

In a bowl, combine the flour, sugar, cornmeal, salt, and baking powder, then mix the ingredients together well. This recipe is SO GOOD with 1 cup of sugar, but you can reduce that amount to ¾ cup sugar and it’s still pretty fantastic. If you desire a cornier cornbread, use a coarsely ground cornmeal, although I prefer using a finer grind.

In another bowl, crack the eggs and whisk them smooth, then add in the buttermilk, oil, and vanilla extract and whisk well, until slightly frothy. Mix the wet ingredients into the dry, but don’t over mix, just turn the ingredients together until everything is wet, but still lumpy.

Now carefully remove the skillet from the pre-heated oven and then carefully coat the entire inside of the skillet with about 1 Tbsp of canola oil. Pour in the batter, which should fill a 10 inch skillet about ¾ full, because you’ll want to leave room for the cornbread batter to rise.

cornbread recipe

Bake at 350 degrees Fahrenheit for 25 minutes, then reduce the oven temperature to 200 degrees F and allow the cornbread to bake for an additional 15 minutes. After that time, the cornbread should have risen and formed a firm, golden dome.

Carefully remove the skillet from the oven and pierce the center of the cornbread with a toothpick or knife, which should draw clean when removed. If wet batter is visible, then return to the cornbread to the oven for another 5 minutes and check once more.

Once the cornbread is baked through, allow it to rest in the skillet for 10 to 15 minutes, then remove the bread from the skillet and place on a cooling rack. If the cornbread sticks in the skillet, you can give the skillet a good shake to free the bread from the bottom of the pan.

It’s ready to eat, maybe with a slather of cold butter, or maybe not, you’ll just have to follow your cornbread instincts. I love slicing this bread and then grilling the sides in a buttery skillet to add an extra dimension of cornbread decadence, but do this at your own risk, because it will likely spoil you for life.

I hope you enjoy this sweet cornbread recipe. For another corny bread dish, try this beautiful cheese and jalapeno Corn Muffin Recipe.

corn muffin recipe
Corn muffins are delicious, but adding cheese and jalapeno makes them irresistible.

Thanks for checking out our sweet skillet cornbread recipe, and all of our recipes. Be sure and sign up for our mailing list and never miss a new cooking video. Click a button below and share the dishes with your friends, and follow Chef Buck on Youtube. We appreciate all the kind comments and support, and we’ll see you next time in the kitchen!

Thanks for watching our recipe videos! 

We include affiliate links for products on our website, so if you make a purchase after clicking on our links, we may earn a commission which helps us produce more videos and drink more coffee :^).   We participate in the Amazon Services LLC Associates Program, which is an affiliate advertising program providing a means for us to earn fees by linking to Amazon.com and affiliated sites, so we can make more videos.

Share and Enjoy !

Cheese Ball Recipe on a Pretzel Stick

cheese ball recipe

Tiny cheese balls on a pretzel stick make a super simple snack or party food perfect for any social gathering.  My sister made this cheese ball recipe for Christmas and it was a big hit.

Shredded cheese adds body, and any shredded cheese will work, but freshly shredded cheese works best. The outer coating creates a lot of flavor and texture. This cheese ball recipe tastes great with bacon, but the recipe is super adjustable, and you can leave bacon out for a no-meat treat. The nuts add crunch, so use whatever nuts you like.

Ingredients for Cheese Ball Recipe

PRETZEL STICKS
12 oz. softened CREAM CHEESE (about a block and a half of cream cheese)
2 cups freshly shredded CHEESE (choose your favorite cheese!)
1 tsp GARLIC POWDER
1 tsp PAPRIKA
1 tsp BLACK PEPPER
chopped pickled JALAPENO
8oz can crushed PINEAPPLE drained
fresh chopped CHIVES
5-7 pieces extra-crispy chopped BACON
1 cup chopped PECAN or WALNUTS

Pecans can be pretty pricey, but check here for current pecan prices on Amazon.      

cheese ball recipe

How to Make Cheese Balls on a Stick

First thing, set the cream cheese out to soften, then cook up a few slices of crispy bacon. When the bacon cools you can crumble it into bits.

Chop and drain the pineapple, because you don’t want the pineapple to be super wet when you add it into the cheese mixture.

In a bowl, combine the cream cheese, shredded cheese, garlic powder, paprika, black pepper, pineapple, jalapeno, and some chives, then mix well, until all ingredients are well incorporated and smooth.

I’m using a mix of pepper jack and gouda cheese in the recipe video, but use whatever cheese you prefer. I’ve had cheese balls made from cheddar cheese, but I like a white cheese mix, especially if it has a little zing like a pepper jack, and adding pickled jalapeno will also provide some pizzazz.

In a shallow bowl, add chives, nuts, and crumbled bacon and mix to form the cheese ball coating. Add a spoonful of the cheese mixture and roll in the mix until coated, then roll in between your hands to form into a ball. Set the balls aside on a plate, and then insert a pretzel stick into each tiny cheese ball.

Place the cheese balls in the fridge for at least 30 minutes. These cheese balls are fantastic, and they are especially tasty right out of the fridge, so leave them refrigerated until ready to serve.

For another easy party snack, try this family favorite, Easy Pecan Candy Recipe.

candied pecans
Candied pecans are a perfect treat for a gathering of friends and family.

Thanks for checking out this easy cheese ball recipe on a pretzel, give it a try and let me know what you think, and and be sure and sign up for our mailing list so you’ll never miss a Chef Buck cooking video, and go ahead and click a button below and share the dishes with your friends.  We appreciate all the kind comments and support, and we’ll see you next time in the kitchen!

–Chef Buck

Thanks watching our videos…we appreciate all the support!

We include affiliate links for products on our website, so if you make a purchase after clicking on our links, we may earn a commission which helps us produce more videos and drink more coffee :^)

We are a participant in the Amazon Services LLC Associates Program, which is an affiliate advertising program that provides a means for us to earn fees by linking to Amazon.com and affiliated sites.

Share and Enjoy !

Shortbread Cookie Recipe Super Simple

shortbread cookie recipe

Try this easy Shortbread Cookie recipe.  It takes very few ingredients and these cookies make a terrific treat, especially with coffee.  Mama Redbuck likes to make shortbread cookies in a cake tin and then cut them into wedges, but you can also simply roll the dough out into a sheet and cut the cookies after baking, or use a cookie cutter and cut the cookies before baking, but any way you do it the cookies will taste great.

Ingredients for this Shortbread Cookie Recipe

2 cups sifted ALL-PURPOSE FLOUR
1 cup softened BUTTER
1 cup POWDERED SUGAR
¼ cup chopped ALMONDS or PECANS (optional)
2 tsp VANILLA EXTRACT
¼ tsp ALMOND EXTRACT (optional)

shortbread cookie recipe

How to Make Shortbread Cookies

Remove butter from the fridge so that it can soften and come to room temperature. In a bowl combine the butter, the powdered sugar, the vanilla and almond extract, and then mix well. Gradually add in the sifted flour and continue to mix until the ingredients are well incorporated, then, if desired, mix in chopped almonds or pecans.

Bring the dough together and then roll it out to about ¼ inch thickness.  My mama likes to roll the dough into cake tins and cut cookies into wedges after baking, but you can roll the dough onto a baking sheet and cut into squares after baking, cut shapes with a cookie cutter before baking, or simply form individual cookies by hand, there is no wrong way, and it will all taste the same.  Check here for current prices for Cookie Baking Sheets on Amazon.

Bake on parchment paper or a lightly oiled baking sheet in an oven preheated to 300 degrees Fahrenheit for 35 to 40 minutes.  The shortbread won’t get a lot of color when baking, so don’t wait until the cookies get too dark.

If you are cutting into cookie shapes after baking, do so right out of the oven, before the cookies cool and firm up, otherwise they will break apart when you cut them.

As soon as the cookies cool they’re ready to eat! If you want to try another tasty Mama Redbuck recipe, then check out her fantastic Lemon Meringue Pie Recipe, which is one of my all-time-favorite pies.

lemon meringue pie
The best lemon meringue pie you will ever eat.

Thanks For Watching Our Recipe Videos!

Thanks for checking out our shortbread cookie recipe, and all of our recipes. Sign up for our mailing list so you’ll never miss a new recipe. Also click a button below and share the dishes with your friends. You can also follow Chef Buck on Youtube. We appreciate all the kind comments and support, and we’ll see you next time in the kitchen!

If you like what CG and I do, support us on Patreon, or throw us a tip in our Paypal Tip Jar. We’ll happily enjoy a coffee on the road – Thanks! We appreciate all the support, and we’ll see you next time in the kitchen!

We include affiliate links for products on our website. Making a purchase after clicking on our links and we may earn a commission which helps us produce more videos and drink more coffee :^) We participate in the Amazon Services LLC Associates Program, which is an affiliate advertising program. It provides a means for us to earn fees by linking to Amazon.com and affiliated sites, so we can make more videos.


Share and Enjoy !

Cola de Mono Recipe – Chilean Holiday Drink

cola de mono recipe

Cola de Mono is a traditional Chilean holiday drink that you can make anywhere you live. In Chile, they use a very strong aguardiente liquor that packs a punch, but you can make a version of this tasty drink with any neutral flavored alcohol, or a virgin cocktail by simply leaving out the alcohol all together. A cola de mono is super tasty, and in many ways reminds me of a lighter variation of a white Russian cocktail.

Ingredients for a Cola de Mono Recipe

This version makes 3-5 small (1/2 cup) portions

1/4 cup granulated SUGAR
1/4 cup WATER
.5 oz CINNAMON STICKS
3 tablespoons INSTANT COFFEE, medium to dark roast
2 cups WHOLE MILK
1 teaspoon VANILLA EXTRACT
1/2 cup CHILEAN AGUARDIENTE …but definitely adjust according to taste. Alternatives: Chilean pisco, white rum, brandy, or vodka. Chilean pisco is exported, Chilean aguardiente is not.

Other Traditional Spices….that we left out
5 whole cloves
1/8 teaspoon finely ground nutmeg
orange peel (e.g. 1″ wide by 2″ long)

cola de mono recipe

How to make a Cola de Mono

  • Combine the water, sugar and cinnamon stick in a medium saucepan and bring to a boil.
  • Reduce the heat and simmer for 5 minutes.
  • Remove from heat and stir in instant coffee. Instead of instant coffee, you can use finely ground espresso powder. Or you can use 1/2 cup strongly brewed coffee per teaspoon of instant coffee that has cooled. If you use brewed coffee, reduce the amount of milk you add, and add it AFTER the syrup has cooled, along with the milk, vanilla and alcohol.
  • Set aside to cool to room temperature.
  • Remove cinnamon stick and cloves
  • Add milk, vanilla, and aguardiente or desired alcohol to taste.
  • Pour the mix into a container and refrigerate until chilled, at least 4 hours, but overnight is ideal.

Serve very, very cold.
A couple ways to help keep it cold: make a 1/2 recipe without alcohol and make cola de mono ice cubes, or use coffee ice cubes instead, or place the prepared pitcher of cola de mono in the freezer for 10-30 minutes before serving.

Serve the drinks in fancy-pants glasses to be more festive, and enjoy! Salud!
Cocktails always taste better in a fancy glass, so check here for current prices on amazon for Fancy-pants Glassware for Cocktails.

And for more adult beverage ideas, check out these Fancy-pants Cocktail Recipes.

cocktail recipes
Coffee ice cubes are ideal for cold coffee cocktail recipes.

Thanks for checking out our version of a cola de mono recipe. Be sure and sign up for our mailing list so you’ll never miss a Chef Buck cooking video, and click a button below and share the dishes with your friends. We appreciate all the kind comments and support, and we’ll see you next time in the kitchen!
–Chef Buck

We appreciate you watching our videos!

We include affiliate links for products on our website. If you make a purchase after clicking on our links, we may earn a commission which helps us produce more videos and drink more coffee :^)
We are a participant in the Amazon Services LLC Associates Program, an affiliate advertising program designed to provide a means for us to earn fees by linking to Amazon.com and affiliated sites.

Share and Enjoy !


Cranberry Brie Bites Recipe

cranberry brie bites

Cranberry Brie Bites are a tasty treat for parties. It’s an easy snack recipe you can make even easier by substituting canned cranberry sauce for the filling. The creaminess of the cheese and the tartness of the cranberry are a great combination. We use chopped pecans for this party recipe, but use whatever kind of nuts you like.

What you Need for Cranberry Brie Bites

CRANBERRY SAUCE, Homemade (recipe follows) or Canned
CRESCENT DOUGH SHEETS
BRIE CHEESE
PECANS, or try other NUTS
ROSEMARY
OIL or BUTTER

This cranberry brie cheese recipe is super simple and adjustable. We use homemade cranberry sauce, but you can easily substitute canned cranberry sauce if you like.

For Homemade Cranberry Sauce you will Need

2 8oz bags CRANBERRIES (fresh or frozen)
½ cup SUGAR
1-2 ORANGES (entire zest and juice)
2 CINNAMON sticks

To make cranberry sauce, add all ingredients into a sauce pot. If you don’t feel like zesting the orange, you can cut the peel into strips and add the entire peel into the simmer. Simmer over medium low heat until cranberries burst and the sauce thickens, about 20 minutes. Remove the cinnamon sticks and orange peels before serving.

How to Make Cranberry Brie Bites

These cranberry brie bites are mini bites, so you will need a mini-muffin tin. A muffin pan is not hard to find at a thrift store, or check here for current mini-muffin tin prices on Amazon.

cranberry brie bites
  • Lightly grease the cups of your muffin tin with butter or oil.
  • Finely chop fresh rosemary. You can use whole sprigs of rosemary for a more decorative look, but we prefer to chop the rosemary for easier eating and flavor distribution.
  • Chop the nuts. Use pecans, walnuts, cashews, or whatever nut you prefer.
  • Open the crescent dough and spread dough out on a floured surface.
  • Lightly roll the dough out and cut into as many squares as your mini-muffin tin will accommodate.
  • Place a dough square into each muffin cup and mold into the tin.
  • Cut and place your brie cheese into squares that will fit comfortably into each dough cup.
  • Add a dollop of cranberry sauce into each cup.
  • Top with a sprinkling of chopped nuts and rosemary.
  • Place the muffin tin into an oven preheated to 350 degrees Fahrenheit.
  • Bake 15-20 minutes until the pastry is golden brown around the edges.
  • Remove from the oven and promptly devour.

Thanks for watching our videos!

fruit cake recipe

For another party treat, try serving bite-sized bars of this easy No-Bake Fruit Cake Recipe.

Thanks for checking out the cranberry brie bites recipe. Be sure and sign up for our mailing list so you’ll never miss a Chef Buck cooking video, and click a button below and share the dishes with your friends. We appreciate all the kind comments and support, and we’ll see you next time in the kitchen!
–Chef Buck

We include affiliate links for products on our website. If you make a purchase after clicking on our links, we may earn a commission which helps us produce more videos and drink more coffee :^)
We are a participant in the Amazon Services LLC Associates Program, an affiliate advertising program designed to provide a means for us to earn fees by linking to Amazon.com and affiliated sites.

Share and Enjoy !

Candied Sweet Potatoes Holiday Recipe

Candied sweet potatoes make a great holiday dish, or anytime dish. It’s decadent and flavorful, and this candied sweet potato recipe is perfect as a side for all kinds of savory meals. It’s an easy 4 ingredient recipe, or only 3 ingredients if you want to skip the vanilla; the dish will taste yummy either way.

What you need for Candied Sweet Potatoes Recipe

4-6 large SWEET POTATOES
1-1½ cup SUGAR
1 stick BUTTER
1-2 tsp VANILLA EXTRACT

How to Make Sweet Sweet Potatoes

candied sweet potatoes

This candied sweet potato recipe is super simple and adjustable, so use as much butter and sugar as you like. The above ingredient ratios are just guidelines; there is no wrong way to make this recipe. You’ll have to go way out of your way to screw it up, so adjust the ratios as you like. Use more or less butter and sugar, depending on your desires.

One important part of this recipe is to peel and clean your potatoes well. Remove the skins and any dark blemishes on the peeled potatoes. Dark areas on the potatoes will become even darker as the dish cooks, and it will look quite unappealing.

Check current prices for a 3 Qt oven-safe baking dish on Amazon.

  • Peel and clean the potatoes.
  • Cut potatoes into uniform wedges.
  • Spread half the sugar on the bottom of an ungreased, oven safe dish.
  • Add potatoes to the dish and spread evenly.
  • Top potatoes with remaining sugar.
  • Cut the butter over the top of the potatoes.
  • Cover dish with aluminum foil and bake at 350 degrees Fahrenheit for 30 minutes.
  • After 30 minutes, remove foil cover. The butter and sugar will be melted. Add vanilla into the dish, and toss the potatoes with the liquid.
  • Return dish to the oven uncovered and continue baking until the potatoes are soft, but not mushy.
  • The butter and sugar in the dish will thicken as the potatoes cool.
  • Serve candied sweet potatoes hot or cold.

For another decadent potato dish, try this rich Italian Potatoes Recipe.
seasoned red potato

Thanks For Watching Our Recipe Videos!

Thanks for checking out our candied sweet potatoes recipe, and all of our recipes. Be sure and sign up for our mailing list so you’ll never miss a new recipe. Also click a button below and share the dishes with your friends. You can also follow Chef Buck on Youtube. We appreciate all the kind comments and support, and we’ll see you next time in the kitchen!

If you like what CG and I do, you can also support us on Patreon, or throw us a tip in our Paypal Tip Jar. We’ll happily enjoy a coffee on the road – Thanks! We appreciate all the support, and we’ll see you next time in the kitchen!

We include affiliate links for products on our website. So, if you make a purchase after clicking on our links, we may earn a commission which helps us produce more videos and drink more coffee :^) We participate in the Amazon Services LLC Associates Program, which is an affiliate advertising program. It provides a means for us to earn fees by linking to Amazon.com and affiliated sites, so we can make more videos.

Share and Enjoy !

Indian Chicken Curry Recipe in a Pot

indian chicken

Indian Chicken Curry is delicious and easy to make. For this chicken curry recipe, we use a flavorful marinade and then cook everything up in a pot. It’s a great dish to serve over rice.  As an alternative, we went low-cal and served the Indian chicken over salad greens with a little quinoa.

Indian Chicken Curry Ingredients

2 lbs. boneless skinless CHICKEN
½ cup GREEK YOGURT
5-6 cloves GARLIC (finely chopped)
¼ cup GINGER (finely chopped)
¼ cup ALMONDS
2 Tbsp TOMATO SAUCE
2 large ONIONS (finely chopped)
2-3 Tbsp LEMON JUICE
2 tsp CORIANDER powder
1 tsp CUMIN powder
1 tsp GARAM MASALA
CHILI powder (to taste)
SALT (to taste)
OIL for cooking

Check out current prices for Indian Spices on Amazon.

How To Make Chicken Curry

  • In a food processor, finely grind the ginger, garlic, and almonds.
  • In a small bowl, combine the yogurt and the ground ingredients from the food processor.
  • Into the bowl, add the dried spices, lemon juice, and tomato sauce.
  • Mix bowl ingredients well to form the marinade.
  • Place chicken pieces into a large Ziploc bag. Use boneless, skinless chicken for the quickest cooking time. We prefer chicken thighs, but use your favorite chicken pieces.
  • Add the marinade into the bag and zip it closed. Mix the marinade well with the chicken. Open the bag a little to let out excess air, then zip close. Manipulate the bag until the chicken is thoroughly covered.
  • Place the chicken/marinade mixture in the fridge and allow to marinate overnight.  If you’re in a hurry, try to marinade for a minimum of 1 hour; otherwise, you’re just wasting all the marinade flavors.
  • When ready to cook dinner, heat a large pot with oil on medium low heat. Use just enough oil to sauté the onion.
  • Add finely chopped onions into the pot and sauté until light brown/caramelized, about 20-30 minutes.
  • When the onions are ready, add ½ cup water.
  • Add in the chicken and the marinade. Mix well with the onions.
  • Cover pot and bring the mixture to a bubble. Reduce the heat to low, keep covered with the lid, and simmer for about one hour, or until the chicken is cooked through.
  • Serve over rice, or whatever you like.

indian chicken
In the video recipe we served the Indian chicken over greens and some quinoa, which was a great combo. CG even added dried cranberries to the salad, which we will definitely do again in the future.

For more great Indian recipe ideas, check out this complete Indian Meal Cooking Tutorial. Cooking delicious Indian food at home is super easy. And check out current prices for Indian Spices on Amazon.

how to cook indian food

Thanks For Watching Our Recipe Videos!

Thanks for checking out this chicken curry recipe, and all of our recipes. Be sure and sign up for our mailing list so you’ll never miss a new recipe. Also click a button below and share the dishes with your friends. You can also follow Chef Buck on Youtube. We appreciate all the kind comments and support, and we’ll see you next time in the kitchen!

If you like what CG and I do, you can also support us on Patreon, or throw us a tip in our Paypal Tip Jar. We’ll happily enjoy a coffee on the road – Thanks! We appreciate all the support, and we’ll see you next time in the kitchen!

We include affiliate links for products on our website. So, if you make a purchase after clicking on our links, we may earn a commission which helps us produce more videos and drink more coffee :^) We participate in the Amazon Services LLC Associates Program, which is an affiliate advertising program. It provides a means for us to earn fees by linking to Amazon.com and affiliated sites, so we can make more videos.

Share and Enjoy !

No-Bake Holiday Fruit Cake Recipe

fruit cake recipe

Try this easy, almost no-cooking fruit cake recipe for people who hate fruit cake.  Just tell the fruit cake haters it’s graham cracker chews.  They will taste it and fall in love. The holiday season is upon us and this is a great dish to take to parties, pot lucks, and family gatherings. This dessert recipe can be made quickly, is extremely adjustable and freezes well. Follow the recipe exactly, or use whatever nuts and dried fruit you prefer.

What You Need For A Refrigerator Fruit Cake Recipe

14 oz box of GRAHAM CRACKERS, smashed  [alternative:  VANILLA WAFERS]
10 oz bag MARSHMALLOWS
½ cup MILK
3 cups of NUTS, chopped*
4 cups of dried FRUIT, chopped*
2 Tbsp CINNAMON (optional)

*[What we used for this recipe:  2 cups walnuts, raw and 1 cup pecans, toasted; 6 oz unsweetened coconut, 5 oz dried pineapple (NOT candied like used in traditional fruit cake), 5 oz reduced sugar craisins, white raisins.  The coconut adds some moisture without adding a strong coconut flavor.]

How To Make This Fruit Cake Recipe

If you want to try an old-school store bought fruit cake, you can check out current prices for Claxton Fruit Cake on Amazon.

fruit cake recipe
  • In a large bowl, crush an entire box of graham crackers (or vanilla wafers). You can do this by hand or use a food processor, but crush crackers as small as possible.
  • Add in the dried fruit and nuts. There are no wrong fruits and nuts, whatever YOU LIKE will work.   Candied ginger? Dried cherries? Follow my ingredients exactly or use your own, it’s an extremely adjustable recipe, which is one of the reasons the recipe is so great!
  • Add in the cinnamon, and toss all the ingredients together well. Maybe a little cardamon, too? Added sugar? I think adding more sugar is crazy, but it’s an option. Brown sugar? Maybe.
  • On the stove top, heat a pot on low heat and add in the milk and marshmallows.
  • Stir milk and marshmallows together for about two minutes until they melt into a gooey liquid-like state. Stick to low heat, because using higher heat and getting in a hurry is just an invitation to disaster. it’ll only take a couple of minutes on low heat.
  • Once the marshmallows are melted, as quickly as possible–while the warm marshmallow mixture is at it’s “gooeyest”–pour the melted marshmallow in with the dry ingredients and mix everything together very well.
  • Then add the mixed ingredients into an ungreased dish and compress the mixture down into a dense loaf. You can do this with a spoon or spatula, or wax paper works very well, too. Use whatever size dish you like. The size of the dish will determine the shape of the cake. I generally use a flat dish, like an 8″ X 10″, then I cut the fruitcake pieces into nice cubes. My mother-in-law likes to use a loaf pan, and then cut the cake pieces into larger slices.
  • Put the dish in the refrigerator for at least a couple of hours, and then it’ll be ready to slice and serve.

This cake recipe is so simple to make, and it stores and travels very well, which makes it perfect for parties and gatherings and gifts. Fruit cake is the perfect gift for someone you like, but don’t really love, so definitely give this refrigerator fruit cake a try.

If you want a fancier cake that’s crazy delicious and still pretty easy to make, try this Chocolate Cherry Cake Recipe.

chocolate cherry cake

Thanks for Watching our Videos!

Thanks for checking outour fruit cake recipe, and all of our recipes. Sign up for our mailing list so you’ll never miss a new recipe. Also click a button below and share the dishes with your friends. You can also follow Chef Buck on Youtube. We appreciate all the kind comments and support, and we’ll see you next time in the kitchen!

If you like what CG and I do, support us on Patreon, or throw us a tip in our Paypal Tip Jar. We’ll happily enjoy a coffee on the road – Thanks! We appreciate all the support, and we’ll see you next time in the kitchen!

We include affiliate links for products on our website. Making a purchase after clicking on our links and we may earn a commission which helps us produce more videos and drink more coffee :^) We participate in the Amazon Services LLC Associates Program, which is an affiliate advertising program. It provides a means for us to earn fees by linking to Amazon.com and affiliated sites, so we can make more videos.

Share and Enjoy !

Share and Enjoy !

Pupusa Recipe for a Sweet Easy Dessert

pupusa recipe

Try this sweet twist on a pupusa recipe that turns gluten-free corn flour into a quick dessert treat. Pupusas are a traditional Latin American dish of corn tortilla filled with cheese, beans, peppers and meat, but you can use any combo of ingredients you like to cook pupusas, including sweet ingredients to make a variety of delicious dessert pupusas.

What you need for Dessert Pupusas

CORN FLOUR and warm water to create the dough
CINNAMON
BROWN SUGAR and/or POWDERED SUGAR
PEANUT BUTTER crunchy or creamy
CHOCOLATE CHIPS plus whatever other sweet filling you like!
OIL for cooking

for the creamy topping:
plain GREEK YOGURT
MAPLE SYRUP

and top the dessert pupusa with a sprinkling of
POWDERED SUGAR and
FRESH FRUIT

pupusa recipe

How to make a Dessert Pupusa Recipe

This pupusa dessert is super easy and almost foolproof. I’m not going to use ingredient amounts, because it’s really all to taste. Check here for current Corn Flour pricing on Amazon.

  • In a bowl, combine corn flour, sugar, and cinnamon. For measurements, it will be hard to make a bad ratio, just follow your heart. If you must have something to work with, try 1 cup of flour with 2 Tbsp of sugar and 1 Tbsp of cinnamon, but really, you can use twice as much sugar and cinnamon and it will still taste great. It’s dessert! Nobody wants to do math! The dough is easy to make, and the pupusas can be any size you like.
  • To make the corn dough you simply combine the corn flour mixture with warm water and mix by hand until you achieve a doughy consistency. If the dough is too dry, add more water, and if it’s too wet, add more flour.
  • Mix in a large ball and then divide into smaller golf ball sizes.
  • Flatten each ball into a flat disc shape and spread lightly with peanut butter.
  • Add chocolate chips, or any flavor chips, or meltable candies. Marshmallows? Sure! Although I find it to chewy with marshmallow, but you might love it!
  • Close the flat flour disc around the peanut butter and fillings and shape into a ball again.
  • Now flatten the ball, but with the fillings now inside. If some of the filling peeks through, it’s no big deal. A little leakage is fine.
  • Heat a skillet and about 1 Tbsp of coconut oil on medium low heat.
  • When the oil is heated, add each pupusa to the skillet and cook 1-2 minutes on each side. The longer they cook the crunchier the pupusa will get, because it’s corn flour just the same as used to make tortillas. Cook lightly to make a soft cookie consistency, or cook longer for a crunch.
  • After cooking, set pupusas aside on a paper towel.
  • For the creamy topping, I simply combine a rich Greek yogurt with Maple syrup, and sometimes I even use maple syrup to make the pupusa dough instead of sugar. Mix the yogurt and syrup well, and that’s it. Or simply use whipped cream!
  • To serve, place a dollop of cream on each pupusa. If desired, top with sliced fruit and a sprinkling of powdered sugar. This will make the desert look extra fancy pants with very little effort.

Give this sweet dessert pupusas recipe a try and let me know what you think, and bon appétit! And for a savory version, check out this Traditional Pupusa Recipe.

pupusas recipe
A pupusas recipe can be cooked quickly on a lightly greased skillet or griddle.

Thanks for checking out the pupusa recipe. Be sure and sign up for our mailing list so you’ll never miss a Chef Buck cooking video, and click a button below and share the dishes with your friends. We appreciate all the kind comments and support, and we’ll see you next time in the kitchen!
–Chef Buck

Share and Enjoy !


Best Fried Green Tomatoes Recipe

fried green tomatoes recipe

Cornmeal gives a fried green tomatoes recipe a great flavor, color, and crunch that flour alone can’t beat. A creamy dressing or aoli pairs well with fried tomatoes, but this classic southern recipe is tasty enough to stand on it’s own.

What you need for a Fried Green Tomatoes Recipe

GREEN TOMATOES
1 cup CORNMEAL (use a medium or fine grind…coarsely ground cornmeal can be a bit much)
1 cup all-purpose FLOUR (divided)
1 EGG
SEASONING (be generous, and use whatever seasonings you like…I prefer Italian seasonings, lots of garlic powder, and black pepper)
SALT
OIL for cooking

How to Cook Fried Green Tomatoes

When I order fried green tomatoes at a restaurant, whether I like them or not will depend largely on the batter. Cornmeal adds that great flavor and crunch that I associate with classic fried tomatoes, and fried tomatoes without cornmeal just fall flat. Buy hard, green tomatoes. They can have a tinge of red, but not too much, because you want them firm enough to cook and not become too soft.

fried green tomatoes recipe

  • Slice the green tomatoes to desired width; I like mine about ¼ inch thick.
  • Spread the tomato slices out and lightly salt.
  • Set up a breading station with 3 flat-bottom bowls.
  • In the first bowl place ½ cup of flour. Season the flour as desired, and mix.
  • In the second bowl whisk 1 egg and 1 Tbsp of cold water.
  • In the third bowl place the other ½ cup of flour and cornmeal. Season the cornmeal and flour as desired, and mix. Check current pricing for cornmeal on Amazon
  • Using a paper towel, dry the tomato slices.
  • Heat a skillet of oil on medium-low heat. You don’t need a lot of oil, about 1/8 inch deep.
  • Take a slice of tomato and on each side bread it lightly in the flour, then coat it in the egg, then bread it one final time in the cornmeal/flour mixture.
  • Carefully place the breaded tomato in the skillet. It should sizzle and begin to cook immediately when it hits the oil.
  • Cook each tomato 2-3 minutes or until golden brown in color.
  • Remove fried tomatoes from the skillet and place on a paper towel to drain for a moment, then serve.

Serve fried green tomatoes hot. Theses tomatoes are good enough to eat plain, or you can accompany them with hot sauce, creamy salad dressing, aoli dressing, or a mild mustard or creamy horseradish dressing. For another easy appetizer side dish recipe, take a look at these Crispy Baked Onion Rings.

Onion Rings recipe
The best onion ring recipe baked in the oven.

Thanks for checking out the Fried Green Tomatoes recipe. Be sure and sign up for our mailing list so you’ll never miss a Chef Buck cooking video, and click a button below and share the dishes with your friends. We appreciate all the kind comments and support, and we’ll see you next time in the kitchen!
–Chef Buck

Share and Enjoy !


Peanut Butter Candy – no cooking required

peanut butter candy recipe

Here is a quick no cooking required Peanut Butter Candy Recipe made with just 3 ingredients: Creamy Peanut Butter, Powdered Sugar, and Milk. This peanut butter sugar candy was a real treat for me when I was a kid, and it still feels like a treat 50 years later.

What you need for this Sugar Candy recipe

POWDERED SUGAR …also called confectioners’ sugar
creamy PEANUT BUTTER
MILK or half and half

How to make Peanut Butter Candy

This candy recipe looks super simple, but there is a slight learning curve for spreading out the sugar “dough” and rolling up the peanut butter log, so don’t be discouraged if your first few
attempts are a little awkward. I haven’t made this recipe enough to be good at it. My mom makes it look easy.

Spoon powdered sugar into a small bowl, about 1½ cups. The measurement doesn’t have to be exact, because the main thing you want to accomplish is getting the milk-to-sugar ratio right. Build a small “well” in the center of your powdered sugar. Add milk or half ‘n half in at about a tablespoon at a time, mixing it slowly as you go. Don’t add the milk too quickly. Stir the mixture around until it clumps and thickens like a dough. Add milk as needed, and if it gets too wet, just add more sugar.

Start mixing with a spoon. As it clumps into a “sugar dough”, use your hand to mix. Once you get a “dough ball” of sugar, “flour” a flat surface with powdered sugar and place the doughy ball of sugar on it. Flatten the dough with your hand, sprinkling more sugar as needed to keep it from sticking. Turn the sugar dough and flatten it out by hand and then use a rolling pin to flatten and spread the dough until it is about the thickness of a tortilla.

peanut butter candy recipe

Use a spatula to spread a thin layer of creamy peanut butter over the entire surface of the sugar. Then carefully roll the sugar up from one side to the next, creating a pinwheel of sugar and peanut butter. Dust with sugar as needed to keep the log from sticking. Knead the peanut butter sugar log and press and pull and turn to make it as long as possible without tearing.

Use a knife to cut the log into candy pieces about ½” in length. Set the candy aside on a plate and it will firm up over time. Place it in the fridge and it will firm up faster. Make as much candy as you like, but don’t go crazy–it’s a bunch of sugar! It’s a nice treat, but definitely one you want to eat in moderation. I hope you like this peanut butter candy, it’s one of my childhood favorites.

My mama uses a lot of her kitchen baking gadgets in this video, but you can easily make do with regular kitchen items like a spatula and butter knife, or you can check current prices for some of the gadgets on Amazon: Dough Roller or Dough Scraper or a Flexible Cutting Board Mat.

For another easy to make sweet treat, take a look at this Candied Pecans Recipe.

candied pecans
My mom sends out tins of candied pecans to her favorite children, which sometimes includes me.

If you’re interested in treats for the holidays, what about an Easy Fruit Cake Recipe? I know the idea of fruit cake is out of fashion, but this recipe will convert you into a fruit cake lover.

fruit cake recipe

Thanks for checking out the peanut butter candy recipe. Be sure and sign up for our mailing list so you’ll never miss a Chef Buck cooking video, and click a button below and share the dishes with your friends. We appreciate all the kind comments and support, and we’ll see you next time in the kitchen!
–Chef Buck

Thanks for watching our recipe videos!

We include affiliate links for products on our website, so if you make a purchase after clicking on our links, we may earn a commission which helps us produce more videos and drink more coffee :^) We participate in the Amazon Services LLC Associates Program, which is an affiliate advertising program providing a means for us to earn fees by linking to Amazon.com and affiliated sites, so we can make more videos.

Share and Enjoy !

Ramen Noodles Complete One Pot Meal

ramen noodles

Here’s a complete one-pot ramen noodles meal using only 4 ingredients. I love hipster ramen restaurants with fancy egg and noodle dishes, and you can make a similar recipe at home with a package of cheap grocery store ramen noodles. Just add green onion, spinach, and a creamy soft boiled egg to make this simple dish.

One-Pot Complete Meal with 4 Ingredients

1 pkg RAMEN NOODLES
1 EGG
1-2 GREEN ONIONS (green tops chopped, white stalks thinly sliced)
some SPINACH

I use the Oriental flavored ramen in the video recipe, but I often use the beef or chicken as well, so use whatever flavor you like. Check here for current prices for ramen on Amazon.

ramen noodles

If you don’t care whether your egg yolk is runny or not, then there is no pressure,
but if you like a soft boiled egg, then timing is everything. The total simmer time for a runny yolk should be 5-6 minutes.

    How to make Ramen Noodles with a Soft Boiled Egg

  • Heat a pot with enough water to cover the egg.
  • Bring the water to a boil, then reduce to a simmer and gently add the egg with a spoon.
  • Let simmer for 3 minutes, then add in the ramen noodles and sliced onion whites with the egg.
  • After another 2-3 minutes, turn off the heat, remove only the egg from the pot, and immediately drop the egg into an ice bath.
  • Add spinach and ramen seasoning into the pot and stir well.  You don’t have to use the entire flavor packet; I find it overpowering and use about half, so add to taste.
  • Return to the egg and peel it.
  • Pour the noodles, spinach, and onion stalk into a bowl.
  • Add the egg.
  • Top with green onion tops, and serve.

Try the dish out and let me know if you like it. It’s an easy way to elevate an inexpensive package of ramen noodles to a nice meal. For another ramen noodle recipe idea, try this Asian-Style Noodle Slaw Recipe.

crunchy slaw
Crunchy coleslaw or noodle salad? What sounds tastier?

Thanks watching and checking out the ramen noodle recipes, and be sure to sign up for our mailing to receive our weekly posts delivered to your inbox. If you liked the recipe, click a few buttons below to share it with your friends. Thanks, I appreciate it!
–Chef Buck

Share and Enjoy !


Tostones Recipe for Crispy Plantains

tostones recipe

A crispy, crunchy tostones recipe is a tasty way to enjoy green, unripe plantains. If you like French fries, or tator tots, or waffle fries or any kind of fried potato, then you’ll want to give tostones a try. Ripe plantains are sweet just like dessert bananas, but unripe plantains are more like starchy potatoes. Green plantains are super savory, in fact, you can boil and mash them to make a dish similar to mashed potatoes. Tostones are a staple snack in latin American cuisine and easy to prepare, and especially tasty with a creamy dipping sauce. Tostones are twice-fried and not health nut friendly. For a healthier plantain recipe, stick to a plantain mash, but for a faux fry fix, try this crispy tostones recipe.

What you need for this Tostones Recipe

unripe, green PLANTAINS
OIL for frying
SALT
PEPPER
GARLIC POWDER

and a DIPPING SAUCE
…any sauce you enjoy with with fried potatoes will work with tostones,
a creamy AIOLI is great, or just RANCH dressing if you’re feeling lazy.
For my SEMI-AIOLI dressing I use:
1-2 cloves raw GARLIC minced
1 cup MAYONNAISE
1 Tbsp LEMON JUICE

tostones recipe
Use green, unripe plantains for crispy, crunchy tostones

How to Make Tostones

  • Choose firm, green, unripe plantains.
  • Slice off the very tips of the plantain.
  • Green plantains can be hard to peel. You can cut the peel lengthwise into thin strips and pull the peeling strips away, or slice the length of the peel and then work the peel away from the plantain using your thumbs or a spoon.
  • Cut the peeled plantain into discs about ¼ to ½ an inch thick. I prefer thinner slices, about ¼ inch thick.
  • Heat a skillet and oil on medium heat.  If you prefer deep frying, check current prices for a counter top Deep Fryer on Amazon.
  • Add in the sliced plantains.
  • Season the plantains in the skillet.
  • Fry 1-2 minutes and turn and fry 1-2 minutes more.
  • Remove plantains from skillet and drain on a paper towel.
  • Place on a flat surface and smash flat to desired thickness. There is no wrong size, whatever size you like is the right size. I prefer my tostones to be about the size and thickness of a silver dollar.
  • Return flattened plantains to the oil and fry until golden brown.
  • Remove and drain on a paper towel, salt to taste, and serve with a dipping sauce.
  • To make the dipping sauce, just combine aioli ingredients and mix well; the sauce, like any sauce, will be better if you make it a little ahead of time.
  • Enjoy!
tostones recipe
Tostones are a staple snack in latin American cuisine, easy to prepare, and especially tasty with a creamy dipping sauce.

Unripe green plantains are a terrific ingredient that you can use in all kinds of savory, starchy dishes. For another unripe plantain dish, try this MASHED PLANTAINS RECIPE. And for a sweeter option, try FRIED RIPE PLANTAINS. But no matter how you prepare them, pick up plantains at the grocery and give them a try; plantains are a great value and very versatile.

Thanks for Watching our Videos!

Thanks for checking out our tostones recipe. Sign up for our mailing list so you’ll never miss a new recipe. Also click a button below and share the dishes with your friends. You can also follow Chef Buck on Youtube. We appreciate all the kind comments and support, and we’ll see you next time in the kitchen!

If you like what CG and I do, support us on Patreon, or throw us a tip in our Paypal Tip Jar. We’ll happily enjoy a coffee on the road – Thanks! We appreciate all the support, and we’ll see you next time in the kitchen!

We include affiliate links for products on our website. Making a purchase after clicking on our links and we may earn a commission which helps us produce more videos and drink more coffee :^) We participate in the Amazon Services LLC Associates Program, which is an affiliate advertising program. It provides a means for us to earn fees by linking to Amazon.com and affiliated sites, so we can make more videos.

Share and Enjoy !

No-Bake Marshmallow Bars for busy people

marshmallow bars

Here is a quick no-bake marshmallow bars recipe that you can fix almost as fast as you can melt marshmallow on the stove. It’s like a rice krispie treat on steroids, with added nuts, cereal, and
coconut.

What You Need for a Marshmallow Bar Recipe

7-10 oz SWEET SHREDDED COCONUT
1½ cups PECANS
1 tsp VANILLA
2 tsp CINNAMON
4 Tbsp unsalted BUTTER (plus butter to grease dish)
10 oz MARSHMALLOWS
3-4 cups CEREAL

How to make this Marshmallow Bars Recipe

Prep the ingredients first. Once you start melting the marshmallow on the stove, it will be much easier to throw the recipe together if you have the ingredients prepared and measured in advance.

  • Toast the shredded coconut and pecans in the stove. Just a little toasting will add a lot of flavor. Heat the oven at 350 degrees and toast the ingredients for 5-10 minutes, or until colored
    nicely. Keep an eye on them while toasting! Pecans can be expensive, and you don’t want to burn them. If toasting together, watch closely, because one may finish toasting before the other.
  • Lightly butter an 8X8 pan, a slightly larger or smaller pan is fine, depending on how tall you want your marshmallow bars to be.
  • On the stove, heat a pot on medium low heat.
  • Add the butter and marshmallows to the pot and stir until marshmallow begins to soften.
  • Add in all of the ingredients, remove from the stove and stir until everything is mixed well.
  • Immediately spoon the mixture into your pan and DON’T spread it out right away, because it will be a sticky mess. Wait a a few minutes and it will be lass hassle to spread.
  • Once the marshmallow has cooled a bit, spread flat.
  • Let the dish sit for a while and firm up a bit before slicing. If you’re in a hurry, you can set it in the fridge for a bit.
  • Once cool, you can drizzle the marshmallow bars with chocolate, or top with icing or glaze or peanut butter or anything you like. Or leave it as is, it’ll be tasty either way.
marshmallow bars

Do you want to make Marshmallow Cereal Bars that kids will go crazy for?

This cereal bar recipe is tasty, but bran flakes, corn flakes, and granola do make these treats look a little on the healthy side. To add a bit of color and excitement to the recipe, here are some optional ingredient ideas:

  • Add a more colorful cereal. Fruity Pebbles, Fruit Loops, and Lucky Charms are good examples, but any multi-colored cereal will do.
  • What about dried fruit? Raisins, cranberries, pineapple, apple, chopped prunes, etc..
  • Chocolate chips, of course. Peanut butter chips will work great, and M&M’s, or any chocolatey candy chopped into a convenient size to mix into the melted marshmallow.

If you’re interested in treats for the holidays, try an Easy Fruit Cake Recipe.

fruit cake recipe

Thanks for checking our marshmallow bars recipe out. You’ll find more of my Dessert Recipes Here. And if you’re on Youtube often, subscribe to the Chef Buck Cooking Channel. Be sure to click a button or two below and share the dish with your friends and family. I appreciate it!
–Chef Buck

Thanks for watching our recipe videos!

We include affiliate links for products on our website, so if you make a purchase after clicking on our links, we may earn a commission which helps us produce more videos and drink more coffee :^) We participate in the Amazon Services LLC Associates Program, which is an affiliate advertising program providing a means for us to earn fees by linking to Amazon.com and affiliated sites, so we can make more videos.

Share and Enjoy !

Mashed Plantains …easy green plantain recipe

mashed plantains

Mashed Plantains are a tasty twist on a mash potato recipe, and it’s my go-to recipe for green, unripe plantains. If you’re in a potato rut, give unripe plantains a try and surprise your family. Just boil and mash plantains with your favorite seasonings, plus garlic and onion if you want to really make a tasty mash. Cooking bananas are not sweet at all, they make a great savory starch you can use in a variety of recipes. Try substituting green plantains in some of your favorite potato recipes, it’s an easy way to put a twist on dinner.

What you need for this Mashed Plantains Recipe

2 unripe PLANTAINS
3-5 cloves GARLIC finely chopped
1 ONION chopped
SALT
PEPPER
in this recipe I also use:
GARLIC POWDER
CHILI POWDER
FENNEL SEEDS
PAPRIKA
…but experiment with seasonings you like
2 Tbsp BUTTER
MILK or CREAM
OIL for sauteing

mashed plantains

How to Make Plantain Mash

  • Choose firm, green, unripe plantains.
  • Slice off the very tips of the plantain, but leave on the peeling.
  • Cut the unpeeled plantain into about three sections.
  • Bring a pot of salted water to boil and add the plantain sections.
    Reduce the heat and let the plantains simmer for about 20 minutes, or until a knife passes easily into the plantain.
  • While plantains boil, heat a skillet and oil on medium heat.
  • Add onions and saute 2 minutes.
  • Add garlic and seasonings and continue to saute another 4-5 minutes.
  • Remove skillet from the heat and set aside until plantains have completed boiling.
  • Once a fork passes easily through the plantains, remove plantains from the water.
  • Make a slice along the length of the cooked plantain and remove the peeling.
  • Place cooked plantains into a bowl and mash.
  • Add butter.
  • Add sauteed onion/garlic and mix well.
  • Pour milk or cream 1-2 Tbsp at a time, mixing until the desired consistency is reached.

Whether you call this dish mashed plantains, mofongo, or mangu, it’s gonna be yummy. Serve just like mashed potatoes!

Unripe green plantains are a terrific ingredient that you can use in all kinds of savory, starchy dishes. Definitley give them a try, and for a sweeter option, try ripe plantains. The simple fried plantain recipe below is one of the best ways to use ripened plantains.

mashed plantains

How to cook Sweet Fried Plantains

Avoid green plantains for frying, and buy plantains that are yellow to black in color. Feel the plantains and select ones that are soft or only semi-firm, you can buy the super soft blacker plantains, but I prefer more texture.

  • Heat a skillet on medium heat and add oil.
  • Slice the tips off of the plantain and peel away the skin.
  • Cut the plantain in half through the middle, and then cut each half lengthwise into 3-4 planks.
  • Slide plantains into the hot skillet.
  • Season top half if desired, I like to use a mix of chili pepper and cinnamon.
  • Fry until the bottom begins to brown, then turn and brown other side.
  • Add more seasoning if desired, or even some sugar, if you’re crazy.
  • Once the plantains are cooked to desired color, remove and drain on a paper towel,
    Serve warm.

They are great alone as a snack, or a tasty side dish, especially with rice or a seasoned meat dish. Have you ever heard of the expression “a little sweet and some meat”? Plantains mare a perfect combo for this dining idea. I really enjoy fried plantains for breakfast with fried eggs.

Give fried plantains a try and let me know what you think, and try mashed plantains, as well. Depending on the ripeness of the plantain, you can use them for a wide variety of dishes.

Sign up for our Recipe Mailing List and receive our latest recipe video right in you inbox!

If you liked the idea of green plantains as a starchy alternative to potato, you might like trying a Delicious Rutabaga Recipe, too.

Thanks for checking out this Mashed Plantains Recipe and video, if you enjoyed the dish, click a button or two below and share it with your friends. And if you’re on Youtube often, subscribe to the Chef Buck Cooking Channel.

I appreciate it, thanks!
–Chef Buck

Share and Enjoy !


Black Bean Corn Salsa is Good on Everything*

Black Bean Corn Salsa

Here’s a simple Black Bean Corn Salsa that will knock your socks off, or at least be very tasty on a chip, a fish, a salad, on or in an omelet…you get the idea. It’s an easy and versatile way to use beans, which are good for your heart, in fact the more you eat beans, the more you…crave more beans? Something like that, so definitely give this recipe a try. This salsa is super tasty and you can pack it with raw, healthy, and fresh ingredients to use as an accompaniment for types of recipe dishes.

What you need for Black Bean Corn Salsa

dressing:
1 Tbsp LEMON JUICE
1 Tbsp RED WINE VINEGAR or balsamic vinegar
1 Tbsp HONEY
1 tsp TURMERIC
1 tsp GARLIC POWDER or 1 Tbsp minced garlic
¼ tsp PAPRIKA
½ BLACK PEPPER
½-1 tsp SALT
salsa:
2 15 oz cans BLACK BEANS, drained and rinsed
1 15 oz can YELLOW AND WHITE CORN, drained or 2 cups frozen corn, thawed
12-16 sliced CHERRY TOMATOES
5-7 small GREEN ONIONS, finely sliced, or ½ cup red onion, finely diced.
1 Red or Orange BELL PEPPER, diced
1 bunch of chopped, fresh CILANTRO, or substitute parsley
1-2 AVOCADO peeled, pitted, and diced; add JUST before serving

Black Bean Corn Salsa
Salsa is great on a chip, as a topping for fish or salad, in an omelet, on ice cream…well, maybe not ice cream.

How to make the Black Bean Corn Salsa

  • In a small bowl, combine the dressing ingredients, mix well, and then set aside.
  • Drain and rinse the black beans and corn. In this recipe we use a mix of yellow and white whole kernel corn.
  • Slice and dice and chop tomatoes, onions, and other veggies you want to add; see other veggie suggestions below.
  • In a large bowl, combine and toss veggies and beans and corn.
  • Add dressing and mix well.
  • For best results, place overnight in the refrigerator. Remember that turmeric can stain some plastic containers. Ziplocs allow you to periodically flip salsa to distribute dressing more evenly.
  • Let marinate at least a couple of hours, preferably overnight.
  • Before serving, add diced avocados and gently mix.
  • Taste, adjust seasoning as needed.
  • Serve with chips, or as a topping or filling.

Options and Substitutions

  • ½ cup red onion, finely chopped
  • Pickled jalapeno slices
  • ½ tsp chili powder
  • 2 tsp cumin
  • Mango, diced

More Uses for Salsa

  • Use black bean corn salsa as a salad topping!
  • Fancy Slaw: add chopped cabbage, mayo/yogurt.
  • Fish topping: add mango and cumin and then warm.
  • Omelet filling or topping: add cheese, cumin, then garnish with sour cream and/or guacamole.
  • Use salsa as a filling for quesadillas, tortillas, etc..

If you’re new to home cooking, get a bunch of spices, pots and pans, and begin experimenting with different recipes. It’s a healthy hobby that will save you money in the long run. Check out current prices for Complete Kitchenware Sets on Amazon as well as Complete Starter Spice Kits. Or go to a thrift store! I’ve found some of my favorite kitchen gear at second-hand stores.

This black bean corn salsa goes great with a lot of dishes, and for another avocado-ee recipe try a Classic Homemade Guacamole Recipe.

easy guacamole recipe
guacamole recipe

Be sure and sign up for our mailing list and never miss a new Chef Buck cooking video, and also click a button below and share the dishes with your friends. We appreciate all the kind comments and support, and we’ll see you next time in the kitchen!
–Chef Buck

Thanks for watching our recipe videos!

We include affiliate links for products on our website, so if you make a purchase after clicking on our links, we may earn a commission which helps us produce more videos and drink more coffee :^) We participate in the Amazon Services LLC Associates Program, which is an affiliate advertising program providing a means for us to earn fees by linking to Amazon.com and affiliated sites, so we can make more videos.

*almost

Share and Enjoy !

Egg Coffee for Perfect Coffee on the Stove

egg coffee

Here’s a simple way to make a smooth cup of coffee on the stove top. Try this Scandinavian Egg Coffee brewing technique. All you need is coffee, an egg, and a pot of water. You can brew a great cup of coffee super quick and with no fancy coffee gadgets. I love French press and Moka pot coffee, but when I find myself without those accessories, this egg coffee is my new go-to for brewing coffee.

What You Need To Make Stove Top Egg Coffee

COFFEE …Buy whole beans and grind them at home, fresh-ground coffee makes all the difference.
1 EGG …I use a large egg
WATER …We use cold tap water, ’cause we’re savages (I mean eco-friendly / cheap)
and then just a POT to brew the water and coffee,
and if you’re making extra, a COFFEE CARAFE or THERMOS

egg coffee
Make egg coffee for friends…they’ll love the coffee, and think you’re “interesting”

How to Make Egg Coffee

Use your favorite coffee beans. Shop around. Experiment. When brewing coffee, the beans make all the difference. Buy whole beans and grind them fresh at home.

I’ve made Egg Coffee with a course grind and a fine grind; it works either way, but a finer grind will make stronger coffee, just as leaving the brew to go longer will make the coffee stronger.
If you don’t want to use freshly ground beans, then this scandinavian Egg Coffee technique might be the ideal brewing system. Brewing coffee with egg shell will help smooth out a rough coffee.
It’s all about acids and bases and sciencey stuff like that.

I like to use a ratio of 1 Tbsp ground coffee to 6oz of water for a light roast, or 1 Tbsp coffee to 8oz of water for a dark roast, but this is very subjective,
so experiment and adjust to taste.

  • In a small bowl, crack an egg…leave the entire egg, shell and all.
  • Add ground coffee.
  • Mix well. Add a Tbsp or two of water, but not too much, you want the coffee and egg to form a gooey paste, not a muddy liquid.
  • On the stove top, heat a pot of water to a boil.
  • Turn off the heat and let the water sit for one minute, this will bring the temperature down so as to not overcook the coffee.
  • After one minute, add the coffee paste, and let sit for about 30 seconds, then stir.
  • Turn the burner back on, not to boil, but just enough to keep the coffee hot as it brews.
  • Remove from the heat after 3-4 minutes and strain into a coffee cup or carafe. The ground coffee beans will clump with the egg and make separating the brewed coffee much easier.
  • Enjoy that coffee, dude.

A coffee carafe or thermos is handy whenever you brew extra coffee, even if you have an electric coffee maker; leaving coffee on a burner is a recipe for bitter, burnt coffee. It’s easy to find a carafe at the thrift store–I’ve never bought a new one!–but if you’re a buy-new kinda person, here are some current online prices at amazon for coffee carafes.

Become a Coffee Nerd

Give egg coffee a try, and let me know what you think. Ever try Cold Brew Coffee? I love cold brew on a hot day, and for more ways to make a great cup of coffee anytime, check out our Coffee Playlist for Maximum Coffee Pleasure …sorta.

pour over coffee
click pic for how to make French Press Coffee

Thanks for checking out this weird but wonderful Scandinavian Egg Coffee, and if you give it a try, I think you will be happy you did. Imagine how much fun it will be to make this egg coffee for your friends! Thanks for watching, and be sure to sign up for our mailing list and never miss one of our video recipes. And if you know someone who might like our stuff, then click a button or two below and share it, we sure appreciate it! Thanks!
–Chef Buck

Share and Enjoy !


Fried Plantains Recipe …try Platanos Maduros!

fried plantains recipe

Try this easy fried plantains recipe. In the store, plantains are sold green and unripe, yellowing, or even totally black. A totally black banana is yucky, but a totally black plantain is okay. It’s fine to buy plantains at any stage of ripeness and use them for various recipes. For frying plantains, I like to buy the medium-ripe plantains and slice them into planks and fry in oil in a skillet. They have a nice sweetness and make a tasty side dish for breakfast, especially with rice and eggs.

What you need for this Fried Plantains Recipe

PLANTAIN …medium-ripe to ripe
OIL for sauteing
and seasoning is optional
…I like a bit of
CHILI POWDER
CINNAMON
SALT
and for an even sweeter
dessert-style side dish add
BROWN SUGAR
…but that’s crazy

fried plantains recipe
Fried plantains…sweet platanos maduros, and less ripe plantains used for twice-fried tostones

How to Fry Plantains

Choose ripe plantains for frying, and buy plantains that are yellow to black in color. Feel the plantains and select ones that are semi-firm to soft, you can buy the super soft blacker plantains, but I prefer more texture.

  • Heat a skillet on medium heat and add oil.
  • Slice the tips off of the plantain and peel away the skin.
  • Cut the plantain in half through the center, and then cut each half lengthwise into 3-4 planks.
  • Slide plantains into the hot skillet.
  • Season top half if desired.
  • Fry until the bottom begins to brown, then turn and brown other side.
  • Add more seasoning if desired, or even some sugar, if you’re crazy.
  • Once the plantains are cooked to desired color, remove and drain on a paper towel,
    Serve warm.

They are great alone as a snack, or a tasty side dish, especially with rice or a seasoned meat dish. Have you ever heard of the expression “a little sweet and some meat”? Plantains make a perfect combo for this dining idea. I really enjoy fried plantains for breakfast with fried eggs.
Give fried plantains a try and let me know what you think, and try green plantains, as well. Depending on the ripeness of the plantain, you can use them for a wide variety of dishes.

fried plantains recipe
I love fried plantains for breakfast, served with eggs and rice

How to Cook Green Plantains

Green plantains are a great ingredient, but unripe plantains definitely need cooking. They are not sweet, harder to peel raw, very starchy, and much like a potato. I like to boil green plantains, because it’s easy.

  • Slice off the very tips of the plantain, but leave on the peeling.
  • Cut the unpeeled plantain into three sections.
  • Bring a pot of salted water to boil and add the plantain sections.
  • Reduce the heat and let the plantains simmer for about 20-30 minutes, or until a knife passes easily into the plantain.
  • Remove the plantains from the water.
  • Make a slice along the length of the cooked plantain and remove the peeling.
  • The banana will be very starchy, savory, and neutral in flavor, and you can use it just like you might a potato.

One of my favorite ways to use boiled plantains is to mash them with onions and seasoning, kind of like a plantain version of mashed potato.
Experiment with green plantains a try them in some of your favorite potato recipes, and let me know what you think.

For more tasty vegetarian dishes, check out my Vegetarian Recipe Playlist, and if you liked the idea of green plantains, you might like trying this Easy Yuca Recipe, too.

yuca recipe

Be sure to sign up for our website mailing list and receive our latest recipe video right in your inbox. And if you like hanging out on Youtube, subscribe to the Chef Buck Cooking Channel.
Thanks for checking out this Fried Plantains Recipe and video, if you enjoyed the dish, click a button or two below and share it with your friends.
I appreciate it, thanks!
–Chef Buck

Share and Enjoy !


Pot Roast Recipe Perfect on the Stove Top

pot roast recipe

Here’s a perfect pot roast recipe you can cook on the stove top that is super simple and tastes fantastic. My mama likes a boneless chuck roast and prefers a beef bouillon paste for seasoning the roast, but any seasoning rub will work. Throw your chuck roast in a pot on the stove and it practically cooks itself. If you’ve ever wondered how to cook the perfect pot roast, then look no farther than this recipe.

What you need for this Pot Roast Recipe

…not a lot, keep it simple!
BONELESS CHUCK ROAST
SEASONING RUB

How to Cook a Perfect Pot Roast on the Stove Top

Buy a roast with some fat in it. Marbling in the meat adds flavor and juiciness; the thinner and richer the marbling, the better. For a stove top roast preparation, use a pot with a tight fitting lid and a heavy bottom.

  • Season the roast generously with salt, pepper, and whatever seasonings you like. A beef bouillon paste like my mama uses in the video is delicious. Check current prices for BEEF BOUILLION PASTE on Amazon.
  • Place the cooking pot on the stove with just a few spoonfuls of water in the bottom and add the roast.
  • Lightly brown the roast on high heat for a few minutes.
  • Reduce the heat down to low, and cover the pot with a lid.
  • Check the roast periodically. About an hour into cooking, turn the roast.
  • The beef will release it’s flavors and cook in it’s own juices.
    Once the roast cooks out it’s juices, it will begin to reduce.
  • Continue cooking until the roast cooks down to it’s grease and drippings. [ For this meat thickness, at our altitude and on this stove, it took about 2 hours for the liquid to reduce to the grease and drippings. ]
  • Remove the lid, raise the heat to medium, and brown the meat a final time in it’s grease.
  • Remove meat from the pot.  Let it rest 10-15 minutes before slicing.
  • Cut it across the grain, at an angle.

Want to Make Gravy?

To make beef gravy from the drippings, add a bit of flour and mix well over medium heat.
Stir for about 1 minute until the flour and fat are well incorporated and the flour gets a bit of color. This is called “making a roux”.
Raise the temperature and stir in broth or water and continue stirring until the mixture begins to boil and thicken, then add extra salt and seasoning as desired and pour into a gravy bowl.

pot roast recipe
Throw your chuck roast in a pot on the stove and it practically cooks itself.

For another meaty meal, check out this Beef Tenderloin Recipe.

pot roast recipe
try a juicy pork tenderloin for your next great family meal.

Thanks For Watching Our Recipe Videos!

Thanks for checking out our stove top pot roast recipe, and all of our recipes. Be sure and sign up for our mailing list so you’ll never miss a new recipe. Also click a button below and share the dishes with your friends. You can also follow Chef Buck on Youtube. We appreciate all the kind comments and support, and we’ll see you next time in the kitchen!

If you like what CG and I do, you can also support us on Patreon, or throw us a tip in our Paypal Tip Jar. We’ll happily enjoy a coffee on the road – Thanks! We appreciate all the support, and we’ll see you next time in the kitchen!

We include affiliate links for products on our website. So, if you make a purchase after clicking on our links, we may earn a commission which helps us produce more videos and drink more coffee :^) We participate in the Amazon Services LLC Associates Program, which is an affiliate advertising program. It provides a means for us to earn fees by linking to Amazon.com and affiliated sites, so we can make more videos.

Share and Enjoy !

Crunchy Slaw Noodle Salad Recipe

crunchy slaw

If you think coleslaw is too healthy, then here’s a crunchy noodle salad recipe that will remedy that, but you’ll still find plenty of good nutrition in this delicious salad with Ramen noodles and toasted nuts. The great thing about this coleslaw recipe is that it’s easy to alter and it will still taste great. There are a lot of strong flavors in the salad, so add more of what you like and less of what you want to avoid. Over the years, we’ve really cut back on the amount of sugar we put in this recipe, but it still tastes great.

crunchy slaw
Crunchy coleslaw or noodle salad? What sounds tastier?

What You Need To Make Crunchy Slaw

Salad:
1 cup slivered ALMONDS
1 cup SUNFLOWER SEEDS
2 pkg BEEF RAMEN NOODLES (Check current prices for ramen noodles on Amazon.)
1 lb CABBAGE
3-4 GREEN ONIONS

Dressing:
2 Tbsp VINEGAR
¼ cup OLIVE OIL
¼ cup SUGAR
1 tsp SESAME OIL
some of the NOODLE SEASONING Package (to taste…add slowly…it’s strong stuff!)
…Also, add a bit of water to the dressing if you wish to thin it.

How to Make Crunchy Noodle Coleslaw

  • Break up the ramen noodles while still in the packaging, and set aside the flavor pack after opening.
  • In an oven preheated to 350 degrees Fahrenheit, on a baking sheet, toast the ramen noodles, nuts, and seeds. This will only take about 3-5 minutes; watch them closely as they toast, they will
    burn quickly. Check current prices for slivered almonds on Amazon.
  • Set toasted items aside to cool.
  • Combine the dressing elements in a small bowl and mix well. Adjust sugar, sesame oil, and noodle flavor pack to taste. Use the noodle flavor pack sparingly because it is a very strong flavor.
  • Slice cabbage into narrow strips and desired lengths. I like to use at least two types of cabbage for a variety of colors, but use only one type of cabbage if you like.
  • Chop up green onions. I chop the white bottoms finer than the green tops.
  • In a large bowl combine cabbage and green onion.
  • Add dressing and mix well.
  • Add in crunchy toasted elements and toss with cabbage.

And that’s it.
Serve this crunchy slaw as a side dish, or even as an entree. If you’re making it for a pot luck, you can make the elements of the crunchy slaw in advance, and then combine them before serving.

I hope you enjoy this noodle and cabbage salad, and for a more traditional slaw dish, check out this Classic Coleslaw Recipe.

crunchy slaw
classic coleslaw recipe

Thanks For Watching Our Recipe Videos!

Thanks for checking out our crunchy slaw and noodle salad recipe, and all of our recipes. Be sure and sign up for our mailing list so you’ll never miss a new recipe. Also click a button below and share the dishes with your friends. You can also follow Chef Buck on Youtube. We appreciate all the kind comments and support, and we’ll see you next time in the kitchen!

If you like what CG and I do, you can also support us on Patreon, or throw us a tip in our Paypal Tip Jar. We’ll happily enjoy a coffee on the road – Thanks! We appreciate all the support, and we’ll see you next time in the kitchen!

We include affiliate links for products on our website. So, if you make a purchase after clicking on our links, we may earn a commission which helps us produce more videos and drink more coffee :^) We participate in the Amazon Services LLC Associates Program, which is an affiliate advertising program. It provides a means for us to earn fees by linking to Amazon.com and affiliated sites, so we can make more videos.

Share and Enjoy !

Chayote Squash Facts and Low-Fat Recipe

chayote

What is chayote? Chayote squash is a fruit, but in the same way that squash and cucumber are fruit, it’ll never win a fruit contest. Chayote, aka choko or mirliton, is completely edible cooked or raw, from the skin to the flesh to the seed in the center. Chayote squash has a neutral flavor, so this “fruit” needs a lot of seasoning. It’s an ideal ingredient for it’s texture more than it’s flavor, like jicama and young green jackfruit. Chayote squash is an easy ingredient to work with and a healthy dining choice, so definitely give it a try if you find it in your local market.

Chayote Fun Facts

  • “Fun” might be too strong a word.
  • Chayote is an excellent source of dietary fiber, anti-oxidants, vitamins, and minerals.
  • It is a member of the “gourd family” along with pumpkin, squash, and cucumber.
  • Known as chayote, sayote, mirliton, choko, chocho, vegetable pear, and is eaten all around the world.
  • When buying, choose chayote that are smooth and firm. Pick medium sized chayote. Older, larger fruit will sprout sooner.
  • Peeling chayote exposes you to the juice, which can feel “weird” on your skin, but you don’t have to peel it; the skin, inner seed, and flesh are all edible.

What you need to Cook a Spicy Chayote Recipe

1 CHAYOTE thinly sliced
1 ONION chopped
2-3 GARLIC cloves
1 tsp CUMIN SEEDS
HOT PEPPER as desired
1-2 Tbsp CURRY SEASONING
SALT to taste
OIL for sauteing

chayote squash
Peel or unpeel the chayote, whichever you prefer. When peeling a chayote, you’ll find the
inner juice to be annoyingly slippery/sticky.

How Cook Chayote Squash in a Skillet

Slice the chayote thinly. Chayote has a dense apple like texture that holds up very well under heat, so it takes a bit to soften up when cooked, so slice very thinly
if you like your chayote less crispy crunchy.
Heat oil in a skillet on medium heat and add cumin seeds.
Add onion and garlic.
Add fresh hot pepper if desired.
Saute for several minutes.
Add seasoning and cook about 2 minutes more.
Add sliced chayote, mix well, and saute for a minute.
Add a small amount of water, cover, and simmer to desired tenderness. Add more water as needed, but never too much.

That’s it!
Give Chayote squash a try and let me know what you think!

Have you ever tried Rutabaga? It’s another interesting ingredient you might want to give a try.
And for more tasty vegetarian dishes, explore my Vegetarian Recipe Playlist 

Thanks for checking out the recipe and video, if you liked the dish, click a button or two below and share it with your friends.
I appreciate it, thanks!
–Chef Buck

Share and Enjoy !


Lemon Meringue Pie Recipe … Best Pie Ever

lemon meringue pie

If you love fresh-baked homemade pie, you’ll want to try Mama Redbuck’s best lemon meringue pie recipe. The meringue recipe for this lemon pie is truly impressive and piles high and holds its shape and makes a great topping for any kind of pie you bake. My mom uses this perfect meringue recipe for chocolate cream pie as well, and I love it. This lemon pie is full of fresh lemon goodness, so give this dessert recipe a try, and you’ll be glad you did.

Lemon Meringue Pie Recipe

pie filling ingredients:
9″ DEEP DISH PIE CRUST
1 cup SUGAR
½ cup CORN STARCH …check cornstarch price on Amazon
¼ tsp SALT
2¼ cup WATER
1 Tbsp LEMON ZEST …current prices online for Kitchen Zesters
4 EGG YOLKS
3 Tbsp BUTTER
½ cup LEMON JUICE

meringue ingredients:
2 Tbsp SUGAR
1 Tbsp CORNSTARCH
½ cup WATER
4 EGG WHITES
1 tsp VANILLA
pinch of SALT
then another 4 Tbsp SUGAR

lemon meringue pie
Try Mama Redbuck’s best lemon meringue pie recipe ever!

How To Make Lemon Meringue Pie

Make your own pie crust from scratch, or to make the recipe super easy, just bake up a pre-made frozen pie crust.
Firstly, bake the crust and have it cooled and ready before beginning to make the pie filling.
Then break 4 eggs and separate the yolks from the whites in two separate bowls.
Zest two lemons, and then squeeze the juice to fill ½ cup.

To Make The Lemon Pie Filling:

In a saucepan, add the sugar, cornstarch, salt, and zest of two large lemons.
On medium heat, stir water into the saucepan and continue stirring the pan 15-20 minutes, or until the mixture thickens and begins to bubble.
Slowly spoon 5-6 Tbsp of the heated, thickened mixture in with the eggs yolks, stirring constantly so as not to cook the eggs.
Then stir the egg yolk mixture into the saucepan with the rest of the heated filling.
Stir in the lemon juice and butter and continue stirring until the butter is melted and the mixture is smooth.
Pour the filling into the pre-baked pie shell and set aside to cool.

To Make The Meringue:

In a small saucepan add 1 Tbsp of cornstarch, 2 Tbsp sugar, and ½ cup water.
Mix the three ingredients well and on the stovetop heat over medium heat, stirring until the mixture thickens and clears slightly.
Set saucepan aside to cool.
In a mixing bowl, beat the egg whites until frothy.  My mom uses a plain old hand held electric mixer.  You can check here for current hand mixer prices on Amazon if you need one for your kitchen.
Add in vanilla and a pinch of salt and beat again to mix.
Gradually beat in 4 Tbsp of sugar, 1 Tbsp at a time.
Then beat in the cooled cornstarch mixture.
Continue beating until stiff peaks form.

To Finish The Pie:

Take a spatula and spread the meringue evenly over the pie filling.
Lightly chop the top of the meringue to form peaks on top of the pie.
Slide the pie into an oven preheated to 400 degrees Fahrenheit and bake meringue for 10-12 minutes,
or until the top of the top of the meringue sets and shows a nice color.
Remove the pie from the oven and allow to cool completely before slicing.
When cooled, store pie in the refrigerator beneath a pie dome, do not wrap meringue in plastic wrap or foil.

lemon meringue pie
This meringue pie topping is tasty on all kinds of pies.

And that’s it! Give Mama Redbuck’s Lemon Meringue Pie Recipe a try and let us know what you think.

Or try Mama Redbuck’s step-by-step CHOCOLATE PIE RECIPE.

chocolate pie recipe


And for another simple dessert recipe idea, try this easy Chocolate Cake Recipe.

lemon meringue pie
Try this easy chocolate cake recipe…made with beans…wha!!!?

We appreciate you watching  our videos!

I hope you enjoy this lemon meringue pies recipe. Sign up for our mailing list so you’ll never miss a new recipe. Also click a button below and share the dishes with your friends. You can also follow Chef Buck on Youtube. We appreciate all the kind comments and support, and we’ll see you next time in the kitchen!

If you like what CG and I do, support us on Patreon, or throw us a tip in our Paypal Tip Jar. We’ll happily enjoy a coffee on the road – Thanks! We appreciate all the support, and we’ll see you next time in the kitchen!

We include affiliate links for products on our website. Making a purchase after clicking on our links and we may earn a commission which helps us produce more videos and drink more coffee :^) We participate in the Amazon Services LLC Associates Program, which is an affiliate advertising program. It provides a means for us to earn fees by linking to Amazon.com and affiliated sites, so we can make more videos.

Share and Enjoy !

Muffin Recipe with a Ginger Twist You’ll love

muffin recipe

Combine ginger, lemon, and cardamom to create an easy ginger muffin recipe that will blow your mind. Candied ginger is tasty all by itself, but baking it in a muffin is even better, and you’ll find it’s a perfect pairing with a nice cup of coffee or hot tea. Bake these muffins at home and feel like you’re lounging in your favorite coffee cafe, but without all those annoying hipsters. This muffin is chock full with the entire zest from 1 large lemon, which is a great accent to the ginger, and the ground cardamom adds a touch of the exotic that will transform these muffins a real bakery treat, so get out a muffin pan and get to work!

Ingredients for Ginger Muffin Recipe

(this recipe makes about 8 muffins)
Dry Ingredients:
2 cups ALMOND FLOUR
1 tbsp CINNAMON
1 Tbsp CARDAMOM
1 tsp BAKING SODA
¼ tsp SALT
‘Wet’ Ingredients:
3 regular EGGS
2 tsp VANILLA
1/3 cup MAPLE SYRUP
113g (3-4 oz) unsweetened APPLESAUCE
2 Tbsp refined melted COCONUT OIL

1 cup chopped CANDIED GINGER
zest of 1 large LEMON

Crumble Topping:
(this recipe makes enough for 2-3 batches of muffins)
5 Tbsp ALMOND FLOUR
3 Tbsp COCONUT SUGAR
1½ tsp CINNAMON
pinch of SALT
2 Tbsp refined COCONUT OIL (at temperature so oil is a solid consistency, cut into the other
ingredients like butter)
*Refined coconut oil does NOT have a coconut flavor; virgin coconut oil HAS a distinct coconut flavor

muffin recipe
Candied ginger is a terrific muffin ingredient; adds great texture, flavor, and zing.

How to make this Muffin Recipe

  • Prepare baking tins and have cooling rack ready.
  • Preheat oven to 375.
  • If using the crumble topping, make that first. The coconut oil should be in a solid state. Add coconut sugar, cinnamon, and salt into a small, sealable container and mix. Cut in the coconut oil like butter, and mix. This recipe will make enough crumble topping for 3-4 batches of muffins. Set crumble mix in the fridge until ready to use.
  • In a bowl, mix the other dry ingredients together and set aside.
  • Using another bowl for the wet ingredients, whisk the eggs together. Mix the vanilla, maple syrup, applesauce, and melted coconut oil in with the eggs.
  • Add the bowl of dry ingredients into the wet, mixing just until all ingredients are wet, no need to over mix.
  • Stir in the candied ginger and lemon zest and mix gently.
  • Divide the batter equally between muffin cups.
  • Top each muffin batter cup with some crumble topping, as much as you like.
  • Bake in preheated oven at 375 degrees for 10 minutes. Turn muffins around; bake for about another 10 minutes.
  • Test for doneness with a toothpick or knife. The muffins are ready to come out if have no batter on the toothpick. If not done, then test after 4 minute intervals of additional cooking, because there’s no reason to get this far and then burn your muffins!
  • Cool on rack for at least 5 minutes.

And that’s it!
Give this awesome gluten free candied ginger muffin recipe a try and let us know what you think.

muffin recipe
Add the zest of a lemon and ground cardamom to transform these muffins into a real treat.

More Great Gluten Free Options

For another muffin recipe, try this Gluten Free Cinnamon Apple Muffin. And for a crazy gluten free dessert option, check out this fantastic Chocolate Cake Recipe made from beans. what!? I know, it sounds crazy, but this cake made from garbanzo beans is super moist and one of my favorite desserts to bake, so take a chance and give it a try, I think you’ll be very happy with the results.

chocolate cake recipe
A flourless, gluten-free chocolate cake

Thanks for checking our recipe videos out, and if you like what you see, click a button or two below and share this muffin recipe with your friends and family. I appreciate it!
–Chef Buck

Share and Enjoy !


Vegetable Soup Recipe with Rutabaga

vegetable soup

Try a tasty vegetable soup featuring rutabaga. Rutabaga is a healthy root vegetable you can use like a potato, but with less than half the calories and carbs of potato. Rutabaga is like a larger version of a turnip, only sweeter. It’s related to cabbage, and has a mild cabbagy taste, but not the “scary” cabbagy taste. Rutabaga is great in soups, and I love it simply seasoned and roasted in the oven. Like most produce, when buying rutabaga choose one that’s firm and seems heavy for it’s size, because that means it’s not too old, or dried out. Next time you’re at the market, pick up a rutabaga and give this vegetable soup a try and let me know what you think.

What you need for this Rutabaga Vegetable Soup Recipe

1 large RUTABAGA
1 ONION
2 stalks of CELERY
2 CARROTS
4-6 GARLIC
HOT PEPPER as desired
OIL for sauteing
CUMIN and FENNEL 1-2 tsp
(seeds optional)
1 Tbsp GARLIC POWDER
1-2 Tbsp CURRY POWDER
1 Tbsp SMOKED PAPRIKA
SALT and PEPPER to taste
(I use water in the soup if making ahead of time, or ready-made broth if eating soon)
Also, it’s soup; so add whatever else you want and clean the odds and ends out of your fridge.

vegetable soup
rutabaga is like a turnip on steroids, but sweeter

How to make a Vegetable Soup with Rutabaga

  • Slice the ends off the rutabaga and cut away the outer skin with a knife.
  • Chop rutabaga into large cubes, approximately 1/2″ squares, but err on larger pieces.
  • In a large soup pot, heat oil on medium heat.
  • Add seeds and cook about 20 seconds.
  • Add garlic, hot pepper, and onion and saute for another 4-5 minutes.
  • Add in seasoning and mix well.
  • Add carrot, celery and rutabaga and mix well.
  • Fill pot with enough broth or water to cover veggies (use veggie or chicken broth instead of water if eating soup the same day, use water if sitting overnight), cover with a lid, and bring pot to a
    boil.
  • Reduce heat and simmer on low for 40-50 minutes until rutabaga is fork tender.

That’s it!
Give this easy rutabaga soup recipe a try and let me know what you think, and bon appétit!

vegetable soup
Rutabaga soup is like The Eagles, and the veggies are the groupies (if you were born after 1990, The Eagles are an American Rock band)

Is Rutabaga Healthier than Potato?

  • Rutabaga has LESS THAN HALF the calories of potato.
  • Rutabaga has 60% FEWER CARBS than potato.
  • Rutabaga contains about the same amount of Dietary Fiber as potato.
  • Potato wins the vitamin count; rutabaga provides more Vitamin C than potato,
    but overall, is less nutrient rich than potato.

So, don’t give up on potatoes, but add rutabaga into your menu rotation and you’ll find it makes a great change-up from the regular potato routine. If you want to jazz up your breakfast, you can start with this Hash Browns Recipe with Rutabaga, or get down to basics
with this Roasted Rutagaba dish.

rutabaga recipe
Roasted rutabaga makes a great alternative to a potato side dish.

For another super vegetarian recipe idea, try this No-Meat Vegetarian Chili Recipe.

Thanks for checking out this rutabaga soup recipe, and if you liked the dish, click a button or two below and share it with your friends.
I appreciate it, thanks!
–Chef Buck

Share and Enjoy !


Jackfruit Pulled Pork Recipe for Vegetarian BBQ

jackfruit pulled pork

Here is the easiest jackfruit pulled pork recipe ever. A faux pork vegetarian recipe made with canned young, green jackfruit will deliver the taste and texture of your favorite BBQ pork, and it’s a much healthier choice. This recipe is basically a BBQ sauce delivery system. Unripe canned jackfruit makes a perfect meat substitute that works well for either pork or chicken, so definitely give it a try.

Ingredients for Jackfruit Pulled Pork BBQ

1 20oz can young, green JACKFRUIT
1 medium ONION
2-4 cloves GARLIC
your favorite BBQ SAUCE
1 tsp CUMIN POWDER
½ tsp CHILI POWDER
some SALT and PEPPER
OIL for sautéing

jackfruit pulled pork
BBQ jackfruit makes a perfect vegetarian pulled “pork” sandwich.

How to Make Vegetarian Pulled Pork BBQ with Jackfruit

  • Rinse and drain the young, green jackfruit. Make sure to buy unripe jackfruit and NOT the
    yellow ripe jackfuit. You can buy jackfruit online. Check CURRENT CANNED JACKFRUIT PRICES on Amazon.
  • Shred the jackfruit. I do this by hand, it’s very easy, but you can use a knife, too.
  • Heat oil in a skillet on medium heat.
  • Add thinly sliced onion and finely chopped garlic and saute 3-4 minutes.
  • Add in seasoning.
  • Add jackfruit and a little BBQ sauce.
  • Raise the temperature and heat the jackfruit through, then reduce to a simmer and cook until the dish reduces as the water cooks out of the onion and jackfruit.
  • Add more BBQ sauce to desired sauciness, and then remove from heat.

This jackfruit pulled pork substitute is great all on its own, served over rice, or perfect on a soft roll or bun, so definitely give it a try. If you like pulled pork BBQ, you will be amazed at this vegetarian option and how easy it is to prepare.

jackfruit pulled pork
Jackfruit BBQ is great over rice, on a sandwich, or all on its own.

What is Jackfruit?

Jackfruit is exactly what it sounds like, a fruit, but it’s HUGE. A 50 pound jackfruit is not uncommon. This giant tropical fruit grows on trees and is very popular in Asia. Unripe jackfruit can be cooked and used in savory dishes. Ripened jackfruit can be eaten raw and, unlike young green jackfruit, is very juicy and sweet.

Buying and cleaning fresh jackfruit is quite an endevour, so canned jackfruit is a perfect alternative. I prefer the green jackfruit and find it to be a terrific ingredient to experiment with in a variety of vegetarian recipes. The mildness of its flavor allows young jackfruit to be incredibly versatile, and it will enhance a recipe without overpowering it.

I’ve used green jackfruit as a pulled pork BBQ, as a faux meat filling in tacos, in an Indian-style variation of Jackfruit Tikka Masala, and as a No-Potato Hash for breakfast.
Its super nutritious, readily available at Asian markets, and well worth giving a try, so seek it out.

jackfruit recipe
Seasoned and baked Jackfruit makes a convincing faux chicken when added to this rich Indian inspired tikka masala.

Thanks for watching our recipe videos!

Thanks for checking out the canned jackfruit pulled pork recipe, and all of our recipes. Be sure and sign up for our mailing list to never miss a new cooking video, and also click a button below and share the dishes with your friends, and follow Chef Buck on Youtube. We appreciate all the kind comments and support, and we’ll see you next time in the kitchen!

If you like what CG and I do, support us on Patreon, or throw a tip in our Paypal Tip Jar We’ll happily enjoy a coffee on the road, or maybe even pay a bill or two!–Thanks! We appreciate all the support, and we’ll see you next time in the kitchen!

We include affiliate links for products on our website, so if you make a purchase after clicking on our links, we may earn a commission which helps us produce more videos and drink more coffee :^) We participate in the Amazon Services LLC Associates Program, which is an affiliate advertising program providing a means for us to earn fees by linking to Amazon.com and affiliated sites, so we can make more videos.

Share and Enjoy !

Corn Muffin Recipe with Jalapeno and Cheese

corn muffin recipe

Corn muffins are delicious, but adding cheese and jalapeno makes them irresistible. CG cooks up a tasty corn muffin recipe with whole kernel corn to make them super moist and flavorful. If you’re not a fan of hot jalapenos, then try substituting milder pickled jalapenos which are often sold right alongside jars of hotter peppers at the grocery store. Topping the muffins with sliced jalapeno makes them look so good!

What you need for this Corn Muffin Recipe

¾ cup CORNMEAL …we use a medium grind in this recipe
1¼ cup ALL-PURPOSE FLOUR
2½ tsp BAKING POWDER
½ tsp SMOKED PAPRIKA
½ tsp CHIPOTLE or regular chili powder
½ tsp SALT…unless the corn or butter already contains salt
1 cup MILK
2 Tbsp OIL or use melted butter instead
4 Tbsp HONEY
1 EGG
1 cup CANNED WHOLE KERNEL CORN drained
¼ cup PICKLED JALAPENOS, roughly chopped
¼ ONION, minced
1 cup freshly shredded CHEDDAR CHEESE plus ¼ cup for topping
fresh JALAPENO deseeded and sliced for topping…or you can use pickled slices for the topping

corn muffin recipe
Corn muffins are delicious, but adding cheese and jalapeno makes them irresistible.

How to make Corn Muffins

If you need a muffin tin for your kitchen, you can check current prices for a Cupcake and Muffin Pan on Amazon.

  • Place rack in middle of the oven.
  • Heat oven to 400 degrees Fahrenheit.
  • Grease 12 muffin pan cups or line with parchment paper baking cups and set aside.
  • Combine dry ingredients in bowl.
  • Combine remaining ingredients in another bowl and mix, but reserve fresh jalapeno slices and a little cheese for topping.
  • Add the dry ingredients to the wet and stir until ingredients are moistened.
  • Fill prepared muffin cups evenly.
  • Top with fresh jalapeno slices and a very light sprinkling of cheese.
  • Bake 20-30 minutes or until toothpick inserted into center comes out clean and muffins are golden brown.
  • Allow to cool for 5 minutes before removing from muffin tins.

And that’s it! Hope you like this cheesy jalapeno corn muffin recipe. You can serve them hot or cold for breakfast, lunch or dinner, and I especially love them in the morning with over easy eggs.

corn muffin recipe
broken eggs are less sad with corn muffins

Give this corn muffin recipe a try and let us know what you think, and for another bready treat, check out this perfect BUTTERMILK BISCUIT RECIPE. Both recipes go great with a big bowl of VEGETARIAN CHILI.

vegetarian chili
pot o’ meatless chili for good times

Thanks for checking out our corn muffin recipe, and all of our recipes. Be sure and sign up for our mailing list and never miss a new Chef Buck cooking video, and also click a button below and share the dishes with your friends. We appreciate all the kind comments and support, and we’ll see you next time in the kitchen!

Thanks for watching our recipe videos!

We include affiliate links for products on our website, so if you make a purchase after clicking on our links, we may earn a commission which helps us produce more videos and drink more coffee :^)                                                                                                We participate in the Amazon Services LLC Associates Program, which is an affiliate advertising program providing a means for us to earn fees by linking to Amazon.com and affiliated sites, so we can make more videos.

Share and Enjoy !

Vegetarian Chili is not just for Vegetarians!

vegetarian chili

Here’s a satisfying and hearty vegetarian chili recipe that’ll put a little pep in your step. If you’re a die-hard carnivore, then your initial reaction is probably NOPE, but you should give meatless chili a try. I love a good meat chili, and when I get chili at a restaurant I generally order a meat and bean chili, but at home I’m vegetarian chili all the way. Vegetarian chili just tastes great, and I don’t miss the meat, plus it’s a perfect way to clean out all the veggie odds and ends in your fridge. The key to a hearty meatless chili is lots of seasoning, onions, and peppers. I like to add at least two kinds of beans, and the veggies can be whatever you like, so be creative!

What You Need to Make a Great Vegetarian Chili

15 oz can CHICK PEAS
15 oz can KIDNEY BEANS
1 BELL PEPPER (chopped)
Lg ONION (chopped)
JALAPENO PEPPER (diced, very optional)
2-3 cloves GARLIC (finely chopped)
1 ZUCHINNI (cut into large pieces)
1 cup CAULIFLOWER (chopped)
2 ROMA TOMATOES (chopped)
28 oz can CRUSHED TOMATOES
1 heaping Tbsp DRIED OREGANO
1 Tbsp CUMIN
1 tsp GARLIC POWDER
1 Tbsp CHILI POWDER
1 Tbsp SMOKED PAPRIKA
SALT and PEPPER, to taste
2 Tbsp OLIVE OIL for sauteing
WATER as needed…add slowly
I also add a little leftover RUTABAGA to this recipe, but that is very optional. A vegetarian chili is a great way to clean out the fridge of all those veggie odds and ends, so use what you have.

vegetarian chili
pot o’ meatless chili for good times

How to Make Easy Vegetarian Chili

  • Slice, dice, mince, and chop all your ingredients. Prepping this dish is the most labor intensive part of this recipe. Once your ingredients are ready, it’s pretty eazy peezy.
  • Heat some oil in a large pot on medium heat.
  • Add in the onion and hot pepper and saute for 4-5 minutes.
  • Add in the rest of the peppers, garlic, and seasoning, then mix and saute for another couple minutes.
  • Add in everything else, plus about ½ a can of water. Be conservative with the water. The dish might seem overly thick, but a lot of water will be released from the veggies as the chili cooks. You can always add more water later.
  • Cover and bring the pot to a bubble, reduce the heat down to a simmer, and cook covered for about 45 minutes, adding water as needed and desired.
  • After 45 minutes give the dish a taste test and adjust seasoning, but remember, the flavor of the chili will intensify on its own as it sits.

Like any soup or stew or chili, it’s ideal if you make the recipe ahead of time, because the dish will get exponentially better as the days pass, so be sure to make a big pot of chili so you’ll have plenty of leftovers.

vegetarian chili
hearty vegetarian chili recipe…try it!

That’s it! Hope you like it, and if you’ve got a bigger pot, CLICK HERE for a double-sized variation of this vegetarian chili recipe.

If you want jalapeno corn muffins to pair with chili, here’s a recipe that tastes great and is a breeze to make.

vegetarian chili
make a batch of corn muffins for a great chili sidedish

Jalapeno Corn Muffin Recipe

¾ cup cornmeal (whole, medium grind)
1¼ cup all-purpose flour
2½ tsp baking powder
½ tsp smoked paprika
½ tsp chipolte (or regular chili powder)
½ tsp salt…unless the corn or butter already contain salt
1 cup milk
2 Tbsp oil (alternative butter, melted)
3 Tbsp honey
1 large egg
1 cup canned corn kernels, drained
¼ cup pickled jalapenos, chopped
¼ onion, minced
1 cup shredded sharp cheddar cheese (plus ¼ cup for topping)
optional: 1 jalapeno (deseeded and sliced for topping)

Place rack in middle of the oven and preheat to 400°F.
Grease 12 muffin pan cups or line with parchment paper baking cups; set aside.
Combine dry ingredients in bowl.
Combine remaining ingredients in another bowl (minus topping, jalapeno). Add to dry ingredients and stir until ingredients are moistened.
Fill prepared muffin cups evenly.
Top with remaining jalapeno rings and cheese.
Bake 20-30 minutes or until toothpick inserted into center comes out clean and muffins are golden brown.
Allow to cool for 5 minutes before removing from muffin tins.
Serve warm or cold. Serve with butter or honey butter.
HONEY BUTTER:
½ cup butter, softened
2 Tbsp honey

I hope you like these recipe ideas. Give this healthy chili recipe a try and let me know what you think, and for more hearty meat-free options, try this very easy blackened eggplant Veggie Burger Recipe or this fantastic faux pasta made with Zucchini Zoodles.
Or visit my Vegetarian Recipe Playlist over on The Chef Buck Youtube Channel.

Thanks for Watching our Vegetarian Chli Recipe!

Click a button below and share the dishes with your friends. We appreciate all the kind comments and support, and we’ll see you next time in the kitchen!

If you like what CG and I do, support us on Patreon, or throw us a tip in our Paypal Tip Jar. We’ll happily enjoy a coffee on the road – Thanks! We appreciate all the support, and we’ll see you next time in the kitchen!

We include affiliate links for products on our website. Making a purchase after clicking on our links and we may earn a commission which helps us produce more videos and drink more coffee :^) We participate in the Amazon Services LLC Associates Program, which is an affiliate advertising program. It provides a means for us to earn fees by linking to Amazon.com and affiliated sites, so we can make more videos.

Share and Enjoy !

Cauliflower Cakes for LESS Carbs MORE Flavor

cauliflower cakes

Try this cauliflower cakes recipe if you’re into healthy, low carb, and delicious. Just ball your cauliflower into flavorful balls, press them out into cakes, and bake them in the oven. I like to top mine with a creamy sauce, but that’s optional. Serve these cauliflower cakes over a bed of spinach and you’ve got a low carb, light and delicious meal.

What You Need To Make Cauliflower Cakes

3 cups of grated CAULIFLOWER
½ cup of freshly grated CHEESE
2 EGGS beaten
1 Tbsp chopped JALAPENO
¼ cup finely chopped BELL PEPPER
2 finely chopped GREEN ONIONS
1-2 cloves minced GARLIC
1 tsp dried ITALIAN SEASONING
1 tsp TURMERIC POWDER
1 tsp GARLIC POWDER
1 tsp SMOKED PAPRIKA
1 tsp CHILI POWDER
PARCHMENT PAPER to line your baking sheet
MAYONNAISE and LEMON for dressing

cauliflower cakes
Try a cauliflower cakes recipe if you’re into healthy, low carb, and delicious.

How to Cook Cauliflower Cakes

  • Grate fresh cauliflower into granules resembling “poprocks”. I like to use a hand grater, but feel free to use a food processor, however, I think grating the cauliflower by hand actually makes the cauliflower cakes lighter and fluffier. If you do use a food processor, don’t over-process the cauliflower into a doughy consistency, unless you prefer a more dense cauliflower patty.
  • In a bowl, add the grated cauliflower and the rest of the ingredients.
  • Mix all ingredients well, then separate into individual portions for cakes.
  • Form each portion into a ball and squeeze out excess liquid.
  • Form the cauliflower ball into a ½ inch thick patty and place on the parchment paper lined baking sheet, and definitely USE PARCHMENT PAPER, or your cauliflower might stick after baking. The cakes will not hold together well before cooking, but you can adjust the shape and size of each patty while on the baking sheet. Check here for current pricing for parchment paper on Amazon.
  • Place baking sheet in an oven preheated to 400 degrees Fahrenheit, bake approx. 30-40 minutes, or until the cauliflower cakes color and firm up.
  • Remove cauliflower cakes from the oven and serve over a bed of greens.
cauliflower cakes
Cauliflower cakes made with a food processor can form heavier, denser patties. For lighter cakes, use a hand grater.

I like to top the cakes with a simple dressing of mayonnaise and lemon, and adding a dash of jalapeno pickling juice or horseradish isn’t a terrible idea!
And that’s it. Eat and enjoy!

Quick Dressing for Cauliflower Fritters

½ cup MAYONNAISE
2-3 Tbsp LEMON JUICE
minced LEMON ZEST
1 tsp finely chopped PICKLE, JALAPENO, or GARLIC

Mix ingredients in a small bowl, adjust to taste. Refrigerate until ready to serve.

And For More Cauliflower Recipes

Try this Cauliflower Crust Pizza Recipe, which can also make a pretty cool Cauliflower Burrito Recipe.

If you don’t have a baking sheet, use a big pizza pan. Big pizza pans make the best baking sheets for cauliflower pizza crusts, nachos, whatever…round is always better than square, right? If you need one in your kitchen, check out current Big Pizza Pan prices on Amazon.

white pizza
A white pizza is great on any kind of crust.

Give these beautiful cauliflower cakes a try and let me know what you think. Or would you call them cauliflower fritters? If you’re serving them to kids, I’d definitely call them “cakes”. And if you like the recipe, then click some of the buttons below to share it with friends and family. I appreciate it!
–Chef Buck

Share and Enjoy !

Rutabaga Recipe for a Low Carb Diet

rutabaga recipe

Here’s an easy Roasted Rutabaga Recipe that you will love, and it’s a great alternative to potato. Rutabaga is a low-carb root vegetable you can use just like a potato, but with less than half the calories and carbs of potato. In appearance rutabaga is like a larger version of a turnip, but it tastes a bit sweeter. It’s related to cabbage, so it has a very mild cabbage taste. It’s great baked in the oven, cooked in soups, and I love it shredded and cooked into breakfast hash browns. Like most produce, when buying rutabaga choose one that’s firm and seems heavy for it’s size. Give this rutabaga recipe a try and let me know what you think.

What You Need for a Roasted Rutabaga Recipe

RUTABAGA cubed
OLIVE OIL
SALT
CHILI PEPPER
BLACK PEPPER
ROSEMARY

rutabaga recipe
Roasted rutabaga makes a great alternative to a potato side dish.

How to Roast Rutabaga in the Oven

  • Buy a rutabaga that’s heavy for it’s size and not dried out.
  • Slice the end off the rutabaga and cut away the outer skin with a knife.
  • Cut into roughly 1/2″ square cubes.
  • Toss the rutabaga cubes in a bowl with olive oil.
  • Add seasoning and toss until cubes are well coated
  • Spread rutabaga on an ungreased baking sheet. Aluminium foil is a good idea.
  • Bake in a preheated oven at 400 degrees Fahrenheit for approximately 45 minutes.
  • Halfway through the cooking process, you can check on the rutabaga and give them a turn to prevent overcooking on one side.

And that’s it!
Roast some rutabaga in the oven let me know what you think.

rutabaga recipe
Don’t be scared of da rutabaga

Is Rutabaga Healthier than Potato?

  • Rutabaga has LESS THAN HALF the calories of potato.
  • It has 60% FEWER CARBS than potato.
  • Rutabaga contains about the same amount of Dietary Fiber as potato.
  • Potato wins the vitamin count; rutabaga provides more Vitamin C than potato,
    but overall, is less nutrient rich than potato.

So, don’t give up on potatoes, but add a rutabaga recipe into your menu rotation, it’ll make a great change-up from the regular potato routine. One of my favorite faux potato dishes is this Mock Potato Salad made with cauliflower.
And for another tasty rutabaga recipe idea, try Rutabaga Hash Browns.

hash browns recipe
click pic for recipe

Thanks for checking out this baked rutabag recipe and video, if you liked the dish, click a button or two below and share it with your friends.
I appreciate it, thanks!
–Chef Buck

Share and Enjoy !


Gluten Free Muffins with Apple Cinnamon

gluten free muffins

Check out these moist and delicious gluten free muffins made with almond flour. CG has been baking muffins up the wazzoo lately, and apple-cinnamon almond flour muffins are some of my favorites, so give them a try. Don’t be put off by terms like gluten free and grain free, just focus on delicious. Also feel free to experiment with recipe substitutions as well, like maple syrup instead of coconut sugar, or ginger instead of apples, or using banana instead of apple sauce.  Muffins are great treats, and while gluten free options are generally underwhelming, this muffin recipe is a winner.

Ingredients for Gluten Free Muffins

Crumble Topping:
(this recipe makes enough for 2-3 batches of muffins)
5 Tbsp ALMOND FLOUR
3 Tbsp COCONUT SUGAR
1½ tsp CINNAMON
pinch of SALT
2 Tbsp refined COCONUT OIL

Dry Ingredients:
2 cups ALMOND FLOUR
1 heaping Tbsp CINNAMON
1 tsp BAKING SODA
¼ tsp SALT

‘Wet’ Ingredients:
3 regular EGGS
2 tsp VANILLA
4 Tbsp COCONUT SUGAR or use 1/3 cup maple syrup
113g (3-4 oz) unsweetened APPLESAUCE
2 Tbsp refined melted COCONUT OIL

1 medium APPLE, diced

(this recipe makes 6-8 muffins)

*Refined coconut oil does NOT have a coconut flavor; virgin coconut oil HAS a distinct coconut flavor

gluten free muffins
Gluten free apple-cinnamon muffins that are delicious? Oh, yeah.

How to Make Gluten Free Muffins with Apple Cinnamon

  • Prepare baking tins and have cooling rack ready.
  • Preheat oven to 375.
  • Combine crumble topping ingredients together. Coconut oil should be in a solid state in order to cut into the mixture like butter, then store the crumble in fridge while mixing together the rest of the batter.
  • Mix the dry ingredients together and set aside.
  • In a bowl, whisk eggs together. Add vanilla, coconut sugar, applesauce, and melted coconut oil, and mix well.
  • Then add dry ingredients to wet, combining just until all ingredients are wet, no need to over mix. Add apples and mix gently.
  • Divide batter equally between 6-8 muffin cups.
  • Top each muffin batter cup with crumble topping, as much as you like.
  • Bake in preheated oven at 375 degrees for 10 minutes. Turn muffins around; bake for another 10 minutes.
  • Test muffins with a toothpick or knife blade. The muffins are ready if no batter sticks on the toothpick or knife. If muffins need more cooking time, return to the oven and then test every 4 minutes, because there’s no reason to get this far and then burn your muffins!
  • When finished baking, cool muffins on rack for about 5 minutes, this will keep them from sticking to the muffin cup papers.

Muffin Time!

Now all you need is a hot cup of coffee or a cold glass of milk and you’ll be on your way to a perfect day! Give this gluten free muffins recipe a try and then let us know what you think. And for another dessert recipe, give this Gluten Free Chocolate Cake Recipe made from beans. wha!?

chocolate cake recipe
A flourless, gluten-free chocolate cake

Thanks for watching our recipe videos and then trying some out. If you like what you see, click a button or two below and share this gluten free muffins recipe with friends and family. I appreciate it!
–Chef Buck

Share and Enjoy !

Liver Recipe for People Scared of Liver

liver recipe

If you ever wondered how to cook liver, then this liver recipe is an easy place to start. Growing up in the southern USA, I ate a lot of liver and onions. I know it looks like a scary prop from a Freddy Kruger movie, but it’s nutrient dense and delicious. If you didn’t grow up eating liver and onions, then the idea probably doesn’t sound very appealing, but it’s worth giving a try if you’re at all curious. Here’s a simple liver recipe with just a little oil, seasoning, hint of flour, and a whole lot of onions. Liver cooks up quickly. The onions take a little more time, but even so, it’s a quick and easy dish to prepare. And liver is a protein superfood, for reals.

What You Need for This Liver Recipe

BEEF LIVER (buy skinned and deveined liver, and thicker cuts are easier to handle)
ONIONS (lots of onions)
FLOUR (just a light dusting, use almond flour for a gluten free recipe)
SALT
PEPPER
(add other seasonings as well, if desired)
OIL for cooking

liver recipe
Beef liver is a bargain ingredient packed full of flavor and nutrition. For easiest prep and handling, buy liver that is already sliced and deveined.

How Cook Liver and Onions

  • Wash and pat dry the liver.
  • Cut liver into palm sized pieces for easy handling in the skillet.
  • Bread liver lightly with seasoned flour.
  • Heat oil in a skillet on medium heat. Check current prices for a non-stick skillet on Amazon.
  • Add liver and cook about 2 minutes on each side, or until liver if firm, but still slightly pink inside.
  • Remove liver and place on a paper towel.
  • Add onions to the skillet and saute until carmelized.
  • Return liver to the skillet and heat through with the onions.
  • Plate liver and top with onions.

That’s it!
Give this liver recipe a try and let me know what you think, and bon appétit!

liver recipe
Liver is a protein superfood packed with nutrition, and it tastes great, so take a chance and see if you like it!

Tips for Buying and Cooking Liver

  • Buy paler liver for milder flavor. The darker the liver, the stronger the flavor.
  • “Calf liver” is milder, but more expensive than “beef liver”.
  • Buy “de-veined” liver; this will reduce some of the chewiness.
  • If you can’t find liver in your butcher’s meat case, check the frozen section. Beef liver is often sold frozen.
  • You can marinate beef liver in milk for a milder flavor.
  • Cook liver until it is firm, but still slightly pink inside. Overcooked liver can be chewy.

Benefits of Eating Liver

  • Liver is a nutrient powerhouse: a protein superfood.
  • It is packed with vitamins B12 and A.
  • Liver is high in iron, zinc, copper, and folic acid.
  • Liver is an excellent source of protein.
  • Eat liver to prevent or treat anemia.
  • Does liver sound gross? Remember, liver does not store toxins, but acts as a filter, and eating liver will benefit your own liver function.

Not sure what kind of onions to use? Here’s a video about Different Types of Onions, But don’t watch unless you have a sense of humor!

types of onions
What is the difference between red, white, and yellow onions?

And for another tasty meal idea, check out this delicious Oven-Baked BBQ Ribs Recipe.

Baby back ribs recipe in the oven
Slow Cooked Baby Back Ribs

Thanks for Watching our Videos!

Thanks for checking out our liver recipe. Sign up for our mailing list so you’ll never miss a new recipe. Also click a button below and share the dishes with your friends. You can also follow Chef Buck on Youtube. We appreciate all the kind comments and support, and we’ll see you next time in the kitchen!

If you like what CG and I do, support us on Patreon, or throw us a tip in our Paypal Tip Jar. We’ll happily enjoy a coffee on the road – Thanks! We appreciate all the support, and we’ll see you next time in the kitchen!

We include affiliate links for products on our website. Making a purchase after clicking on our links and we may earn a commission which helps us produce more videos and drink more coffee :^) We participate in the Amazon Services LLC Associates Program, which is an affiliate advertising program. It provides a means for us to earn fees by linking to Amazon.com and affiliated sites, so we can make more videos.

Share and Enjoy !

Must Try Egg Bread Bake Recipe

egg bread

Egg bread is a fancy dish for breakfast or brunch, and it’s an easy recipe to prepare. The recipe is a cross between baked eggs, bread pudding, and stove top stuffing. It’s a great way to use up old and stale bread. I go light on the cheese in this egg bread recipe, but adding more cheese and making a cheese bread is super tasty. One thing you don’t want to do is go light on the seasoning, especially if you’re using a plain loaf of bread; the more seasoning the better–especially rosemary!

What You Need for an Egg Bread Bake

crusty BREAD cubed
6 EGGS
about 1 cup MILK
2 GREEN ONION chopped
HOT PEPPER finely chopped
shredded CHEESE
1-2 Tbsp dried ROSEMARY
1 tsp dried OREGANO
PAPRIKA
BLACK PEPPER
GARLIC POWDER
CHILI POWDER (optional)
BUTTER/OIL to grease the baking dish

egg bread
Fancy baked eggs to impress friends and family

How to Make Baked Egg Bread

Any bread will do, but ideally use a hard and crusty loaf. If you’ve got a loaf of bread you’re thinking is to stale to eat, then this is a perfect recipe to save it.

  • Slice the bread into cubes and place in a large mixing bowl. I like using larger cube sizes for a rustic looking dish.
  • In a bowl, whisk 2 eggs and milk.
  • Add the egg/milk mixture in with the bread and toss, coating the bread.
  • Add in the herbs and spices, onion, hot pepper, and cheese and toss until the bread is well coated.
  • Lightly grease an oven safe baking dish and add the bread mix, spreading out evenly. Check current prices on a Pyrex Baking Dish on Amazon.
  • With a spoon, make an impression on the top of the bread mix for each egg serving.
  • Crack an egg into each depression.
  • Slide into a preheated oven and bake at 350 degrees Fahrenheit for 30-40 minutes, until the eggs are baked to desired doneness.
  • Slice into servings and serve hot or cold.
egg bread
add extra bling for fancier egg bread, but don’t skimp on the seasoning

That’s it! Takes a little while to bake, but otherwise this egg bread is a fairly quick dish to prepare, and a fancy way to use up stale bread.

Give this baked egg bread recipe a try and let me know what you think, and bon appétit!

And for a less bready baked egg dish, try this Fancy Egg Bake Recipe.

egg bake recipe
sliced egg bake on a salad is yummy!

Thanks For Watching Our Recipe Videos!

Thanks for checking out this Egg Bread recipe, and all of our recipes. Sign up for our mailing list so you’ll never miss a new recipe. Also click a button below and share the dishes with your friends. You can also follow Chef Buck on Youtube. We appreciate all the kind comments and support, and we’ll see you next time in the kitchen!

If you like what CG and I do, support us on Patreon, or throw us a tip in our Paypal Tip Jar. We’ll happily enjoy a coffee on the road – Thanks! We appreciate all the support, and we’ll see you next time in the kitchen!

We include affiliate links for products on our website. Making a purchase after clicking on our links and we may earn a commission which helps us produce more videos and drink more coffee :^) We participate in the Amazon Services LLC Associates Program, which is an affiliate advertising program. It provides a means for us to earn fees by linking to Amazon.com and affiliated sites, so we can make more videos.

Share and Enjoy !

Hash Browns Recipe w/ Rutabaga and Zero Potato

hash browns recipe

Try a no potato hash browns recipe with rutabaga. Rutabaga is a root vegetable you can use just like a potato, but it’s a healthier choice with less than half the calories and carbs of potato. Rutabaga is like a larger version of a turnip, but a bit sweeter. It’s related to cabbage, and has a very mild cabbage taste. Rutabaga is great in soups, and I love it simply seasoned and roasted in the oven. Rutabagas look sorta like turnips, but they’re usually bigger. Like most produce, when buying rutabaga choose one that’s firm and seems heavy for it’s size. Give rutabaga a try and let me know what you think.

What You Need for a Rutabaga Hash Browns Recipe

2 cups shredded RUTABAGA
2 chopped GREEN ONIONS (separate white bottoms from green tops)
some chopped HOT PEPPER
1 EGG
shredded CHEESE (optional)
SALT to taste, for flavor and drawing out the water
season to taste, I like:
SMOKED PAPRIKA, GARLIC POWDER,
CHIPOTLE, BLACK PEPPER, etc. …use flavors you like
OIL for sauteing

hash browns recipe
Top rutabaga hash browns with an over easy egg for instant sauce

How to make Hash Browns Recipe with Rutabaga

  • Slice the end off the rutabaga and cut away the outer skin with a knife.
  • Shred about 2 cups of rutabaga using a hand grater or food processor.
  • Place rutabaga in a colander and lightly sprinkle with salt. Mix and let sit for a few minutes while you prepare the other ingredients, this will give the salt time to draw out the water.
  • Squeeze excess water from the rutabaga and place in a bowl.
  • Add green onion bottoms, peppers, egg, and seasoning. Mix well.
  • Heat a skillet and oil on medium heat.
  • Add in the rutabaga mix and cook until browned, turning occasionally.
  • When near completion, stir in green onion bottoms and cheese.

hash browns recipe
Skip shredding and cut rutabaga into cubes for tasty breakfast hash.

That’s it!
Give an easy Rutabaga Hash Browns Recipe a try and let me know what you think, and bon appétit!

And for another breakfast hash recipe idea, try out this canned Jackfruit Breakfast Hash Recipe.

canned jackfruit
Jackfruit and potato hash topped with fried egg; the yolk makes a nice sauce.

Thanks for checking out this rutabaga hash brown recipe and video, if you liked the dish, click a button or two below and share it with your friends.
I appreciate it, thanks!
–Chef Buck

Share and Enjoy !


Cheesy Cauliflower Hack for Winners

cheesy cauliflower

Here’s an easy cheesy cauliflower recipe that makes a great side dish or a tasty treat between meals. It’s saucy and cheesy and will satisfy your need for something decadent in the middle of the day.

What You Need To Make Easy Cheesy Cauliflower

CAULIFLOWER (florets, stems, the whole thing…whatever your taste buds prefer
CHEESE …freshly grated, and whatever cheese you like, but cheddary is nice
MUSTARD …fancy mustard!…definitely don’t use yellow mustard, unless you’re a savage
MAYONNAISE
SALT and PEPPER to taste

Also add additional spices and herbs if you like…make it as complicated or simple as you like.
I like this dish for it’s simplicity, and because it’s a tasty snack that keeps me from making a nutritionally
inferior choice, but you can definitely jazz the recipe up. Add fresh dill and minced garlic to the sauce, or garlic
and onion powder, or dried Italian seasonings; make the dish as simple or complicated as you like.

cheesy cauliflower
Top cauliflower with sauce and cheese for a quick snack.

How to Make Microwave Cheesy Cauliflower

  • You can microwave an entire head of cauliflower in a bowl, but I like to break the cauliflower into smaller bowls for a tiny cauliflower treat. Use the stems and florets and cook accordingly. The more stem you use, the longer the cooking time.
  • Add a splash of water to the bowl and microwave of high heat to desired doneness.
  • While the cauliflower cooks, in a bowl mix the sauce of mustard, mayonnaise, salt, and pepper. Adjust ratios to taste.
  • Once the cauliflower has cooked to desired doneness, spoon and spread the sauce over the cauliflower.
  • Top with freshly grated cheese.
  • Microwave another minute to melt the cheese.

cheesy cauliflower
Sure, it’s cauliflower…but you know you want this.

And that’s it.
Serve this simple microwave cauliflower cheese as a side dish, or eat it right out of the bowl for a cheesy cauliflower treat. Believe me, it’s a treat.
Is it ice cream? No. It’s not ice cream. But it’s goooood, you’ll actually love it, and be satisfied, and you won’t feel as bad when you’re finished.

For more yummy cauliflower ideas, explore my Cauliflower Recipes Playlist

cauliflower salad
add sliced tomato for a quick splash of color

Cauliflower sound too hum drum? Wanna graduate to bok choy? Try this Amazing Bok Choy Recipe.

Give this cheesy cauliflower recipe a try and let me know what you think. If you liked the recipe, click a few buttons below to share it with your friends. Thanks, I appreciate it!
–Chef Buck

Share and Enjoy !


White Pizza on a Cauliflower Pizza Crust

white pizza

Make a delicious White Pizza on a cauliflower pizza crust recipe that will not fall apart after baking. White pizza sauce is cheesy and creamy and less acidic than a tomato pizza sauce, and it’s simple to prepare! A cauliflower pizza crust is gluten free, healthier than bread dough, and definitely worth trying.

What You Need To Make a Cauliflower Crust White Pizza

2 cups of grated CAULIFLOWER
1 cup of freshly grated PARMESAN CHEESE
1 EGG beaten
PARCHMENT PAPER to line your baking sheet
1 cup RICOTTA CHEESE
½ cup PLAIN YOGURT
1 Tbsp dried ITALIAN SEASONING
1 tsp ONION POWDER
1 tsp GARLIC POWDER
1-2 Tbsp PESTO (optional)
…and PIZZA TOPPINGS:
I like a combo of fresh spinach,
tomato, onion, basil, and mozzarella
cheese

cauliflower pizza crust
Cauliflower pizza crust after cooking about 20 mins. in a 400 F oven. Crust should be cooked firm with a nice, golden color. And it can be round or square! (or rectangular)

How to Cook A Cauliflower Crust White Pizza

Make the Cauliflower Crust

  • Grate fresh cauliflower into granules resembling “poprocks”
  • Heat the grated cauliflower in a skillet–don’t add oil or water–use medium heat, not too hot. Stir until the cauliflower has dried out somewhat, it won’t dry completely, but the dryer the better. Heat at least 10 minutes, just enough to evaporate the moisture, not enough to color or cook down.
  • Remove skillet from burner and set aside to allow cauliflower to slightly cool.
  • In a bowl, beat 1 egg.
  • Add grated Parmesan cheese to the egg. You can substitute, asiago or romano cheeses, just be sure you use a hard cheese for best results.
  • Add the cauliflower to the bowl and mix well with the egg and cheese and form into a ball.
  • Spread parchment paper onto a baking sheet. DEFINITELY USE PARCHMENT PAPER, otherwise your crust may tear when you try to pick it up. If you’re out of paper, here’s some current parchment paper prices on amazon.
  • Place the balled cauliflower and cheese onto the parchment paper and spread out into a pizza shape about ¼ inch thick.
  • Do not make the edges of the crust too thin; keep the size of the crust uniform for even cooking. The cauliflower will darken quite rapidly around the edges if too thin.
  • Place crust into an oven preheated to 400 degrees Fahrenheit and cook approx. 15-20 minutes until the crust has colored and firmed up.
  • Remove cauliflower pizza crust from the oven and top with your favorite pizza sauce.
    A cauliflower pizza crust will not rise since there is no yeast involved, and since the crust is entirely cauliflower, cheese, and egg, it will not achieve the same crispness as a thin dough pizza. But the pizza will stay together just fine, and will taste very much like a pizza.

How to Make a White Pizza Sauce

  • In a bowl, combine the ricotta, yogurt, and seasonings. Instead of garlic powder, you can use finely chopped fresh garlic. I also like to use fresh basil as a topping on a white pizza, but if you don’t have fresh basil, you can add a little pesto to the sauce. Mix well. If you make this sauce ahead of time, it will have even more flavor.
  • Spread the sauce over the pizza crust, as much as you like. If using a cauliflower crust, don’t use too much white sauce, especially if using fresh sliced tomatoes as a topping, you don’t want the pizza too be too wet.
  • A white sauce is especially tasty on a vegetable pizza. One of my favorite combos is sauce, then a layer of chopped spinach and basil, then a layer of tomato, then chopped onion, and finally a topping of mozzarella cheese.
  • Return the pizza to the oven, still at 400 degrees Fahrenheit, and cook another 10 minutes, or until the toppings are done as desired.

And that’s it. Eat and enjoy!

white pizza
A white pizza is great on any kind of crust.

Tips for Making a Cauliflower Pizza Crust That Will Not Fall Apart

  • Use fresh cauliflower, and only use the florets. Don’t allow overly large pieces of cauliflower into the “dough” –keep the vegetable pieces reasonably uniform.
  • The drier the cauliflower pieces the better, but don’t be obsessed!
  • Use only a hard cheese like Parmesan or Romano in the crust mixture, this helps make the crust stable.
  • Don’t make the crust too thick, around ¼” is ideal.
  • Make the crust a uniform size all the way to the edges so that it will cook evenly.
  • Cook the cauliflower crust on parchment paper! otherwise the crust will stick and break apart when you try to remove it from the pan.
  • Spread your pizza sauce almost to the outer edges of the crust; your pie will look better. The cauliflower pizza crust is a healthier choice, but it is not the prettiest pizza crust.

And for another delicious way to use a cauliflower crust, try a Cauliflower Crust Burrito Recipe

cauliflower pizza crust recipe
This is a nice variation on a burrito recipe and a great way to use a cauliflower crust.

Is a Cauliflower Pizza Crust Healthy ? …well
It provides more nutrition.
It adds less empty calories.
It’s gluten-free.
And it works. It’s an alternative to a bready pizza crust that I think will satisfy your pizza needs.

Give this cauliflower crust white pizza recipe a try and let me know what you think. If you liked it, then click some of the buttons below to share with friends and family. I appreciate it!
–Chef Buck

Share and Enjoy !


Pad Thai Recipe with Spaghetti Squash Noodles

pad thai recipe

Try a tasty Pad Thai recipe with a spaghetti squash twist. Spaghetti squash is a lowfat low carb ingredient with a terrific texture and a mild flavor that allows it to work well in a variety of recipes, including this easy Pad Thai Recipe. A few simple ingredients are all you need to cook this healthy faux noodle vegetarian recipe.

What You Need to Make Pad Thai Recipe w/ Spaghetti Squash

SPAGHETTI SQUASH
4-6 cloves GARLIC finely chopped
2-3 GREEN ONIONS chopped, bottoms separated from tops
1 RED BELL PEPPER chopped
2 Tbsp OLIVE OIL
1 Tbsp SESAME OIL
1-2 Tbsp RICE VINEGAR
1- 2 Tbsp SOY SAUCE
1-2 Tbsp PEANUT BUTTER
FISH SAUCE (optional) 1 or 2 EGGS
1 tsp CHILI PEPPER
SALT and PEPPER to taste

Garnishes:
chopped PEANUTS
chopped CILANTRO
BEAN SPROUTS

The measurements above are just loose suggestions, and really need to be adjusted to your own tastes. The size of the spaghetti squash and how much squash noodles you dig out will determine how much of the other ingredients you need; they are simple and fresh ingredients, so there really is no wrong way to make this dish.

best spaghetti squash
When cooked spaghetti squash pulls apart into “noodley strings”

How to Make Spaghetti Squash Make Pad Thai

  • When buying a spaghetti squash, choose one that seems heavy for its size.
  • Carefully slice the squash into halves. Cut the squash across instead of lengthwise; this will make for longer “noodles”.
  • Place cut sides down in shallow water in a roasting pan.
  • Bake for about 30-45 minutes at 350 degrees Fahrenheit. You can check on the squash after 30 minutes; the cooking time will vary according to the size of the squash. It’s important not to overcook the squash, slightly crunchy strands of squash add great texture to a dish, and overcooking the squash will make the ingredient mushy.
  • Remove squash from the oven and carefully turn halves over to check for doneness –the water will be hot and steam will be trapped under the squash, so be cautious.
  • Allow squash to sit 5-10 minutes to cool slightly for easier handling.
  • Insert a fork and twist out strands of “spaghetti”. Once the fork has done its job, use a spoon to scrape out the remaining squash; it’s edible all the way to the rind, so don’t waste any!

On the stove top…

  • Heat a skillet on medium heat and add sesame and olive oil. You can check here for current pricing for a non-stick skillet on Amazon.
  • Add chopped green onion bottoms, chopped garlic, and chopped bell pepper and saute cook 1-2 minutes. If you like a bit of heat with your dish, add some red pepper flakes or fresh chopped hot peppers.
  • Add in salt and chili pepper and continue sauteing.
  • Stir in rice vinegar, soy sauce, and peanut butter. Add fish sauce if you’re a hardcore pad Thai aficionado. Add a bit of water to thin the sauce, if desired.
  • Cook for 1 -2 minutes. Then, add in the spaghetti squash and mix well with the sauce.
  • Make a well in the center of the squash and add in the whisked eggs. Once the eggs set, give them a stir and scramble, then mix scrambled eggs in with the rest of the dish and get it off the heat.
  • Top with fresh chopped cilantro and chopped peanuts and serve.
  • Add fresh bean sprouts, too, if you be cray.
pad thai recipe
Pad Thai with spaghetti squash noodles

And that’s it.
This recipe makes a nice twist on a traditional pad Thai recipe.
Give this spaghetti squash recipe a try and let me know what you think, and bon appetit!

And for another healthy veggie noodle dish, try this handmade Zucchini Zoodles Recipe.

zoodles recipe
Handmade zoodles are easy to make and a nice change from a heavy pasta dish.

Thanks for checking out our spaghetti squash pad Thai recipe, and all of our recipes. Be sure and sign up for our mailing list and never miss a new Chef Buck cooking video, and also click a button below and share the dishes with your friends. We appreciate the kind comments and support, and we’ll see you next time in the kitchen!
–Chef Buck

Thanks for watching our recipe videos!

We include affiliate links for products on our website, so if you make a purchase after clicking on our links, we may earn a commission which helps us produce more videos and drink more coffee :^) We participate in the Amazon Services LLC Associates Program, which is an affiliate advertising program providing a means for us to earn fees by linking to Amazon.com and affiliated sites, so we can make more videos.

Share and Enjoy !

Moka Pot for Great Coffee on the Stove Top

moka pot

Be your own barista with a simple moka pot coffee maker and brew super smooth espresso style coffee at home on a gas or electric stove top.

Moka pots come in a variety of sizes, so it’s easy to brew a cup just for yourself or for friends. Coffee from a moka pot is not a true espresso like you get from an espresso machine, but it’s strong enough to kick you in the pants. And remember, you don’t need a degree from Coffee College to brew awesome coffee; the foundation for a great coffee is using freshly ground coffee beans that you love.

View current prices for Moka Pots on Amazon, here are affiliate links for
2-3 cup Moka Pots
6-cup Moka Pots
9-cup Moka Pots

How Does a Moka Pot Work

A moka pot is made up of 3 parts:

  • The bottom boiling chamber which is filled with water.
  • The middle funnel/filter which is filled with the ground coffee.
  • And the top coffee pot chamber where the brewed coffee collects.

When heated, the water comes to a boil in the bottom chamber and rises up the funnel and passes through the ground beans where it brews the coffee, continuing up through the funnel where it collects in the top chamber as strong, ready to drink coffee, or it is often mixed with hot water to make an Americano or with hot milk to make a cafe au lait.

moka pot
Brew great coffee on the stove top with a moka pot.

How to Use a Moka Pot

Fill the bottom chamber with hot water from the tap; fill to the pressure valve level, not above. Some folks fill the bottom chamber with almost boiled water, and if you’ve got time for that, do so; usually when I want a cup of coffee, I want it as soon as possible, so heating it to completion in the actual moka pot works just fine for me, and it cuts out an unnecessary step, I think.

Fill the middle funnel/filter with ground coffee. Using freshly ground coffee beans you love is the single greatest thing you can do to accomplish the perfect cup of coffee. Unremarkable coffee beans will make unremarkable coffee no matter how you brew it.

Do not compact the ground coffee into the filter, simply fill it level to the top and level it off. Use a medium grind of coffee, just like you put in an electric coffee machine. Don’t use a course grind as in a French press, or as fine a grind as used in an espresso maker where pressurized water is forced through the grounds.

Securely screw on the top pot, but no need to overtighten.

Place the moka pot on the stove on low heat with the top up. A moka pot coffee maker can be used on a gas or electric stove.

moka pot
I love to use a little moka pot for the perfect cup of cafe au lait

Low and slow is the moka pot mantra. Even on low heat, it will brew in a timely fashion, so no need to rush.
Be sure the moka pot handle is not overly exposed to the heat, or the handle may become too hot and become damaged.

After only a few minutes, the water will begin to boil and reach a temperature where it rises through the funnel, pass through the coffee, and pour through the funnel top into the upper chamber. If your heat is correct, the coffee comes through slowly and fills the upper chamber steadily. The coffee shouldn’t gush out of the top, but rather pour gently out of the funnel.

As brewing nears completion, the coffee will quicken and become lighter and have a final push through the funnel top.

Immediately close the top and remove the pot from the heat.

It’s not a true espresso, but it can be a very strong coffee, especially if using a darker roast. If that’s how you like your coffee, then drink away!

I like mine mixed with a bit of hot water to make an Americano-style cup of coffee, or mixed with an equal amount of hot milk or cream to make a cafe au lait. Take a peek at current prices for Moka Pots on amazon and see if you find one you like.

Is a French Press better for brewing coffee?

I’m a big fan of the French press, and you can check out my blog and video all about French press coffee brewing.

pour over coffee

The perfect pairing for coffee is a fresh, home-baked Scone Recipe.

blueberry scone recipe

Thanks For Watching Our Recipe Videos!

Thanks for checking out our easy berry pie recipe, and all of our recipes. Be sure and sign up for our mailing list so you’ll never miss a new recipe. Also click a button below and share the dishes with your friends. You can also follow Chef Buck on Youtube. We appreciate all the kind comments and support, and we’ll see you next time in the kitchen!

If you like what CG and I do, you can also support us on Patreon, or throw us a tip in our Paypal Tip Jar. We’ll happily enjoy a coffee on the road – Thanks! We appreciate all the support, and we’ll see you next time in the kitchen!

We include affiliate links for products on our website. So, if you make a purchase after clicking on our links, we may earn a commission which helps us produce more videos and drink more coffee :^) We participate in the Amazon Services LLC Associates Program, which is an affiliate advertising program. It provides a means for us to earn fees by linking to Amazon.com and affiliated sites, so we can make more videos.

Share and Enjoy !

Egg Bake Italiano with Spinach and Tomato

egg bake

An egg bake recipe is one of the easiest and least expensive meals to prepare, and an Italian egg bake is one of the tastiest. I’ll often clean out the fridge and use odds and ends to make a random egg casserole recipe, but an egg bake doesn’t always have to be a random mishmash of ingredients. If I have fresh spinach and sun dried tomato on hand, then an Italian Egg Bake is a cinch to make. It’s almost like a lasagna, but a whole lot easier and less expensive to prepare. An egg bake is an easy way to feed a family or gathering, and a casserole travels very well, so it’s a perfect recipe for a potluck or dinner party or any event where you need to bring a dish.

What You Need to Make an Italian Egg Bake

(ideal ingredients for a 1½ quart baking dish)

7 EGGS
8-10 oz SPINACH
1 med ONION (chopped)
SUN DRIED TOMATOES (chopped) …smoked sun dried tomatoes are my favorite!
6-10 cloves GARLIC (minced)
½ tsp dried ITALIAN SEASONING
1 cup shredded PARMESAN
or ROMANO CHEESE
½ cup MILK or YOGURT
SALT and PEPPER and
seasonings to taste, like:
garlic powder
onion powder
chili powder
paprika
…add others, or leave some of
these out.
OIL for sauteing

egg bake
It’s like an easier, less expensive lasagna

How to Make an Italian Egg Bake

  • In a large bowl, crack the eggs, add milk and dried Italian seasonings, and whisk well. Set bowl aside.
  • Heat oil in a skillet on medium high heat.
  • Into the skillet add the onion, garlic, and sun dried tomatoes and saute 4-5 minutes.
  • Add in the seasoning and continue sauteing 3-4 minutes.
  • Add in spinach. Stir until spinach wilts and cooks down, which will happen quickly.
  • Lightly spray a 1½ quart baking dish and line the bottom with freshly shredded Romano or Parmesan cheese.
    You don’t need a lot of cheese, line the bottom of the dish and whatever is left reserve to melt on top of the dish later. Check here for current prices on a Pyrex Baking Dish set on Amazon.
  • Remove the sauteed skillet ingredients and spread them evenly over the cheese layer.
  • Gently pour over the whisked egg and milk.
  • Slide the baking dish into an oven preheated to 350 degrees Fahrenheit and bake about 20 minutes or until the egg is firm.
  • Remove from the oven. If desired, top with more shredded cheese and return dish to the oven for about 5 more minutes.
egg bake
I like to use smoked sundried tomatoes for this egg bake recipe…give them a try.

And that’s all there is to this egg casserole.
An Italian egg bake tastes great right out of the oven, but will taste even better the next day.
Serve hot or cold. I actually prefer it cold or at room temperature, so this egg bake recipe makes a great snack, or perfect breakfast, lunch, or dinner; or even brunch, if you’re one of those kinda people.

And that’s it! Give this easy Italian Egg Bake Recipe a try and let us know what you think. And for another breakfast or brunch recipe idea, check out this Fancy Oven-Baked Eggs Recipe.

baked eggs
Baked eggs are an easy way to impress folks for breakfast.

Thanks For Watching Our Recipe Videos!

Thanks for checking out this Egg Bake recipe, and all of our recipes. Sign up for our mailing list so you’ll never miss a new recipe. Also click a button below and share the dishes with your friends. You can also follow Chef Buck on Youtube. We appreciate all the kind comments and support, and we’ll see you next time in the kitchen!

If you like what CG and I do, support us on Patreon, or throw us a tip in our Paypal Tip Jar. We’ll happily enjoy a coffee on the road – Thanks! We appreciate all the support, and we’ll see you next time in the kitchen!

We include affiliate links for products on our website. Making a purchase after clicking on our links and we may earn a commission which helps us produce more videos and drink more coffee :^) We participate in the Amazon Services LLC Associates Program, which is an affiliate advertising program. It provides a means for us to earn fees by linking to Amazon.com and affiliated sites, so we can make more videos.

Share and Enjoy !

Apple Crisp Recipe with Oats and Ginger

apple crisp

If you like homemade apple pie, then you’ll love this easy apple crisp recipe. And if you’re a fan of fresh ginger, adding minced ginger to the apple crisp will make it even better. This is a terrific dessert recipe that makes a whole heap of sweet apple goodness. The recipe makes plenty of servings to feed the family, and this dessert travels well, so it’s a perfect party treat to bring to a family gathering or function. Definitely top with ice cream or a rich creamy topping for best results.

What You Need to Make an Apple Crisp

apple part of recipe:
¼ cup BUTTER melted, browned
½ cup SUGAR
1 large EGG
1 tsp VANILLA
4-5 APPLES chopped
1 tsp CINNAMON
1-2 Tbsp minced GINGER

crisp part of recipe:
1¼ cups all-purpose FLOUR
3 cups QUICK OATS
1½ BROWN SUGAR
1 cup BUTTER
2 tsp CINNAMON
1 cup toasted PECANS
1 tsp minced GINGER

apple crisp
This apple crisp is like an apple pie, but heavier…which is better, right?

How to Make an Apple Crisp Recipe

  • In a sauce pan, melt ¼ cup BUTTER and simmer over med-low heat until butter begins to color, then set aside to cool.
  • In a large bowl, beat 1 EGG and ½ cup SUGAR together until smooth.
  • Add in VANILLA, cooled BUTTER and chopped APPLES. Mix well and set bowl aside.
  • In another bowl, combine FLOUR, 2 cups of the OATS (reserve 1 cup oats for later), CINNAMON, GINGER, BROWN SUGAR, and mix well.
  • Add in 1 cup unsoftened BUTTER and cut into the mixture until about pea-sized.
  • Add reserved OATS and toasted PECANS and mix.
  • Spread half the crisp mixture out in an ungreased 9 X 13 baking dish. Spread the apple mixture evenly over the bottom crisp layer. Then spread the remainder of the crisp mixture over the apple layer; this will create three layers in the dish: crisp/apple/crisp. If desired, dress the top of the crisp with a few apple slices for decoration.
  • Place into an oven preheated to 350 degrees Fahrenheit and bake for 45-50 minutes, until the top of the apple crisp is toasty.
  • Serve with ice cream or creamy whipped topping.

If you need a decent oven-safe baking dish, check out some current pricing for a Pyrex dish on Amazon.

And that’s it! Give this Apple Crisp Recipe a try and let us know what you think. And for another knock-out recipe idea, check out my mama’s Lemon Meringue Pie Recipe.

lemon meringue pie
This meringue pie topping is tasty on all kinds of pies.

Thanks for checking our recipe videos out. If you like what you see, click a button or two below and share the apple crisp recipe with your friends and family. I appreciate it!
–Chef Buck

Share and Enjoy !


Jicama Recipe for Easy Breakfast Hash

jicama recipe

Try a tasty breakfast hash made from fresh jicama. Jicama makes an easy hash recipe because jicama is crunchy and can be eaten raw, just cook it long enough with the other ingredients to impart flavor and heat the jicama through. I like lots of onion and peppers in this jicama recipe, but experiment with other ingredients as well. A hash is a great dish for cleaning out the fridge. Jicama root is like the offspring of a potato and an apple; the root is white and crunchy and can be eaten raw, it has a very mild flavor, and is not too sweet, so it makes an ideal ingredient for many recipes. Give this jicama recipe a try and let me know what you think!

Ingredients for this Jicama Recipe

1 JICAMA diced into cubes
chopped ONION
chopped BELL PEPPERS
chopped HOT PEPPER
finely chopped GARLIC? why not.
seasonings:
SALT for jicama
PAPRIKA
CHIPOTLE
GARLIC POWDER
BLACK PEPPER
but use whatever
seasonings you like
…sometimes I use dried
ITALIAN SEASONING
…give it a try

jicama recipe
Jicama root is super mild and crunchy and can be eaten raw and used in many recipes. Give it a try!

How to make a Breakfast Hash with Jicama

  • Buy jicama with an unblemished, unbroken skin, one that seems
    heavy for its size since jicama is mostly water, just like you.
  • Wash and cut the skin of the jicama off with a knife.
  • Dice jicama into cubes and toss in a bowl with salt and set aside.
  • Heat oil in a skillet and add in the onion, peppers, and garlic.
  • Saute for 2-3 minutes and then add in seasonings to taste, but don’t be shy.
  • Continue sauteing another 2-3 minutes.
  • Dry salted jicama with a paper towel and add into the skillet.
  • Saute jicama with the other ingredients as desired.
  • Once the jicama is heated through, the dish is ready!

jicama recipe
Jicama hash with just onions and seasoning…make a super simple hash for a quick breakfast side dish.

Give this easy jicama recipe a try and let me know what you think, and bon appétit!

And for another vegetarian breakfast dish idea, try out this canned Jackfruit Hash Recipe.

Thanks for checking out the jicama recipe and video, if you liked this quick breakfast hash idea, click a button or two below and share it with your friends.
I appreciate it, thanks!
–Chef Buck

Share and Enjoy !


Jackfruit Recipe Meatless Chicken Tikka Masala

jackfruit recipe

Chicken tikka masala is one of the most popular Indian inspired dishes in the world, because it’s fantastic, but you can easily make a tasty and meatless version of a tikka masala using this canned jackfruit recipe. Young green jackfruit is versatile and very easy to use. Green jackfruit’s mild flavor and rich texture make young green jackfruit an excellent faux meat. It’s popular in mock BBQ pork dishes, and also a favorite of my own in a meatless breakfast hash. When seasoned and baked in the oven, jackfruit handily mimics the texture of baked chicken, and it makes an ideal substitute in this tikka masala recipe. I’m using as few ingredients as I can in order to make this jackfruit recipe super easy.

Ingredients for a Meatless Tikka Masala Jackfruit Recipe

1 20oz can JACKFRUIT (use only young green jackfruit! …don’t buy sweet ripe jackfruit in syrup!)
15oz can TOMATO SAUCE
15oz can CRUSHED TOMATO
½ cup PLAIN GREEK YOGURT
1 medium chopped ONION
6-8 cloves finely chopped GARLIC
1 tsp CUMIN SEEDS
2-3 Tbsp pre-mixed CURRY (or make your own!)
SALT to taste
½ tsp CHILI POWDER
1 tsp GARLIC POWDER
OIL for sauteing
CILANTRO or green onion

jackfruit recipe
When buying canned jackfruit, notice that there are often two types for sale: a ripe sweet jackfruit in syrup, and young green jackfruit. Use young green jackfruit for this mock chicken tikka masala recipe.

How to Make a Meatless Chicken Tikka Masala with Jackfruit

  • For this jackfruit recipe, rinse and drain the jackfruit and cut into smaller, bite-sizes. You can buy jackfruit online. Check current canned jackfruit prices on Amazon.
  • In a bowl, toss the jackfruit with chili and garlic powder.
  • Spread the seasoned jackfruit out on a lightly greased baking sheet and bake at 400 degrees Fahrenheit
    for about 20 minutes.
  • In a skillet, heat oil on medium high heat.
  • When the oil is heated, add the cumin seeds, stir and allow to simmer for just a few moments.
  • Once the seeds begin to crack, add the finely chopped garlic.
  • Saute for a few moments and add in the onion.
  • Reduce the heat to medium and stir for approx. 2-3 minutes and add the curry powder. Use a premixed curry, or your own mixture. Mix well and continue to saute for 1-2 more minutes.
  • Add in the canned tomatoes. Mix well, raise the temperature and allow the ingredients to come to a bubble.
    Reduce the pot to a simmer, cover, and allow cooking for 10 minutes.
  • After 10 minutes, turn the heat off.
  • Blend the ingedients in the pot smooth with a hand blender; this step isn’t crucial, but it will help give the dish the creaminess of a restaurant style chicken tikka masala.
  • Stir in yogurt and mix well.
  • Add in the baked jackfruit and mix well.
  • Serve with rice or on its own.
  • Garnish with fresh coriander leaves or chopped green onion tops.
jackfruit recipe
Use young green jackfruit for a tasty meatless “chicken” tikka masala recipe.

Give this easy meatless “chicken” tikka masala recipe a try and let me know what you think. If you’re a fan of chicken tikka masala, definitely try this jackfruit recipe version out.
The dish cooks up super quick with much less effort than you need to make a traditional chicken tikka masala, and I think you will be very happy with this meatless version. Cook it up and try it out on your friends and family–don’t tell them it’s jackfruit!–tell them it’s chicken tikka masala and see if they notice the difference.

For more easy Indian recipe ideas, check out my Complete Indian Meal Tutorial where I cook up an entire dinner.

how to cook indian food

Thanks for checking out the canned jackfruit recipe, and all of our recipes.

Be sure and sign up for our mailing list to never miss a new cooking video, and also click a button below and share the dishes with your friends, and follow Chef Buck on Youtube. We appreciate all the kind comments and support, and we’ll see you next time in the kitchen!

If you like what CG and I do, support us on Patreon, or throw a tip in our Paypal Tip Jar We’ll happily enjoy a coffee on the road, or maybe even pay a bill or two!–Thanks! We appreciate all the support, and we’ll see you next time in the kitchen!

We include affiliate links for products on our website, so if you make a purchase after clicking on our links, we may earn a commission which helps us produce more videos and drink more coffee :^) We participate in the Amazon Services LLC Associates Program, which is an affiliate advertising program providing a means for us to earn fees by linking to Amazon.com and affiliated sites, so we can make more videos.

Share and Enjoy !

Tofu Recipe for Beginners – Breakfast Scramble

tofu recipe

Try a tofu recipe that makes a nice break from a typical breakfast egg scramble. This dish is a great introduction to tofu. I use firm tofu in this dish and lots of fresh greens. In this tofu scramble I’m using the leaves and stems of fresh kale, but we often use fresh spinach too, which will cook up quicker if you’re in a rush.

Ingredients for Tofu Recipe

6-8 oz Firm TOFU
2 cups chopped KALE
or substitute SPINACH
chopped GREEN ONIONS
chopped BELL PEPPER
finely chopped GARLIC
sliced CHERRY TOMATOES
and whatever seasonings
you like, like:
PAPRIKA, CURRY, dried HERBS,
CHILI POWDER, SALT, and PEPPER
OIL for cooking
….optional: SEEDS!…I use seeds in this video cause I had too much oil in my skillet and I wanted to take advantage of it. I added caraway seeds, but cumin or fennel seeds
would have added great flavor, too.

If you’re not used to using tofu in cooking, this tofu recipe is a good place to start. Tofu is a soy product and a meatless protein. It has almost no flavor, so tofu is very versatile. Tofu will take on whatever flavors you add, and it needs lots of flavor, so be generous. Bland tofu is terrible, but a well-seasoned tofu dish can be delicious. Give this version of a tofu scramble a try, or make your own with whatever fresh veggies you have on hand.

tofu recipe
Use firm tofu for this recipe

How to Make a Tofu Breakfast Scramble

  • Even firm tofu isn’t all that firm, so buy firm tofu.
  • Chop tofu into cubes or slices, but not too small.
  • Heat oil in a skillet on medium heat. Check here for current prices for a non-stick skillet on Amazon.
  • Season tofu well and saute about 5-10 minutes, turning as it cooks,until the tofu is browned on most sides.
  • In another skillet, heat oil on medium heat.
  • Add in chopped kale stems and cook 2-3 minutes.
  • Add onions, peppers, and garlic and continue sauteeing another 2-3 minutes.
  • Add seasoning and spices and mix ingredients well.
  • Add in the remaining ingredients–kale leaves, tomato, green onion tops–and continue cooking another 3-5 minutes.
  • Add in browned tofu. Mix well, and serve.

tofu recipe
this tofu recipe makes a perfect breakfast, lunch, or dinner

And that’s it. Experiment and use whatever ingredients you desire and have on hand. A breakfast scramble can be whatever you want, and tofu is a great way to add
protein to a meatless dish. And this tofu breakfast scramble makes a nice lunch and dinner, too!

And for another healthy breakfast dish, check out this Eggs Benedict on Salmon Recipe.

salmon cakes
use leftover salmon cakes to make a terrific variation of Eggs Benedict!

Thanks for checking the video and tofu recipe out. Be sure and sign up for our mailing list so you’ll never miss a Chef Buck cooking video, and click a button below and share the dishes with your friends. We appreciate all the kind comments and support, and we’ll see you next time in the kitchen!
–Chef Buck

Share and Enjoy !


Shrimp Toast on a Crunchy English Muffin

shrimp toast

Here’s a shrimp toast recipe based on a Vietnamese deep fried shrimp bread dish. This shrimp recipe works as a snack or main dish, and it doesn’t require many shrimp, so it can be an economical shrimp recipe choice. I prefer English muffins for shrimp toast because it’s the perfect size, and they toast up super well in the oven. I use a mix of chopped and whole shrimp for maximum shrimpiness and visual effect, but experiment and find what you like.

Shrimp Toast Recipe Ingredients

12-15 SHRIMP peeled and deveined
3 ENGLISH MUFFINS
2 EGG WHITES
1 clove minced GARLIC
1 tsp dried ITALIAN SEASONING
1 tsp PAPRIKA
SALT and PEPPER to taste
some OLIVE OIL

shrimp toast
Shrimp Toast on English Muffins

How to Make Shrimp Toast

  • Peel and devein shrimp.
  • In a bowl, lightly toss shrimp with olive oil, season with salt, pepper, and paprika and set bowl aside.
  • Lightly coat English muffin halves with olive oil and slightly toast face down in a skillet.
  • Then place muffin halves face-up on a baking pan.
  • In a small bowl, whisk 1 or 2 egg whites with dried Italian seasoning and minced garlic.
  • Place a spoonful of this egg white mix on each muffin half.
    Place shrimp over the egg white and cover the muffin half. Use whole shrimp, or chop them, or use a combo. I like using some chopped and whole shrimp, that way I can entirely cover the
    muffin with shrimp, but also have a whole shrimp on top so it looks extra cool and tasty.
  • Top the shrimp with another spoonful of the egg white mix. This will bake and form a seal to hold the muffin and shrimp together.
  • Bake in an oven at 400 degrees Fahrenheit for about 20 minutes, or until toasted golden.

That’s it.
A healthier version of Shrimp Bread that really works. Give it a try and let me know what you think.

Have fun in the kitchen. Get a bunch of spices, pots and pans, and begin experimenting with different recipes. Home cooking is a healthy hobby that will save you tons of money in the long run. Check out current prices for Complete Kitchenware Sets on Amazon as well as Complete Starter Spice Kits. Or go to a thrift store! I’ve found some of my favorite kitchen gear at second-hand stores.

Here’s A look at Banh Mi Tom Chien or Vietnamese Deep Fried Shrimp Bread.

For another shrimp dish idea, check out this Spicy Shrimp Tempura Recipe.

spicy fried shrimp

Thanks for checking the the shrimp toast recipe out. Be sure and sign up for our mailing list so you’ll never miss a Chef Buck cooking video, and click a button below and share the dishes with your friends. We appreciate all the kind comments and support, and we’ll see you next time in the kitchen!
–Chef Buck

Share and Enjoy !


Shrimp Bread …let’s try Banh Mi Tom Chien

shrimp bread

I finally tried Vietnamese fried shrimp bread, or bahn mi tom chien, or is it banh mi chien tom? Whatever you call it, it was a very tasty shrimp recipe. I have since made several different versions of shrimp bread at home, trying to make a healthy baked shrimp recipe that I can prepare in the oven instead of frying. I made a few duds, but finally settled on a baked version of Vietnamese shrimp toast using an English muffin, egg white, garlic, and Italian seasoning. I’m pretty happy with the recipe, although I might tinker with it a bit more. As soon as I get a video edited of the recipe, I’ll put it up, but until then, maybe experiment yourself with some versions of shrimp bread or shrimp toast. I love using the whole shrimp in the recipe, it looks very tasty, but in my own versions of Vietnamese shrimp bread, I peeled the shrimp and removed the head and tail. Unpeeled shrimp might be yummy when deep fried, but I don’t think baking will have as tasty an effect.

Baked Shrimp Bread Recipe Ingredients

SHRIMP peeled and deveined
ENGLISH MUFFIN
EGG WHITE
minced GARLIC
dried ITALIAN SEASONING
PAPRIKA
SALT and PEPPER to taste
OLIVE OIL

shrimp bread
homemade baked shrimp bread

How to Make Baked Shrimp Bread

  • Peel and devein shrimp.
  • In a bowl, lightly toss shrimp with olive oil and minced garlic and then season with salt, pepper, and paprika and set bowl aside.
  • Lightly coat English muffin halves with olive oil and slightly toast face down in a skillet.
  • Then place muffin halves face-up on a baking pan.
  • In a small bowl, whisk 1 or 2 egg whites with dried Italian seasoning.
  • Place a spoonful of this egg white mix on each muffin face.
  • Place shrimp over the egg white and cover the muffin face. Use whole shrimp, or chop them, or use a combo. I like using some chopped and whole shrimp, that way I can entirely cover the muffin with shrimp, but also have a whole shrimp on top so it looks extra cool and tasty.
  • Top the shrimp with another spoonful of the egg white mix. This will bake and form a seal to hold the muffin and shrimp together.
  • Bake in an oven at 400 degrees Fahrenheit for about 20 minutes, or until toasted golden.

That’s it. A healthier version of shrimp bread that really works. Give it a try and let me know what you think. I’m still tinkering with the recipe a bit, but I’m pretty happy with this version of a twist on Vietnamese baked banh mi tom chien. If you find a tasty twist of your own, let me know! It’s an interesting recipe to experiment with.

For another shrimp dish, check out this Super Garlicky Shrimp Recipe

Thanks for watching the video recipes and checking out these versions of Vietnamese Shrimp Bread. If you liked it, then click a button or two below and share the recipe with your friends, I appreciate it!
–Chef Buck

Share and Enjoy !


Canned Jackfruit and Potato Hash Recipe

canned jackfruit

Make a tasty breakfast potato hash with canned jackfruit. Young, green jackfruit is a great meat substitute that works well in this classic breakfast recipe of potato and peppers. Canned jackfruit is easy to use, inexpensive, and a extremely versatile ingredient. Unripe jackfruit adds a nice texture when pulled apart, and its neutral flavor makes it ideal for many recipes.

Ingredients for Canned Jackfruit Potato Hash

1 20oz can young, green JACKFRUIT
1 cup chopped POTATO (any kind you like, sweet potato makes a nice change-up)
½ cup chopped ONION
chopped PEPPERS (I like using a combo of jalapeno and bell peppers, but use whatever you prefer)
finely chopped GARLIC (optional, but always a good idea)
1 tsp CUMIN POWDER
1 tsp PAPRIKA
1 tsp TURMERIC
2 Tbsp WORCERSTERSHIRE
some SALT and PEPPER

canned jackfruit
Breakfast hash with young green jackfruit with potato

How to Make Jackfruit Potato Hash

  • Rinse and drain canned jackfruit. You can buy jackfruit online. Check current canned jackfruit prices on Amazon.
  • Shred it. I do this by hand, it’s very easy, but you can use a knife, too.
  • Heat oil in a skillet on medium high heat.
  • Add chopped onion and peppers and saute 3-4 minutes.
  • Add garlic and cook 1 minute.
  • Add seasoning and mix well, continue sauteing for another minute.
  • Add in shredded jackfruit and Worcestershire sauce and mix well.
  • Raise skillet heat and add in potato. Add 1 can of water and mix.
  • Cover skillet and allow ingredients to come to a bubble.
  • Reduce heat to a simmer and continue cooking until potatoes are near done.
  • Remove cover and continue cooking hash until potatoes are done.
  • Serve as a breakfast side or the main dish.
    Top with eggs, if desired.
canned jackfruit
Jackfruit and potato hash topped with fried egg; the yolk makes a nice sauce.

What is Jackfruit?

Jackfruit is exactly what it sounds like, a fruit, but it’s HUGE. A 50 pound jackfruit is not uncommon. This giant tropical fruit grows on
trees and is very popular in Asia. Unripe, jackfruit can be treated like a starch, cooked and used in savory dishes. Ripened jackfruit can be eaten raw and is very
juicy and sweet; quite a combo. Buying and cleaning a fresh jackfruit is quite an endevour. For me, canned jackfruit is a perfect ingredient.

I prefer unripe, young, green jackfruit and find it to be a terrific ingredient to experiment with in a variety of recipes. The texture of unripe jackfruit makes it a fantastic faux meat,
and the mildness of its flavor allows it to be incredibly versatile.

I’ve used it as a meatless pulled pork BBQ, as a faux meat filling in tacos, in an Indian-style variation of Jackfruit Tikka Masala, and as a potato hash for breakfast.
Its super nutritious, readily available at Asian markets, and well worth giving a try.

No canned jackfruit on hand, but still want a tasty potato dish for breakfast? Try this classic Crispy Potato Breakfast Recipe.

home fried potatoes recipe
home fried potatoes

Thanks for watching our recipe videos!

Thanks for checking out the canned jackfruit recipe, and all of our recipes. Be sure and sign up for our mailing list to never miss a new cooking video, and also click a button below and share the dishes with your friends, and follow Chef Buck on Youtube. We appreciate all the kind comments and support, and we’ll see you next time in the kitchen!

If you like what CG and I do, support us on Patreon, or throw a tip in our Paypal Tip Jar We’ll happily enjoy a coffee on the road, or maybe even pay a bill or two!–Thanks! We appreciate all the support, and we’ll see you next time in the kitchen!

We include affiliate links for products on our website, so if you make a purchase after clicking on our links, we may earn a commission which helps us produce more videos and drink more coffee :^) We participate in the Amazon Services LLC Associates Program, which is an affiliate advertising program providing a means for us to earn fees by linking to Amazon.com and affiliated sites, so we can make more videos.

Share and Enjoy !

Cauliflower Salad Recipe — Cauliflower Super Salad

cauliflower salad

I’ll call this cauliflower recipe a Cauliflower Super Salad because it’s super easy and super nutritious. This cauliflower salad requires few ingredients, but packs tons of terrific flavor. The recipe is based on an Italian-style red potato recipe that is one of my favorite dishes; substituting cauliflower for the potato in that recipe is a perfect switch. Cauliflower Super Salad is a light, low calorie, low carb recipe that works great as a side dish, or you can use it as a topping for your favorite leafy greens.

What You Need To Make This Cauliflower Salad Recipe

2 lbs CAULIFLOWER
1-2 minced GARLIC cloves
½ cup chopped GREEN ONIONS
1 cup chopped PARSLEY
2 tsp WORCESTERSHIRE
½ cup OLIVE OIL
¼ cup VINEGAR
1 tsp DRY MUSTARD
1 tsp PAPRIKA
SALT and PEPPER (to taste)

cauliflower salad
Quick and easy cauliflower recipe!

How to Make a Cauliflower Super Salad

  • Break the cauliflower into florets and chop the stems into smaller pieces.
  • Steam the cauliflower for 5-8 minutes, but don’t over-steam or it will become mushy in the salad.
  • Once cauliflower is steamed, set it aside to cool a bit.
  • While the cauliflower cools, make the dressing.
  • In a small bowl, combine the olive oil, vinegar, Worcestershire sauce, seasonings, and garlic. Mix well.
  • In a a larger bowl, add steamed cauliflower, parsley, green onion, and the dressing.
  • Toss until everything is well coated in the dressing.

Serve as a side dish or as part of a leafy salad.
It tastes great right away while it’s warm, and it will taste great later after it has been refrigerated, and if you have leftovers, it will taste even more fantastic the next day.

cauliflower salad
add sliced tomato for a quick splash of color

Tips for a Better Cauliflower Salad

  • Use curly leaf parsley; I think it holds well with the dressing and works better than a leafy Italian parsley.
  • If you’re making the salad a day or two in advance, hold off on the green onions and add them later.
  • When serving, adding a few sliced cherry tomatoes is a quick way to add a dash of color.
  • For a vegan salad, check the label on your Worcestershire sauce, some sauces use anchovies, some don’t.
  • To easily add a bit of protein to this dish, top with toasted nuts.
  • Make a complete meal of this dish by serving it on a bed of spinach and topping it with toasted nuts.

For another cauliflower salad recipe idea, try a Cauliflower “Potato” Salad

And for even more cauliflower dishes, take a peak at my Cauliflower Recipes Playlist

cauliflower gratin
click pic for cauliflower playlist

Give this cauliflower salad recipe a try and let me know what you think. If you liked the recipe, click a few buttons below to share it with your friends. Thanks, I appreciate it!
–Chef Buck

Share and Enjoy !


Baked Fish Recipe for Cod with Tartar Sauce

baked fish recipe

Cod fillets make a great baked fish recipe. This recipe is great for all types of fish, especially cod or tilapia fish fillets, which are generally good buys at the supermarket. Cod and
tilapia are both low key fish with a mild flavor, so baking them in the oven with a homemade tartar sauce and panko breadcrumb topping adds a nice twist. This baked fish recipe cooks up quick and is
perfect for family meals.

What You Need for this Baked Fish Recipe

2 COD FILLETS (about 8oz each)
½ ONION (sliced)
½ cup PANKO BREADCRUMBS check current prices on Amazon
1 Tbsp melted BUTTER
½ tsp PAPRIKA (optional)
SALT and PEPPER to taste
chopped fresh DILL
spray cooking OIL for pan and onions
sauce:
½ cup MAYONNAISE
some chopped fresh DILL
1-2 Tbsp chopped PICKLES or PICKLE RELISH
spoonful or two of the pickling solution or
1 Tbsp fresh LEMON JUICE (add zest for extra lemony-ness)
(also…add a sqeeze of dijon mustard if desired)

baked fish recipe
cod is often a great buy at the supermarket

How to Make a Baked Fish Recipe

  • Pat the cod fillets dry and lightly season with salt and pepper
  • Heat a skillet on the stove top and melt butter.
  • Turn burner off, add breadcrumbs to the skillet and stir until butter is absorbed.
  • Add salt, pepper, any other spices desired, ½ of the chopped dill, and mix well.
  • To make the sauce, combine the remaining dill, mayonnaise, chopped pickles, and pickling solution or lemon juice, in a bowl, and stir until smooth.
  • Spray a baking pan or aluminium foil with cooking spray. If you need an oven-safe pan, you can check here for current prices for baking sheets on Amazon.
  • Lay onion slices in pan and place fillets over top the onions.
  • Evenly coat the tops of the fish with the tartar sauce mixture.
  • Sprinkle and press the seasoned panko crumbs into the sauce.
  • Place pan in oven and bake at 400 degrees F for 20-25 minutes until the crumb topping has turned a nice, golden brown.
  • Serve with rice and veggies.
    And enjoy!

And for another easy fish recipe, here’s a quick way to cook up a crispy skin Stove top Salmon Fillet Recipe.

how to cook salmon
Keep salmon skin-side up to preserve crispiness

Thanks for checking out our baked fish recipe, and all of our recipes. Be sure and sign up for our mailing list and never miss a new Chef Buck cooking video, and also click a button below and share the dishes with your friends. We appreciate all the kind comments and support, and we’ll see you next time in the kitchen!

Thanks for watching our recipe videos!

We include affiliate links for products on our website, so if you make a purchase after clicking on our links, we may earn a commission which helps us produce more videos and drink more coffee :^)                                                                                                We participate in the Amazon Services LLC Associates Program, which is an affiliate advertising program providing a means for us to earn fees by linking to Amazon.com and affiliated sites, so we can make more videos.

Share and Enjoy !

Creme Fraiche – Great Homemade Sour Cream

creme fraiche recipe

This Crème Fraîche recipe is like a homemade sour cream but less tangy, and it’s easy to make, just heavy cream mixed with live cultures. Crème Fraîche is easy to make and can be 3-4 times cheaper than store-bought crème fraîche. It’s is a thickened cream, similar in consistency to sour cream, but without the sharp tanginess. 

Homemade Crème Fraîche Recipe

All you need to make crème fraîche is
HEAVY CREAM also called Heavy Whipping Cream
YOGURT or BUTTERMILK with live cultures A crème fraîche made with buttermilk has more tang.

A Crème Fraîche recipe practically makes itself. All you have to do is introduce the two parties, put them together in a warm environment around 70F, and then let them hang out for 12-24 hours. How long it takes for the cream to thicken will mostly depend on the room temperature; if it’s a bit warmer or cooler in the room, it might take a bit shorter or longer time to make crème fraîche.

I generally make 16oz of crème fraîche at a time. This is a convenient size for heavy whipping cream. Heavy whipping cream and heavy cream are similarly used names for the exact same product, so whichever label you buy will work fine. Heavy cream is cream with a milkfat content greater than 35%, by contrast, half and half is ½ milk and ½ cream, with a milkfat content around 12%. This higher fat content allows crème fraîche be added to simmering dishes without curdling, adding creaminess to soups and sauces, eggs, etc..

In a jar, combine 16oz of heavy cream with 2 Tbsp of cultured buttermilk or yogurt. It is essential that the yogurt or buttermilk contain live cultures, since this is the agent that will allow the heavy cream to thicken.

Need a jar? Check current prices for Mason Jars on Amazon.

Stir the ingredients together, and then top the jar with a loose fitting lid or mesh, a coffee filter works great. Set jar aside and allow to rest at room temperature for 12-24 hours.
The cream will thicken over time, stir occasionally if desired. Once the cream thickens to the consistency of yogurt, place the crème fraîche in the refrigerator. It will continue to thicken and
will keep 8 to 10 days in the refrigerator.

creme fraiche recipe
Delicious crème fraîche can be made at home simply and inexpensively.

What can you do with Crème Fraîche?

It makes an ideal topping for desserts; it is rich and velvety smooth and can transform whatever it tops into a dessert, especially fruit. Or it can add creaminess to savory dishes as well. Crème fraîche has a high fat content, so it can be added into dishes as they cook and the cream will resist curdling. Add crème fraîche to soups and sauces to create a smooth, creamy richness. Crème fraîche can be used in any way you might use a whipped topping or sour cream, but the simplicity and richness of this thickened cream can elevate a dish to something special.

Love Mexican food? You can use this recipe to make a fresh, delicious Mexican crema that is better than what you buy in the stores. Mexican crema is basically crème fraîche with a bit of lime juice and salt added after it has sat in the frig for a day. And for an extra tang, use cultured buttermilk instead of the yogurt. What you will get is thick, creamy goodness that is a great topping for chilaquiles, pozole, tacos …. the list is endless!

My Favorite Ways To Use Crème Fraîche

Use crème fraîche as a fruit topping. It turns fruit into dessert. An actual dessert if you top with powdered sugar as well.
Saute apples in butter and cinnamon and then top with crème fraîche. Holy cow it’s good.
Or just drop a dollop of crème fraîche on pie or cake.
Stir crème fraîche into pasta to add a decadent creaminess. Mac ‘n cheese!
Stir crème fraîche into soups and sauces, it will add creaminess without curdling.
Top oatmeal with crème fraîche to turn a bland breakfast into a better breakfast.
Add crème fraîche to scrambled eggs for the creamiest eggs ever.

If you’ve never tried crème fraîche then give it a go. And if you’ve only previously bought it from the store, definitely try this homemade crème fraîche recipe.

Here’s some desserts that would look nice under a dollop of crème fraîche!
Try a homemade Fruit Cobbler Recipe.

creme fraiche
homemade fruit cobbler

Or try crème fraîche on a fancy French Baked Pear Recipe.

pear salad

Thanks for checking out the crème fraîche recipe. If you liked the video, then click a button or two below and share it with your friends.

Thanks for watching our recipe videos!

We include affiliate links for products on our website, so if you make a purchase after clicking on our links, we may earn a commission which helps us produce more videos and drink more coffee :^) We participate in the Amazon Services LLC Associates Program, which is an affiliate advertising program providing a means for us to earn fees by linking to Amazon.com and affiliated sites, so we can make more videos.

Share and Enjoy !

Cauliflower Pizza Crust Recipe for Best Burritos

cauliflower pizza crust recipe

You can make a cauliflower pizza crust recipe that will not fall apart and turn that crust into a delicious Burrito Recipe. A cauliflower pizza crust recipe is gluten free and heartier than a thin flour tortilla, so it makes a very filling burrito recipe. This recipe makes a giant burrito supreme that can be sliced into two generous servings. If you’re a fan of cauliflower crust recipes, then definitely give this burrito recipe a try.

Cauliflower Pizza Crust Recipe Burrito Ingredients

2 cups of grated CAULIFLOWER
1 cup of freshly grated CHEESE for crust
1 EGG beaten
PARCHMENT PAPER to line your baking sheet
Burrito BEAN FILLING
freshly grated CHEDDAR CHEESE for burrito filling
CILANTRO (optional)
plus toppings like sour cream, guacamole, and salsa

cauliflower pizza crust recipe
A soft cauliflower pizza crust makes a perfect burrito.

How to Make a Burrito Recipe with a Cauliflower Pizza Crust

  • Grate fresh cauliflower florets into granules resembling “poprocks” or confetti.
  • Heat the grated cauliflower in a skillet–don’t add oil or water–use medium heat, not too hot.
  • Stir until the cauliflower has dried out somewhat, it won’t dry completely, but the dryer the better. Heat at least 10 minutes, just enough to evaporate the moisture, not enough to color or cook down.
  • Remove skillet from burner and set aside to allow cauliflower to slightly cool.
  • In a bowl, beat 1 egg.
  • Add freshly grated cheese to the egg. You can substitute, Asiago or Romano cheeses, just be sure you use a hard cheese for best results.
  • Add the cauliflower to the bowl and mix well with the egg and cheese and form into a ball.
  • Spread parchment paper onto a baking sheet.
    USE PARCHMENT PAPER, otherwise your crust may tear when you try to pick it up. If you’re out of paper, here’s some current parchment paper prices on amazon.
  • Place the balled cauliflower and cheese onto the parchment paper and spread out into a squared shape about ¼ inch thick. Shaping the crust into a square will make it easier to roll into a uniform burrito shape.
    Do not make the edges of the crust too thin; keep the size of the crust uniform for even cooking.
  • Place crust into an oven preheated to 400 degrees Fahrenheit and cook approx. 15-20 minutes until the crust has colored and firmed up.
  • Remove cauliflower pizza crust from the oven.
  • Allow the crust to cool slightly for 4-5 minutes, but not too long; the crust will be easier to roll if it is warm.
  • Spread burrito filling over the top of the crust. Spread evenly over the crust, but leave room at the edges – this will make it easier to roll into a burrito shape.
  • Sprinkle with freshly grated cheese. I like to use Colby or pepper jack cheese, but use your favorite.
  • I also like to top with freshly chopped cilantro, but this is optional.
  • Carefully roll the crust up into a burrito shape. If the filling wants to push through the crust, or it tears, that’s cool, just shape it back together and continue rolling it up into a tube shape. It’ll end up looking like a jelly roll.
  • Return the bean-filled crust to the oven and continue to cook at 400 F for another 10-15 minutes.
  • If desired, in the final cooking minutes, top with additional cheese.
  • Remove the burrito from the oven let cool 2-3 minutes before handling.
  • Slice the giant burrito into desired sizes and serve with whatever sides and burrito toppings you like!

For a more traditional take on a burrito recipe you can check out
Camera Girl’s Family Style Burrito Recipe

cauliflower pizza crust recipe
click pic for video recipe

How to Make a Basic Vegetarian Burrito Bean Filling

Ingredients:
1 can BLACK BEANS (15oz)
1 can REFRIED BEANS (15oz)
½ cup BELL PEPPERS (chopped)
1 cup ONION (chopped)
1 Tbsp CHILI POWDER
1 Tbsp CUMIN
1 tsp SMOKED PAPRIKA
SALT and PEPPER (to taste)
OIL for sauteing

cauliflower pizza crust recipe
A square crust is best for a cauliflower burrito

Directions:

  • In a skillet, heat oil on medium heat.
  • Add onions and peppers and saute for 3-4 minutes.
  • Stir in seasonings and continue sauteing for 2 minutes.
  • Add beans and mix well.
  • Add 1 cup of water. Stir and bring to a simmer. Cover and let simmer 10 minutes, stirring occasionally. Cook until beans thicken.
  • Remove from heat.

This recipe generally makes more beans than you will need for the cauliflower pizza crust recipe burrito.  However, the beans can be used in all kinds of dishes. I’ll often double this recipe just to have plenty of seasoned beans on hand. Use these beans on nachos, in pupusas, in omelets, or just as a side dish.

Tips for Making a Cauliflower Pizza Crust That Will Not Fall Apart

  • Use fresh cauliflower, and only use the florets. Don’t allow overly large pieces of cauliflower into the “dough” –keep the vegetable pieces reasonably uniform.
    The dryer the cauliflower pieces the better, but don’t be obsessed!
  • Use only a hard cheese like Parmesan or Romano in the crust mixture, this helps make the crust stable.
  • Don’t make the crust too thick, around ¼” is ideal.
  • Make the crust a uniform size all the way to the edges so that it will cook evenly.
  • Cook the cauliflower crust on parchment paper! otherwise the crust will stick and break apart when you try to remove it from the pan.

cauliflower pizza crust recipe
Cauliflower pizza crust transformed into a Burrito Supreme

We use a giant pizza pan for nachos and all kinds of recipes calling for a baking sheet. If you don’t have a larger baking sheet, then check current pricing for a larger pizza pan like this one on amazon or look at a local thrift store–that’s where we found our huge pizza pan.

Give this cauliflower pizza crust recipe a try and let me know what you think. If you liked it, then why not share with your friends? click some of the buttons below to share with friends and family. Thanks a lot!
–Chef Buck

Share and Enjoy !


Veggie Burger Recipe with Blackened Eggplant

veggie burger recipe

I love a great burger, especially if it’s a healthy veggie burger recipe that also just happens to taste terrific. A thick slice of blackened eggplant makes a perfect sandwich filling, and if you dress
sliced eggplant up like a hamburger, eggplant makes one of the easiest, quickest, and tastiest veggie burger recipes you’ll ever eat. Portabello mushrooms make a nice veggie burger substitute, but can sometimes be a bit soggy. I’m a big fan of black bean burgers, but a bean burger can be a bit of work to make and hold together into a burger patty shape that satisfies. A blackened eggplant sandwich is super easy to prepare and definitely satisfies.

What You Need to Make a Great Veggie Burger Recipe

1 globe EGGPLANT also called an aubergine eggplant
some OIL to lightly coat the eggplant and skillet
a variety of spices like
CHILI POWDER, CHIPOTLE,
PAPRIKA, GARLIC POWDER,
GINGER POWDER, etc., but experiment and try your favorite spices
Burger Fixings such as
badass BUN
crunchy ONION
crisp LETTUCE
cool TOMATO
CHEESE, maybe?

How to Make a Blackened Eggplant Veggie Burger

Use an aubergine eggplant, also known as a globe eggplant. The skin has a dark purplish color and is edible, in fact the skin and meat of the eggplant can be eaten raw,
but for faux burger patties, I like to remove the skin.

  • Remove the skin.
  • Cut eggplant into thick slices, ¾” to 1″ thick.
  • Coat the eggplant lightly in oil.
  • Generously season both sides of the eggplant with your favorite spices, including salt.
  • Heat a lightly oiled skillet on medium-medium high heat. If you need a skillet that’s great on the stove top and in the oven, you can check current prices for a cast iron skillet on Amazon.
  • Cook the eggplant for 2 minutes on each side.
  • If you like cheese on your faux burger, add a slice over the eggplant during it’s last miunte in the skillet.
  • Remove the eggplant from the skillet and build your burger while it’s hot.

And that’s it.
Super tasty, meat-free, and probably the easiest veggie burger recipe you’ll ever make.

veggie burger recipe
Veggie burger recipe with blackened eggplant

What to Look for When Choosing an Eggplant

  • Buy an eggplant that seems heavy for its size.
  • A larger eggplant will sometimes have a slight bitterness, so choose a smaller eggplant.
  • Look for a bright green stem top and a smooth shiny skin.
  • The flesh of the eggplant should be firm, and bounce back when lightly pressed.

Give this super easy an very tasty blackened eggplant veggie burger recipe a try and let me know what you think, and bon appétit!

And for another great veggie dish, try this fantastic faux pasta recipe made with Zucchini Zoodles.

zoodles recipe
Handmade zoodles are easy to make and a nice change from a heavy pasta dish.

Thanks For Watching Our Recipe Videos!

Thanks for checking out our eggplant recipe, and all of our recipes. Be sure and sign up for our mailing list so you’ll never miss a new recipe. Also click a button below and share the dishes with your friends. You can also follow Chef Buck on Youtube. We appreciate all the kind comments and support, and we’ll see you next time in the kitchen!

If you like what CG and I do, you can also support us on Patreon, or throw us a tip in our Paypal Tip Jar. We’ll happily enjoy a coffee on the road – Thanks! We appreciate all the support, and we’ll see you next time in the kitchen!

We include affiliate links for products on our website. So, if you make a purchase after clicking on our links, we may earn a commission which helps us produce more videos and drink more coffee :^) We participate in the Amazon Services LLC Associates Program, which is an affiliate advertising program. It provides a means for us to earn fees by linking to Amazon.com and affiliated sites, so we can make more videos.

Share and Enjoy !

Zoodles Recipe …handmade zucchini noodles

zoodles recipe

Make a healthy zucchini zoodles recipe without a fancy spiralizer. You can cook a low fat zoodles pasta substitute by simply slicing zucchini into faux noodles with a knife. It takes almost no time, in fact, the time you save cleaning up will likely make it just as fast as using a fancy kitchen gadget. This zucchini zoodles recipe is light and low-fat and provides a nice break from a heavy pasta dish, so definitely make some handmade zoodles and give this dish a go.

Healthy Zoodles Recipe with Zucchini Noddles

2 medium ZUCCHINI
10-15 CHERRY TOMATOES (halved)
¼ cup GARLIC
¼ cup ONION
some PARMESAN CHEESE
(or romano or asiago cheese)
½ LEMON …use the juice and zest (current price for a kitchen zester)
1 tsp ITALIAN SEASONING
SALT and PEPPER to taste
2-3 Tbsp OLIVE OIL
OIL for sauteing

zoodles recipe
Handmade zoodles are easy to make and a nice change from a heavy pasta dish.

How To Make Zucchini Noodles a.k.a Zoodles Recipe

This zoodles recipe cooks quickly, so have all of the ingredients prepared and on hand before you start cooking.

  • Buy zucchini that are firm and blemish free, also buy zucchini that are relatively straight, because they’re easier to slice into zoodles.
  • Wash the zucchini and, leaving the skin on, slice the zucchini lengthwise into thin planks.
  • Stack planks on one another in bundles of three and slice into thinner shoelace size “strings”; they
    don’t have to be too thin or uniform, just get as close to shoestring size as you can, they’ll cook up easily enough and get soft quickly on the stove top.
  • Heat oil in a skillet on medium heat and add in the onion and cook for about 1 minute.
  • Add in the garlic and cook for 1-2 minutes more. If you want a little heat, add in some rep pepper flakes as well.
  • Add salt, pepper, Italian seasoning, and lemon zest. Mix and cook another minute.
  • Add in the sliced zucchini and mix well with all the ingredients.
  • Once the zucchini is added, just cook 2-4 minutes or until the zucchini is heated through. Do not cook overly long or the zucchini will lose its texture and the dish will become too wet. If this
    happens. just drain off a bit of the water.
  • Stir in the olive oil and lemon juice.
  • If desired, add in a little grated Parmesan cheese to taste.
  • Remove the skillet from the stove top and serve immediately.

That’s all there is to this super easy and delicious zoodles dish. If you love kitchen gadgets you can check the current price for a Vegetable Spiralizer on Amazon. I might get one if I see it in the thrift store, and I’m feeling a bit richy-rich.
Give this healthy zucchini zoodles recipe a try and let me know what you think, and bon appétit.

And for another low-fat veggie entree alternative, check out this Spaghetti Squash Recipe.

best spaghetti squash
When cooked spaghetti squash pulls apart into “noodley strings”

Thanks for checking out our zoodles recipe, and all of our recipes. Be sure and sign up for our mailing list and never miss a new Chef Buck cooking video, and also click a button below and share the dishes with your friends. We appreciate the kind comments and support, and we’ll see you next time in the kitchen!
–Chef Buck

Thanks for watching our recipe videos!

We include affiliate links for products on our website, so if you make a purchase after clicking on our links, we may earn a commission which helps us produce more videos and drink more coffee :^) We participate in the Amazon Services LLC Associates Program, which is an affiliate advertising program providing a means for us to earn fees by linking to Amazon.com and affiliated sites, so we can make more videos.

Share and Enjoy !

Biscotti Recipe – Chocolate Biscotti with a Coffee Twist

biscotti recipe

A homemade biscotti recipe is easy to make, and adding a little cocoa powder and ground coffee makes a rich, tasty twist for this Italian twice-baked cookie treat. If you’re not in the mood for
chocolate biscotti just leave out the cocoa powder and coffee and make a simple almond biscotti; it’s a nice cookie either way you bake it. A biscotti is a twice-baked cookie that makes a perfect pairing with a nice cup of coffee or tea.

What You Need for Chocolate Biscotti Recipe

1 cup sliced ALMONDS
2 cups FLOUR
¼ COCOA POWDER
2 Tbsp GROUND COFFEE
1 cup SUGAR
1 tsp BAKING POWDER
1/8 tsp SALT
3 large EGGS
2 tsp VANILLA EXTRACT
1 tsp ALMOND EXTRACT
3 Tbsp RUM or COFFEE LIQUOR
or other BOOZE

biscotti recipe
This twice-baked chocolate biscotti is perfect for dunking.

How to Make Chocolate Biscotti Recipe

  • Preheat oven to 350 degrees Fahrenheit.
  • Toast almond slices; watch them closely, it only takes about 2 minutes to toast.
  • In a bowl, combine flour, sugar, cocoa powder, coffee, baking powder, and salt; mix and set aside.
  • In another bowl, Whisk the eggs, rum, and extracts until blended well.
  • Add the wet ingredients to the dry ingredients, including the toasted almond slices, and mix until combined.
    Dough will be sticky at this point.
  • Scrape the dough out onto a baking sheet lined with parchment paper.
  • Quickly shape into a long flat loaf.
  • Bake about 20-30 minutes at 350 degrees F.
  • Remove from the oven and cool 10-15 minutes.
  • Lower oven heat to 300 degrees F.
  • Slice loaf into 1/2″ wide slices.
  • Lay the slices cut side down on the baking sheet and bake another 10-15 minutes.
  • Turn the slices over and bake 10 minutes more.
  • Cool the biscotti on a rack.
    Cool completely before storing, or they’ll lose crunchiness!

Serve this biscotti recipe with coffee or hot tea for a tasty, dunkable cookie treat.
And that’s it, man.
Give this chocolate biscotti recipe a try and let me know what you think, and bon appétit!

And for another fancy pants baked treat, try this deadly SCONE RECIPE.

maple pecan scones
best scone ever…really

Thanks For Watching Our Biscotti Recipe!

Thanks for checking out our biscotti, and all of our recipes. Be sure and sign up for our mailing list so you’ll never miss a new recipe. Also click a button below and share the dishes with your friends. You can also follow Chef Buck on Youtube. We appreciate all the kind comments and support, and we’ll see you next time in the kitchen!

If you like what CG and I do, you can also support us on Patreon, or throw us a tip in our Paypal Tip Jar. We’ll happily enjoy a coffee on the road – Thanks! We appreciate all the support, and we’ll see you next time in the kitchen!

We include affiliate links for products on our website. So, if you make a purchase after clicking on our links, we may earn a commission which helps us produce more videos and drink more coffee :^) We participate in the Amazon Services LLC Associates Program, which is an affiliate advertising program. It provides a means for us to earn fees by linking to Amazon.com and affiliated sites, so we can make more videos.

Share and Enjoy !

Shrimp Pancake Recipe Spicy Haemul Pajeon

shrimp pancake

This spicy shrimp pancake makes a nice change from your average pancake or shrimp recipe. It’s a savory pancake dish that can be prepared quick and easy and served for any meal, even
breakfast, if you don’t mind looking at a shrimp first thing in the morning. I like big chunky pancakes full of shrimp and vegetables, especially lots of green onion, but you can easily make
smaller versions of this seafood pancake.

Ingredients for Shrimp Pancake Recipe

8-10 Lg SHRIMP
5-7 GREEN ONIONS
2 EGGS
¼ RED BELL PEPPER
HOT PEPPER slices (optional)
1 cup FLOUR
1 cup WATER
1 tsp CHILI POWDER
1 tsp PAPRIKA
1 tsp GARLIC POWDER
SALT and PEPPER (to taste)
2-3 Tbsp OIL for cooking
1 Tbsp melted BUTTER optional

dipping sauce:
¼ cup RICE VINEGAR
¼ cup SOY SAUCE
CHILI-GARLIC SAUCE (to taste, optional)

shrimp pancake
Korean style Haemul Pajeon with shrimp

How to Make a Spicy Shrimp Pancake

  • Combine flour and water and mix well, the batter should be thin.
  • Add in melted butter (this is optional…sometimes I do, sometimes I don’t).
  • Add in spices and stir.
  • Chop slender green onions into approx. 1 inch pieces and add into batter (thicker onions should be sliced lengthwise first).
  • Add in chopped shrimp.
  • Add thinly sliced red bell pepper and hot peppers to batter and combine all until ingredients are well coated.
  • Heat oil in a non-stick skillet on medium high. Check current prices for non-stick skillets on Amazon.
  • Adjust temperature as needed through out cooking, but make sure the oil is hot before adding the batter.
  • Add batter to hot skillet and shape into a pancake shape. Make 1 big pancake, or make pancakes; this recipe easily serves 2 people.
  • Pour a beaten egg over the pancake top.
  • Cook until the cake is golden brown on bottom, about 4-6 minutes.
  • Turn the cake (or flip it–but with confidence!) and cook the eggy side for about 2 more minutes.

And that’s it!
Top with sour cream, soy sauce, or with a mixed dipping sauce.

Dipping Sauce Idea

Combine equal parts rice vinegar and soy sauce and mix well. Adding a little chili-garlic sauce is a nice touch, and and will provide a nice bite. For a sweeter sauce, add a little hoisin or plum
sauce, or just 1-2 tsp sugar.

Give this shrimp pancake a try and let me know what you think, and for another shrimp dish, check out this Fennel and Shrimp Recipe.

shrimp recipe
lots of garlic + lots of shrimp = delicious

Thanks for checking out the shrimp pancake recipe, and all of our recipes. Be sure and sign up for our mailing list to never miss a new cooking video, and also click a button below and share the dishes with your friends, and follow Chef Buck on Youtube.

If you like what we do, support CG and I on Patreon, or throw us a tip in our Paypal Tip Jar We’ll happily enjoy a coffee on the road, or maybe even pay a bill or two!–Thanks! We appreciate all the support, and we’ll see you next time in the kitchen!

Thanks for watching our recipe videos!

We include affiliate links for products on our website, so if you make a purchase after clicking on our links, we may earn a commission which helps us produce more videos and drink more coffee :^) We participate in the Amazon Services LLC Associates Program, which is an affiliate advertising program providing a means for us to earn fees by linking to Amazon.com and affiliated sites, so we can make more videos.

Share and Enjoy !

Cauliflower Potato Salad “NO POTATO” Recipe

cauliflower potato salad

A cauliflower potato salad recipe is a great substitute for classic potato salad. This fake “potato” salad is a light, low calorie, low carb recipe that tastes great and is just as easy to make as potato salad. In fact, a creamy cauliflower salad is easier to make, since steaming cauliflower takes less time than cooking potatoes. And you won’t miss the potato at all, trust me.

What You Need To Make Cauliflower Potato Salad

2 lbs CAULIFLOWER florets
1 cup chopped RED BELL PEPPER
2 stalks chopped CELERY
½ cup chopped PARSLEY
chopped whites of 4-6 BOILED EGGS

Cauliflower Potato Salad Dressing:

4-6 EGG YOLKS
½ cup MAYONNAISE
2 Tbsp CREAMY HORSERADISH (or 3 Tbsp?…it’s good in this dish)
1 Tbsp fancy MUSTARD
1-2 Tbsp of PICKLE RELISH
(a splash or two of pickle juice is a good idea, too, or if you don’t have pickle relish, add 1-2 Tbsp of vinegar)
SALT and PEPPER (to taste)

cauliflower potato salad
low carb cauliflower “potato” salad recipe

How to Make Fake Potato Salad with Cauliflower

  • Break the cauliflower into florets and chop the stems into smaller pieces.
  • Steam the cauliflower for 5-8 minutes, but don’t over-steam or the cauliflower will become mushy
    when mixed with the other ingredients; of course, if you prefer smooth potato salad over chunky potato salad,
    then you might like the cauliflower over-steamed; just follow your heart.
  • Once cauliflower is steamed, set it aside to cool a bit.
  • While the cauliflower cools, make the dressing.
  • Remove the yolks from your boiled eggs and place the yolks into a small bowl.
  • To the yolks, add the horseradish, mayonnaise, mustard, pickle relish (or substitute vinegar), salt and pepper, and mix until smooth.
  • Into a larger bowl, add the steamed cauliflower, bell pepper, celery, parsley, and chopped egg whites.
  • Add in the dressing and toss until well incorporated.
  • It tastes great right away while it’s warm, and it will taste great later after it has been refrigerated, and if you have leftovers, it will taste even more fantastic the next day.

And that’s it.
I love the taste of cauliflower potato salad just as much as classic potato salad, probably even more now that my metabolism is slowing down and I’m counting my carbs a little more. Cauliflower is a great ingredient for low carb recipes, so definitely try substituting cauliflower for other recipes as well.
Enjoy!

For another great way to use cauliflower, try it as a pizza crust instead of flour. Take a look at the Cauliflower Crust White Pizza Recipe, try it and let me know what you think!

white pizza
A white pizza is great on any kind of crust.

If you liked the recipes, click a few buttons below to share it with your friends. Thanks, I appreciate it!
–Chef Buck

Share and Enjoy !


French Onion Soup Recipe – How to Make Onion Soup

french onion soup

French onion soup is a great way to use up a lot of onions, and it’s an easy soup to prepare. The key to great French onion soup is caramelizing the onions into a gooey, rich, golden sweetness. Avoid using a non-stick pan, since this will make caramelizing the onions take longer. Yellow or sweet onions are best for this recipe. Cook the onions down until they begin to release their sugars, turn golden, and stick to the pot. Sticking to the pot is good when it comes to caramelizing onions. And deglazing the pot with a bit of vinegar or white wine will add fantastic flavor to the French onion soup.

French Onion Soup Ingredients

4 lg ONIONS sliced into strips
1 Tbsp BUTTER
1 Tbsp OIL
3-5 cloves GARLIC finely chopped
½ tsp ITALIAN SEASONING
1 Tbsp WORCESTERSHIRE
dry WHITE WINE
or VINEGAR for de-glazing
2 cups BROTH
SALT and PEPPER (to taste)
toasted BREAD for crouton
creamy white CHEESE for topping

french onion soup
Impress family and friends with a fancy-pants French onion soup

How to Make This French Onion Soup Recipe

  • Don’t use a non-stick pan. Sticking is good for French onion soup. Check current prices for a stainless steel soup pot on amazon.
  • Use yellow or sweet onions for this recipe, they have lots of sugar and are best for caramelizing.
  • On medium heat, melt a combo of butter and oil.
  • Add sliced onions into the pot.
  • Add salt and mix the onions well with salt, butter, and oil.
  • Add garlic if you want to, it’s optional for you, but it’s not optional for me.
  • Cook, stirring occasionally, until the onions have cooked down and caramelized.
    Caramelization will take a while, you can’t rush the process.
    Keep the heat around medium. Never on high heat.
    You’re not just cooking the onions, you’re cooking the onions down, coaxing out the sugars and turning the onions into a rich goodness. Turning the heat up to high and searing the onions will not produce the same effect as caramelizing the onions, so be patient and give the onions time to caramelize…caramelization is the reason French onion soup tastes so good.
  • After 30-45 minutes, your onions will begin to brown and stick to the pan.
  • Once the onions turn gooey and have a nice color, add a bit of apple cider vinegar or a dry white wine to deglaze the pan and free any tasty onion flavor from the bottom of the pan.
    If nothing is stuck to the pan, still add a bit of vinegar or white wine; it’s just a good idea.
  • Add dried Italian seasoning, black pepper, and broth.
  • Add in a little Worcestershire sauce if you like, it’s optional, but another good idea.
  • Stir and bring the pot up to a bubble, reduce down to a simmer, and cook as long as you like, but at least 20-30 minutes.

And that’s it, the soup is ready.
Whenever you’re ready to serve the dish:

  • Fill a serving of soup in an oven safe bowl.
  • Top the soup with a toasted crouton; traditionally a large crouton is used, almost like a “raft” for the cheese, but this can be awkward to eat, so use smaller croutons, it will work just as well, and be less fuss for your spoon.
  • Heap a mound of freshly shredded cheese onto the crouton. Be generous with the cheese. You want to use enough cheese so that it will melt and cover the entire top of the soup in a toasty cheese crust. Gruyere cheese is a nice choice, but any creamy white cheese will work. I like a combo of Monterrey jack and Parmesan cheese. Swiss is good, too. Whatever cheese you choose, be generous with it.
  • Slide the soup bowl under a broiler until the cheese is melted and beginning to toast.
  • As soon as it cools to a temperature that won’t burn your taste buds, it’s ready.

Enjoy!
Give this French onion soup recipe a try and let me know what you think, and bon appétit!

And for another rich soup dish, check out this Parsnip Soup Recipe

french onion soup
parsnip soup

Thanks For Watching Our Recipe Videos!

Thanks for checking out this onion soup recipe, and all of our recipes. Be sure and sign up for our mailing list so you’ll never miss a new recipe. Also click a button below and share the dishes with your friends. You can also follow Chef Buck on Youtube. We appreciate all the kind comments and support, and we’ll see you next time in the kitchen!

If you like what CG and I do, you can also support us on Patreon, or throw us a tip in our Paypal Tip Jar. We’ll happily enjoy a coffee on the road – Thanks! We appreciate all the support, and we’ll see you next time in the kitchen!

We include affiliate links for products on our website. So, if you make a purchase after clicking on our links, we may earn a commission which helps us produce more videos and drink more coffee :^) We participate in the Amazon Services LLC Associates Program, which is an affiliate advertising program. It provides a means for us to earn fees by linking to Amazon.com and affiliated sites, so we can make more videos.

Share and Enjoy !

Cauliflower Gratin Recipe …creamy cauliflower casserole

cauliflower gratin

This cauliflower gratin recipe is a tasty way to add cauliflower to your diet. This French inspired recipe is basically a veggie cheese casserole. I like to put creamy horseradish sauce in my version. I also like to add a few other veggies for color. I use red bell pepper, celery, and green onion in the video, but use whatever vegetables have in the fridge; using just a little shredded carrot will add pizzazz.

What You Need To Make a Cauliflower Gratin

2 lbs CAULIFLOWER florets
1 cup chopped veggies …like:
–CELERY
–RED PEPPER
–GREEN ONION
….but use whatever you have
2 cups whole MILK (or half and half)
5 Tbsp BUTTER
5 Tbsp FLOUR
1-2 cups freshly grated CHEESE
(I like using a combo of cheeses, some of my faves are
swiss, parmesan, gruyere, gouda, and havarti)
1 Tbsp CREAMY HORSERADISH (or 2 Tbsp?…it’s good in this dish)
1 Tbsp fancy MUSTARD
2 tsp ITALIAN SEASONING
SALT and PEPPER (to taste)

cauliflower gratin
add a cup of colorful chopped veggies to your cauliflower gratin

How to Cook Cauliflower Gratin

  • Cut the cauliflower into florets.
  • I like to steam the florets for 2-3 minutes, this will make the cauliflower gratin creamier. Use a steaming basket, or just place half an inch of water in a pan, cover, and steam that way for a few minutes. If you prefer your cauliflower a little firmer in your gratin,
    you can skip the steaming.
  • Lightly butter an oven safe baking dish. Check here to see current prices for a casserole baking dish on Amazon.
  • Arrange the cauliflower florets on the bottom.
  • Add about 1 cup of assorted, chopped veggies on top, for color and added texture.
  • In a sauce pan, melt butter.
  • On medium heat, add in the flour with the butter and stir for about 1 minute.
  • Add in half the milk (or Half and Half), and continue stirring.
  • As the mixture thickens, add in the rest of the milk and whisk smooth.
  • Add in salt and pepper to taste, and dried Italian seasoning.
  • Add in half of the freshly grated cheese, stir until melted, and remove from the heat.
  • Evenly pour the creamy, cheesy mixture over the top of the cauliflower/veggie mix.
  • Top the gratin with the remainder of the cheese (although you can reserve a bit of cheese for topping at the end, if desired)
  • Bake 25-35 minutes in an oven pre-heated to 350 degrees Fahrenheit.
  • When the cauliflower gratin begins to color nicely on top, it’s ready.
  • Garnish with extra cheese or fresh herbs.

And that’s it. Enjoy!

For another gratin-style recipe idea, try this Baked Quinoa with Celery Root Recipe.

Quinoa Vegetable Gratin

Definitely give this cauliflower gratin recipe a try and let me know what you think. If you liked the recipe, click a few buttons below to share it with your friends. Thanks, I appreciate it!
–Chef Buck

Share and Enjoy !


Chole Masala Recipe with the fewest ingredients!

chole masala

Chole masala is an Indian chickpea curry recipe. For this simple chole recipe, I’m using the fewest ingredients I can. I do add Garam masala and cilantro to this version of chickpea curry; for a super simple version of chole masala, these two ingredients can be optional, but certainly use them if you have them on hand. I’m leaving out the asoefetida and besan (chickpea flour), and also the onion, which I will often cook into a chana masala. Chickpea curry is a delicious Indian staple, and a great introduction to Indian cooking.

what you need to make Chole Masala

1 15oz can CHICKPEAS
1 15oz can DICED TOMATO
3-5 cloves GARLIC finely chopped
½ tsp CUMIN SEEDS
1 tsp CUMIN POWDER
½ tsp TURMERIC POWDER
1 tsp CORIANDER POWDER
1 tsp CHILI POWDER
SALT and PEPPER (to taste)
½ tsp GARAM MASALA (optional)
fresh chopped CILANTRO (optional)
OIL for sauteing
Check out current prices for Indian Spices on Amazon.

chole masala
Chana masala is a great introduction to Indian cooking

how to make Chole Masala

  • In a skillet, heat oil on medium high heat.
  • When the oil is heated, add the cumin seeds, stir and allow to simmer for about 20 seconds.
  • Once the seeds begin to crack, add the finely chopped garlic.
  • Stir for approx. 1 minute and then add the diced tomatoes. Mix well and allow the tomatoes to bubble.
    As the tomatoes cook down, you can crush them with your stirrer for a smoother chana massala.
  • Stir in the chili powder, turmeric, coriander, and cumin powders (or substitute a premade curry mix instead).
  • Mix in the chickpeas and add ½ can of water.
  • Bring the dish to a bubble, then reduce to a simmer, cover, and allow cooking for 10 minutes.
  • After 10 minutes, the chick peas will be soft. Use a fork or potato masher to smash some of the chick peas, this will help thicken the chana masala.
  • If desired, add garam masala and then simmer uncovered to the desired consistency, remove and serve.
  • Garnish with fresh coriander leaves.
    Serve with rice or on its own.

Give this easy chole masala recipe a try and let me know what you think, and bon appétit!

And for more easy Indian recipe ideas, check out my Indian Recipes Playlist.

chole masala
click pic for easy Indian cooking recipes

Thanks for checking the chole masala recipe out, if you like it, then click a button or two below and share the dish with your friends, I appreciate it.
Thanks,
–Chef Buck

Share and Enjoy !


Canned Herring Recipe …how to eat kippers

canned herring recipe

Here’s an easy canned herring recipe if you’ve ever wondered what to do with canned herring or kippers. Canned smoked fish can be used to make healthy snacks or dinner recipes with very little time and effort. Canned herring is a good source of omega-3 fatty acids and other beneficial fats, and also a cost effective way to get healthy fish into your diet.

Make a Canned Herring Recipe on a Crostini

canned HERRING …also called KIPPERS
thinly sliced and toasted BAGUETTE
CREAM CHEESE
RED ONION thinly sliced
MUSTARD (very optional…but I like it…as long as it’s not hot dog mustard!)
CAPERS …current caper prices online
fresh DILL

canned herring recipe
Make a quick crostini for a canned herring snack
  • A good bread is the start of a great crostini.
  • Slice the bread thinly, so as to not overwhelm your toppings.
  • Toast the bread lightly.
  • Smear with cream cheese.
  • Spread on a drop of mustard, too, this is optional, but quite nice with herring.
  • Add a bit on thinly sliced red onion.
  • Add capers and fresh dill.
  • Top with smoked herring …either canned in oil or water, whatever you prefer.

Shop for tins at your local grocer, or check current Canned Herring Prices on Amazon.

Enjoy!

canned herring recipe
…nothing to be afraid of in here.

Make a Healthy Salad with Kippers …aka smoked herring

Place an assortment of mixed greens in a salad bowl. No need to dress the salad greens; the salad toppings will be enough.
Add sliced carrot, bell pepper, or celery for a nice crunch, and added nutrition.
Top the greens with a kippered herring filet.
Spread whipped or softened cream cheese over the kipper, add a dash of Dijon or stone ground mustard, if desired.
Top with chopped red onion, capers, and fresh dill…and serve.

canned herring recipe
Kipper salad?…why not?

Canned herring is such a quick, easy, and healthy snack or dinner option.
Try these canned herring recipe ideas and let me know what you think…and bon appétit!

And for more Omega-3 Fatty Acid Fish options,
Take a look at this Canned Salmon Recipe for a healthier burger.

salmon burger recipe
Canned Pink Salmon …traditional style means skin and bones are still intact

Thanks for checking out these canned herring recipe dishes, and all of our recipes. Be sure and sign up for our mailing list and never miss a new Chef Buck cooking video, and also click a button below and share the dishes with your friends. We appreciate the kind comments and support, and we’ll see you next time in the kitchen!
–Chef Buck

Thanks for watching our recipe videos!

We include affiliate links for products on our website, so if you make a purchase after clicking on our links, we may earn a commission which helps us produce more videos and drink more coffee :^) We participate in the Amazon Services LLC Associates Program, which is an affiliate advertising program providing a means for us to earn fees by linking to Amazon.com and affiliated sites, so we can make more videos.

Share and Enjoy !

Easy Kale Recipe Idea — Mexican Kale

easy kale recipe

Here’s an easy kale recipe with a South of the border flair. We make a lot of dishes with fresh kale. Kale is a versatile, nutrient packed leafy green that we alternate often with spinach. Spinach and kale are interchangeable in most recipes. We call this recipe Mexican Kale since it has corn, beans, and cilantro, with spices that lend it a flavor you might find in a healthy restaurant featuring a Southwestern style menu.

Ingredients for Easy Kale Recipe

8-10 KALE leaves and stems
1 bunch CILANTRO chop and roughly divide leaves and stems
1 large ONION chopped
1 RED BELL PEPPER chopped
5 cloves GARLIC finely chopped
14oz can CORN rinsed and drained
15oz can BLACK BEANS rinsed and drained
1 tsp CHILI POWDER
2 tsp CUMIN POWDER
SALT and PEPPER to taste
OIL for sauteing

easy kale recipe
Steaming the kale at the end of the recipe preserves the nutrition

How to Make Mexican Kale

  • Wash kale thoroughly; kale leaves can hold a lot of dirt and grit in the leaves!
  • Separate the kale leaves from the stem.
  • Tear or chop the leaves into rough salad sizes, and chop the stems into ¼ inch pieces, or smaller.
  • Set stem pieces aside, and in a bowl, massage the kale leaves with about about a ¼ tsp of salt, or less.
  • Set kale aside.
  • Heat a skillet with oil on medium high heat.
  • When hot, add the onion, bell pepper, and kale stems and saute for 4-5 minutes.
  • Add in the corn, beans, cilantro stems, and garlic.
  • Add in the seasonings, but go lightly on the salt, since salt has already been added to the kale leaves.
  • Mix ingredients well, cover and continue cooking 3-4 minutes.
  • Remove the skillet lid and top the skillet mixture with the cilantro and kale leaves. Spread leaves evenly.
    Replace the lid, turn off the heat, and let the leaves steam for 3-5 minutes.
  • Uncover, mix well, and serve hot as a healthy side dish or entree.

easy kale recipe
Turn a simple kale side dish into a kale entree for a healthier dinner

That’s it, hope you like it.

Give this Mexican kale recipe a try and let me know what you think. For more easy kale recipe ideas, check out KALE RECIPE PLAYLIST.

easy kale recipe
click pic for more kale recipe ideas

Thanks for watching. If this easy kale recipe was helpful, please click a button or two below and share it with your friends, I appreciate it!
— Chef Buck

Share and Enjoy !


Pour Over Coffee is not complicated

pour over coffee

Pour over coffee is easy; not as easy as French Press coffee, or a Mr. Coffee type coffee maker, but it requires minimal equipment to get the job done. All you need to make pour over coffee is coffee, hot water, a filter, a funnel, and a coffee carafe or thermos. You don’t need a fancy pants pour over funnel, or spout, or a lab coat and a degree from Coffee College. The key to great coffee, no matter how you make it, is freshly ground coffee beans that you love.

What You Need To Make Pour Over Coffee

COFFEE buy whole beans and grind them at home, freshly ground coffee makes all the difference.
CARAFE or THERMOS or just a CUP, if you’re only making a cup…although you’ll probably need something deeper to accommodate the funnel when you pour the water over the grounds.
FUNNEL you can buy an overpriced hipster fancy pour over coffee thingy designed specifically for coffee…or you can just buy a funnel like mine
FILTER a coffee filter, duh
WATER …DON’T pour boiling water over your ground coffee! Heat cold water to a boil, then set aside for 1 minute, then return to the burner on low heat to maintain the temperature while you
pour.

When making pour over coffee, 2 Tbsp whole coffee beans to 6oz of water is a good ratio to start with…but coffee is subjective, so experiment and adjust to taste.

pour over coffee
grind beans, heat water, pour…ta-da!

How to Make Pour Over Coffee

Use your favorite coffee beans. Shop around. Experiment. The beans make all the difference.
Buy whole beans and grind them fresh at home.
Grind the beans coarsely.
Don’t over grind.
Finely ground coffee will thicken in the filter and the water will pass too slooooowly through the filter, ain’t nobody got time for that. If there a few chunks of larger bean in your grind, it’s not the end of the world…less is more…that’s coffee philosophy 101.
Place the funnel in a carafe or thermos. A carafe or thermos is handy whenever you brew extra coffee, even if you have an electric coffee maker; leaving it on a burner is a recipe for bitter, burnt coffee. It’s easy to find a carafe at the thrift store–I’ve never bought a new one!–but if you’re a buy-new kinda person, here are some current online prices at amazon for coffee carafes.
Line the funnel with a coffee filter and fill with freshly ground coffee.
Heat water to a boil, remove from burner and allow to cool 1 minute, then return to the burner and keep on low heat; this is just to maintain the heat between the pouring.
Slowly pour water over the coffee grounds. Do this in a circular motion. Cover all grounds evenly, don’t pour in a single concentrated area.
Once all the water is poured through, remove funnel and cap carafe or thermos.
That’s it, dude.

If that sounds a little too hot for your tastes, you can always try some Homemade Cold Brew Coffee.

cold brew coffee
cold brew for the best iced coffee

Thanks for checking out the videos. If you like what you see, share it with your friends and family on social media, I appreciate it!
–Chef Buck

Share and Enjoy !


Salmon Recipe – quick and easy cooked salmon fillet

salmon recipe

My favorite salmon recipe calls for crisping the fish skin on the stove top then finishing the salmon fillet in the oven under the broiler. This is a simple salmon dish with just a bit of oil and seasoning and a maple glaze to add a hint of sweetness. Honey can be substituted for the maple syrup, or this step can be skipped entirely. I often season salmon with just salt and pepper and then cook the salmon fillet in the same manner.

Ingredients for salmon recipe

SALMON FILLET w/ skin
OLIVE OIL
PAPRIKA
GARLIC POWDER
SALT and PEPPER
MAPLE SYRUP (optional, or substitute honey)
OIL for frying

salmon recipe
Crisp salmon skin on the stove top for added flavor and texture

How To Cook Salmon Recipe

  • Wash the salmon filet and pat dry with a paper towel.
  • Coat the salmon with olive oil, skin side as well.
  • Generously season fish.
  • Using an oven safe skillet, on med. high heat, heat a little oil on the stove top. Check current prices for a stove top and oven safe cast iron skillet on Amazon.
  • When oil is hot, add salmon fillet skin side down and cook about 3 minutes.
  • Transfer the skillet to the oven and continue cooking the salmon under the broiler for 2-3 minutes –adjust time depending on the size of the fillet.
  • When the salmon is almost finished cooking, apply a glaze of maple syrup, and continue broiling for final minute. If you don’t have a nice syrup
    on hand, substitute honey.
  • Remove skillet from the stove and transfer fish to a plate.
salmon recipe
Add a glaze of maple syrup or honey for a touch of sweetness

Hope you like the salmon dish. Ever try baked catfish? This recipe tastes like fried catfish, but better.

fried catfish recipe
Not Fried Catfish …tastes great, easy, and less mess.

Thanks for Watching our Salmon Recipe Video!

Click a button below and share the dishes with your friends. You can also follow Chef Buck on Youtube. We appreciate all the kind comments and support, and we’ll see you next time in the kitchen!

If you like what CG and I do, support us on Patreon, or throw us a tip in our Paypal Tip Jar. We’ll happily enjoy a coffee on the road – Thanks! We appreciate all the support, and we’ll see you next time in the kitchen!

We include affiliate links for products on our website. Making a purchase after clicking on our links and we may earn a commission which helps us produce more videos and drink more coffee :^) We participate in the Amazon Services LLC Associates Program, which is an affiliate advertising program. It provides a means for us to earn fees by linking to Amazon.com and affiliated sites, so we can make more videos.

Share and Enjoy !

Egg Salad Recipe …spicy like you likey

egg salad recipe

Try a spicy egg salad recipe for a flavorful twist on a traditional boring, bland egg salad. Most egg salads are a snooze fest, but sauteing up a little onion, pepper, and spices will put a little zing in your thing, and added nuts will give your egg salad a sorely needed crunch.

Spicy Egg Salad Recipe Ingredients

8 BOILED EGGS [link to Best Way to Boil Eggs ]
3-5 cloves GARLIC finely chopped
chopped HOT PEPPER as desired (I generally use a whole jalapeno pepper with the ribs and seeds removed)
2 tsp GINGER minced
½ to 1 cup CASHEWS (or if nuts ain’t your thang, sub some chopped celery)
1 small RED ONION chopped
¼ cup MAYONNAISE
½ cup chopped CILANTRO
½ cup chopped PARSLEY
10-12 CHERRY TOMATOES cut into quarters
LEMON zest and juice
1 tsp CHILI POWDER
1 Tbsp PAPRIKA
1 tsp TURMERIC
SALT and PEPPER to taste
OIL for sauteing

egg salad recipe
Perfectly boiled eggs make the best egg salad

How to Make This Egg Salad Recipe

The key to any egg salad are the eggs; you don’t want overdone boiled eggs that are dried out with that tell-tell greenish tint. But no fear! Fool proof boiled eggs are super easy to prepare.
HOW TO MAKE PERFECT HARD BOILED EGGS:

  • In a pot, cover the eggs with cold water.
  • Cover and bring the pot to a boil.
  • Once boiling, remove the pot from the heat and allow the eggs to sit in the hot water for 10 minutes.
  • After 10 minutes, transfer the eggs to an ice water bath.
  • Peel eggs when cooled.
  • In a skillet, heat a little oil on medium high heat.
  • Add in the garlic and hot peppers and cook for 1 minute then
  • add in the onion and ginger and continue cooking until onions begin to soften.
  • Stir in the spices and then the cashews. Substitute peanuts if you prefer, or if you’re not into nuts, add chopped celery; a little crunchiness makes for a more interesting egg salad dish.
  • Saute ingredients for 2-3 more minutes, then set skillet aside to cool.
  • In a bowl, combine the peeled eggs and mayonnaise and mash into a lumpy mixture.
  • Add in the cooled ingredients from the skillet, and mix well.
  • Add lemon juice and zest, and stir in some fresh herbs, like parsley, cilantro, or dill.
  • And finally, stir in some quartered cherry tomatoes; cherry tomatoes are best because the tomato skin will help keep them from falling apart.
    And that’s it!–serve warm or cold, all by itself or as a salad or bread topping or a hearty egg salad sandwich.

egg salad recipe
Top egg salad on a green salad, use as a sandwich filling, or spread on a crostini or cracker

Give this spicy egg salad recipe a try and let me know what you think, and bon appétit!

And for another tasty salad idea, try this Southwestern Quinoa Salad Recipe.

southwestern quinoa salad
a southwestern quinoa salad makes a tasty and healthy dinner choice.

Thanks for checking the egg salad recipe out. If you liked the dish, then click a button or two below and share it with friends…I appreciate it!
–Chef Buck

Share and Enjoy !


Best Spaghetti Squash low-fat, low-carb recipe

best spaghetti squash

It doesn’t take a lot to make the best spaghetti squash recipe. A few simple ingredients are all you will need to cook this healthy, low fat spaghetti squash dish. This squash is a lowfat low carb ingredient with a wonderful texture and a mild flavor that allows it to work very well in a variety of recipes.

What you need for this Squash Recipe

1 SPAGHETTI SQUASH
GARLIC (5-10 cloves, finely chopped)
LEMON zest and juice (current price for a kitchen zester)
BUTTER (1-2 Tbsp)
OLIVE OIL (¼ cup)
PARSLEY (½ cup, chopped)
SALT and PEPPER to taste

The measurements above are just loose suggestions, and really need to be adjusted to your own tastes. The size of the spaghetti squash and how much squash you dig out will determine how much of the other ingredients you need. This recipe calls for simple and fresh ingredients, so there really is no wrong way to make this dish. The best spaghetti squash doesn’t get more super simple than this!

best spaghetti squash
spaghetti squash makes a healthy, low fat, low carb pasta alternative

Best Spaghetti Squash …simple, low fat, low carb recipe

  • When buying a spaghetti squash, choose one that seems heavy for its size.
  • Carefully slice the squash into halves. Cut the squash across instead of lengthwise, this will make for longer “noodles”.
  • Place cut sides down in shallow water in a roasting pan.
  • Bake for about 30-45 minutes at 350 degrees Fahrenheit. You can check on the squash after 30 minutes; the cooking time will vary according to the size of the squash.
  • It’s important not to overcook the squash, slightly crunchy strands of squash add great texture to a dish, and overcooking the squash will make the ingredient mushy.
  • Remove squash from the oven and carefully turn halves over to check for doneness –the water will be hot and steam will be trapped under the squash, so be cautious.
  • Allow squash to sit 5-10 minutes to cool slightly for easier handling.
  • Insert a fork and twist out strands of “spaghetti”. Once the fork has done its job, use a spoon to scrape out the remaining squash; it’s edible all the way to the rind, so don’t waste any!

On the Stove Top

  • Heat a skillet and melt cooking oil on medium heat.
  • Add finely chopped garlic and cook 1-2 minutes until it begins to color up. If you like a bit of heat with your dish, add some red pepper flakes as well.
  • Add a bit of butter for extra flavor (this is optional).
  • Add the spaghetti squash to the skillet and mix with the garlic.
  • Add salt and pepper to taste, add lemon zest and juice, and stir. Check current price for a lemon zester on Amazon.
  • Turn off the heat and add in a bit of dark, flavorful olive oil.
  • You can also stir in a bit of freshly grated Parmesan Cheese if desired, but this is optional.
  • Add fresh chopped parsley for bright flavor and color, and mix well.

And that’s it.  Enjoy!

If you’re new to home cooking, just get a bunch of spices, pots and pans, and start experimenting with different ingredients and recipes. It’s a healthy hobby that can save a lot of money in the long run. You can check out current prices for Complete Kitchenware Sets on Amazon as well as Complete Starter Spice Kits. Or just go to a thrift store! I’ve found some of my favorite kitchen gear at second-hand stores.

For another tasty veggie ingredient to experiment with, try some tasty Rutabaga Recipes. It’s a great potato substitute!

vegetable soup
rutabaga is like a turnip on steroids, but sweeter

Thanks for checking out our best spaghetti squash recipe, and all of our recipes. Be sure and sign up for our mailing list and never miss a new Chef Buck cooking video, and also click a button below and share the dishes with your friends. We appreciate the kind comments and support, and we’ll see you next time in the kitchen!
–Chef Buck

Thanks for watching our recipe videos!

We include affiliate links for products on our website, so if you make a purchase after clicking on our links, we may earn a commission which helps us produce more videos and drink more coffee :^) We participate in the Amazon Services LLC Associates Program, which is an affiliate advertising program providing a means for us to earn fees by linking to Amazon.com and affiliated sites, so we can make more videos.

Share and Enjoy !

Bean Dip Recipe for Healthy Snacking

bean dip

White bean dip is super versatile, and this easy dip recipe can be used in a variety of dishes. Bean dip makes a handy spread for a crostini or sandwich, a healthy dip for chips or vegetables, or as a bean puree to serve as a dinner side for meat, fish, or vegetarian meals.

Bean Dip Recipe Ingredients

2 15oz cans of WHITE BEANS (rinsed and drained)
16 oz MUSHROOMS (chopped)
5-10 cloves GARLIC (chopped)
½ cup ROMANO CHEESE (I like to use freshly grated Romano, Parmesan, or Asiago cheeses)
1 medium to large size LEMON, juice and zest
½ tsp RED PEPPER FLAKES (or use fresh peppers)
3-4 Tbsp WORCESTERSHIRE SAUCE
SALT and PEPPER to taste
2-3 Tbsp of dark, rich OLIVE OIL
Garnish dip with tomato, olives, capers, fresh herbs, etc.

bean dip
Add mushrooms and Worcestershire sauce for a bean dip recipe twist.

How To Make a Bean Dip Recipe

I like to use canned beans.
You can use your favorite beans, or a mixture of bean types.
I prefer white beans for this recipe, like Navy or Cannellini.

  • Heat oil in a pot on medium heat for sauteing.
  • Add in the chopped garlic and red pepper flakes; stir the garlic for a few minutes until it begins to color.
  • Add in a bit of black pepper, and the chopped mushrooms, and continue sauteing.
  • Add the Worcestershire sauce.
  • Continue cooking for 3 or 4 minutes; the mushrooms will cook down quite quickly.
  • Add in the beans and maybe ½ cup of water or broth. Be conservative when adding liquid; the finished bean dip will be best thicker, rather than thinner.
  • Raise the heat to medium high, cover, and simmer beans for about 5 minutes.
  • Uncover, reduce the heat, and continue simmering until the liquid has cooked down and the bean mix thickens.
  • Turn off the burner.
  • Stir in the cheese until it melts into the beans. Use freshly grated cheese for best results.
  • Add the zest and juice of one medium to large lemon, and 2-3 Tbsp of dark olive oil.
  • Mix into the beans and cheese.
  • Transfer to a blender or food processor and blend until the bean dip is smooth,
    or use a hand mixer and blend dip in the cooking pot. Check current prices for Hand Blenders at Amazon.
  • Give it a taste test and adjust seasoning as needed.
  • Set dip aside to cool a bit.
bean dip
White bean puree makes an excellent bean dip or spread.

This bean dip can be served warm or cold, although it’s especially tasty warm.
Use it as a dip for chips or sliced veggies; it pairs particularly well with thick tortilla chips.
Use this bean dip as a sandwich spread instead of mayonnaise, or as a crostini topping.
White bean dip will pair nicely as a puree for fish or meat entrees.
Great as a party or dinner appetizer or just as a movie watching snack.

Give this easy bean dip recipe a try and let me know what you think, and bon appétit!

And for another creamy, beany option, check out this Healthy Hummus Recipe.

hummus

Thanks For Watching Our Bean Dip Recipe!

Thanks for checking out our beet and quinoa recipe, and all of our recipes. Be sure and sign up for our mailing list so you’ll never miss a new recipe. Also click a button below and share the dishes with your friends. You can also follow Chef Buck on Youtube. We appreciate all the kind comments and support, and we’ll see you next time in the kitchen!

If you like what CG and I do, you can also support us on Patreon, or throw us a tip in our Paypal Tip Jar. We’ll happily enjoy a coffee on the road – Thanks! We appreciate all the support, and we’ll see you next time in the kitchen!

We include affiliate links for products on our website. So, if you make a purchase after clicking on our links, we may earn a commission which helps us produce more videos and drink more coffee :^) We participate in the Amazon Services LLC Associates Program, which is an affiliate advertising program. It provides a means for us to earn fees by linking to Amazon.com and affiliated sites, so we can make more videos.

Share and Enjoy !

Wings Recipe – Crispy Baked Chicken Wings

wings recipe

This oven baked wings recipe is a healthier and less messy chicken wing dish, compared to traditionally fried wings. These chicken wings are super tasty whether you eat them with or without a salt and pepper seasoned topping, or wing sauce. This seasoned wings recipe is based on salt and pepper style dishes I love ordering at Chinese restaurants.

What You Need For A Crispy Wings Recipe

3 lbs CHICKEN WINGS
10-12 GARLIC CLOVES, finely chopped
big bunch of CILANTRO, chopped (stems and leaves)
3-4 GREEN ONIONS, chopped, bottoms separated from tops…use the green tops as a garnish
1-2 JALAPENOS, finely chopped (or substitute red pepper flakes)
2 Tbsp BAKING POWDER*
1 tsp TURMERIC POWDER
1 tsp GARLIC POWDER
1 tsp ONION POWDER
1 tsp CHILI POWDER (I used chipotle, or smoked jalapeno in the video)
SALT and PEPPER (to taste)
OIL to saute seasoning topping

*Baking Powder is a mixture that works similarly to some cooking properties of baking soda and cornstarch.

wings recipe
For crispy wings, bake with a coating of baking powder and lots of seasoning

How to Make a Crispy Wings Recipe

Preparing and Cooking The Wings:

I generally remove the skin from chicken, but not when I’m baking this wings recipe; that crisp cooked skin is what makes chicken wings so tasty.
Buy your wings already cut up, or cut them up yourself at home.  [They’re not difficult to process at home, just cut easily between the joints, and be sure and save the wing tips to use for a chicken broth.]

1) Pat chicken pieces dry with a paper towel and set aside. Do not add oil, there’s plenty of fat in the skin.  [If your wings are room temperature (they haven’t been cooled in the frig), you may need to wet your wings before patting dry.  You want the chicken to have a bit of moisture to it, so plenty of the seasoning will stick to it.]
2) Combine the baking powder and powdered seasonings in a bowl and mix together well.
3) Toss the wingettes and drumettes with the dry coating.
4) Arrange the chicken pieces on a wire rack over a baking pan and place in an oven preheated to 425 degrees Fahrenheit. Here’s a good option if you want to check current prices for an oven-safe roasting rack on amazon.
5) Cook wings for 50-60 minutes, turning every 20 minutes until crispy and done.

While The Wings Bake, Make The “Salt and Pepper” Seasoning Mix:

1) Heat a little oil in a skillet, on medium heat.
2) Add fresh chopped jalapenos, or substitute red pepper flakes, and chopped green onion bottoms.
Saute on Medium low heat for 2-4 minutes.
3) Add finely chopped garlic and continue to saute for a couple of minutes; be sure to keep the temperature low enough to not burn the garlic.
4) Add chopped cilantro, lots of it, stems and all.
5) Continue sauteing the mixture on medium low heat for 10-15 minutes until the cilantro has cooked down.  You want the seasoning to still contain a small amount of moisture, so it will stick to the cooked wings.
6) Once the wings have baked to crispy completion, toss the wings and the seasoning together and serve.

wings recipe
Try tossing crispy wings with a salt and pepper seasoning mix for a tasty Chinese style dish

That’s it! Let me know what you think of this oven baked wings recipe, and if you’d like to try an Asian twist on baked wings, here is an easy Korean-Style Wings Recipe.

korean wings recipe

And for a tasty non-wing baked chicken recipe, check out this Chicken Tenders Recipe

wings recipe
Oven-baked Chicken Tender Recipe …or do you call them chicken fingers?

Thanks For Checking out our Recipes

We hope you love this easy wings recipe! Sign up for our mailing list so you’ll never miss a new recipe. Also click a button below and share the dishes with your friends. You can also follow Chef Buck on Youtube. We appreciate all the kind comments and support, and we’ll see you next time in the kitchen!

If you like what CG and I do, support us on Patreon, or throw us a tip in our Paypal Tip Jar. We’ll happily enjoy a coffee on the road – Thanks! We appreciate all the support, and we’ll see you next time in the kitchen!

We include affiliate links for products on our website. Making a purchase after clicking on our links and we may earn a commission which helps us produce more videos and drink more coffee :^) We participate in the Amazon Services LLC Associates Program, which is an affiliate advertising program. It provides a means for us to earn fees by linking to Amazon.com and affiliated sites, so we can make more videos.

Share and Enjoy !

Scrambled Eggs with Curry and Spinach

scrambled eggs

A little curry is a simple way to add a nice twist to scrambled eggs, and adding a bit of fresh greens into the mix will elevate the eggs to a slightly healthier plane. Scrambled eggs are always a good idea for a quick, hot breakfast, and this curry egg scramble cooks up quick. We often add spinach to egg dishes; it doesn’t effect the cooking time at all. I’m more of a runny yolk guy myself, and plain-jane scrambled eggs are never a good idea, but curry makes all things wonderful…and if the idea of mayonnaise on eggs sounds awful…well…just give this curry mayo a try.

What You Need for a Quick Scrambled Egg Curry

2-4 EGGS
2 cups fresh SPINACH
2 GREEN ONIONS
1 clove GARLIC
1 tsp DRIED ONION FLAKES
¼ tsp GARLIC POWDER
½ tsp CURRY POWDER
1 tsp BUTTER
SALT and PEPPER to taste
splash of OIL for cooking

2 Tbsp MAYONNAISE
½ tsp CURRY POWDER
(add additional CUMIN or TURMERIC if desired)

scrambled eggs
adding spinach to scrambled egg dishes is a quick way to add color and nutrition

How To Make a Scrambled Eggs Curry

In a bowl, whisk eggs with salt, pepper, onion flakes, garlic powder, and ½ the curry.
In a smaller dish, mix the rest of the curry with the mayonnaise (add additional seasonings as desired).
On a medium burner, heat oil in a skillet. Check here for current prices for a non-stick skillet on Amazon.
When oil is hot, add garlic and chopped green onion bottoms and saute for 1 minute.
Add butter and spread garlic and onion on the pan bottom.
Top with the spinach, spreading the leaves evenly across the pan.
Add in the egg mixture and let cook for about 2 minutes keeping the burner on medium heat.
Turn the eggs (or flip them…it’s more fun to flip) and turn off the heat.
The pan will be hot enough to finish the eggs.
Plate the eggs and top with a dollop of the Curry Mayonnaise.
And that’s it!

scrambled eggs
scrambled egg curry with curry mayo

Give this scrambled egg recipe a try and let me know what you think, and bon appétit!

For another quick breakfast recipe idea, try this easy Fancy Herb Omelet Recipe.

How to make an omelette
omelet recipe

Thanks for checking out the recipes. Be sure and sign up for our mailing list so you’ll never miss a Chef Buck cooking video, and click a button below and share the dishes with your friends. We appreciate all the kind comments and support, and we’ll see you next time in the kitchen!
–Chef Buck

Share and Enjoy !


Yuca Recipe – How to Cook Cassava Root

yuca recipe

Check out this easy yuca recipe. Yuca is a starchy root that makes a terrific change up from a potato dish. We have been cooking up yuca roots with garlic and onion for years, inspired by our favorite Cuban restaurants in Florida. The combo of yuca, with plenty of garlic, onion, and cumin will knock your socks off. So, check out the video and give this delicious yuca recipe a try.

Ingredients for this Cuban-Inspired Yuca Recipe

YUCA (about 1 lb.)   In the video we use fresh yuca, but you can use frozen in the same way.
1-2 large ONION (diced)
5-10 cloves GARLIC (finely chopped)
OIL for sauteing the onion and garlic
RED PEPPER FLAKES to taste
2-3 Tbsp CUMIN
½ cup OLIVE OIL total (1/4-1/2 to saute onion & garlic, rest to drizzle on top)
zest and juice of 1 LEMON
SALT to taste
CUMIN SEEDS (1 tsp, optional) I like using Badia seeds ’cause they’re a great buy, and you can check current prices for Cumin Seeds on Amazon.

I’ve got lots of yuca in the video, so I’m doubling this recipe.

yuca recipe
Yuca is a popular root that can be used much like a potato


How To Cook Yuca Recipe

  • Using a sharp knife, cut the yuca into manageable sizes to carefully cut away the outer skin of the yuca root. The skin is inedible and should be discarded. [One advantage of using frozen yuca is that the outer skin is already removed.]
  • Place yuca pieces into a pot of water and bring to a boil. Yuca should NEVER be eaten uncooked.
  • Reduce heat and simmer 15-20 minutes or until yuca root can be pierced easily with a fork. 
  • Do NOT overcook! Yuca pieces should not be mushy.
  • Zest lemon; squeeze lemon juice.
  • Drain yuca and cool with water.
  • Remove fibrous stem from center of root and cut into 1 inch chunks (or smaller, if you want to taste more of your seasonings).
  • Heat oil in a skilleton medium high heat.
  • Add cumin seeds for just a few moments, then add garlic and onion and let simmer for a several minutes. 
  • Turn down to medium heat. Add red pepper flakes, cumin powder, and salt to taste.
  • Next, add yuca.
  • Mix and allow all to simmer for 5 minutes. Give the yuca an occasional stir. Add a bit of water if needed, but not too much.
  • Remove from heat.
  • Finally, add lemon juice and zest. Drizzle a bit of oil on top (extra virgin olive oil is a great topping).

Have Fun with Yuca!

yuca recipe
Cook yuca by removing the skin and boiling the root in water

And that’s it!

Yuca is an excellent substitute for potato. It goes great with any meat entree and makes a great vegetarian meal when paired with stuffed peppers and a crisp green salad.
Give this yuca recipe a try and let me know what you think, and bon appetit!

And, if you wanna try out the stuffed peppers with yuca, check out this recipe as well.
Jalapeno Peppers Recipe
kick ass jalapeno poppers

Thanks for checking the yuca recipe and video out. If you liked it, click a few buttons below and share it with your friends and family. I appreciate it!
–Chef Buck

And here’s a LO-FI video version of this yuca recipe I made back before I knew what a haircut was.

We appreciate you watching our videos…Thanks!


We include affiliate links for products on our website, so if you make a purchase after clicking on our links, we may earn a commission which helps us produce more videos and drink more coffee :^)                                    Also, we are participants in the Amazon Services LLC Associates Program, which is an affiliate advertising program that provides a means for us to earn fees by linking to Amazon.com and affiliated sites, so we can make more videos.

Share and Enjoy !

Zucchini Noodles with Marinara Sauce Recipe

zucchini noodles

This zucchini noodles and marinara sauce recipe is super simple to cook. The marinara sauce will pair great with any pasta, even a gluten free faux zucchini pasta, which is really just raw zucchini cut into noodles, but your taste buds will trick your brain into believing otherwise. Thin sliced ribbons of zucchini will act just like egg noodles, except when it comes to racking up the calories.

What You Need To Make Zucchini Noodles with Marinara Sauce

2-3 ZUCCHINI
1 lb ground SAUSAGE
1 ONION
crazy amount of GARLIC
½ GREEN BELL PEPPER
1 15 oz can DICED TOMATO
1 15 oz can TOMATO SAUCE
2-3 tsp ITALIAN SEASONING
RED PEPPER FLAKES (to taste)
½ up PARSLEY (chopped, optional)
SALT and PEPPER (to taste)
OIL for sauteing

zucchini noodles
Add thin sliced raw zucchini to hot marinara for a great gluten free faux pasta

How To Make Marinara Sauce with Zucchini Noodles

  • In a large skillet, heat oil on medium heat.
  • When pan is hot, add sausage. Sometimes I’ll shape sausage into meatballs before adding to the skillet and other times I’ll just divide the sausage once it’s in the pan; whatever works for you is the right way.
  • Brown the sausage for a few minutes and then add the onion, garlic, and peppers.
  • Continue sauteing for 3-4 minutes.
  • Add herbs and salt and pepper to taste.
  • Add canned tomato and about ½ can of water.
  • Mix well and bring the skillet up to a bubble.
  • Reduce to a low simmer and cook 20-30 minutes. Add water as desired.
  • While sauce simmers, wash and peel 2-3 zucchini into thin noodles. I find a simple vegetable peeler to be the easiest method for slicing zucchini into thin, egg noodle like strips.
  • After sauce simmers, adjust seasoning as desired and stir in the chopped parsley. The parsley is optional, but adds a great color to the sauce, especially if you’re serving the marinara sauce over traditional noodles.
  • Remove the skillet from the heat and stir sliced zucchini noodles into the marinara sauce.
  • The thin zucchini will readily heat through in the hot marinara sauce and no more cooking is required.
  • Serve immediately (and top with Parmesan cheese if you like!)

zucchini noodles
raw ribbons of zucchini make a perfect pasta substutute

Give this very tasty marinara sauce with zucchini noodles recipe a try and let me know what you think, and bon appétit!

For another great noodle dish, check out this Gluten Free Tofu Lasagna
gluten free tofu lasagna

Thanks for checking out the recipes. If you like what you see, share it with your friends and family on social media, I appreciate it!
–Chef Buck

Share and Enjoy !


Kiwano Melon – How to eat a Horned Melon

kiwano melon

What is kiwano melon? ….it’s a fruit, also known as a horned melon and an African horned cucumber; it originated in Africa, but is becoming popular around the globe, mostly because of it’s interesting appearance. Check out the video to see how to eat a kiwano and, if today is payday, go ahead and pick one up at the market …it’s a pricey piece of fruit.

How to Eat Kiwano Melon

  • Kiwano Melon will last several months when stored at room temperature.
  • Kiwano is also called a horned melon, and an African horned cucumber.
    Its taste is mild to slightly citrus with comparisons to lemon, kiwi, and cucumber.
  • Kiwano is a variety of melon, and grows on the ground from a vine.
  • Buy a kiwano melon that is orange in color, the more orange the better.
  • Unripe kiwano is hard and green, but as it ripens, it colors to yellow and then to orange.
  • It is edible at any stage as it ripens. When overripe, it will burst.
  • Kiwano can be sliced open and eaten raw.
  • The inner pulp and seeds are edible. Kiwano has a high water content, and lots of seeds.
  • Eat the fruit directly from the gourd or remove the pulp to use in a recipe.
  • The decorative kiwano gourd can be incorporated in kiwano dishes.

kiwano melon
Kiwano is filled with an edible, seedy pulp

Kiwano Melon Fun Facts

  • Kiwano was used as a prop in an episode of Star Trek Deep Space Nine, staring as a “Golana Melon” from planet Golana.
  • Kiwano is sometimes called “blowfish fruit” because it looks like …a blowfish.
  • Because of its high water content, kiwano is prized in African desert regions.
  • Some varieties of kiwano have smooth skin (also known as “boring kiwano”).
  • Kiwano can be tied to the end of a stick and used to kill your enemies.

kiwano melon
kiwano has hints of citrus and cucumber

In the Northwest USA where I currently live, kiwano melon is found quite readily in local markets, but it is expensive.
At the local grocery in my neighborhood, this horned melon sells for $7.99 each. Yikes!
It’s a bit pricey, but if you have expensive tastes and like a piece of fruit that looks cool, give kiwano a try.

Or try Dragon Fruit …an equally cool and potentially overpriced piece of produce.

Thanks for checking out our videos. If you like what you see, share it with your friends and family on social media, I appreciate it!
–Chef Buck

Share and Enjoy !


Roast Chicken Recipe – a complete meal

roast chicken

A roast chicken recipe is easy to prepare and makes a tasty one-pot meal when cooked up with your favorite root vegetables. I like to butter up a whole chicken and roast it at a higher heat for a tender chicken with a golden skin.

What You Need for this Roast Chicken Recipe

WHOLE CHICKEN (about 5 lb)
2-3 Tbsp BUTTER (melted)
OLIVE OIL
2-3 bulbs GARLIC
2 PARSNIPS
3 CARROTS
1-2 ONIONS
1 lb POTATOES
some HOT PEPPERS (optional)
1 big LEMON
Fresh HERBS like ROSEMARY, SAGE, and THYME, or use a dried Italian herb mix
1-2 Tbsp PAPRIKA
1-2 Tbsp GARLIC POWDER
SALT and PEPPER (to taste)
…but really, use whatever seasonings you like
(just make sure you use lots of them)

roast chicken
Coat the chicken in butter for a golden roast chicken

How To Make Roast Chicken Dinner

  • Buy a 5 pound chicken, or larger…might as well make it worth your while!
  • Remember to wash your hands frequently and clean your kitchen prep areas thoroughly before and after handling raw chicken.
  • Before cooking the chicken, remove it from the fridge for about an hour, this will help the chicken cook more evenly.
  • Wash the bird and then pat dry with paper towels.
  • Place the bird in a cooking pan and coat it with butter. I like to use melted butter, cause it’s easier, the butter will add great flavor and color; also, be sure to use a pan that’s large enough to accommodate the chicken and all the root veggies.
  • Season the bird well, inside and out, with salt and pepper; be generous with the seasonings!
  • For this recipe, I also coat the chicken with garlic powder and paprika, but use whatever seasonings you desire. If you’re just getting into home cooking and don’t have a lot of seasoning choices, you can check out current pricing for a Complete Starter Spice Set on Amazon.
  • Placing fresh produce in the chicken cavity will add flavor and moisture as the bird roasts.
  • I’m using onion, garlic cloves, and lemon to stuff the chicken, but add fresh herbs as well if you have them on hand; rosemary, thyme, and sage are flavorful choices.
  • Using cooking twine, tie the legs together to close up the cavity; this will keep the stuffing inside and also prevent the legs from sticking out and becoming overcooked during the roast.
  • Remove the chicken from the pan and set it aside.
roast chicken
Roasting a whole chicken with potatoes and root vegetables makes a perfect one-pot meal.
  • Chop up your root vegetables and potatoes and place in the pan. Chop the veggies into larger sizes since they will be roasting for a long time.
  • Season the veggies as desired and then coat the veggies generously with olive oil. Using your hands, mix the seasonings, olive oil, and veggies together until they are well coated.
  • Spread the vegetables evenly along the bottom of the pan and then place the chicken on top in the center, with the breasts and legs up. Bring the wings against the chicken and tuck them under the body, this will keep them close and ensure even cooking.
  • Bake in an oven pre-heated to 425 degrees Fahrenheit for about 90 minutes, a bit more of less depending on the size of the chicken and the amount of veggies.
  • If desired, roast with a thermometer inserted to check for doneness. Insert a thermometer into the meat between the leg and thigh (avoiding the bone) and cook until a temperature of 165-170
    degrees F. If not using a thermometer, you can check for doneness by cutting between the thigh and leg; the juices should run clear of blood and the chicken should not be pink. Check current roasting thermometer prices on Amazon.
  • After 90 minutes at 425 F, remove the chicken from the oven.
  • Move the chicken off of the veggies and onto a separate plate; do not cut the chicken except to check for doneness.
  • Allowing the chicken to rest 10-15 minutes before carving will ensure that the juices inside the chicken are not lost.
  • Carefully remove the twine from the chicken legs and remove the stuffing from the cavity. Mix the stuffing into the pan of roasted veggies.

And that’s it.
This roast chicken recipe makes a great dish for a holiday or family meal. I always make roasted chicken with root vegetables and potato; it’s the perfect pairing with the juicy deliciousness of a whole chicken roasted in the oven.

Give this roast chicken recipe a try and let me know what you think, and bon appétit!

And for another family meal, try my mama’s fantastic Stove Top Pot Roast Recipe.

pot roast recipe
Throw your chuck roast in a pot on the stove and it practically cooks itself.

Thanks for watching our recipe videos!

I hope you enjoy this roast chicken dish! Sign up for our mailing list so you’ll never miss a new recipe. Also click a button below and share the dishes with your friends. You can also follow Chef Buck on Youtube. We appreciate all the kind comments and support, and we’ll see you next time in the kitchen!

If you like what CG and I do, support us on Patreon, or throw us a tip in our Paypal Tip Jar. We’ll happily enjoy a coffee on the road – Thanks! We appreciate all the support, and we’ll see you next time in the kitchen!

We include affiliate links for products on our website. Making a purchase after clicking on our links and we may earn a commission which helps us produce more videos and drink more coffee :^) We participate in the Amazon Services LLC Associates Program, which is an affiliate advertising program. It provides a means for us to earn fees by linking to Amazon.com and affiliated sites, so we can make more videos.

Share and Enjoy !

Ginger Chicken Recipe Chinese Restaurant Style

Ginger Chicken

This Ginger Chicken Recipe will remind you of a delicious dish from your favorite Chinese restaurant. The key to a tasty ginger chicken dish is fresh ginger, and lots of it. You won’t need hard to find ingredients, just a little soy sauce, sesame oil, and some fresh produce will make all of the difference.

What You Need To Make This Ginger Chicken Recipe

1 lbs. CHICKEN
1 Tbsp CORN STARCH
1 Tbsp SESAME OIL
1 Tbsp SOY SAUCE
SALT and PEPPER (to taste)
4-6 cloves GARLIC
½ cup GINGER
½ cup ONION
½ to 1 cup CARROTS
½ to 1 cup CASHEWS
1 cup chopped Zucchini or other veggies (optional)
some OIL for sauteing
HOT PEPPER (optional)

Sauce Ingredients:
1 Tbsp SESAME OIL
2 Tbsp SOY SAUCE
2 Tbsp RICE VINEGAR
2-3 Tbsp JAM (or substitute sugar)
1 Tbsp CORN STARCH
½ to 1 cup WATER

Ginger Chicken
Best Ginger Chicken Recipe

How To Make Ginger Chicken

  • Use skinless and boneless white or dark meat chicken, whichever you prefer.
  • Chop chicken into bite-sized pieces and place into a bowl.
  • Add 1 Tbsp sesame oil, 1 Tbsp soy sauce, 1 Tbsp corn starch, and salt and pepper to taste.
    Mix well with the chicken and then set the bowl aside.
  • In another bowl, combine sauce ingredients and set aside.
  • Prepare the veggies; this dish will cook fast, so have all the veggies chopped before beginning to cook the chicken.
  • Chop fresh ginger into matchstick sizes; fresh ginger and lots of it make this recipe delicious,so don’t be shy with the ginger.
  • Cut carrots into matchstick sizes.
  • Finely chop the garlic.
  • Chop onions (I prefer green onions if I have them on hand, but any onion will work.
  • Chop hot pepper if desired; the fresh ginger will add a bit of bite to the dish,
    so skip the pepper if you prefer a milder recipe.
  • Heat a skillet and oil on medium high heat. Add chicken and cook, stirring occasionally for 5 minutes, and adjust heat as needed. If you need a nice skillet, you can check here for current pricing for a non-stick skillet on Amazon.
  • After 5 minutes, add onion, garlic, ginger, and hot peppers.
  • Cook another 5 minutes, then add carrots and any other veggies; add sauce and mix well and continue to cook for 5 more minutes.
  • Add more water if desired. The sauce will be thicker or thinner depending on the amount of water added.
  • To finish the dish, stir in cashew nuts and remove from the heat.
  • And that’s it! Serve over rice.

    Give this this super simple and flavorful ginger chicken recipe a try and let me know what you think, and bon appétit!

    And for another Chinese favorite, check out this General Tso’s Chicken Recipe.

    general tso chicken

    Thanks for checking out the recipes and videos. If you like what you see, share it with your friends and family on social media, I appreciate it!
    –Chef Buck

    Share and Enjoy !


    Stuffed Mushrooms Recipe …easy appetizer

    Stuffed Mushrooms Recipe

    This stuffed mushrooms recipe makes a great appetizer and party dish. Stuffed mushrooms are often filled with freshly grated Parmesan, garlic, and herbs, but it’s a super versatile recipe…so experiment with your favorite flavors; I personally like a blue cheese and hot sauce combo thrown into the filling.

    What You Need for This Stuffed Mushrooms Recipe

    12-15 MUSHROOMS
    ½ cup PANKO BREADCRUMBS
    1-2 TBSP BUTTER
    some OLIVE OIL
    filling mixture like…
    ½ cup PARMESAN CHEESE
    ½ cup BLUE CHEESE
    4-6 cloves GARLIC (finely chopped)
    ½ cup PARSLEY (chopped)
    ½ cup CASHEWS (chopped)
    some HOT SAUCE
    SALT and PEPPER (to taste)
    …but fillings are optional

    stuffed mushrooms recipe
    This stuffed mushrooms recipe makes a great appetizer and party dish

    If you’re new to home cooking, get a bunch of spices, pots and pans, and start experimenting with different recipes. It’s a healthy hobby that can save a lot of money in the long run. Check out current prices for Complete Kitchenware Sets on Amazon as well as Complete Starter Spice Kits. Or try a thrift store! I’ve found some of my favorite kitchen gear at second-hand stores.

    How To Make Stuffed Mushrooms

    Buy whole mushrooms that are uniform in size; I buy mushrooms that are not already pre-packaged, so I can select the best.
    Choose mushrooms that are firm and dry and store in the fridge in a paper sack until you are ready to use them.
    Before using, clean mushrooms with a damp towel.
    Remove the stems and use a knife or spoon to open the mushroom center and create more room for the stuffing.
    Take your time preparing the mushroom caps to avoid splitting them.
    I often set aside some of the stems to use in other recipes, while reserving some to chop and mix with the stuffing.
    Coat the mushroom caps lightly with olive oil and set aside.
    In a bowl, combine some of the chopped stems and whatever fillings you desire.
    I often use an egg, minced garlic, freshly grated Parmesan, and fresh chopped parsley with my filling, butthe variations are endless.
    Blue cheese is fantastic in stuffed mushrooms.
    For added crunchiness, nuts are a great idea. I find that chopped cashews work very well.
    I’ll often add ingredients to the stuffing mix as I stuff the mushrooms, which makes for a nice variety of flavors.
    Spoon the filling into the mushroom cap.
    In a skillet, melt butter and add panko breadcrumbs. The breadcrumbs will soak up the butter and flavor.
    Top stuffed mushrooms with panko breadcrumbs and place on a rack over a baking sheet.
    Place stuffed mushrooms in an oven pre-heated to 375 degrees F. and bake for approximately 30 minutes or until
    the breadcrumb topping is nicely toasted.
    Serve warm.

    Tips for Best Stuffed Mushrooms

    • Bake the mushrooms on a rack! This will dry them out more and make them less mushy!
    • Breadcrumb topping and nuts are optional, but they both add nice texture and crunch.
    • Set aside some mushroom stems for another recipe and make room for more non-mushroomy filling.
    • Start with a simple filling and then add other ingredients as you stuff the mushrooms for more variety.

    Give this stuffed mushrooms recipe a try, and let me know what you think, and bon appétit!

    For another tasty party and appetizer dish, check out this Jalapeno Poppers Recipe.
    jalapeno poppers

    Thanks For Watching Our Mushroom Recipe

    Thanks for checking out this quinoa salad recipe, and all of our recipes. Be sure and sign up for our mailing list so you’ll never miss a new recipe. Also click a button below and share the dishes with your friends. You can also follow Chef Buck on Youtube. We appreciate all the kind comments and support, and we’ll see you next time in the kitchen!

    If you like what CG and I do, you can also support us on Patreon, or throw us a tip in our Paypal Tip Jar. We’ll happily enjoy a coffee on the road – Thanks! We appreciate all the support, and we’ll see you next time in the kitchen!

    We include affiliate links for products on our website. So, if you make a purchase after clicking on our links, we may earn a commission which helps us produce more videos and drink more coffee :^) We participate in the Amazon Services LLC Associates Program, which is an affiliate advertising program. It provides a means for us to earn fees by linking to Amazon.com and affiliated sites, so we can make more videos.

    Share and Enjoy !

    Chicken Tenders – Oven Baked Chicken Strips

    chicken tenders

    Try this very tasty baked chicken tenders recipe. You can easily bake chicken tenders in the oven that you’ll enjoy just as much as deep fried tenders, the trick is to add butter to the breadcrumbs.

    Ingredients For Baked Chicken Tenders Recipe

    1½ lbs. CHICKEN
    2 EGGS
    3 cups PANKO BREADCRUMBS
    1 cup FLOUR
    1/3 cup BUTTER (I say 3/4 cup in the video, but I misspoke)
    1-2 tsp TURMERIC POWDER
    1-2 tsp TURMERIC POWDER
    1 tsp CHILI POWDER
    1 tsp GARLIC POWDER
    1 tsp ONION POWDER
    1 tsp PAPRIKA
    HOT SAUCE (to taste)
    SALT and PEPPER (to taste)
    …but really, use whatever seasonings you like
    (just make sure you use lots of them)

    chicken tenders
    Oven-baked Chicken Tender Recipe …or do you call them chicken fingers?

    How To Make This Chicken Tenders Recipe

    Buy white chicken breasts already cut into strips, or buy breasts and cut them yourself, just make
    sure to cut them into reasonably uniform sizes so that they will cook evenly.

    • In a bowl, season the chicken strips generously, and set aside. If you’re just getting into home cooking and don’t have a lot of seasoning choices, you can check out current pricing for a
      Complete Starter Spice Set on Amazon.
    • In a skillet, melt butter and then turn the stove burner off.
    • Add panko breadcrumbs to the butter and mix well. The breadcrumbs will quickly soak up the butter like it was never there.
    • Break eggs into a bowl and whisk.
    • In another bowl, add flour. Season the flour. Seasoning the flour and the chicken and adding the butter to the breadcrumbs all combine to make these oven baked tenders so awesome.
    • Line a large baking sheet with aluminium foil and lightly coat with oil.
    • Take a chicken strip and dredge it in the flour, then coat it in the egg, and then roll it in the breadcrumbs until the chicken strip is well breaded.
    • Place the chicken strip onto the lightly oiled pan and repeat until all of the chicken strips have been prepared.
    • The strips should be arranged on the pan with a slight space between each one.
    • Bake in an oven at 425 degrees F for 20-25 minutes, turning once about halfway through the cooking time.
    • Serve chicken tenders while hot, right out of the oven.

    Chicken tenders go great with a dipping sauce. Ranch dressing is a favorite, along with blue cheese dressing, BBQ sauce, and honey mustard.

    Chicken fingers make a great salad topping, too –it’s a decadent way to incorporate a nice salad into your day.

    Give this oven-bake chicken tender recipe a try and let me know what you think, and bon appétit!

    And for another faux fried oven-baked dish, check out this Onion Ring Recipe.

    onion rings recipe
    How to make an Onion Rings recipe in the Oven.

    Thanks for checking out the recipes and videos If you like what you see, share it with your friends and family on social media, I appreciate it!
    –Chef Buck

    Share and Enjoy !


    Cocktail Recipes for Breakfast or Anytime

    cocktail recipes

    Here are a few easy cocktail recipes for breakfast or anytime you feel like a nice libation. Coldbrew coffee can make a great mixer for a morning pick-me-up, but if you’re not a coffee person, then root beer will do in a pinch. Check out the video for quick and easy cocktail ideas, and look a bit farther below for tips on making coldbrew coffee at home.

    Easy Cocktail Recipes

    COLDBREW COFFEE COCKTAIL
    6oz Coldbrew Coffee
    1oz Vodka
    1oz Irish Cream
    …also add a splash of half ‘n half if you like

    ROOTBEER FLOAT COCKTAIL
    4-5oz Rootbeer
    1oz Vodka
    1oz Irish Cream
    …also add a splash of half ‘n half if you like

    cocktail recipes
    Coffee ice cubes are ideal for cold coffee cocktail recipes.

    MIMOSA:
    equal parts chilled
    Champagne and orange juice

    SCREWDRIVER:
    1-2oz Vodka to
    5oz Orange Juice

    GREYHOUND:
    1-2oz Vodka to
    5oz Grapefruit Juice

    BLOODY MARY:
    2oz Vodka
    4oz Tomato Juice
    Lemon Juice
    …and then just a little bit of everything else in your refrigerator

    SHOT OF JAMESON:
    shot of Jameson

    Want to Know How to Make Coldbrew Coffee?

    What You Need To Make Cold Brew Coffee

    COFFEE …Buy whole beans and grind them at home, fresh-ground coffee makes all the difference.
    WATER …We use cold tap water, ’cause we’re savages (I mean eco-friendly / cheap)
    TIME …This is the hardest part, allow at least 12-24 hours. My wife prefers 36 hours…it’s pretty subjective.

    cold brew coffee
    cold brew for the best iced coffee

    How to Make Cold Brew Coffee for the Best Iced Coffee

    Use your favorite coffee beans. Shop around. Experiment. The beans make all the difference.
    Buy whole beans and grind them fresh at home.
    Grind the beans coarsley.
    Place the ground beans in a sealable pitcher or jar and add water.
    We like a ratio of 1½ cups whole beans to 4 cups water, but experiment and adjust to your taste…nothing is more subjective than a cup of coffee.
    Stir.
    Seal the container and place in the refrigerator for 12 to 24 hours (or more, if you like).
    When the time is up, simply strain the mixture through a coffee filter and it’s ready to drink.
    Make multiple batches of cold brew coffee at one time, then you won’t have to wait.
    Make extra batches of cold brew for coffee ice cubes: just pour coffee into an ice tray and freeze it…coffee ice cubes are fantastic for iced-coffee …it’ll keep the coffee chill without diluting the flavor.

    Why Cold Brew?

    • Cold brew coffee is super smooth, and can be less acidic than coffee brewed hot, so it might be a better choice for sensitive tummies.
    • Cold brew stays fresher longer than hot brewed coffee, so you can make bigger batches at a time without
      the coffee growing old and stale to taste.
    • It’ll put pep in your step.

    Give cold brew coffee a try and let me know what you think, and bon appétit!

    Feel like a Redneck Martini Recipe

    Thanks for checking out the videos and recipes. If you like what you see, click some of the buttons below and share it with your friends and family on social media, I appreciate it!
    –Chef Buck

    Share and Enjoy !


    Salmon Cakes Benedict w/ Hollandaise Sauce

    salmon cakes

    Canned salmon is perfect for making delicious salmon cakes. You can use salmon cakes for a variety of dishes, including salmon burgers. I generally make extra patties when I cook up salmon cakes, and one of my favorite uses for these leftover salmon cakes is in a variation of Eggs Benedict. Check out the recipe video below to see how to make this super tasty breakfast recipe.

    Ingredients for Salmon Cakes Eggs Benedict

    leftover SALMON CAKES
    fresh SPINACH
    thick sliced TOMATO
    EGGS
    HOLLANDAISE SAUCE

    How to Make Salmon Cakes Eggs Benedict

    This is a terrific way to use leftover salmon cakes (detailed salmon cake recipe below), in fact, it’s best to use leftover salmon cakes for this recipe; no sane person wants to open a can of salmon first thing in the morning.
    On a plate, arrange a bed of spinach and top with a thick slice of tomato.
    In a skillet, re-heat a leftover salmon cake.
    While the salmon cake heats through, whip together a quick blender Hollandaise sauce (recipe below).
    In another skillet, fry an over easy egg (or poach an egg, if you prefer).
    Top the sliced tomato with the heated salmon cake, and then top the salmon with the fried egg.
    Cover the egg with Hollandaise sauce and serve immediately.

    salmon cakes
    use leftover salmon cakes to make a terrific variation of Eggs Benedict!

    How to Make a Quick Hollandaise Sauce

    ¼ cup melted BUTTER
    2 EGG YOLKS
    1 Tbsp LEMON JUICE (or substitute vinegar)
    ½ tsp DIJON MUSTARD (or substitute creamy wasabi or a little hot sauce)

    In a bowl, combine two egg yolks, lemon juice, and mustard…also add a sprinkling of black pepper if you like. Melt the butter until it is bubbling, then slowly add the butter into the egg mixture while blending the eggs with a hand blender. Be sure to add the hot butter slowly, so the eggs don’t harden.
    Blend for about 5-10 seconds. Use the sauce immediately, or hold in a bath of hot water until ready to use. This recipe makes just enough for two servings; when I want lots of Hollandaise sauce, I’ll double this recipe, with the exception of the egg yolks…instead of 4 yolks, I’ll just use 3 yolks.

    Salmon Cakes Ingredients:

    14oz canned SALMON (red or pink)
    ¼ – ½ cup ONION (finely chopped)
    HOT PEPPER (finely chopped, to taste)
    1 to 2 EGGS (beaten) …I generally use 1 egg for a fancy salmon cake entree and 2 eggs when
    making salmon cakes for sandwiches.
    SALT and PEPPER to taste
    OIL for sauteing (3-4 Tbsp…salmon will soak up the oil)
    1 Tbsp CURRY POWDER (optional)

    salmon cakes
    I make 4 salmon cakes from one can of salmon, and often prepare 8 cakes at a time so that I’ll have leftover salmon cakes for sandwiches and salmon Benedicts.

    How to Make Salmon Cakes:

    Traditional canned salmon will come with skin and bones still intact . The skin and bones are soft and edible. You can remove the skin and bones if you like; I used to remove them, but now I’m too cheap, and I don’t want to miss out on the extra nutrition, either.

    • Place drained salmon in a bowl.
    • Add ¼ – ½ cup onion depending on how much you like onion. Make sure the onion is finely chopped; smaller pieces will help keep the patties from falling apart. If desired, add some finely chopped hot pepper. If you don’t have fresh pepper, add a little chili powder or hot sauce.
    • Add salt and pepper to taste.
    • Add one or two beaten eggs. I like to use two beaten eggs because it helps to keep the patties together better; I don’t like my burgers to fall apart while I’m eating them.
    • Mix all the ingredients together well.
    • Shape into patties. I usually get 4 patties out of a 14oz can, but make as many as you like–bigger or smaller–depending on how big you want your burger to be. Here’s some current prices for canned salmon if you like to do your fishing on the internet.
    • Heat oil in a skillet. I like medium heat. You want the oil to be hot enough to sizzle when you add the patties, but not so hot that the patties will cook too quickly; you want the patties to get a nice cooked side before turning them, this will keep then from breaking apart.
    • Cook 5-7 minutes and then turn gently when the patties are golden brown.
    • Cook another 3-4 minutes and then remove from skillet and drain salmon patties on a paper towel.

    I like to serve salmon patties on a toasted bun with sliced tomato, onion, lettuce and mayo.
    It’s a nice break from hamburgers, and just as tasty.
    Sometimes I’ll add a Tbsp of curry powder into the mix to make Curried Salmon Burgers, which you should definitely try sometime.

    Give this canned salmon recipe a try and let me know what you think, and bon appétit!

    And for another canned salmon recipe, check out this Salmon Meatballs Recipe.

    canned salmon
    Salmon meatballs in a rich curry sauce.

    Thanks for checking out our salmon cakes recipe, and all of our recipes. Be sure and sign up for our mailing list to never miss a new cooking video, and also click a button below and share the dishes with your friends, and follow Chef Buck on Youtube. We appreciate all the kind comments and support, and we’ll see you next time in the kitchen!

    If you like what CG and I do, support us on Patreon, or throw a tip in our Paypal Tip Jar We’ll happily enjoy a coffee on the road, or maybe even pay a bill or two!–Thanks! We appreciate all the support, and we’ll see you next time in the kitchen!

    Thanks for watching our recipe videos!

    We include affiliate links for products on our website, so if you make a purchase after clicking on our links, we may earn a commission which helps us produce more videos and drink more coffee :^) We participate in the Amazon Services LLC Associates Program, which is an affiliate advertising program providing a means for us to earn fees by linking to Amazon.com and affiliated sites, so we can make more videos.

    Share and Enjoy !

    Cold Brew Coffee for the Best Iced Coffee

    cold brew coffee

    If you want to know how to make cold brew coffee it’s easy: Coffee + Water + Time = Cold Brew
    Even if you’re bad at math, you can make a smooth batch of the best iced coffee you’ll ever drink, and you won’t have to pay $4 a cup for it like you’ll spend at Starbucks.

    What You Need To Make Cold Brew Coffee

    COFFEE Buy whole beans and grind them at home, fresh-ground coffee makes all the difference.
    WATER We use cold tap water, ’cause we’re savages …I mean eco-friendly/cheap.
    TIME This is the hardest part, allow at least 12-24 hours to brew. CG prefers 36 hours, but it’s pretty subjective.
    CARAFE You don’t need a fancy-pants carafe, but if you wanna go fancy-pants, you can check the current price for a Takeya Cold Brew Coffee Maker on amazon.

    cold brew coffee
    cold brew for the best iced coffee

    How to Make Cold Brew Coffee for the Best Iced Coffee

    Use your favorite coffee beans. Shop around. Experiment. The beans make all the difference.
    Buy whole beans and grind them fresh at home.
    Grind the beans coarsely.
    Place the ground beans in a sealable pitcher or jar and add water.
    We like a ratio of 1½ cups whole beans to 4 cups water, but experiment and adjust to your taste…nothing is more subjective than a cup of coffee.
    Stir.
    Seal the container and place in the refrigerator for 12 to 24 hours (or more, if you like).
    When the time is up, simply strain the mixture through a coffee filter and it’s ready to drink.
    Make multiple batches of cold brew coffee at one time, then you won’t have to wait.
    Make extra batches of coffee for ice cubes: just pour coffee into an ice tray and freeze it…coffee ice cubes are fantastic for iced-coffee …it’ll keep the coffee chill without diluting the flavor.

    Why Cold Brew?

    • Cold brew is super smooth, and can be less acidic than coffee brewed hot, so it might be a better choice for sensitive tummies.
    • Cold brew stays fresher longer than hot brewed coffee, so you can make bigger batches at a time without
      the coffee growing old and stale to taste.
    • It’ll put pep in your step.

    And if iced coffee is too chilly for you, see how to make Hot Coffee with a Moka Pot.

    moka pot
    Brew great coffee on the stove top with a moka pot.

    Thanks for checking out our recipes. You can check out my complete Coffee Video Playlist on Youtube. Be sure and sign up for our mailing list and never miss a new Chef Buck cooking video, and also click a button below and share the dishes with your friends. We appreciate all the kind comments and support, and we’ll see you next time in the kitchen!

    If you like what CG and I do, support us on Patreon, or throw a tip in our Paypal Tip Jar We’ll happily enjoy a coffee on the road, or maybe even pay a bill or two!–Thanks! We appreciate all the support, and we’ll see you next time in the kitchen!

    Thanks for watching our recipe videos!

    We include affiliate links for products on our website, so if you make a purchase after clicking on our links, we may earn a commission which helps us produce more videos and drink more coffee :^) We participate in the Amazon Services LLC Associates Program, which is an affiliate advertising program providing a means for us to earn fees by linking to Amazon.com and affiliated sites, so we can make more videos.

    Share and Enjoy !

    Fettuccine Alfredo Recipe …easy to make Alfredo Sauce

    fettuccine alfredo recipe

    A fettuccine alfredo recipe is an easy and delicious dish to cook at home. A thick alfredo sauce with rich cream and parmesan cheese is so satisfying and decadent. Shrimp fettuccine, chicken fettuccine, mushrooms –you can add anything you like to the noodles and alfredo sauce, but a simple and classic Fettuccine alfredo dish is one of my favorites …a classic Italian recipe so good it doesn’t need any bells and whistles.

    What You Need To Make a Fettuccine Alfredo Recipe

    10 oz FETTUCCINE NOODLES
    4 Tbsp BUTTER
    ¼ cup OLIVE OIL
    1½ cups CREAM
    10-15 cloves GARLIC (finely chopped)
    2 cups PARMESAN CHEESE (finely shredded)
    SALT and PEPPER (to taste)
    PARSLEY (if you like, chopped)

    fettuccine alfredo recipe
    Creamy fettuccine alfredo topped with fresh parsley and served with buttered bread.

    How To Make Classic Fettuccine Alfredo

    Heat a large skillet on medium heat and add the butter and oil.
    When oil is hot, add garlic and saute for 20-30 seconds.
    Add salt and pepper to taste.
    Add cream and mix well.
    Stir the parmesan cheese into the skillet.
    Adjust the stove top temperature as needed.
    Stir the sauce until it is smooth …the sauce will thicken even more after it is off of the stove.
    Add chopped parsely if you like!
    Prepare the fettuccine noodles according to package directions.
    Drain and add the noodles to the alfredo sauce.
    And that’s it …serve hot with a salad and buttered bread, and that’s about as good as life gets.

    Tips for Fettuccine Alfredo

    Use finely shredded Parmesan cheese, and if buying pre-grated cheese, buy cheese without a lot of additives listed in the ingredients. Too many additives can make the parmesan lumpy and less smooth when it is melted. Ideally, grate your own cheese.
    To make more alfredo sauce, simply add additional cheese and cream to taste. I like lots of sauce, so too much is not enough.
    Shrimp, grilled chicken, and mushrooms are great additions to this dish, even broccoli (although fettuccine alfredo is soooo good when it’s kept simple, I rarely make these additions.)
    Cook the fettuccine noodles al dente, meaning NOT OVERDONE! Chewy noodles are best for Alfredo.
    Do not rinse your noodles after cooking them, this will wash away a lot of the flavor; simply drain the noodles and then stir them slowly into the alfredo sauce.

    Give this creamy Italian fettuccine alfredo recipe a try and let me know what you think, and bon appétit!

    For another great noodle dish, check out this Spaghetti Carbonara recipe.

    spaghetti carbonara
    click pic for recipe

    Thanks for checking out the recipes. If you like what you see, share it with your friends and family on social media, I appreciate it!
    –Chef Buck

    Share and Enjoy !


    Pupusas Recipe — Gluten Free Corn Flour Pupusa

    pupusas recipe

    How to make a pupusas recipe.
    This pupusas recipe is a traditional Latin American dish of corn tortilla filled with cheese, beans, peppers and meat, although you can use any combo of ingredients you like to cook pupusas. Corn flour is mixed with salt and water to make a corn dough, or masa, and wrapped around a center filling;
    that filling can simply be cheese and peppers, but I like to make it a full meal by adding beans and meat as well.

    What You Need To Make This Easy Pupusas Recipe

    2 cups CORN FLOUR
    about 1½ cups WATER
    SALT and PEPPER to taste
    1 tsp TURMERIC (optional)
    here are some filling ideas…use any
    combo, and substitute what you like:
    leftover MEATS (minced)
    REFRIED BEANS
    CHEESE (grated)
    pickled PEPPERS (like green chili or jalapeno)

    pupusas recipe
    Pupusas …inspired by a traditional Salvadorean recipe.

    How To Make Pupusas

    First thing, mix up your pupusa filling…this will allow time for the flavors to interact.
    You can simply use cheese and peppers, but adding a little refried beans and leftover meat
    into the mixture can turn your pupusas into a filling meal.
    I often mince up leftover breakfast sausage to add into my filling, but any pork, beef, or chicken
    will do, just be sure to use meat that is already cooked through; it’s a great way to use leftovers.
    Combine the filling ingredients together in a bowl.
    Mix well and set aside.
    In another bowl, add corn flour (Maseca is a populer brand in the USA, but any corn flour will do).
    Add in salt and pepper and turmeric.
    Turmeric is not a traditional pupusa ingredient, but I find it adds a great color.
    Mix dry ingredients together.
    Add in warm tap water and mix into a dough …it mixes quite easily;
    Use your hands to mix…this will give you a better sense of the dough consistency.
    Mix until the dough is “doughy” and pliable–not too dry and not too wet–add additional water
    or flour until reaches this consistency.
    Tear off a handful of dough and roll it into a ball, then flatten the dough into a disc.
    Place a ball of the cheese/bean/meat filling in the center of the disc, and then close up the edges
    of the dough, sealing the filling inside a doughy ball.
    Pinch off any excess dough from the top and return it to the bowl.
    Flatten the dough filled ball into a disc shape, try to keep the disc intact, but if the filling leaks slightly,
    it’s no big deal.
    You can use more dough, or less filling, or be more careful folding the filling inside to make an absolutely
    perfect pupusa…but why work that hard?
    I like my pupusas to have a thin tortilla skin.
    I like them to leak a little bit…I like the taste of the toasted cheese on the edges.
    But that’s just me…follow your heart; but believe me, if your pupusas aren’t perfect,
    they’ll taste just as good, or better.
    Heat a lightly oiled griddle or skillet on med/med-high heat and cook the pupusas
    about three minutes on each side.
    And that’s it.
    Serve as a snack or main meal. Top with sour cream, salsa, or even a cabbage slaw for a nicely balanced dish.

    Give this pupusas recipe a try and let me know what you think, and bon appétit!

    Ingredients For Curtido …pickled slaw topping for pupusas recipe

    half a small CABBAGE (chopped)
    2 CARROTS (shredded)
    1 white ONION (sliced)
    1 JALAPENO (thinly sliced)
    1 Tbsp dried OREGANO
    SALT and PEPPER to taste
    mild VINEGAR (I like to use a rice or malt vinegar)

    How to Make Curtido

    Bring a pot of salted water to a boil; boil enough water to cover the veggies.
    Once water is boiling, turn off and then add the veggies to the pot.
    Add oregano and pepper.
    Let soak for 3 minutes.
    Drain the veggies from the pot, but reserve some of the water.
    Put the strained veggies into a jar; ideally, use a size jar that will be completely filled.
    Press the veggies into the jar until it is crammed full.
    Add reserved water until the veggies are slightly more than halfway covered, then add
    vinegar until the veggies are completely covered.
    Allow to cool, and then cover jar with a lid and refrigerate.
    The more ahead of time you make this, the more flavorful it will be.
    It’s a simple and tasty topping or side for pupusas or sandwiches.

    For more awesome recipes, take a look at my Chef Buck Recipe Playlists.

    pupusas recipe
    This is a fantastic Nachos Supreme dish, and a giant pizza pan makes a great dish for cooking and serving.

    Thanks for checking out this pupusas recipe. If you like what you see, share it with your friends and family on social media, I appreciate it!
    –Chef Buck

    Share and Enjoy !


    Groundnut Soup Recipe – Lamb Stew with Peanuts

    peanut soup recipe

    This groundnut soup recipe is an African-inspired dish made with peanuts. I make this peanut soup like a stew, with nice chunky ingredients, including meat and potato. This particular recipe is a variation on lamb stew, but you can use chunks of lamb, beef, chicken, or pork, whatever meat you prefer. Adding peanut butter to soup is a very yummy idea, and you should definitely give it a try.

    groundnut soup recipe

    What You Need To Make Peanut Soup

    1 lb. LAMB (or preferred meat, cut into stew pieces)
    1 lb. FISH (cut into stew pieces)
    2 ONIONS (chopped)
    HOT PEPPER (finely chopped, or substitute chili powder)
    1 SWEET POTATO (chopped, substitute white potato)
    ½ cup PEANUT BUTTER
    3-5 cloves GARLIC (finely chopped)
    2 tsp TURMERIC
    2 tsp PAPRIKA
    2 tsp CUMIN
    15oz can CRUSHED TOMATO
    ½ cup PARSLEY (chopped)
    SALT and PEPPER (to taste)

    peanut soup recipe
    Peanut butter soup with lamb and fish.

    How To Make A Peanut Soup Recipe

    You can use chicken, beef, lamb, fish, pork or any combination of these ingredients. Soup is the perfect opportunity to use whatever ingredients you have on hand, or whatever is on sale.
    For this particular peanut soup recipe, I’m using a combination of lamb and fish.

    • Firstly, season the meat and set aside while you chop and slice the other ingredients.
    • Then heat a soup pot on medium high heat, and add in your lamb. Sear the meat on all sides and then remove lamb from the pot. Check current prices for a Soup Pot on Amazon.
    • Add a little oil to the pot and reduce heat to medium.
    • Add in the garlic, onion, and hot pepper and saute for 3-5 minutes. Add additional seasoning as desired.
    • Return seared lamb to the pot and add in the crushed tomato and 1 can of water.
    • Chop one sweet potato (or sub white potato) and add to pot.
    • Raise the temperature and bring the pot to a boil.
    • In a bowl, mix 1 cup of hot water and peanut butter until smooth.
    • Add mix to the soup pot.
    • Bring pot to a simmer, cover, and cook 30 minutes.
    • Add chopped fish.
    • Cover and simmer 15-20 minutes.
    • Add more water if desired.
    • Adjust seasoning as needed.
    • Turn off heat and add chopped parsley.

    And that’s it…serve as is, or over rice.
    Give this super tasty African-inspired stew recipe a try, and let me know what you think, and bon appétit!

    For a more traditional Western-style stew, try this Classic Beef Stew Recipe.

    beef stew recipe

    Thanks For Watching Our Recipe Videos!

    Thanks for checking out this Africa-inspired groundnut soup recipe, and all of our recipes. Be sure and sign up for our mailing list so you’ll never miss a new recipe. Also click a button below and share the dishes with your friends. You can also follow Chef Buck on Youtube. We appreciate all the kind comments and support, and we’ll see you next time in the kitchen!

    If you like what CG and I do, you can also support us on Patreon, or throw us a tip in our Paypal Tip Jar. We’ll happily enjoy a coffee on the road – Thanks! We appreciate all the support, and we’ll see you next time in the kitchen!

    We include affiliate links for products on our website. So, if you make a purchase after clicking on our links, we may earn a commission which helps us produce more videos and drink more coffee :^) We participate in the Amazon Services LLC Associates Program, which is an affiliate advertising program. It provides a means for us to earn fees by linking to Amazon.com and affiliated sites, so we can make more videos.

    Share and Enjoy !

    Onion Rings Recipe – Crispy Baked Onion Rings

    onion rings recipe

    Try a delicious, crispy onion rings recipe. Can a baked onion ring be as good as a fried onion ring? Yep. You just need to batter the onions and bake them to onion ring perfection. Onion rings cooked in the oven can be quite crispy and flavorful, and these baked onion rings will still be considerably less mess and fuss than a fried onion rings recipe –and a much healthier recipe as well.

    What You Need To Make This Baked Onion Rings Recipe

    1 large ONION
    2 EGGS
    ½ cup ALL PURPOSE FLOUR
    (plus flour for coating onions in bag)
    2 Tbsp melted BUTTER
    ½ cup HALF N HALF or BUTTERMILK
    1½ cups PANKO BREADCRUMBS
    2 Tbsp CORNMEAL
    1 tsp CURRY POWDER
    1 tsp PAPRIKA
    1 tsp GARLIC POWDER
    1 tsp ITALIAN SEASONING
    1 tsp CHILI POWDER
    1-2 tsp SALT (to taste)

    Onion Rings recipe
    The best onion ring recipe baked in the oven.

    How To Make Crispy Onion Rings Baked in the Oven

    I like to use a yellow onion when making onion rings. I find a baseball-sized onion serves two people, and makes a great side dish for any burger or sandwich.

    Slice each end of the onion off and then remove the skin. Cut the onion into slices about ½” thick and then separate the onion into rings –use even the center and smallest rings!
    Place the separated onion rings into a ziplock bag with about 2 Tbsp of flour. Seal the bag with plenty of air inside to give the onion room to move freely. Now shake the bag until the onion slices are well coated in dry flour and set the bag aside.

    In a bowl, Combine the bread crumbs, cornmeal, and seasonings. Mix well and set aside.

    In another bowl, break two eggs and whisk. Whisk in the milk and melted butter. Whisk in about ½ cup of flour. The batter should end up being similar to a thin pancake batter.

    Now you’re ready to batter your onion rings

    Arrange rings on a baking sheet or pan.
    Use a fork –or chopsticks!– to handle the onions during the battering process…it will be less messy.

    Take each onion ring coated in dry flour and dip it into the pancakey batter. Remove from the batter and let excess batter drip off, then drop into the breadcrumb mix and coat the onion completely.

    Carefully, without knocking off the batter, place the battered onion ring onto the baking sheet.
    Arrange the rings so they are not touching…you can place the smaller rings inside larger rings.
    If you need an oven-safe pan, you can check here for current prices for baking sheets on Amazon.

    Bake onion rings in an oven pre-heated to 400 degrees Fahrenheit, about 20 minutes, turning the onions once about halfway through the cooking process.
    And that’s it.

    Give this onion ring recipe a try and let me know what you think, and bon appétit!

    For another great dish, check out this Crispy Baked Chicken Wings Recipe

    hot wings recipe
    Make spicy chicken wings at home and serve with creamy ranch or blue cheese dressing

    Thanks For Checking out our Recipes

    We hope you love this onion rings recipe! Sign up for our mailing list so you’ll never miss a new recipe. Also click a button below and share the dishes with your friends. You can also follow Chef Buck on Youtube. We appreciate all the kind comments and support, and we’ll see you next time in the kitchen!

    If you like what CG and I do, support us on Patreon, or throw us a tip in our Paypal Tip Jar. We’ll happily enjoy a coffee on the road – Thanks! We appreciate all the support, and we’ll see you next time in the kitchen!

    We include affiliate links for products on our website. Making a purchase after clicking on our links and we may earn a commission which helps us produce more videos and drink more coffee :^) We participate in the Amazon Services LLC Associates Program, which is an affiliate advertising program. It provides a means for us to earn fees by linking to Amazon.com and affiliated sites, so we can make more videos.

    Share and Enjoy !

    Tzatziki Sauce Recipe – Greek cucumber yogurt dressing

    Tzatziki Sauce recipe

    It’s super easy to make a healthy Greek tzatziki sauce recipe. It’s fairly quick to prepare tzatziki sauce, but it takes a little time to reach it’s full flavor potential, so make it a few hours ahead of time before serving. Tzatziki is a mild cucumber yogurt dressing that pairs very well with spicy falafel or lamb. The sauce can be used as a dressing or dip, especially for stuffed pitas, pita chips, or fresh veggies.

    Ingredients You’ll Need for Tzatziki Sauce Recipe:

    2 cups GREEK YOGURT
    2 cups fresh CUCUMBER
    3-4 cloves GARLIC (finely chopped)
    1 small LEMON zest and juice
    or substitute 1-2 Tbsp
    WHITE WINE VINEGAR
    ½ cup (or more) chopped HERBS
    …like dill, mint, or parsley
    1-2 Tbsp OLIVE OIL
    SALT and PEPPER (to taste)

    tzatziki sauce recipe
    Greek Tzatziki Sauce, a cucumber yogurt dressing

    How To Make a Greek Tzatziki Sauce Recipe:

    I prefer using English cucumbers (also called hothouse cucumbers), or using smaller, japanese cucumbers.
    These cucumber types have a lot of flavor, are less watery, and the skin is thin enough to be eaten and enjoyed (although I generally peel them when making tzatziki).
    When making a tzatziki sauce, start by preparing the cucumber; this will give the cucumber time to drain while you prepare the rest of the sauce ingredients.
    Peel your cucumber and grate with a hand grater, or use a food processor if you enjoy cleaning appliances.
    Chop the cucumber into smaller pieces, if desired, but don’t over-process, since chunks of cucumber make a tzatziki quite nice.
    Place the grated cucumber into a strainer over a bowl to allow the cucumber to drain.
    Mix a bit of salt to help draw out the water. Set bowl aside and prep the other ingredients.
    Into a mixing bowl, add Greek yogurt, minced garlic, lemon zest and juice, and fresh chopped herbs.
    If you don’t have a lemon on hand, substitute a mild rice or wine vinegar.
    Mix ingredients well.
    Return to the cucumber. Quite a bit of water will have drained into the straining bowl. Use a spatula or spoon to press out more water, and then add the strained cucumber to the yogurt mixture.
    Mix well, and add additional salt and pepper to taste.
    Cover and place in the fridge for at least 2+ hours before serving; this will give the flavors time to maximize.
    Serve as a dip or dressing/sauce.
    it’s great with pita chips or fresh sliced veggies; or serve with spicy lamb–especially as a sauce in stuffed pitas, or as a condiment on lamb burgers.
    Or as a dressing for a fresh salad.
    Greek tzatziki is healthy, versatile, and an easy recipe worth giving a go.
    Give this Greek tzatziki sauce recipe try and let me know what you think, and bon appétit!
    For another Greek inspired dish, check out this Hummus Recipe

    hummus
    click pic for video recipe

    Or this very tasty Pita Chips Recipe …that goes great with tzatiki
    spicy pita chips
    Thanks for checking out the recipes. If you like what you see, share these dishes with your friends and family on social media, I appreciate it!
    –Chef Buck

    Share and Enjoy !


    Asparagus Curry easy asparagus recipe

    asparagus curry

    Try this fantastic asparagus curry recipe. Plain and simple asparagus tastes great, but jazzing it up with a little curry is an excellent idea. Asparagus is healthy and delicious and quick to prepare. If you’re a fan of Indian cooking, then this curry recipe will be a real treat, and if you’re new to Indian style recipes, then this dish will be a great introduction. And this curry cooks up fast, so making it part of preparing an Indian meal at home is a smart idea.

    What You Need To Make This Easy Asparagus Recipe

    1 lb. ASPARAGUS
    5-6 cloves GARLIC (finely chopped)
    ¼ cup GINGER (finely chopped)
    1 lb. CHERRY TOMATOES
    1 cup ONION (chopped)
    1 tsp FENNEL SEED
    1 tsp CUMIN SEED
    1-2 Tbsp CURRY POWDER
    SALT (to taste)

    asparagus curry
    Easy Asparagus Curry Recipe

    How To Make Asparagus Curry

    When buying asparagus, thin is better than thick. Choose firm spears. Avoid asparagus that have a wrinkled skin, or tips that are wet and greasy looking.

    • Rinse and drain the asparagus spears, then chop into 1 inch pieces. When slicing, leave the tops of the spears intact so they don’t fall apart while cooking.
    • Heat oil on medium heat in a skillet.
    • When oil is hot, add cumin and fennel seeds and stir for 20-30 seconds–not long at all.
    • Add garlic, ginger, and onion and stir skillet.
    • Let simmer about 2 minutes, lower heat if necessary.
    • Stir in curry powder and cook for another minute.
    • Add sliced cherry tomatoes and salt to taste.
    • Continue simmering about 2 minutes, and then add 1 cup of water.
    • Raise the temperature and bring the skillet to a bubble.
    • Add asparagus and reduce the temperature back to medium heat.
    • Simmer uncovered for another 3-4 minutes, or until the asparagus is done to your liking–it won’t take long!

    And that’s it. Give this asparagus curry a try and let me know what you think, and bon appétit!
    Check out current prices for an assortment of Indian Spices on Amazon.

    For a slightly less curried asparagus dish, check out this Lemon-Ginger Asparagus Recipe.

    Thanks for checking out the asparagus recipe. Be sure and sign up for our mailing list so you’ll never miss a Chef Buck cooking video, and click a button below and share the dishes with your friends. We appreciate all the kind comments and support, and we’ll see you next time in the kitchen!
    –Chef Buck

    Share and Enjoy !


    Omelet Recipe with Cream Cheese and Lamb

    omelet recipe

    For this fancy-pants omelet recipe I’m using lamb, garlic, and cream cheese, which is the perfect hipster omelette combination, but there are no end to the ingredients that can be used to make an omelet. Do you spell it omelet or omelette? However you spell it, it’s the perfect egg dish for breakfast, brunch or a lazy man’s dinner.

    Omelet Recipe Ingredients

    2 EGGS
    GROUND LAMB
    GARLIC finely chopped
    WHIPPED CREAM CHEESE or grated cheese of choice
    OIL or BUTTER for cooking
    SALT and PEPPER to taste

    omelet recipe
    Important!! –let the omelet cook and set on the first side before turning!

    How to Make the Best Omelet Recipe

    Pre-cook any ingredients that need to be cooked: onions, peppers, meat…anything that takes longer than an egg to cook should be pre-cooked.

    In a skillet, heat oil or butter on medium heat. Use enough oil to coat the bottom of the skillet. You can check here for current pricing for a non-stick skillet on Amazon.

    Medium is a good heat–not too hot, not too cold–enough to allow the eggs to cook and set without overcooking; an omelet should be soft, not crusty and overcooked–avoid too high a heat and browning the eggs!–that’s my preference of course, but give it a try. Don’t rush an omelet!–hell, it doesn’t take long anyway.

    In a small bowl, crack two eggs and whisk well. The more you whisk, the fluffier the omelet.
    Pour eggs into the skillet. Give the skillet a shake to spread the egg out.
    And then leave it alone. The eggs should cook gently. Sprinkle salt and pepper to taste.

    Let the eggs set and cook around the edges until the eggs move easily in the pan–this will take 1-2 minutes depending on how hot your skillet is.

    Once the omelet can be moved easily, flip or turn the eggs over gently with a spatula. Immediately turn off the heat, the pan will be hot enough to finish off the omelet.

    Add cream cheese or a little shredded cheese to one side along with other omelet fillings. Fold eggs over omelet fillings, making a half moon, and then slide your omelet onto a plate.
    And that’s it–a super easy and delicious omelet!

    And for another fancy pants breakfast dish, try this Egg and Onion Korean Pajeon Pancake Recipe.

    green onion pancake
    A Korean style green onion pancake can be made quick and easy –give it a try!

    Thanks for checking out the video and recipe. If you found it helpful, click the links below to share it with friends and family …I appreciate it!
    –Chef Buck

    Share and Enjoy !


    Creamed Kale Recipe – healthy coconut kale dish

    kale

    Cook a healthy creamed kale recipe that is not only incredibly tasty, but super simple to make. Although there are few ingredients to this kale dish, it’s super flavorful and makes a great side dish or a complete healthy meal when served over rice or quinoa.

    Ingredients for Coconut Creamed Kale Recipe

    1 big bunch KALE
    15 oz canned COCONUT MILK
    ½ cup ONION (chopped)
    5-9 cloves GARLIC (chopped)
    1 JALAPENO (optional, chopped)
    SALT and PEPPER (to taste)
    OIL for cooking
    serve over rice or quinoa,
    and top with crushed peanuts

    creamed kale recipe
    Buy fresh kale that is firm and crisp and free off blemishes and discoloration. Avoid kale that is soft and wilted.

    How to Cook Coconut Creamed Kale Recipe

    Buy Kale that is crisp and firm, not sad and wilted.
    Wash and drain the kale and separate the leaves from the stem. We’ll only be using the leaves for this recipe.
    (If you can figure out something tasty to do with the stems, please let me know!)
    Chop kale into a manageable sizes.
    Heat a little oil in a large skillet or pot and saute the onion, garlic, and peppers for 2-3 minutes.
    Add in the coconut milk and bring to a simmer. Check current prices for canned coconut milk on Amazon.
    Add in the chopped kale, cover and let the kale steam and wilt for a couple of minutes.
    Stir the pot and mix ingredients well.
    Bring to a simmer, cover, and let cook to desired consistency…simmering about 5 minutes is good for me…the kale
    is cooked down, but still has a nice texture.
    Remove the pot from the stove and serve.
    This dish makes a great side, or a healthy entree when served over rice or quinoa.
    If desired, top with crushed peanuts for added texture and flavor.

    creamed kale recipe
    This Creamed Kale recipe is a simple and quick dish to prepare –and a very healthy choice!

    Give this creamed kale recipe a try and let me know what you think, and take a look at more Chef Buck Kale Recipes.

    Tips for Using Raw Kale

    Thanks for checking out our creamed kale recipe, and be sure and sign up for our mailing list so you’ll never miss a Chef Buck cooking video, and also click a button below and share the dishes with your friends. We appreciate all the kind comments and support, and we’ll see you next time in the kitchen!

    We appreciate you watching our recipe videos!

    We include affiliate links for products on our website, so if you make a purchase after clicking on our links, we may earn a commission which helps us produce more videos and drink more coffee :^) We are a participant in the Amazon Services LLC Associates Program, which is an affiliate advertising program that provides a means for us to earn fees by linking to Amazon.com and affiliated sites.

    Share and Enjoy !

    Cook Spaghetti Squash for a Healthy, Low-fat Diet

    best spaghetti squash

    Cook spaghetti squash for a healthy addition to a low-fat diet. It’s mild flavor and hardy texture makes spaghetti squash ideal for a variety of recipes.

    How to cook Spaghetti Squash

    This is a basic spaghetti squash recipe :
    Slice squash into halves.
    Place cut sides down in shallow water in a roasting pan.
    Bake for about 45 minutes at 350 degrees Fahrenheit.
    Remove squash from the oven and carefully turn halves over to check for doneness –the water will be hot and steam will be trapped under the squash, so be cautious.
    Allow squash to sit 5-10 minutes to cool slightly for easier handling.
    With a fork or spoon, remove the meat of the squash.
    The squash will pull away into strands that resemble spaghetti, although this squash will taste nothing like spaghetti.

    cook spaghetti squash
    When cooked spaghetti squash pulls apart into “noodley strings”

    Here’s one of my favorite spaghetti squash recipes —

    Mediterranean Spaghetti Squash Recipe

    This dish is super tasty, and I can eat way too much without feeling too guilty. Watch the video and learn how to easily cook this squash. It’s a terrific ingredient; delicious and healthy. This Mediterranean style recipe is just one of many ways to use this versatile vegetable. Give it a try!

    Spaghetti Squash Recipe Ingredients:

    1 medium SPAGHETTI SQUASH
    1 Tbsp OLIVE OIL
    1 large ONION (chopped)
    4-6 cloves GARLIC (finely chopped)
    ½ RED BELL PEPPER (sliced)
    1 14 oz can ARTICHOKE HEARTS in water (chopped)
    1 cup OLIVES, and olive juice to taste (chopped)
    ¾ to 1 cup PARMESAN CHEESE (shredded or grated)
    1 tsp OREGANO
    ½ tsp THYME
    1 tsp BASIL
    SALT and PEPPER to taste

    How to Make this Spaghetti Squash Recipe

    Preheat oven to 350.
    Cut spaghetti squash in half, lengthwise (a good, sharp knife will be nice).  Place each side, cut side down, in a shallow pan with about ¾ c water. Cook spaghetti squash uncovered for 45 minutes. Set aside to cool squash halves–enough to handle without causing death to the handler–but not completely cool.
    You have time to chop up all your ingredients while the squash cooks.   For the artichoke, you may want to remove some of the outer, tougher leaves.
    For each half, use a spoon to scrape out and discard the seeds and dark center strings.  Use a fork to scrape out the squash into ‘spaghetti-like’ strands.
    Heat oil over medium high heat.  Saute onion and garlic 4-6 minutes.  Add bell pepper. Turn heat to low, stir and cover for 2-4 minutes.  Uncover, stir in spaghetti squash and remaining ingredients.  Cover and cook til all ingredients are warm, about 7-10 minutes
    Add 1 Tbsp of olive juice and any other seasonings to taste. Serve warm. And a little toasted bread on the side won’t hurt.
    Give this spaghetti squash recipe a try and let me know what you think, and…
    Bon appétit!
    And for another great spaghetti squash recipe, try this Spanish-style Spaghetti Squash.

    spaghetti squash recipe
    click image to check out this recipe

    Thanks for watching, sharing, and subscribing to my videos, I appreciate it!

    Share and Enjoy !


    Crispy Salmon Recipe – How to Cook Salmon

    crispy salmon recipe

    This crispy salmon recipe is delicious. Cooking salmon with a crispy skin adds great texture and flavor. Keep it simple; all you need is a little oil, salt, and pepper to cook up this tasty fish dinner. Give this super easy crispy salmon dish a try…it’s a winner.

    How to Cook A Crispy Salmon Recipe

    SALMON FILET w/ skin on
    OLIVE OIL
    SALT and PEPPER to taste
    OIL for frying

    crispy salmon recipe
    Keep salmon skin-side up to preserve crispiness
    • Wash the salmon filet and pat dry with a paper towel.
    • If your cut of fish has pin bones, remove them.
    • Coat the salmon with olive oil, skin side as well.
    • Generously season fish with salt and pepper.
    • Using an oven safe skillet, on medium high heat, heat a little oil on the stove top. Check current prices for a stove top and oven safe cast iron skillet on Amazon.
    • When the oil is hot, add the salmon fillet skin side down and cook for 2-4 minutes –adjust time depending on the size of the fillet.
    • Transfer the skillet to the oven and continue cooking the salmon under the broiler for 1-3 minutes.
    • Remove the skillet from the stove and transfer salmon fillet to a plate, skin-side up …resting the fish skin-side down will cause the skin to lose it’s crispiness!

    Give this simple crispy salmon recipe a try and let me know what you think, and bon appétit!

    And don’t just cook salmon this way! Any tasty fillet of fish with skin on can be prepared in this manner. To appreciate fresh fish, keep it simple.

    And for another tasty fish dish, try this healthy baked cod recipe.

    baked fish recipe
    oven baked fish fillets

    Thanks for Watching our Videos!

    Thanks for checking out our crispy salmon recipe. Sign up for our mailing list so you’ll never miss a new recipe. Also click a button below and share the dishes with your friends. You can also follow Chef Buck on Youtube. We appreciate all the kind comments and support, and we’ll see you next time in the kitchen!

    If you like what CG and I do, support us on Patreon, or throw us a tip in our Paypal Tip Jar. We’ll happily enjoy a coffee on the road – Thanks! We appreciate all the support, and we’ll see you next time in the kitchen!

    We include affiliate links for products on our website. Making a purchase after clicking on our links and we may earn a commission which helps us produce more videos and drink more coffee :^) We participate in the Amazon Services LLC Associates Program, which is an affiliate advertising program. It provides a means for us to earn fees by linking to Amazon.com and affiliated sites, so we can make more videos.

    Share and Enjoy !

    Banana Pancakes – Flourless Gluten Free Recipe

    banana pancakes

    This Banana Pancakes recipe tastes great! These banana pancakes are flourless and gluten free and cook up fluffy and filling for a healthy, easy to make breakfast alternative to traditional pancakes. And pancakes are especially tasty when you add in some nuts, chocolate chips, or fresh berries.

    What You Need to Make Banana Pancakes

    (makes 6 good-size pancakes or 8-10 sissy cakes)

    2 BANANAS
    2 EGGS
    ½ tsp BAKING POWDER
    ½ tsp CINNAMON POWDER
    splash of VANILLA EXTRACT
    sprinkle of WALNUTS and/or FRUIT if desired
    SALT to taste (optional)

    banana pancakes
    Banana pancakes are flourless and gluten free and cook up fluffy and filling for a healthy, easy to make breakfast alternative to traditional pancakes.

    How to Make Banana Pancakes

    • In a bowl, mash up 2 bananas; the riper the bananas, the more banana-ee your pancakes will be!
    • Add eggs.
    • Add cinnamon, baking powder, salt, and vanilla extract.
    • Mix ingredients well. The batter should be the consistency of a traditional pancake batter–add more mashed banana if needed.
    • Let batter sit for a few minutes.
    • Heat a greased skillet or griddle on medium low heat. In the video I use a Lodge cast iron skillet which works great and is pretty affordable for a cast iron skillet. Check the current price for a cast iron skillet on Amazon.
    • Once skillet is heated, spoon batter to form pancakes; whatever size you like.
    • Cook undisturbed about 3-4 minutes or until the pancake begins to brown.
    • If desired, sprinkle nuts or berries or chocolate chips on the cakes.
    • Flip pancakes with a spatula and cook on the other side until brown. Unlike traditional flour pancakes, you can flip these cakes over and over until they are cooked and colored to your liking.
    • Serve hot off the grill with maple syrup.
    banana pancakes
    Banana Pancake Recipe

    Give these flourless banana pancakes a try and let me know what you think, and bon appétit!

    And for another healthy breakfast idea, try a Tofu Scramble Recipe.

    tofu recipe
    this tofu recipe makes a perfect breakfast, lunch, or dinner

    Thanks for checking out this banana pancakes recipe, and all of our recipe videos. Be sure and sign up for our mailing list and never miss a new Chef Buck cooking video, and also click a button below and share the dishes with your friends. We appreciate all the kind comments and support, and we’ll see you next time in the kitchen!

    Thanks for watching our recipe videos!

    We include affiliate links for products on our website, so if you make a purchase after clicking on our links, we may earn a commission which helps us produce more videos and drink more coffee :^) We participate in the Amazon Services LLC Associates Program, which is an affiliate advertising program providing a means for us to earn fees by linking to Amazon.com and affiliated sites, so we can make more videos.

    Share and Enjoy !

    Hot Wings Recipe – Crispy Baked Chicken

    hot wings recipe

    Make a spicy hot wings recipe at home. You can bake crispy wings for a healthier version of your favorite wings recipe, and a Buffalo sauce is super easy to prepare. I usually buy the whole wings and cut them up at home, but you can buy bags of chicken wings already cut up into drumettes and wingettes.

    What You Need to Make This Hot Wings Recipe

    3 lbs CHICKEN WINGS
    2 Tbsp BAKING POWDER
    1 tsp SALT
    ½ tsp ONION POWDER
    1 tsp GARLIC POWDER
    1 tsp PAPRIKA
    ¼ tsp BLACK PEPPER
    …but really, use whatever spices you like

    Ingredients For Buffalo Hot Wings Recipe Sauce

    ¼ cup BUTTER
    ¼ – ½ cup HOT SAUCE
    1 tsp WORCESTERSHIRE
    1-3 Tbsp HONEY

    hot wings recipe
    You can bake crispy chicken wings for a healthier version of your favorite hot wings recipe

    How to Make Crispy Chicken Wings In The Oven

    Preparing and Baking the Wings:

    I generally remove the skin from chicken, but not when I’m having wings; that crisp cooked skin is what makes wings so tasty. Buy your wings already cut up, or cut the up yourself at home. They’re not difficult to process at home, just cut easily between the joints, and be sure and save the wing tips to use for a chicken broth.

    • Pat chicken pieces dry with a paper towel and set aside
    • Combine the baking powder and seasonings in a bowl and mix together well
    • Toss the wingettes and drumettes with the dry coating
      Arrange the chicken pieces on a wire rack over a baking pan and place in oven preheated to 425 degrees F. Here’s a good option if you want to price an oven-safe roasting rack on Amazon.
    • Cook wings for 50-60 minutes, turning every 20 minutes until crispy and done.
    While the Wings Bake, Make the Sauce:

    A classic Buffalo chicken wing sauce is easy to prepare.

    • In a sauce pot, melt butter
    • Add an equal amount of hot sauce to the pot, or more if you like your wings spicier
    • Throw in a splash of Worcestershire sauce
    • And for sweeter wings, add honey to taste
    • Mix well and heat through
    hot wings recipe
    A classic Buffalo chicken wing sauce is easy to prepare.
    Sauce the Wings, Or Don’t:

    I like my spicy wings right out of the oven, just the wings and crispy skin. I like them tossed in Buffalo sauce, too, so I usually sauce half and leave half un-sauced, but follow your own heart.

    To sauce the wings, simply combine the wings hot out of the oven and the sauce hot off of the stove into a bowl and toss. And a creamy blue cheese or ranch dressing makes a nice accompaniment.

    And that’s it!

    Give this hot wings recipe a try let me know what you think, and bon appétit!

    And for another fun party type food, check out this recipe for a giant platter of Nachos Supreme.

    best nachos recipe
    This is a fantastic Nachos Supreme dish, and a giant pizza pan makes a great dish for cooking and serving.

    Thanks For Checking out our Recipes

    We hope you love this hot wings recipe! Sign up for our mailing list so you’ll never miss a new recipe. Also click a button below and share the dishes with your friends. You can also follow Chef Buck on Youtube. We appreciate all the kind comments and support, and we’ll see you next time in the kitchen!

    If you like what CG and I do, support us on Patreon, or throw us a tip in our Paypal Tip Jar. We’ll happily enjoy a coffee on the road – Thanks! We appreciate all the support, and we’ll see you next time in the kitchen!

    We include affiliate links for products on our website. Making a purchase after clicking on our links and we may earn a commission which helps us produce more videos and drink more coffee :^) We participate in the Amazon Services LLC Associates Program, which is an affiliate advertising program. It provides a means for us to earn fees by linking to Amazon.com and affiliated sites, so we can make more videos.

    Share and Enjoy !

    Candied Pecans – Easy Pecan Candy Treats

    candied pecans

    You can make a super simple and tasty candied pecan treat. This sugar pecan recipe
    is an easy way to impress friends and family. My mom gives tins of pecan candy out
    as gifts for the holidays, and it’s a sure hit for any party or get-together.
    CG especially likes these nuts as ice cream toppings.

    What You Need to Make Candied Pecans

    1 lb. PECANS
    1 cup SUGAR
    1 tsp CINNAMON
    ½ tsp SALT
    1 EGG WHITE
    1 Tbsp WATER

    candied pecans
    Place pecans on a large ungreased baking sheet and bake 30 minutes at 300 degrees F. Turn pecans every 10 minutes while baking.

    How to make Pecan Candies

    Buy a pound of pecan halves. When buying, be sure to choose pecans that are in good shape
    …a bag of broken and busted up pecans doesn’t look as pretty in a dish.  Pecans can be pretty pricey, but check here for current pecan prices on Amazon.           

    In a bowl, combine the cinnamon, sugar, and salt, and then mix well.
    Set that bowl aside, and in another bowl, combine 1 egg white and 1 Tbsp. of water.
    Whisk the egg white and water into a frothy foam.
    Add the pecan halves into the egg white mix.
    By hand, mix the pecans until coated thoroughly.
    Once the pecans are coated completely, transfer then into the dry mix bowl. Still using your hand,
    mix the pecans in the cinnamon sugar until they are coated well.

    On an ungreased baking sheet, spread the coated pecans into a single layer.
    Place the baking sheet in an oven preheated to 300 degrees Fahrenheit. You can check here for current prices for baking sheets on Amazon.

    Remove the baking sheet every 10 minutes to give the pecans a stir and spread them out again; this will let the pecans bake evenly and keep from sticking together.

    After a total of 30 minutes baking time, remove the pecans for a final stir, then set aside to cool.
    That’s it. As soon as they’re cool enough to eat, then eat away.
    Be sure to allow the pecans to cool completely before sealing in a container.

    candied pecans
    My mom sends out tins of candied pecans to her favorite children, which sometimes includes me.

    These sugar pecan candies make a great holiday treat or anytime treat. My mom makes them all the time for family gatherings and they’re
    a sure fire hit.

    Give this candied pecans recipe a try and let me know what you think, and bon appétit!

    For another quick tasty treat idea, try this classic Peanut Butter Candy Recipe.

    peanut butter candy recipe

    Thanks for checking out this candied pecans recipe, and all of our recipe videos. Be sure and sign up for our mailing list and never miss a new Chef Buck cooking video, and also click a button below and share the dishes with your friends. We appreciate all the kind comments and support, and we’ll see you next time in the kitchen!
    –Chef Buck

    Thanks for watching our recipe videos!

    We include affiliate links for products on our website, so if you make a purchase after clicking on our links, we may earn a commission which helps us produce more videos and drink more coffee :^) We participate in the Amazon Services LLC Associates Program, which is an affiliate advertising program providing a means for us to earn fees by linking to Amazon.com and affiliated sites, so we can make more videos.

    Share and Enjoy !

    Mediterranean Quinoa Salad Recipe

    Mediterranean Quinoa salad

    Mediterranean quinoa salad is easy to make, tastes great, and is a healthy choice for a better diet. This quinoa recipe is a perfect entree or side dish, either hot or cold. Quinoa cooks up similar to rice, in fact, you can substitute quinoa for rice in most recipes, so give quinoa a try.

    Mediterranean Quinoa Salad Recipe Ingredients :

    1 cup QUINOA
    2 cups packed SPINACH
    10-15 CHERRY TOMATOES (sliced in halves)
    3 cloves chopped GARLIC
    ½-1 cup FETA cheese
    ¼ cup fresh BASIL
    1 med chopped ONION
    1 Tbsp OLIVE OIL for sautéing the onion
    1-2 Tbsp mild VINEGAR
    SALT and PEPPER to taste
    1 tsp dried HERBS (thyme, basil, oregano, etc.)

    mediterranean quinoa salad
    Mediterranean Quinoa makes a great entrée or side dish.

    How to Make Mediterranean Quinoa :

    Bring 2 cups of salted water to a boil.
    Add 1 cup of quinoa (at this time also add any dried herbs). Cover and let simmer 15 minutes, until the water is absorbed.
    While the quinoa cooks, sauté the onions and garlic.
    Once quinoa is cooked, remove from the heat and while the quinoa is still hot, stir in the spinach and basil until wilted, then add the onion and garlic.
    Let Quinoa cool about 10 minutes, and then stir in the cherry tomatoes, vinegar, feta cheese, and extra salt and pepper as desired.
    Serve warm or cold, it’s tasty either way.
    Give this Mediterranean quinoa salad recipe a try and let me know what you think, and bon appétit!

    Sometimes quinoa is pricey, but by shopping around, you can often find a better deal. See current prices for quinoa on Amazon. I like to buy quinoa in the bulk bins, or sometimes you can find a good deal on quinoa in the rice section. Quinoa in the “health” or “natural foods” section is often over-priced, so definitely look around for the better deal, because it’s out there!

    For another flavor twist, try this Southwest inspired quinoa salad recipe.

    southwestern quinoa salad
    a southwestern quinoa salad makes a tasty and healthy dinner choice.

    And for another more easy quinoa dishes, check out my quinoa recipe playlist on the Chef Buck Youtube Channel.

    Thanks for checking out this Mediterranean quinoa recipe, and be sure and sign up for our mailing list so you’ll never miss a Chef Buck cooking video, and also click a button below and share the dishes with your friends. We appreciate all the kind comments and support, and we’ll see you next time in the kitchen!

    We appreciate you watching our recipe videos!

    We include affiliate links for products on our website, so if you make a purchase after clicking on our links, we may earn a commission which helps us produce more videos and drink more coffee :^) We are a participant in the Amazon Services LLC Associates Program, which is an affiliate advertising program that provides a means for us to earn fees by linking to Amazon.com and affiliated sites.

    Share and Enjoy !

    Potato Cake Recipe — How To Make Sweet Potato Latkes

    potato cake recipe

    Check out this simple potato cake recipe. Or do you call them potato pancakes? Or potato latkes? I like to use sweet potatoes because they are less starchy and cook up quicker than white potatoes, plus sweet potatoes just taste great, and they are a good nutrition and energy source.

    Ingredients to Make A Sweet Potato Cake Recipe :

    1 med SWEET POTATO
    ONION (½ as much as potato)
    Fresh HOT PEPPER (optional)
    2 EGGS
    2 Tbsp FLOUR
    1 tsp CURRY POWDER
    ½ tsp CHILI POWDER (optional)
    ……or whatever seasonings you prefer!
    SALT and PEPPER (to taste)
    OIL for cooking

    potato cake recipe
    Are they potato latkes, potato pancakes, or potato cakes? What do you call them?

    How to Make Sweet Potato Latkes :

      • Shred sweet potato into strings, and thinly slice onion into stringy lengths.
      • I like to also thinly slice a jalapeno pepper; the pepper adds a nice zing, flavor, and color, but you can skip the pepper if you’re a “fraidy cat”.
      • In a bowl, combine the potato, onion, and pepper with the flour until well coated.
      • Beat two eggs and add into the mix, stirring well.
      • Add seasonings as desired. I like a lot of seasoning, and the potato and onion like it, too, so be liberal with the salt, pepper, and flavors you prefer; it’ll make for tastier cakes.

    potato cake recipe
    thinly sliced sweet potato, onion, and pepper make for a sturdy, tasty, potato cake.

    • Heat oil in a skillet on medium-high heat and spoon the potato mixture into the skillet and press and shape into patties. The potato cakes should be about the size and thickness of a nice ¼lb burger, but not too thin.
    • Don’t crowd the skillet. I use a ten-inch skillet and get two batches of three patties each, which is a terrible sentence, and almost sounds like math, so sorry for that.
    • Cook patties for 3-4 minutes on each side, turning carefully.
    • Adjust the burner temperature as needed; reduce heat to cook each potato patty for 3-4 minutes without burning.
    • Cook until nicely colored, then remove potato cakes from the skillet and drain on a paper towel.

    It’s a great dish for breakfast, lunch, or dinner.
    Give this simple potato cakes recipe a try and let me know what you think, and bon appétit.

    And for another yummy potato dish, check out this classic Home Fried Potatoes Recipe.

    home fried potatoes recipe
    home fried potatoes

    Thanks for watching. If you like the potato cake recipe, use some of the share links below to share the dish with your friends and family.
    I appreciate it!
    –Chef Buck

    Share and Enjoy !


    Frozen Yogurt Banana Pops – make a healthy treat

    frozen yogurt banana

    Try a healthy Frozen Yogurt Banana Treat. It’s easy to make, and a nice dessert option instead of ice cream when you’re trying not to be too bad. Crushed peanuts and coconut flakes make this yogurt banana popsicle extra tasty, and a chocolate chip or two won’t hurt, especially if you’re making it as a ghostly Halloween treat for some lucky kid.

    What You Need to make a Frozen Yogurt Banana Pop

    Banana
    Crushed Peanuts
    Coconut Flakes
    Chocolate Chips
    Greek Yogurt
    (or melt
    white chocolate
    instead of yogurt)
    and some Wax Paper

    How to make a frozen Yogurt Banana Pop

    • Peel a banana!
    • You can use 1 banana to make 2 popsicles, or 4 popsicles.
    • For two frozen treats, just cut the banana in two. This size makes a yummy pop, but can be a bit much if frozen for a loooong time; for easier to eat frozen banana popsicles, cut the halves into lengthwise halves.
    • Poke a stick into the center of the banana. A thin stick will be needed for smaller popsicles, otherwise the banana will split.
    • Roll or dip the banana stick in yogurt and coat thoroughly. Thick, Greek yogurt is ideal for a nice coating.
    • Place pops on wax paper and Freeze AT LEAST 1 hour. The longer it freezes, the more like a popsicle they will become, but it will take at least 1 hour for minimum frozen popsicle satisfaction.
    • For fancy popsicles, roll the banana sticks in crushed peanuts and coconut flakes. This can be done before or after the pops are coated in yogurt.
    • For extra coconut flavor, toast the coconut flakes.
    • For a more decadent dessert, sprinkle the yogurt covered pops with chocolate chips before freezing. Or M&M’s…or any kind of sprinkles you like.
    • And for a spooky treat for the children, use chocolate chips to shape eyes and a mouth to make a yogurt/banana ghost. This is an easy and healthy low-calorie treat to make around Halloween.
    • And if you’re not counting calories, use white (or dark) chocolate instead of yogurt; simply melt chocolate in a skillet and roll the banana sticks to coat.

    frozen yogurt banana
    You can fancy up a frozen yogurt banana recipe with chocolate chips, coconut flakes , peanuts, peanut butter, M&M’s…whatever you like!

    Give this frozen yogurt covered banana recipe a try and let me know what you think, and bon appétit!

    And for another tasty (and healthier) dessert idea, check out this Chocolate Cake made with garbanzo beans.

    gluten free cake
    Gluten-free Garbanzo Bean Cake

    THANKS FOR WATCHING! If you enjoyed the post, share it with your friends …be a cool kid and hit some of the share links below. I appreciate it!
    –Chef Buck

    Share and Enjoy !


    Green Onion Pancake Korean Pajeon Recipe

    korean pajeon

    Pajeon is a Korean-style green onion pancake recipe. It is a savory, delicious pancake that can be prepared quick and easy. I’m using rice flour in this video, so it’s actually a gluten-free pancake recipe, but using all-purpose wheat flour is fine. You can use either chives or scallions for this recipe (or both).

    What You Need To Make Pajeon

    1 bunch GREEN ONIONS
    1 EGG
    ¼ cup RED BELL PEPPER
    HOT PEPPER (optional)
    ½ cup FLOUR
    ½ cup WATER
    2-3 Tbsp OIL for cooking
    SALT and PEPPER (to taste)
    sauce:
    ¼ cup RICE VINEGAR
    ¼ cup SOY SAUCE
    CHILI-GARLIC SAUCE (to taste, optional)

    For a gluten-free pancake, check here for CURRENT RICE FLOUR PRICES on Amazon.

    How to Make a Pajeon Green Onion Pancake

    • Combine flour and cold water and mix well, the batter should be thin.
    • Chop slender green onions into approx. 1 inch pieces and add into batter (thicker onions should be sliced lengthwise first).
    • Add red bell pepper and any hot pepper (optional) to batter and combine all until ingredients are well coated.
    • Heat oil in a non-stick skillet on medium high. Adjust temperature as needed through out cooking, but make sure the oil is hot before adding the batter.
    • Add batter to hot skillet and shape into a pancake shape. Make 1 big pancake, or 2 smaller pancakes; this recipe can serve 1 to 2 people, although I generally eat it all, since it’s quick and easy to prepare, and I often make it when I’m just cooking for myself.
    • Add salt and pepper to taste (remember that the sauce will have have soy sauce)
    • After 3 minutes, pour a beaten egg over the pancake top.
    • Cook until the cake is golden brown on bottom, about 4-6 minutes.
    • Turn the cake (or flip it–but with confidence!) and cook the eggy side for about 2 more minutes.
      And that’s it! Serve hot with a dipping sauce.

    Dipping Sauce

    Combine equal parts rice vinegar and soy sauce and mix well. Adding a little chili-garlic sauce is a nice touch, and and will provide a nice bite. For a sweeter sauce, add a little hoisin or plum sauce, or just 1-2 tsp sugar.

    green onion pancake
    A Korean style green onion pancake can be made quick and easy.

    Give this pajeon green onion pancake recipe a try and let me know what you think, and bon appétit.

    And for a Korean-style pancake, check out this Haemul Pajeon Seafood Pancake Recipe.

    shrimp pancake
    Korean style Haemul Pajeon seafood pancake

    Thanks For Watching Our Recipe Videos!

    Thanks for checking out this green onion pancake recipe, and all of our recipes. Sign up for our mailing list so you’ll never miss a new recipe. Also click a button below and share the dishes with your friends. You can also follow Chef Buck on Youtube. We appreciate all the kind comments and support, and we’ll see you next time in the kitchen!

    If you like what CG and I do, support us on Patreon, or throw us a tip in our Paypal Tip Jar. We’ll happily enjoy a coffee on the road – Thanks! We appreciate all the support, and we’ll see you next time in the kitchen!

    We include affiliate links for products on our website. Making a purchase after clicking on our links and we may earn a commission which helps us produce more videos and drink more coffee :^) We participate in the Amazon Services LLC Associates Program, which is an affiliate advertising program. It provides a means for us to earn fees by linking to Amazon.com and affiliated sites, so we can make more videos.

    Share and Enjoy !

    Fried Chicken Cutlets Chinese Restaurant Style

    fried chicken cutlets

    Try this fried chicken cutlets recipe that I find in a lot of non-fancy Chinese restaurants. It’s a chicken cutlet served over lettuce and rice and topped with peanut sauce, crushed peanuts, and green
    onion. It’s a very simple dish to make, and a kind of comfort food for me.

    What You Need to Make A Chinese Fried Chicken Cutlets Recipe

    CHICKEN BREAST sliced thin
    OIL for frying
    EGG and FLOUR for breading
    LETTUCE …use fresh, crisp greens
    RICE …I like jasmine rice for this dish
    CRUSHED PEANUTS
    GREEN ONION TOPS
    SALT and PEPPER (to taste)
    peanut sauce:
    ¼ cup NATURAL PEANUT BUTTER
    2 Tbsp SOY SAUCE
    1 Tbsp CHILI GARLIC SAUCE
    ¼ cup WATER or as needed to thin sauce
    to desired consistency

    chicken cutlet dish
    Slice chicken breast thinly and season simply with salt and pepper for this chicken cutlet dish.

    How to Make A Chinese Style Fried Chicken Dish

    Slice chicken breast into cuts about ¼ inch thick.
    Season chicken with salt and pepper.
    Coat chicken lightly with all purpose flour.
    Dredge chicken in an egg wash,
    Re-flour chicken (or use bread crumbs…I kinda like just more flour for this recipe)
    Heat a skillet and oil on medium heat, maybe slightly more than medium–you’ll have to adjust the heat during cooking depending
    on how much chicken is in the pan.
    Make sure oil is hot before adding chicken! Otherwise the chicken will soak in the oil and be too greasy.

    fried chicken cutlets
    Adjust the heat as needed when frying chicken cutlets. You want the oil hot enough to cook the chicken through, but still leave the breading a nice, golden color.

    Add chicken to skillet.
    Cook approx. 4 minutes until chicken is fried golden brown on bottom, then turn and fry other side approx 4 minutes. Adjust cooking time
    as needed; the key is not having the oil so hot that the breading overcooks before the chicken is done, adjust heat as required.
    Remove chicken from oil and drain on a paper towel.
    For each serving, plate a serving of sticky white rice.
    Top rice with sliced lettuce; use fresh, crisp greens.
    Combine peanut sauce ingredients and drizzle sauce over the lettuce.
    Slice one of the whole fried chicken cutlets into ½ inch cuts and top over lettuce.
    Add more peanut sauce.
    Top dish with crushed peanuts and sliced green onion tops.

    chinese chicken
    Top Chinese chicken cutlet with a tangy peanut sauce, crushed peanuts, and green onion.

    And that’s it!
    Give this Chinese-style fried chicken cutlets dish a try and let me know what you think, and bon appétit!

    And for another Asian inspired chicken dish, check out this General Tso’s Chicken Recipe.
    general tso chicken

    Thanks for checking out the video and recipe. If you like it, please click and share with your friends! I appreciate it!
    –Chef Buck

    Share and Enjoy !


    Canned Mackerel Recipe for Meatballs

    canned mackerel recipe

    Try this canned mackerel recipe and cook a healthy Italian-style meatball dish. Mackerel provides a ton of nutrition, and is a wild caught fish full of healthy oils. It’ a rich source of omega-3 fatty acids. Canned mackerel is inexpensive, super convenient, and an ideal ingredient to have around the house.

    What You Need to Make a Meatball Canned Mackerel Recipe

    1 can MACKEREL
    1 EGG
    1 Lg ONION
    4-5 cloves GARLIC
    4-5 Tbsp OLIVE OIL
    14oz can TOMATO SAUCE
    14oz can CRUSHED TOMATO
    ½ GREEN BELL PEPPER
    1 RED or YELLOW BELL PEPPER
    ½ cup grated ROMANO CHEESE
    1 Tbsp ITALIAN SEASONING
    2 tsp CHILI POWDER
    SALT and PEPPER (to taste)
    some fresh parsley…and serve over rice or noodles

    How to Make Canned Mackerel Meatballs

    • Open the canned mackerel and pour fish into a bowl. Like canned tuna, the mackerel has already been cooked during the canning process. The skin and bones are edible, in fact they are quite nutritious.
    • Remove some of the juice that was in the can, but leave about a ¼ cup of juices.
    • The larger vertabrae, while quite chewable, can be a little distracting in a meatball.
      Using your hands, break the fish up, smashing as much of the bone matter as convenient.
    • Into the bowl add salt, pepper, and chili powder to taste. You’ll also add some of these spices into the marinara sauce as well.
    • Add the freshly grated Romano cheese, or substitute Parmesan cheese.
    • Add one egg, and about 1 Tbsp each of finely chopped onion, garlic and green bell pepper.
    • Thoroughly combine all of the ingredients in the bowl and then form the mixture into meatballs about the size of a ping pong ball. The bowl should yield 12-14 meatballs.

    Time to Cook the Meatballs!

    • Heat a skillet with oil on medium high heat.
    • Brown the meatballs on all sides. Be gentle, the mackerel meatballs will be moist and quite soft. The meatballs will likely not keep their round shape, but that’s fine. Use tongs and turn them gently in the hot oil. The browning will help the meatballs to keep their shape later in the marinara sauce.
    • Brown meatballs for 5-7 minutes and the remove the meatballs from the skillet and set aside on a plate.
    • Into the skillet add the remaining onion, garlic, and bell peppers. Saute for several minutes until they begin to soften.
    • Add more salt, pepper, and hot pepper as desired. Use fresh hot peppers if you like!
    • Add in the crushed tomatoes and tomato sauce.
    • Stir in the dried Italian seasonings.
    • Bring skillet to a bubble and the reduce to a simmer and cover and let simmer for about 20 minutes.
    • After 20 minutes, add fresh parsley and then return the meatballs to the skillet.
    • Gently mix the meatballs with the sauce and let cook for another 5 minutes.

    And that’s it! Serve the sauce and mackerel meatballs over pasta or rice.
    Give this canned mackerel recipe a try and let me know what you think, and bon appétit!

    If you can’t find it at the store, you can check out canned mackerel prices on Amazon.

    canned mackerel recipe
    Canned Mackerel is packed with nutrition, super convenient, and relatively inexpensive.

    And for another canned seafood recipe, try this delicious Salmon Burger Recipe.

    Thanks for watching the video and checking out the recipe. If you enjoyed it, then click some of the share buttons below and introduce your friends to the joy of canned mackerel! I appreciate it!
    –Chef Buck

    Share and Enjoy !


    Follow Me!