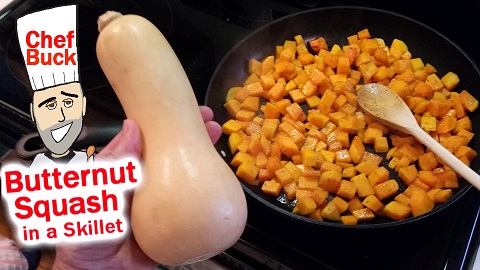
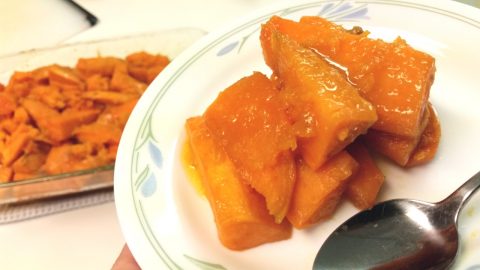
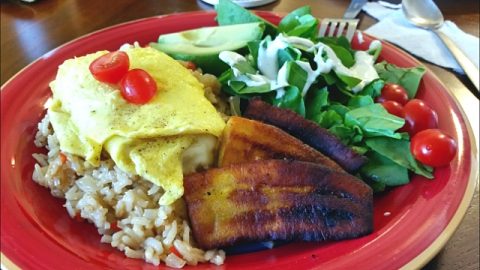
I love sweet potato and CG and I found a delicious savory sweet potato recipe at a local BBQ joint. Cumin and fresh cilantro add a tasty and surprising twist to this delicious sweet potato dish, so if you’re looking for an alternative to a classic candied sweet potato, then try this potato recipe out; it’s easy to cook and makes a versatile side dish.
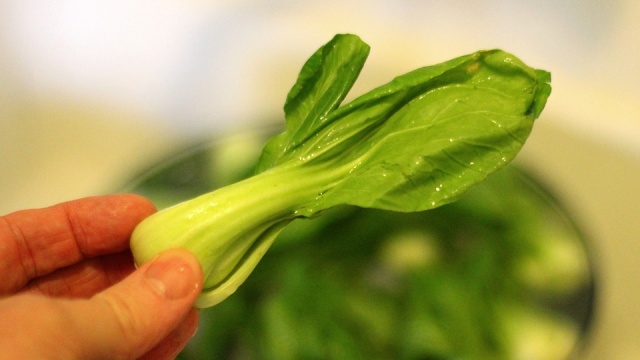
Sweet Potato Recipe Ingredients
3 SWEET POTATOES rough cut 1 cup fresh CILANTRO chopped 2-3 cloves GARLIC minced 1 tsp CUMIN ½ CHILI POWDER SALT to taste
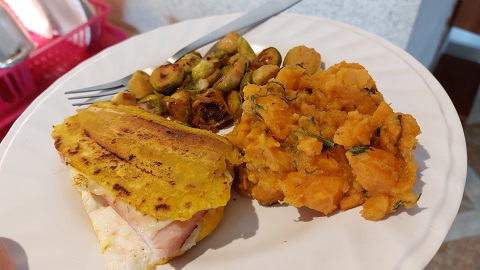
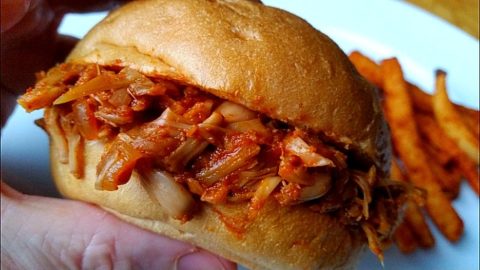
savory sweet potato with brussels sprouts and a sandwich
How to Make a Savory Sweet Potato Recipe
Cut most of your sweet potato into rustic sizes, but I like to cut about ½ cup of the potato into smaller sizes so it’ll cook down faster.
Heat oil in a skillet on medium heat and add in the potato and saute for a few minutes.
Add in the seasoning and garlic and cook for another 2 minutes. I added measurements in the recipe for seasoning, but really it’s all season to taste, especially the cumin; put a little more than you think you want, and you might be surprised how tasty it gets.
Add in 1 cup of water, cover your skillet and bring the dish to a simmer. Simmer until the potato becomes soft enough to smash with a fork and add a little more water if needed.
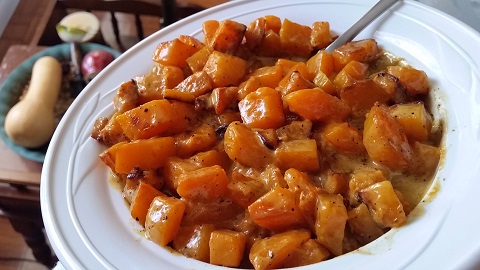
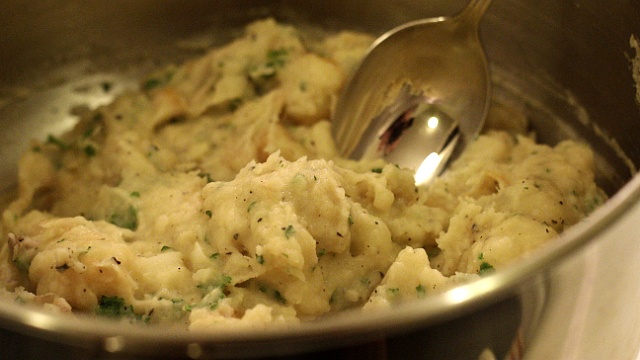
Smash about ⅓ of the potato in the skillet, adjust seasoning to taste, and continue to cook to the consistency you desire.
When the potato is done, turn off the heat and stir in the fresh cilantro.
This savory sweet potato recipe makes a great side dish. We originally had it with BBQ ribs and it was a perfect pairing. Give this recipe a try and let us know what you think.
Thanks for Watching our Sweet Potato Recipe Video!
Click a button below and share the dishes with your friends. You can also follow Chef Buck on Youtube. We appreciate all the kind comments and support, and we’ll see you next time in the kitchen!
If you like what CG and I do, support us on Patreon, or throw us a tip in our Paypal Tip Jar. We’ll happily enjoy a coffee on the road – Thanks! We appreciate all the support, and we’ll see you next time in the kitchen!
We include affiliate links for products on our website. Making a purchase after clicking on our links and we may earn a commission which helps us produce more videos and drink more coffee :^) We participate in the Amazon Services LLC Associates Program, which is an affiliate advertising program. It provides a means for us to earn fees by linking to Amazon.com and affiliated sites, so we can make more videos.
If you’re new to home cooking, get a bunch of spices, pots and pans, and start experimenting with different recipes. It’s a healthy hobby that can save a lot of money in the long run. Check out current prices for Complete Kitchenware Sets on Amazon as well as Complete Starter Spice Kits. Or try a thrift store! I’ve found some of my favorite kitchen gear at second-hand stores.
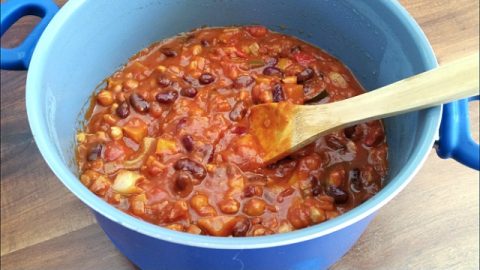
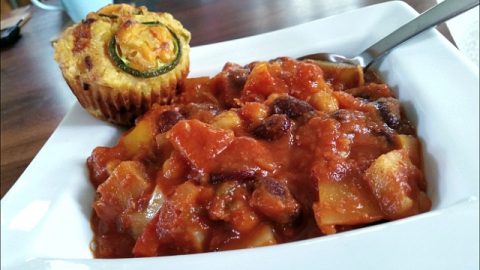
Puttanesca with chickpeas is a flavorful, quick and versatile twist on a classic Italian dish. A puttanesca recipe calls for anchovies, which is an ingredient some folks are not excited about–including myself!–but anchovy is perfect in this recipe. Like your favorite spaghetti sauce, puttanesca is great right when you cook it, and even more delicious the next day.
Ingredients for Chickpea Puttanesca
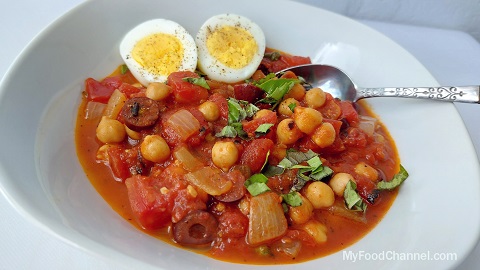
Optional: top your puttanesca with a protein e.g. boiled egg, Italian sausage, fish, poultry.
1 Tbsp oil 1/2 tsp dried chili pepper flakes 1 tsp cumin seeds (optional) 1 tsp fennel seeds (optional) Large onion (about a cup), cut in bite-sized chunks 1 Tbsp garlic cloves, finely chopped 3 anchovy fillets (about 1 oz), drained and finely chopped 1 Tbsp tomato paste 1/2 cup white wine 28 oz can diced tomatoes (in the video we used fire roasted) 1 tsp Italian seasoning 1/2 tsp black pepper 1 15 oz can of chickpea, drained and rinsed 1/3 cup sliced Kalamata olives 2 Tbsp capers, drained
Optional garnish: 1/4 cup choppped fresh basil (or parsley)
How to Make Puttanesca with Chickpeas
Note: You will want to pay extra attention to the heat of your skillet with this dish because you’re working with seeds and because you want some lightly brown bits….not a pan of burnt seeds, garlic and/or anchovies.
Prep some ingredients: Drain and rinse chickpeas. Peel and chop onions. Peel garlic. Dab excess moisture from anchovies. Mince garlic and anchovies. Open your cans of tomato paste, tomatoes Measure and drain your olives and capers. Decide if you want to have some protein on the top of your puttanesca. In the video, we served the puttanesca with boiled eggs. Here are two ways to make the perfect boiled eggs every time.
Prepare a flavorful base: Heat oil over medium high heat in a large skillet. Saute chili flakes, cumin seeds and fennel seeds onions for 30 seconds, stirring constantly. Add onions and cook for about 4 minutes. Add anchovies and garlic, stir constantly for 30 seconds more, until fragrant. Turn heat to medium. Add tomato paste and stir in for 30 seconds more. Add wine and stir for another minute, scraping up any small bits that have stuck to the pan. A stainless steel skillet is ideal for this recipe. Check current prices for stainless steel skillets on Amazon.
Complete your puttanesca: Add the tomatoes and juice, Italian seasoning and black pepper. Cook until the liquid is reduced by half, about 10 minutes. Add your chickpeas, olives and capers. Heat through.
Serve with basil and/or protein.
Experiment with your Puttanesca
Instead of white wine, you can use 1/4 cup white wine vinegar + 1/4 cup water.
Experiment with the seasonings. In one version, instead of the Italian seasoning and pepper flakes, we used Olde Thompson Italian Seasoning (now called ‘Pinch of Rome’ seasoning) – that is actually more like a great pizza topping.
Thanks for checking out this puttanesca recipe, and all of our recipes. Sign up for our mailing list so you’ll never miss a new recipe. Also click a button below and share the dishes with your friends. You can also follow Chef Buck on Youtube. We appreciate all the kind comments and support, and we’ll see you next time in the kitchen!
If you like what CG and I do, support us on Patreon, or throw us a tip in our Paypal Tip Jar. We’ll happily enjoy a coffee on the road – Thanks! We appreciate all the support, and we’ll see you next time in the kitchen!
We include affiliate links for products on our website. Making a purchase after clicking on our links and we may earn a commission which helps us produce more videos and drink more coffee :^) We participate in the Amazon Services LLC Associates Program, which is an affiliate advertising program. It provides a means for us to earn fees by linking to Amazon.com and affiliated sites, so we can make more videos.
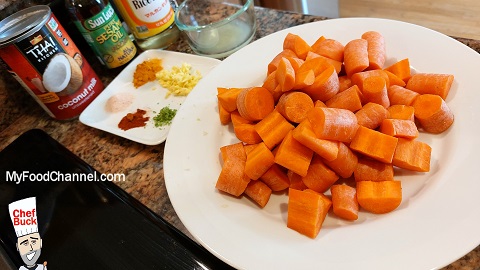
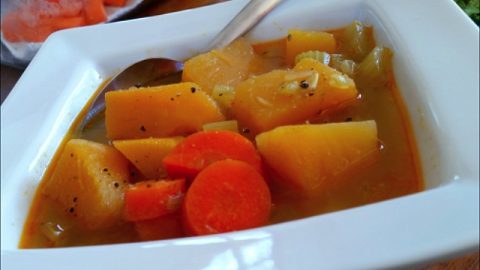
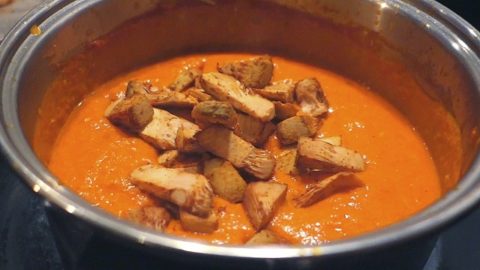
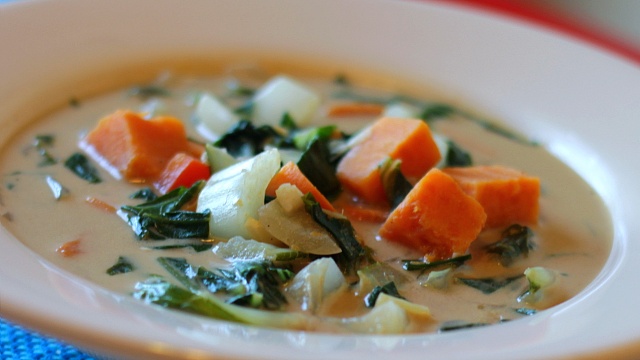
Balance hot summer days with a chilled carrot soup. This blended carrot recipe packs a lot of flavor and nutrition in a refreshingly light vegan recipe. Fresh ingredients like ginger, lime, and garlic add zing to this easy to prepare carrot soup dish.
Ingredients for Carrot Soup
2 Tbsp OIL, divided 1 ORANGE BELL PEPPER, seeded and cut into bite-sized pieces 2 Tbsp GARLIC, minced 1 lb CARROTS, cut into bite-sized pieces 3/4 tsp TUMERIC POWDER 1/4 tsp SMOKED PAPRIKA 1/2 tsp SALT 1/2 cup WATER
13.5 oz can COCONUT MILK 1 Tbsp LIME JUICE (1/2 lime) 1/4 tsp LIME ZEST 1 tsp SESAME OIL 1 Tbsp RICE VINEGAR 2 tsp HONEY, if soup is extra tangy
Garnish: 1/3 cup unsalted roasted PEANUTS, chopped. Alternative: 2 Tbsp SESAME SEEDS, toasted. 1/3 cup CILANTRO, chopped
You’ll also need a blender: a regular, stationery blender, or a smaller, handheld immersion blender like one used in the video. Check current prices for an immersion blender on Amazon.
How To Make Chilled Carrot Soup
Wash, chop carrots, orange bell pepper into bite-sized pieces. Peel and mince garlic.
Heat 1 tsp oil on medium high heat.
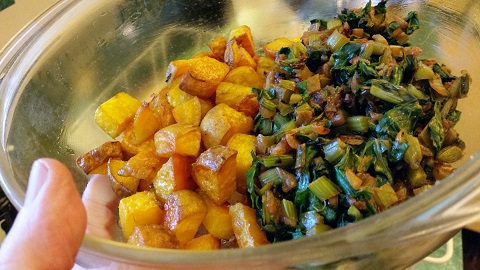
Saute orange bell pepper and garlic till they begin to brown, then remove to a big bowl.
Heat another 1 tsp oil; saute carrots till you see browned areas, about 4 minutes.
Add turmeric powder, smoked paprika, salt and water. Stir, cover and let cook until a fork easily goes through carrots; about 5 minutes.
Add cooked carrots and remaining ingredients (except garnish) to the bowl with cooked bell pepper and garlic.
Blend all ingredients together to desired consistency.
Place soup in the fridge and chill for at least 2 hours.
Remove from the fridge. Stir in more water or coconut milk (1/4 cup at a time), until desired consistency.
Serve chilled carrot soup with a garnish of peanuts and cilantro.
This Carrot Soup Recipe Is Versatile
Instead of sautéing your carrots, you can microwave them. Or, you can roast the carrots, pepper and garlic (leave cloves whole to roast, then mince) in 1 Tbsp oil and the seasonings, for 20-30 minutes at 400˚F. If you want a hot soup, leave out the lime juice and zest. Instead of lime, stir in 1 tsp or more of your favorite savory seasoning, such as curry or rosemary. Heat on low/medium heat, or microwave, just until heated through. Serve it over rice, noodles or rice noodles.
Thanks for checking out this cool carrot soup recipe, and all of our recipes. Sign up for our mailing list so you’ll never miss a new recipe. Also click a button below and share the dishes with your friends. You can also follow Chef Buck on Youtube. We appreciate all the kind comments and support, and we’ll see you next time in the kitchen!
If you like what CG and I do, support us on Patreon, or throw us a tip in our Paypal Tip Jar. We’ll happily enjoy a coffee on the road – Thanks! We appreciate all the support, and we’ll see you next time in the kitchen!
We include affiliate links for products on our website. Making a purchase after clicking on our links and we may earn a commission which helps us produce more videos and drink more coffee :^) We participate in the Amazon Services LLC Associates Program, which is an affiliate advertising program. It provides a means for us to earn fees by linking to Amazon.com and affiliated sites, so we can make more videos.
A German Pancake, also called a Dutch baby pancake, is easy to learn and can be used with a variety of savory or sweet toppings. This recipe version easily serves 2 people – each person enjoying half a 10”, ½” thick pancake plus toppings. If you’ve never had a German pancake, it’s a delicious cross between an easy-to-make soufflé, and a bowl-shaped crepe. You may know it by another name: a Bismarck, a Dutch Puff, or as a variation of the English Yorkshire pudding.
How To Make a Successful German Pancake
Use a cast-iron skillet . In a pinch, you can use some other oven-safe dish like a Pyrex dish, but it’s convenient to have something that can go from the stove to the oven. Cast iron skillets can be pricey, but I use economical Lodge Cast Iron skillets, including the one in the video. You can check current prices for these skillets on Amazon.
Make sure your eggs and milk at room temperature (In a pinch, you can use your microwave to knock the cold off….but don’t overcook either ingredient);
Make sure your butter or oil is sizzling hot, but not burnt, when the batter is poured into your pan;
You want your batter to be bubbly/frothy before you pour it into your pan with hot oil, AND your oven preheated to 425˚F so that as soon as the batter is poured, it is immediately placed into a hot oven.
Do NOT open the oven while the pancake is baking. This is where your oven light comes in handy.
Ingredients for a Savory German Pancake
3 large eggs ½ cup milk [can use non-dairy milk] ½ cup all-purpose flour ½ tsp salt ½ tsp freshly ground black pepper [1 tsp fresh herb e.g. thyme, optional ] 3 Tbsp unsalted butter or oil or combo
Sample Pancake Toppings: 8 cherry tomatoes, halved 2 Tbsp garlic, minced 3 kale leaves, stems and leaves chopped separately; stems minced 2 green onions, chopped 2-3 small red and/or yellow bell peppers, chopped [In the video, we made a heaping amount of topping, using up some refrigerator items e.g. mushrooms.]
Optional Garnishes: Sprinkle of parmesan cheese Fresh chopped parsley, or chives, for garnish
the same Savory German Pancake Recipe without Mushrooms
Directions for Making a Dutch Baby Pancake
Take eggs and milk out of frig. Room temperature ingredients yield more desired ‘puffiness’; also easier to blend.
Chop toppings. Sauté in 10 in cast-iron skillet. Remove toppings and keep warm. Wipe out skillet. Or use two separate skillets as I do in the video recipe.
Position an oven rack so that your pancake has at least 6 inches of space to rise. We simply remove one rack.
Preheat oven to 425°F. Place your skillet/dish in oven as it warms.
In a large bowl, whisk eggs and milk until blended. Whisk in flour, salt and pepper until smooth; stir in fresh herb – if adding. Continue to whisk until smooth and fluffy.
If you forgot to heat the pan, you can Heat a 10-in. cast-iron or other ovenproof skillet over medium-high heat.
AFTER pan is heated, remove from oven, add butter and heat until sizzling, but before it is browned . Watch to make sure butter doesn’t burn. Pour batter into hot pan. Immediately place into preheated oven.
Bake until top is puffed and sides are golden brown and crisp, 10-20 minutes, or until desired doneness. For savory dishes, I prefer a cooking time around 10 minutes, but for sweeter, more desert-like German Pancakes, I like to cook the cake for 15-20 minutes. Do not open oven while cooking – use oven light.
Set your table. Doublecheck your toppings.
Remove from oven. Immediately sprinkle with cheese, reserved toppings and garnishes. Serve hot.
Helpful Hints as you Experiment with German Pancakes
This recipe is scalable. The basic pancake ratio: 1 egg to ¼ cup flour, ¼ cup milk. You can add an extra egg to this ratio – like we did for this recipe.
You can also make the batter the night before, to save blending time. Start with all ingredients at room temperature. Refrigerate combined batter. Next morning, let come to room temperature. Beat the batter until light and foamy. Continue with recipe.
Instead of a single oven-proof dish or pan, you can use two 6” pans to make individual pancakes.
Savory German Pancake with Mushroom, Kale, and Tomato
Other Savory Topping Combinations to Try
In the video, we packed our pancake with lots of things we found in the frig, that we thought needed to be used. You can be choosier with your German pancake experiments. Here’s some ideas to get your imagination cooking.
Chopped asparagus, capers and a squeeze of lemon
Cooked bacon or Canadian ham and your favorite cheese
Brown some diced portabella mushrooms, ½ onion with a ¼ lb ground turkey, flavored with your favorite seasonings
Mushrooms, garlic and Parmesan cheese
Roasted tomatoes, garlic, a splash of fresh greens and cheese once it’s finished baking
Potential Ingredients for Making a Sweet German Pancake
Stay tuned for a separate video and blog for making a sweet dutch baby pancake. But, in the meantime, you can experiment with some of these ingredients…
Sweet Dutch Baby Pancake Topping Ideas: Lemon curd and powdered sugar Fresh berries and powdered sugar or a smidge of maple syrup and mint Applesauce, yogurt, cinnamon, nuts (sliced almonds, chopped walnuts) Cream and jam or jelly Sauté sliced apples, 2 Tbsp brown sugar, 2 Tbsp butter and about quarter cup of brandied cranberries, rum apples or bananas. For a fancy-pants occasion, flame ¼ cup brandy or rum over the fruit. Or maybe just add sliced toasted almonds or chopped walnuts.
For another delicious breakfast/brunch dish, check out our EGG BREAD RECIPE.
Fancy baked eggs to impress friends and family
Thanks For Watching Our Recipe Videos!
Thanks for checking out this savory German pancake recipe, and all of our recipes. Sign up for our mailing list so you’ll never miss a new recipe. Also click a button below and share the dishes with your friends. You can also follow Chef Buck on Youtube. We appreciate all the kind comments and support, and we’ll see you next time in the kitchen!
If you like what CG and I do, support us on Patreon, or throw us a tip in our Paypal Tip Jar. We’ll happily enjoy a coffee on the road – Thanks! We appreciate all the support, and we’ll see you next time in the kitchen!
We include affiliate links for products on our website. Making a purchase after clicking on our links and we may earn a commission which helps us produce more videos and drink more coffee :^) We participate in the Amazon Services LLC Associates Program, which is an affiliate advertising program. It provides a means for us to earn fees by linking to Amazon.com and affiliated sites, so we can make more videos.
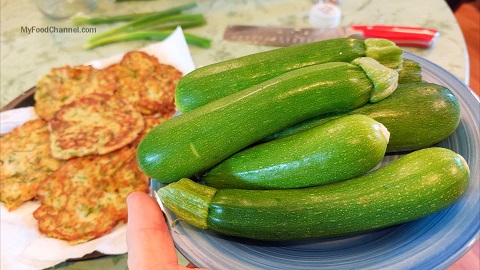
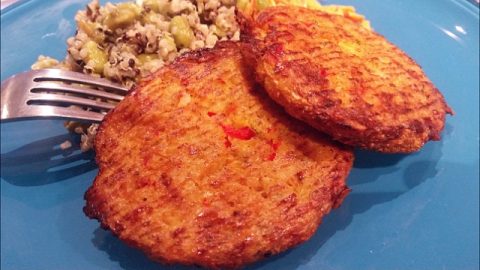
These zucchini fritters are flavorful, easy to make and great anytime of the day!
Ingredients for Delicious Zucchini Fritters
Makes about 6 fritters
4 cups of fresh ZUCCHINI, grated ½ tsp SALT 2 GREEN ONIONS, cut into thin 2-inch long slices ¼ cup CREAMY CHEESE 2 EGGS 12 RITZ CRACKERS (or use 3 Tbsp of saltines or flour) ½ tsp BLACK PEPPER ¼ tsp RED PEPPER FLAKES OIL for frying
Optional: A creamy fritter topping
Directions for Making These Easy Zucchini Fritters
Grate the zucchini into a colander. Mix in salt and set aside for 20 minutes to draw out some of the zucchini’s moisture.
While zucchini is drying out: Slice green onions into thin strains, about 2-inch long. Cover a plate with paper towels to absorb oil when fritters come out of the pan.
After letting zucchini set, squeeze out excess moisture.
In a large bowl, combine egg and cheese. Then add zucchini, green onions, crushed crackers and seasonings. Mix to combine ingredients.
Heat oil in large nonstick pan over medium heat. Place ¼ cup of fritter mix in heated oil, use non-metal spatula to flatten each fritter. Check prices for a non-stick skillet on Amazon.
Cook each side of the fritters for about 1 minute or until lightly browned. Place on paper toweled plate to absorb the oil.
Serve warm a la carte, or with your favorite creamy sauce. It can be as simple as a dollop of sour cream or mix up your special recipe.
Zucchini Fritter Options
Want to make these gluten-free? Use a non-gluten flour instead of the crackers.
Don’t want to spend the money on herbed goat cheese? Soften 2 oz cream cheese, and stir in 1/4 tsp garlic powder, 1 1/2 tsp Italian seasoning.
Thanks for checking out this zucchini recipe, and all of our recipes. Sign up for our mailing list so you’ll never miss a new recipe. Also click a button below and share the dishes with your friends. You can also follow Chef Buck on Youtube. We appreciate all the kind comments and support, and we’ll see you next time in the kitchen!
If you like what CG and I do, support us on Patreon, or throw us a tip in our Paypal Tip Jar. We’ll happily enjoy a coffee on the road – Thanks! We appreciate all the support, and we’ll see you next time in the kitchen!
We include affiliate links for products on our website. Making a purchase after clicking on our links and we may earn a commission which helps us produce more videos and drink more coffee :^) We participate in the Amazon Services LLC Associates Program, which is an affiliate advertising program. It provides a means for us to earn fees by linking to Amazon.com and affiliated sites, so we can make more videos.
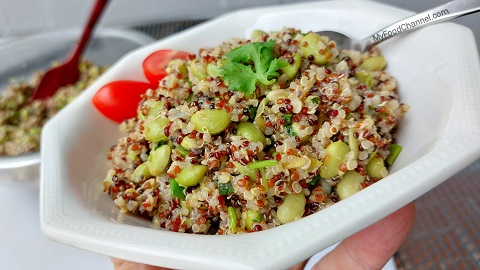
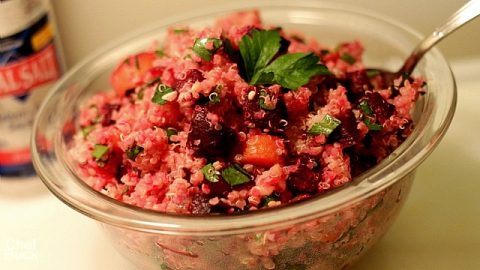
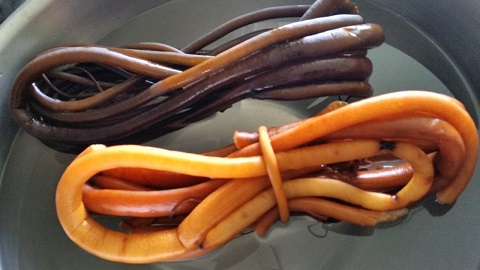
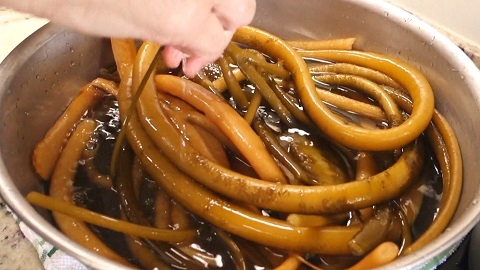
Here’s a super healthy mukimame quinoa recipe. Shelled soybeans are called mukimame, but you might also find them still labeled as edamame even after they’ve been shelled. We buy bags of frozen shelled soybeans in the grocer freezer and pair them with quinoa to make a veggie protein bowl that’s great as a vegetarian entree or a delicious side dish.
Ingredients for Mukimame Quinoa Recipe
12 or 16 oz bag frozen MUKIMAME (may be labeled “edamame”) 1 cup QUINOA 2 Tbsp GINGER finely chopped 4-5 cloves GARLIC finely chopped 2 Tbsp fresh LIME JUICE 2 Tbsp RICE VINEGAR 2 tsp SOY SAUCE 2 tsp SESAME OIL optional: 3-4 GREEN ONIONS chopped ½ cup CILANTRO chopped 2 Tbsp SESAME SEEDS, toasted additional SALT and PEPPER to taste
Add ginger and garlic and sauté for a minute until fragrant.
Remove garlic and ginger from pan and set aside. I’ve tried skipping this step, and just continued cooking the garlic and ginger along with the rice, but it’s not as flavorful, so it’s definitely worth setting the garlic and ginger aside to add to the dish later.
In the same pan, bring 2¼ cups water, quinoa, and mukimame to a boil, then reduce pot to a simmer and cover with a tight-fitting lid. Cook for about 15 minutes or until all the water is absorbed. Stoves heat differently. Sometimes, to get rid of the extra water from the mukimame, you can turn the heat up to medium, take off the lid, and cook for another 4-6 minutes. Current prices for quinoa on amazon.
In a small bowl, combine lime juice, vinegar, soy sauce, and sesame oil.
After water is absorbed and quinoa is cooked, remove quinoa and mukimame from the stove. Add ginger, garlic, lime juice mixture and if desired, scallions, cilantro and toasted sesame seeds.
Mix well and add additional salt and pepper as needed.
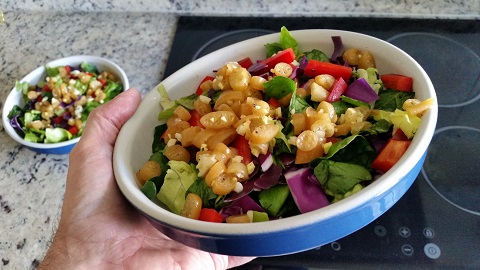
Serve this mukimame quinoa recipe in a bowl as a vegetarian entrée. This combo is great topped with fresh chopped tomatoes, zucchini, or cucumber or simply serve as a tasty side dish.
Thanks for checking out this mukimame quinoa recipe, and all of our recipes. Sign up for our mailing list so you’ll never miss a new recipe. Also click a button below and share the dishes with your friends. You can also follow Chef Buck on Youtube. We appreciate all the kind comments and support, and we’ll see you next time in the kitchen!
If you like what CG and I do, support us on Patreon, or throw us a tip in our Paypal Tip Jar. We’ll happily enjoy a coffee on the road – Thanks! We appreciate all the support, and we’ll see you next time in the kitchen!
We include affiliate links for products on our website. Making a purchase after clicking on our links and we may earn a commission which helps us produce more videos and drink more coffee :^) We participate in the Amazon Services LLC Associates Program, which is an affiliate advertising program. It provides a means for us to earn fees by linking to Amazon.com and affiliated sites, so we can make more videos.
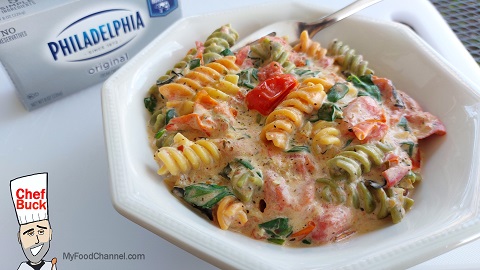
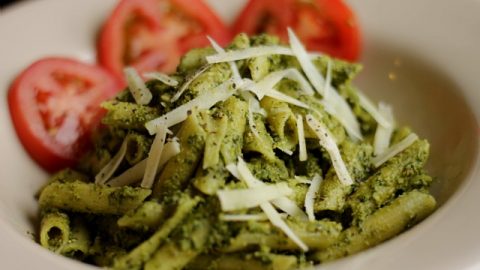
Try a delicious cream cheese pasta recipe with roasted tomatoes. It’s an easy dish to prepare using an 8oz bar of cream cheese. You can also sneak in a little nutrition with added spinach.
Ingredients for Cream Cheese Pasta Recipe
8-10 oz of PASTA 8 oz bar of CREAM CHEESE 2 pints CHERRY TOMATOES 4-6 cloves minced GARLIC 2 Tbsp OLIVE OIL 1 Tbsp ITALIAN SEASONING ½ tsp BLACK PEPPER SALT to taste ½ tsp RED PEPPER FLAKES ¼ cup fresh BASIL 1 cup fresh SPINACH
So far, my favorite pastas for this dish are the smaller elbow pastas and rotini pasta.
How to Make Cheesy Pasta
Preheat oven to 400˚F
In a baking dish, toss whole cherry tomatoes with 1 Tbsp of olive oil. Check prices for a baking dish on amazon.
Add in the garlic, salt, black pepper, pepper flakes, Italian seasoning and toss until the tomatoes are coated.
Make space for the bar of cream cheese in the center of the tomatoes and top the cheese with 1 Tbsp of olive oil.
Bake uncovered in the oven for 20 minutes.
While the tomatoes bake, make the pasta according to the pasta package directions.
Drain the pasta and toss the pasta in a bowl with roughly chopped spinach and basil. Check current prices for a colander on amazon.
After the tomatoes roast for 20 minutes, turn the oven to broil and continue to cook the tomatoes for 5 more minutes, then remove the tomatoes from the oven.
Carefully crush the tomatoes and cheese with a fork and stir the mixture together into a sauce.
Add the sauce to the past–or the pasta to the sauce!–whichever is easier with the dishes you’re using. Mix everything together well and serve the cheesy pasta hot.
Tips for this Creamy Pasta Recipe
Smaller pasta works great with this dish. Rotini pasta is ideal because the outer ridges are hold onto the creamy, cheesy sauce.
A bar of Philadelphia cream cheese is perfect for this recipe, but you can experiment with other creamy cheeses as well. My mom likes using Boursin cheeses, especially the garlic and herb flavor. Or you can try feta cheese, and maybe add some Greek olives for a Mediterranean twist.
Fresh basil is a nice touch, but it’s optional. Try adding a little dried basil if you don’t have fresh leaves, or just add a little extra Italian seasoning and leave the basil out altogether.
Sneaking spinach into the recipe is an easy way to add nutrition, and the green makes the dish look very appetizing. I don’t cook onions into this dish, but adding chopped green onions into the final toss of sauce and pasta is also an option and a way to add fresh color without the spinach.
Thanks for checking out this cream cheese pasta recipe, and all of our recipes. Be sure and sign up for our mailing list so you’ll never miss a new recipe. Also click a button below and share the dishes with your friends. You can also follow Chef Buck on Youtube. We appreciate all the kind comments and support, and we’ll see you next time in the kitchen!
If you like what CG and I do, you can also support us on Patreon, or throw us a tip in our Paypal Tip Jar. We’ll happily enjoy a coffee on the road – Thanks! We appreciate all the support, and we’ll see you next time in the kitchen!
We include affiliate links for products on our website. So, if you make a purchase after clicking on our links, we may earn a commission which helps us produce more videos and drink more coffee :^) We participate in the Amazon Services LLC Associates Program, which is an affiliate advertising program. It provides a means for us to earn fees by linking to Amazon.com and affiliated sites, so we can make more videos.
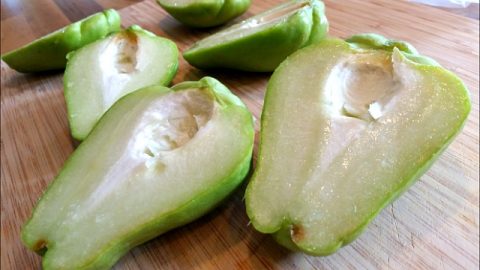
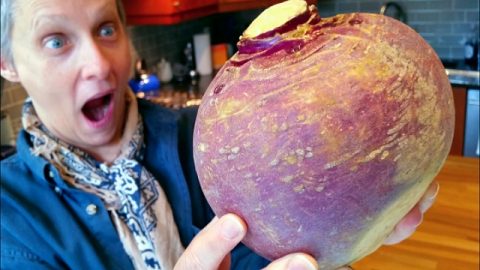
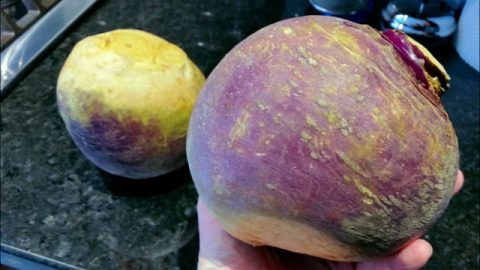
Today we are preparing a delicious and healthy turnip root recipe. One of the easiest ways to cook turnip root is to roast it in the oven. I like to roast a variety of root vegetables together along with onion and garlic. Roasted turnips make a terrific side dish, or even as a salad topping as in this recipe.
Ingredients for this Turnip Root Recipe
TURNIP ROOTS roast turnips with other root veggies like: Carrot, Potato, Parsnip, Rutabaga, Onion, Garlic, etc SEASONINGS as desired 2 Tbsp OLIVE OIL
Roasted Turnip Root Recipe
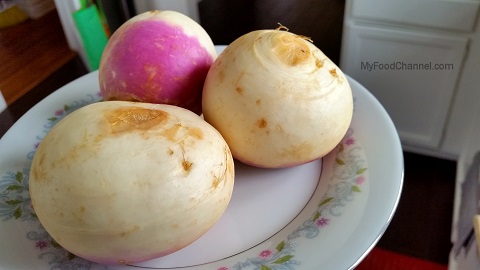
Wash and clean the turnip roots.
Cut turnip roots into relatively uniform sizes about half the size of your thumb.
Place the chopped turnip root into a bowl along with any other root veggies you wish to add. I’ll sometimes add potato, carrot, or rutabaga, and I almost always add some chopped onion or garlic to roast along with the turnip, although you can roast the turnips all by themselves if you prefer.
Add enough olive oil to the bowl to coat the veggies when tossed together.
Season to taste. In the video I add Black Pepper, Garlic Salt, Cayenne Pepper, Chili Powder, Italian Seasoning, but use whatever seasonings you’re in the mood for; smoked paprika is a favorite of mine, and sometimes I’ll use a curry mix seasoning. Sometimes I’ll roast the veggies with only salt and pepper to keep the dish simple.
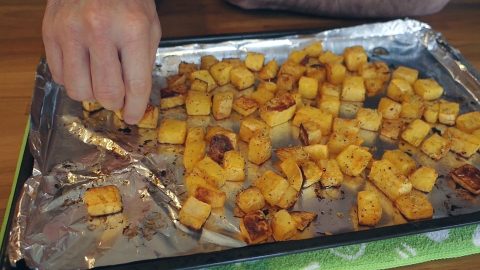
Toss the veggies so that everything is coated in oil and seasoning, then spread the veggies out into a single layer on a baking sheet. Compare prices for a baking sheet on Amazon.
Place in an oven preheated to 400˚F and roast until the veggies have colored up and can be pierced easily with a fork. The cooking time might be between 30-45 minutes depending on the size of your veggies. Once during this cooking time, you can stir the veggies and re-spread them out into a single layer.
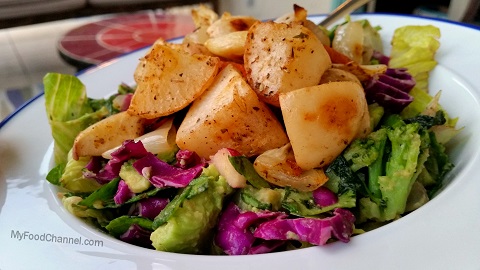
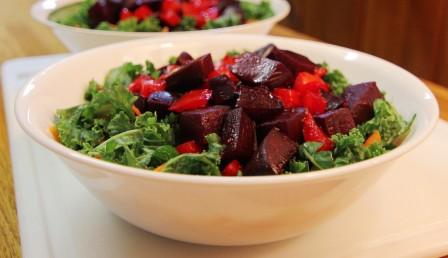
Roasted turnips make a great side dish for almost any meal, or you can simply top them on a salad.
Thanks for checking out our beet green recipes, and all of our recipes. Be sure and sign up for our mailing list so you’ll never miss a new recipe. Also click a button below and share the dishes with your friends. You can also follow Chef Buck on Youtube. We appreciate all the kind comments and support, and we’ll see you next time in the kitchen!
If you like what CG and I do, you can also support us on Patreon, or throw us a tip in our Paypal Tip Jar. We’ll happily enjoy a coffee on the road – Thanks! We appreciate all the support, and we’ll see you next time in the kitchen!
We include affiliate links for products on our website. So, if you make a purchase after clicking on our links, we may earn a commission which helps us produce more videos and drink more coffee :^) We participate in the Amazon Services LLC Associates Program, which is an affiliate advertising program. It provides a means for us to earn fees by linking to Amazon.com and affiliated sites, so we can make more videos.
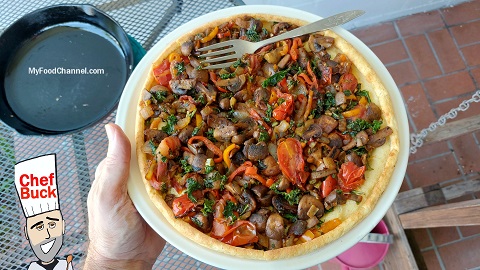
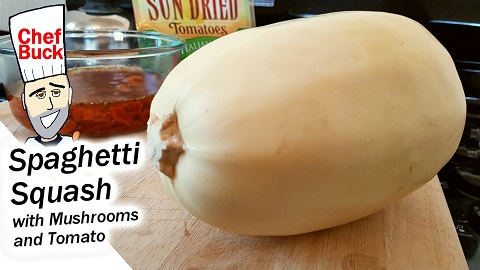
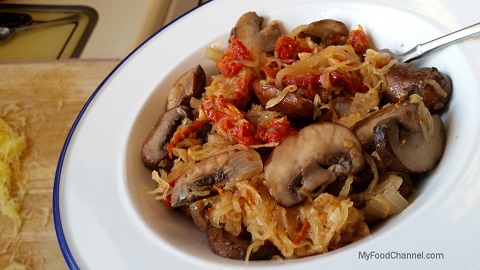
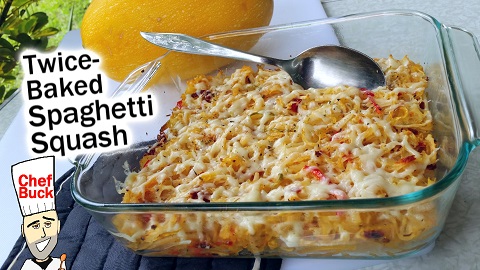
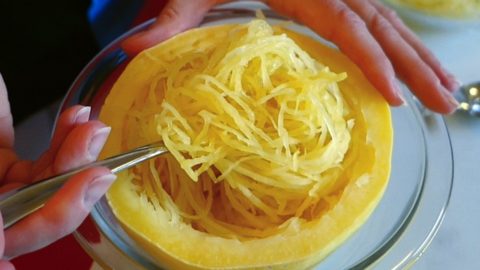
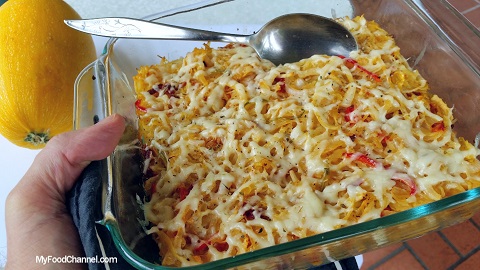
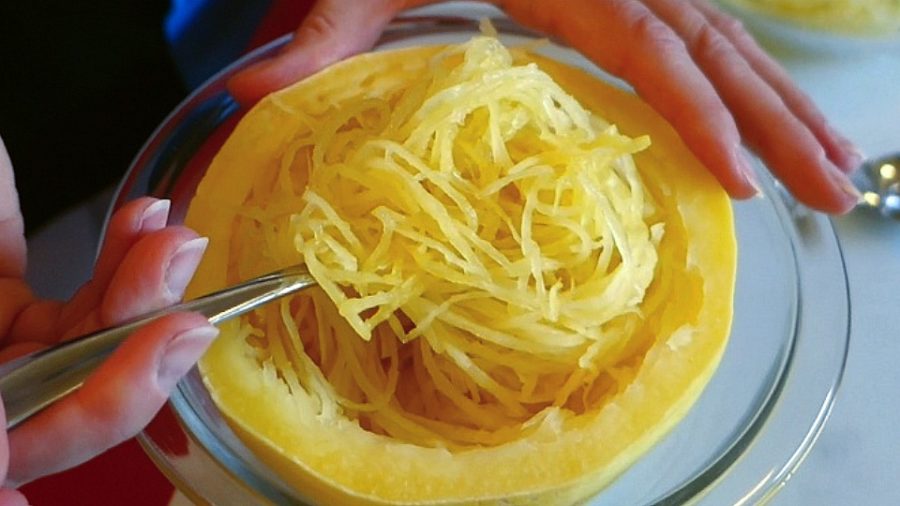
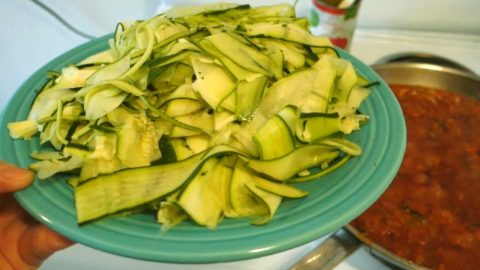
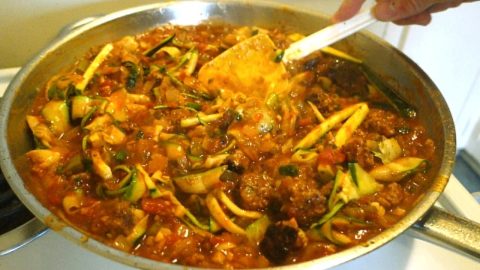
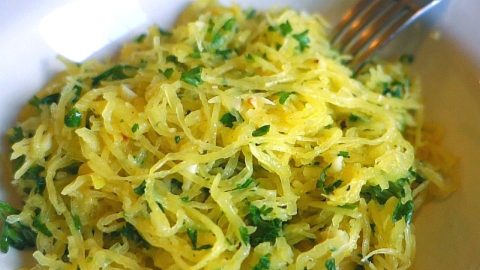
Today we’re making spaghetti squash with mushrooms and sundried tomatoes. Spaghetti squash is one of our favorite ingredients and, true to its name, can be used in many healthy, faux pasta-like dishes. I soak the sun dried tomatoes in warm water to reconstitute them before adding them to the recipe. This recipe is a great flavor combo and an excellent way to prepare spaghetti squash.
a basic spaghetti squash recipe : Slice squash into halves. Place cut sides down in shallow water in a roasting pan. Bake for about 45 minutes at 350 degrees Fahrenheit. Remove squash from the oven and carefully turn halves over to check for doneness –the water will be hot and steam will be trapped under the squash, so be cautious. Allow squash to sit 5-10 minutes to cool slightly for easier handling. With a fork or spoon, remove the meat of the squash. The squash will pull away into strands that resemble spaghetti, although this squash will taste nothing like spaghetti.
How to make Spaghetti Squash with Mushrooms and Tomato
Heat 1-2 oz of olive oil in a large skillet.
Add sliced onion and saute for 3-4 minutes. You can add the garlic during this saute time if you prefer, but I like to add the garlic a little later in this recipe so that the dish will have a stronger garlic flavor.
Add sliced mushrooms and a little salt and pepper and mix well. Cover and let the mushrooms cook down for 5 minutes.
Uncover and then add in the reconstituted sun dried tomatoes and continue to saute ingredients in the skillet. Add more seasoning as desired.
Stir in the garlic.
Add in the spaghetti squash. Spaghetti squash varies in size, so add the entire squash or just as much as you like; mix in as much squash as you desire for a tasty mushroom/tomato/squash ratio. Any leftover squash can be used in another squash recipe.
Turn off the stove and then finish the dish by stirring in a little heavy olive oil to taste. Adjust salt and pepper and you’re ready for dinner.
Thanks for checking out our spaghetti squash recipe, and all of our recipes. Be sure and sign up for our mailing list so you’ll never miss a new recipe. Also click a button below and share the dishes with your friends. You can also follow Chef Buck on Youtube. We appreciate all the kind comments and support, and we’ll see you next time in the kitchen!
If you like what CG and I do, you can also support us on Patreon, or throw us a tip in our Paypal Tip Jar. We’ll happily enjoy a coffee on the road – Thanks! We appreciate all the support, and we’ll see you next time in the kitchen!
We include affiliate links for products on our website. So, if you make a purchase after clicking on our links, we may earn a commission which helps us produce more videos and drink more coffee :^) We participate in the Amazon Services LLC Associates Program, which is an affiliate advertising program. It provides a means for us to earn fees by linking to Amazon.com and affiliated sites, so we can make more videos.
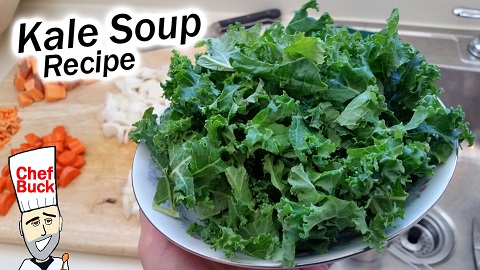
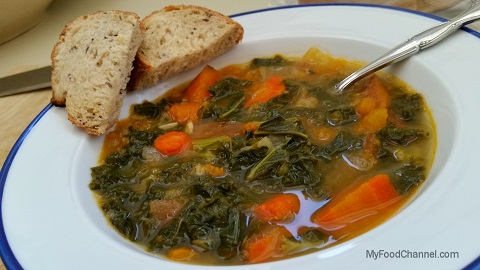
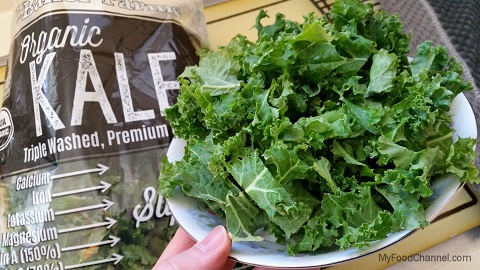
If you’re on the fence with kale, then try this healthy, leafy green in an easy kale soup recipe. Kale is a vegetable that folks either love or hate because of its texture, but kale’s robust texture makes it extremely versatile for many recipes, and using kale in a vegetable soup is a simple way to tame the texture.
Kale Soup Recipe Ingredients
12 oz KALE 1 lg ONION chopped 1 CARROT 1 SWEET POTATO 3-5 cloves GARLIC chopped 1 tsp CHILI POWDER 1 tsp CAYENNE PEPPER 1 tsp GARLIC POWDER ½ tsp BLACK PEPPER 2 cups BROTH 2 Tbsp OLIVE OIL
How to Make Kale Soup
Wash kale greens thoroughly and chop into rough, large sizes. Need a new Cutting Board? Price boards on Amazon.
I use 2 medium sized onions in the kale recipe video, or just use 1 large onion, but you can be flexible on the ratio of ingredients as you prefer. I like to cut the onion into large, thin slices for this soup dish.
Add seasoning and continue to saute for 2 minutes.
Add sweet potato, carrots, and broth, then top the dish with your kale greens. Cover the pot for a couple of minutes to allow the greens to soften and wilt.
Once the greens have wilted, stir all the ingredients together well, then add just enough water to cover the ingredients completely.
Cover the pot and turn up the heat to bring the pot to a bubble, then reduce the heat, cover the pot with a lid, and allow the soup to simmer gently for about 30 minutes.
After half an hour, your soup will be ready to eat, but the longer you let soup sit, the tastier it will be, which is always true for soups and stews, so the more advanced you can make the dish ahead of time, the better it will be!
Thanks for checking out our beet green recipes, and all of our recipes. Be sure and sign up for our mailing list so you’ll never miss a new recipe. Also click a button below and share the dishes with your friends. You can also follow Chef Buck on Youtube. We appreciate all the kind comments and support, and we’ll see you next time in the kitchen!
If you like what CG and I do, you can also support us on Patreon, or throw us a tip in our Paypal Tip Jar. We’ll happily enjoy a coffee on the road – Thanks! We appreciate all the support, and we’ll see you next time in the kitchen!
We include affiliate links for products on our website. So, if you make a purchase after clicking on our links, we may earn a commission which helps us produce more videos and drink more coffee :^) We participate in the Amazon Services LLC Associates Program, which is an affiliate advertising program. It provides a means for us to earn fees by linking to Amazon.com and affiliated sites, so we can make more videos.
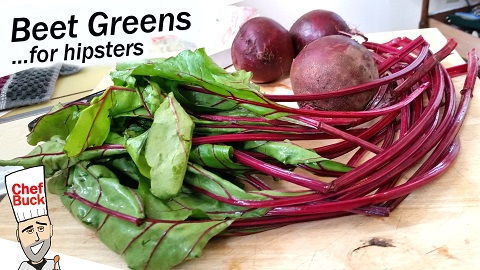
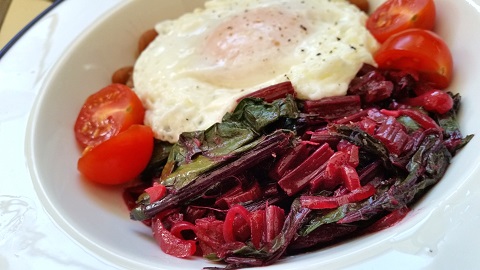
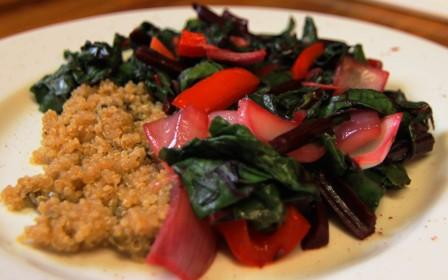
For a quick beet greens brunch recipe, pair up tasty greens with beans and an egg! Beets are delicious and nutritious, and if you find beet bulbs with fresh beet greens attached, then you’ll have veggies for multiple beet recipes. Beet greens cook up super quick and make a fantastic side dish for all kinds of meals.
Hipster Beet Greens Brunch Recipe
BEET GREENS ONION medium sized, thinly sliced GARLIC 3-4 cloves thinly sliced 2 Tbsp BALSAMIC VINEGAR SALT and PEPPER to taste 2 Tbsp OLIVE OIL for sauteing other seasoning as desired
Buy beet roots with the greens for two great ingredients.
Basic Beet Greens with Beans and Egg
This recipe calls for the beet greens only.
Wash the greens thoroughly and separate the stems from the leafy greens.
Tear greens into rough shreds.
Chop stems into ½ inch pieces.
Heat light olive oil in a skillet on medium heat.
Sauté thinly sliced onion for 2 minutes.
Add beet stems and garlic and continue to cook for another 2 minutes.
Season with salt and pepper to taste.
Add beet greens and cover the skillet with lid for 1 minute.
These quick beet greens make a perfect side dish for all kinds of meals, especially quick cook dishes like fish and kielbasa, or if you want to be a little less carnivorous, pair these greens with a side of beans and top with a soft-yolk egg for a perfect brunch recipe. The yolk makes a great sauce!
Thanks for checking out our beet green recipes, and all of our recipes. Be sure and sign up for our mailing list so you’ll never miss a new recipe. Also click a button below and share the dishes with your friends. You can also follow Chef Buck on Youtube. We appreciate all the kind comments and support, and we’ll see you next time in the kitchen!
If you like what CG and I do, you can also support us on Patreon, or throw us a tip in our Paypal Tip Jar. We’ll happily enjoy a coffee on the road – Thanks! We appreciate all the support, and we’ll see you next time in the kitchen!
We include affiliate links for products on our website. So, if you make a purchase after clicking on our links, we may earn a commission which helps us produce more videos and drink more coffee :^) We participate in the Amazon Services LLC Associates Program, which is an affiliate advertising program. It provides a means for us to earn fees by linking to Amazon.com and affiliated sites, so we can make more videos.
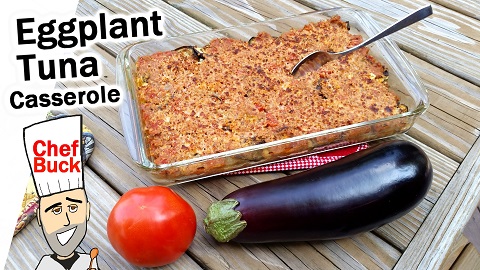
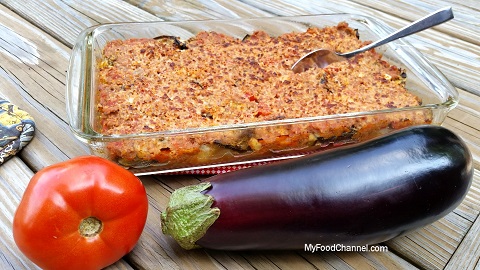
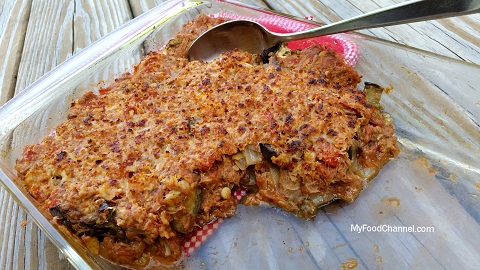
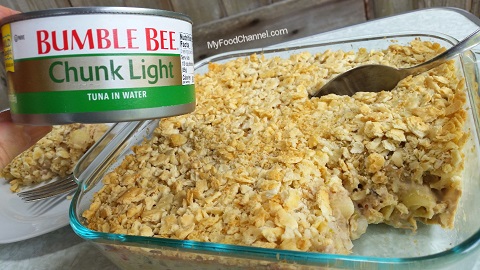
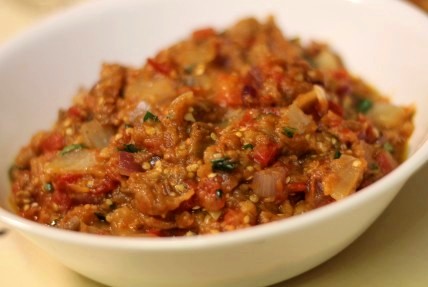
Twice baked eggplant tuna casserole is a delicious comfort food that is surprisingly healthy. It is an easy and forgiving recipe too. If you are trying to wean yourself away from yummy (aka bready, meaty, cheesy) tomato dishes, this can help. Yes, it has some parmesan cheese but is delicious without the addition of mozzarella, ricotta, flour and/or egg that you often find in similar dishes. When you scan the ingredients and see eggplant and tuna – don’t flee! The first time I had a variation of this dish, I was very glad I wasn’t told those two ingredients were in it. Try it! It’s easy to make, delicious, and you may surprise yourself too.
Ingredients Needed To Make Eggplant Tuna Casserole
1 large EGGPLANT 1 tsp SALT 2 cups ONION, diced 7+ medium/large GARLIC CLOVES, pressed (go wild, use a whole bulb!) OIL for veggie baking AND casserole dish (around 2 1/2 Tbsp) 9 oz CANNED TUNA in water, drained 14.5 oz can DICED TOMATOES, half drained 8 oz can TOMATO SAUCE 1 Tbsp ITALIAN SEASONING 1 Tbsp ROASTED GARLIC POWDER (regular garlic powder works too) 1 tsp MINCED ONION SEASONING 1 tsp CARAWAY SEEDS ½ C grated PARMESAN CHEESE, divided Optional Seasoning: In the video, we also used 1 tsp OLDE THOMPSON EVERYTHING ITALIAN (it’s pizza seasoning – adds a bit of heat too!)
Cut eggplant into 1/4 inch discs. Quarter the bigger discs. Sprinkle/distribute salt and let sit for 10 minutes (to draw out some moisture). While your eggplant sweats, you can dice the onion. Peel and press the garlic. Put any extra small cloves aside so they don’t burn during the roasting process. [If you’ve never had roasted garlic before, and the amount we’re suggesting sounds very scary, know this – roasted garlic has a much more mellow flavor compared to eating it raw or sautéed. You can have roasted garlic without having ‘garlic breath’ for several hours.]
Oil baking sheet and casserole dish.
Pat eggplant dry.
If your eggplant is extra large or your baking pan is small – you will need to roast your veggies in two parts (or use two oiled baking sheets). Place your eggplant and garlic in single layer on the oiled baking sheet. Sprinkle the onion onto pan – letting the onion cover any remaining surface area on the pan.
Cook your veggies for just 15-20 minutes. The onion tips will just begin to brown. In the finished casserole, the onions still have some texture – something to bite into*.
While your veggies cook, mix together your sauce of tuna, tomatoes, tomato sauce, and seasonings. Set aside.
Reduce your oven temperature to 350 F, when you take your veggies out.
Pick out garlic. Dice your garlic, in order to distribute the yummy flavor thorough out finished dish. Mix the diced garlic into your sauce.
In your oiled casserole dish, layer one-half of your eggplant, then one-half of your sauce** and sprinkle with about 1/3 of your Parmesan. Repeat the layers, topping with remaining 2/3 Parmesan cheese.
Bake, uncovered, in 350 degree F oven for 20 to 25 minutes. Most of the liquid will be gone. Broil/brown the cheese -watch carefully after 1 minute.
Some people (Hi Mom!) would rather have their onions cooked more, so they don’t taste undone. If you’re in that group, simply cook your veggies till your onions are softer.
It’s okay if your sauce has a bit of liquid to it – simply mix up the sauce before you start layering.
How To Freeze Your Twice Baked Eggplant Casserole
Cover unbaked casserole with freezer paper and date it. Freeze it for up to one month.
To bake frozen casserole, place in 375 degree F oven for 50 to 60 minutes. Let it set 10 minutes before serving to reabsorb some moisture.
If you’re not into eggplant, try a classic Tuna Casserole Recipe, but one that’s not wet!
Thanks For Watching Our Recipe Videos!
Thanks for checking out our eggplant tuna casserole recipe, and all of our recipes. Be sure and sign up for our mailing list so you’ll never miss a new recipe. Also click a button below and share the dishes with your friends. You can also follow Chef Buck on Youtube. We appreciate all the kind comments and support, and we’ll see you next time in the kitchen!
If you like what CG and I do, you can also support us on Patreon, or throw us a tip in our Paypal Tip Jar. We’ll happily enjoy a coffee on the road – Thanks! We appreciate all the support, and we’ll see you next time in the kitchen!
We include affiliate links for products on our website. So, if you make a purchase after clicking on our links, we may earn a commission which helps us produce more videos and drink more coffee :^) We participate in the Amazon Services LLC Associates Program, which is an affiliate advertising program. It provides a means for us to earn fees by linking to Amazon.com and affiliated sites, so we can make more videos.
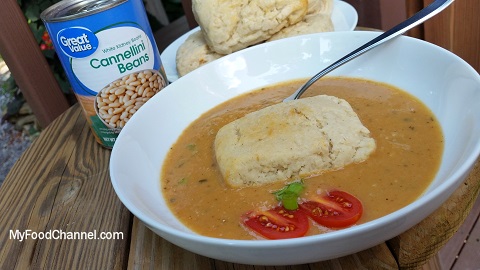
Make a rich white bean gravy with canned beans. I prefer cannellini beans for this gravy recipe, but most white beans will do the trick. When eating a low-fat diet, two of the things I miss most are biscuits and gravy, but there are healthy alternatives for these cravings, and a white bean gravy is super satisfying if you season it up just right.
Ingredients for White Bean Gravy
15oz can WHITE BEANS 1 med ONION 1-2 cloves GARLIC BROTH as needed fresh ROSEMARY (or SAGE is nice!) ½ tsp FENNEL SEED 1 Tbsp FLOUR 1 tsp SALT 1 tsp PAPRIKA 1 tsp GARLIC POWDER ½ tsp BLACK PEPPER HOT PEPPER (optional) I use Costena Chipotles check current prices on Amazon 1 Tbsp OIL Optional: fresh herbs or chopped green onion for garnish
How to Make White Bean Gravy
Heat about 1 Tbsp of oil in a pot on medium heat.
When the skillet is hot, add chopped onion and saute for 2 minutes.
Add garlic and hot pepper and all seasoning and continue cooking for 2 minutes more.
Stir in flour.
Add canned beans and about half a can of broth. Stir, and bring the skillet up to a simmer, then cover and let simmer for 10 minutes.
If needed, reduce the gravy farther on the stove, or add more broth or water if desired.
Use this bean gravy just like you would your favorite fat and flour gravy! And garnish with fresh green herbs or green onion for a picture perfect meal.
If you enjoy this white bean gravy recipe, then check out a breakfast bean favorite, Eggs and Beans!
Thanks for checking out our white bean gravy recipe, and all of our recipes. Be sure and sign up for our mailing list so you’ll never miss a new recipe. Also, click a button below and share the dishes with your friends. You can also follow Chef Buck on Youtube. We appreciate all the kind comments and support, and we’ll see you next time in the kitchen!
If you like what CG and I do, support us on Patreon. Or throw a tip in our Paypal Tip Jar. We’ll happily enjoy a coffee on the road – Thanks! We appreciate all the support, and we’ll see you next time in the kitchen!
Thanks for watching our recipe videos!
We include affiliate links for products on our website. So, if you make a purchase after clicking on our links, we may earn a commission which helps us produce more videos and drink more coffee :^) We participate in the Amazon Services LLC Associates Program, which is an affiliate advertising program. It provides a means for us to earn fees by linking to Amazon.com and affiliated sites, so we can make more videos.
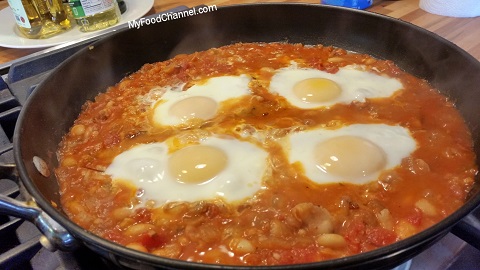
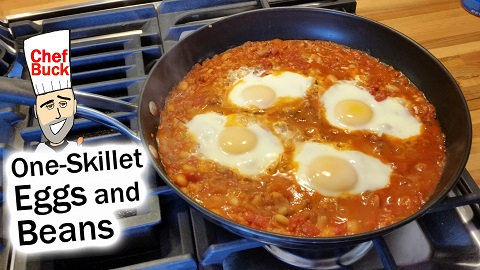
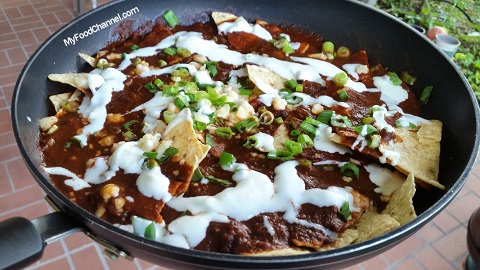
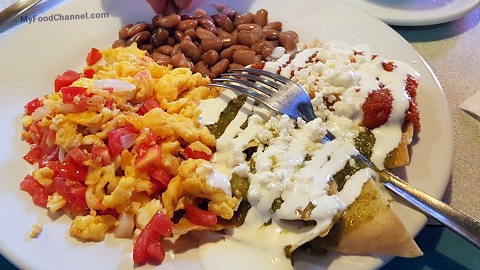
Try a delicious one-skillet breakfast recipe for beans and eggs. This egg recipe is easily adjustable for any family meal; just add as many eggs to the recipe as you have folks to feed! I like to spice up this bean dish with hot pepper and lots of seasoning, because beans and tomato can handle a lot of added flavor.
Ingredients for Beans and Eggs
4 EGGS …add more eggs for more mouths! 15oz can BEANS …white beans are my favorite 15oz can diced TOMATOES 1 finely chopped ONION 2 cloves minced GARLIC fresh chopped HOT PEPPER or try La Costena Chipotle like I use in the video recipe a little OIL for cooking seasonings like: ½ tsp SALT ½ tsp BLACK PEPPER 1 tsp PAPRIKA 1 tsp GARLIC POWDER …adjust seasonings to taste
Optional: fresh herbs or chopped green onion for garnish
How to Make One-Skillet Beans and Eggs
Heat about 1 Tbsp of oil in a skillet on medium heat.
When the skillet is hot, add chopped onion and saute for 2 minutes.
Add garlic and hot pepper and seasoning and continue cooking for 2 minutes more. I use La Costena Chipotle pepper in the recipe video. Check the current price for this Chipotle on Amazon.
Add canned beans and tomato and a little water. Stir, and bring the skillet up to a simmer, then cover and let simmer for about 10 minutes.
Uncover and stir until liquid reduces to saucey, but not too wet.
Crack eggs into the skillet, leaving space between them.
Cover and let cook 4-6 minutes more until the eggs are done to your liking…cook for a bit more than this if you like the yolks hard.
Turn off the heat, and serve the eggs and beans immediately. Garnish with fresh green herbs or green onion for a picture perfect meal.
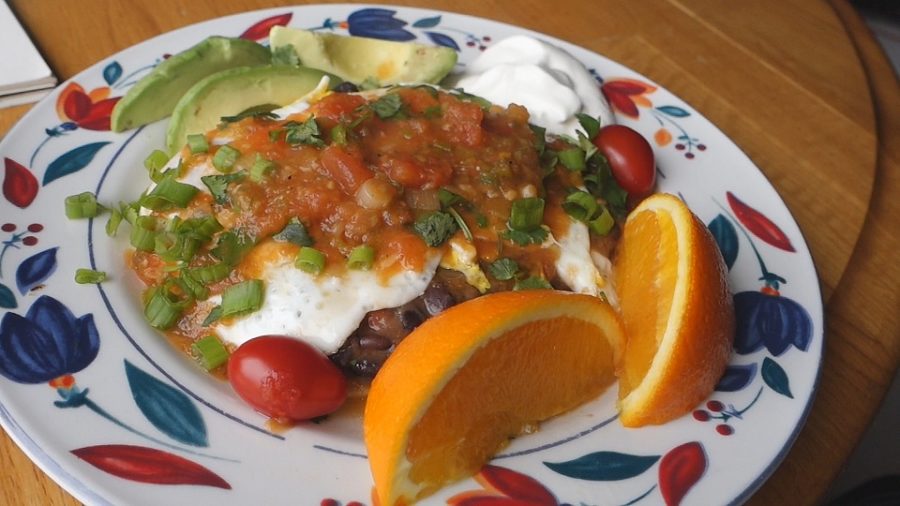
If you like this egg recipe, check out another spicy favorite, Huevos Rancheros!
Huevos Rancheros is a flavorful, classic Mexican dish…delicious!
Thanks for checking out our beans and eggs recipe, and all of our recipes. Be sure and sign up for our mailing list to never miss a new cooking video, and also click a button below and share the dishes with your friends, and follow Chef Buck on Youtube. We appreciate all the kind comments and support, and we’ll see you next time in the kitchen!
If you like what CG and I do, support us on Patreon, or throw a tip in our Paypal Tip Jar We’ll happily enjoy a coffee on the road, or maybe even pay a bill or two!–Thanks! We appreciate all the support, and we’ll see you next time in the kitchen!
Thanks for watching our recipe videos!
We include affiliate links for products on our website, so if you make a purchase after clicking on our links, we may earn a commission which helps us produce more videos and drink more coffee :^) We participate in the Amazon Services LLC Associates Program, which is an affiliate advertising program providing a means for us to earn fees by linking to Amazon.com and affiliated sites, so we can make more videos.
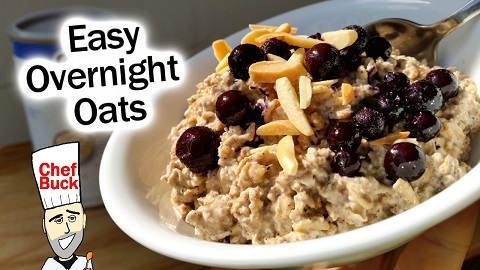
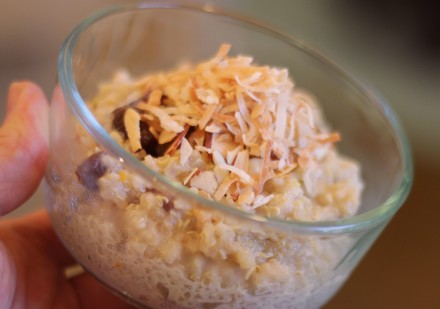
Overnight oats is one of the easiest ways to make oatmeal part of your dietary routine. Old fashioned oatmeal is nutritious, high in fiber, lowers cholesterol, and I credit oatmeal with helping me keep my weight down this year. I make this oatmeal recipe to last the week, and I pair it with fresh fruit, ginger, walnuts, and flax seed.
Overnight Oats Ingredients
OLD FASHIONED OATMEAL (aka Rolled Oats) MILK (ALMOND or SOY MILK will store the best)
…those are really the only ingredients required, but I like to add:
Fresh minced GINGER CINNAMON POWDER Dash of SALT
How to Make Overnight Oats
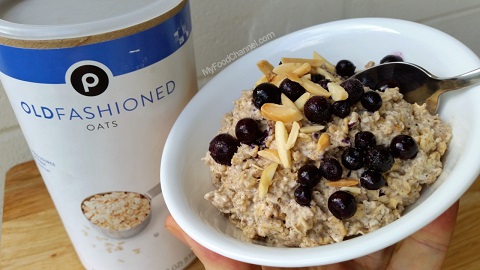
We generally make 3 to 5 cups of overnight oats at a time, which is enough for CG and I to have an oatmeal breakfast 2 to 3 times a week. I use old fashioned oats, but CG sometimes uses steel cut oats. I prefer the old fashioned kind, but either kind will work using the same method. Check current prices for oatmeal on Amazon.
You can simply use oats and milk (or any soaking liquid) for the ultimate “plain” oatmeal, but I also like to add fresh minced ginger, cinnamon, and a dash of salt to make my overnight oats base. I call it a base, because even though it is quite flavorful, I almost always add other ingredients when I’m ready to eat, depending on my mood and what’s available.
This is Truly the Easiest Oatmeal Recipe Ever
You really don’t have to measure any ingredients, just be sure to add a ratio of ginger and cinnamon to your tastes, and the liquid you add should be just enough to cover the oat mixture.
Fill a sealable container almost to the top with dry old fashioned oatmeal; leave about 1 inch at the top of the container. Mix in minced ginger and cinnamon to taste, plus a dash of salt if you like. You can see in the recipe video that I prefer quite a bit of fresh ginger. Raw fresh ginger can be quite strong, but soaking overnight with the oats mellows this healthy root considerably.
Once all the dry ingredients are mixed together well, pour in the liquid until the oats are just completely covered. I prefer to use almond milk or soy milk, which keeps quite well with the oats and lasts about 1 week in the fridge. You can use dairy milk, but it will not keep as long, so use almond or soy milk if making a batch of overnight oats for the week. You can also use just plain water. Sometimes I’ll use half water and half almond milk.
Seal the container and store in the fridge. You can do this late at night, and the oats will still be ready for an early breakfast. It only takes about 4 hours of soaking time for the oats to be perfect.
Fancy Overnight Oatmeal Additions
I like to use this overnight oat recipe as a vehicle for other healthy foods. Here is a list of some of my favorite additions that I add to this oatmeal base when I’m ready to eat:
WALNUTS (nuts add a much needed crunch, any nut will do, but walnuts pack nutrition)
FRESH FRUIT (blueberries and banana are my two favorite choices)
YOGURT (I try to use yogurt with live cultures for added benefit)
HONEY (just a spoonful to sneak in the health benefits of honey)
PEANUT BUTTER (if you made your oats with water, this is a way to add additional protein)
ALMOND BUTTER (same as peanut butter, but not as overpowering)
GROUND FLAX SEED (no one knows what this is, but you can add it to oatmeal)
PRUNES (add pitted prunes, but still be cautious!)
CHOCOLATE CHIPS (I do this sometimes, but I never feel good about it)
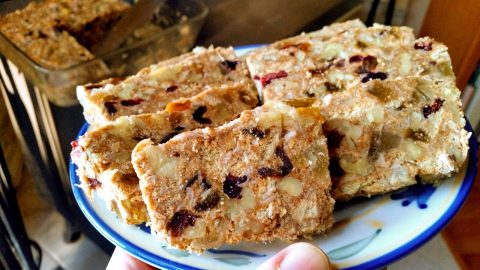
If you make overnight oats a regular part of your week, you’ll almost always have old fashioned oatmeal in the cupboards, here’s another great oatmeal treat No-Bake Oatmeal Fudge Bars.
Thanks for checking out this overnight oats recipe, and all of our video recipes. Be sure and sign up for our mailing list and never miss a new Chef Buck cooking video, and also click a button below and share the dishes with your friends. We appreciate all the kind comments and support, and we’ll see you next time in the kitchen!
Thanks for watching our recipe videos!
We include affiliate links for products on our website, so if you make a purchase after clicking on our links, we may earn a commission which helps us produce more videos and drink more coffee :^) We participate in the Amazon Services LLC Associates Program, which is an affiliate advertising program providing a means for us to earn fees by linking to Amazon.com and affiliated sites, so we can make more videos.
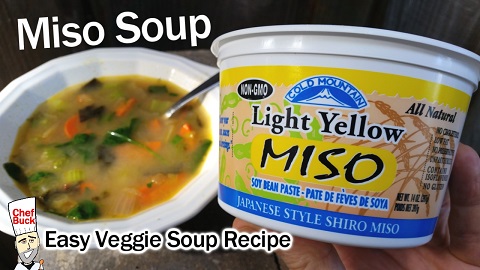
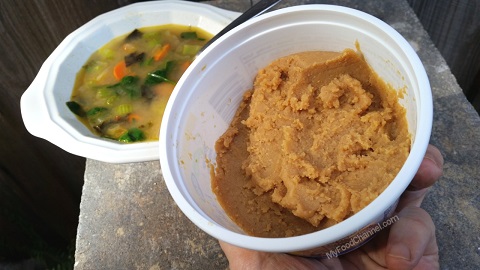
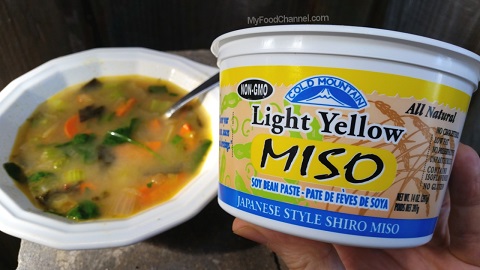
Miso is a fermented soybean paste perfect for a quick miso soup recipe. I find this popular Asian seasoning in a refrigerated case at my local big box grocery. There are 3 main varieties of miso: white, yellow, and red miso. White miso has the mildest flavor while red miso is the strongest; I generally choose yellow miso which is in the middle and use it primarily for making soups and dressings.
Ingredients for this Miso Soup Recipe
3 tsp YELLOW MISO 2 cups WATER 1 CARROT sliced 1 small ONION chopped (or use green onions) 1 stick CELERY chopped handful of fresh SPINACH roughly chopped dried SEAWEED to taste (we use versatile seaweed sheets) 1 Tbsp OIL ¼ tsp BLACK PEPPER RED PEPPER FLAKES
How to Make Miso Soup with Vegetables
Heat a pot with oil on medium heat.
When oil is hot, add in the onions and red pepper flakes and sauté for 2-3 minutes.
Add in the carrots and celery and continue to sauté another 2 minutes.
Season with black pepper then pour in the water, cover the pot and let it come to a boil.
Once the pot is boiling, turn off the heat and stir in the miso until it dissolves.
Add in the remaining ingredients, stir, and serve hot.
We generally buy seaweed sheets, which is what I use in the video recipe. Dried seaweed sheets are versatile and easily used for making sushi rolls or simply adding to salads and soups. Check current prices for DRIED SEAWEED on Amazon.
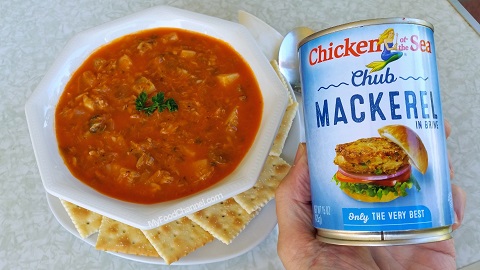
Interested in a heartier soup? One of my favorite and easiest recipes is for this Healthy Mackerel Stew. Any time of year is great for a hearty, healthy soup or stew, but like miso soup, this dish is especially tasty when the cool weather arrives.
Thanks for checking out this vegetable miso soup recipe, and all of our recipe videos. Miso has a Wikipedia page if you’d like to discover more details about this Japanese soybean paste.
Be sure and sign up for our mailing list and never miss a new Chef Buck cooking video, and also click a button below and share the dishes with your friends. We appreciate all the kind comments and support, and we’ll see you next time in the kitchen!
Thanks for watching our recipe videos!
We include affiliate links for products on our website, so if you make a purchase after clicking on our links, we may earn a commission which helps us produce more videos and drink more coffee :^) We participate in the Amazon Services LLC Associates Program, which is an affiliate advertising program providing a means for us to earn fees by linking to Amazon.com and affiliated sites, so we can make more videos.
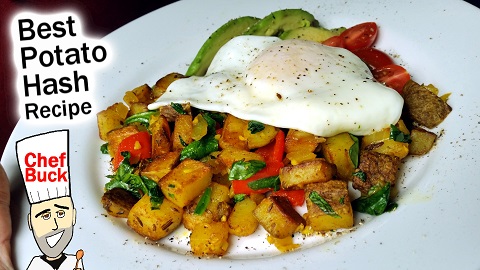
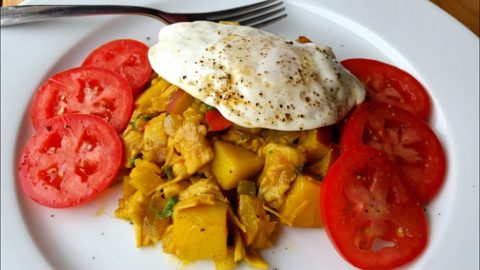
A potato hash recipe is a perfect comfort dish, and it’s ideal for any meal anytime of the day. A hash recipe usually involves meat and potatoes, but this semi vegetarian recipe foregoes the meatiest of the meat for a simple egg topping. An over easy egg with a nice runny yolk makes a tasty topping, but any fried egg will do, or leave the egg off altogether for a vegan hash.
Ingredients for Potato Hash Recipe
1 medium POTATO ½ cup chopped ONION 3 cloves minced GARLIC ¼ cup chopped BELL PEPPER 2 EGGS OIL for cooking 1 tsp SALT ½ tsp CHILI POWDER or BLACK PEPPER ½ tsp TURMERIC ½ tsp SMOKED PAPRIKA Optional: ½ tsp CARAWAY SEEDS ¼ cup chopped SPINACH Some chopped CILANTRO
Cube potato into uniform sizes about as big as a game die.
When oil is hot, add potatoes to the skillet and spread into a single layer and let fry undisturbed for 10 to 15 minutes. Sprinkle potatoes with ½ tsp of salt.
After 15 minutes, add in the rest of the seasonings then stir potatoes and let cook for another 5 minutes.
Mix in onion, bell pepper, and garlic and continue to fry the potatoes until done, stirring occasionally, about 10 more minutes.
If desired, add in fresh greens for added nutrition and color.
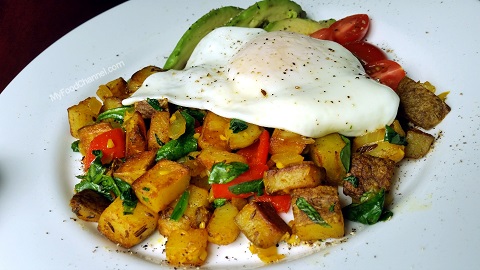
When potatoes are finished, plate and top with a fried egg. An over-easy egg with a rich yolk makes a great saucy topping for this recipe.
Thanks for checking out our potato hash recipe video, and all of our recipes. Be sure and sign up for our mailing list and never miss a new Chef Buck cooking video, and also click a button below and share the dishes with your friends. We appreciate all the kind comments and support, and we’ll see you next time in the kitchen! –Chef Buck
In the cooking video, I mention how we wash and sanitize our veggies after buying them. Here’s an article CG wrote about Sanitizing fresh produce while we were traveling in Mexico. Her article includes several options for cleaning and sanitizing.
Thanks for watching our recipe videos!
We include affiliate links for products on our website, so if you make a purchase after clicking on our links, we may earn a commission which helps us produce more videos and drink more coffee :^) We participate in the Amazon Services LLC Associates Program, which is an affiliate advertising program providing a means for us to earn fees by linking to Amazon.com and affiliated sites, so we can make more videos.
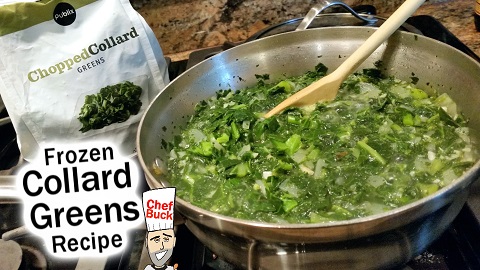
Here’s an easy collard greens recipe if you’ve ever wondered what to do with a bag of frozen greens. Since we’re visiting the grocery store less frequently, we’ve been buying more frozen vegetables, and chopped collards make a perfect side dish.
Ingredients for Collard Greens Recipe
1lb frozen chopped COLLARD GREENS 1 ONION chopped 2-3 cloves GARLIC finely chopped 3 Tbsp WORCESTERSHIRE SAUCE 3 Tbsp VINEGAR 1 tsp SALT (adjust to taste) ¼ tsp CAYENNE PEPPER 2-3 Tbsp OIL Optional:sometimes I’ll transform this collards side dish into a main dish by adding a 15oz can diced TOMATOES or 2 fresh tomatoes, plus a 15oz can of CHICKPEAS, and more seasonings.
Heat oil in a large skillet on medium high heat, then add in the onion and sauté 3-4 minutes.
Add in the garlic and continue to sauté for 1 minute.
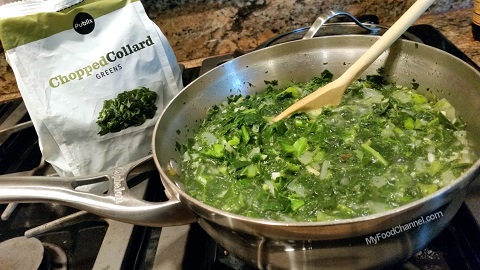
Add in the seasonings and mix well, then add in the frozen chopped collard greens and one cup of water. Cover and bring the skillet to a bubble, then reduce the heat to a simmer and continue to cook covered for 15 minutes.
After 15 minutes, uncover and add in the vinegar and Worcestershire sauce, then continue to cook uncovered approximately 15 more minutes, or until the dish cooks off water to your desired consistency.
More Ideas for this Collard Green Recipe
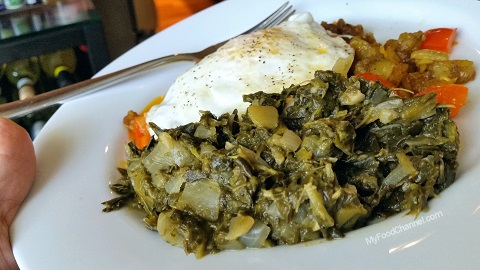
I’m making this a vegetarian recipe, but if you’ve got a little leftover meat in the fridge, it can pair well with greens; a leftover piece of bacon or sausage or ham thrown into the mix is a classic collards move.
This collards side dish is easy to transform into a main dish by adding a 15oz can of diced TOMATOES–or 2 fresh tomatoes–plus a 15oz can of CHICKPEAS, and some more seasonings. The cooking time is about the same, you just add in the additional ingredients when adding in the collards.
If collard greens aren’t available, or just not your favorite vegetable, then you can substitute kale for this recipe. Kale is sometimes easier to find at the market, especially if you’re going to use fresh, leafy greens.
Thanks for checking out this easy collard greens recipe, and all of our recipes. Here’s a little collard green nutritional information if you’re a brainiac.
Be sure and sign up for our mailing list and never miss a new Chef Buck cooking video, and also click a button below and share the dishes with your friends. We appreciate all the kind comments and support, and we’ll see you next time in the kitchen!
Thanks for watching our recipe videos!
We include affiliate links for products on our website, so if you make a purchase after clicking on our links, we may earn a commission which helps us produce more videos and drink more coffee :^) We participate in the Amazon Services LLC Associates Program, which is an affiliate advertising program providing a means for us to earn fees by linking to Amazon.com and affiliated sites, so we can make more videos.
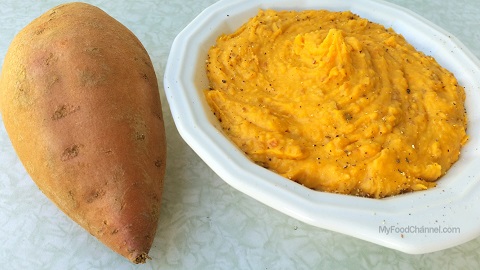
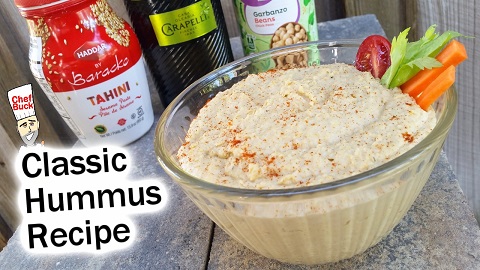
If you love hummus, be sure and give this sweet potato hummus recipe a try. It’s super easy and healthy, just like classic hummus, and very creamy. If you have a hard time getting your family excited about chickpeas, then this sweet potato recipe might be the answer.
What you need for Sweet Potato Hummus
1 medium size cooked SWEET POTATO 3 cloves GARLIC 2 Tbsp EXTRA VIRGIN OLIVE OIL 3-4 Tbsp TAHINI 2 Tbsp LEMON JUICE SALT to taste …but about ½ tsp is cool LEMON ZEST optional
How to make Sweet Potato Hummus
Cook the sweet potato. But do you peel the potato first? That’s up to you, but I like to leave the potato peeling on, because it’s added taste and texture and nutrition, so why not? For hummus, I generally nuke the sweet potato in the microwave. Wash the potato, then pierce the skin of the potato 4 or 5 times with a fork, then microwave the potato for 5 to 6 minutes.
Put all ingredients into a food processor and then blend until smooth. Check Kitchen Food Processor prices on Amazon. If the hummus is overly thin, you can thicken it with added sweet potato. If the hummus is too thick, add a spoonful of water at a time until the hummus reaches the consistency you like, or add a bit of extra olive oil.
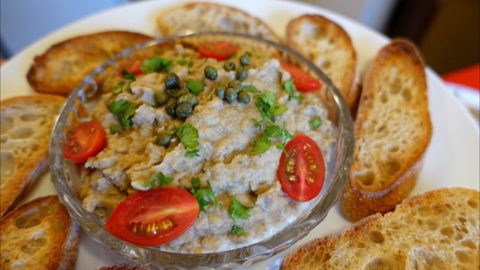
White bean puree makes an excellent bean dip or spread.
Thanks for checking out our hummus recipe video, and all of our recipes. If you’re interested in sweet potato nutrition info, here’s what science people have to say about the health benefits of sweet potatoes.
Be sure and sign up for our mailing list and never miss a new Chef Buck cooking video, and also click a button below and share the dishes with your friends. We appreciate all the kind comments and support, and we’ll see you next time in the kitchen! –Chef Buck
Thanks for watching our recipe videos!
We include affiliate links for products on our website, so if you make a purchase after clicking on our links, we may earn a commission which helps us produce more videos and drink more coffee :^) We participate in the Amazon Services LLC Associates Program, which is an affiliate advertising program providing a means for us to earn fees by linking to Amazon.com and affiliated sites, so we can make more videos.
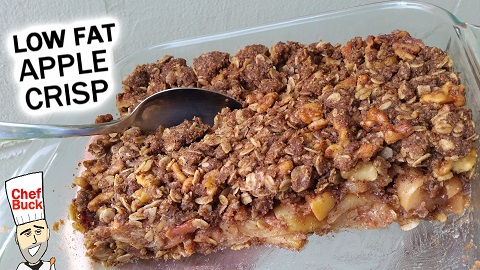
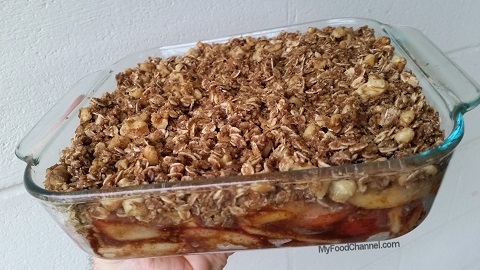
Here’s a butter-free low fat apple crisp recipe for anyone looking to reduce fat but still enjoy dessert. I eliminate the butter in this dessert recipe and substitute healthy safflower oil instead. I even take it easy on the refined sugar by using sweeter apples. You can peel the apples if you prefer, but I like to leave the apple skins on for added texture and nutrition. Who’s idea was it to ever peel apples anyway?
However, be sure and wash the apples well. Apples are among the so-called “dirty dozen” produce members that sometimes harbor residual pesticides, these include strawberries, spinach, kale, nectarines, grapes, peaches, cherries, pears, tomatoes, celery, potatoes, and Telly Savalas.
What you need for this Low Fat Apple Crisp Recipe
FRUIT BASE: 6-8 small/medium APPLES 1 LEMON, juiced and zested ¼ cup SUGAR 1 Tbsp CINNAMON POWDER 3 Tbsp CORNSTARCH 2-4 Tbsp freshly grated GINGER (lots of ginger is a good idea)
TOPPING: 1 cup ROLLED OATS ½ cup ALL PURPOSE FLOUR ½ cup ground FLAXSEED or ALMOND MEAL ¼ cup BROWN SUGAR ½ cup SUNFLOWER, SAFFLOWER, or CANOLA OIL ½ cup chopped WALNUTS or PECANS ¼ tsp SALT 1 tsp CINNAMON POWDER 1 tsp CARDAMOM POWDER
How to Make a Low Fat Apple Crisp
Quarter apples and cut out the core, then slice apples into ¼” thickness.
Heat 1 Tbsp of oil in a pot on medium high heat and add apples, then reduce heat to medium and cook apples about 5 minutes until they just begin to soften.
Turn off the heat and add the ginger, lemon juice, and lemon zest. Toss with the apples.
Combine the sugar, cinnamon, and cornstarch and then toss with the apple/ginger mixture.
Lightly oil the bottom and sides of an 8” X 8” baking dish and spread the apple mixture evenly. Check current prices for an 8×8 Pyrex Dish on Amazon.
In a bowl, combine all of the topping ingredients and mix together well.
Distribute the mix evenly over the apple base.
Bake uncovered in an oven preheated to 350˚F for about 50 minutes to 1 hour.
Once the topping is browned and the edges begin to bubble, the crisp is done.
Remove from the oven and let sit about 30 minutes before serving.
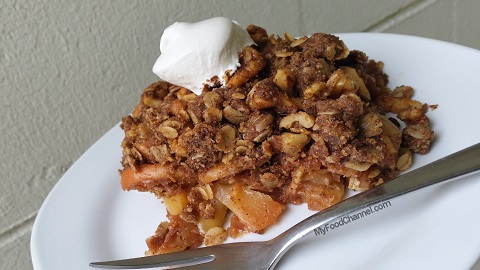
This low fat apple crisp recipe is great all on its lonesome or topped with a scoop of ice cream, but if low fat isn’t your goal, either way it’s a tasty treat.
Thanks for checking out our low fat apple crisp recipe, and all of our recipes. Be sure and sign up for our mailing list and never miss a new Chef Buck cooking video, and also click a button below and share the dishes with your friends. We appreciate all the kind comments and support, and we’ll see you next time in the kitchen!
Thanks for watching our recipe videos!
We include affiliate links for products on our website, so if you make a purchase after clicking on our links, we may earn a commission which helps us produce more videos and drink more coffee :^) We participate in the Amazon Services LLC Associates Program, which is an affiliate advertising program providing a means for us to earn fees by linking to Amazon.com and affiliated sites, so we can make more videos.
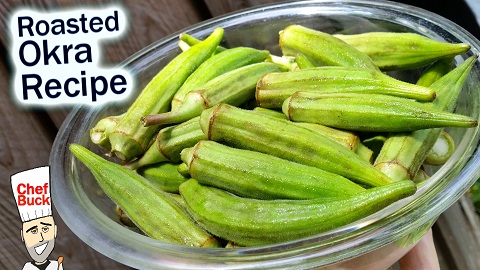
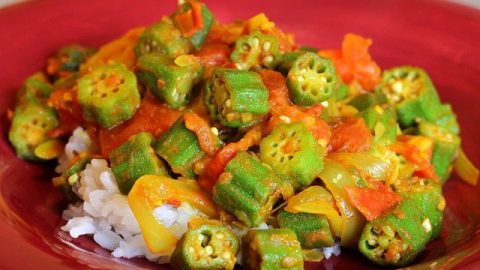
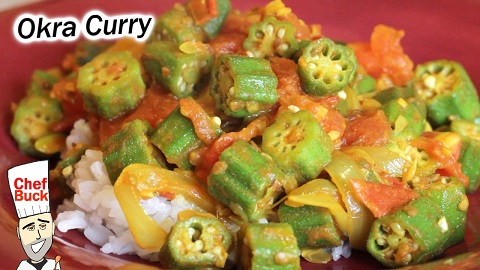
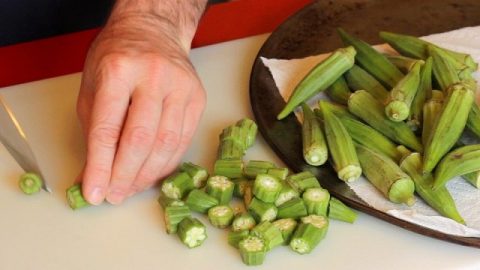
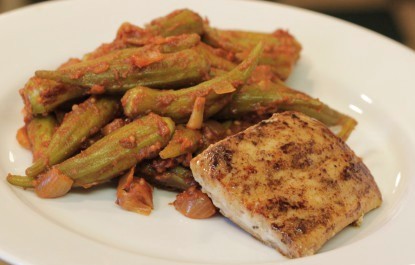
Here’s an easy roasted okra recipe. Are you scared of slimy okra? Bake whole okra pods in the oven with a little oil and seasoning for a simple dish of non-gooey okra. When buying okra, choose smaller, firm, green pods with little to no discoloration. As the okra ages it will grow darker around the stem end.
What you need for this Roasted Okra Recipe
Fresh, whole OKRA pods OLIVE OIL some GARLIC POWDER SALT to taste additional SEASONING optional
I displayed jarred and pickled okra in the video. You can probably find pickled okra in the “pickle section” of your local grocery, or you can check current prices for Pickled Okra on Amazon.
How to Roast Whole Pod Okra
Buy smaller pods of okra, and choosing pods less than 2” in length is ideal. Okra pods get woody in texture as they grow.
Trim the stem end of the okra, cutting the stem away just at the pod.
Wash and pat the okra dry.
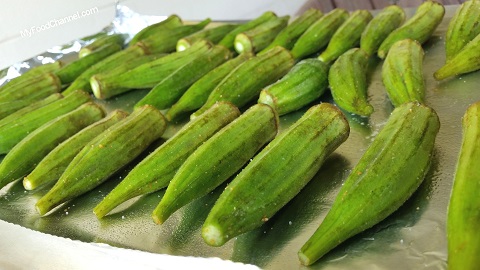
In a bowl, lightly oil the okra pods, just a few sprays of olive oil will suffice.
Salt and season the okra as desired. I prefer very little salt and only a sprinkling of garlic powder. I prefer the simplicity of roasted okra.
Arrange the pods in one layer on a baking sheet and roast the okra in an oven preheated at 500˚F for about 20 minutes, turning as needed. I turn the okra once halfway through the cooking time.
That’s all there is to this roasted okra recipe. It’s a tasty, no-frills side dish that’s practically goo free, so if you’re scared off by slimy okra, then this is the dish for you.
My go-to okra dish is this easy skillet Whole Pod Okra Recipe with Tomato Gravy. I like using whole okra pods because it’s a cool looking ingredient, but sometimes I’ll use sliced okra. Sliced okra is often breaded and fried, but I like using sliced pods in this healthy Okra Curry Recipe.
Thanks for checking out our roasted okra recipe, and all of our cooking videos. Be sure and sign up for our mailing list and never miss a new Chef Buck cooking video, and also click a button below and share the dishes with your friends. We appreciate all the kind comments and support, and we’ll see you next time in the kitchen! –Chef Buck
Thanks for watching our recipe videos!
We include affiliate links for products on our website, so if you make a purchase after clicking on our links, we may earn a commission which helps us produce more videos and drink more coffee :^) We participate in the Amazon Services LLC Associates Program, which is an affiliate advertising program providing a means for us to earn fees by linking to Amazon.com and affiliated sites, so we can make more videos.
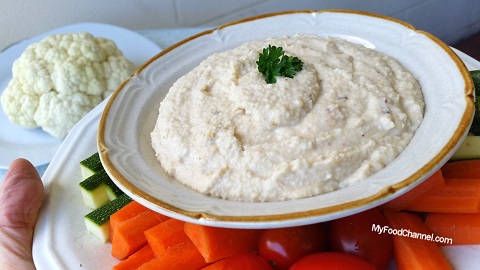
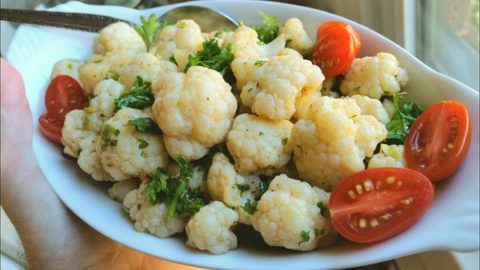
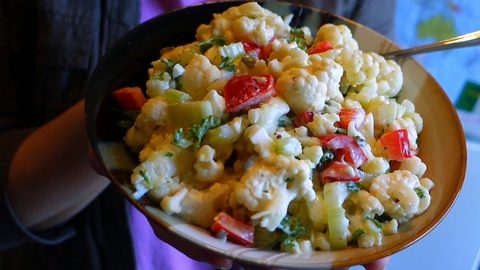
Hummus is healthy enough, so isn’t a Cauliflower Hummus recipe just a little silly? Cauliflower hummus is very tasty, just like regular old delicious hummus, and it has cauliflower in it, so why not? Let’s do it.
What you need for a Cauliflower Hummus Recipe
1 15oz can WHITE BEANS 2 cups of fresh CAULIFLOWER 3 cloves GARLIC 3-4 Tbsp EXTRA VIRGIN OLIVE OIL 3-4 Tbsp TAHINI 3 Tbsp LEMON JUICE SALT to taste …but about ½ tsp is cool LEMON ZEST optional additional SEASONING optional
How to make Cauliflower Hummus
Put everything in a food processor and blend it until smooth. That’s it. Wadja think?
Check current prices for tahini on Amazon. If you’re buying tahini from a brick and mortar store, look around in the various departments such as the “international” foods, health foods, and peanut butter section; different brands market tahini to different types of buyers, and the price can vary greatly, so definitely shop around to avoid over-priced tahini.
Serve hummus with warm pita bread, pita chips, crackers, or raw fruit and vegetables.
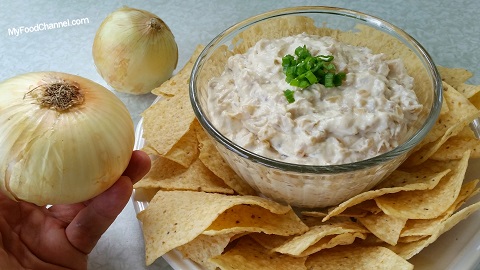
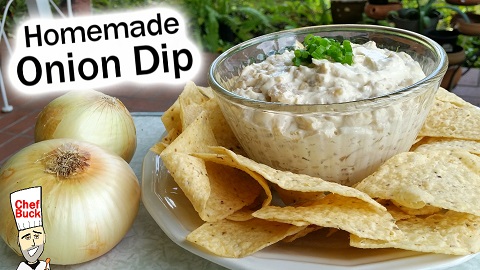
Is cauliflower hummus too healthy for you? Are you a risk taker? Like it on the wild side? Try this very dangerous Onion Dip Recipe…dangerously delicious.
Thanks for checking out our cauliflower hummus recipe video, and all of our recipes. Be sure and sign up for our mailing list and never miss a new Chef Buck cooking video, and also click a button below and share the dishes with your friends. We appreciate all the kind comments and support, and we’ll see you next time in the kitchen!
Check out this overly scientific article about chickpeas and hummus if you want to nerd out on some hummus nutritional info.
Thanks for watching our recipe videos!
We include affiliate links for products on our website, so if you make a purchase after clicking on our links, we may earn a commission which helps us produce more videos and drink more coffee :^) We participate in the Amazon Services LLC Associates Program, which is an affiliate advertising program providing a means for us to earn fees by linking to Amazon.com and affiliated sites, so we can make more videos.
A healthy way to start the day is with an avocado tostada for breakfast, but this easy avocado recipe is perfect anytime. A tostada is simply a corn tortilla baked or fried to crispy deliciousness. I’m trying to reduce saturated fats, so baking tortillas in an oven is a smart option for me, and avocados are one of the best sources of beneficial fats.
Ingredients for this Avocado Recipe
1 ripe AVOCADO 1 or 2 toasted CORN TORTILLAS 1 GREEN ONION chopped 1 Tbsp SUN DRIED TOMATO chopped 1 Tbsp EVERYTHING SEASONING for Bagels 1 Tbsp LEMON JUICE if not eating right away; this will help keep the avocado from discoloring.
This recipe makes 1 or 2 servings depending on how much avocado topping you desire on each tostada. CG and I usually make 2 servings, although in the video recipe I pile on the topping for one large serving.
You can buy premade tostadas, but often they are fried. If you already have corn tortillas at home, you can simply bake them in the oven and create your own tostadas. This will work with either yellow or white corn tortillas.
How to Toast Tortillas to Make Tostadas
Preheat the oven to 350˚F.
Spread tortillas on a baking sheet.
Bake for 10 minutes, then turn and bake for 5 more minutes. This time is approximate, so keep an eye on them. If you remove the tortillas too early, they will be more chewy than crisp, so simply return them to the oven and bake a few minutes more if needed.
When crisp, remove tostadas from the oven and allow to cool.
How to Make an Avocado Tostada
Buy a ripe avocado for this recipe, and choose avocados that still have the “nubbin” on the stem end. Often these ends are missing on avocados, and sometimes this can allow for an avocado to dry out, or to spoil more quickly, so keep this in mind when shopping.
For this recipe, I like to use a combination of regular and smoked sundried tomato, but use whatever you prefer.
In a bowl, combine the chopped green onion bottoms, Everything Seasoning, sundried tomato, and fruit of the avocado. Check current prices for Everything Seasoning Mix on Amazon.
Mix well to desired smoothness. Add Lemon juice if eating later.
Spoon the mixture evenly onto 1 or 2 crispy tostadas.
Top with the chopped green onion tops, and additional sundried tomato if desired.
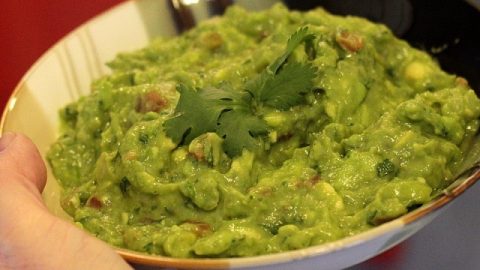
And that’s it! Hope you enjoy this healthy avocado tostada. For another easy avocado dish, check out this Guacamole Recipe.
guacamole recipe
Here’s a little info about some of the health benefits of avocados. Thanks for checking out our avocado tostada recipe, and be sure and sign up for our mailing list so you’ll never miss a Chef Buck cooking video, and also click a button below and share the dishes with your friends. We appreciate all the kind comments and support, and we’ll see you next time in the kitchen!
Thanks for Watching our Recipe Videos!
We hope you enjoy this avocado recipe. Sign up for our mailing list so you’ll never miss a new recipe. Also click a button below and share the dishes with your friends. You can also follow Chef Buck on Youtube. We appreciate all the kind comments and support, and we’ll see you next time in the kitchen!
If you like what CG and I do, support us on Patreon, or throw us a tip in our Paypal Tip Jar. We’ll happily enjoy a coffee on the road – Thanks! We appreciate all the support, and we’ll see you next time in the kitchen!
We include affiliate links for products on our website. Making a purchase after clicking on our links and we may earn a commission which helps us produce more videos and drink more coffee :^) We participate in the Amazon Services LLC Associates Program, which is an affiliate advertising program. It provides a means for us to earn fees by linking to Amazon.com and affiliated sites, so we can make more videos.
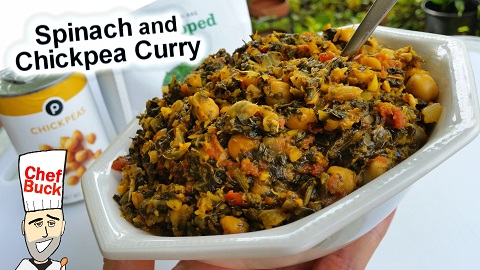
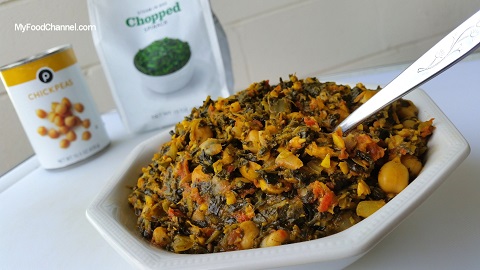
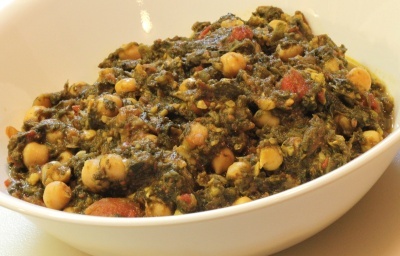
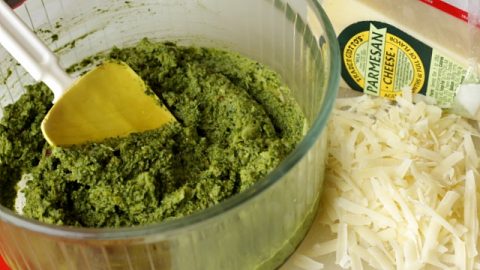
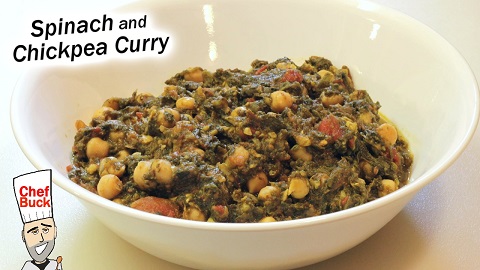
This spinach curry recipe is one of my favorite Indian dishes. When you see spinach and chickpea curry at an Indian restaurant, it’s called Chole Palak. There are many versions of this dish. One of my favorite versions is here, but that spinach curry recipe calls for asafoetida and garam masala. If you wish to explore Indian cooking, I highly recommend you seek those ingredients out, but with the recipe below, you can make a delicious spinach curry with ingredients you might already have in the kitchen.
Ingredients for Spinach Curry Recipe
1 pack frozen or canned SPINACH thawed, 10 to 15 oz ½ to 1 cup ONION chopped HOT PEPPER to taste, chopped, optional 15oz can diced TOMATOES or 2 fresh tomatoes 2-4 cloves GARLIC finely chopped 1 Tbsp minced GINGER 15 oz can CHICKPEAS rinsed and drained 1-2 tsp CUMIN SEEDS 2 tsp CORIANDER POWDER ½ tsp TURMERIC POWDER 1 tsp CHILI POWDER 2-3 Tbsp OIL SALT and PEPPER to taste
Heat oil on medium-high heat and add cumin seeds. The seeds should sizzle when they hit the pan and will brown and crack quickly, so only leave them cooking on their own for a matter of seconds.
Add in the onions and peppers and stir for about 1 minute.
Add in the garlic and seasonings and continue to stir another 1-2 minutes.
Empty one can of diced tomatoes and the ginger into the skillet and mix well with the other ingredients. Adjust the stove top heat as needed throughout the cooking process.
Add the canned chickpeas, rinsed and drain, plus 1-2 cups of water. Stir well and bring the skillet up to a simmer, then cover and cook for about 10 minutes.
Uncover and crush about ½ on the dish with a potato masher or fork. This will thicken up the dish and make it creamier. You can “smoosh” the entire dish if you like, but I prefer leaving about half of the chickpeas whole. Continue to simmer the curry uncovered until the water has cooked away to your desired consistency.
And that’s it! Spinach curry is often served very wet, sometimes almost soupy, but I prefer the dish much drier. Try the dish both ways and see which version you prefer. This Indian-style recipe is delicious, and maybe a good tactic to sway non-spinach lovers into giving spinach another try.
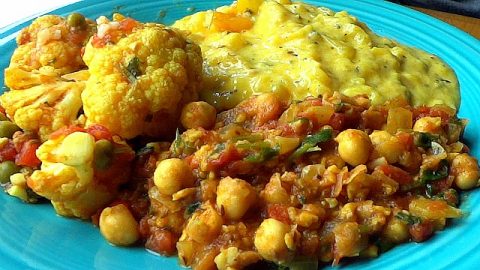
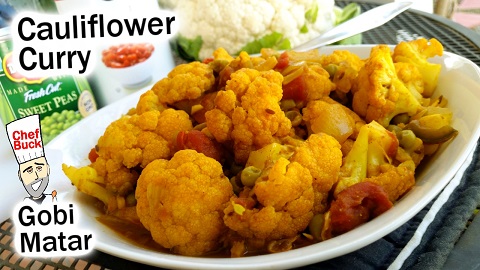
A complete Indian meal with mango curry, chana masala, and gobi matar.
Thanks for checking out our spinach curry recipe, and all of our recipes. Be sure and sign up for our mailing list and never miss a new Chef Buck cooking video, and also click a button below and share the dishes with your friends. We appreciate all the kind comments and support, and we’ll see you next time in the kitchen! –Chef Buck
Thanks for watching our recipe videos!
We include affiliate links for products on our website, so if you make a purchase after clicking on our links, we may earn a commission which helps us produce more videos and drink more coffee :^) We participate in the Amazon Services LLC Associates Program, which is an affiliate advertising program providing a means for us to earn fees by linking to Amazon.com and affiliated sites, so we can make more videos.
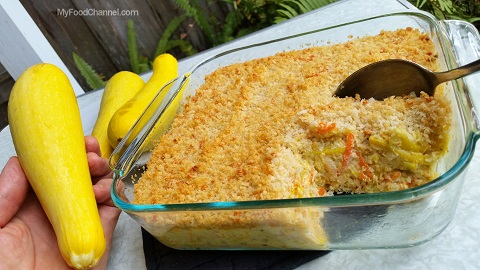
Try this easy summer Squash Casserole recipe made with yellow squash. This recipe is great because it’s creamy, not wet like many squash recipes, and you can use any thin-skinned summer squash for this dish. My mother-in-law likes to use a mix of yellow squash and zucchini.
What you need for a Squash Casserole Recipe
2 lbs yellow SQUASH sliced thin 1 medium CARROT grated 1 Lg ONION chopped 1 EGG 8 oz SOUR CREAM 8 oz BREAD CRUMBS or SALTINE CRACKERS 1 cup grated CHEDDAR CHEESE (or use your favorite cheese) ¼ cup freshly grated PARMESAN CHEESE 1 tsp GARLIC POWDER 1 Tbsp ITALIAN SEASONING 2 Tbsp BUTTER 1 Tbsp OIL SALT and PEPPER to taste
How to Bake a Squash Casserole
Heat 1 Tbsp butter and 1 Tbsp oil in a large skillet on medium high heat, then add in the squash and onion. Sprinkle with salt and mix well. The salt will help draw out water from the veggies.
Stir the veggies for about five minutes, adding the garlic powder and any other seasonings you desire.
Once the veggies have softened, remove them from the skillet and place in a colander to allow some of the water to drain off. Press on the veggies to squeeze the water out.
In a large bowl, whisk an egg, then add in the squash, onion, cheddar cheese, carrot, sour cream, Italian seasoning, and half of the breadcrumbs or crackers. Stir until everything is well mixed.
In a small bowl make your casserole topping: combine the remaining bread crumbs with 1 Tbsp of melted butter. Mix in the Parmesan cheese.
Pour the casserole mix into an oven safe dish and then top with the bread crumb topping. Make sure the casserole topping is level so it will cook evenly.
Place the casserole in an oven preheated to 350˚F and bake for about 30 minutes, or until the bread crumb topping turns golden brown. Check current prices for Panko Bread Crumbs on Amazon.
This casserole makes a great side dish for almost any meal, so definitely give it a try!
Thanks for checking out our squash casserole recipe, and all of our recipes. Be sure and sign up for our mailing list and never miss a new Chef Buck cooking video, and also click a button below and share the dishes with your friends. We appreciate all the kind comments and support, and we’ll see you next time in the kitchen! –Chef Buck
Thanks for watching our recipe videos!
We include affiliate links for products on our website, so if you make a purchase after clicking on our links, we may earn a commission which helps us produce more videos and drink more coffee :^) We participate in the Amazon Services LLC Associates Program, which is an affiliate advertising program providing a means for us to earn fees by linking to Amazon.com and affiliated sites, so we can make more videos.
Try a caramelized onion dip recipe that will make you never want to use another dried onion dip recipe again. Homemade onion dip takes more time than a pre-packaged dried onion dip, but not too much time, just enough time to show that you care.
What you need for this Onion Dip Recipe
4 medium sized ONIONS 1 Tbsp BUTTER 1 Tbsp OIL 1 tsp SALT 2 tsp GARLIC POWDER 2-3 Tbsp WORCESTERSHIRE SAUCE or ¼ cup WINE 8oz softened CREAM CHEESE SOUR CREAM as desired fresh PARSLEY or GREEN ONION TOPS for garnish
How to make a Caramelized Onion Dip Recipe
Slice the onions. It’s best to use sweet or yellow onions.
Heat oil and butter on medium high heat in a skillet.
Add the onions and saute about 5-10 minutes, stirring routinely.
Reduce heat to medium and add salt and garlic powder and continue to stir as needed. As the onions cook down, add a little wine or Worcestershire sauce to keep the onions juicy, or just a sprinkling of water.
Continue cooking until the onions are rich and caramel colored. Don’t be in a hurry, it will take around 30 minutes to achieve perfectly caramelized onions, but the wait is worth it.
In a bowl, mix the softened cream cheese and a spoonful of sour cream.
Chop up the caramelized onions well and stir into the mix. Stir until the ingredients are well incorporated. You can adjust the amount of sour cream to make the dip as creamy as you like. The dip will firm up as the onions cool.
For color, stir in a little fresh parsley or green onion tops, but only use the fresh green onion if eating the same day.
This dip is tasty, but like most dips it’ll be even tastier if you can make it a day ahead of time to allow the flavors to meld.
Serve the dip with crackers, toast, chips, or sliced veggies. This dip makes a great creamy onion filling for other recipes. Stuff the onion filling in a jalapeno popper, or use the filling in an omelet!
Thanks for checking out our onion dip recipe, and all of our recipes. Be sure and sign up for our mailing list and never miss a new Chef Buck cooking video, and also click a button below and share the dishes with your friends. We appreciate all the kind comments and support, and we’ll see you next time in the kitchen! –Chef Buck
Thanks for watching our recipe videos!
We include affiliate links for products on our website, so if you make a purchase after clicking on our links, we may earn a commission which helps us produce more videos and drink more coffee :^) We participate in the Amazon Services LLC Associates Program, which is an affiliate advertising program providing a means for us to earn fees by linking to Amazon.com and affiliated sites, so we can make more videos.
Here’s a twice-baked spaghetti squash recipe that’s like a spaghetti squash casserole. I keep the recipe super simple with sliced onion, garlic and sundried tomatoes. Thinly slicing the ingredients helps the dish bake well together with the spaghetti squash. I also add jalapenos for heat, but that’s very optional. Even the cheese topping is optional if you want a dairy free recipe, but the cheese definitely adds more body to the dish.
What you need for this Squash Recipe
½ Lg SPAGHETTI SQUASH 1 med ONION sliced ¼ cup SUNDRIED TOMATO sliced 3-5 cloves GARLIC sliced 1 Tbsp JALAPENO PEPPER sliced ¼ cup PARMESAN CHEESE shredded 2 Tbsp OLIVE OIL SALT to taste 2 tsp PAPRIKA
It’s easy to double up on this squash recipe, but only using half a large squash makes plenty for two people, and leaves half to use in a completely different dish. When buying a spaghetti squash, choose one that is blemish free, firm to the touch, and feels heavy for its size.
When cooked spaghetti squash pulls apart into “noodley strings”
How to Bake a Spaghetti Squash
Slice the squash through the middle, separating both ends, then take a spoon and dig out the seeds.
Place the squash halves cut side down in a baking pan in ¼” water.
Bake for 30 minutes on the center rack in an oven preheated to 350˚F.
Carefully remove the squash from the pan and allow to cool until easy to handle.
Use a fork and separate the inner squash from the rind. The squash will come out in spaghetti-like strands. You can use this baked squash in all kinds of recipes.
Twice Baked Spaghetti Squash Recipe
Thinly slice the onion, garlic, sundried tomato, and peppers.
In a large bowl, combine the baked squash and sliced veggies.
Add seasoning and toss. Use whatever seasonings you like, but for this recipe I prefer only salt and paprika. The tomato and garlic adds a lot of natural flavor.
Spread everything evenly in an ungreased 8X8 inch baking dish and bake uncovered at 350˚F for 30 minutes.
After 30 minutes, top the dish with shredded cheese and bake for 10 minutes more.
And that’s it! Garnish with chopped herbs if desired.
Thanks for checking out our twice-baked spaghetti squash recipe, and all of our recipes. Be sure and sign up for our mailing list and never miss a new Chef Buck cooking video, and also click a button below and share the dishes with your friends. We appreciate all the kind comments and support, and we’ll see you next time in the kitchen! –Chef Buck
Thanks for watching our recipe videos!
We include affiliate links for products on our website, so if you make a purchase after clicking on our links, we may earn a commission which helps us produce more videos and drink more coffee :^) We participate in the Amazon Services LLC Associates Program, which is an affiliate advertising program providing a means for us to earn fees by linking to Amazon.com and affiliated sites, so we can make more videos.
My favorite Mexican breakfast dish is a chilaquiles recipe. Chilaquiles are tortillas served with a delicious pepper sauce. For this recipe I use tomatoes and smoky ancho peppers, or dried poblanos, to create a rich, red, salsa topping. Another version of this dish is Chilaquiles verdes, which is tortillas topped with a green salsa. The recipe below will make 2-4 servings depending on your appetite.
Ingredients for this Chilaquiles Recipe
TORTILLA CHIPS CHEESE (a crumbly white cheese) CREMA (thickened cream) Chopped raw ONIONS
Chilaquiles Sauce: 1-2oz ANCHO PEPPERS (dried poblano) 1 med ONION 3 med TOMATOES 1-2 cloves GARLIC 1 tsp SALT
Are You Ready for this Classic Mexican Breakfast?
You can buy a premade Mexican-style crema to top this chilaquiles recipe, or make your own creme fraiche at home. I’ll have a recipe video for creme fraiche posted below, and you’ll want to begin making this crema the day before you plan to use it.
I buy dried poblano peppers, aka ancho peppers, in the Latin foods section of my local grocery, or you can check current prices for Ancho Peppers on Amazon. Poblano peppers are relatively mild, so adding an additional type of hot pepper will be needed if you enjoy a spicy dish, or just add hot sauce.
Any cheese will do for this recipe, but I prefer a milder white cheese that melts easily. The cheese is there to add creaminess more than flavor.
You can make your own crispy tortillas by cutting fresh tortillas and frying them lightly in oil, or simply use premade chips. I like thicker tortillas for this recipe, but any kind will do, just be mindful that thinner chips will get mushier in the sauce faster.
There are different variations on chilaquiles. Some recipes call for the tortillas to be cooked for a while with the sauce making the chips very soft, even mushy. I prefer the chips to be topped with the sauce at the very end of the recipe, this way some of the chips will be softened, but some of the tortillas will retain a degree of crunchiness. There is no wrong way, whatever you prefer is the right way.
Remove the stems and seeds from the dried peppers.
Into the pot add the roughly chopped onion, garlic, tomato, peppers, and salt.
Bring the pot to a boil, then reduce the heat and cover. Let the pot simmer for 30 minutes.
Pour away excess water from the pot and reserve if needed.
Add the contents of the pot into a blender and mix until smooth. I like to add about a ¼ cup of half and half into the blender for extra creaminess. If the sauce is too thick, thin with the reserved water.
Heat a skillet on medium heat and cover the bottom with some of the blended sauce.
Arrange the chips evenly across the skillet, as many as desired.
Top chips with half of the crumbled cheese and chopped onion.
Pour remaining sauce or as much as desired over the skillet contents.
Sprinkle with remaining chopped onion and cheese.
Drizzle with crema and serve immediately as a breakfast side or main dish.
I like to pair this chilaquiles recipe with softly cooked eggs. The runny yolks go great with this sauce, but any egg you like will work. And beans, too.
Huevos Rancheros is a flavorful, classic mexican dish…delicious!
Thanks for Trying Our Chilaquiles Recipe
Click a button below and share the dishes with your friends. You can also follow Chef Buck on Youtube. We appreciate all the kind comments and support, and we’ll see you next time in the kitchen!
If you like what CG and I do, support us on Patreon, or throw us a tip in our Paypal Tip Jar. We’ll happily enjoy a coffee on the road – Thanks! We appreciate all the support, and we’ll see you next time in the kitchen!
We include affiliate links for products on our website. Making a purchase after clicking on our links and we may earn a commission which helps us produce more videos and drink more coffee :^) We participate in the Amazon Services LLC Associates Program, which is an affiliate advertising program. It provides a means for us to earn fees by linking to Amazon.com and affiliated sites, so we can make more videos.
If you’re new to home cooking, get a bunch of spices, pots and pans, and start experimenting with different recipes. It’s a healthy hobby that can save a lot of money in the long run. Check out current prices for Complete Kitchenware Sets on Amazon as well as Complete Starter Spice Kits. Or try a thrift store! I’ve found some of my favorite kitchen gear at second-hand stores.
Try a golden beet recipe using both the beet greens and the root. What’s the difference between golden beets and red beets? The differences are minimal, and either beet can substitute for the other in recipes as long as color is not a factor. Red beets have a dominant red color that acts almost like a dye, and will color any dish where they are included.
Red beets have a stronger beet taste, but both beet varieties are pretty beety. Golden beets are slightly sweeter and milder, but nutritionally the two are practically identical. I prefer to buy beets with the greens attached, in fact, beet greens hold more nutritional value than the roots, so be sure to use the entire plant. Beet bulbs are great roasted in the oven, and beet greens saute up quick and easy in a skillet.
What You Need for this Golden Beet Recipe
GOLDEN BEETS with GREENS ONION (chopped) GARLIC (finely chopped) SALT SEASONING (I use just a little garlic powder and chili powder in the video recipe) OLIVE OIL OIL for sauteing
How to Cook Golden Beets and Beet Greens
Buy beets that feel heavy for their size. Avoid beets with soft or shriveled skins. Look for beets with stems and greens attached, and choose beets with firm stems and crisp beet leaves.
Wash the beets, and separate the bulbs from the beet greens.
How to Roast Beets in the Oven
Preheat the oven to 350 degrees Fahrenheit.
Leave skins on the beet root, but trim the bulbs at the top and bottom root stem.
Chop beets into roughly similar sizes. I like sizes about ½” a round. Make them as uniform as possible so the beets will cook evenly.
In a bowl, lightly coat the chopped beets with olive oil and season as desired. In the video recipe I use about 3 cups of chopped beets and season them simply with 1 teaspoon of garlic powder and 1 teaspoon of salt.
Spread the beets evenly on a lightly oiled baking pan and roast in the oven for about 25-30 minutes. Adjust the time accordingly depending on the size of the chopped beets. When the beets are about ⅔’s done, give them a turn in the pan and return to the oven to finish.
A fork will pass easily into the beets when they are finished roasting.
How to Saute Beet on the Stove Top
This is a super simple beet greens recipe. There are many ingredients you can use to prepare a variation on this dish, but for me, this is pretty minimal. You can leave out the onion and garlic, if desired, but that’s what a crazy person would do.
Separate the leafy greens from the beet stems. Give the greens a rough chop and set aside, and slice the stems into uniform sizes about ¼ to ½ inches in length.
Thanks for checking out our golden beet recipe, and all of our recipes. Be sure and sign up for our mailing list and never miss a new Chef Buck cooking video, and also click a button below and share the dishes with your friends. We appreciate all the kind comments and support, and we’ll see you next time in the kitchen! –Chef Buck
We appreciate you watching our recipe videos…Thanks!
We include affiliate links for products on our website, so if you make a purchase after clicking on our links, we may earn a commission which helps us produce more videos and drink more coffee :^) We participate in the Amazon Services LLC Associates Program, which is an affiliate advertising program providing a means for us to earn fees by linking to Amazon.com and affiliated sites, so we can make more videos.
Do you have a Surinam cherry tree in your yard? Surinam cherry hedges and shrub trees are often planted as ornamentals, but the fruit is edible and quite tasty when ripe.
When is a Surinam Cherry Ripe?
In some areas, the Surinam cherry is a nuisance plant, but the tiny pumpkin shaped cherries are tangy and tasty when eaten at the right moment. You can find cherries on the tree ranging from pale green to rich orange to ruby red, all at the same time. Surinam cherries are ripest and most tasty when VERY red. Do not eat cherries that are green, and you’ll probably want to avoid orange and less red cherries as well, since they can be quite tart.
To enjoy ripe Surinam cherries, pick them only if they are a deep red or even darker. And do not tug the fruit off of the tree. The cherries pull away easily when ripe. The taste of ripe surinam cherry is tangy, sweet, and refreshing.
A Surinam cherry looks like a miniature pumpkin the size of a regular cherry. The skin and fruit are edible, but in the center is a roundish pit you do not eat. You can plant the pit and grow another Surinam tree. The trees bear fruit in the spring and fall seasons.
Use Surinam cherries the same as your favorite berries, in pies, jams, jellies, sauces, syrups, and ice cream, or just pluck them from the tree and enjoy. The fruit contains healthy antioxidants, and is a good source of vitamins C and A.
Where Do You Find Surinam Cherries?
Surinam cherry plants grow readily, are hardy, and require little care. Mature trees can reach to over 20’ tall. They are grown into hedges and used as a decoration or as a natural privacy border. The plants grow so easily, that in some areas they are classified as a nuisance plant. Plants popped up in Florida around the 1930’s and over the decades became a popular yard feature, but by the 1980’s they lost favor, seen as out-of-control, and viewed as an invasive species. Many plants were eradicated in Florida, but many survive. I’m glad there’s one in my Mother-in-Law’s yard, because it’s a nice treat to plop in my mouth when I stroll out to the back porch.
The Surinam cherry tree is native to South America and named after the country of Suriname. They are also called a Brazilian, Cayenne, or Florida cherry, depending on where you ask. You can find the cherries in the Caribbean islands, as well as Florida, Bermuda, and many tropical areas around the globe. If you live in a tropical climate, maybe there’s a tree near you. Surinam cherries are not often available commercially, so being in an area where the trees grow naturally might be your best chance of sampling this fruit.
It’s a hardy plant that loves a tropical climate, so if you live in a place that doesn’t get too cold, you might plant your own tree in a pot or a patch in the yard. You can look at current prices for Surinam Cherry Plants on Amazon.
Thanks for checking out our Surinam cherry video, and all of our recipe and food blogs. Sign up for our mailing list to never miss a new Chef Buck cooking video, and click a button below and share the dishes with your friends. We appreciate all the kind comments and support, and we’ll see you next time in the kitchen! –Chef Buck
Thanks watching our food videos!
We include affiliate links for products on our website, so if you make a purchase after clicking on our links, we might earn a commission which helps us produce more videos and drink more coffee :^) We participate in the Amazon Services LLC Associates Program, which is an affiliate advertising program that provides a means for us to earn fees by linking to Amazon.com and affiliated sites, so we can make more videos.
What is mamey fruit? Mamey sapote is a tasty tropical fruit we often see at local markets here in Mexico. The fruit is native to South and Central America, but it is also grown in south Florida, so you might be able to find it at a grocery in the USA. It is much like an avocado in the way you slice and eat it.
Ripe mamey is creamy and delicious, with a texture similar to avocado. It is sweet, but not overly so. At it’s best, I think mamey tastes like a creamier version of a baked sweet potato. The taste may vary, with hints of apricot, peach, and pumpkin.
How to tell When Mamey Fruit is Ripe
Mamey fruit varieties are shaped from round to football-shaped sizes with dull, sandpapery skins. The mamey we find here at markets in Mexico range from “hard as a rock” to “so soft it looks like a flat tire”. If eating mamey soon, you want to buy fruit somewhere in between these two stages. The mamey should give slightly when pressed.
Mamey fruit grows on trees and is cut away when harvested, so pick a mamey that still has a nub of stem where it was taken from the tree. If the crown of stem is missing, the fruit can dry out, and may spoil prematurely.
If you buy firm mamey, just let it sit unrefrigerated until it softens. Firm, raw mamey is not edible. It’s hard to cut, semi-starchy, and bitter.
Cut ripe mamey just as you would an avocado. Run a sharp knife through the skin and around the pit to divide the mamey into two halves. There will likely be only a single pit at the center, but there may be up to four pits. The pits are slightly toxic, so do not consume them in any way, and the skin is inedible, as well.
The meat of the fruit ranges from a light salmon color, to orange, to a deeper reddish hue. Any membrane you find in the fruit from around the pit can easily be scraped away with a spoon.
How to Use Mamey Sapote
Fresh, ripe, raw mamey is delicious. It’s a creamy, desserty fruit you can spoon right into your mouth like a pudding.
We really enjoy mamey ice cream, and we also love “paletas” made from mamey. A paleta is like a creamsicle or frozen fruit bar on a stick. Because it’s creamy, mamey is perfect for a smoothie. But whatever kind of smoothie you like, if you’re a smoothie person, you can check out current prices for a Personal Smoothie Maker on Amazon.
Creamy mamey fruit can also be whipped into a batter and used for baking cakes, muffins, or used as a pastry filling.
Is Mamey Fruit Good for You?
Is there a fruit that’s not good for you? Like with many natural fruits, you’ll find a bounty of health benefits. Similar to bananas, Mamey is a good source of potassium. It is high in dietary fiber, vitamins B6, C, and E. Plus other B vitamins, and even manganese.
Mamey fruit also contains carotenoids, which gives the ripe fruit its rich color similar to pumpkin and carrot. Carotenoids may help to protect the body from certain cancers.
And did I mention it’s delicious? If you’re an egghead and wish to read more, here’s some detailed, sciency info about pouteria sapota a.k.a. Mamey fruit.
We’ve found so many things to love south of the border, and you can see them over at our video travels in Mexico.
We appreciate you checking out our mamey fruit video, and all of our recipe and food blogs. Be sure and sign up for our mailing list and never miss a new Chef Buck cooking video, and also click a button below and share the dishes with your friends. We appreciate all the kind comments and support, and we’ll see you next time in the kitchen! –Chef Buck
Thanks for watching our recipe videos!
We include affiliate links for products on our website, so if you make a purchase after clicking on our links, we may earn a commission which helps us produce more videos and drink more coffee :^) We participate in the Amazon Services LLC Associates Program, which is an affiliate advertising program that provides a means for us to earn fees by linking to Amazon.com and affiliated sites, so we can make more videos.
If you’re curious about fresh artichoke, Buck and I will provide two different perspectives on this vegetable. We’ll walk you through the pros and cons of cooking a fresh artichoke, how to pick a good one, tips to prepare and microwave-steam an artichoke, and some dip/sauce ideas to compliment your cooked, warm veggie.
Fresh artichoke is one of those foods I toss into the same category as crab legs and crayfish; fancy and delicious foods, and usually a bit expensive. And with each of these foods, you have to work hard for your bites and there are few edible parts compared to the discarded/inedible parts. And if you haven’t watched the video, spoiler alert, Buck has very little use for a fresh artichoke. 😉
Why Eat Fresh Artichoke?
So why eat fresh artichokes when there are other delicious foods that don’t require so much work?
Variety is the spice of life. Our bodies appreciate getting nutrition from a variety of natural sources. Artichokes are packed with potassium, vitamin C, vitamin K, folate, magnesium and dietary fiber. And according to Webmd.com, artichokes are number 7 on the USDA’s top 20 antioxidant-rich foods list.
Maybe you want to impress someone who’s favorite food is fresh artichoke. Maybe preparing and eating fresh artichoke can be an effective part of your mindfulness practice.
Plus, despite what Buck thinks, every mouthful of food does not have to be a big one to be satisfying.
Tips To Pick The Best Artichoke.
Just to be clear, we are talking about globe artichokes in this article. If you are unfamiliar with artichokes and see a reference to a Jerusalem or Chinese artichoke, just know that those are very different vegetables.
Ever see a globe artichoke growing? It looks like what it is – the flower on a tall thistle plant. Keep that in mind when you’re trying to remember how to pick the freshest artichokes. You want THiStleS.…..
Tight. The leaves are still pretty tight or close together, they haven’t opened up too much.
Heavy. A lighter artichoke can indicate a more dried out veggie.
Squeaky. If you gently squeeze a fresh artichoke, it will ‘squeak’ slightly.
Stemmy. It’s a nice bonus when you have 1-2 inches of stem. The stem’s interior is almost as yummy as the artichoke heart.
Want To Avoid A Long Cooking Process?
As with many foods, you can prepare artichokes in a variety of ways. What’s the quickest, and one of the most nutritious ways to prepare fresh artichokes? Well, let’s compare some cooking times.
Stuff and Bake. You can add some great flavors but expect an hour of cooking time.
Grill. Great grill taste but you need 45 minutes of cooking time.
Boil or Steam on the Stove. After the water comes to a boil, it takes another 20-35 minutes, depending on artichoke’s size
Use a Pressure Cooker. Cooks faster, but you need a pressure cooker. And, it’s harder to tell when the artichokes are done.
Microwave Steaming. Generally will take about 6-10 minutes to microwave steam an entire artichoke, depending on your microwave’s power settings, and the size of the artichoke. DING, DING, DING – WE HAVE A WINNER!
Tips For The Best Steamed Artichokes In The Microwave.
So, you’ve decided to steam an artichoke in the microwave. Here’s how to make the most of it.
Prep The Artichoke.
Before microwaving, cut the top third of each artichoke off. This is going to be the toughest, inedible artichoke leaves so don’t be sad. You can always make your compost pile a little happier with inedible artichoke parts. A sharp, serrated knife helps cut through the top. Even better, use an electric knife, if you got it.
To keep it from browning before you eat it, once you cut it, sprinkle with some lemon or lime. Some types of fresh artichokes brown more easily than other. One good thing – if it does brown, it doesn’t impact the taste.
Find The Right Dish.
You want a dish where you can place the artichoke(s) cut side down, with about ¼ – ½ cup of water in the bottom, and that can be tightly covered. The cover can be the microwavable lid, a dinner plate, or plastic wrap.
Add Some Seasoning Before You Cook.
Add a bay leaf and/or some lemon to the water. Sprinkle some herbs over the artichokes before you cook it.
To increase the cooking time even more, cut your artichoke into 4-6 parts. This way, you have more surface area to season, and you will reduce your cooking time even more.
Avoid Overcooking Your Artichoke.
Although the microwave makes cooking the artichokes fast and easy, you don’t want to overcook your artichoke. And different sized artichokes will cook differently. Check a whole artichoke after 7 minutes to get an idea how fast your microwave is cooking. If you cut your artichoke in halves or quarters, check it after 4 minutes. You know the artichoke is done when you can pull an outer leaf off with ease.
Serve Warm.
Let the artichoke cool slightly, but serve warm.
Serve With One or Two Dipping Sauces.
There are endless possibilities for dipping sauces. You can buy or make something ahead of time. Some favorite homemade choices that complement the artichoke’s taste include:
Sauteed garlic and melted butter. Saute 2 Tbsp of minced garlic in 1 Tbsp of butter, then melt 4 Tbsp more of butter.
Mayo with balsamic vinegar. Mix together 3 Tbsp mayo with 2 tsp of balsamic vinegar. Alternatives: Yogurt for the mayo; soy sauce or tamari for the balsamic vinegar.
Pesto. You don’t have to use fancy pants and expensive pine nuts either. You can substitute walnuts or almonds. Check out our Pesto Recipe.
Buck ONLY buys canned or jarred artichoke…because he thinks you’d be crazy not to. This is one of the best prices I found on Amazon for Canned Artichokes but mostly the artichoke prices are pretty over the top online…so definitely check your local grocery store first for canned or jarred artichoke.
canned artichoke hearts
What’s Edible on an Artichoke …and what’s not
Remember I said there is plenty of the artichoke that is not edible? The video shows you what you can eat. Here’s a summary of what is edible and not. Artichoke Trivia: The fuzzy hairs found at the center of the veggie, on top of the artichoke heart, are called the ‘choke’.
Not Edible:
The outer layer(s) of leaves. Each artichoke is different – sometimes you have to pull away 2-3 layers of leaves before you find one whose base is tender enough to scrape out with your teeth.
Leaf ends. In fact, there is just a small part at the base of each internal leaf that is edible.
End of central flower. These are the thinner leaves found in the center of the artichoke, that are touch. Depending on the variety of globe artichoke you have, the flower may be white or purple.
Fuzzy hairs found on the top of the artichoke heart. One exception: In baby artichokes, the fuzzy hairs are edible because they aren’t formed enough to be a distraction.
Stem’s exterior.
Edible:
White/lighter colored base of each inner leaf. So how do you eat it? You pull a leaf off, dunk it in your favorite dipping sauce, then use your teeth to squeeze out the interior. The closer you get to the center, the tender/edible part of the leave gets bigger. Um, well, relatively speaking. Don’t ever expect a big mouthful of taste from the artichoke leaves. It’s one of the reason Buck grumbles so much about fresh artichokes.
Base of the inner leaves (purple or white flower). Similar to the individual leaves, the base of the artichoke’s central purple flowers are edible. Just pull off the whole cluster of central, thin flower petals and use your teeth to tear off the tender base.
Artichoke heart. Don’t forget to pull out/spoon out the fuzzy top first. You also can use a spoon to scoop out the heart. Now you can buy jars of plain or marinated artichoke hearts; can you believe there was a time when folks threw that away? Guess the fuzzy part threw them off?
Stem’s interior. If you look at the stem from the end, you will see that about ⅔ of the stem are darker and more fibrous. You want to cut out the inner, lighter part of the stem. Again, the amount of edible stem depending on the type of artichoke you have, and its age.
You can eat the entire chayote: skin, flesh, and center seed.
Thanks for checking out our Fresh Artichoke video, and all of our recipes. Be sure and sign up for our mailing list and never miss a new Chef Buck cooking video, and also click a button below and share the dishes with your friends. We appreciate all the kind comments and support, and we’ll see you next time in the kitchen! –Chef Buck
We appreciate you watching our videos…Thanks!
We include affiliate links for products on our website, so if you make a purchase after clicking on our links, we may earn a commission which helps us produce more videos and drink more coffee :^) We are participants in the Amazon Services LLC Associates Program, which is an affiliate advertising program that provides a means for us to earn fees by linking to Amazon.com and affiliated sites, so we can make more videos.
Here is all you need to know to choose a ripe papaya and how to eat papaya. Cutting and eating a papaya is super simple because you can eat the entire tropical fruit including the skin, seeds, and flesh. This makes it an ideal ingredient in smoothies, especially if the papaya is a little on the over-ripe side. Papaya is packed with nutrients and great for digestive health. I found the papaya seeds really tasty, and the seeds added a nice texture, too.
Two Major Papaya Varieties We’ve Tried
There are many varieties of papaya available. Before arriving in Mexico we were most familiar with the smaller Solo variety of papaya grown in Hawaii. We are currently in central Mexico and have had yummy maradol papaya at local restaurants. The street vendors here sell gorgeous fruit cups of papaya, watermelon, jicama and pineapple – YUM!
In Central Mexico, the maradol papaya is popularly grown. Both the Maradol and the Solo varieties are easy to peel and the fruit has a mild sweet flavor. The Maradol papaya can get up to 20 inches long and weigh several pounds. It is generally not as sweet as the Solo, but still has a great taste and, when ripe, has a texture similar to a soft honeydew or cantaloupe. Its mild flavor profile means it’s a great compliment for a variety of foods.
Papaya is nutrition-rich. This tropical fruit is high in vitamin C and a great source of vitamin A and folate. You also get plenty of fiber, magnesium, and potassium when you eat a serving of papaya. The digestive health benefits papaya are considerable because of an enzyme called papain that helps with the digestion of proteins. Papain is extracted from papaya and used as a main ingredient in powdered meat tenderizers.
How To Pick A Ripe Papaya
To pick a ripe papaya, look for mostly yellow to orange skin. You want the papaya to give a bit when you press it, but it should still be hard at the stem-end. As with any produce, you do not want a lot of soft or moldy spots.
IF you have a few days to wait for the sweet taste, you can pick a papaya that has just started to turn yellow. Just leave it on your kitchen counter to ripen OR put it in a paper bag with a banana and set it in the fridge.
One more thing, a good papaya can have a slightly musky aroma. Wait! Don’t run away…try it first. One of Buck’s favorite ways to eat raw papaya is with a generous amount of fresh lime juice. If the smell turns you off, that’s one of many ways you can overcome the musky aroma.
How To Eat Papaya
When you’re ready to use your papaya, as with any fruit, wash the skin with soap and water before cutting. Cut off the stem end, then cut it lengthwise. For this type of papaya, the fruit will be a yellow/orange color. Generally folks scoop out and discard the seeds and membrane…but see our related thoughts at the end of this post. The texture will be similar to a ripe cantaloupe or honeydew melon.
Once a papaya is ripe, you want to store it in the fridge and use it within a day or two. Skinned papaya chunks can be frozen for later use. But like any fruit with a high water content, you don’t want to leave it frozen for too long.
Ripe papaya is soft enough that you can easily scoop our spoonfuls and eat it right out of the skin. Or, just squeeze a generous amount of lime juice over it just before you eat it. That simple combination is fantastic! Feeling adventurous but lazy? Add a bit of chipotle chili or cayenne to your papaya/lime mixture. What about some grated ginger, mint and a scoop of yogurt? Raw papaya is especially friendly with citrus and creamy accompaniments.
More Things To Do With Papaya
You can make all kinds of salsas and cold salads with papaya. Just remember one thing when you make any cold dishes: the same enzyme that allows papayas to help you digest proteins, softens other fruits was well. That means that you want to eat your cold papaya creations within a day of mixing.
Use papaya to make a nutrient-packed beverage. Make a papaya smoothie mixing fruit chunks with some coconut milk, honey and a pinch of cinnamon. Try blending in a few seeds and a piece of skin for added nutrition.
What about using papaya in a cake topping? Puree papaya with seeds and mix into lemon curd and use as a topping on a cake. Just pour on the top and drizzle down the sides over a whipped cream frosting.
The possibilities for including ripe papaya in your diet are endless, and your body will appreciate it.
How To Use Green Papaya
Got a totally green, unripe papaya? Don’t despair! Folks purposely choose a TOTALLY green papaya (usually smaller than the ripe one) for some scrumptious meals. Shred it up and make a tart cold salad. A Vietnamese friend has served us a green papaya salad – OMG! Green papaya has a firmer texture than a ripe one, and can be added to hot dishes. Add it to soup, stews, and curries.
Don’t forget, a green papaya has a bit less of the papain enzyme than a ripe one. But still, you want to use it within a couple of days of cutting it.
You Can Eat ALL The Papaya
Yep, you can eat the seeds, central membrane and the skin.
You can eat the black seeds raw with the papaya. The seeds have a peppery and oh-so slightly bitter taste. You can also wash and dry the seeds, then use them as you would peppercorns. Try grinding up a few fresh or dried seeds and add to a salad dressing or a cocktail. Some studies suggest papaya seeds help keep intestinal parasites out the body or as a treatment for heartburn.
See that light-colored membrane under the seeds? That can be the sweetest part of the papaya. In terms of texture, that may not be your thing but, like other fruit membranes, it packs some nutrition.
Eat the skin? Your choice. It doesn’t have much flavor but a little can add some additional fiber to your smoothie. Don’t knock it until you try it!
And that’s about all you need to know to eat and enjoy a papaya. We hope this info has been helpful, and for another tropical fruit treat, check out All You Need To Know About Mango!
Be sure and sign up for our mailing list and never miss a new Chef Buck cooking video, and also click a button below and share the dishes with your friends. If you enjoyed this How To Eat Papaya video, check out my Cool Fruit Playlist on Youtube. We appreciate all the kind comments and support, and we’ll see you next time in the kitchen! –Chef Buck
We appreciate you watching our videos…Thanks!
We include affiliate links for products on our website, so if you make a purchase after clicking on our links, we may earn a commission which helps us produce more videos and drink more coffee :^) We are participants in the Amazon Services LLC Associates Program, which is an affiliate advertising program that provides a means for us to earn fees by linking to Amazon.com and affiliated sites, so we can make more videos.
Ripe mango is great for making a refreshing mango smoothie and unripe mango can be used to make a tasty mango pie, kinda like an apple pie, but with mango. Read on for how to choose a ripe mango and the best way to cut a mango for eating, plus two very tasty mango recipes for both ripe and unripe mangoes.
How to Choose a Ripe Mango
How a mango feels to the touch is the best indicator of its ripeness, so hold the mango and give it a squeeze. Firm = Unripe Gives Slightly = Ripe Feels Soft = Unripe
A mango with black spots on it might be going bad. Give it a squeeze, and if the mango feels squishy, then it is overripe. A mango that smells especially mango-ee might be ready to eat, too, but give it a squeeze because that is always the best way to tell when a mango is ripe for the eating.
How to cut a Mango
Mango fruit has a large flat seed through its center. The seed is shaped like a disk and makes the fruit complicated to cut, but knowing where the seed is makes the task slightly easier. Firstly, wash the mango. The mango shape is more oval than round, with slightly wider cheeks on each side. Using the mango stem as the center, take a knife and cut away the cheeks of mango on either side of the stem, leaving about a ¼ inch thickness in the center. You might feel the seed as you cut through the fruit, but just angle the knife blade around the seed, cutting as close as you can.
Take the seed and cut away the outer edges of mango, then cut the mango cheeks into roughly one 1 slices, and then pass the knife blade between the skin and the fruit, slicing the skin away as closely as possible.
Once mango fruit begins to ripen, it has a very short shelf life, but it freezes very well, so eat all you wish, and freeze the rest for later. One of our favorite dishes to make with frozen mango is a refreshing mango lassi, which is basically a mango smoothie.
Ingredients for a Mango Smoothie
2 cups frozen MANGO 1 cup plain YOGURT MILK as needed and sprinkle of ground CARDAMOM
How to Make a Mango Smoothie
Do you call it a mango smoothie or mango lassi? Is there a difference? You can use fresh chopped mango, but frozen mango makes a lassi more like a chilly milkshake. Add the chopped mango and yogurt into a blender, then add ½ cup of milk and blend until smooth. If the mixture is too thick, then just add more milk, if it is too thin, add more mango.
If the mango smoothie isn’t sweet enough, then add a little honey, or other sweet fruit. Frozen banana also makes a nice sweet additive. If the smoothie is too sweet, you can balance it out with a squeeze of lemon juice.
A traditional mango lassi is topped with ground cardamom, and a sprinkling on top is all you need. Sweet ripe mango is perfect for a smoothie, so give this mango smoothie recipe a try, but if you’ve got unripe mango hanging around, then a mango pie might be in your future.
How to make a Mango Pie
INGREDIENTS:
1 frozen deep dish PIE CRUST
Pie Filling: 3 ½ cups UNRIPE* MANGO sliced 1 Tbsp LIME JUICE 1 ¼ cup SUGAR ½ tsp GROUND NUTMEG 1 tsp CINNAMON 1 tsp fresh GINGER grated 2 Tbsp FLOUR
Crumble Topping: ½ cup chilled BUTTER ⅔ cup SUGAR 1 cup ALL-PURPOSE FLOUR
DIRECTIONS: To make the pie filling, cut the unripe mango into slices and then toss with the lime juice in a bowl. Mix together the other filling ingredients and then combine with the mango/lime and toss everything together well. Place this mixture into the pre-thawed pie shell.
To make the crumble topping, grate the chilled butter into a bowl and then add in the sugar and flour. Use your fingers, a fork, or a pastry blender to mix and cut the ingredients together into crumbly pea-sized shapes, and then sprinkle this mixture evenly over the top of the pie filling.
Bake at 400 degrees Fahrenheit for 45-55 minutes or until the crumb topping and crust are golden brown. Remove the pie from the oven and place on a rack and allow time to cool before slicing.
Give these mango recipes a try and let us know what you think. And for another fantastic fruit recipe, try this very French take on a Baked Pears Recipe.
Thanks for checking out our mango recipes, and be sure and sign up for our mailing list so you’ll never miss a Chef Buck cooking video, and also click a button below and share the dishes with your friends. We appreciate all the kind comments and support, and we’ll see you next time in the kitchen! –Chef Buck
We appreciate you watching our videos…Thanks!
We include affiliate links for products on our website, so if you make a purchase after clicking on our links, we may earn a commission which helps us produce more videos and drink more coffee :^) We are a participant in the Amazon Services LLC Associates Program, which is an affiliate advertising program that provides a means for us to earn fees by linking to Amazon.com and affiliated sites.
Do you say PIMENTO cheese or PIMIENTO cheese spread? It doesn’t matter, because whatever you call this classic southern cheese recipe, it’s plain delicious, and super easy to prepare. Mama Redbuck made a pimiento cheese spread, and then I made a jalapeno cheese spread, so check out both dishes and let us know which you like best.
Pimiento Cheese Spread Ingredients
8 oz freshly shredded YELLOW CHEDDAR CHEESE 4 oz jar of PIMIENTOS 2-4 Tbsp MAYONNAISE (to taste) …and yes, you can check prices for mayonnaise on Amazon BLACK PEPPER (fresh ground pepper is nice)
How to Make Classic Pimento Cheese
Shred the yellow cheddar into a mixing bowl, and definitely use freshly shredded cheese for this spread!
Drain the pimientos and add them to the cheese.
Add mayonnaise one tablespoon at a time and mix until the spread reaches the consistency you prefer.
Add black pepper to taste. Freshly ground black pepper is ideal for pimento cheese spread.
what can’t pimento cheese spread do?
Jalapeno Cheese Spread Ingredients
8 oz freshly shredded WHITE CHEDDAR CHEESE 10-15 pickled JALAPENO slices (to taste) MAYONNAISE (to taste)
Drain the jalapenos and add them to the cheese. I like to use whole jalapeno slices, but you can chop them if you like. It won’t make a difference, the pepper cheese spread will be just as spicy either way, so I suggest leaving the slices whole, because it makes the spread look better.
Add mayonnaise one tablespoon at a time and mix until the spread reaches the consistency you prefer.
And that’s it! Two very tasty and easy to make cheese spreads. These quick cheese dishes are great on crackers, in a sandwich, and as a dip for sliced veggies, so give each one a try and let me know which you prefer! And for another tasty spread idea, check out this Spicy Egg Salad Recipe.
Try a spicy egg salad recipe for a flavorful twist on a traditional boring, bland egg salad.
Thanks for checking out Mama Redbuck making a pimiento cheese spread, and be sure and sign up for our mailing list so you’ll never miss a Chef Buck cooking video, and also click a button below and share the dishes with your friends. We appreciate all the kind comments, and we’ll see you next time in the kitchen! –Chef Buck
We appreciate you watching our videos…Thanks!
We include affiliate links for products on our website, so if you make a purchase after clicking on our links, we may earn a commission which helps us produce more videos and drink more coffee :^) We are a participant in the Amazon Services LLC Associates Program, which is an affiliate advertising program that provides a means for us to earn fees by linking to Amazon.com and affiliated sites.
If you like homemade jam, then you’ll love this easy fig jam recipe. Whether you buy fresh figs at the store or have access to a fig tree in your neighborhood, this jam recipe is the perfect way to use up a bunch of figs. Fig jam is particularly good on biscuits and toast, and even as a warm topping on ice cream.
Easy Fig Jam with Just 3 Ingredients
About 40 medium-sized FRESH FIGS ½ cup SUGAR ¼ cup HONEY
How to make Quick Fig Jam
This recipe will work with all kinds of fruit (blueberries, blackberries, strawberries, etc.), but Mama Redbuck has a fig tree in her backyard, so she mostly uses figs when making this quick jam. If you don’t have fresh fruit handy in the neighborhood, just buy fresh fruit at the market.
Buy figs that are a little soft, color can be a good indication, but not always, sometimes even the greener figs can be soft enough, so give figs a squeeze to test for squishiness. Once picked, figs don’t last very long, maybe 2 days when ripe.
You can keep fresh figs in the fridge, but even refrigerated they won’t keep for very long after becoming soft, only a couple of days, so making a jam is an easy way to extend their life another 7-10 days. My mom seals extra fig jam in bags and freezes it for future use.
My mom uses a Foodsaver model 2100 for sealing and freezing extra jam.
Quarter and then chop the figs as desired. We like a rustic, chunky jam.
Heat a medium-sized saucepan on low heat.
Add figs, sugar, and honey and bring the pot to a simmer, stirring regularly.
As the pot bubbles away, the figs will release water.
Let the pot simmer until the mixture reaches your desired “jamminess”, this might take 10 to 20 minutes depending on how wet the figs are and how thick you like your jam.
The jam will thicken even more off of the heat, so don’t overcook the fruit; you want a spreadable jam, not a clunky fig paste.
If the jam becomes overly thick, you can always add a wee little bit of water back into the pot.
Remove the Jam from the heat and allow to cool before adding into a container.
The jam will keep in the fridge for about a week to 10 days, although a pint of jam
disappears fairly quickly around our home, especially if we make some biscuits.
Give this easy fig jam recipe a try and let me and Mama Redbuck know what you think. Fig jam makes a perfect pairing with biscuits, so take a look at My Favorite Biscuit Recipe.
Easy Buttermilk Biscuit Recipe
Thanks for checking out Mama Redbuck’s jam recipe, and be sure and sign up for our mailing list so you’ll never miss a Chef Buck cooking video, and also click a button below and share the dishes with your friends. We appreciate all the kind comments, and we’ll see you next time in the kitchen! –Chef Buck
We appreciate you watching our videos…Thanks!
We include affiliate links for products on our website, so if you make a purchase after clicking on our links, we may earn a commission which helps us produce more videos and drink more coffee :^) We are a participant in the Amazon Services LLC Associates Program, which is an affiliate advertising program that provides a means for us to earn fees by linking to Amazon.com and affiliated sites.
This butternut squash recipe is an easy and tasty dish and it’s quick to prepare. You can cook the squash on the stove top in a skillet in just 10-12 minutes with only four ingredients. You can also add a little sugar as well, but that’s entirely optional.
Coconut Butter Squash Recipe Ingredients
1 BUTTERNUT SQUASH 1 can COCONUT MILK (or less if using a smaller squash) SALT and PEPPER (to taste) 2 Tbsp SUGAR (optional) 2 Tbsp OIL for cooking
When buying a butternut squash, choose one with a smooth, creamy, blemish free skin, and also one that feels heavy for its size. At home you can store the squash in a cool dry place and it will keep for 1-2 months.
Butternut squash has a fairly thin skin, so it is easy to peel, in fact you can easily peel the skin with a potato peeler, or just slice away the skin with a sharp knife.
Wash a peel the butternut squash. The squash has a cylindrical top and a bulbous bottom, and I find that cutting the top away from the bottom makes it much easier to cut away the peel.
Once peeled, slice the squash lengthwise in half.
The bottom bulbous end will have a cavity filled with seeds. Take a spoon and scoop out the seeds.
Chop the squash into roughly ½ inch squares or smaller. The cut squash pieces should be roughly similar in size for even cooking. The smaller the pieces, the quicker the dish will cook.
Heat oil in a skillet on medium heat.
Add in the squash and toss with the oil, then cover and cook for 2 minutes.
Add salt and pepper to taste, plus a little sugar if desired, but this is entirely optional.
Stir, cover, and cook for 2 more minutes.
Reduce the heat to medium low.
Uncover and add in the coconut milk. I generally use an entire 15oz can of coconut milk, but for a smaller squash you might use less. How creamy do you want your squash to be?
Simmer gently for 4-6 minutes until the squash is cooked to desired doneness.
This butternut squash recipe makes a great side with very little effort and time, so definitely give the dish a try.
And if you’ve never tried spaghetti squash, take a look at One Of The Best Squash Dishes Ever! It’s all you need to know to prepare this very versatile winter squash variety.
When cooked spaghetti squash pulls apart into “noodley strings”
Thanks for checking out this skillet squash recipe, and be sure and sign up for our mailing list so you’ll never miss a Chef Buck cooking video, and also click a button below and share the dishes with your friends. We appreciate all the kind comments, and we’ll see you next time in the kitchen! –Chef Buck
We appreciate you watching our videos…Thanks!
We include affiliate links for products on our website, so if you make a purchase after clicking on our links, we may earn a commission which helps us produce more videos and drink more coffee :^) We are a participant in the Amazon Services LLC Associates Program, which is an affiliate advertising program that provides a means for us to earn fees by linking to Amazon.com and affiliated sites.
Spinach is so good, and good for you, even if you add a little less healthy stuff to transform it into a decadent creamed spinach recipe. I use creamed cheese for this spinach dish, but any meltable cheese will work. You can leave the meat out if you prefer. However, I find that adding even just a hint of meatiness makes the best creamed spinach.
Ingredients for Creamed Spinach
15 oz SPINACH fresh or frozen 1 small/med ONION chopped 2-4 cloves GARLIC finely chopped 2 Tbsp BUTTER 2-3 oz leftover COOKED MEAT ½ cup softened CREAM CHEESE Some HALF N HALF 1-2 Tbsp OIL for cooking SALT and PEPPER to taste
How to Make the Best Creamed Spinach Recipe
IF using frozen spinach, allow to thaw, then heat spinach through in a skillet and drain.
IF using fresh spinach, add a splash of water to the skillet and heat, then add the spinach leaves and cook down until spinach has wilted and most of the excess water has evaporated, then set spinach aside in a colander to drain.
Return the skillet to the stove and heat oil on medium heat, and then add chopped onions and cook about 2 minutes. If using some meat, add now. I like a bit of leftover pork, but any tid-bit you have in the fridge that will add a bit of flavor will work. Stir the meat with the onions for another minute.
Add in the garlic and butter and stir until the butter has melted. Add in the softened cream cheese and stir another minute. You can use a freshly shredded parmesan cheese instead, but if so, wait until after the milk is added and heated through.
In the colander, squeeze out any excess water remaining in the cooked spinach, as much as you can, then add the spinach back into the skillet and mix into the ingredients.
Add in half ‘n half as desired. Start with a ½ cup half ‘n half and then add an additional ¼ cup at a time to reach the consistency you like. Heat the milk through, but don’t boil, and reduce the heat as needed; you want the liquid to steam just on the edge of simmering. If using freshly shredded cheese instead of creamed cheese, add, stirring until smooth.
When the creamed spinach reaches the consistency you like, remove it from the stove, because it’s done, dude. It’s a great side dish for almost any meal, especially chops or steak.
Give this creamed spinach recipe a try and let me know what you think. For another crazy delicious spinach recipe, try this Indian favorite, Chole Palak.
Thanks for checking out this creamed spinach recipe. Be sure and sign up for our mailing list so you’ll never miss a Chef Buck cooking video. Also click a button below and share the dishes with your friends. We appreciate all the kind comments and support, and we’ll see you next time in the kitchen! –Chef Buck
We appreciate you watching our videos…Thanks for the support!
We include affiliate links for products on our website. So if you make a purchase after clicking on our links, we may earn a commission which helps us produce more videos and drink more coffee :^)
Try this easy skillet asparagus recipe. Asparagus is super healthy and quick to prepare, in fact, the quicker the better! Asparagus is best not overcooked, and even served plain and simple, it just tastes terrific.
What You Need for this Asparagus Recipe
1 lb. ASPARAGUS SALT and BLACK PEPPER to taste A little OIL for cooking optional: 3-4 cloves GARLIC (finely chopped) 1 small ONION (chopped)
How to Cook a Quick Skillet Asparagus
When buying asparagus, thin is better than thick. Choose firm spears. Avoid asparagus that has a wrinkled skin, or tips that are wet and greasy looking.
Rinse and drain asparagus stalks, then snap off the bottoms of the spears to leave only the tenderest parts of the asparagus.
Add asparagus, spreading the spears out so that they lay flat on the bottom of the pan. Leave alone for a couple of minutes to sear, then turn and sear all around. Add salt and pepper to taste.
Cook for 5 to 6 minutes, or until desired doneness, but asparagus tastes great if it’s not overcooked. Soggy asparagus = sad asparagus, right?
You can serve skillet asparagus as a side cooked simply with salt and pepper, or jazz it up with a little sauteed onion and garlic. Remove the cooked spears from the skillet and set aside. Add a wee bit more oil to the pan, and then add one small, chopped onion. Saute onion for 3-4 minutes, then add finely chopped garlic and saute for 1 minute more.
Return the asparagus to the skillet and toss with the onion garlic mix, then serve hot.
Give this easy asparagus recipe a try and let me know what you think. And for another tasty take on healthy asparagus, try this Indian inspired Asparagus Curry Recipe.
Easy Asparagus Curry Recipe
Thanks for all the support!
We include affiliate links for products. If you make a purchase after clicking on our links, we may earn a commission which helps us produce more videos and drink more coffee.
We are a participant in the Amazon Services LLC Associates Program, an affiliate advertising program designed to provide a means for us to earn fees by linking to Amazon.com and affiliated sites.
Cochayuyo is a versatile, tubular kelp seaweed that is packed with nutrition and can be used in a variety of dishes. It’s a great vegetarian option high in protein, so it’s ideal for meat-free meals.
Cochayuyo is generally sold in dried bundles, so it needs to be rehydrated before being used in a recipe. I’ve tried cochayuyo that is light tan in color, and cochayuyo that is much darker, bordering on black. I find the darker seaweed to be less tender and to have a stronger flavor, so I prefer to use it in cooked cochayuyo recipes, and because it is more mild, the lighter cochayuyo is perfect for salads.
Easy Way To Rehydrate Cochayuyo
Place the dried cochayuyo in a large pot of cold water and then soak overnight. That’s it. You don’t have to salt the water or anything, and after the cochayuyo has rehydrated, simply rinse well and then slice into strips, rings, or whatever shape is ideal for the dish you are creating.
How to make a Cochayuyo Salad Recipe
ingredients: 2 cups diced COCHAYUYO (use the lighter cochayuyo) 1-3 cloves minced GARLIC 1 Tbsp minced GINGER 3 Tbsp OLIVE OIL 2 Tbsp LIME JUICE SALT and PEPPER to taste
In a bowl, combine the oil and lime juice and then mix well, and if you don’t have fresh lime juice, just use fresh lemon juice, or you can substitute a bottled citrus juice or vinegar. Add the minced ginger and garlic, and then salt and pepper to taste. Mix well, and after that toss the chopped cochayuyo with the dressing.
Serve this garlicky cochayuyo as a salad topping, or as a topping for any dish that can benefit from a little pizzazz and chewiness, and since it’s packed with nutrition, the added health benefits are a nice bonus!
Skillet Cochayuyo Recipe
Cochayuyo pairs well with black beans in a skillet saute. Here is one of my favorite ways to use this hearty seaweed in a hot dish, and this is also a good recipe for cleaning out the fridge, so substitute whatever veggies you have on hand.
ingredients: 3 cups sliced COCHAYUYO 1 15 oz can BLACK BEANS ½ cup sliced RED PEPPER 1 chopped ONION 4-5 cloves minced GARLIC 2 Tbsp minced GINGER ½ can diced TOMATO 3 cups SPINACH ½ cup CELERY 2-3 Tbsp COOKING OIL
And lots of SEASONINGS…in this video recipe I use 1 tsp CUMIN 1 Tbsp CURRY POWDER 1 tsp CHILI POWDER 1 tsp PAPRIKA ROSEMARY SALT and PEPPER to taste But experiment with different flavors!
How to Cook Cochayuyo with Black Beans
In a large skillet, heat cooking oil.
Add onions and saute 2-3 minutes.
Add garlic, ginger, red pepper and saute another minute.
Stir in the seasonings.
Add in the celery, black beans, and tomato.
Mix well, cover, and simmer for 15 minutes.
Add in the spinach and cochayuyo.
Cover and simmer another 5 minutes, until the spinach is wilted and the cochayuyo is heated through.
And that’s it, an easy and very flavorful way to use this great ingredient, so if you can get your hands on cochayuyo, give it a try. I bet it would be a great conversation starter at a dinner party, but that’s for you to find out.
Another super versatile ingredient for cooking is chick peas, aka garbanzo beans, because like cochayuyo, it has a mild flavor, so check out this version of an Indian Chana Masala Recipe, which is one of my favorite chickpea dishes, and a very economical dish to prepare, as well.
Thanks for checking out the cochayuyo recipes, and all of our recipes. Be sure and sign up for our mailing list to never miss a new cooking video, and also click a button below and share the dishes with your friends, and follow Chef Buck on Youtube. We appreciate all the kind comments and support, and we’ll see you next time in the kitchen!
If you like what CG and I do, support us on Patreon, or throw a tip in our Paypal Tip Jar We’ll happily enjoy a coffee on the road, or maybe even pay a bill or two!–Thanks! We appreciate all the support, and we’ll see you next time in the kitchen!
Thanks for watching our Cuchayuyo recipes!
We include affiliate links for products on our website, so if you make a purchase after clicking on our links, we may earn a commission which helps us produce more videos and drink more coffee :^) We participate in the Amazon Services LLC Associates Program, which is an affiliate advertising program providing a means for us to earn fees by linking to Amazon.com and affiliated sites, so we can make more videos.
Cranberry Brie Bites are a tasty treat for parties. It’s an easy snack recipe you can make even easier by substituting canned cranberry sauce for the filling. The creaminess of the cheese and the tartness of the cranberry are a great combination. We use chopped pecans for this party recipe, but use whatever kind of nuts you like.
What you Need for Cranberry Brie Bites
CRANBERRY SAUCE, Homemade (recipe follows) or Canned CRESCENT DOUGH SHEETS BRIE CHEESE PECANS, or try other NUTS ROSEMARY OIL or BUTTER
This cranberry brie cheese recipe is super simple and adjustable. We use homemade cranberry sauce, but you can easily substitute canned cranberry sauce if you like.
For Homemade Cranberry Sauce you will Need
2 8oz bags CRANBERRIES (fresh or frozen) ½ cup SUGAR 1-2 ORANGES (entire zest and juice) 2 CINNAMON sticks
To make cranberry sauce, add all ingredients into a sauce pot. If you don’t feel like zesting the orange, you can cut the peel into strips and add the entire peel into the simmer. Simmer over medium low heat until cranberries burst and the sauce thickens, about 20 minutes. Remove the cinnamon sticks and orange peels before serving.
How to Make Cranberry Brie Bites
These cranberry brie bites are mini bites, so you will need a mini-muffin tin. A muffin pan is not hard to find at a thrift store, or check here for current mini-muffin tin prices on Amazon.
Lightly grease the cups of your muffin tin with butter or oil.
Finely chop fresh rosemary. You can use whole sprigs of rosemary for a more decorative look, but we prefer to chop the rosemary for easier eating and flavor distribution.
Chop the nuts. Use pecans, walnuts, cashews, or whatever nut you prefer.
Open the crescent dough and spread dough out on a floured surface.
Lightly roll the dough out and cut into as many squares as your mini-muffin tin will accommodate.
Place a dough square into each muffin cup and mold into the tin.
Cut and place your brie cheese into squares that will fit comfortably into each dough cup.
Add a dollop of cranberry sauce into each cup.
Top with a sprinkling of chopped nuts and rosemary.
Place the muffin tin into an oven preheated to 350 degrees Fahrenheit.
Bake 15-20 minutes until the pastry is golden brown around the edges.
Thanks for checking out the cranberry brie bites recipe. Be sure and sign up for our mailing list so you’ll never miss a Chef Buck cooking video, and click a button below and share the dishes with your friends. We appreciate all the kind comments and support, and we’ll see you next time in the kitchen! –Chef Buck
We include affiliate links for products on our website. If you make a purchase after clicking on our links, we may earn a commission which helps us produce more videos and drink more coffee :^) We are a participant in the Amazon Services LLC Associates Program, an affiliate advertising program designed to provide a means for us to earn fees by linking to Amazon.com and affiliated sites.
Candied sweet potatoes make a great holiday dish, or anytime dish. It’s decadent and flavorful, and this candied sweet potato recipe is perfect as a side for all kinds of savory meals. It’s an easy 4 ingredient recipe, or only 3 ingredients if you want to skip the vanilla; the dish will taste yummy either way.
What you need for Candied Sweet Potatoes Recipe
4-6 large SWEET POTATOES 1-1½ cup SUGAR 1 stick BUTTER 1-2 tsp VANILLA EXTRACT
How to Make Sweet Sweet Potatoes
This candied sweet potato recipe is super simple and adjustable, so use as much butter and sugar as you like. The above ingredient ratios are just guidelines; there is no wrong way to make this recipe. You’ll have to go way out of your way to screw it up, so adjust the ratios as you like. Use more or less butter and sugar, depending on your desires.
One important part of this recipe is to peel and clean your potatoes well. Remove the skins and any dark blemishes on the peeled potatoes. Dark areas on the potatoes will become even darker as the dish cooks, and it will look quite unappealing.
Thanks for checking out our candied sweet potatoes recipe, and all of our recipes. Be sure and sign up for our mailing list so you’ll never miss a new recipe. Also click a button below and share the dishes with your friends. You can also follow Chef Buck on Youtube. We appreciate all the kind comments and support, and we’ll see you next time in the kitchen!
If you like what CG and I do, you can also support us on Patreon, or throw us a tip in our Paypal Tip Jar. We’ll happily enjoy a coffee on the road – Thanks! We appreciate all the support, and we’ll see you next time in the kitchen!
We include affiliate links for products on our website. So, if you make a purchase after clicking on our links, we may earn a commission which helps us produce more videos and drink more coffee :^) We participate in the Amazon Services LLC Associates Program, which is an affiliate advertising program. It provides a means for us to earn fees by linking to Amazon.com and affiliated sites, so we can make more videos.
Cornmeal gives a fried green tomatoes recipe a great flavor, color, and crunch that flour alone can’t beat. A creamy dressing or aoli pairs well with fried tomatoes, but this classic southern recipe is tasty enough to stand on it’s own.
What you need for a Fried Green Tomatoes Recipe
GREEN TOMATOES 1 cup CORNMEAL (use a medium or fine grind…coarsely ground cornmeal can be a bit much) 1 cup all-purpose FLOUR (divided) 1 EGG SEASONING (be generous, and use whatever seasonings you like…I prefer Italian seasonings, lots of garlic powder, and black pepper) SALT OIL for cooking
How to Cook Fried Green Tomatoes
When I order fried green tomatoes at a restaurant, whether I like them or not will depend largely on the batter. Cornmeal adds that great flavor and crunch that I associate with classic fried tomatoes, and fried tomatoes without cornmeal just fall flat. Buy hard, green tomatoes. They can have a tinge of red, but not too much, because you want them firm enough to cook and not become too soft.
Slice the green tomatoes to desired width; I like mine about ¼ inch thick.
Spread the tomato slices out and lightly salt.
Set up a breading station with 3 flat-bottom bowls.
In the first bowl place ½ cup of flour. Season the flour as desired, and mix.
In the second bowl whisk 1 egg and 1 Tbsp of cold water.
Heat a skillet of oil on medium-low heat. You don’t need a lot of oil, about 1/8 inch deep.
Take a slice of tomato and on each side bread it lightly in the flour, then coat it in the egg, then bread it one final time in the cornmeal/flour mixture.
Carefully place the breaded tomato in the skillet. It should sizzle and begin to cook immediately when it hits the oil.
Cook each tomato 2-3 minutes or until golden brown in color.
Remove fried tomatoes from the skillet and place on a paper towel to drain for a moment, then serve.
Serve fried green tomatoes hot. Theses tomatoes are good enough to eat plain, or you can accompany them with hot sauce, creamy salad dressing, aoli dressing, or a mild mustard or creamy horseradish dressing. For another easy appetizer side dish recipe, take a look at these Crispy Baked Onion Rings.
The best onion ring recipe baked in the oven.
Thanks for checking out the Fried Green Tomatoes recipe. Be sure and sign up for our mailing list so you’ll never miss a Chef Buck cooking video, and click a button below and share the dishes with your friends. We appreciate all the kind comments and support, and we’ll see you next time in the kitchen! –Chef Buck
A crispy, crunchy tostones recipe is a tasty way to enjoy green, unripe plantains. If you like French fries, or tator tots, or waffle fries or any kind of fried potato, then you’ll want to give tostones a try. Ripe plantains are sweet just like dessert bananas, but unripe plantains are more like starchy potatoes. Green plantains are super savory, in fact, you can boil and mash them to make a dish similar to mashed potatoes. Tostones are a staple snack in latin American cuisine and easy to prepare, and especially tasty with a creamy dipping sauce. Tostones are twice-fried and not health nut friendly. For a healthier plantain recipe, stick to a plantain mash, but for a faux fry fix, try this crispy tostones recipe.
What you need for this Tostones Recipe
unripe, green PLANTAINS OIL for frying SALT PEPPER GARLIC POWDER
and a DIPPING SAUCE …any sauce you enjoy with with fried potatoes will work with tostones, a creamy AIOLI is great, or just RANCH dressing if you’re feeling lazy. For my SEMI-AIOLI dressing I use: 1-2 cloves raw GARLIC minced 1 cup MAYONNAISE 1 Tbsp LEMON JUICE
Use green, unripe plantains for crispy, crunchy tostones
How to Make Tostones
Choose firm, green, unripe plantains.
Slice off the very tips of the plantain.
Green plantains can be hard to peel. You can cut the peel lengthwise into thin strips and pull the peeling strips away, or slice the length of the peel and then work the peel away from the plantain using your thumbs or a spoon.
Cut the peeled plantain into discs about ¼ to ½ an inch thick. I prefer thinner slices, about ¼ inch thick.
Fry 1-2 minutes and turn and fry 1-2 minutes more.
Remove plantains from skillet and drain on a paper towel.
Place on a flat surface and smash flat to desired thickness. There is no wrong size, whatever size you like is the right size. I prefer my tostones to be about the size and thickness of a silver dollar.
Return flattened plantains to the oil and fry until golden brown.
Remove and drain on a paper towel, salt to taste, and serve with a dipping sauce.
To make the dipping sauce, just combine aioli ingredients and mix well; the sauce, like any sauce, will be better if you make it a little ahead of time.
Enjoy!
Tostones are a staple snack in latin American cuisine, easy to prepare, and especially tasty with a creamy dipping sauce.
Unripe green plantains are a terrific ingredient that you can use in all kinds of savory, starchy dishes. For another unripe plantain dish, try this MASHED PLANTAINS RECIPE. And for a sweeter option, try FRIED RIPE PLANTAINS. But no matter how you prepare them, pick up plantains at the grocery and give them a try; plantains are a great value and very versatile.
Thanks for Watching our Videos!
Thanks for checking out our tostones recipe. Sign up for our mailing list so you’ll never miss a new recipe. Also click a button below and share the dishes with your friends. You can also follow Chef Buck on Youtube. We appreciate all the kind comments and support, and we’ll see you next time in the kitchen!
If you like what CG and I do, support us on Patreon, or throw us a tip in our Paypal Tip Jar. We’ll happily enjoy a coffee on the road – Thanks! We appreciate all the support, and we’ll see you next time in the kitchen!
We include affiliate links for products on our website. Making a purchase after clicking on our links and we may earn a commission which helps us produce more videos and drink more coffee :^) We participate in the Amazon Services LLC Associates Program, which is an affiliate advertising program. It provides a means for us to earn fees by linking to Amazon.com and affiliated sites, so we can make more videos.
Mashed Plantains are a tasty twist on a mash potato recipe, and it’s my go-to recipe for green, unripe plantains. If you’re in a potato rut, give unripe plantains a try and surprise your family. Just boil and mash plantains with your favorite seasonings, plus garlic and onion if you want to really make a tasty mash. Cooking bananas are not sweet at all, they make a great savory starch you can use in a variety of recipes. Try substituting green plantains in some of your favorite potato recipes, it’s an easy way to put a twist on dinner.
What you need for this Mashed Plantains Recipe
2 unripe PLANTAINS 3-5 cloves GARLIC finely chopped 1 ONION chopped SALT PEPPER in this recipe I also use: GARLIC POWDER CHILI POWDER FENNEL SEEDS PAPRIKA …but experiment with seasonings you like 2 Tbsp BUTTER MILK or CREAM OIL for sauteing
How to Make Plantain Mash
Choose firm, green, unripe plantains.
Slice off the very tips of the plantain, but leave on the peeling.
Cut the unpeeled plantain into about three sections.
Bring a pot of salted water to boil and add the plantain sections. Reduce the heat and let the plantains simmer for about 20 minutes, or until a knife passes easily into the plantain.
While plantains boil, heat a skillet and oil on medium heat.
Add onions and saute 2 minutes.
Add garlic and seasonings and continue to saute another 4-5 minutes.
Remove skillet from the heat and set aside until plantains have completed boiling.
Once a fork passes easily through the plantains, remove plantains from the water.
Make a slice along the length of the cooked plantain and remove the peeling.
Place cooked plantains into a bowl and mash.
Add butter.
Add sauteed onion/garlic and mix well.
Pour milk or cream 1-2 Tbsp at a time, mixing until the desired consistency is reached.
Whether you call this dish mashed plantains, mofongo, or mangu, it’s gonna be yummy. Serve just like mashed potatoes!
Unripe green plantains are a terrific ingredient that you can use in all kinds of savory, starchy dishes. Definitley give them a try, and for a sweeter option, try ripe plantains. The simple fried plantain recipe below is one of the best ways to use ripened plantains.
How to cook Sweet Fried Plantains
Avoid green plantains for frying, and buy plantains that are yellow to black in color. Feel the plantains and select ones that are soft or only semi-firm, you can buy the super soft blacker plantains, but I prefer more texture.
Heat a skillet on medium heat and add oil.
Slice the tips off of the plantain and peel away the skin.
Cut the plantain in half through the middle, and then cut each half lengthwise into 3-4 planks.
Slide plantains into the hot skillet.
Season top half if desired, I like to use a mix of chili pepper and cinnamon.
Fry until the bottom begins to brown, then turn and brown other side.
Add more seasoning if desired, or even some sugar, if you’re crazy.
Once the plantains are cooked to desired color, remove and drain on a paper towel, Serve warm.
They are great alone as a snack, or a tasty side dish, especially with rice or a seasoned meat dish. Have you ever heard of the expression “a little sweet and some meat”? Plantains mare a perfect combo for this dining idea. I really enjoy fried plantains for breakfast with fried eggs.
Give fried plantains a try and let me know what you think, and try mashed plantains, as well. Depending on the ripeness of the plantain, you can use them for a wide variety of dishes.
Sign up for our Recipe Mailing List and receive our latest recipe video right in you inbox!
If you liked the idea of green plantains as a starchy alternative to potato, you might like trying a Delicious Rutabaga Recipe, too.
Thanks for checking out this Mashed Plantains Recipe and video, if you enjoyed the dish, click a button or two below and share it with your friends. And if you’re on Youtube often, subscribe to the Chef Buck Cooking Channel.
Here’s a simple Black Bean Corn Salsa that will knock your socks off, or at least be very tasty on a chip, a fish, a salad, on or in an omelet…you get the idea. It’s an easy and versatile way to use beans, which are good for your heart, in fact the more you eat beans, the more you…crave more beans? Something like that, so definitely give this recipe a try. This salsa is super tasty and you can pack it with raw, healthy, and fresh ingredients to use as an accompaniment for types of recipe dishes.
What you need for Black Bean Corn Salsa
dressing: 1 Tbsp LEMON JUICE 1 Tbsp RED WINE VINEGAR or balsamic vinegar 1 Tbsp HONEY 1 tsp TURMERIC 1 tsp GARLIC POWDER or 1 Tbsp minced garlic ¼ tsp PAPRIKA ½ BLACK PEPPER ½-1 tsp SALT salsa: 2 15 oz cans BLACK BEANS, drained and rinsed 1 15 oz can YELLOW AND WHITE CORN, drained or 2 cups frozen corn, thawed 12-16 sliced CHERRY TOMATOES 5-7 small GREEN ONIONS, finely sliced, or ½ cup red onion, finely diced. 1 Red or Orange BELL PEPPER, diced 1 bunch of chopped, fresh CILANTRO, or substitute parsley 1-2 AVOCADO peeled, pitted, and diced; add JUST before serving
Salsa is great on a chip, as a topping for fish or salad, in an omelet, on ice cream…well, maybe not ice cream.
How to make the Black Bean Corn Salsa
In a small bowl, combine the dressing ingredients, mix well, and then set aside.
Drain and rinse the black beans and corn. In this recipe we use a mix of yellow and white whole kernel corn.
Slice and dice and chop tomatoes, onions, and other veggies you want to add; see other veggie suggestions below.
In a large bowl, combine and toss veggies and beans and corn.
Add dressing and mix well.
For best results, place overnight in the refrigerator. Remember that turmeric can stain some plastic containers. Ziplocs allow you to periodically flip salsa to distribute dressing more evenly.
Let marinate at least a couple of hours, preferably overnight.
Before serving, add diced avocados and gently mix.
Taste, adjust seasoning as needed.
Serve with chips, or as a topping or filling.
Options and Substitutions
½ cup red onion, finely chopped
Pickled jalapeno slices
½ tsp chili powder
2 tsp cumin
Mango, diced
More Uses for Salsa
Use black bean corn salsa as a salad topping!
Fancy Slaw: add chopped cabbage, mayo/yogurt.
Fish topping: add mango and cumin and then warm.
Omelet filling or topping: add cheese, cumin, then garnish with sour cream and/or guacamole.
Use salsa as a filling for quesadillas, tortillas, etc..
If you’re new to home cooking, get a bunch of spices, pots and pans, and begin experimenting with different recipes. It’s a healthy hobby that will save you money in the long run. Check out current prices for Complete Kitchenware Sets on Amazon as well as Complete Starter Spice Kits. Or go to a thrift store! I’ve found some of my favorite kitchen gear at second-hand stores.
Be sure and sign up for our mailing list and never miss a new Chef Buck cooking video, and also click a button below and share the dishes with your friends. We appreciate all the kind comments and support, and we’ll see you next time in the kitchen! –Chef Buck
Thanks for watching our recipe videos!
We include affiliate links for products on our website, so if you make a purchase after clicking on our links, we may earn a commission which helps us produce more videos and drink more coffee :^) We participate in the Amazon Services LLC Associates Program, which is an affiliate advertising program providing a means for us to earn fees by linking to Amazon.com and affiliated sites, so we can make more videos.
Try this easy fried plantains recipe. In the store, plantains are sold green and unripe, yellowing, or even totally black. A totally black banana is yucky, but a totally black plantain is okay. It’s fine to buy plantains at any stage of ripeness and use them for various recipes. For frying plantains, I like to buy the medium-ripe plantains and slice them into planks and fry in oil in a skillet. They have a nice sweetness and make a tasty side dish for breakfast, especially with rice and eggs.
What you need for this Fried Plantains Recipe
PLANTAIN …medium-ripe to ripe OIL for sauteing and seasoning is optional …I like a bit of CHILI POWDER CINNAMON SALT and for an even sweeter dessert-style side dish add BROWN SUGAR …but that’s crazy
Fried plantains…sweet platanos maduros, and less ripe plantains used for twice-fried tostones
How to Fry Plantains
Choose ripe plantains for frying, and buy plantains that are yellow to black in color. Feel the plantains and select ones that are semi-firm to soft, you can buy the super soft blacker plantains, but I prefer more texture.
Heat a skillet on medium heat and add oil.
Slice the tips off of the plantain and peel away the skin.
Cut the plantain in half through the center, and then cut each half lengthwise into 3-4 planks.
Slide plantains into the hot skillet.
Season top half if desired.
Fry until the bottom begins to brown, then turn and brown other side.
Add more seasoning if desired, or even some sugar, if you’re crazy.
Once the plantains are cooked to desired color, remove and drain on a paper towel, Serve warm.
They are great alone as a snack, or a tasty side dish, especially with rice or a seasoned meat dish. Have you ever heard of the expression “a little sweet and some meat”? Plantains make a perfect combo for this dining idea. I really enjoy fried plantains for breakfast with fried eggs. Give fried plantains a try and let me know what you think, and try green plantains, as well. Depending on the ripeness of the plantain, you can use them for a wide variety of dishes.
I love fried plantains for breakfast, served with eggs and rice
How to Cook Green Plantains
Green plantains are a great ingredient, but unripe plantains definitely need cooking. They are not sweet, harder to peel raw, very starchy, and much like a potato. I like to boil green plantains, because it’s easy.
Slice off the very tips of the plantain, but leave on the peeling.
Cut the unpeeled plantain into three sections.
Bring a pot of salted water to boil and add the plantain sections.
Reduce the heat and let the plantains simmer for about 20-30 minutes, or until a knife passes easily into the plantain.
Remove the plantains from the water.
Make a slice along the length of the cooked plantain and remove the peeling.
The banana will be very starchy, savory, and neutral in flavor, and you can use it just like you might a potato.
One of my favorite ways to use boiled plantains is to mash them with onions and seasoning, kind of like a plantain version of mashed potato. Experiment with green plantains a try them in some of your favorite potato recipes, and let me know what you think.
For more tasty vegetarian dishes, check out my Vegetarian Recipe Playlist, and if you liked the idea of green plantains, you might like trying this Easy Yuca Recipe, too.
Be sure to sign up for our website mailing list and receive our latest recipe video right in your inbox. And if you like hanging out on Youtube, subscribe to the Chef Buck Cooking Channel. Thanks for checking out this Fried Plantains Recipe and video, if you enjoyed the dish, click a button or two below and share it with your friends. I appreciate it, thanks! –Chef Buck
If you think coleslaw is too healthy, then here’s a crunchy noodle salad recipe that will remedy that, but you’ll still find plenty of good nutrition in this delicious salad with Ramen noodles and toasted nuts. The great thing about this coleslaw recipe is that it’s easy to alter and it will still taste great. There are a lot of strong flavors in the salad, so add more of what you like and less of what you want to avoid. Over the years, we’ve really cut back on the amount of sugar we put in this recipe, but it still tastes great.
Crunchy coleslaw or noodle salad? What sounds tastier?
Dressing: 2 Tbsp VINEGAR ¼ cup OLIVE OIL ¼ cup SUGAR 1 tsp SESAME OIL some of the NOODLE SEASONING Package (to taste…add slowly…it’s strong stuff!) …Also, add a bit of water to the dressing if you wish to thin it.
How to Make Crunchy Noodle Coleslaw
Break up the ramen noodles while still in the packaging, and set aside the flavor pack after opening.
In an oven preheated to 350 degrees Fahrenheit, on a baking sheet, toast the ramen noodles, nuts, and seeds. This will only take about 3-5 minutes; watch them closely as they toast, they will burn quickly. Check current prices for slivered almonds on Amazon.
Set toasted items aside to cool.
Combine the dressing elements in a small bowl and mix well. Adjust sugar, sesame oil, and noodle flavor pack to taste. Use the noodle flavor pack sparingly because it is a very strong flavor.
Slice cabbage into narrow strips and desired lengths. I like to use at least two types of cabbage for a variety of colors, but use only one type of cabbage if you like.
Chop up green onions. I chop the white bottoms finer than the green tops.
In a large bowl combine cabbage and green onion.
Add dressing and mix well.
Add in crunchy toasted elements and toss with cabbage.
And that’s it. Serve this crunchy slaw as a side dish, or even as an entree. If you’re making it for a pot luck, you can make the elements of the crunchy slaw in advance, and then combine them before serving.
I hope you enjoy this noodle and cabbage salad, and for a more traditional slaw dish, check out this Classic Coleslaw Recipe.
classic coleslaw recipe
Thanks For Watching Our Recipe Videos!
Thanks for checking out our crunchy slaw and noodle salad recipe, and all of our recipes. Be sure and sign up for our mailing list so you’ll never miss a new recipe. Also click a button below and share the dishes with your friends. You can also follow Chef Buck on Youtube. We appreciate all the kind comments and support, and we’ll see you next time in the kitchen!
If you like what CG and I do, you can also support us on Patreon, or throw us a tip in our Paypal Tip Jar. We’ll happily enjoy a coffee on the road – Thanks! We appreciate all the support, and we’ll see you next time in the kitchen!
We include affiliate links for products on our website. So, if you make a purchase after clicking on our links, we may earn a commission which helps us produce more videos and drink more coffee :^) We participate in the Amazon Services LLC Associates Program, which is an affiliate advertising program. It provides a means for us to earn fees by linking to Amazon.com and affiliated sites, so we can make more videos.
What is chayote? Chayote squash is a fruit, but in the same way that squash and cucumber are fruit, it’ll never win a fruit contest. Chayote, aka choko or mirliton, is completely edible cooked or raw, from the skin to the flesh to the seed in the center. Chayote squash has a neutral flavor, so this “fruit” needs a lot of seasoning. It’s an ideal ingredient for it’s texture more than it’s flavor, like jicama and young green jackfruit. Chayote squash is an easy ingredient to work with and a healthy dining choice, so definitely give it a try if you find it in your local market.
Chayote Fun Facts
“Fun” might be too strong a word.
Chayote is an excellent source of dietary fiber, anti-oxidants, vitamins, and minerals.
It is a member of the “gourd family” along with pumpkin, squash, and cucumber.
Known as chayote, sayote, mirliton, choko, chocho, vegetable pear, and is eaten all around the world.
When buying, choose chayote that are smooth and firm. Pick medium sized chayote. Older, larger fruit will sprout sooner.
Peeling chayote exposes you to the juice, which can feel “weird” on your skin, but you don’t have to peel it; the skin, inner seed, and flesh are all edible.
What you need to Cook a Spicy Chayote Recipe
1 CHAYOTE thinly sliced 1 ONION chopped 2-3 GARLIC cloves 1 tsp CUMIN SEEDS HOT PEPPER as desired 1-2 Tbsp CURRY SEASONING SALT to taste OIL for sauteing
Peel or unpeel the chayote, whichever you prefer. When peeling a chayote, you’ll find the inner juice to be annoyingly slippery/sticky.
How Cook Chayote Squash in a Skillet
Slice the chayote thinly. Chayote has a dense apple like texture that holds up very well under heat, so it takes a bit to soften up when cooked, so slice very thinly if you like your chayote less crispy crunchy. Heat oil in a skillet on medium heat and add cumin seeds. Add onion and garlic. Add fresh hot pepper if desired. Saute for several minutes. Add seasoning and cook about 2 minutes more. Add sliced chayote, mix well, and saute for a minute. Add a small amount of water, cover, and simmer to desired tenderness. Add more water as needed, but never too much.
That’s it! Give Chayote squash a try and let me know what you think!
Have you ever tried Rutabaga? It’s another interesting ingredient you might want to give a try. And for more tasty vegetarian dishes, explore my Vegetarian Recipe Playlist
Thanks for checking out the recipe and video, if you liked the dish, click a button or two below and share it with your friends. I appreciate it, thanks! –Chef Buck
If you love fresh-baked homemade pie, you’ll want to try Mama Redbuck’s best lemon meringue pie recipe. The meringue recipe for this lemon pie is truly impressive and piles high and holds its shape and makes a great topping for any kind of pie you bake. My mom uses this perfect meringue recipe for chocolate cream pie as well, and I love it. This lemon pie is full of fresh lemon goodness, so give this dessert recipe a try, and you’ll be glad you did.
meringue ingredients: 2 Tbsp SUGAR 1 Tbsp CORNSTARCH ½ cup WATER 4 EGG WHITES 1 tsp VANILLA pinch of SALT then another 4 Tbsp SUGAR
Try Mama Redbuck’s best lemon meringue pie recipe ever!
How To Make Lemon Meringue Pie
Make your own pie crust from scratch, or to make the recipe super easy, just bake up a pre-made frozen pie crust. Firstly, bake the crust and have it cooled and ready before beginning to make the pie filling. Then break 4 eggs and separate the yolks from the whites in two separate bowls. Zest two lemons, and then squeeze the juice to fill ½ cup.
To Make The Lemon Pie Filling:
In a saucepan, add the sugar, cornstarch, salt, and zest of two large lemons. On medium heat, stir water into the saucepan and continue stirring the pan 15-20 minutes, or until the mixture thickens and begins to bubble. Slowly spoon 5-6 Tbsp of the heated, thickened mixture in with the eggs yolks, stirring constantly so as not to cook the eggs. Then stir the egg yolk mixture into the saucepan with the rest of the heated filling. Stir in the lemon juice and butter and continue stirring until the butter is melted and the mixture is smooth. Pour the filling into the pre-baked pie shell and set aside to cool.
To Make The Meringue:
In a small saucepan add 1 Tbsp of cornstarch, 2 Tbsp sugar, and ½ cup water. Mix the three ingredients well and on the stovetop heat over medium heat, stirring until the mixture thickens and clears slightly. Set saucepan aside to cool. In a mixing bowl, beat the egg whites until frothy. My mom uses a plain old hand held electric mixer. You can check here for current hand mixer prices on Amazon if you need one for your kitchen. Add in vanilla and a pinch of salt and beat again to mix. Gradually beat in 4 Tbsp of sugar, 1 Tbsp at a time. Then beat in the cooled cornstarch mixture. Continue beating until stiff peaks form.
To Finish The Pie:
Take a spatula and spread the meringue evenly over the pie filling. Lightly chop the top of the meringue to form peaks on top of the pie. Slide the pie into an oven preheated to 400 degrees Fahrenheit and bake meringue for 10-12 minutes, or until the top of the top of the meringue sets and shows a nice color. Remove the pie from the oven and allow to cool completely before slicing. When cooled, store pie in the refrigerator beneath a pie dome, do not wrap meringue in plastic wrap or foil.
This meringue pie topping is tasty on all kinds of pies.
And that’s it! Give Mama Redbuck’s Lemon Meringue Pie Recipe a try and let us know what you think.
Try this easy chocolate cake recipe…made with beans…wha!!!?
We appreciate you watching our videos!
I hope you enjoy this lemon meringue pies recipe. Sign up for our mailing list so you’ll never miss a new recipe. Also click a button below and share the dishes with your friends. You can also follow Chef Buck on Youtube. We appreciate all the kind comments and support, and we’ll see you next time in the kitchen!
If you like what CG and I do, support us on Patreon, or throw us a tip in our Paypal Tip Jar. We’ll happily enjoy a coffee on the road – Thanks! We appreciate all the support, and we’ll see you next time in the kitchen!
We include affiliate links for products on our website. Making a purchase after clicking on our links and we may earn a commission which helps us produce more videos and drink more coffee :^) We participate in the Amazon Services LLC Associates Program, which is an affiliate advertising program. It provides a means for us to earn fees by linking to Amazon.com and affiliated sites, so we can make more videos.
Try a tasty vegetable soup featuring rutabaga. Rutabaga is a healthy root vegetable you can use like a potato, but with less than half the calories and carbs of potato. Rutabaga is like a larger version of a turnip, only sweeter. It’s related to cabbage, and has a mild cabbagy taste, but not the “scary” cabbagy taste. Rutabaga is great in soups, and I love it simply seasoned and roasted in the oven. Like most produce, when buying rutabaga choose one that’s firm and seems heavy for it’s size, because that means it’s not too old, or dried out. Next time you’re at the market, pick up a rutabaga and give this vegetable soup a try and let me know what you think.
What you need for this Rutabaga Vegetable Soup Recipe
1 large RUTABAGA 1 ONION 2 stalks of CELERY 2 CARROTS 4-6 GARLIC HOT PEPPER as desired OIL for sauteing CUMIN and FENNEL 1-2 tsp (seeds optional) 1 Tbsp GARLIC POWDER 1-2 Tbsp CURRY POWDER 1 Tbsp SMOKED PAPRIKA SALT and PEPPER to taste (I use water in the soup if making ahead of time, or ready-made broth if eating soon) Also, it’s soup; so add whatever else you want and clean the odds and ends out of your fridge.
rutabaga is like a turnip on steroids, but sweeter
How to make a Vegetable Soup with Rutabaga
Slice the ends off the rutabaga and cut away the outer skin with a knife.
Chop rutabaga into large cubes, approximately 1/2″ squares, but err on larger pieces.
In a large soup pot, heat oil on medium heat.
Add seeds and cook about 20 seconds.
Add garlic, hot pepper, and onion and saute for another 4-5 minutes.
Add in seasoning and mix well.
Add carrot, celery and rutabaga and mix well.
Fill pot with enough broth or water to cover veggies (use veggie or chicken broth instead of water if eating soup the same day, use water if sitting overnight), cover with a lid, and bring pot to a boil.
Reduce heat and simmer on low for 40-50 minutes until rutabaga is fork tender.
That’s it! Give this easy rutabaga soup recipe a try and let me know what you think, and bon appétit!
Rutabaga soup is like The Eagles, and the veggies are the groupies (if you were born after 1990, The Eagles are an American Rock band)
Is Rutabaga Healthier than Potato?
Rutabaga has LESS THAN HALF the calories of potato.
Rutabaga has 60% FEWER CARBS than potato.
Rutabaga contains about the same amount of Dietary Fiber as potato.
Potato wins the vitamin count; rutabaga provides more Vitamin C than potato, but overall, is less nutrient rich than potato.
So, don’t give up on potatoes, but add rutabaga into your menu rotation and you’ll find it makes a great change-up from the regular potato routine. If you want to jazz up your breakfast, you can start with this Hash Browns Recipe with Rutabaga, or get down to basics with this Roasted Rutagaba dish.
Roasted rutabaga makes a great alternative to a potato side dish.
Thanks for checking out this rutabaga soup recipe, and if you liked the dish, click a button or two below and share it with your friends. I appreciate it, thanks! –Chef Buck
Here is the easiest jackfruit pulled pork recipe ever. A faux pork vegetarian recipe made with canned young, green jackfruit will deliver the taste and texture of your favorite BBQ pork, and it’s a much healthier choice. This recipe is basically a BBQ sauce delivery system. Unripe canned jackfruit makes a perfect meat substitute that works well for either pork or chicken, so definitely give it a try.
Ingredients for Jackfruit Pulled Pork BBQ
1 20oz can young, green JACKFRUIT 1 medium ONION 2-4 cloves GARLIC your favorite BBQ SAUCE 1 tsp CUMIN POWDER ½ tsp CHILI POWDER some SALT and PEPPER OIL for sautéing
BBQ jackfruit makes a perfect vegetarian pulled “pork” sandwich.
How to Make Vegetarian Pulled Pork BBQ with Jackfruit
Rinse and drain the young, green jackfruit. Make sure to buy unripe jackfruit and NOT the yellow ripe jackfuit. You can buy jackfruit online. Check CURRENT CANNED JACKFRUIT PRICES on Amazon.
Shred the jackfruit. I do this by hand, it’s very easy, but you can use a knife, too.
Heat oil in a skillet on medium heat.
Add thinly sliced onion and finely chopped garlic and saute 3-4 minutes.
Add in seasoning.
Add jackfruit and a little BBQ sauce.
Raise the temperature and heat the jackfruit through, then reduce to a simmer and cook until the dish reduces as the water cooks out of the onion and jackfruit.
Add more BBQ sauce to desired sauciness, and then remove from heat.
This jackfruit pulled pork substitute is great all on its own, served over rice, or perfect on a soft roll or bun, so definitely give it a try. If you like pulled pork BBQ, you will be amazed at this vegetarian option and how easy it is to prepare.
Jackfruit BBQ is great over rice, on a sandwich, or all on its own.
What is Jackfruit?
Jackfruit is exactly what it sounds like, a fruit, but it’s HUGE. A 50 pound jackfruit is not uncommon. This giant tropical fruit grows on trees and is very popular in Asia. Unripe jackfruit can be cooked and used in savory dishes. Ripened jackfruit can be eaten raw and, unlike young green jackfruit, is very juicy and sweet.
Buying and cleaning fresh jackfruit is quite an endevour, so canned jackfruit is a perfect alternative. I prefer the green jackfruit and find it to be a terrific ingredient to experiment with in a variety of vegetarian recipes. The mildness of its flavor allows young jackfruit to be incredibly versatile, and it will enhance a recipe without overpowering it.
I’ve used green jackfruit as a pulled pork BBQ, as a faux meat filling in tacos, in an Indian-style variation of Jackfruit Tikka Masala, and as a No-Potato Hashfor breakfast. Its super nutritious, readily available at Asian markets, and well worth giving a try, so seek it out.
Seasoned and baked Jackfruit makes a convincing faux chicken when added to this rich Indian inspired tikka masala.
Thanks for watching our recipe videos!
Thanks for checking out the canned jackfruit pulled pork recipe, and all of our recipes. Be sure and sign up for our mailing list to never miss a new cooking video, and also click a button below and share the dishes with your friends, and follow Chef Buck on Youtube. We appreciate all the kind comments and support, and we’ll see you next time in the kitchen!
If you like what CG and I do, support us on Patreon, or throw a tip in our Paypal Tip Jar We’ll happily enjoy a coffee on the road, or maybe even pay a bill or two!–Thanks! We appreciate all the support, and we’ll see you next time in the kitchen!
We include affiliate links for products on our website, so if you make a purchase after clicking on our links, we may earn a commission which helps us produce more videos and drink more coffee :^) We participate in the Amazon Services LLC Associates Program, which is an affiliate advertising program providing a means for us to earn fees by linking to Amazon.com and affiliated sites, so we can make more videos.
Corn muffins are delicious, but adding cheese and jalapeno makes them irresistible. CG cooks up a tasty corn muffin recipe with whole kernel corn to make them super moist and flavorful. If you’re not a fan of hot jalapenos, then try substituting milder pickled jalapenos which are often sold right alongside jars of hotter peppers at the grocery store. Topping the muffins with sliced jalapeno makes them look so good!
What you need for this Corn Muffin Recipe
¾ cup CORNMEAL …we use a medium grind in this recipe 1¼ cup ALL-PURPOSE FLOUR 2½ tsp BAKING POWDER ½ tsp SMOKED PAPRIKA ½ tsp CHIPOTLE or regular chili powder ½ tsp SALT…unless the corn or butter already contains salt 1 cup MILK 2 Tbsp OIL or use melted butter instead 4 Tbsp HONEY 1 EGG 1 cup CANNED WHOLE KERNEL CORN drained ¼ cup PICKLED JALAPENOS, roughly chopped ¼ ONION, minced 1 cup freshly shredded CHEDDAR CHEESE plus ¼ cup for topping fresh JALAPENO deseeded and sliced for topping…or you can use pickled slices for the topping
Corn muffins are delicious, but adding cheese and jalapeno makes them irresistible.
Combine remaining ingredients in another bowl and mix, but reserve fresh jalapeno slices and a little cheese for topping.
Add the dry ingredients to the wet and stir until ingredients are moistened.
Fill prepared muffin cups evenly.
Top with fresh jalapeno slices and a very light sprinkling of cheese.
Bake 20-30 minutes or until toothpick inserted into center comes out clean and muffins are golden brown.
Allow to cool for 5 minutes before removing from muffin tins.
And that’s it! Hope you like this cheesy jalapeno corn muffin recipe. You can serve them hot or cold for breakfast, lunch or dinner, and I especially love them in the morning with over easy eggs.
broken eggs are less sad with corn muffins
Give this corn muffin recipe a try and let us know what you think, and for another bready treat, check out this perfect BUTTERMILK BISCUIT RECIPE. Both recipes go great with a big bowl of VEGETARIAN CHILI.
pot o’ meatless chili for good times
Thanks for checking out our corn muffin recipe, and all of our recipes. Be sure and sign up for our mailing list and never miss a new Chef Buck cooking video, and also click a button below and share the dishes with your friends. We appreciate all the kind comments and support, and we’ll see you next time in the kitchen!
Thanks for watching our recipe videos!
We include affiliate links for products on our website, so if you make a purchase after clicking on our links, we may earn a commission which helps us produce more videos and drink more coffee :^) We participate in the Amazon Services LLC Associates Program, which is an affiliate advertising program providing a means for us to earn fees by linking to Amazon.com and affiliated sites, so we can make more videos.
Here’s a satisfying and hearty vegetarian chili recipe that’ll put a little pep in your step. If you’re a die-hard carnivore, then your initial reaction is probably NOPE, but you should give meatless chili a try. I love a good meat chili, and when I get chili at a restaurant I generally order a meat and bean chili, but at home I’m vegetarian chili all the way. Vegetarian chili just tastes great, and I don’t miss the meat, plus it’s a perfect way to clean out all the veggie odds and ends in your fridge. The key to a hearty meatless chili is lots of seasoning, onions, and peppers. I like to add at least two kinds of beans, and the veggies can be whatever you like, so be creative!
What You Need to Make a Great Vegetarian Chili
15 oz can CHICK PEAS 15 oz can KIDNEY BEANS 1 BELL PEPPER (chopped) Lg ONION (chopped) JALAPENO PEPPER (diced, very optional) 2-3 cloves GARLIC (finely chopped) 1 ZUCHINNI (cut into large pieces) 1 cup CAULIFLOWER (chopped) 2 ROMA TOMATOES (chopped) 28 oz can CRUSHED TOMATOES 1 heaping Tbsp DRIED OREGANO 1 Tbsp CUMIN 1 tsp GARLIC POWDER 1 Tbsp CHILI POWDER 1 Tbsp SMOKED PAPRIKA SALT and PEPPER, to taste 2 Tbsp OLIVE OIL for sauteing WATER as needed…add slowly I also add a little leftover RUTABAGA to this recipe, but that is very optional. A vegetarian chili is a great way to clean out the fridge of all those veggie odds and ends, so use what you have.
pot o’ meatless chili for good times
How to Make Easy Vegetarian Chili
Slice, dice, mince, and chop all your ingredients. Prepping this dish is the most labor intensive part of this recipe. Once your ingredients are ready, it’s pretty eazy peezy.
Heat some oil in a large pot on medium heat.
Add in the onion and hot pepper and saute for 4-5 minutes.
Add in the rest of the peppers, garlic, and seasoning, then mix and saute for another couple minutes.
Add in everything else, plus about ½ a can of water. Be conservative with the water. The dish might seem overly thick, but a lot of water will be released from the veggies as the chili cooks. You can always add more water later.
Cover and bring the pot to a bubble, reduce the heat down to a simmer, and cook covered for about 45 minutes, adding water as needed and desired.
After 45 minutes give the dish a taste test and adjust seasoning, but remember, the flavor of the chili will intensify on its own as it sits.
Like any soup or stew or chili, it’s ideal if you make the recipe ahead of time, because the dish will get exponentially better as the days pass, so be sure to make a big pot of chili so you’ll have plenty of leftovers.
If you want jalapeno corn muffins to pair with chili, here’s a recipe that tastes great and is a breeze to make.
make a batch of corn muffins for a great chili sidedish
Jalapeno Corn Muffin Recipe
¾ cup cornmeal (whole, medium grind) 1¼ cup all-purpose flour 2½ tsp baking powder ½ tsp smoked paprika ½ tsp chipolte (or regular chili powder) ½ tsp salt…unless the corn or butter already contain salt 1 cup milk 2 Tbsp oil (alternative butter, melted) 3 Tbsp honey 1 large egg 1 cup canned corn kernels, drained ¼ cup pickled jalapenos, chopped ¼ onion, minced 1 cup shredded sharp cheddar cheese (plus ¼ cup for topping) optional: 1 jalapeno (deseeded and sliced for topping)
Place rack in middle of the oven and preheat to 400°F. Grease 12 muffin pan cups or line with parchment paper baking cups; set aside. Combine dry ingredients in bowl. Combine remaining ingredients in another bowl (minus topping, jalapeno). Add to dry ingredients and stir until ingredients are moistened. Fill prepared muffin cups evenly. Top with remaining jalapeno rings and cheese. Bake 20-30 minutes or until toothpick inserted into center comes out clean and muffins are golden brown. Allow to cool for 5 minutes before removing from muffin tins. Serve warm or cold. Serve with butter or honey butter. HONEY BUTTER: ½ cup butter, softened 2 Tbsp honey
Click a button below and share the dishes with your friends. We appreciate all the kind comments and support, and we’ll see you next time in the kitchen!
If you like what CG and I do, support us on Patreon, or throw us a tip in our Paypal Tip Jar. We’ll happily enjoy a coffee on the road – Thanks! We appreciate all the support, and we’ll see you next time in the kitchen!
We include affiliate links for products on our website. Making a purchase after clicking on our links and we may earn a commission which helps us produce more videos and drink more coffee :^) We participate in the Amazon Services LLC Associates Program, which is an affiliate advertising program. It provides a means for us to earn fees by linking to Amazon.com and affiliated sites, so we can make more videos.
Try this cauliflower cakes recipe if you’re into healthy, low carb, and delicious. Just ball your cauliflower into flavorful balls, press them out into cakes, and bake them in the oven. I like to top mine with a creamy sauce, but that’s optional. Serve these cauliflower cakes over a bed of spinach and you’ve got a low carb, light and delicious meal.
What You Need To Make Cauliflower Cakes
3 cups of grated CAULIFLOWER ½ cup of freshly grated CHEESE 2 EGGS beaten 1 Tbsp chopped JALAPENO ¼ cup finely chopped BELL PEPPER 2 finely chopped GREEN ONIONS 1-2 cloves minced GARLIC 1 tsp dried ITALIAN SEASONING 1 tsp TURMERIC POWDER 1 tsp GARLIC POWDER 1 tsp SMOKED PAPRIKA 1 tsp CHILI POWDER PARCHMENT PAPER to line your baking sheet MAYONNAISE and LEMON for dressing
Try a cauliflower cakes recipe if you’re into healthy, low carb, and delicious.
How to Cook Cauliflower Cakes
Grate fresh cauliflower into granules resembling “poprocks”. I like to use a hand grater, but feel free to use a food processor, however, I think grating the cauliflower by hand actually makes the cauliflower cakes lighter and fluffier. If you do use a food processor, don’t over-process the cauliflower into a doughy consistency, unless you prefer a more dense cauliflower patty.
In a bowl, add the grated cauliflower and the rest of the ingredients.
Mix all ingredients well, then separate into individual portions for cakes.
Form each portion into a ball and squeeze out excess liquid.
Form the cauliflower ball into a ½ inch thick patty and place on the parchment paper lined baking sheet, and definitely USE PARCHMENT PAPER, or your cauliflower might stick after baking. The cakes will not hold together well before cooking, but you can adjust the shape and size of each patty while on the baking sheet. Check here for current pricing for parchment paper on Amazon.
Place baking sheet in an oven preheated to 400 degrees Fahrenheit, bake approx. 30-40 minutes, or until the cauliflower cakes color and firm up.
Remove cauliflower cakes from the oven and serve over a bed of greens.
Cauliflower cakes made with a food processor can form heavier, denser patties. For lighter cakes, use a hand grater.
I like to top the cakes with a simple dressing of mayonnaise and lemon, and adding a dash of jalapeno pickling juice or horseradish isn’t a terrible idea! And that’s it. Eat and enjoy!
Quick Dressing for Cauliflower Fritters
½ cup MAYONNAISE 2-3 Tbsp LEMON JUICE minced LEMON ZEST 1 tsp finely chopped PICKLE, JALAPENO, or GARLIC
Mix ingredients in a small bowl, adjust to taste. Refrigerate until ready to serve.
If you don’t have a baking sheet, use a big pizza pan. Big pizza pans make the best baking sheets for cauliflower pizza crusts, nachos, whatever…round is always better than square, right? If you need one in your kitchen, check out current Big Pizza Pan prices on Amazon.
A white pizza is great on any kind of crust.
Give these beautiful cauliflower cakes a try and let me know what you think. Or would you call them cauliflower fritters? If you’re serving them to kids, I’d definitely call them “cakes”. And if you like the recipe, then click some of the buttons below to share it with friends and family. I appreciate it! –Chef Buck
Here’s an easy Roasted Rutabaga Recipe that you will love, and it’s a great alternative to potato. Rutabaga is a low-carb root vegetable you can use just like a potato, but with less than half the calories and carbs of potato. In appearance rutabaga is like a larger version of a turnip, but it tastes a bit sweeter. It’s related to cabbage, so it has a very mild cabbage taste. It’s great baked in the oven, cooked in soups, and I love it shredded and cooked into breakfast hash browns. Like most produce, when buying rutabaga choose one that’s firm and seems heavy for it’s size. Give this rutabaga recipe a try and let me know what you think.
What You Need for a Roasted Rutabaga Recipe
RUTABAGA cubed OLIVE OIL SALT CHILI PEPPER BLACK PEPPER ROSEMARY
Roasted rutabaga makes a great alternative to a potato side dish.
How to Roast Rutabaga in the Oven
Buy a rutabaga that’s heavy for it’s size and not dried out.
Slice the end off the rutabaga and cut away the outer skin with a knife.
Cut into roughly 1/2″ square cubes.
Toss the rutabaga cubes in a bowl with olive oil.
Add seasoning and toss until cubes are well coated
Spread rutabaga on an ungreased baking sheet. Aluminium foil is a good idea.
Bake in a preheated oven at 400 degrees Fahrenheit for approximately 45 minutes.
Halfway through the cooking process, you can check on the rutabaga and give them a turn to prevent overcooking on one side.
And that’s it! Roast some rutabaga in the oven let me know what you think.
Don’t be scared of da rutabaga
Is Rutabaga Healthier than Potato?
Rutabaga has LESS THAN HALF the calories of potato.
It has 60% FEWER CARBS than potato.
Rutabaga contains about the same amount of Dietary Fiber as potato.
Potato wins the vitamin count; rutabaga provides more Vitamin C than potato, but overall, is less nutrient rich than potato.
So, don’t give up on potatoes, but add a rutabaga recipe into your menu rotation, it’ll make a great change-up from the regular potato routine. One of my favorite faux potato dishes is this Mock Potato Salad made with cauliflower. And for another tasty rutabaga recipe idea, try Rutabaga Hash Browns.
click pic for recipe
Thanks for checking out this baked rutabag recipe and video, if you liked the dish, click a button or two below and share it with your friends. I appreciate it, thanks! –Chef Buck
Try a no potato hash browns recipe with rutabaga. Rutabaga is a root vegetable you can use just like a potato, but it’s a healthier choice with less than half the calories and carbs of potato. Rutabaga is like a larger version of a turnip, but a bit sweeter. It’s related to cabbage, and has a very mild cabbage taste. Rutabaga is great in soups, and I love it simply seasoned and roasted in the oven. Rutabagas look sorta like turnips, but they’re usually bigger. Like most produce, when buying rutabaga choose one that’s firm and seems heavy for it’s size. Give rutabaga a try and let me know what you think.
What You Need for a Rutabaga Hash Browns Recipe
2 cups shredded RUTABAGA 2 chopped GREEN ONIONS (separate white bottoms from green tops) some chopped HOT PEPPER 1 EGG shredded CHEESE (optional) SALT to taste, for flavor and drawing out the water season to taste, I like: SMOKED PAPRIKA, GARLIC POWDER, CHIPOTLE, BLACK PEPPER, etc. …use flavors you like OIL for sauteing
Top rutabaga hash browns with an over easy egg for instant sauce
How to make Hash Browns Recipe with Rutabaga
Slice the end off the rutabaga and cut away the outer skin with a knife.
Shred about 2 cups of rutabaga using a hand grater or food processor.
Place rutabaga in a colander and lightly sprinkle with salt. Mix and let sit for a few minutes while you prepare the other ingredients, this will give the salt time to draw out the water.
Squeeze excess water from the rutabaga and place in a bowl.
Add green onion bottoms, peppers, egg, and seasoning. Mix well.
Heat a skillet and oil on medium heat.
Add in the rutabaga mix and cook until browned, turning occasionally.
When near completion, stir in green onion bottoms and cheese.
Skip shredding and cut rutabaga into cubes for tasty breakfast hash.
That’s it! Give an easy Rutabaga Hash Browns Recipe a try and let me know what you think, and bon appétit!
Jackfruit and potato hash topped with fried egg; the yolk makes a nice sauce.
Thanks for checking out this rutabaga hash brown recipe and video, if you liked the dish, click a button or two below and share it with your friends. I appreciate it, thanks! –Chef Buck
Here’s an easy cheesy cauliflower recipe that makes a great side dish or a tasty treat between meals. It’s saucy and cheesy and will satisfy your need for something decadent in the middle of the day.
What You Need To Make Easy Cheesy Cauliflower
CAULIFLOWER (florets, stems, the whole thing…whatever your taste buds prefer CHEESE …freshly grated, and whatever cheese you like, but cheddary is nice MUSTARD …fancy mustard!…definitely don’t use yellow mustard, unless you’re a savage MAYONNAISE SALT and PEPPER to taste
Also add additional spices and herbs if you like…make it as complicated or simple as you like. I like this dish for it’s simplicity, and because it’s a tasty snack that keeps me from making a nutritionally inferior choice, but you can definitely jazz the recipe up. Add fresh dill and minced garlic to the sauce, or garlic and onion powder, or dried Italian seasonings; make the dish as simple or complicated as you like.
Top cauliflower with sauce and cheese for a quick snack.
How to Make Microwave Cheesy Cauliflower
You can microwave an entire head of cauliflower in a bowl, but I like to break the cauliflower into smaller bowls for a tiny cauliflower treat. Use the stems and florets and cook accordingly. The more stem you use, the longer the cooking time.
Add a splash of water to the bowl and microwave of high heat to desired doneness.
While the cauliflower cooks, in a bowl mix the sauce of mustard, mayonnaise, salt, and pepper. Adjust ratios to taste.
Once the cauliflower has cooked to desired doneness, spoon and spread the sauce over the cauliflower.
Top with freshly grated cheese.
Microwave another minute to melt the cheese.
Sure, it’s cauliflower…but you know you want this.
And that’s it. Serve this simple microwave cauliflower cheese as a side dish, or eat it right out of the bowl for a cheesy cauliflower treat. Believe me, it’s a treat. Is it ice cream? No. It’s not ice cream. But it’s goooood, you’ll actually love it, and be satisfied, and you won’t feel as bad when you’re finished.
Give this cheesy cauliflower recipe a try and let me know what you think. If you liked the recipe, click a few buttons below to share it with your friends. Thanks, I appreciate it! –Chef Buck
Eating raw broccoli and other raw vegetables is a simple way to boost nutrition and improve digestion. The health benefits of a raw broccoli salad recipe are considerable, from added nutrition to protecting against disease and chronic illness, but raw broccoli can be kinda hard to enjoy. A variety of veggies is a good idea for improved health, so including raw broccoli is a no-brainer.
Cooked broccoli is extremely beneficial as well, as long as it’s not overcooked, particularly boiled; in fact, the nutrients in cooked broccoli are actually absorbed more readily by the body, especially lightly steamed broccoli. Consuming broccoli in a variety of recipe methods is best. I’ve found piggybacking on the classic Waldorf salad recipe to be an ideal way of sneaking raw broccoli into my diet.
If you’re new to home cooking, get a bunch of spices, pots and pans, and start experimenting with different recipes. It’s a healthy hobby that can save a lot of money in the long run. Check out current prices for Complete Kitchenware Sets on Amazon as well as Complete Starter Spice Kits. Or try a thrift store! I’ve found some of my favorite kitchen gear at second-hand stores.
Ingredients for Waldorf Salad w/ Raw Broccoli Recipe
1 cup diced CELERY 1-2 cups diced APPLES ½ cup chopped WALNUTS or PECANS ¾ cup MAYONNAISE 1 med LEMON zest and juice ¼ cup dark RAISINS some SALT and PEPPER …plus BROCCOLI FLORETS!
Even raw broccoli looks good in a waldorf salad.
How to make a Waldorf Salad with Broccoli
Broccoli and apples can be two of the potentially dirtiest produce items at the grocery, so wash them well.
In a small bowl, add mayonnaise, lemon juice, lemon zest, salt, and pepper and whisk until smooth.
In a larger bowl, add chopped apple, sliced celery, toasted walnuts, and raisins.
Add in the dressing and toss the salad as soon as possible, this will keep the chopped apples looking fresh.
That’s all there is to a classic Waldorf Salad recipe, and it’s delicious, but adding a bit of raw broccoli will turn the salad from a semi-decadent dessert salad into a Superfood salad, and it won’t hurt at all; it’ll just be a bit more savory than sweet. I like to add just the raw broccoli florets. You can chop the broccoli stem into smaller pieces and add into the salad, but why punish yourself? The broccoli stem will make much tastier and better use in a soup, stir-fry, or casserole. Add whatever amount of broccoli florets to the Waldorf salad as you like, just be mindful to keep broccoli portion at what food scientists call the “fun ratio”. Adding broccoli florets to a Waldorf salad is a super tasty way to get kids or people who generally hate broccoli to eat raw broccoli, and enjoy it.
Raw broccoli is high in vitamins and nutrients and is great for digestive health.
Why Eat More Broccoli?
Broccoli has potential health benefits such as…
Lots of nutrition with few fat and calories.
Increased fiber, to lower risks from diabetes, coronary disease, obesity.
Increased digestive tract health (use your imagination).
Broccoli packs loads of vitamins, including vitamin C.
Broccoli is a great source of vitamin K for healthy bones and teeth, although I doubt your dog will be interested.
Some folks like to add broccoli as a pizza topping, but that’s a terrible idea, and I do not endorse it at all.
Give a waldorf and raw broccoli salad recipe a try and let me know what you think, and bon appétit!
Click a button below and share the dishes with your friends. You can also follow Chef Buck on Youtube. We appreciate all the kind comments and support, and we’ll see you next time in the kitchen!
If you like what CG and I do, support us on Patreon, or throw us a tip in our Paypal Tip Jar. We’ll happily enjoy a coffee on the road – Thanks! We appreciate all the support, and we’ll see you next time in the kitchen!
We include affiliate links for products on our website. Making a purchase after clicking on our links and we may earn a commission which helps us produce more videos and drink more coffee :^) We participate in the Amazon Services LLC Associates Program, which is an affiliate advertising program. It provides a means for us to earn fees by linking to Amazon.com and affiliated sites, so we can make more videos.
This zucchini noodles and marinara sauce recipe is super simple to cook. The marinara sauce will pair great with any pasta, even a gluten free faux zucchini pasta, which is really just raw zucchini cut into noodles, but your taste buds will trick your brain into believing otherwise. Thin sliced ribbons of zucchini will act just like egg noodles, except when it comes to racking up the calories.
What You Need To Make Zucchini Noodles with Marinara Sauce
2-3 ZUCCHINI 1 lb ground SAUSAGE 1 ONION crazy amount of GARLIC ½ GREEN BELL PEPPER 1 15 oz can DICED TOMATO 1 15 oz can TOMATO SAUCE 2-3 tsp ITALIAN SEASONING RED PEPPER FLAKES (to taste) ½ up PARSLEY (chopped, optional) SALT and PEPPER (to taste) OIL for sauteing
Add thin sliced raw zucchini to hot marinara for a great gluten free faux pasta
How To Make Marinara Sauce with Zucchini Noodles
In a large skillet, heat oil on medium heat.
When pan is hot, add sausage. Sometimes I’ll shape sausage into meatballs before adding to the skillet and other times I’ll just divide the sausage once it’s in the pan; whatever works for you is the right way.
Brown the sausage for a few minutes and then add the onion, garlic, and peppers.
Continue sauteing for 3-4 minutes.
Add herbs and salt and pepper to taste.
Add canned tomato and about ½ can of water.
Mix well and bring the skillet up to a bubble.
Reduce to a low simmer and cook 20-30 minutes. Add water as desired.
While sauce simmers, wash and peel 2-3 zucchini into thin noodles. I find a simple vegetable peeler to be the easiest method for slicing zucchini into thin, egg noodle like strips.
After sauce simmers, adjust seasoning as desired and stir in the chopped parsley. The parsley is optional, but adds a great color to the sauce, especially if you’re serving the marinara sauce over traditional noodles.
Remove the skillet from the heat and stir sliced zucchini noodles into the marinara sauce.
The thin zucchini will readily heat through in the hot marinara sauce and no more cooking is required.
Serve immediately (and top with Parmesan cheese if you like!)
raw ribbons of zucchini make a perfect pasta substutute
Give this very tasty marinara sauce with zucchini noodles recipe a try and let me know what you think, and bon appétit!
Parsnips are delicious and can be cooked into a great mash, just like potatoes. You can make this parsnip recipe as smooth or chunky as you like; I like it a little chunky–and I throw in a potato, too, with the skin on! The skin adds a great texture. Mashed parsnips make a nice change from the same old potato dish.
What You Need For This Parsnip Recipe
2 lbs. PARSNIPS 1 lb. POTATOES 3-4 Tbsp BUTTER 3-4 Tbsp OLIVE OIL HALF N HALF, CREAM, or MILK as desired SALT and PEPPER to taste ½ cup PARSLEY (chopped) and enough water or broth to cover the simmering parsnips
A delicious and creamy parsnip recipe. It’s a perfect side for a meaty entree or a filling addition to a vegetarian meal.
If you’re new to home cooking, get a bunch of spices, pots and pans, and start experimenting with different recipes. It’s a healthy hobby that can save a lot of money in the long run. Check out current prices for Complete Kitchenware Sets on Amazon as well as Complete Starter Spice Kits. Or try a thrift store! I’ve found some of my favorite kitchen gear at second-hand stores.
How to Make a Mashed Parsnip Recipe
Wash the parsnips and potato. I don’t peel either!–the skin adds great texture and nutrition (but you can follow your own heart). In a mid-size pot, heat butter and oil. Chop the parsnips and potatoes into chunks roughly ½ inch in size–they don’t have to be perfect, close is close enough. Add chopped parsnips and potato to the pot, mix with butter and oil and let cook 2-3 minutes, stirring as needed. Add water to the pot, just enough to cover the parsnips. Sometimes I use broth instead of water–give it a go sometimes, but it’s delicious either way. Add salt and pepper to taste. Bring the pot to a simmer, cover, and let simmer about 5 minutes. Uncover and continue simmering until the liquid is reduced and parsnips are soft and break apart. Add a little milk, cream, or half n half. This will make the dish super creamy; add to taste, but don’t add so much that the dish becomes soupy. Stir over heat a minute or two until the dish reaches desired consistency; you can use a hand blender to puree the mix or leave it chunky like a home-style mashed potato dish…it’s great both ways.
Here I’m serving parsnips with a country fried steak and fresh veggies.
Give this Mashed Parsnip recipe a go and let me know what you think, and bon appétit!
Thanks for checking out this quinoa salad recipe, and all of our recipes. Be sure and sign up for our mailing list so you’ll never miss a new recipe. Also click a button below and share the dishes with your friends. You can also follow Chef Buck on Youtube. We appreciate all the kind comments and support, and we’ll see you next time in the kitchen!
If you like what CG and I do, you can also support us on Patreon, or throw us a tip in our Paypal Tip Jar. We’ll happily enjoy a coffee on the road – Thanks! We appreciate all the support, and we’ll see you next time in the kitchen!
We include affiliate links for products on our website. So, if you make a purchase after clicking on our links, we may earn a commission which helps us produce more videos and drink more coffee :^) We participate in the Amazon Services LLC Associates Program, which is an affiliate advertising program. It provides a means for us to earn fees by linking to Amazon.com and affiliated sites, so we can make more videos.
Try this simple baby bok choy recipe with a super tasty sauce that’s ready in minutes. This dinky cabbage can be steamed or sautéed to create many healthy and tasty dishes. Bok choy is easily found in markets and is sold in several shapes and sizes under the name bok choy, ranging from tiny baby bok choy to the larger size cabbages that are perfect for soups.
What You Need To Make A Baby Bok Choy Recipe
15-20 BABY BOK CHOY HOT PEPPERS (finely chopped, to taste) 2 Tbsp GINGER (finely chopped) 5-7 cloves GARLIC (finely chopped) ½ cup HOISIN SAUCE 1-2 Tbsp OLIVE OIL for sauteing
fresh baby bok choy
How To Cook Baby Bok Choy
Wash the bok choy; bok choy tends to hold dirt around the stem bottoms, so soak and wash thoroughly. Slice the bok choy lengthwise into even halves.
Steam bok choy for 3-4 minutes. Do not overcook. The stalks are fairly thin and do not require much steaming to soften them, and you don’t want the leafy tops to become overdone; by not over cooking, you’ll preserve a crunchy texture in the stalk as well as more of the nutritional value.
In a skillet, heat olive oil on medium heat. Add hot peppers, ginger, and garlic and saute for 1-2 minutes. Add the hoisin sauce and mix well.
Add steamed bok choy to the skillet and toss with the sauce until well coated.
If desired, top with toasted sesame seeds or crushed peanuts–it’s very tasty that way–but I like it just as well without. This dish makes a complete meal when served with a rice or quinoa side.
Hope you like it! It’s well worth giving baby bok choy recipe a try. Give this dish a go and let me know what you think, and bon appétit!
This pesto recipe is crazy delicious, and makes a perfect sauce for pasta. I like my pesto pasta to have a thick sauce with lots of flavor!–a thin, watery pesto pasta is not for me; if you feel the same way, then give this pasta dish a go–and use a hearty pasta that will hold lots of pesto sauce, something like a penne or rotini pasta.
What You Need for Pesto Recipe
¾ cup PINE NUTS, toasted (or substitute almonds or walnuts) 2-3 cloves garlic 2 cups (packed) fresh BASIL leaves (or substitute 1 cup for SPINACH leaves) [4oz grocery basil = approx 2 cups] zest & juice from 1 small LEMON ½ – ¾ cup OLIVE OIL (darker the better) ½ tsp SALT and ¼ tsp PEPPER to taste ¼ tsp crushed RED PEPPER FLAKES ½ cup (to taste) freshly grated PARMESAN CHEESE (or asiago or Pecorino)
16oz PASTA (I prefer pene or rotini for this dish)
Fresh ingredients make the best pesto
How to Make Pesto Recipe
Toast the pine nuts at 400 degrees Fahrenheit for approx 3 minutes–but watch them like a hawk!–they will toast fast and you DO NOT WANT TO OVER-TOAST OR BURN them ’cause they cost way TOO MUCH MONEY! Check here for current pine nut prices on Amazon.
Place pine nuts and garlic in a food processor and pulse/chop. Season with salt and pepper and red pepper flakes. Into the processor, add basil (when buying basil, choose basil that has NOT flowered yet–or only a little–basil loses sweetness as the plant flowers), spinach, lemon juice and zest.
Process until the greens are shredded. Add olive oil incrementally and process until fully incorporated and to desired smoothness and consistency.
Transfer the pesto to a serving bowl and mix in the freshly grated Parmesan cheese.
And that’s it–your pesto sauce is complete! Use it however you see fit!
For pesto pasta: In a pot, cook 16oz of pasta according to package directions. I recommend a pasta that is thick and hearty, with lots of surface area for the pesto sauce to cling to; I lprefer a penne or rotini pasta.
When pasta is cooked to desired consistency–al dente is best, I think–reserve 1 cup of the pasta water, then drain the pasta–DO NOT RINSE!–this washes away flavor.
Immediately return drained pasta to the pot and add in the pesto. Mix with the noodles. Add some of the reserved pasta water until the sauce is as desired. Add pasta water SLOWLY! You DO NOT want to make your pesto sauce TOO THIN! Or at least I don’t–I like a lot of pesto flavor with my pasta.
Top with freshly grated Parmesan cheese and serve.
Pesto Pasta Recipe
Give this pesto pasta recipe a go and let me know what you think, and bon appétit!
And for another fantastic pasta dish that’s incredibly healthy and NOT EVEN PASTA, try this Spaghetti Squash Pasta Recipe.
just a few simple flavors and ingredients will make the best spaghetti squash recipe
Thanks for checking out the pesto pasta recipe. Be sure and sign up for our mailing list so you’ll never miss a Chef Buck cooking video, and click a button below and share the dishes with your friends. We appreciate all the kind comments and support, and we’ll see you next time in the kitchen! –Chef Buck
This okra curry makes a great side dish or awesome entree when served over rice. Okra is a hearty, tasty, versatile vegetable which is relatively cheap and usually found in markets year-round. I like to cook okra whole in the pod, but for spicier dishes, I like to cut up okra and saute it with tomato and onion. This Indian bhindi recipe is easy and delicious, so give it a try.
Okra Curry Ingredients:
1 lb. OKRA (cut) 4-5 ROMA TOMATOES (chopped) ½ ONION (sliced) 3 Tbsp OLIVE OIL 1 tsp FENNEL SEEDS 1 tsp CUMIN SEEDS 1 tsp HOT PEPPER (finely chopped) 5-7 cloves GARLIC (finely chopped) 2 Tbsp GINGER (finely chopped) 2 tsp CORIANDER 1 tsp TURMERIC ¼ CHILI PEPPER (or to taste) SALT and PEPPER (to taste)
Okra is a versatile vegetable and tasty whole or cut.
How to make Okra Curry
Select okra pods 1″ to 2″ in length. Okra gets huge if left overlong on the plant, but big okra can be woody and tough, so bigger isn’t always better. Choose firm, green pods–okra will blacken around the edges as it gets older, so use within a few days.
Wash and dry okra thoroughly. Slice off the ends and cut into uniform sizes for even cooking. Heat oil in a skillet on medium high.
Once oil is hot, add cumin and fennel seeds. The seeds will begin to crack after about 30 seconds. Add garlic and ginger and saute another 1-2 minutes. Add onion slices and continue cooking another 2-3 minutes. If you want a little more spice, also add some fresh chopped chili peppers.
Add in coriander, turmeric, and chili powder. Stir well for 1 minute and add tomato. I use 4 cut roma tomatoes, but use 1 can diced tomatoes if preferred. Add salt to taste. Reduce heat to medium. You can check prices for Indian Spices on amazon.
Let tomatoes cook about 5 minutes. Add okra. The acid in the tomato helps to cut down on the natural “gooeyness” of okra. Some folks call it slime, but it’s just the juices in the okra. The gooeyness will reduce the longer the okra is cooked, so cook uncovered another 5-10 minutes depending on how well you like your okra done.
I cook mine about 8 minutes. Sometimes I finish off the dish with a little garam masala for a more “Indiany” flavor, but this time I didn’t. Garam masala adds a little sweetness. Serve this okra curry on its own as a side dish or serve over rice as an entree. It makes a nice vegetarian meal with a salad.
Give this okra curry recipe a try and let me know what you think, and bon appétit!
Thanks for checking out our okra recipes, and all of our cooking videos. Sign up for our mailing list and never miss a new Chef Buck cooking video, and click a button below and share the dishes with your friends. We appreciate all the kind comments and support, and we’ll see you next time in the kitchen!
Thanks for Watching our Okra Recipe
Sign up for our mailing list so you’ll never miss a new recipe. Also click a button below and share the dishes with your friends. You can also follow Chef Buck on Youtube. We appreciate all the kind comments and support, and we’ll see you next time in the kitchen!
If you like what CG and I do, support us on Patreon, or throw us a tip in our Paypal Tip Jar. We’ll happily enjoy a coffee on the road – Thanks! We appreciate all the support, and we’ll see you next time in the kitchen!
We include affiliate links for products on our website. Making a purchase after clicking on our links and we may earn a commission which helps us produce more videos and drink more coffee :^) We participate in the Amazon Services LLC Associates Program, which is an affiliate advertising program. It provides a means for us to earn fees by linking to Amazon.com and affiliated sites, so we can make more videos.
A BBQ Bean Recipe with a spicy kick. This recipe is tangy and delicious and using a variety of beans gives this dish the illusion of grandeur, but it’s just beans, yummy tasty beans.
What You Need for BBQ Beans Recipe
4 15oz cans BEANS 1 large ONION (coarsely chopped) 1 GREEN PEPPER (coarsely chopped) 4 cloves of GARLIC (chopped) 1/3 cup light BROWN SUGAR 28oz can CRUSHED TOMATOES 14oz can BROTH 1/3 cup APPLE CIDER VINEGAR 1 Tbsp fresh ROSEMARY (minced) 1 tsp WORCESTERSHIRE SAUCE 1/2 tsp RED PEPPER FLAKES 1 1/2 tsp dried THYME 1/4 cup stone ground MUSTARD 1 Tbsp SOY SAUCE 1 BAY LEAF 3 Tbsp OLIVE OIL SALT & PEPPER, to taste
How To Make Easy BBQ Beans
Heat olive oil in large skillet over medium high heat. Add onion, green pepper and sauté about 2 minutes. Add garlic and continue sautéing on med heat until begins to brown (3-5 more minutes). Add rosemary, thyme and red pepper flakes and stir 1 minute. Add tomatoes, prepared mustard, brown sugar, soy sauce, worcestershire sauce, stock, vinegar. Mix well. Bring to a bubble. Stir in beans, bay leaf. Season with salt and pepper. Reduce heat and simmer on low for 60 minutes, stirring as needed. Serve as a side–or a main dish–if you want your main dish to be beans. And that’s it. Give this BBQ Beans recipe a try and let me know what you think, and bon appetit!
-6 to 11 percent of a cooked bean’s weight is protein. -Beans are one of the best things to eat for improving the stability of blood sugar levels in diabetics. -Beans are low fat, contain no cholesterol or saturated fat, and are an excellent source of fiber, protein, calcium, iron, folic acid and potassium. -North Dakota produces more beans than any other state in the USA.
Thanks for Watching our BBQ Bean Recipe Video!
Click a button below and share the dishes with your friends. You can also follow Chef Buck on Youtube. We appreciate all the kind comments and support, and we’ll see you next time in the kitchen!
If you like what CG and I do, support us on Patreon, or throw us a tip in our Paypal Tip Jar. We’ll happily enjoy a coffee on the road – Thanks! We appreciate all the support, and we’ll see you next time in the kitchen!
We include affiliate links for products on our website. Making a purchase after clicking on our links and we may earn a commission which helps us produce more videos and drink more coffee :^) We participate in the Amazon Services LLC Associates Program, which is an affiliate advertising program. It provides a means for us to earn fees by linking to Amazon.com and affiliated sites, so we can make more videos.
The hummus you buy at the market will never be as good as the hummus you make at home, so make it at home! Here is a no-frills, classic homemade hummus recipe.
1 15oz can CHICK PEAS also called Garbanzo Beans 2 Tbsp EXTRA VIRGIN OLIVE OIL SALT to taste – I use about ¼ tsp
WATER as needed
How to Make Hummus
I use canned beans because it’s a lot less hassle and they’re fine in hummus. Drain and rinse one 15oz can of chick peas, also called Garbanzo Beans.
IMPORTANT NOTE: For a creamier hummus, it makes a difference which ingredients you add first. Add only the tahini, lemon juice and garlic to the food processor and mix until creamy, usually around 30-45 seconds. Start with only 1 garlic clove because your friends and family will appreciate it.
Add the chick peas, extra virgin olive oil and salt to taste. Blend for another 30 seconds or so. [ The extra virgin olive oil has a richer flavor than the varieties used for sauteing. ]
Water can be added. The amount really depends on the consistency of the hummus you’re trying to make. Start with a ¼ cup and add more water if needed. Blend ingredients until desired chunkiness or smoothness is attained. Taste. Add more oil, salt and/or other ingredients (additional ideas provided below), according to your liking.
Garnish with extra virgin olive oil, paprika, parsley or cilantro, etc.
Make Different Hummus Recipes
All manner of ingredients can be added to the basic recipe above. ROASTED RED PEPPERS make a tasty addition, especially those from a jar as they blend readily, but forego adding water since the peppers will have plenty.
Also try adding cucumber, hot peppers, cumin, dill, curry, green onions, etc. The subtle flavor of the chick peas will pair nicely with most ingredients.
Serve hummus with warm pita bread, pita chips, crackers, or raw fruit and vegetables. It’s great in wraps and sandwiches. Hummus on a hamburger? Why not. It’s inexpensive, easy to make, delicious, and a healthy dining choice. Hummus fits perfectly into a healthy Mediterranean diet.
Thanks for checking out our homemade hummus recipe, and all of our recipes. Be sure and sign up for our mailing list and never miss a new Chef Buck cooking video, and also click a button below and share the dishes with your friends. We appreciate all the kind comments and support, and we’ll see you next time in the kitchen!
We include affiliate links for products on our website, so if you make a purchase after clicking on our links, we may earn a commission which helps us produce more videos and drink more coffee :^)
We participate in the Amazon Services LLC Associates Program, which is an affiliate advertising program providing a means for us to earn fees by linking to Amazon.com and affiliated sites, so we can make more videos.
This tomato okra recipe features whole pod okra in a tomato gravy. It’s a terrific southern style okra dish that tastes great without the dreaded okra slime!
Tomato Okra Recipe Ingredients
1 lb OKRA (whole pods) 1 medium ONION (chopped) 1 cup TOMATO PUREE (or 2 chopped tomatoes) 2 Tbsp OLIVE OIL 1 tsp MUSTARD SEEDS 1 Tbsp CORIANDER POWDER 1 tsp CHILI POWDER 1 Tbsp white wine VINEGAR SALT and PEPPER (to taste) ¼ cup WATER
How to Cook Okra
Heat olive oil on medium heat and add onions.
Cook for 1 minute and add mustard seeds. Add coriander and chili powder and continue sauteing onions for another minute.
Stir in the tomato puree. Add salt. I like using puree because it’s thick and sweet and acts like a gravy. You can substitute fresh chopped tomato instead if you prefer a thinner consistency.
Add fresh okra. Fresh! Buy okra that’s bright green and firm, not soft and bendy. Small okra pods are best—1” to 2”. Okra won’t stay pretty in the fridge for too long, so use soon after buying (1-2 days). Trim the stems, but not too much—you don’t want to cut into the pod and release the watery goo. I say goo, but not in a bad way. Okra is a dry climate vegetable and stores a lot of moisture in its pod—it’s a kinda gooey moisture—that’s why cut okra is often used in soups and gumbos as a thickener. Mix the okra into the tomato gravy.
Add vinegar and continue sauteing another minute. The tomato and vinegar will cut the “slickness” of the okra.
Add ¼ water, cover pan and reduce heat to low. Let simmer for 5 minutes.
Add pepper and adjust salt as needed and serve.
That’s it! Give this tomato okra recipe a try and let me know what you think.
You know what goes great with this okra recipe? This crazy delicious Blackened Fish Recipe.
Have fun in the kitchen. Get a bunch of spices, pots and pans, and begin experimenting with different recipes. Home cooking is a healthy hobby that will save you tons of money in the long run. Check out current prices for Complete Kitchenware Sets on Amazon. Or go to a thrift store! I’ve found some of my favorite kitchen gear at second-hand stores.
Thanks for checking out our okra recipes, and all of our cooking videos. Be sure and sign up for our mailing list and never miss a new Chef Buck cooking video, and also click a button below and share the dishes with your friends. We appreciate all the kind comments and support, and we’ll see you next time in the kitchen! –Chef Buck
Thanks for watching our recipe videos!
We include affiliate links for products on our website, so if you make a purchase after clicking on our links, we may earn a commission which helps us produce more videos and drink more coffee :^) We participate in the Amazon Services LLC Associates Program, which is an affiliate advertising program providing a means for us to earn fees by linking to Amazon.com and affiliated sites, so we can make more videos.
Try this flavorful Indian gobi matar recipe with cauliflower and green peas. I use a mix of spices to create my own masala for this vegetarian recipe, but you can substitute a store-bought pre-made curry spice mix. This spicy vegan cauliflower curry makes a great side dish or entrée.
What You Need To Make Gobi Matar
1 CAULIFLOWER (cut into florets) 1 15oz can DICED TOMATOES (or 2 med tomatoes) 1 8oz can GREEN PEAS 1 large ONION (chopped) 1 HOT PEPPER (finely chopped) 1 Tbsp GINGER (finely chopped) 5-7 GARLIC cloves (finely chopped) 1 Tbsp CHILI POWDER (sub cumin powder for less heat) 1 Tbsp CUMIN SEEDS 1 Tbsp TURMERIC POWDER 1 Tbsp CORIANDER POWDER 2 tsp GARAM MASALA (optional) 3 Tbsp OIL for cooking ¼ cup WATER SALT (to taste)
Is it gobi matar or gobi mattar? However you want to spell it, it’s a delicious Indian dish.
How To Make Cauliflower Curry
In a skillet or pot, heat oil on medium high heat.
Add cumin seeds. Seeds will brown and crack quickly, so almost immediately add onion.
Add onion and stir.
Cook 1 minute and then add ginger, garlic, and hot pepper.
Continue cooking until onions are soft.
Add turmeric, chili, and coriander powder and mix well.
Stir in tomatoes and continue cooking 4-5 minutes.
Add salt to taste.
Add tomatoes. If using fresh tomato, as tomatoes cook down I like to crush them with a spoon.
Stir in cauliflower florets.
Add water and bring dish to a bubble, then reduce heat to a simmer, cover, and let cook 4-5 minutes. I don’t want to cook all the nutrients out of the cauliflower, and I like my florets to still have a bit of crunch to them, so I simmer my cauliflower for only a few minutes.
When the cauliflower is almost cooked to your liking, add garam masala and green peas.
Mix and continue cooking until peas are heated through.
And that’s it, your cauliflower and peas are transformed into a delicious vegetable curry.
Thanks for checking out our gobi matar recipe, and all of our recipes. Be sure and sign up for our mailing list and never miss a new Chef Buck cooking video, and also click a button below and share the dishes with your friends. We appreciate all the kind comments and support, and we’ll see you next time in the kitchen! Check out the Chef Buck Youtube Channel.
Thanks for watching our Indian curry recipe!
We include affiliate links for products on our website, so if you make a purchase after clicking on our links, we may earn a commission which helps us produce more videos and drink more coffee :^) We participate in the Amazon Services LLC Associates Program, which is an affiliate advertising program providing a means for us to earn fees by linking to Amazon.com and affiliated sites, so we can make more videos.
Chole Palak is an Indian-style spinach and chickpea recipe that’s super flavorful and a breeze to make. With a few ingredients in the cabinet, this tasty dish is always just a few minutes away.
What You Need to Make Chole Palak
SPINACH (13 oz can or frozen, or 3 cups chopped fresh) CHICKPEAS (15 oz can, rinsed and drained) TOMATOES (diced, 14 oz can—or 2 fresh tomatoes HOT PEPPER (1 or 2, minced) GINGER (1 Tbsp, minced) OLIVE OIL (2-3 Tbsp) CUMIN SEEDS (1 tsp) ASAFOETIDA (¼ tsp) CORIANDER (1 Tbsp) CHILI POWDER (1 tsp) TURMERIC (½ tsp) GARAM MASALA (1 tsp) SALT (to taste) Check out current prices for Indian Spices on Amazon.
Chole Palak is a popular Spinach and Chickpea dish
How to Make Chole Palak
Heat olive oil on medium high heat and add cumin seeds and asafoetida. The seeds should sizzle when they hit the pan and will brown and crack quickly. Add the tomatoes, ginger, and peppers. Mix well and then add the coriander, chili, and turmeric powder.
Mix and allow the tomatoes to cook down 3-4 minutes. Add the spinach and salt and stir well. Add ¼ – ½ cup water—I like less water, but add as desired throughout the recipe. Cover and let cook 3-4 minutes.
Uncover and mix in chickpeas (also called garbanzo beans). Add another ¼ cup of water, reduce heat to simmer, cover and cook for 5-6 minutes. At this point the chickpeas will be soft enough to smash easily with a fork, which you don’t have to do, but I prefer the consistency of the dish if I mush about half of them.
Add the garam masala and stir another minute or two, also adding more water if desired. And that’s it! Enjoy! When I prepare an Indian meal, I almost always serve this dish; it’s easy, healthy, and delicious, so why not? Give chole palak a try, let me know what you think, and bon appétit!
Click a button below and share the spinach curry with your friends. You can also follow Chef Buck on Youtube. We appreciate all the kind comments and support, and we’ll see you next time in the kitchen!
If you like what CG and I do, support us on Patreon, or throw us a tip in our Paypal Tip Jar. We’ll happily enjoy a coffee on the road – Thanks! We appreciate all the support, and we’ll see you next time in the kitchen!
We include affiliate links for products on our website. Making a purchase after clicking on our links and we may earn a commission which helps us produce more videos and drink more coffee :^) We participate in the Amazon Services LLC Associates Program, which is an affiliate advertising program. It provides a means for us to earn fees by linking to Amazon.com and affiliated sites, so we can make more videos.
This is a super simple beet greens recipe. If you purchase beets with the greens intact, don’t throw those greens away! You can cook up a tasty dish using the beet greens (and if you don’t buy beets with the greens, then you need to make an adjustment in your shopping habit).
Beet Greens Recipe Ingredients:
1 bunch BEET GREENS ½ RED ONION (chopped) 1/3 RED BELL PEPPER (chopped) 2 cloves GARLIC (thinly sliced) 2 Tbsp OLIVE OIL SALT (to taste) PEPPER (to taste) LEMON JUICE or VINEGAR (optional)
Buy beet roots with the greens for two great ingredients.
How to make Beet Greens
Remove the greens from the root and wash thoroughly because greens always seem to need a good washing, especially beet greens. I like to separate the green leaf from the thicker stem since the leafy greens will need far less time to cook. Heat 2 Tbsp of olive oil on med-med high heat. When the oil is hot, add onions and garlic.
I chop the onion big and the garlic thin. Stir for a minute and then add the red bell pepper and stir for a few minutes more. I use about a third of a red pepper, not too much, because it’s more for color than to influence the taste of the dish. The stems are a nice contrast to the dark greens.
Add a little water if needed, but not too much, the greens will release plenty of water. Add the beet green stems. These will soften pretty fast, so a minute or two will be plenty of time Remember, overcooked veggies are a drag, man! Add the leafy greens.
Initially, I don’t mix the greens with the ingredients. I just cover the skillet for a minute or two and give the greens time to wilt. Remove the lid and stir, then add salt and pepper to taste and stir a minute more. That’s about when they’re ready. Camera Girl likes to add a splash of lemon, and vinegar goes great with greens, too. Remove from heat and serve hot.
Beet greens make a great side, especially with chicken or a cheap cut of meat. I like to serve greens as a main dish over quinoa, which is a seed that acts like a grain and is an excellent source of protein. (Check current prices for quinoa on Amazon.)
These quick beet greens make a perfect side dish for all kinds of meals, especially quick cook dishes like fish and kielbasa, or if you want to be a little less carnivorous, pair these greens with a side of beans and top with a soft-yolk egg. The yolk makes a great sauce!
Give these healthy beet greens recipes a try and let me know what you think, and bon appétit!
For another beet dish, try this Roasted Beet and Quinoa Recipe.
Quinoa with roasted root vegetables.
Thanks For Watching Our Recipe Videos!
Thanks for checking out our beet green recipes, and all of our recipes. Be sure and sign up for our mailing list so you’ll never miss a new recipe. Also click a button below and share the dishes with your friends. You can also follow Chef Buck on Youtube. We appreciate all the kind comments and support, and we’ll see you next time in the kitchen!
If you like what CG and I do, you can also support us on Patreon, or throw us a tip in our Paypal Tip Jar. We’ll happily enjoy a coffee on the road – Thanks! We appreciate all the support, and we’ll see you next time in the kitchen!
We include affiliate links for products on our website. So, if you make a purchase after clicking on our links, we may earn a commission which helps us produce more videos and drink more coffee :^) We participate in the Amazon Services LLC Associates Program, which is an affiliate advertising program. It provides a means for us to earn fees by linking to Amazon.com and affiliated sites, so we can make more videos.