Crab Meat and What Type to Buy

There are lots of easy, delicious crab recipes you can make at home. However, before you go shopping, it’s helpful to know something about the varieties of crab meat you may find, so you don’t pay too much for the crab recipe you are making. Check current prices for canned crab meat on Amazon.

We are going to talk about two basic kinds of shelled crab we find in our local US grocery stores.  

  • Pasteurized, refrigerated crab, that is generally labelled according to it’s ‘grade’ of crab meat. In the U.S., we find them in the fresh seafood section of the grocery store.
  • Canned crab, which can include variety of ingredients, including some preservatives. We find them in the grocery store with the cans of tuna, sardines and oysters.

Types of Crab Meat

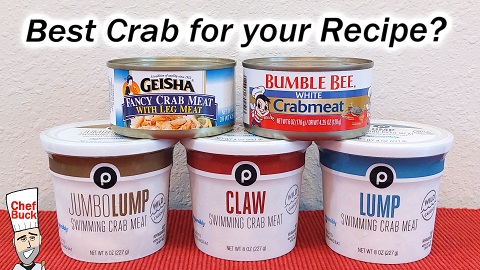
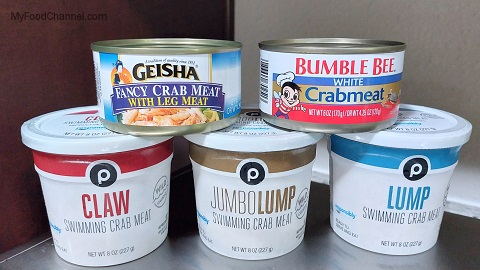
Of these two basic kinds of shelled crab meat you can find, there are four types we frequently encounter in either the refrigerated or canned forms:

crab meat
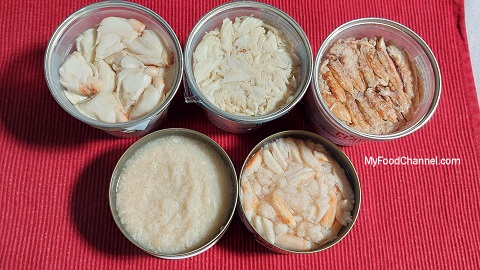
  1. Jumbo or Colossal lump crab. Buck would call this the ‘fancy pants’ of the crab meats.  It’s whole pieces of large blue crab’s muscles, and has a yummy delicate flavor.  Expect to pay top dollar for this kind of crab. This is reserved for SPECIAL occasions. Folks choose this meat for crab cocktail , crab sauté or crab louis recipes where the large crab pieces can be appreciated.
  • Lump (or backfin) crab meat. This grade of crab is great for a variety of dishes where you want the delicate crab taste to shine through. The difference between lump or backfin crab is just the size of the pieces; lump is bigger pieces. Both have the same great crab taste. Besides using for PART of SPECIAL crab cakes, this type of crab is ideal for a crab omelet or Crab Benedict.
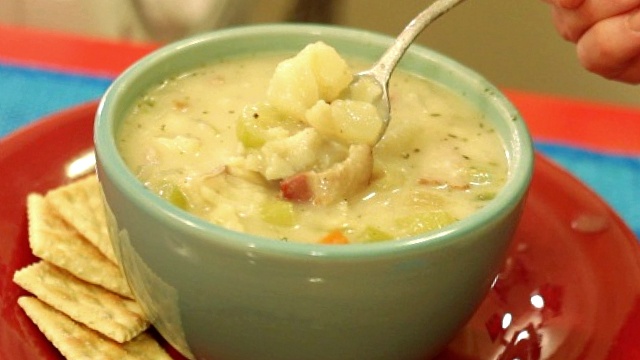
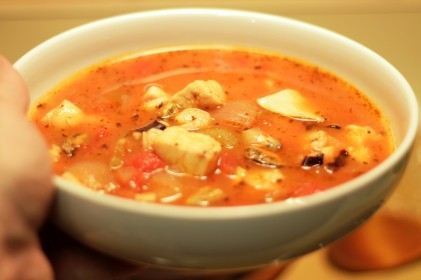
  • Claw crab meat.  It’s some of the cheapest graded crab that you can find in the US. It will be more brown and oiler, than white crab meat. It is also more flavorful, and I actually prefer it in many recipes where I want the crab taste to stand up to other ingredients – like in any kind of seafood soups/bisques, or salads. Also, I use this meat in crab cakes when I’ll be adding green peppers, horseradish or other strong flavors. Since we’re talking about crab cakes, when I want to treat Chef Buck and myself, I mix fresh claw crab meat with lump crab.
  • Special or white crab meat. This is not to be confused with the crab meat’s color. Most natural ‘white’ crab meat is more of an off-white or ivory color. You get a good crab flavor and color in pieces about the size of shredded canned tuna.

This list is not meant to be exhaustive. In fact, there are two types of readily available crab that ARE NOT included in this list: truly fresh crab that you can buy from your local seafood shop or fisherman, and also NOT included in this list is imitation crab which, just like it sounds, isn’t really crab.

crab meat

More Tips For Choosing Perfect Crab Meat For Your Recipe

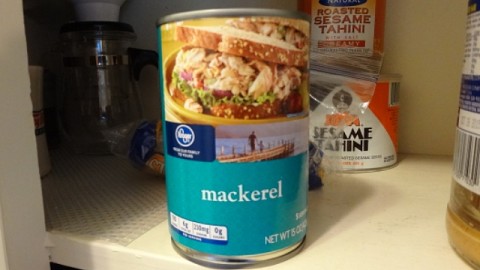
Canned crab meat. There are MANY brands of canned crab that represent a vast variety of flavors and textures. Many are perfectly great for making some crab dishes. Besides the checking the basics such as sale by date, texture, smell, it’s still a bit of trial and error to identify brands that work for your particular recipes. That just means to ‘test before you guest’; stick to a canned brand that you know, when guests are coming over, rather than using a ‘mystery’ can. Also, buying smaller cans of crab less than 16oz often yields better quality. Check current prices for canned crab meat on Amazon.

Some folks think that canned crab is too salty. One way to freshen canned crab a bit is to drain it. Then soak it in ice water for 10 minutes, drain it again and pat it dry.

Net weight vs Dry weight. Especially for canned crab, you will often find a net weight vs a dry weight. Unless otherwise specified, your recipe is talking about the dry weight of the can, the weight AFTER you drain the brine.

Crab is high in protein, and can be a quick-fix dish. The ‘graded’ forms of crab meat come from the crab muscles, legs and claws.  Other ‘ungraded’ crab meat can also include ‘brown’ crab meat that is found near the crab’s top shell. The ‘brown’/top shell meat is high is omega-3s, a smoother texture and stronger flavor. The white is a ‘cleaner’ flavor and has a firmer texture.

Crab Cake Recipe

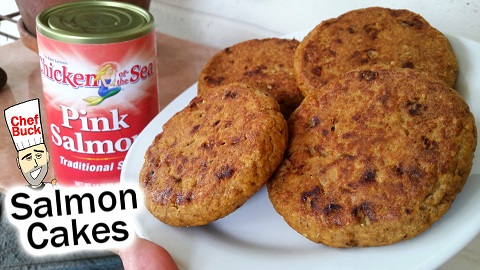
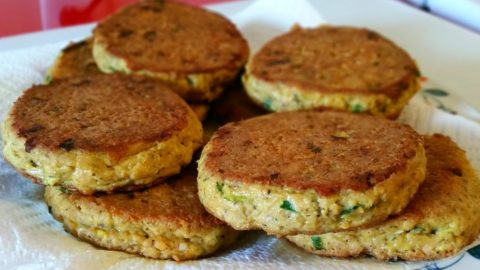
Crab cakes are one of our favorite crab dishes to prepare, but remember, when forming crab cakes, DON’T overmix and DON’T overpack the cakes; you’re making delicate crab cakes, not denser salmon cakes or hamburgers.

Ingredients for Crab Cakes

16-18oz CRAB MEAT, picked over gently to assure no shells remain. We like to use a mix of refrigerated CLAW crab meat and canned crab.
3 Tbsp PORK RINDS, finely crushed
1 large EGG, beaten
½ cup MAYONNAISE
1 tablespoon DIJON MUSTARD
1 tablespoon WORCESTERSHIRE SAUCE
1⁄8 teaspoon fresh ground BLACK PEPPER
¼ cup OIL for cooking
Lemon wedges, for serving

crab meat

How to Make Crab Cakes

In a large bowl, whisk the egg. Add mayo, mustard, Worcestershire sauce until smooth. Mix in crushed pork rinds. Gently fold drained crabmeat into mixture.

Gently fold drained crabmeat into mixture. Check current prices for canned crab meat on Amazon.

Cover and refrigerate the mix for at least 1 hour, and can even be refrigerated overnight.

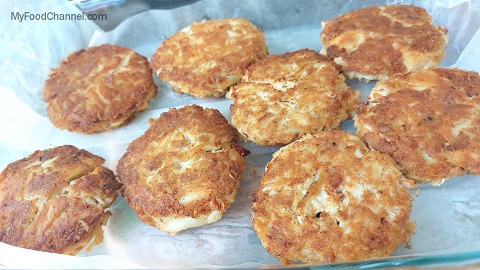
When ready to cook, heat oil in a large skillet over medium heat. Gently form cakes into patties about 1½” thick using approximately ⅓ cup of crab mixture for each patty.

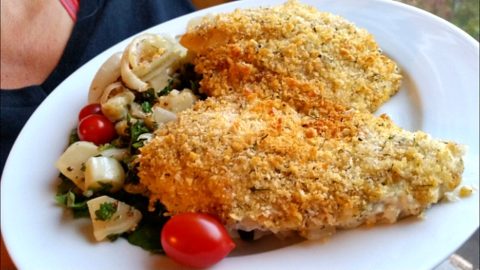
Add the crab cakes to the skillet and cook over moderately high heat until golden and heated through, about 2-3 minutes per side. Use a large enough skillet to allow room to turn the cakes. Turn the cakes gently with a sturdy spatula, and let the cakes set before you turn them; if you try to turn them too soon, they are more likely to fall apart.

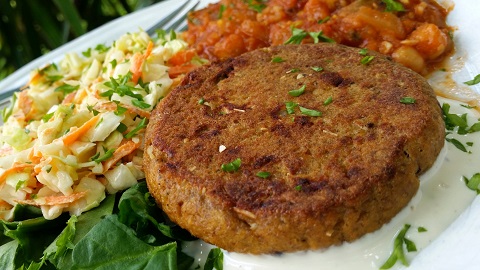
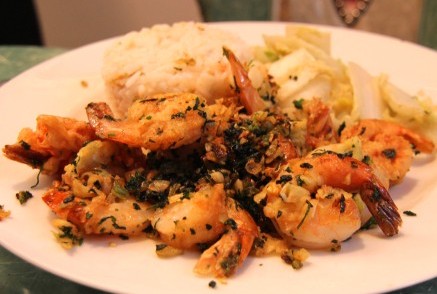
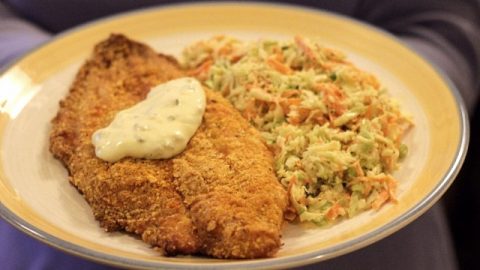
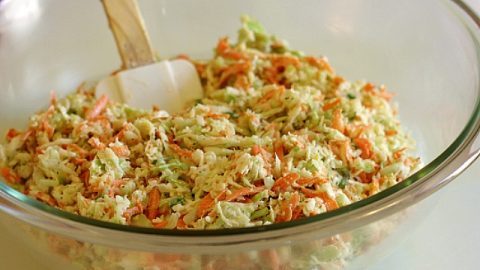
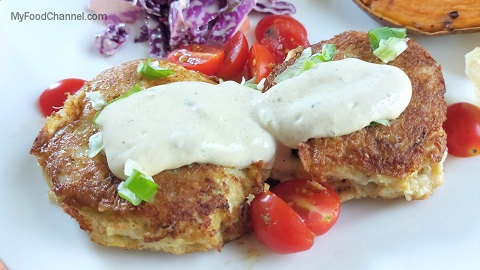
Serve crab cakes with your favorite sauce or dressing, or just lemon wedges. We often keep crab cake meals light, and will accompany them with a light salad or side of coleslaw.

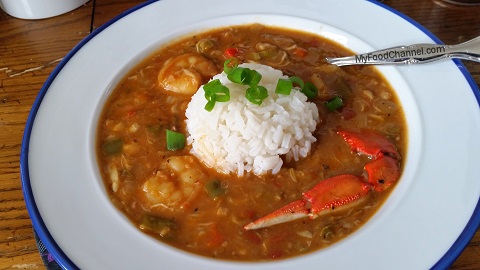
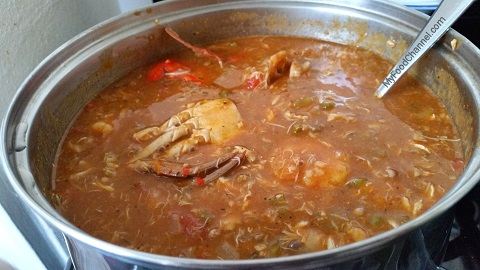
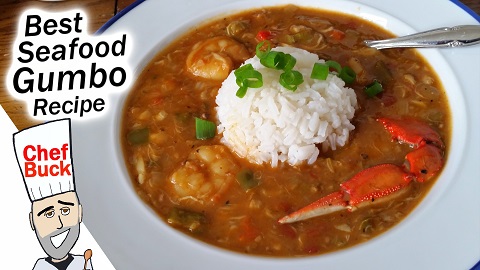
For another seafood dish with crab, check out this Authentic New Orleans Seafood Gumbo Recipe.

seafood gumbo recipe

Thanks For Checking out our Recipes

We hope this info is helpful for the next time you’re out buying crab meat at the supermarket. Sign up for our mailing list so you’ll never miss a new recipe. Also click a button below and share the dishes with your friends. You can also follow Chef Buck on Youtube. We appreciate all the kind comments and support, and we’ll see you next time in the kitchen!

If you like what CG and I do, support us on Patreon, or throw us a tip in our Paypal Tip Jar. We’ll happily enjoy a coffee on the road – Thanks! We appreciate all the support, and we’ll see you next time in the kitchen!

We include affiliate links for products on our website. Making a purchase after clicking on our links and we may earn a commission which helps us produce more videos and drink more coffee :^) We participate in the Amazon Services LLC Associates Program, which is an affiliate advertising program. It provides a means for us to earn fees by linking to Amazon.com and affiliated sites, so we can make more videos.

Share and Enjoy !

Seafood Gumbo Recipe – New Orleans Gumbo

seafood gumbo recipe

Make the best seafood gumbo at home! Since we’re in New Orleans, we thought we’d make a big pot of seafood gumbo with shrimp, fish, and crab –and of course a little fresh okra! It takes a little time to make a great gumbo, but maybe not as long as you think, and it’s not complicated, so give this gumbo recipe a try and let me know what you think.

seafood gumbo recipe

Ingredients for Seafood Gumbo Recipe

¾ cup oil VEGETABLE OIL …don’t substitute butter because it burns easily, but we’ll add a little butter eventually.
1½ cup FLOUR
2 Tbsp BUTTER
2 cup ONIONS, finely chopped
2 cups GREEN BELL PEPPER, chopped
1 cup RED BELL PEPPER, chopped
1 cup CELERY, chopped
12-16oz FRESH OKRA, cut into ¼” discs (frozen then thawed okra can be used, but fresh is better)
3-5 cloves GARLIC, minced
14.5 oz can undrained petite DICED TOMATOES
8oz can TOMATO SAUCE
2-3 BAY LEAVES
2 Tbsp SMOKED PAPRIKA (1 Tbsp to start, another Tbsp later in the recipe)
1 tsp dried THYME
4 Tbsp CREOLE SEASONING (2 Tbsp to start, another 2 Tbsp later in the recipe)
1 tsp SALT
4 cups of chicken or veggie STOCK (sub 8 oz clam juice for 1 of the cups, if desired)
1 tsp WORCESTERSHIRE SAUCE

4 lbs seafood:
2 lb firm white FISH like cod, catfish, tilapia, etc. cut into ½” cubes
1 lb peeled and deveined SHRIMP
1 lb LUMP CRAB MEAT, or use less and substitute more fish or shrimp
Toss in a few hard shell GUMBO CRABS if you like, but that’s optional!

If you don’t use a pre-prepared GUMBO SEASONING MIX, you can make your own creole seasoning with a simple mix of paprika, cayenne, garlic powder, oregano, salt and pepper. Here’s the GEAUX CREOLE SEASONING we used in the recipe video; price it on Amazon.

seafood gumbo recipe

How to Make Seafood Gumbo

  • Chop, dice, mince your veggies.
  • In a large pot, heat oil over medium heat for a few minutes until heated through. Check prices for Big Gumbo Cooking Pots on amazon.
  • Mix in flour and stir until smooth and then continue to stir constantly. You are making a “sort of roux”. A roux is equal parts fat and flour, but we’re using a little more flour in this recipe. Keep the heat on low to medium low and stir until the mixture slowly browns into a dark, rich, ice cream coffee coor. This might take 40-50 minutes, but don’t rush the process or your mixture will scorch.
  • When the roux is a rich, medium brown color, immediately add onions, green pepper, celery, garlic, and okra and stir well.
  • Add the first round of seasonings: 1 Tbsp smoked paprika, 2 Tbsp Creole seasoning, 1 Tsp dried crushed thyme, and bay leaves.
  • Add petite tomatoes, tomato sauce, and 4 cups of water/stock, and also include hard-shell gumbo crabs (optional). Mix everything together well.
  • Turn up the heat to bring the pot to a soft boil. Turn the heat down and simmer for 30 minutes. Stir occasionally.
  • After 30 minutes, add Worcestershire sauce and chopped fish and let the pot continue to simmer for about 10 minutes.
  • Add additional seasoning to finish: 2 Tbsp Creole seasoning, 1 Tbsp smoked paprika, 1 tsp dried crushed thyme.
  • Add shrimp and crab and cook for a final 5-10 minutes.
  • Adjust seasoning and stock/water as desired.

Serve seafood gumbo with WHITE RICE and top with chopped GREEN ONION or PARSLEY.

If you’d like to try a fish stew that tastes great, is very inexpensive, and super easy to make, then a take a look at this Canned Mackerel Fish Stew Recipe.

fish stew recipe

Thanks For Watching Our Recipe Videos!

Thanks for checking out our seafood gumbo recipe, and all of our recipes. Be sure and sign up for our mailing list so you’ll never miss a new recipe. Also click a button below and share the dishes with your friends. You can also follow Chef Buck on Youtube. We appreciate all the kind comments and support, and we’ll see you next time in the kitchen!

If you like what CG and I do, you can also support us on Patreon, or throw us a tip in our Paypal Tip Jar. We’ll happily enjoy a coffee on the road – Thanks! We appreciate all the support, and we’ll see you next time in the kitchen!

We include affiliate links for products on our website. So, if you make a purchase after clicking on our links, we may earn a commission which helps us produce more videos and drink more coffee :^) We participate in the Amazon Services LLC Associates Program, which is an affiliate advertising program. It provides a means for us to earn fees by linking to Amazon.com and affiliated sites, so we can make more videos.

Share and Enjoy !

Eggplant Tuna Casserole Recipe

Twice baked eggplant tuna casserole is a delicious comfort food that is surprisingly healthy. It is an easy and forgiving recipe too. If you are trying to wean yourself away from yummy (aka bready, meaty, cheesy) tomato dishes, this can help. Yes, it has some parmesan cheese but is delicious without the addition of mozzarella, ricotta, flour and/or egg that you often find in similar dishes. When you scan the ingredients and see eggplant and tuna – don’t flee! The first time I had a variation of this dish, I was very glad I wasn’t told those two ingredients were in it. Try it! It’s easy to make, delicious, and you may surprise yourself too.

eggplant tune casserole

Ingredients Needed To Make Eggplant Tuna Casserole

1 large EGGPLANT
1 tsp SALT
2 cups ONION, diced
7+ medium/large GARLIC CLOVES, pressed (go wild, use a whole bulb!)
OIL for veggie baking AND casserole dish (around 2 1/2 Tbsp)
9 oz CANNED TUNA in water, drained
14.5 oz can DICED TOMATOES, half drained
8 oz can TOMATO SAUCE
1 Tbsp ITALIAN SEASONING
1 Tbsp ROASTED GARLIC POWDER (regular garlic powder works too)
1 tsp MINCED ONION SEASONING
1 tsp CARAWAY SEEDS
½ C grated PARMESAN CHEESE, divided
Optional Seasoning: In the video, we also used 1 tsp OLDE THOMPSON EVERYTHING ITALIAN (it’s pizza seasoning – adds a bit of heat too!)

In the video we used a 2 qt glass pyrex casserole dish, measuring 7 1/2 x 12. Check out current prices for a BAKING DISH on Amazon.

How To Make Twice Baked Eggplant Casserole

Preheat oven to 425 F.

Cut eggplant into 1/4 inch discs. Quarter the bigger discs. Sprinkle/distribute salt and let sit for 10 minutes (to draw out some moisture).  While your eggplant sweats, you can dice the onion. Peel and press the garlic. Put any extra small cloves aside so they don’t burn during the roasting process. [If you’ve never had roasted garlic before, and the amount we’re suggesting sounds very scary, know this – roasted garlic has a much more mellow flavor compared to eating it raw or sautéed. You can have roasted garlic without having ‘garlic breath’ for several hours.]

Oil baking sheet and casserole dish.

Pat eggplant dry.  

If your eggplant is extra large or your baking pan is small – you will need to roast your veggies in two parts (or use two oiled baking sheets). Place your eggplant and garlic in single layer on the oiled baking sheet. Sprinkle the onion onto pan – letting the onion cover any remaining surface area on the pan.

Cook your veggies for just 15-20 minutes. The onion tips will just begin to brown. In the finished casserole, the onions still have some texture – something to bite into*.

While your veggies cook, mix together your sauce of tuna, tomatoes, tomato sauce, and seasonings. Set aside.

Reduce your oven temperature to 350 F, when you take your veggies out.

Pick out garlic. Dice your garlic, in order to distribute the yummy flavor thorough out finished dish. Mix the diced garlic into your sauce.

In your oiled casserole dish, layer one-half of your eggplant, then one-half of your sauce** and sprinkle with about 1/3 of your Parmesan. Repeat the layers, topping with remaining 2/3 Parmesan cheese.

Bake, uncovered, in 350 degree F oven for 20 to 25 minutes. Most of the liquid will be gone. Broil/brown the cheese -watch carefully after 1 minute.  

Let it cool and then enjoy!

eggplant tuna casserole

If you enjoy this twice based eggplant casserole recipe, then check out other favorite eggplant recipes!

Hints To Make Your Casserole Just Right

Some people (Hi Mom!) would rather have their onions cooked more, so they don’t taste undone. If you’re in that group, simply cook your veggies till your onions are softer.

It’s okay if your sauce has a bit of liquid to it – simply mix up the sauce before you start layering.

How To Freeze Your Twice Baked Eggplant Casserole

Cover unbaked casserole with freezer paper and date it.  Freeze it for up to one month.

To bake frozen casserole, place in 375 degree F oven for 50 to 60 minutes. Let it set 10 minutes before serving to reabsorb some moisture.

If you’re not into eggplant, try a classic Tuna Casserole Recipe, but one that’s not wet!

tuna casserole recipe

Thanks For Watching Our Recipe Videos!

Thanks for checking out our eggplant tuna casserole recipe, and all of our recipes. Be sure and sign up for our mailing list so you’ll never miss a new recipe. Also click a button below and share the dishes with your friends. You can also follow Chef Buck on Youtube. We appreciate all the kind comments and support, and we’ll see you next time in the kitchen!

If you like what CG and I do, you can also support us on Patreon, or throw us a tip in our Paypal Tip Jar. We’ll happily enjoy a coffee on the road – Thanks! We appreciate all the support, and we’ll see you next time in the kitchen!

We include affiliate links for products on our website. So, if you make a purchase after clicking on our links, we may earn a commission which helps us produce more videos and drink more coffee :^) We participate in the Amazon Services LLC Associates Program, which is an affiliate advertising program. It provides a means for us to earn fees by linking to Amazon.com and affiliated sites, so we can make more videos.

Share and Enjoy !

Swordfish Steaks with Rustic Veggies

Seared swordfish steaks are meaty and filling filets of fish. I find swordfish filets at a good price from the grocer’s freezer, but this simple fish preparation will work with many different fish types. To cook swordfish follow along step by step in this real-time recipe video as I prepare and serve blackened fish filets with couscous and rustic veggies. This complete fish dinner can be prepared and served in about 30 minutes.

How to Cook Swordfish Steaks

I buy swordfish steaks frozen from my regular big box grocery in the freezer case near the seafood counter. The swordfish filets are individually packaged and frozen and quite thick, but you can use almost any fish for this recipe, just be mindful of the size of the filet and adjust the cooking time as needed. Fish is easy to cook, and even easier to overcook, which you’ll want to avoid.

swordfish steaks

This basic preparation is a simple seasoning and searing of the filet. This is similar to a blackened fish, but I’m not using butter, which is common to blackening fish.

  • If frozen, allow the swordfish steaks to thaw completely.
  • Season both sides of the fish very well. Many seasonings will work great, but some of my favorites are paprika, chili powder, garlic powder, black pepper, and of course salt.
  • Heat 2 Tbsp of oil in a heavy-bottomed skillet on medium high heat. A cast iron skillet is ideal. I travel with a Lodge brand cast iron skillet which works well and is priced well, too.
  • Once oil is heated, add the swordfish steaks to the skillet. It should sizzle right when it hits the pan. Leave the fish alone and allow it to cook undisturbed 4-5 minutes, depending on the size of the fillet. Adjust the stove temperature as needed.
  • Turn the fish once and continue to cook on the other side 2-4 minutes as needed. If the swordfish steaks are especially thick, sear the sides of the fish as well.
  • Serve right away, and top with a tsp. of hot butter if desired.

Fish cooks up fast. Whether you’re serving salmon, tuna, swordfish steaks, mahi mahi, etc., you can whip up a fancy feast in quick time with these equally fast side-dish recipes.

Quick Rustic Veggies Recipe

This is a quick and healthy side-dish that pairs perfectly with swordfish and looks great if you chop the veggies into large irregular sizes. I use Za’atar as a seasoning in the recipe video; it’s a tasty ingredient we’ve enjoyed trying out, especially in vegetable dishes. You can check the current price for za’atar on Amazon.

2 cups thick cut ZUCCHINI
3-5 GARLIC CLOVES chopped
½ large ONION chopped
1 or 2 fresh TOMATOES chopped
1-2 Tbsp fresh chopped PARSLEY
Season as desired…
In the video recipe I use
½ tsp SALT
½ tsp BLACK PEPPER
1 Tbsp ZA’ATAR (or substitute ITALIAN SEASONING)
OIL for sauteing

  • Heat oil in a skillet on medium high heat.
  • Add in the onions and garlic and sauté 2 minutes. Adjust heat as needed.
  • Mix in the seasonings and sauté another 2 minutes.
  • Add in the zucchini and cook for 5 minutes.
  • Turn off the heat and stir in the chopped tomato and parsley and serve.
swordfish steaks

Fancy Couscous Recipe

Couscous is a quick-cooking pasta that is incredibly easy to prepare. Plain couscous makes a nice side-dish for swordfish steaks, but it doesn’t take much effort to transform plain couscous into fancy couscous.

about 1 cup COUSCOUS
½ tsp CUMIN SEEDS (optional)
3-5 GARLIC CLOVES chopped
½ large ONION chopped
1-2 Tbsp fresh chopped CILANTRO (or substitute fresh PARSLEY)
Season as desired…
In the video recipe I use
½ tsp SALT
1 tsp CORIANDER POWDER
1 Tbsp ITALIAN SEASONING
2 Tbsp OIL for sauteing

  • Heat oil in a pot on medium high heat.
  • When oil is hot, add in the cumin seeds and let cook for about 10 seconds. Then add in the onion and garlic and continue to sauté for 3-4 minutes.
  • Stir in the seasoning.
  • Add about 1 cup of water, cover, and bring the pot to a boil.
  • When water boils, stir in the couscous and the chopped parsley. The measure of couscous should be the same as the measure of water.
  • Remove the pot from the heat, recover the pot, and let sit undisturbed for at least 5 minutes.
  • After 5 minutes, fluff the couscous with a fork and serve.

That’s it! All three of these dishes combine to make a terrific fish dinner that kinda looks fancy, but it’s really pretty easy. Swordfish steaks have a great meatiness that is texturally reminiscent of a nice cut of beef, so if you’ve never tried swordfish then give it a go, it will taste like a nice treat. But whatever fish you choose to cook, it will probably pair very well with these quick side-dishes.

If you enjoyed this real-time Swordfish Steak dinner, then you might also like this step-by-step Mackerel Stew Recipe. This seafood stew is incredibly tasty and a great dish for family meals or anyone looking to freeze some leftovers.

fish stew recipe

Thanks for checking out our Swordfish Steak video. If you’re a stranger to this fish, here’s some swordfish info.

Be sure and sign up for our mailing list and never miss a new Chef Buck recipe, and also click a button below and share the dishes with your friends. We appreciate all the kind comments and support, and we’ll see you next time in the kitchen!

Thanks for watching our Cooking Videos!

We include affiliate links for products on our website, so if you make a purchase after clicking on our links, we may earn a commission which helps us produce more videos and drink more coffee :^) We participate in the Amazon Services LLC Associates Program, which is an affiliate advertising program providing a means for us to earn fees by linking to Amazon.com and affiliated sites, so we can make more videos.

Share and Enjoy !

Canned Clam Recipe for Flatbread Clam Pizza

Try this easy canned clam recipe for healthy flatbread clam pizza. Price wise, canned clams are one of the best buys for canned seafood. We use a thin tortilla wrap to make a super light clam pizza that packs tons of flavor without a lot of heavy bread.

How to Make Flatbread White Clam Pizza

This canned clam recipe will work with almost any kind of premade flatbread. For instance, we prefer a thin wrap because it crisps up nicely around the edges and doesn’t overwhelm the flavor of the pizza toppings.

You can really adjust the toppings and measurements for this pizza recipe. In the video, we use two cans of clams, one minced and one chopped, for an overwhelmingly clammy pizza experience, but we’ve also made this recipe using just one can of clams for two tortilla wrap pizzas and found it more than satisfying, so definitely adjust the recipe to taste.

And we love garlic, so two heaping Tbsp of minced garlic is perfect for us on a single pizza wrap. However, use less garlic if you’re scared.

canned clam recipe

Ingredients for a Flatbread Canned Clam Recipe

large TORTILLA WRAP or FLAT BREAD of choice
6.5 OZ minced CANNED CLAMS …use ½ can or an entire can for each wrap
1-2 Tbsp GARLIC minced
2 Tbsp extra-virgin OLIVE OIL
¼ cup grated MOZZARELLA CHEESE
1-2 Tbsp grated PARMESAN CHEESE
½ tsp dried OREGANO or Italian Seasoning

optional toppings:
some spinach leaves, thinly sliced onion, capers, chopped artichoke heart, cooked bacon crumbles, fresh parsley, dried red pepper flakes for heat

canned clam recipe

Check current prices for CANNED CLAMS on Amazon.

How to Cook Flatbread Clam Pizza on a Tortilla Wrap

  • Preheat the oven to 425 degrees.
  • In a small bowl, combine olive oil and minced garlic.
  • Brush half of the garlic-oil over the tortilla wrap, making sure to extend all the way to the tortilla edges.
  • Evenly distribute clams over the crust.
  • Add additional ingredients as desired. Remember to take your toppings all the way to the tortilla edges to avoid burnt edges with no flavor.
  • Drizzle the pizza top with the remaining garlic-oil.
  • Top with the dried oregano, and freshly grated Parmesan and Mozzarella cheese.
  • Place pizza on a lightly sprayed pan and slide into the preheated oven.
  • Bake until the crust edges are lightly browned and the cheese is melted, about 8-10 minutes.
  • Loosen the tortilla from the pan with a spatula and serve the pizza hot, warm, or cold; it’s garlicky and delicious anytime.
  • For added heat, sprinkle with dried red pepper flakes.
  • This flatbread pizza looks nice with fresh greens, and just a little spinach adds color and nutrition. But if you don’t love spinach, just a sprinkling of fresh parsley before serving will do the trick.

Check out more canned seafood recipe Ideas for a healthy diet.

canned herring recipe
Canned herring is an affordable and easy way to incorporate the health benefits of fish into your diet.

Thanks for checking out this canned clam recipe, and all of our cooking videos. Be sure and sign up for our mailing list and never miss a new Chef Buck cooking video, and also click a button below and share the dishes with your friends. We appreciate all the kind comments and support, and we’ll see you next time in the kitchen!

Here’s some nutritional data for canned clams.

Thanks for watching our canned clam recipe video!

We include affiliate links for products on our website, so if you make a purchase after clicking on our links, we may earn a commission which helps us produce more videos and drink more coffee :^) We participate in the Amazon Services LLC Associates Program, which is an affiliate advertising program providing a means for us to earn fees by linking to Amazon.com and affiliated sites, so we can make more videos.

Share and Enjoy !

Tuna Casserole Recipe – Creamy NOT Wet!

Is there a more classic comfort food than a Tuna Casserole Recipe? A creamy tuna noodle bake is one of the easiest, tastiest dishes that you can serve. It’s super affordable, very filling, and a versatile recipe for using up odds and ends in the fridge.

Tuna Casserole Ingredients

12 oz can of TUNA in water
8 oz SHELL PASTA (8 ounces before cooking)
4 oz CREAM CHEESE softened
1 can CREAM of MUSHROOM SOUP
1 small ONION chopped
1 Tbsp PIMIENTOS or substitute fresh chopped peppers
½ cup CELERY chopped
some GREEN PEAS
1 Tbsp fancy MUSTARD
½ sleeve of SALTINE CRACKERS or BREADCRUMBS
2 Tbsp BUTTER
SALT and PEPPER to taste

tuna casserole recipe

How to Make Tuna Casserole Recipe

  • In a large bowl, simply combine all of the ingredients. Check current price for canned tuna on Amazon.
  • Cook the shell pasta according to package directions and then stir into the mix, but prepare the pasta al dente, which means firm and chewy, do not overcook!
  • Pour mixture into a greased 8×8 baking dish.
  • Spread the mixture evenly in the dish and then top with buttered, crushed saltines, or breadcrumbs.
  • Bake in an oven preheated at 400˚F for 30 minutes or until the topping is golden brown.

And that’s it! Hope you love this easy tuna casserole recipe. For another easy casserole dish, check out this Squash Casserole Recipe.

squash casserole recipe

Thanks for checking out our tuna casserole recipe, and be sure and sign up for our mailing list so you’ll never miss a Chef Buck cooking video, and also click a button below and share the dishes with your friends. We appreciate all the kind comments and support, and we’ll see you next time in the kitchen!

We appreciate you watching our recipe videos!

We include affiliate links for products on our website, so if you make a purchase after clicking on our links, we may earn a commission which helps us produce more videos and drink more coffee :^) We are participants in the Amazon Services LLC Associates Program, which is an affiliate advertising program that provides a means for us to earn fees by linking to Amazon.com and affiliated sites.

Share and Enjoy !

Best Fennel Recipe with Shrimp

What’s fancier than a fennel recipe? Shrimp with fennel! Fennel sounds fancy, but it’s a super easy vegetable to use with a slightly different taste than all other vegetables. You can eat fennel cooked or raw, so it pairs well with quick-cooking seafood. If you’ve never tried fresh fennel before, this shrimp and fennel recipe is a great place to start.

Ingredients for Fennel Recipe

1 bulb of FENNEL
1 lb. SHRIMP peeled and deveined
1 small ONION sliced
15-20 sliced CHERRY TOMATOES
1 Tbsp TOMATO PASTE
½ cup to 1 cup WHITE WINE
1 Tbsp SMOKED PAPRIKA
SALT and PEPPER to taste
2 Tbsp OIL for cooking
FENNEL fronds for garnish

Fennel Recipe with Shrimp

How to Buy and Cut Fresh Fennel

When you buy fennel at the store, it might simply be the bulb, or it might include the bulb, stalks and fronds. Buy fennel with an unblemished bulb, or at least with a bulb that can be cleaned up easily with a peeler. The edible parts of fennel are the bulb and the dill-like fennel fronds. The stalks resemble celery, but are too chewy to enjoy.

fennel recipe

Pull off some of the fennel fronds, wash, dry, and then chop them into a garnish for later. The stalks can be cut away and discarded. Wash the bulb and cut away any blemishes, or remove the outer layers entirely if they have too many spoiled areas.

Thinly shave the bottom of the bulb away. Cut the bulb in half from top to bottom to reveal the core. Larger fennels will have thicker layers and a larger core. Make divots on either side of the core and cut it away and discard. Slice the fennel into larger, thin pieces. Smaller fennel is more tender, and better suited for raw recipes, while larger fennel is best for cooking.

How to Peel and Devein Shrimp

For this recipe, I like to buy medium-sized shrimp at the best price I can find. Don’t spend gobs of cash on super-model shrimp, because the shrimp are not the star ingredient, this is an ensemble of great tastes working together.

If the best-priced shrimp aren’t peeled and deveined already, that’s fine, cleaning shrimp is a simple task. Just take the shrimp and twist off the head, then squeeze the shrimp at the tail-end of the shell and pull the shell and legs off like a jacket. The head and shells can be saved to make a seafood stock.

On the top and bottom of the shrimp you’ll see dark lines running along the length of the body. The bottom line you can ignore, that’s just a vein, but the dark line up top is the gritty intestinal tract of the shrimp, and should be removed for best eating.

With a sharp knife, cut along the length of the line at the top of the shimp. Don’t cut deeply, just enough to cut open the “vein”, which is really the digestive tract. Open the cut under water and wash the intestines away. And that’s it!

Cooking Fennel and Shrimp in a Skillet

Heat a skillet and oil on medium heat. For a skillet like the one used in the video, you can check current prices for a Cast Iron Skillet on Amazon .

Add in the onion slices and cook for one minute, then add in the fennel slices and continue cooking another minute. Add in the smoked paprika, salt, and pepper and mix well, then add in the tomato paste and continue mixing.

Add in a little wine. Add in ½ cup to start, and then ¼ cup at a time as desired. Wine is great for this dish, but water is fine if you’d rather.

Add in sliced cherry tomatoes and shrimp, and then stir another 2-3 minutes or until the shrimp are opaque and cooked through. And that’s it! This shrimp recipe is great over rice, and looks especially nice topped with a garnish of the chopped fennel fronds.

Give this shrimp and fennel recipe a try and let me know what you think, and check out this Eggs, Fennel and Salmon Brunch Recipe.

poached egg recipe

If you like the flavor of fennel, give cooking with fennel seeds a try. Seeds add incredible flavor to a dish, and cumin seeds and fennel seeds are two ingredients my kitchen is never without. Check current prices for Fennel Seeds on Amazon.

fennel recipe

Thanks for checking out our fancy fennel recipe, and be sure and sign up for our mailing list so you’ll never miss a Chef Buck cooking video, and also click a button below and share the dishes with your friends. We appreciate all the kind comments and support, and we’ll see you next time in the kitchen!

We appreciate you watching our recipe videos!

We include affiliate links for products on our website, so if you make a purchase after clicking on our links, we may earn a commission which helps us produce more videos and drink more coffee :^) We are a participant in the Amazon Services LLC Associates Program, which is an affiliate advertising program that provides a means for us to earn fees by linking to Amazon.com and affiliated sites.

Share and Enjoy !

Baked Salmon Cakes in the Oven

Try this easy baked salmon cakes recipe made with canned salmon. I generally use canned pink salmon to make a salmon cake because it’s less expensive than red salmon. But what’s the difference between the two types of canned salmon? They are actually two different species of salmon, and the pink fish is more prevalent, so the cost is less. Salmon cakes taste great cooked in a skillet on the stove top, but baking them in the oven uses less oil, so if you’re seeking a break from fried foods, baked canned salmon is a healthy option.

Ingredients for Baked Salmon Cakes

15oz canned SALMON
1 EGG
1 tsp minced GARLIC
¼ cup minced ONION
1 Tbsp minced PEPPERS

Season as desired. In this recipe I use…

½ tsp SALT
½ tsp PAPRIKA
1 tsp GARLIC POWDER

You will also need OIL for the baking pan

baked salmon cakes

How to Make Salmon Cakes in the Oven

  • Open and drain the canned salmon. Check current prices for canned salmon on Amazon.
  • In a bowl, crush the fish and bones. Everything in the can is pre-cooked and ready to eat including the bones, skin, and meat.
  • Into the bowl add the egg, minced vegetables, and seasoning.
  • Mix ingredients together well and then form into patties.
  • Place the salmon patties on a lightly oiled baking sheet and bake for 15 minutes in an oven preheated to 400 degrees Fahrenheit.
  • Turn patties once and bake for 5 minutes more.
  • Remove salmon cakes from the oven and serve, or allow to cool and save in the fridge for later.

Add a creamy dressing or sauce and these baked salmon cakes make a nice entree with little effort. The fish cakes also go great on a sandwich, and they make handy leftovers, or freeze easily for future meals.

If you enjoy this salmon cake recipe, then you might also like this Salmon Ball Recipe, which is a versatile way to use baked salmon in saucier dishes.

canned salmon
salmon meatball curry topped with cilantro

Thanks for Watching our Videos!

Thanks for checking out this baked salmon cakes recipe, and all of our recipes. Sign up for our mailing list so you’ll never miss a new recipe. Also click a button below and share the dishes with your friends. You can also follow Chef Buck on Youtube. We appreciate all the kind comments and support, and we’ll see you next time in the kitchen!

If you like what CG and I do, support us on Patreon, or throw us a tip in our Paypal Tip Jar. We’ll happily enjoy a coffee on the road – Thanks! We appreciate all the support, and we’ll see you next time in the kitchen!

We include affiliate links for products on our website. Making a purchase after clicking on our links and we may earn a commission which helps us produce more videos and drink more coffee :^) We participate in the Amazon Services LLC Associates Program, which is an affiliate advertising program. It provides a means for us to earn fees by linking to Amazon.com and affiliated sites, so we can make more videos.

Share and Enjoy !

Smoked Fish Dip with only 4 Ingredients

smoked fish dip

The best smoked fish dip is the easiest, and with just four ingredients you can make a super fish dip that’s a fantastic value and sure to be a tasty hit at parties and family gatherings. I like using smoked sardines, but any smoked fish will do the trick.

Ingredients for Easy Smoked Fish Dip

14 oz SMOKED SARDINES
(plus natural juices from the can, maybe)
8 oz CREAM CHEESE
4 Tbsp CREAMY HORSERADISH
3 Tbsp LEMON JUICE (or rice vinegar)

optional ingredients:
½ tsp powdered CHIPOTLE or SMOKED PAPRIKA
SALT and PEPPER to taste

When I was a kid, I loathed sardines. My dad used to eat sardines on ritz crackers while watching football on tv, and man did that stuff stink up the house! I was only a little kid, but that memory has stayed with me. My dad bought sardines packed in mustard, or tomato sauce, and because of the smelly association I have from childhood, I never buy sardines packed in mustard or tomato. Is that stuff any good? Adult me might have a different perspective now, but adult me isn’t ready to find out yet. But I do know that plain-jane smoked sardines packed in their own juices are fantastic.

smoked fish dip

How to Make Fish Dip

You can use any smoked seafood for this recipe, but smoked sardines are an economical choice and very easy to find.

I paid $3.49 for a 6.7 oz can of Bar Harbor brand smoked sardines at our local grocery. The BEST PRICE I found on Amazon was for a 12 pack of smoked sardines already seasoned with black pepper.

In a bowl, add softened cream cheese, then drain sardines from the natural juices and add fish to the bowl. Add lemon juice and creamy horseradish and mix everything together until blended well.

Taste test, and then adjust ingredients as desired. Also, adding a bit of the natural juices from the sardine can is an easy way to enhance the smoked fish flavor.

For more flavor, add cracked black pepper, or a little smoked paprika for chipotle powder, but take it easy on the added ingredients, because you don’t want to muddle the great taste of smoked fish.

Serve this easy dip with crisp crackers or sliced veggies. I really love this fish dip on a toasted bagel with onion, tomato, and capers, and I bet you will, too.

Give this easy smoked fish dip recipe a try and let me know what you think! And check here for out more Healthy Canned Fish Recipe Ideas.

canned herring recipe
Canned herring is an affordable and easy way to incorporate the health benefits of fish into your diet.

Thanks for Watching our Fish Dip Recipe Video!

Sign up for our mailing list so you’ll never miss a new recipe. Also click a button below and share the dishes with your friends. You can also follow Chef Buck on Youtube. We appreciate all the kind comments and support, and we’ll see you next time in the kitchen!

If you like what CG and I do, support us on Patreon, or throw us a tip in our Paypal Tip Jar. We’ll happily enjoy a coffee on the road – Thanks! We appreciate all the support, and we’ll see you next time in the kitchen!

We include affiliate links for products on our website. Making a purchase after clicking on our links and we may earn a commission which helps us produce more videos and drink more coffee :^) We participate in the Amazon Services LLC Associates Program, which is an affiliate advertising program. It provides a means for us to earn fees by linking to Amazon.com and affiliated sites, so we can make more videos.

Share and Enjoy !

Best Fried Shrimp Po’Boy Recipe

shrimp po boy

Nothing is better than a New Orleans style shrimp po’boy sandwich. Po-boys can be found all over the city, and this is my best fried shrimp po’boy recipe based on the delicious po’boys I used to enjoy at the Quartermaster Deli on Bourbon Street.

What you need for a Shrimp Po’boy

1 lb. SHRIMP peeled and deveined …smaller shrimp are best!
BREAD a soft, white, hoagie-type roll
TOMATO sliced thinly
LETTUCE shredded iceberg is nice
MAYONNAISE
ALL-PURPOSE FLOUR
SALT and PEPPER
And whatever other seasonings you like:
GARLIC POWDER, ONION POWDER,
PAPRIKA, and CHILI POWDER are some of my favorites
OIL for frying

How to Make a Shrimp Po’boy

For this recipe, use small to medium shrimp, peeled and deveined.

If you buy shrimp that isn’t already peeled and deveined, that’s okay, because shrimp are easy to clean. Just take the shrimp and twist off the head, then squeeze the shrimp at the tail-end of the shell and pull the shell and legs off like a jacket, then cut along the back of the shrimp and remove the black “vein”, which is really the shrimp’s stomach. Remember to save the heads and shells of the shrimp to make a seafood stock.

Rinse the shrimp and then let them drain. You can pat the shrimp dry with a paper towel if needed, then toss the shrimp with your favorite seasonings. I like salt, pepper, garlic powder, chili powder, paprika, but use whatever you like, and be generous.

Season just over 1 cup of all-purpose flour with salt and pepper and whatever seasonings you like, then toss the shrimp with flour until well coated.

shrimp po boy

Heat oil in a skillet on medium heat and when hot, add in the battered shrimp. Cook and turn the shrimp until golden brown, a couple of minutes on each side. The po-boy will taste terrific if you have crispy shrimp! Don’t be overly concerned about overcooking the shrimp because crispy shrimp is key great fried shrimp poboy. Check here for current prices for a non-stick skillet on Amazon.

Remove the shrimp from skillet and set aside to drain on paper towels.

Slice a sandwich-sized roll down the center leaving the sides intact like the spine of a book, ideally the bread will be a little crusty on the outside and soft on the inside. A tasty po’boy requires great bread, so picking a bread you like is as important as frying the shrimp! You can press down on the inside of the bread to make a well for your fillings. Even just a little well will allow you to stuff the po-boy without making it a big mess to eat.

Slather the insides with mayonnaise and add crisp, shredded lettuce and thinly sliced tomato, then build a generous a mound of fried shrimp over the top and close the sandwich. You can figure out the next step.

Give this classic New Orleans shrimp po’boy sandwich a try and let me know what you think, and for another classic New Orleans shrimp recipe, try this perfect Shrimp Remoulade Salad.

shrimp remoulade salad

Thanks For Watching Our Recipe Videos!

Thanks for checking out our fried shrimp poboy recipe, and all of our recipes. Sign up for our mailing list so you’ll never miss a new recipe. Also click a button below and share the dishes with your friends. You can also follow Chef Buck on Youtube. We appreciate all the kind comments and support, and we’ll see you next time in the kitchen!

If you like what CG and I do, support us on Patreon, or throw us a tip in our Paypal Tip Jar. We’ll happily enjoy a coffee on the road – Thanks! We appreciate all the support, and we’ll see you next time in the kitchen!

We include affiliate links for products on our website. Making a purchase after clicking on our links and we may earn a commission which helps us produce more videos and drink more coffee :^) We participate in the Amazon Services LLC Associates Program, which is an affiliate advertising program. It provides a means for us to earn fees by linking to Amazon.com and affiliated sites, so we can make more videos.

Share and Enjoy !

Shrimp Recipe with Fancy Fennel

shrimp recipe

What’s fancier than a shrimp recipe? Shrimp with fennel! Fennel even sounds fancy, but it’s a super easy vegetable to use with a slightly different taste than all other vegetables. You can eat fennel cooked or raw, so it pairs very well with quick-cooking seafood. If you’ve never tried a fennel recipe before, this easy shrimp dish is a great place to start.

Ingredients for Quick Shrimp Recipe with Fennel

1 lb. SHRIMP peeled and deveined
1 bulb of FENNEL
1 small ONION sliced
15-20 sliced CHERRY TOMATOES
1 Tbsp TOMATO PASTE
½ cup to 1 cup WHITE WINE
1 Tbsp SMOKED PAPRIKA
SALT and PEPPER to taste
2 Tbsp OIL for cooking
FENNEL fronds for garnish

How to Make Shrimp and Fennel

First thing, get some peeled and deveined shrimp. For this recipe, I prefer to buy medium-sized shrimp at the best price I can find instead of fancy super model shrimp.

shrimp recipe
Fennel and seafood make a great pairing.

How to Peel and Devein Shrimp

Shrimp not already peeled and deveined are easy to clean. Just take the shrimp and twist off the head, then squeeze the shrimp at the tail-end of the shell and pull the shell and legs off like a jacket. Save the heads and shells of the shrimp to make a seafood stock.

On the top and bottom of the shrimp you’ll see dark lines running along the length of the body. The bottom line you can ignore, that’s just a vein, but the dark line up top is the gritty intestinal tract of the shrimp, and should be removed for best eating.

With a sharp knife, cut along the length of the line at the top of the shimp. Don’t cut deeply, just enough to cut open the “vein”, which is really the digestive tract. Open the cut under water and wash the intestines away. And that’s it!

Don’t Be A-scared of Fennel!

When you buy fennel at the store, it might simply be the bulb, or it might include the bulb, stalks and fronds. Buy fennel with an unblemished bulb, or at least with a bulb that can be cleaned up easily with a peeler. The edible parts of fennel are the bulb and the dill-like fennel fronds. The stalks resemble celery, but are too chewy to enjoy.

Pull off some of the fennel fronds, wash, dry, and then chop them into a garnish for later. Cut away and discarded the celery-like fennel stalks. Wash the bulb and cut away any blemishes, or remove the outer layers entirely if they have too many spoiled areas.

Thinly shave the bottom of the bulb away. Cut the bulb in half from top to bottom to reveal the core. Larger fennel will have thicker layers and a larger core. Make divots on either side of the core and cut it away and discard. Slice the fennel into larger, thin pieces. A Smaller fennel bulb is tender and best suited for raw recipes, while larger fennel is better for cooking.

shrimp recipe

Heat a skillet and oil on medium heat. For a skillet like the one used in the video, you can check out current prices for a Cast Iron Skillet on Amazon.

Start with the onion slices and cook for one minute, then add in the fennel slices and continue cooking another minute. Add in the smoked paprika, salt, and pepper and mix well, then add the tomato paste and continue mixing.

Pour in a little white wine. Start with ½ cup of wine, and then ¼ cup at a time as desired. Wine is great for this dish, but water is fine if you’d rather.

To finish, add in sliced cherry tomatoes and shrimp, and stir another 2-3 minutes or until the shrimp are opaque and cooked through. And that’s it! This shrimp recipe is great over rice, and looks especially nice topped with a garnish of the chopped fennel fronds

Give this shrimp recipe a try and let me know what you think, and for another super shrimp dish, check out one of my favorite dishes ever, a Classic New Orleans Shrimp Remoulade Recipe.

shrimp remoulade salad

Thanks for checking out this fancy version of a simple shrimp recipe, and be sure and sign up for our mailing list so you’ll never miss a Chef Buck cooking video, and also click a button below and share the dishes with your friends. We appreciate all the kind comments and support, and we’ll see you next time in the kitchen!
–Chef Buck

We appreciate you watching our videos…Thanks!

We include affiliate links for products on our website, so if you make a purchase after clicking on our links, we may earn a commission which helps us produce more videos and drink more coffee :^) We are a participant in the Amazon Services LLC Associates Program, which is an affiliate advertising program that provides a means for us to earn fees by linking to Amazon and affiliated sites.

Share and Enjoy !

Cochayuyo Recipes – Healthy Kelp Seaweed

cochayuyo recipes

Two Easy Ways To Prepare Cochayuyo

Cochayuyo is a versatile, tubular kelp seaweed that is packed with nutrition and can be used in a variety of dishes. It’s a great vegetarian option high in protein, so it’s ideal for meat-free meals.

cochayuyo recipes

Cochayuyo is generally sold in dried bundles, so it needs to be rehydrated before being used in a recipe. I’ve tried cochayuyo that is light tan in color, and cochayuyo that is much darker, bordering on black. I find the darker seaweed to be less tender and to have a stronger flavor, so I prefer to use it in cooked cochayuyo recipes, and because it is more mild, the lighter cochayuyo is perfect for salads.

Easy Way To Rehydrate Cochayuyo

Place the dried cochayuyo in a large pot of cold water and then soak overnight.  That’s it. You don’t have to salt the water or anything, and after the cochayuyo has rehydrated, simply rinse well and then slice into strips, rings, or whatever shape is ideal for the dish you are creating.

cochayuyo seaweed recipes

How to make a Cochayuyo Salad Recipe

ingredients:
2 cups diced COCHAYUYO (use the lighter cochayuyo)
1-3 cloves minced GARLIC
1 Tbsp minced GINGER
3 Tbsp OLIVE OIL
2 Tbsp LIME JUICE
SALT and PEPPER to taste

In a bowl, combine the oil and lime juice and then mix well, and if you don’t have fresh lime juice, just use fresh lemon juice, or you can substitute a bottled citrus juice or vinegar. Add the minced ginger and garlic, and then salt and pepper to taste.  Mix well, and after that toss the chopped cochayuyo with the dressing.

Serve this garlicky cochayuyo as a salad topping, or as a topping for any dish that can benefit from a little pizzazz and chewiness, and since it’s packed with nutrition, the added health benefits are a nice bonus!

cochayuyo salad recipe

Skillet Cochayuyo Recipe

Cochayuyo pairs well with black beans in a skillet saute.  Here is one of my favorite ways to use this hearty seaweed in a hot dish, and this is also a good recipe for cleaning out the fridge, so substitute whatever veggies you have on hand.

ingredients:
3 cups sliced COCHAYUYO
1 15 oz can BLACK BEANS
½ cup sliced RED PEPPER
1 chopped ONION
4-5 cloves minced GARLIC
2 Tbsp minced GINGER
½ can diced TOMATO
3 cups SPINACH
½ cup CELERY
2-3 Tbsp COOKING OIL

And lots of SEASONINGS…in this video recipe I use
1 tsp CUMIN
1 Tbsp CURRY POWDER
1 tsp CHILI POWDER
1 tsp PAPRIKA
ROSEMARY
SALT and PEPPER to taste
But experiment with different flavors!

How to Cook Cochayuyo with Black Beans

  • In a large skillet, heat cooking oil.
  • Add onions and saute 2-3 minutes.
  • Add garlic, ginger, red pepper and saute another minute.
  • Stir in the seasonings.
  • Add in the celery, black beans, and tomato.
  • Mix well, cover, and simmer for 15 minutes.
  • Add in the spinach and cochayuyo.
  • Cover and simmer another 5 minutes, until the spinach is wilted and the cochayuyo is heated through.

And that’s it, an easy and very flavorful way to use this great ingredient, so if you can get your hands on cochayuyo, give it a try. I bet it would be a great conversation starter at a dinner party, but that’s for you to find out.

Another super versatile ingredient for cooking is chick peas, aka garbanzo beans, because like cochayuyo, it has a mild flavor, so check out this version of an Indian Chana Masala Recipe, which is one of my favorite chickpea dishes, and a very economical dish to prepare, as well.

chana masala chickpea curry

Thanks for checking out the cochayuyo recipes, and all of our recipes. Be sure and sign up for our mailing list to never miss a new cooking video, and also click a button below and share the dishes with your friends, and follow Chef Buck on Youtube. We appreciate all the kind comments and support, and we’ll see you next time in the kitchen!

If you like what CG and I do, support us on Patreon, or throw a tip in our Paypal Tip Jar We’ll happily enjoy a coffee on the road, or maybe even pay a bill or two!–Thanks! We appreciate all the support, and we’ll see you next time in the kitchen!

Thanks for watching our Cuchayuyo recipes!

We include affiliate links for products on our website, so if you make a purchase after clicking on our links, we may earn a commission which helps us produce more videos and drink more coffee :^) We participate in the Amazon Services LLC Associates Program, which is an affiliate advertising program providing a means for us to earn fees by linking to Amazon.com and affiliated sites, so we can make more videos.

Share and Enjoy !

Black Bean Corn Salsa is Good on Everything*

Black Bean Corn Salsa

Here’s a simple Black Bean Corn Salsa that will knock your socks off, or at least be very tasty on a chip, a fish, a salad, on or in an omelet…you get the idea. It’s an easy and versatile way to use beans, which are good for your heart, in fact the more you eat beans, the more you…crave more beans? Something like that, so definitely give this recipe a try. This salsa is super tasty and you can pack it with raw, healthy, and fresh ingredients to use as an accompaniment for types of recipe dishes.

What you need for Black Bean Corn Salsa

dressing:
1 Tbsp LEMON JUICE
1 Tbsp RED WINE VINEGAR or balsamic vinegar
1 Tbsp HONEY
1 tsp TURMERIC
1 tsp GARLIC POWDER or 1 Tbsp minced garlic
¼ tsp PAPRIKA
½ BLACK PEPPER
½-1 tsp SALT
salsa:
2 15 oz cans BLACK BEANS, drained and rinsed
1 15 oz can YELLOW AND WHITE CORN, drained or 2 cups frozen corn, thawed
12-16 sliced CHERRY TOMATOES
5-7 small GREEN ONIONS, finely sliced, or ½ cup red onion, finely diced.
1 Red or Orange BELL PEPPER, diced
1 bunch of chopped, fresh CILANTRO, or substitute parsley
1-2 AVOCADO peeled, pitted, and diced; add JUST before serving

Black Bean Corn Salsa
Salsa is great on a chip, as a topping for fish or salad, in an omelet, on ice cream…well, maybe not ice cream.

How to make the Black Bean Corn Salsa

  • In a small bowl, combine the dressing ingredients, mix well, and then set aside.
  • Drain and rinse the black beans and corn. In this recipe we use a mix of yellow and white whole kernel corn.
  • Slice and dice and chop tomatoes, onions, and other veggies you want to add; see other veggie suggestions below.
  • In a large bowl, combine and toss veggies and beans and corn.
  • Add dressing and mix well.
  • For best results, place overnight in the refrigerator. Remember that turmeric can stain some plastic containers. Ziplocs allow you to periodically flip salsa to distribute dressing more evenly.
  • Let marinate at least a couple of hours, preferably overnight.
  • Before serving, add diced avocados and gently mix.
  • Taste, adjust seasoning as needed.
  • Serve with chips, or as a topping or filling.

Options and Substitutions

  • ½ cup red onion, finely chopped
  • Pickled jalapeno slices
  • ½ tsp chili powder
  • 2 tsp cumin
  • Mango, diced

More Uses for Salsa

  • Use black bean corn salsa as a salad topping!
  • Fancy Slaw: add chopped cabbage, mayo/yogurt.
  • Fish topping: add mango and cumin and then warm.
  • Omelet filling or topping: add cheese, cumin, then garnish with sour cream and/or guacamole.
  • Use salsa as a filling for quesadillas, tortillas, etc..

If you’re new to home cooking, get a bunch of spices, pots and pans, and begin experimenting with different recipes. It’s a healthy hobby that will save you money in the long run. Check out current prices for Complete Kitchenware Sets on Amazon as well as Complete Starter Spice Kits. Or go to a thrift store! I’ve found some of my favorite kitchen gear at second-hand stores.

This black bean corn salsa goes great with a lot of dishes, and for another avocado-ee recipe try a Classic Homemade Guacamole Recipe.

easy guacamole recipe
guacamole recipe

Be sure and sign up for our mailing list and never miss a new Chef Buck cooking video, and also click a button below and share the dishes with your friends. We appreciate all the kind comments and support, and we’ll see you next time in the kitchen!
–Chef Buck

Thanks for watching our recipe videos!

We include affiliate links for products on our website, so if you make a purchase after clicking on our links, we may earn a commission which helps us produce more videos and drink more coffee :^) We participate in the Amazon Services LLC Associates Program, which is an affiliate advertising program providing a means for us to earn fees by linking to Amazon.com and affiliated sites, so we can make more videos.

*almost

Share and Enjoy !

Shrimp Toast on a Crunchy English Muffin

shrimp toast

Here’s a shrimp toast recipe based on a Vietnamese deep fried shrimp bread dish. This shrimp recipe works as a snack or main dish, and it doesn’t require many shrimp, so it can be an economical shrimp recipe choice. I prefer English muffins for shrimp toast because it’s the perfect size, and they toast up super well in the oven. I use a mix of chopped and whole shrimp for maximum shrimpiness and visual effect, but experiment and find what you like.

Shrimp Toast Recipe Ingredients

12-15 SHRIMP peeled and deveined
3 ENGLISH MUFFINS
2 EGG WHITES
1 clove minced GARLIC
1 tsp dried ITALIAN SEASONING
1 tsp PAPRIKA
SALT and PEPPER to taste
some OLIVE OIL

shrimp toast
Shrimp Toast on English Muffins

How to Make Shrimp Toast

  • Peel and devein shrimp.
  • In a bowl, lightly toss shrimp with olive oil, season with salt, pepper, and paprika and set bowl aside.
  • Lightly coat English muffin halves with olive oil and slightly toast face down in a skillet.
  • Then place muffin halves face-up on a baking pan.
  • In a small bowl, whisk 1 or 2 egg whites with dried Italian seasoning and minced garlic.
  • Place a spoonful of this egg white mix on each muffin half.
    Place shrimp over the egg white and cover the muffin half. Use whole shrimp, or chop them, or use a combo. I like using some chopped and whole shrimp, that way I can entirely cover the
    muffin with shrimp, but also have a whole shrimp on top so it looks extra cool and tasty.
  • Top the shrimp with another spoonful of the egg white mix. This will bake and form a seal to hold the muffin and shrimp together.
  • Bake in an oven at 400 degrees Fahrenheit for about 20 minutes, or until toasted golden.

That’s it.
A healthier version of Shrimp Bread that really works. Give it a try and let me know what you think.

Have fun in the kitchen. Get a bunch of spices, pots and pans, and begin experimenting with different recipes. Home cooking is a healthy hobby that will save you tons of money in the long run. Check out current prices for Complete Kitchenware Sets on Amazon as well as Complete Starter Spice Kits. Or go to a thrift store! I’ve found some of my favorite kitchen gear at second-hand stores.

Here’s A look at Banh Mi Tom Chien or Vietnamese Deep Fried Shrimp Bread.

For another shrimp dish idea, check out this Spicy Shrimp Tempura Recipe.

spicy fried shrimp

Thanks for checking the the shrimp toast recipe out. Be sure and sign up for our mailing list so you’ll never miss a Chef Buck cooking video, and click a button below and share the dishes with your friends. We appreciate all the kind comments and support, and we’ll see you next time in the kitchen!
–Chef Buck

Share and Enjoy !


Shrimp Bread …let’s try Banh Mi Tom Chien

shrimp bread

I finally tried Vietnamese fried shrimp bread, or bahn mi tom chien, or is it banh mi chien tom? Whatever you call it, it was a very tasty shrimp recipe. I have since made several different versions of shrimp bread at home, trying to make a healthy baked shrimp recipe that I can prepare in the oven instead of frying. I made a few duds, but finally settled on a baked version of Vietnamese shrimp toast using an English muffin, egg white, garlic, and Italian seasoning. I’m pretty happy with the recipe, although I might tinker with it a bit more. As soon as I get a video edited of the recipe, I’ll put it up, but until then, maybe experiment yourself with some versions of shrimp bread or shrimp toast. I love using the whole shrimp in the recipe, it looks very tasty, but in my own versions of Vietnamese shrimp bread, I peeled the shrimp and removed the head and tail. Unpeeled shrimp might be yummy when deep fried, but I don’t think baking will have as tasty an effect.

Baked Shrimp Bread Recipe Ingredients

SHRIMP peeled and deveined
ENGLISH MUFFIN
EGG WHITE
minced GARLIC
dried ITALIAN SEASONING
PAPRIKA
SALT and PEPPER to taste
OLIVE OIL

shrimp bread
homemade baked shrimp bread

How to Make Baked Shrimp Bread

  • Peel and devein shrimp.
  • In a bowl, lightly toss shrimp with olive oil and minced garlic and then season with salt, pepper, and paprika and set bowl aside.
  • Lightly coat English muffin halves with olive oil and slightly toast face down in a skillet.
  • Then place muffin halves face-up on a baking pan.
  • In a small bowl, whisk 1 or 2 egg whites with dried Italian seasoning.
  • Place a spoonful of this egg white mix on each muffin face.
  • Place shrimp over the egg white and cover the muffin face. Use whole shrimp, or chop them, or use a combo. I like using some chopped and whole shrimp, that way I can entirely cover the muffin with shrimp, but also have a whole shrimp on top so it looks extra cool and tasty.
  • Top the shrimp with another spoonful of the egg white mix. This will bake and form a seal to hold the muffin and shrimp together.
  • Bake in an oven at 400 degrees Fahrenheit for about 20 minutes, or until toasted golden.

That’s it. A healthier version of shrimp bread that really works. Give it a try and let me know what you think. I’m still tinkering with the recipe a bit, but I’m pretty happy with this version of a twist on Vietnamese baked banh mi tom chien. If you find a tasty twist of your own, let me know! It’s an interesting recipe to experiment with.

For another shrimp dish, check out this Super Garlicky Shrimp Recipe

Thanks for watching the video recipes and checking out these versions of Vietnamese Shrimp Bread. If you liked it, then click a button or two below and share the recipe with your friends, I appreciate it!
–Chef Buck

Share and Enjoy !


Baked Fish Recipe for Cod with Tartar Sauce

baked fish recipe

Cod fillets make a great baked fish recipe. This recipe is great for all types of fish, especially cod or tilapia fish fillets, which are generally good buys at the supermarket. Cod and
tilapia are both low key fish with a mild flavor, so baking them in the oven with a homemade tartar sauce and panko breadcrumb topping adds a nice twist. This baked fish recipe cooks up quick and is
perfect for family meals.

What You Need for this Baked Fish Recipe

2 COD FILLETS (about 8oz each)
½ ONION (sliced)
½ cup PANKO BREADCRUMBS check current prices on Amazon
1 Tbsp melted BUTTER
½ tsp PAPRIKA (optional)
SALT and PEPPER to taste
chopped fresh DILL
spray cooking OIL for pan and onions
sauce:
½ cup MAYONNAISE
some chopped fresh DILL
1-2 Tbsp chopped PICKLES or PICKLE RELISH
spoonful or two of the pickling solution or
1 Tbsp fresh LEMON JUICE (add zest for extra lemony-ness)
(also…add a sqeeze of dijon mustard if desired)

baked fish recipe
cod is often a great buy at the supermarket

How to Make a Baked Fish Recipe

  • Pat the cod fillets dry and lightly season with salt and pepper
  • Heat a skillet on the stove top and melt butter.
  • Turn burner off, add breadcrumbs to the skillet and stir until butter is absorbed.
  • Add salt, pepper, any other spices desired, ½ of the chopped dill, and mix well.
  • To make the sauce, combine the remaining dill, mayonnaise, chopped pickles, and pickling solution or lemon juice, in a bowl, and stir until smooth.
  • Spray a baking pan or aluminium foil with cooking spray. If you need an oven-safe pan, you can check here for current prices for baking sheets on Amazon.
  • Lay onion slices in pan and place fillets over top the onions.
  • Evenly coat the tops of the fish with the tartar sauce mixture.
  • Sprinkle and press the seasoned panko crumbs into the sauce.
  • Place pan in oven and bake at 400 degrees F for 20-25 minutes until the crumb topping has turned a nice, golden brown.
  • Serve with rice and veggies.
    And enjoy!

And for another easy fish recipe, here’s a quick way to cook up a crispy skin Stove top Salmon Fillet Recipe.

how to cook salmon
Keep salmon skin-side up to preserve crispiness

Thanks for checking out our baked fish recipe, and all of our recipes. Be sure and sign up for our mailing list and never miss a new Chef Buck cooking video, and also click a button below and share the dishes with your friends. We appreciate all the kind comments and support, and we’ll see you next time in the kitchen!

Thanks for watching our recipe videos!

We include affiliate links for products on our website, so if you make a purchase after clicking on our links, we may earn a commission which helps us produce more videos and drink more coffee :^)                                                                                                We participate in the Amazon Services LLC Associates Program, which is an affiliate advertising program providing a means for us to earn fees by linking to Amazon.com and affiliated sites, so we can make more videos.

Share and Enjoy !

Shrimp Pancake Recipe Spicy Haemul Pajeon

shrimp pancake

This spicy shrimp pancake makes a nice change from your average pancake or shrimp recipe. It’s a savory pancake dish that can be prepared quick and easy and served for any meal, even
breakfast, if you don’t mind looking at a shrimp first thing in the morning. I like big chunky pancakes full of shrimp and vegetables, especially lots of green onion, but you can easily make
smaller versions of this seafood pancake.

Ingredients for Shrimp Pancake Recipe

8-10 Lg SHRIMP
5-7 GREEN ONIONS
2 EGGS
¼ RED BELL PEPPER
HOT PEPPER slices (optional)
1 cup FLOUR
1 cup WATER
1 tsp CHILI POWDER
1 tsp PAPRIKA
1 tsp GARLIC POWDER
SALT and PEPPER (to taste)
2-3 Tbsp OIL for cooking
1 Tbsp melted BUTTER optional

dipping sauce:
¼ cup RICE VINEGAR
¼ cup SOY SAUCE
CHILI-GARLIC SAUCE (to taste, optional)

shrimp pancake
Korean style Haemul Pajeon with shrimp

How to Make a Spicy Shrimp Pancake

  • Combine flour and water and mix well, the batter should be thin.
  • Add in melted butter (this is optional…sometimes I do, sometimes I don’t).
  • Add in spices and stir.
  • Chop slender green onions into approx. 1 inch pieces and add into batter (thicker onions should be sliced lengthwise first).
  • Add in chopped shrimp.
  • Add thinly sliced red bell pepper and hot peppers to batter and combine all until ingredients are well coated.
  • Heat oil in a non-stick skillet on medium high. Check current prices for non-stick skillets on Amazon.
  • Adjust temperature as needed through out cooking, but make sure the oil is hot before adding the batter.
  • Add batter to hot skillet and shape into a pancake shape. Make 1 big pancake, or make pancakes; this recipe easily serves 2 people.
  • Pour a beaten egg over the pancake top.
  • Cook until the cake is golden brown on bottom, about 4-6 minutes.
  • Turn the cake (or flip it–but with confidence!) and cook the eggy side for about 2 more minutes.

And that’s it!
Top with sour cream, soy sauce, or with a mixed dipping sauce.

Dipping Sauce Idea

Combine equal parts rice vinegar and soy sauce and mix well. Adding a little chili-garlic sauce is a nice touch, and and will provide a nice bite. For a sweeter sauce, add a little hoisin or plum
sauce, or just 1-2 tsp sugar.

Give this shrimp pancake a try and let me know what you think, and for another shrimp dish, check out this Fennel and Shrimp Recipe.

shrimp recipe
lots of garlic + lots of shrimp = delicious

Thanks for checking out the shrimp pancake recipe, and all of our recipes. Be sure and sign up for our mailing list to never miss a new cooking video, and also click a button below and share the dishes with your friends, and follow Chef Buck on Youtube.

If you like what we do, support CG and I on Patreon, or throw us a tip in our Paypal Tip Jar We’ll happily enjoy a coffee on the road, or maybe even pay a bill or two!–Thanks! We appreciate all the support, and we’ll see you next time in the kitchen!

Thanks for watching our recipe videos!

We include affiliate links for products on our website, so if you make a purchase after clicking on our links, we may earn a commission which helps us produce more videos and drink more coffee :^) We participate in the Amazon Services LLC Associates Program, which is an affiliate advertising program providing a means for us to earn fees by linking to Amazon.com and affiliated sites, so we can make more videos.

Share and Enjoy !

Canned Herring Recipe …how to eat kippers

canned herring recipe

Here’s an easy canned herring recipe if you’ve ever wondered what to do with canned herring or kippers. Canned smoked fish can be used to make healthy snacks or dinner recipes with very little time and effort. Canned herring is a good source of omega-3 fatty acids and other beneficial fats, and also a cost effective way to get healthy fish into your diet.

Make a Canned Herring Recipe on a Crostini

canned HERRING …also called KIPPERS
thinly sliced and toasted BAGUETTE
CREAM CHEESE
RED ONION thinly sliced
MUSTARD (very optional…but I like it…as long as it’s not hot dog mustard!)
CAPERS …current caper prices online
fresh DILL

canned herring recipe
Make a quick crostini for a canned herring snack
  • A good bread is the start of a great crostini.
  • Slice the bread thinly, so as to not overwhelm your toppings.
  • Toast the bread lightly.
  • Smear with cream cheese.
  • Spread on a drop of mustard, too, this is optional, but quite nice with herring.
  • Add a bit on thinly sliced red onion.
  • Add capers and fresh dill.
  • Top with smoked herring …either canned in oil or water, whatever you prefer.

Shop for tins at your local grocer, or check current Canned Herring Prices on Amazon.

Enjoy!

canned herring recipe
…nothing to be afraid of in here.

Make a Healthy Salad with Kippers …aka smoked herring

Place an assortment of mixed greens in a salad bowl. No need to dress the salad greens; the salad toppings will be enough.
Add sliced carrot, bell pepper, or celery for a nice crunch, and added nutrition.
Top the greens with a kippered herring filet.
Spread whipped or softened cream cheese over the kipper, add a dash of Dijon or stone ground mustard, if desired.
Top with chopped red onion, capers, and fresh dill…and serve.

canned herring recipe
Kipper salad?…why not?

Canned herring is such a quick, easy, and healthy snack or dinner option.
Try these canned herring recipe ideas and let me know what you think…and bon appétit!

And for more Omega-3 Fatty Acid Fish options,
Take a look at this Canned Salmon Recipe for a healthier burger.

salmon burger recipe
Canned Pink Salmon …traditional style means skin and bones are still intact

Thanks for checking out these canned herring recipe dishes, and all of our recipes. Be sure and sign up for our mailing list and never miss a new Chef Buck cooking video, and also click a button below and share the dishes with your friends. We appreciate the kind comments and support, and we’ll see you next time in the kitchen!
–Chef Buck

Thanks for watching our recipe videos!

We include affiliate links for products on our website, so if you make a purchase after clicking on our links, we may earn a commission which helps us produce more videos and drink more coffee :^) We participate in the Amazon Services LLC Associates Program, which is an affiliate advertising program providing a means for us to earn fees by linking to Amazon.com and affiliated sites, so we can make more videos.

Share and Enjoy !

Salmon Recipe – quick and easy cooked salmon fillet

salmon recipe

My favorite salmon recipe calls for crisping the fish skin on the stove top then finishing the salmon fillet in the oven under the broiler. This is a simple salmon dish with just a bit of oil and seasoning and a maple glaze to add a hint of sweetness. Honey can be substituted for the maple syrup, or this step can be skipped entirely. I often season salmon with just salt and pepper and then cook the salmon fillet in the same manner.

Ingredients for salmon recipe

SALMON FILLET w/ skin
OLIVE OIL
PAPRIKA
GARLIC POWDER
SALT and PEPPER
MAPLE SYRUP (optional, or substitute honey)
OIL for frying

salmon recipe
Crisp salmon skin on the stove top for added flavor and texture

How To Cook Salmon Recipe

  • Wash the salmon filet and pat dry with a paper towel.
  • Coat the salmon with olive oil, skin side as well.
  • Generously season fish.
  • Using an oven safe skillet, on med. high heat, heat a little oil on the stove top. Check current prices for a stove top and oven safe cast iron skillet on Amazon.
  • When oil is hot, add salmon fillet skin side down and cook about 3 minutes.
  • Transfer the skillet to the oven and continue cooking the salmon under the broiler for 2-3 minutes –adjust time depending on the size of the fillet.
  • When the salmon is almost finished cooking, apply a glaze of maple syrup, and continue broiling for final minute. If you don’t have a nice syrup
    on hand, substitute honey.
  • Remove skillet from the stove and transfer fish to a plate.
salmon recipe
Add a glaze of maple syrup or honey for a touch of sweetness

Hope you like the salmon dish. Ever try baked catfish? This recipe tastes like fried catfish, but better.

fried catfish recipe
Not Fried Catfish …tastes great, easy, and less mess.

Thanks for Watching our Salmon Recipe Video!

Click a button below and share the dishes with your friends. You can also follow Chef Buck on Youtube. We appreciate all the kind comments and support, and we’ll see you next time in the kitchen!

If you like what CG and I do, support us on Patreon, or throw us a tip in our Paypal Tip Jar. We’ll happily enjoy a coffee on the road – Thanks! We appreciate all the support, and we’ll see you next time in the kitchen!

We include affiliate links for products on our website. Making a purchase after clicking on our links and we may earn a commission which helps us produce more videos and drink more coffee :^) We participate in the Amazon Services LLC Associates Program, which is an affiliate advertising program. It provides a means for us to earn fees by linking to Amazon.com and affiliated sites, so we can make more videos.

Share and Enjoy !

Salmon Cakes Benedict w/ Hollandaise Sauce

salmon cakes

Canned salmon is perfect for making delicious salmon cakes. You can use salmon cakes for a variety of dishes, including salmon burgers. I generally make extra patties when I cook up salmon cakes, and one of my favorite uses for these leftover salmon cakes is in a variation of Eggs Benedict. Check out the recipe video below to see how to make this super tasty breakfast recipe.

Ingredients for Salmon Cakes Eggs Benedict

leftover SALMON CAKES
fresh SPINACH
thick sliced TOMATO
EGGS
HOLLANDAISE SAUCE

How to Make Salmon Cakes Eggs Benedict

This is a terrific way to use leftover salmon cakes (detailed salmon cake recipe below), in fact, it’s best to use leftover salmon cakes for this recipe; no sane person wants to open a can of salmon first thing in the morning.
On a plate, arrange a bed of spinach and top with a thick slice of tomato.
In a skillet, re-heat a leftover salmon cake.
While the salmon cake heats through, whip together a quick blender Hollandaise sauce (recipe below).
In another skillet, fry an over easy egg (or poach an egg, if you prefer).
Top the sliced tomato with the heated salmon cake, and then top the salmon with the fried egg.
Cover the egg with Hollandaise sauce and serve immediately.

salmon cakes
use leftover salmon cakes to make a terrific variation of Eggs Benedict!

How to Make a Quick Hollandaise Sauce

¼ cup melted BUTTER
2 EGG YOLKS
1 Tbsp LEMON JUICE (or substitute vinegar)
½ tsp DIJON MUSTARD (or substitute creamy wasabi or a little hot sauce)

In a bowl, combine two egg yolks, lemon juice, and mustard…also add a sprinkling of black pepper if you like. Melt the butter until it is bubbling, then slowly add the butter into the egg mixture while blending the eggs with a hand blender. Be sure to add the hot butter slowly, so the eggs don’t harden.
Blend for about 5-10 seconds. Use the sauce immediately, or hold in a bath of hot water until ready to use. This recipe makes just enough for two servings; when I want lots of Hollandaise sauce, I’ll double this recipe, with the exception of the egg yolks…instead of 4 yolks, I’ll just use 3 yolks.

Salmon Cakes Ingredients:

14oz canned SALMON (red or pink)
¼ – ½ cup ONION (finely chopped)
HOT PEPPER (finely chopped, to taste)
1 to 2 EGGS (beaten) …I generally use 1 egg for a fancy salmon cake entree and 2 eggs when
making salmon cakes for sandwiches.
SALT and PEPPER to taste
OIL for sauteing (3-4 Tbsp…salmon will soak up the oil)
1 Tbsp CURRY POWDER (optional)

salmon cakes
I make 4 salmon cakes from one can of salmon, and often prepare 8 cakes at a time so that I’ll have leftover salmon cakes for sandwiches and salmon Benedicts.

How to Make Salmon Cakes:

Traditional canned salmon will come with skin and bones still intact . The skin and bones are soft and edible. You can remove the skin and bones if you like; I used to remove them, but now I’m too cheap, and I don’t want to miss out on the extra nutrition, either.

  • Place drained salmon in a bowl.
  • Add ¼ – ½ cup onion depending on how much you like onion. Make sure the onion is finely chopped; smaller pieces will help keep the patties from falling apart. If desired, add some finely chopped hot pepper. If you don’t have fresh pepper, add a little chili powder or hot sauce.
  • Add salt and pepper to taste.
  • Add one or two beaten eggs. I like to use two beaten eggs because it helps to keep the patties together better; I don’t like my burgers to fall apart while I’m eating them.
  • Mix all the ingredients together well.
  • Shape into patties. I usually get 4 patties out of a 14oz can, but make as many as you like–bigger or smaller–depending on how big you want your burger to be. Here’s some current prices for canned salmon if you like to do your fishing on the internet.
  • Heat oil in a skillet. I like medium heat. You want the oil to be hot enough to sizzle when you add the patties, but not so hot that the patties will cook too quickly; you want the patties to get a nice cooked side before turning them, this will keep then from breaking apart.
  • Cook 5-7 minutes and then turn gently when the patties are golden brown.
  • Cook another 3-4 minutes and then remove from skillet and drain salmon patties on a paper towel.

I like to serve salmon patties on a toasted bun with sliced tomato, onion, lettuce and mayo.
It’s a nice break from hamburgers, and just as tasty.
Sometimes I’ll add a Tbsp of curry powder into the mix to make Curried Salmon Burgers, which you should definitely try sometime.

Give this canned salmon recipe a try and let me know what you think, and bon appétit!

And for another canned salmon recipe, check out this Salmon Meatballs Recipe.

canned salmon
Salmon meatballs in a rich curry sauce.

Thanks for checking out our salmon cakes recipe, and all of our recipes. Be sure and sign up for our mailing list to never miss a new cooking video, and also click a button below and share the dishes with your friends, and follow Chef Buck on Youtube. We appreciate all the kind comments and support, and we’ll see you next time in the kitchen!

If you like what CG and I do, support us on Patreon, or throw a tip in our Paypal Tip Jar We’ll happily enjoy a coffee on the road, or maybe even pay a bill or two!–Thanks! We appreciate all the support, and we’ll see you next time in the kitchen!

Thanks for watching our recipe videos!

We include affiliate links for products on our website, so if you make a purchase after clicking on our links, we may earn a commission which helps us produce more videos and drink more coffee :^) We participate in the Amazon Services LLC Associates Program, which is an affiliate advertising program providing a means for us to earn fees by linking to Amazon.com and affiliated sites, so we can make more videos.

Share and Enjoy !

Groundnut Soup Recipe – Lamb Stew with Peanuts

peanut soup recipe

This groundnut soup recipe is an African-inspired dish made with peanuts. I make this peanut soup like a stew, with nice chunky ingredients, including meat and potato. This particular recipe is a variation on lamb stew, but you can use chunks of lamb, beef, chicken, or pork, whatever meat you prefer. Adding peanut butter to soup is a very yummy idea, and you should definitely give it a try.

groundnut soup recipe

What You Need To Make Peanut Soup

1 lb. LAMB (or preferred meat, cut into stew pieces)
1 lb. FISH (cut into stew pieces)
2 ONIONS (chopped)
HOT PEPPER (finely chopped, or substitute chili powder)
1 SWEET POTATO (chopped, substitute white potato)
½ cup PEANUT BUTTER
3-5 cloves GARLIC (finely chopped)
2 tsp TURMERIC
2 tsp PAPRIKA
2 tsp CUMIN
15oz can CRUSHED TOMATO
½ cup PARSLEY (chopped)
SALT and PEPPER (to taste)

peanut soup recipe
Peanut butter soup with lamb and fish.

How To Make A Peanut Soup Recipe

You can use chicken, beef, lamb, fish, pork or any combination of these ingredients. Soup is the perfect opportunity to use whatever ingredients you have on hand, or whatever is on sale.
For this particular peanut soup recipe, I’m using a combination of lamb and fish.

  • Firstly, season the meat and set aside while you chop and slice the other ingredients.
  • Then heat a soup pot on medium high heat, and add in your lamb. Sear the meat on all sides and then remove lamb from the pot. Check current prices for a Soup Pot on Amazon.
  • Add a little oil to the pot and reduce heat to medium.
  • Add in the garlic, onion, and hot pepper and saute for 3-5 minutes. Add additional seasoning as desired.
  • Return seared lamb to the pot and add in the crushed tomato and 1 can of water.
  • Chop one sweet potato (or sub white potato) and add to pot.
  • Raise the temperature and bring the pot to a boil.
  • In a bowl, mix 1 cup of hot water and peanut butter until smooth.
  • Add mix to the soup pot.
  • Bring pot to a simmer, cover, and cook 30 minutes.
  • Add chopped fish.
  • Cover and simmer 15-20 minutes.
  • Add more water if desired.
  • Adjust seasoning as needed.
  • Turn off heat and add chopped parsley.

And that’s it…serve as is, or over rice.
Give this super tasty African-inspired stew recipe a try, and let me know what you think, and bon appétit!

For a more traditional Western-style stew, try this Classic Beef Stew Recipe.

beef stew recipe

Thanks For Watching Our Recipe Videos!

Thanks for checking out this Africa-inspired groundnut soup recipe, and all of our recipes. Be sure and sign up for our mailing list so you’ll never miss a new recipe. Also click a button below and share the dishes with your friends. You can also follow Chef Buck on Youtube. We appreciate all the kind comments and support, and we’ll see you next time in the kitchen!

If you like what CG and I do, you can also support us on Patreon, or throw us a tip in our Paypal Tip Jar. We’ll happily enjoy a coffee on the road – Thanks! We appreciate all the support, and we’ll see you next time in the kitchen!

We include affiliate links for products on our website. So, if you make a purchase after clicking on our links, we may earn a commission which helps us produce more videos and drink more coffee :^) We participate in the Amazon Services LLC Associates Program, which is an affiliate advertising program. It provides a means for us to earn fees by linking to Amazon.com and affiliated sites, so we can make more videos.

Share and Enjoy !

Crispy Salmon Recipe – How to Cook Salmon

crispy salmon recipe

This crispy salmon recipe is delicious. Cooking salmon with a crispy skin adds great texture and flavor. Keep it simple; all you need is a little oil, salt, and pepper to cook up this tasty fish dinner. Give this super easy crispy salmon dish a try…it’s a winner.

How to Cook A Crispy Salmon Recipe

SALMON FILET w/ skin on
OLIVE OIL
SALT and PEPPER to taste
OIL for frying

crispy salmon recipe
Keep salmon skin-side up to preserve crispiness
  • Wash the salmon filet and pat dry with a paper towel.
  • If your cut of fish has pin bones, remove them.
  • Coat the salmon with olive oil, skin side as well.
  • Generously season fish with salt and pepper.
  • Using an oven safe skillet, on medium high heat, heat a little oil on the stove top. Check current prices for a stove top and oven safe cast iron skillet on Amazon.
  • When the oil is hot, add the salmon fillet skin side down and cook for 2-4 minutes –adjust time depending on the size of the fillet.
  • Transfer the skillet to the oven and continue cooking the salmon under the broiler for 1-3 minutes.
  • Remove the skillet from the stove and transfer salmon fillet to a plate, skin-side up …resting the fish skin-side down will cause the skin to lose it’s crispiness!

Give this simple crispy salmon recipe a try and let me know what you think, and bon appétit!

And don’t just cook salmon this way! Any tasty fillet of fish with skin on can be prepared in this manner. To appreciate fresh fish, keep it simple.

And for another tasty fish dish, try this healthy baked cod recipe.

baked fish recipe
oven baked fish fillets

Thanks for Watching our Videos!

Thanks for checking out our crispy salmon recipe. Sign up for our mailing list so you’ll never miss a new recipe. Also click a button below and share the dishes with your friends. You can also follow Chef Buck on Youtube. We appreciate all the kind comments and support, and we’ll see you next time in the kitchen!

If you like what CG and I do, support us on Patreon, or throw us a tip in our Paypal Tip Jar. We’ll happily enjoy a coffee on the road – Thanks! We appreciate all the support, and we’ll see you next time in the kitchen!

We include affiliate links for products on our website. Making a purchase after clicking on our links and we may earn a commission which helps us produce more videos and drink more coffee :^) We participate in the Amazon Services LLC Associates Program, which is an affiliate advertising program. It provides a means for us to earn fees by linking to Amazon.com and affiliated sites, so we can make more videos.

Share and Enjoy !

Canned Mackerel Recipe for Meatballs

canned mackerel recipe

Try this canned mackerel recipe and cook a healthy Italian-style meatball dish. Mackerel provides a ton of nutrition, and is a wild caught fish full of healthy oils. It’ a rich source of omega-3 fatty acids. Canned mackerel is inexpensive, super convenient, and an ideal ingredient to have around the house.

What You Need to Make a Meatball Canned Mackerel Recipe

1 can MACKEREL
1 EGG
1 Lg ONION
4-5 cloves GARLIC
4-5 Tbsp OLIVE OIL
14oz can TOMATO SAUCE
14oz can CRUSHED TOMATO
½ GREEN BELL PEPPER
1 RED or YELLOW BELL PEPPER
½ cup grated ROMANO CHEESE
1 Tbsp ITALIAN SEASONING
2 tsp CHILI POWDER
SALT and PEPPER (to taste)
some fresh parsley…and serve over rice or noodles

How to Make Canned Mackerel Meatballs

  • Open the canned mackerel and pour fish into a bowl. Like canned tuna, the mackerel has already been cooked during the canning process. The skin and bones are edible, in fact they are quite nutritious.
  • Remove some of the juice that was in the can, but leave about a ¼ cup of juices.
  • The larger vertabrae, while quite chewable, can be a little distracting in a meatball.
    Using your hands, break the fish up, smashing as much of the bone matter as convenient.
  • Into the bowl add salt, pepper, and chili powder to taste. You’ll also add some of these spices into the marinara sauce as well.
  • Add the freshly grated Romano cheese, or substitute Parmesan cheese.
  • Add one egg, and about 1 Tbsp each of finely chopped onion, garlic and green bell pepper.
  • Thoroughly combine all of the ingredients in the bowl and then form the mixture into meatballs about the size of a ping pong ball. The bowl should yield 12-14 meatballs.

Time to Cook the Meatballs!

  • Heat a skillet with oil on medium high heat.
  • Brown the meatballs on all sides. Be gentle, the mackerel meatballs will be moist and quite soft. The meatballs will likely not keep their round shape, but that’s fine. Use tongs and turn them gently in the hot oil. The browning will help the meatballs to keep their shape later in the marinara sauce.
  • Brown meatballs for 5-7 minutes and the remove the meatballs from the skillet and set aside on a plate.
  • Into the skillet add the remaining onion, garlic, and bell peppers. Saute for several minutes until they begin to soften.
  • Add more salt, pepper, and hot pepper as desired. Use fresh hot peppers if you like!
  • Add in the crushed tomatoes and tomato sauce.
  • Stir in the dried Italian seasonings.
  • Bring skillet to a bubble and the reduce to a simmer and cover and let simmer for about 20 minutes.
  • After 20 minutes, add fresh parsley and then return the meatballs to the skillet.
  • Gently mix the meatballs with the sauce and let cook for another 5 minutes.

And that’s it! Serve the sauce and mackerel meatballs over pasta or rice.
Give this canned mackerel recipe a try and let me know what you think, and bon appétit!

If you can’t find it at the store, you can check out canned mackerel prices on Amazon.

canned mackerel recipe
Canned Mackerel is packed with nutrition, super convenient, and relatively inexpensive.

And for another canned seafood recipe, try this delicious Salmon Burger Recipe.

Thanks for watching the video and checking out the recipe. If you enjoyed it, then click some of the share buttons below and introduce your friends to the joy of canned mackerel! I appreciate it!
–Chef Buck

Share and Enjoy !


Canned Salmon Recipes — Salmon Meatballs

canned salmon

Canned salmon is one of my favorite ingredients. It’s perfect for making salmon burgers and salmon salad, but it also can be used to make an easy meatball recipe.

What you need for Canned Salmon Meatballs

14 oz canned SALMON check canned salmon prices online
2 EGGS
2-3 cloves GARLIC (crushed)
in this recipe I use:
1 tsp CURRY POWDER
½ tsp CHILI POWDER
SALT and PEPPER (to taste)
…but use whatever spices you like

How to Make Canned Salmon Meatballs

For this recipe, I bake the hell out of the salmon balls. I generally make them to use in curry and stew dishes, so I want them dense and sturdy and tasty. For a juicier meatball to eat all on it’s
own, add diced onion and garlic and bake for a shorter cooking time.

Salmon in the can is already cooked, in fact it is part of the canning process that cooks the salmon.

  • Open the the can and drain off the liquid. Traditional canned salmon will come with skin and bones still intact . The skin and bones are soft and edible.
    You can remove the skin and bones if you like; I used to remove them, but now I’m too cheap, and I don’t want to miss out on the extra nutrition, either.
  • Place drained salmon in a bowl.
  • Add ALL of the other ingredients and mix together well.
  • Shape salmon mixture into ping pong-sized balls.
    I get about 12 meatballs out of this recipe.
  • Place meatballs on a baking sheet and bake at 400 degrees Fahrenheit for 20-30 minutes.
    The longer they bake, the firmer they will become, which is what you want if you’re
    going to use them in a stew or curry dish.
  • Remove the meatballs from the oven and then use them for whatever you want.

Make a double batch and freeze half of them for later!
I love salmon meatballs in curries.

canned salmon
Salmon Meatball dish in a rich curry sauce.

Ingredients for Salmon Meatball Curry

1 Lg ONION (chopped)
12 SALMON “meatballs”
6-8 cloves GARLIC (finely chopped)
1 Tbsp GINGER (finely chopped)
2 Tbsp CHILI GARLIC SAUCE check current prices online
1 tsp TURMERIC
1 tsp CUMIN
2 tsp CORIANDER POWDER
1½ Lg BELL PEPPERS
14 oz can diced TOMATOES
14 oz can COCONUT MILK
2-3 Tbsp OLIVE OIL
SALT (to taste)
top with chopped CILANTRO

How to Make Salmon Meatball Curry

Heat a large skillet on medium high heat and add olive oil. When oil is hot, add in onions, garlic, ginger, and something hot, like fresh chili peppers! Or red pepper flakes! Or chili sauce!
Anything hot will do, but add something spicy; it’s not a curry without a little zing, plus the spiciness will be a nice balance for the cooling coconut and tomato.

Saute ingredients for 3-5 minutes.

Add in the chopped bell pepper. I like nice, big, chopped pieces. A variety of sizes and textures always makes for a more interesting curry, soup, or stew.

Add in the turmeric, cumin, and coriander powders and mix well. Cook for 4-5 minutes.

Add tomato, and salt to taste. Mix and allow to simmer for 5 minutes; add a little water if needed, but not too much.

Add in the coconut milk and salmon balls.
Mix well and bring the dish back to a bubbling simmer.
Simmer for 5 minutes, and that’s it!
Stir in a little chopped cilantro if you like, or just top with cilantro as a garnish.
Serve this curry over rice or quinoa.
Hope you like it!

Give this canned salmon meatball recipe a try and let me know what you think, and bon appétit!

Here’s some current prices for canned salmon if you like to do your fishing on the internet.

salmon burger recipe
Canned Pink Salmon …traditional style means skin and bones are still intact

And for another canned seafood idea, try this Delicious Mackerel Stew Recipe.

fish stew recipe
canned mackerel stew

Thanks for checking out our canned salmon recipe, and all of our recipes. Be sure and sign up for our mailing list and never miss a new Chef Buck cooking video, and also click a button below and share the dishes with your friends. We appreciate all the kind comments and support, and we’ll see you next time in the kitchen!

Thanks for watching our recipe videos!

We include affiliate links for products on our website, so if you make a purchase after clicking on our links, we may earn a commission which helps us produce more videos and drink more coffee :^)                                                                                                We participate in the Amazon Services LLC Associates Program, which is an affiliate advertising program providing a means for us to earn fees by linking to Amazon.com and affiliated sites, so we can make more videos.

Share and Enjoy !

The Best Garlic Shrimp Recipe You’ll Ever Eat

garlic shrimp recipe

Try this super-quick and delicious garlic shrimp recipe. Lots of olive oil and garlic add great flavor, especially when served with fresh sliced bread. Cook the shrimp quickly in a hot skillet, but don’t overcook, because over cooked shrimp get rubbery. The total cooking time for this dish start to finish should be about 5-7 minutes.

What you need for Garlic Shrimp

2 lbs SHRIMP
½ cup OLIVE OIL
½ cup GARLIC …or as much as you like (finely chopped)
½ tsp RED PEPPER FLAKES
½ tsp PAPRIKA
SALT and PEPPER to taste
3-5 Tbsp LEMON JUICE
some PARSLEY (chopped)
sliced BREAD for sure!

How to make this Garlic Shrimp Recipe

  • Peel and devein the shrimp (save the shells and heads to make a stock!)
  • Heat olive oil in a skillet on medium high heat. Check current prices for a non-stick skillet on Amazon.
  • When oil is hot, add red pepper flakes. Red pepper flakes add a nice heat, but substitute fresh peppers, or even a little cayenne if you like.
  • Add garlic and saute for 1 minute. Use as much garlic as you like. I prefer lots of garlic. I literally used an entire bulb. It seems like a lot, but the oil and garlic taste great with thick slices of fresh bread.
  • Add the shrimp, and continue sautéing on medium heat.
  • The shrimp only take about 3-5 minutes to cook depending on the size of your shrimp. Don’t overcook the shrimp; they will become rubbery if cooked overly long.
  • Add paprika, and salt and pepper to taste. If you’re just getting into home cooking, here are current prices for starter spice sets on Amazon.
  • Saute shrimp until JUST cooked, when shrimp begin to color and curl, then remove the skillet from the heat.
  • Add lemon juice and fresh chopped parsley.
  • Mix well and serve in a bowl with thick slices of fresh bread. Or serve over rice…but this oily, garlicky shrimp is GREAT with thick slices of tasty bread.
garlic shrimp recipe
lots of garlic + lots of shrimp = delicious

Give this garlic shrimp recipe a try and let me know what you think…and bon appétit!

If you want another tasty shrimp idea, one of my favorites is this Spicy Tempura Shrimp Recipe.

spicy fried shrimp

Thanks For Watching Our Recipe Videos!

Thanks for checking out this cool carrot soup recipe, and all of our recipes. Sign up for our mailing list so you’ll never miss a new recipe. Also click a button below and share the dishes with your friends. You can also follow Chef Buck on Youtube. We appreciate all the kind comments and support, and we’ll see you next time in the kitchen!

If you like what CG and I do, support us on Patreon, or throw us a tip in our Paypal Tip Jar. We’ll happily enjoy a coffee on the road – Thanks! We appreciate all the support, and we’ll see you next time in the kitchen!

We include affiliate links for products on our website. Making a purchase after clicking on our links and we may earn a commission which helps us produce more videos and drink more coffee :^) We participate in the Amazon Services LLC Associates Program, which is an affiliate advertising program. It provides a means for us to earn fees by linking to Amazon.com and affiliated sites, so we can make more videos.

Share and Enjoy !

Fried Catfish Recipe without the Mess

fried catfish recipe

Here’s a faux fried catfish recipe that’s not fried, but tastes just as good as fried catfish and with a lot less mess. Cornmeal is essential for the breading, but along with flour you can also add crushed saltines or panko breadcrumbs. Catfish tastes best with tartar sauce, so we’ll throw together a simple tartar sauce, too.

Better Than Fried Catfish Ingredients

1 lbs. CATFISH
½ cup CORNMEAL
½ cup FLOUR
1 cup SALTINE CRACKERS (crushed) *optional
OLIVE OIL
SPICES…whatever you like
…in this video I use:
1 tsp PAPRIKA
1 tsp GARLIC POWDER
½ tsp CAYENNE PEPPER
1 tsp OREGANO
1 tsp THYME
1 tsp SALT
1 tsp BLACK PEPPER

also add 1tsp TURMERIC POWDER for great color

Tartar Sauce Ingredients:
1 cup MAYONNAISE
about 1/3 cup SWEET RELISH
1 tsp PICKLED JALAPENO (minced)
1-2 Tbsp JALAPENO PICKLING SOLUTION
(or sub lemon juice for the pickling juice)

Not Fried Catfish Recipe Directions

Catfish and tartar sauce are like Ying and Yang, so first things first, make the tartar sauce.
In a small bowl, combine the mayonnaise, sweet relish, jalapeno slices, and a little of the pickling solution. Ideally you do this a day ahead of time, or at the very least, a few hours; it’ll have a lot more flavor.

Not a fan of jalapeno peppers? Leave the peppers and pickling juices out, and substitute lemon juice instead. Mix well and refrigerate.

fried catfish recipe
Catfish tastes best with tartar sauce (and coleslaw!)

In a bowl, crush the saltine crackers, or you can substitute your favorite bread crumbs. Add the corn meal, all-purpose flour, and whatever spices and herbs you love.

The breading I use in this video is super tasty. Sometimes I use curry powder, which tastes fantastic, and also adds great color because of the turmeric. Whatever spices you use, be generous; catfish should be super flavorful! Remember, whatever spice you use will be balanced by the creamy tartar sauce.

On a baking sheet, generously coat the catfish with olive oil. Check current prices for baking sheets on Amazon. Coat both sides of the fish, and the pan. Dredge the fish in the breading, coating both sides.

Coat the fish well, and press the crumbs into the fish. Place on the baking pan and cook in an oven preheated to 375 degrees Fahrenheit. You can up the oven temperature to 400 degrees F and shorten the cooking time.

Cook until the fish is well-colored and bounces back when pressed. The fish in this video cooked for 45 minutes, but the pieces were quite large.

Make Your Side Dishes as the Fish Bakes

Fried catfish, and this not quite fried catfish recipe, go great with coleslaw, greens, and hush puppies. I’m usually too lazy to make all of that, and often I’ll just serve catfish with coleslaw and garlic toast.

For the perfect catfish dinner side dish, try this Classic Coleslaw Recipe.

crunchy slaw
classic coleslaw recipe

Thanks For Watching Our Recipe Videos!

Thanks for checking out this easy catfish recipe, and all of our recipes. Sign up for our mailing list so you’ll never miss a new recipe. Also click a button below and share the dishes with your friends. You can also follow Chef Buck on Youtube. We appreciate all the kind comments and support, and we’ll see you next time in the kitchen!

If you like what CG and I do, support us on Patreon, or throw us a tip in our Paypal Tip Jar. We’ll happily enjoy a coffee on the road – Thanks! We appreciate all the support, and we’ll see you next time in the kitchen!

We include affiliate links for products on our website. Making a purchase after clicking on our links and we may earn a commission which helps us produce more videos and drink more coffee :^) We participate in the Amazon Services LLC Associates Program, which is an affiliate advertising program. It provides a means for us to earn fees by linking to Amazon.com and affiliated sites, so we can make more videos.

Share and Enjoy !

Fish Chowder Recipe …New England Style

fish chowder recipe

Try this creamy, New England-style Fish Chowder recipe. I use half and half in this dish, but use heavy cream if you like. I also use cod as the primary ingredient, but add additional seafood and you’ve got seafood chowder!

Fish Chowder Recipe Ingredients:

2½ lbs. COD…or some kinda fish (skinless, boneless, and chopped into chunks)
3 med. POTATOES (peeled/cut into ½ inch pieces)
4-5 slices BACON (chopped)
1 Lg ONION (chopped)
1 cup CELERY (chopped)
½ cup CARROT (chopped)
HOT PEPPER (as desired)
8oz CLAM JUICE
2 Tbsp FLOUR
1 tsp dried OREGANO
1 tsp dried THYME
1 BAY LEAF
1 Tbsp BLACK PEPPER (fresh ground)
SALT (to taste)
½ cup HALF N HALF or HEAVY CREAM (add more for more creaminess)

fish chowder recipe
New England-style Fish Chowder

Fish Chowder Recipe Directions:

Heat a large pot on medium heat. Check current pricing for a soup pot on Amazon.

Add bacon. When bacon is cooked, add onion, celery, and hot pepper (optional) and saute for 2-3 minutes. Add black pepper (fresh cracked is ideal), oregano, and thyme. Mix ingredients and cook another minute.

Add chopped potato and carrot, cover with water (use half water half chicken or veggie stock if desired), and add bay leaf. Stir, cover and raise pot to a boil, then reduce and simmer approx. 10 minutes, or until the potatoes soften (but not mushy!).

Add fish (or a variety of seafood if you like). Cod or halibut are commonly used fish in chowders.
Return pot to boil, then reduce and simmer about 5 minutes.
In a small mixing bowl, add clam juice and flour and mix well.
Stir this into the pot and cook 2 minutes until chowder thickens.

Turn off the heat and add half and half or heavy cream. I don’t put too much in myself, cause I don’t like my chowder too milky,but add a little extra if you like.

And that’s it. Top with a sprinkle of parsley or chives and serve with crackers or thick-sliced bread.
Ideally it’ll sit a few hours before you eat it, or even the next day–soups and stews are always better the next day,although I rarely plan that far ahead–still it’s a lot of chowder and you might have leftovers since it’s a big pot.

And for a less creamy seafood dish, try this Seafood Stew Recipe.

seafood stew

Thanks for checking out the recipes. Be sure and sign up for our mailing list so you’ll never miss a Chef Buck cooking video, and click a button below and share the dishes with your friends. We appreciate all the kind comments and support, and we’ll see you next time in the kitchen!
–Chef Buck

Share and Enjoy !


Creamy Shrimp Curry Recipe –quick and easy with a yogurt sauce

creamy shrimp curry

Try this quick, creamy shrimp curry recipe for a change of taste. It’s super fast to prepare and kinda/sorta healthy–I usually serve this shrimp curry with rice and top with fresh chopped cilantro. Don’t be shy adding hot peppers, since the yogurt sauce and rice will absorb a lot of any heat added.

SHRIMP CURRY RECIPE
ingredients:
1 to 1½ lbs SHRIMP (peeled/deveined)
2-3 Tbsp OLIVE OIL
2 tsp MUSTARD SEEDS
2 chili peppers (chopped, or sub red pepper flakes)
1 cup plain Greek YOGURT
¼ tsp ground CINNAMON
¼ tsp ground CLOVE
½ tsp CARDAMOM
1½ tsp MANGO POWDER
2 tsp CORIANDER
½ tsp CORN STARCH
SALT to taste
CILANTRO (chopped)
serve w/ RICE

shrimp curry recipe
Creamy Shrimp Curry Recipe

In a small bowl, combine Greek yogurt with cinnamon, clove, cardamom, mango powder, coriander, and corn starch. Mix ingredients well until the yogurt is smooth. Heat olive oil in a skillet and add mustard seeds and finely chopped peppers. Use as much or little pepper as you like–if you’ve got fresh peppers that’s great, but red pepper flakes make a decent substitute. After 1 minute, add yogurt sauce to the skillet. Stir well and bring to a light bubble and let simmer 2 minutes. Adjust stovetop temperature as needed. Add shrimp, already peeled and deveined. Mix with sauce and return skillet to a simmer. Let cook 4-5 minutes, stirring as needed, until shrimp are pink and done–try not to overcook your shrimp ’cause that’s sad.
Salt dish as desired and remove from heat. Garnish with fresh chopped cilantro and serve with rice. It’s best to cook your rice ahead of time, since this creamy shrimp curry takes very little time to prepare. Give it a try and let me know what you think, and bon appetit!

For another tasty shrimp dish, give SPICY FRIED SHRIMP a try.

Share and Enjoy !


Tilapia Recipe –Easy Baked Panko-Crusted Fish

This easy, baked tilapia recipe will make even those big boring bags of tilapia fillets taste great –or any other less than stellar fillet of fish. Tilapia is not an exciting fish, but it’s often a pretty good buy relative to everything else in the seafood department. This recipe will turn tilapia–or any bargain fillet–into a super tasty, super moist side of aquatic splendor (too much?). Breading and frying always helps tilapia, but breading and baking will do the same, and it’s a lot less messy and a lot more moist–and healthier, too.

Tilapia Recipe Ingredients

2 FISH FILLETS (about 8oz each)
½ ONION (sliced or chopped)
½ cup PANKO BREADCRUMBS
½ tsp GARLIC POWDER
SALT and PEPPER to taste
2 Tbsp fresh DILL (or 2 tsp dried dill)
¼ cup MAYONNAISE
1 tsp DIJON MUSTARD
1 clove GARLIC (minced)
1 Tbsp fresh LEMON JUICE (add zest for extra lemony-ness)

How to Bake Tilapia

Preheat oven to 450 degrees F.
In a small cup, combine panko crumbs (or any breadcrumbs–panko just happens to be best, I think) with garlic powder, salt, pepper and 1/2 of the dill and mix.
In a separate bowl, combine the remaining dill, mayonnaise, Dijon mustard (not yellow mustard!) and lemon juice and stir until smooth.
Rinse and pat the fish fillets dry with paper towels. Spray a baking pan with cooking spray. Lay onion slices in pan and place fillets over
onions. Evenly brush the tops and sides of the fish with the mayonnaise mixture. Sprinkle and press the crumbs into the mayonnaise.
Place pan in oven and bake about 15 minutes until the crumb topping has turned a nice, golden brown. Serve with rice and veggies.
Give this tilapia recipe a try and let me know what you think, and bon appetit!

For another tasty fish dish, try this Crispy Skin Salmon Recipe.

crispy salmon recipe
For the best fresh fish recipes…keep it simple

Have fun in the kitchen. Get a bunch of spices, pots and pans, and begin experimenting with different recipes. home cooking is a healthy hobby that will save you tons of money in the long run. Check out current prices for Complete Kitchenware Sets on Amazon as well as Complete Starter Spice Kits. Or go to a thrift store! I’ve found some of my favorite kitchen gear at second-hand stores.

Thanks for checking out the recipes. Be sure and sign up for our mailing list so you’ll never miss a Chef Buck cooking video, and click a button below and share the dishes with your friends. We
appreciate all the kind comments and support, and we’ll see you next time in the kitchen!
–Chef Buck

Share and Enjoy !


Salmon Cake Recipe Quick and Easy

salmon cakes

Can you get a fancy-pants dinner out of a can of cheap pink salmon? Sure you can! This salmon cake recipe is easy to make and ready any time you like by using convenient canned salmon from the cupboard. Mmmmmm, I likes me some salmon cakes!

Salmon Cake Recipe Ingredients:
Patties:
1 can PINK SALMON (or red salmon, if you’re feeling luxurious)
1 large EGG
1/4 cup ONION (diced)
1/4 cup RED PEPPER (diced)
BLACK PEPPER, to taste
CREOLE PEPPER, to taste
GARLIC POWDER, to taste

Sauce (optional):
CREOLE MUSTARD (or any kind of fancy-pants mustard…check online prices)
YOGURT (plain Greek-style)
DILL WEED
LEMON JUICE (optional)

For the cakes, mix ingredients and shape into cakes. Fry in oil –I usually use extra light olive oil, but any will do. Cook on medium heat 4-5 minutes each side until golden brown).  Allow the cakes to cook well on one side before you turn, this will keep them from falling apart.
If you are making the sauce, mix ingredients to taste. I tend to go a little ‘mustardy’. Also, you might try adding a little lemon juice to the sauce.
Give this salmon cake recipe a try and let me know what you think. Check current prices for canned salmon online.

And for another tasty, nutrition-packed fish recipe, try Mackerel Stew.

fish stew recipe
canned mackerel stew

Thanks for checking out our salmon cake recipe, and all of our recipes. Be sure and sign up for our mailing list and never miss a new Chef Buck cooking video, and also click a button below and share the dishes with your friends. We appreciate all the kind comments and support, and we’ll see you next time in the kitchen!

Thanks for watching our recipe videos!

We include affiliate links for products on our website, so if you make a purchase after clicking on our links, we may earn a commission which helps us produce more videos and drink more coffee :^)                                                                                                We participate in the Amazon Services LLC Associates Program, which is an affiliate advertising program providing a means for us to earn fees by linking to Amazon.com and affiliated sites, so we can make more videos.

Share and Enjoy !

Maki Sushi – Step-by-Step How to Make Sushi

sushi

Maki sushi is my favorite sushi (makizushi), or sushi wrapped in dried seaweed (nori). Check out the video for step-by-step instructions on how to make sushi quick and easy.

Maki sushi is one of the healthiest and most entertaining foods you can put on the table…and pretty easy to prepare. You will need a SUSHI ROLLER to easily make this recipe. They are available at many supermarkets, most health food stores and every Asian market. You can get one for around $2 to $4.

Maki Sushi Ingredients:
6 to 7 NORI (dried seaweed sheets)
2 cups RICE (do not use long grain rice! Japanese sushi rice can be used, but I prefer short-grain brown rice.)
1/2 cup VINEGAR (apple cider or rice)
SALT (to taste, I use very little)
Assortment of SLICED VEGETABLES, FISH, etc
Feel free to experiment with your choices. I generally use a mix of the following: AVOCADO, CUCUMBER, CARROT, GREEN ONIONS, RED PEPPERS, SALMON (I buy 3oz pre-packaged smoked salmon for convenience, since I use so little). I’ve also used SHRIMP, CRAB, CREAM CHEESE and ASPARAGUS (lightly steamed). Mix and match and find combos you enjoy. I find that I almost always use avocado.
Desired condiments e.g. SOY SAUCE, WASABI, PICKED GINGER SLICES
Optional: I like to sprinkle TOASTED SESAME SEEDS over my finished sushi—it adds a great taste and looks nice, too.

Prepare rice according to directions. Remove from stove and add vinegar. Gently mix and set aside to cool. Slice desired ingredients for filling. For a full dinner for two, I generally use 6-7 nori. Place nori shiny side down on your sushi roller. When rice is cool, spread desired amount over nori. I like heaps of rice in my maki sushi, approx. ¾ to1 cup. Spread so that the rice covers the nori leaving ¼ inch on the two sides and on the end closest to you. Leave 1 inch open on the far end of the seaweed sheet. Pull the nori flush with the back end of the roller. Lay the sliced fillings across the rice and, holding the ingredients in check with your fingers, use the roller to roll the seaweed over the ingredients and then press gently along the top and sides. The seaweed should form a nice wrap around the ingredients. Pull the seaweed roll to the back of the roller and roll forward once more until the nori is shaped entirely around the fillings. Use a sharp knife to slice into sushi, and wipe the knife frequently for a cleaner cut. I usually get 6-7 pieces per roll.
After I plate my sushi, I sprinkle lightly with toasted sesame seeds (optional) and serve with wasabi, soy sauce, plum sauce, and pickled ginger slices.
It’s an amazingly easy dish to prepare and a great way to impress a date or get yourself out of the doghouse (if you’re at that stage in your relationship). It kicks ass at parties and your friends will think you are more hip than you probably are –but only if you USE CHOPSTICKS!!!

For a great maki sushi recipe side, try a Calamari Salad Recipe.
calamari salad squid

Share and Enjoy !


Fish Stew Recipe with Canned Mackerel

fish stew recipe

Here’s a great fish stew recipe idea: ever wonder what to do with those cheap cans of mackerel you see on the grocery aisle shoved in between the canned tuna and salmon? It can be used to create a delicious, nutritious seafood stew!

Fish Stew Recipe Ingredients

2 cans MACKEREL (check current canned mackerel prices on Amazon)
2 medium ONIONS (chopped)
1 to 2 cups CELERY (chopped)
32 oz. STOCK (chicken or veg—or use 1/2 stock 1/2 water
1 can TOMATO PASTE (I use only 2/3 can)
1-2 Tbsp LEMON JUICE
2 Tbsp OLIVE OIL
1 Tbsp PARSLEY (chopped)
1 tsp RED PEPPER FLAKES
SALT & PEPPER (to taste)
Optional: RED PEPPER (cajun seasoning, to taste) DRIED JALAPENOS (to taste)

fish stew recipe

How to make this Fish Stew Recipe

  • Drain mackerel, break fish apart, and set aside in a bowl(I remove some of the less attractive bits of skin and bone, but I’m not militant about it).
  • Heat olive oil in a pot and sauté onions and celery for 2-3 minutes.
  • Add the tomato paste and stock. A full can of tomato paste can be used, but I usually just use 2/3 of the can (it all depends on how tomato-ee you like it). Use two cans of stock (32 oz) or just use 1 can stock and 1 can water.
  • Bring pot to a boil and cook for 2 minutes, stirring as needed.
  • Add fish and return pot to boil, then reduce heat to low and simmer for 10 minutes.
  • While simmering, add lemon juice and seasonings. Stir occasionally and add water if needed. Serve over rice or with crackers or bread, or all on its lonesome.

Cook Mackerel Stew in Real-Time

If you want to watch me cooking up a version of this fish stew in real time, check out the longer video below.

Give this awesome canned mackerel fish stew recipe a try and let me know what you think…and bon appétit!

And if canned mackerel isn’t your thing, take a look at this Seafood Stew Recipe.

seafood stew

Thanks For Watching Our Recipe Videos!

Thanks for checking out our fish stew recipe, and all of our recipes. Be sure and sign up for our mailing list so you’ll never miss a new recipe. Also click a button below and share the dishes with your friends. You can also follow Chef Buck on Youtube. We appreciate all the kind comments and support, and we’ll see you next time in the kitchen!

If you like what CG and I do, you can also support us on Patreon, or throw us a tip in our Paypal Tip Jar. We’ll happily enjoy a coffee on the road – Thanks! We appreciate all the support, and we’ll see you next time in the kitchen!

We include affiliate links for products on our website. So, if you make a purchase after clicking on our links, we may earn a commission which helps us produce more videos and drink more coffee :^) We participate in the Amazon Services LLC Associates Program, which is an affiliate advertising program. It provides a means for us to earn fees by linking to Amazon.com and affiliated sites, so we can make more videos.

Share and Enjoy !

Easy Shrimp Linguine Recipe

shrimp linguine

A quick and tasty shrimp pasta dinner recipe for two!

Shrimp LinguineIngredients:

1 pound SHRIMP (20-30, peeled and deveined)
8oz LINGUINE (about ½ box)
1-2 cups BROCCOLI florets (or substitute ½ cup PARSLEY if you’re not into broccoli)
6-8 GARLIC cloves (minced)
½ large ONION (finely chopped)
½ stick BUTTER
3-5 Tbsp OLIVE OIL
SALT to taste
(add OREGANO or ITALIAN HERBS if desired–I like just the extra garlicky taste)
serve with PARMESAN CHEESE

Shrimp Linguine Directions

Prep your ingredients first, then get your pasta cooking.  I like to add a Tbsp of olive oil to my pasta water as well as a 2-4 tsp salt.  Cook the pasta according to the package directions and whatever firmness you desire.  I’m using whole grain wheat linguine for this recipe, which takes about 12 minutes to cook–a bit longer than most linguine.  The cooking time for the skillet ingredients should be around 7-9 minutes, so try to time your pasta to finish with the shrimp–overcooked shrimp is rubbery and overcooked pasta is mushy, so timing is everything!!!

In your skillet, heat 2 Tbsp olive oil and 1/4 butter on medium heat.  When hot, add garlic and cook for 1 minute.  Add onions and continue to cook a couple more minutes.  Add broccoli florets, and add more butter and oil as needed.  If you don’t want to add broccoli, substitute 1/2 cup chopped parsley instead.  Sauté  florets, garlic, and onions another 2 minutes and then add shrimp.  Throw in some Italian herbs if you want to get all herby.

The shrimp will be done when they turn pink–don’t overcook or they’ll turn rubbery!!  Remove the cooked pasta from water and add directly to the skillet.  Don’t drain or strain the pasta!!–you’re just throwing away good flavor.  Add the remainder of your original 1/2 stick butter.  Mix pasta and ingredients.  Add some pasta water to the mix (about 1/2 cup or so).  I find that the salt in the water and butter is plenty for me, but salt a little more if desired.  Remove the skillet from the heat and serve.  Fresh Parmesan cheese and toasted garlic bread are nice accompaniments!!  Maybe some wine?
Bon appétit!

Share and Enjoy !


Fried Shrimp Recipe with spicy tempura

spicy fried shrimp

I love a tasty fried shrimp recipe, and “tempura” is just a fancy pants word for “fried”. This dish is a knock-off of a dish I love to order at a Chinese restaurant when I’m down in Tampa, but since I don’t live in Tampa, I had to figure out how to make this fried shrimp recipe for myself—and I’ve done it!

The key is cilantro, and lots of it—also lots of garlic and a little hot pepper, too! Be sure to use a non-stick pan to cook up the spicy pepper mix, otherwise you’ll be setting yourself up for a headache and burned garlic!

What you need for Spicy Fried Shrimp

1 lb SHRIMP (peeled and deveined, tail on)
1 bunch CILANTRO (1 to 2 cups chopped)
10-12 cloves GARLIC (chopped)
1 or 2 hot PEPPERS (chopped)
1/2 cup GREEN ONION (chopped)
1 tsp RED PEPPER FLAKES (or two tsp!—optional)
1 cup ALL PURPOSE FLOUR
1 EGG
1 cup ice-cold WATER
frying OIL
SALT (to taste)

How to make Spicy Fried Shrimp

  • Chop up 1 bunch of cilantro, stems AND leaves.
  • Chop 2 green onions and dice peppers, I like to use 2 green chili peppers, but use whatever peppers you like depending on how much heat you want in the dish.
  • Chop 10-12 cloves of garlic.
  • Heat a non-stick skillet with 2 Tbsp of oil—definitely use a non-stick skillet! If you don’t have a decent skillet, here’s a link to check out some current skillet prices on Amazon.
  • Add peppers to skillet and allow to cook 1 minute, then add garlic and red pepper flakes (adjust pepper flakes to taste).
  • Cook for 1 minute and then add green onions. Be sure to keep ingredients stirring, reduce heat as necessary to prevent garlic from burning.
  • As garlic browns, add the cilantro and continue to stir ingredients, cooking out the moisture. It’s okay if the garlic browns well, as long as it’s not burned; the dryer the ingredients get the better. Cook the ingredients down and then remove the skillet from the heat and set aside.
  • Heat up the oil for the shrimp.
  • While the oil heats, prepare the tempura batter. It’s best not to prepare the batter ahead of time. In a bowl, beat 1 egg, add 1 cup of ice-cold water, then add 1 cup of all purpose flour.
  • Mix together into a thin batter, but don’t over mix—it’s okay if there are some lumps.
  • Test the batter in the frying oil; the batter will sizzle and float if it is ready.
  • Use peeled and deveined shrimp with the tail still attached—the tail makes a perfect handle.
  • Dip shrimp in batter and then shake off the excess.
  • Lay shrimp in the hot oil and cook 3-4 minutes, turning once. DO NOT cook too many shrimp at the same time because they will stick together and not crisp and brown evenly.
  • When the shrimp are golden, remove from oil and drain on a paper towel (the 1st batch I put into the pepper mix to drain).
  • When all the shrimp are fried, add them to the pepper mix and return the skillet to the burner on low heat.
  • Salt to taste and toss the shrimp GENTLY and thoroughly with the spice mix.
  • Remove from heat and serve immediately.

I like to serve this dish with sticky rice and a sautéed green, something like cabbage or bok choy. Give fried shrimp recipe a try a let me know what you think, and bon appétit!

If you want another tasty shrimp idea, one of my favorite is this fancy Shrimp Pancake Recipe.

shrimp pancake
Korean style Haemul Pajeon with shrimp

Thanks for checking out our shrimp recipe, and all of our recipes. Be sure and sign up for our mailing list and never miss a new Chef Buck cooking video, and also click a button below and share the dishes with your friends. We appreciate all the kind comments and support, and we’ll see you next time in the kitchen!
–Chef Buck

Thanks for watching our recipe videos!

We include affiliate links for products on our website, so if you make a purchase after clicking on our links, we may earn a commission which helps us produce more videos and drink more coffee :^) We participate in the Amazon Services LLC Associates Program, which is an affiliate advertising program providing a means for us to earn fees by linking to Amazon.com and affiliated sites, so we can make more videos.

Share and Enjoy !

Linguine with Clam Sauce Recipe – White Sauce

linguine with clam sauce

Throw together a quick linguine with clam sauce recipe. This dish is super flavorful and very easy to prepare. Give it a try–everyone will love you!

Linguine with White Clam Sauce Ingredients

1 pkg LINGUINE (about 13oz)
3 cans chopped CLAMS (approx. 20 oz., drain and reserve liquid)
½ stick BUTTER
½ cup OLIVE OIL
½ cup ONIONS (chopped)
4-6 cloves GARLIC (finely chopped)
1 cup WHITE WINE (dry, not sweet)
½ qt CHICKEN BROTH
RED PEPPER FLAKES to taste (2-3 tsp is what I use)
1 tsp dried OREGANO
1 tsp BLACK PEPPER
1 Tbsp PARSLEY (fresh chopped or dried)
¾ to 1 cup PARMESAN CHEESE (grated)

linguine with clam sauce

How to make Linguine with Clam Sauce

  • Open canned clams and separate liquid from clams. Check current prices for canned chopped clams on Amazon.
  • Heat a large skillet on medium and begin melting butter, add olive oil.
  • When all is melted, add onion and garlic. Cook until garlic begins to color, mind cooking temperature to avoid burning (lower temp if needed).
  • Add white wine and simmer 5-10 minutes to reduce.
  • Add chicken broth, clam juice reserved from cans (an additional 8oz bottle of clam juice can also be added, if extra clamminess is desired). Add red pepper flakes, oregano, parsley, and black pepper.
  • Reduce heat to low and simmer for 20 minutes.
  • While sauce is simmering, prepare linguine according to package directions.
  • After sauce has cooked for 20 minutes, stir in clams and turn off heat.
  • Add linguine noodles to sauce (don’t drain and rinse noodles, just take them right from the pot and mix them with the sauce).
  • Stir in the grated Parmesan cheese and serve. If desired, top with fresh parsley to add a little color.

And toast up some garlic bread, too.
Give this linguine with clam sauce recipe a try and let me know what you think, and bon appétit!

For another seafood dish, checkout this delicious Seafood Stew Recipe.

seafood stew

Thanks for Watching our Videos!

Thanks for checking out this puttanesca recipe, and all of our recipes. Sign up for our mailing list so you’ll never miss a new recipe. Also click a button below and share the dishes with your friends. You can also follow Chef Buck on Youtube. We appreciate all the kind comments and support, and we’ll see you next time in the kitchen!

If you like what CG and I do, support us on Patreon, or throw us a tip in our Paypal Tip Jar. We’ll happily enjoy a coffee on the road – Thanks! We appreciate all the support, and we’ll see you next time in the kitchen!

We include affiliate links for products on our website. Making a purchase after clicking on our links and we may earn a commission which helps us produce more videos and drink more coffee :^) We participate in the Amazon Services LLC Associates Program, which is an affiliate advertising program. It provides a means for us to earn fees by linking to Amazon.com and affiliated sites, so we can make more videos.

Share and Enjoy !

Best Seafood Pancake Recipe — Korean Haemul Pajeon

seafood pancake dipping sauce

Try out this seafood pancake recipe, haemul pajeon! It’s a tasty Korean twist on a pancake, and pretty damn tasty. A pancake for dinner is a good idea as long as it’s a cool pancake, and seafood is always a good idea.

What You Need For This Seafood Pancake Recipe

Pancake:
6 oz SEAFOOD (shrimp, scallops, squid, etc.)
5-6 GREEN ONIONS (cut into 1” lengths)
1 tsp HOT PEPPER (finely chopped)
½ cup ALL PURPOSE FLOUR
½ cup cold WATER
1 EGG (beaten)
2-3 Tbsp cooking OIL
Sauce:
2 Tbsp SOY SAUCE
1 Tbsp RICE VINEGAR
1 tsp SESAME SEEDS
–optional 1 tsp HOT SAUCE (chili garlic, pepper sauce, etc.)

seafood pancake recipe
Korean-style haemul pajeon is a delicious seafood pancake –and fun to make, too.

How To Make A Seafood Pancake

Mix sauce ingredients in a small dish and set aside.
Cut green onions in half and then lengthwise, then cut into 1” pieces. Finely chop 1 tsp of hot red pepper—a hot green pepper will do—but a red pepper makes the dish look yummier (also, add a little red bell pepper for color, if desired).
Chop seafood (seafood is ideal for this dish because it cooks quickly—use shrimp, squid, scallops, clams, etc.).
In a bowl, mix flour with cold water. Mix well until a thin batter is formed (add a drop more water if needed—the batter should be thin enough to coat the veggies and seafood thoroughly and spread evenly when poured into the skillet).
Add onions, peppers, and seafood to the batter and mix well.
Heat a skillet on medium high heat and add oil. When oil is heated, add batter and spread evenly. Cook for 4-6 minutes until the edges of the cake begin to brown—but before the edges brown, add 1 well-beaten egg to the top of the cake (tip: shake the skillet to spread the egg evenly over the cake). When the cake has cooked to a light brown on one side, turn and cook approx. 2 minutes on the other side (it won’t take long—be mindful to not burn the egg, but a light crispness makes this dish delicious)
Remove and serve immediately with the dipping sauce.
Give this seafood pancake recipe a try and let me know what you think, and bon appétit!

For another awesome and easy seafood dish, try this Seafood Stew Recipe.
seafood stew

Thanks for checking out the seafood pancake recipe. If you enjoyed it, click some of the clickables below to share the recipe with your friends. I appreciate it!
–Chef Buck

Share and Enjoy !


Spring Rolls with Peanut Dipping Sauce

spring rolls dipping sauces

Spring rolls are a nice appetizer when you go out to eat at a fancy-pants restaurant, and they’re just as nice when you eat them at home, and they’re easy to make. Briefly wetting the rice paper and placing it on a damp towel makes the delicate rice paper easier to handle. The rice paper softens while you place your filling–makes the process much easier–definitely give this technique a try!

All you need to make spring rolls are rice paper and some tasty ingredients to roll up inside. You can buy rice paper at any Asian food store, most health food markets, and in the ethnic foods section of many local grocery stores. It’s an economical buy. The last batch I bought was a package of 20 for $2.25 U.S. dollars. It comes in sheets, like paper, but usually round in shape; it doesn’t feel like paper, though—it feels more like plastic, almost like something you’d find at the hardware store, but don’t let that put you off, it softens quickly when wet. Despite its initial “plasticky” appearance, it’s not bad for you, or particularly good for you either—rice, tapioca, salt, and water are the prime components. How your spring rolls taste will be determined by the ingredients you roll up inside, and any dipping sauce you might like to serve them with. It’s a great vehicle for getting raw vegetables into your diet; I like to think of a spring roll as a cigar-shaped salad, but many pre-cooked meats and seafood work well in spring rolls, too.

What You Need to make Spring Rolls

Rice Paper and
Whatever the hell you wanna roll up in the rice paper.
Here are a few options I like to use:
cilantro (I ALWAYS USE CILANTRO), cucumber, basil leaves, lettuce, carrots, sprouts, rice noodles, steamed shrimp, stir-fried spicy pork, bell pepper, green onions, cabbage, and on and on and on…
there’s no end to what you can use.

spring rolls
Spring rolls make a great appetizer or entree

How to Make a Fresh Spring Roll

Prepare your filling ingredients—mainly making sure the ingredients are chopped or sliced in a manner which will make them rice paper-wrapping friendly—this is especially true if you plan on slicing the spring rolls in half—your filling ingredients will tumble out easily if they’re too loose and tiny.
Wet the rice paper with warm tap water. Just a few seconds under a warm tap is plenty. Place the rice paper on a damp towel and gently press down. The rice paper will quickly soften and become pliable. Arrange your filling ingredients at one end of the sheet and roll them up in the rice paper like a burrito. Using basil or lettuce or cabbage leaves as your base ingredient will make the rolls structurally sound and easier to roll. It’s very important that the first rollover be tight—compact the ingredients as much as possible—a loosely rolled spring roll is a sad sight, and will quickly fall apart if sliced. The rice paper will be your friend. It will help. It is very sticky and will seal almost like an envelope around your stuffings. If you want a tasty spring roll, it’s as easy as rolling up a tasty combo of ingredients—a yummy dipping sauce will help, and here are two:

Peanut Dipping Sauce:
1 Tbsp Peanut Butter
1 Tbsp Rice Wine Vinegar
1 Tbsp Toasted Sesame Oil

Chili Dipping Sauce:
2 Tbsp Chili-Garlic sauce
2 Tbsp Soy Sauce
1 tsp Sesame Seeds

And just plain old soy sauce works fine, too. Or maybe some hot mustard—I’ve never tried that, but it just popped into my head, so maybe next time I’ll give it a go.
Alright, that’s enough blabbing.
Give these spring rolls a try and bon appétit!

For another delicious Asian inspired dish, try a Seafood Pancake Recipe.
seafood pancake dipping sauce

Share and Enjoy !


Seafood Stew Recipe for Winners

seafood stew

A simple and delicious seafood stew recipe for winners*.
*also appropriate for non-winners

Seafood Stew Recipe Ingredients

1 lb MIXED SEAFOOD
1 HOT PEPPER (finely chopped)
3-4 cloves GARLIC (finely chopped)
1 medium ONION (chopped)
½ cup CELERY (sliced)
2 Tbsp TOMATO PASTE
1 13 oz can DICED TOMATOES
1 cup CHICKEN STOCK
2 cups WATER (substitute 1 cup CLAM JUICE if desired)
1 cup WHITE WINE
2 Tbsp LEMON JUICE
1 BAY LEAF
1 Tbsp OREGANO
1 tsp THYME
1 tsp BASIL
SALT/PEPPER to taste
1 Tbsp OLIVE OIL

How to make this Seafood Stew

Heat olive oil on medium heat and add onion and celery and hot pepper.
Give these ingredients a minute head start and then add the garlic and salt.

Cook until the onion begins to soften and then add the tomato paste. Push the paste around with the vegetables—spread it around the bottom of the pan and let it cook up a minute or two—if the paste sticks a little, that’s cool—because now we’ll add white wine which will deglaze any stuck on paste.

Add a bay leaf, oregano, thyme, basil—throw some red pepper flakes in as well if you like it hot. Let the mix simmer for about 5 minutes.

Add diced tomatoes, 1 cup of broth (I use chicken broth, but any broth will do), and 2 cups of water—you can substitute 1 cup of clam juice for 1 of the cups of water, if desired. Bring to a boil and then reduce to a simmer, cover, and allow to cook 30 minutes.

After 30 minutes, add 1 lb. of miscellaneous seafood—a variety of big-bite pieces make a nice presentation. Cover and simmer for another 7-8 minutes. Stir in some lemon juice and remove from heat and serve.

It looks tasty in a bowl with a nice pyramid of rice in the middle.
it’s easy peezey and puts a nice glow in your belly, so give this seafood stew recipe a try.

Bon appétit!

Hey!!!  ….what about a Beef Stew Recipe?

beef stew

Thanks for checking the seafood stew recipe out! Click some of the buttons below and share it with your friends and family, I appreciate it.
–Buck

Share and Enjoy !


Calamari Salad Recipe …easy squid dish!

calamari salad squid

Calamari salad makes a great addition to any potluck! Also, Dr. Freud theorized the squid to be the unconscious driver underlying all human action. This recipe builds on that theory, and adds carrots.

What you need for a Calamari Salad

1 lb SQUID
½ cup CARROT (strings)
½ cup CUCUMBER (sticks)
1/3 cup CILANTRO or BASIL LEAVES (chopped)
1 tsp GINGER (minced)
1 tsp SESAME OIL
1 Tbsp extra virgin OLIVE OIL
1 Tbsp RICE WINE VINEGAR
1 tsp CHILI GARLIC SAUCE (or sub hot sauce to taste)
1 Tbsp LEMON JUICE
SOY SAUCE (to taste)
½ tsp SESAME SEEDS
SALT (to taste)

How to make Calamari Salad

Start with 1 lb. of cleaned squid. I’ve used fresh and frozen squid for this recipe and both work well—and smaller squid work best for salad—which is something to think about when choosing your squid; buying them frozen and already cleaned is much nicer than cleaning a dozen dinky cephalopods.

Cut squid into thin rings (1/4 inch max) and boil in salted water for 25 seconds (yep—they’ll cook up that fast). Drain, then rinse under cold water to prevent overcooking (over-boiled squid can be quite rubbery).

In a large bowl, combine sesame oil, olive oil, vinegar, chili garlic sauce, and ginger (also salt to taste—or dress with soy sauce). Mix well.

Add squid, carrot, cucumber, and cilantro and toss with dressing.
Add lemon juice (or substitute lime juice). Add soy sauce to taste.

Mix all, top with sesame seeds, and serve over a bed of mixed greens.
It’s light, tasty, and suctioncupalicious.

Wanna try squid in another dish? One of my favorite uses for calamari is in a Seafood Pancake Recipe, which sounds weird, but try it, you’ll like it.

shrimp pancake
Korean style Haemul Pajeon seafood pancake

Thanks for checking out the calamari salad recipe. If you enjoyed it, click some of the clickables below to share the recipe with your friends. I appreciate it!
–Chef Buck

Share and Enjoy !


Blackened Fish Recipe Quick and Easy

A blackened fish recipe is delicious and super simple to prepare. You take any filet of fish, coat it in butter and lots of spice, and then cook the fish quickly in a very hot skillet.

What you need for this Blackened Fish Recipe

FISH
BUTTER
SEASONING
…and a hot skillet; blackened fish is quick and easy and delicious

How to Blacken Fish

You can use almost any fish for this blackened fish recipe, just be mindful of the size of the filet and adjust the cooking time as needed. Fish is easy to cook, and even easier to overcook, which you’ll want to avoid.

blackened fish recipe

If frozen, allow the fish to thaw completely, and pat it dry. Let the fish sit at room temperature at least 15-20 minutes before cooking, don’t take the fish right out of the fridge and throw it into the skillet.

Melt just enough butter to coat all the fish, then dredge the filets in the butter. Season both sides of the fish well. Many seasonings will work great, but some of my favorite spices for blackening fish are paprika, Italian seasoning, chili powder, garlic powder, black pepper, and salt. There is no wrong amount of spice; if it sticks to the fish, it’s enough.

Heat a lightly oiled skillet on medium heat and then when the skillet is hot, add in the fish. The filet should sizzle when it hits the pan. How long the fish cooks will depend on the size and thickness of the filet. Leave the fish alone and allow it to cook undisturbed for 3-5 minutes, depending on the size of the fillet. Adjust the stove temperature as needed.

You can make due with any skillet, but a cast iron skillet is ideal. I travel with a Lodge brand cast iron skillet which works well and is priced well, too. Check current prices for a cast iron skillet on Amazon.

Turn the fish once and continue to cook on the other side for 2-4 minutes as needed. If the fish filets are especially thick, sear the sides of the fish as well.

Serve this blackened fish recipe away. Fish is a quick entree to prepare and makes a nice main course for yesterday’s leftover side dishes. Whether you’re serving salmon, tuna, swordfish steaks, mahi mahi, etc., you can whip up a fancy feast in quick time with this quick blackening technique.

If you enjoyed this fish recipe, then you might like this Baked Fish dish.

baked fish recipe
Tilapia and cod are great fish fillets for baking

Thanks for checking out our blackened fish recipe video. Sign up for our mailing list and never miss a new Chef Buck recipe, and also click a button below and share the dishes with your friends. We appreciate all the kind comments and support, and we’ll see you next time in the kitchen!

Thanks for watching our recipe videos!

And if you like our food videos, then take a look at Buck and CG’s travel videos.

We include affiliate links for products on our websites, so if you make a purchase after clicking on our links, we may earn a commission which helps us produce more videos and drink more coffee :^) We participate in the Amazon Services LLC Associates Program, which is an affiliate advertising program providing a means for us to earn fees by linking to Amazon.com and affiliated sites, so we can make more videos.

Share and Enjoy !

Shrimp Remoulade Recipe …Best Shrimp Salad Ever!

shrimp remoulade salad
Shrimp remoulade salad is one of my all-time favorite dishes.  I used to eat this all the time when I lived in New Orleans—and I never go back without making a stop at the Gumbo Shop for a taste.  I don’t know exactly how the Gumbo Shop prepares shrimp remoulade sauce, but this recipe is how I throw it together.   A lot of ingredients go into the sauce, but it’s worth the effort.  Give it a try!

What You Need to Make Shrimp Remoulade

TOMATO PUREE (½ cup)
MUSTARD (¼ cup –creole, stone ground, or dijon)
HORSERADISH (2 tsp –prepared)
GREEN ONION (1 tsp, minced)
PARSLEY (1 Tbsp, finely chopped)
WORCESTERSHIRE SAUCE (½ tsp)
MAYONNAISE (3-5 Tbsp)
CELERY (1 Tbsp, minced)
GARLIC (1 clove, minced)
CHILI POWDER (1 tsp)
PAPRIKA (1 tsp, smoked)
SUGAR (1 tsp, optional
SALT (to taste)
HOT SAUCE (½ tsp)
LEMON JUICE (1 Tbsp)
OLIVE OIL (1 Tbsp)
VINEGAR (1 tsp)
Salad Ingredients:
SHRIMP (1 lb, boiled)
SALAD GREENS
TOMATO SLICES
GREEN ONION (chopped, optional)

shrimp remoulade
Shrimp Remoulade is a New Orleans classic

How to Make Shrimp Remoulade

The Remoulade Sauce:

To make the sauce, just mix all the sauce ingredients together (really?!).  I’m using tomato puree in this version, but I’ve also made this dish using ketchup or tomato sauce; it will be thinner if you use those two, but that can be a good thing, especially if you want to toss the greens in the remoulade sauce.  Sugar is optional and definitely not needed if you’re using ketchup, which is usually sweet enough.  Sometimes I’ll add a teaspoon of onion powder.  This is a great recipe to play with, but be judicious with the mayonnaise!  Using fresh ingredients like parsley, garlic, green onion, and celery will really make this sauce shine.  You can definitely make and serve the sauce immediately, but making it hours ahead or even the day before will embolden the flavors.  Embolden the flavors?  I’m not sure if that’s the right way to say that, but you know what I mean.

The Shrimp:

I’m using 1 pound of deveined shrimp in the shell. For this salad, the bigger the shrimp the better, but I usually get whatever’s on sale—any kind of shrimp is gonna be delish in this dish. Before boiling, prepare a bowl of ice water to cool the shrimp after cooking—this will keep the shrimp from becoming overdone (tough and rubbery).
Put a pot of water on the stove and add 2 bay leaves and a generous amount of salt. Bring the pot to a boil and add the shrimp. I find a pound of shrimp takes about 2 minutes, but this will vary depending on the size of the shrimp and the amount of water in the pot. For sure, they will cook fast. Do not ignore them—it’s not a good time to multi-task. When the shrimp turn pink, they’re done. Get ’em out of the hot water and into the ice bath—this will halt the cooking process, and your shrimp will be perfecto (and now that they’re cooked, they’ll be super easy to peel).
Toss the shrimp in the remoulade sauce and serve over a bed of fresh greens. I like to garnish the salad with green onion and fresh tomato. Serve with saltines or a loaf of French bread and soft butter. Let the salivating begin.
And bon appétit!

calamari salad squid
Be adventurous and TRY A CALAMARI SALAD!

Thanks for checking out the recipe. To never miss a video, subscribe to Chef Buck! Click some of the buttons below and share this awesome Shrimp Remoulade with your friends. Thanks!
–Chef Buck

Share and Enjoy !


Follow Me!