Best Cauliflower Pizza Crust Recipe That Won’t Fall Apart

cauliflower pizza crust

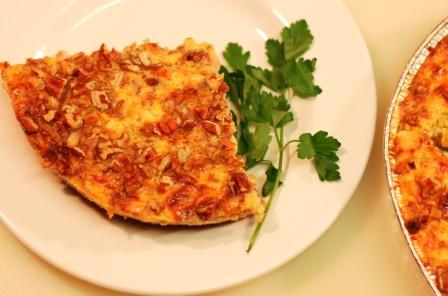
You can make the best cauliflower pizza crust recipe that will not fall apart after baking. Slice it, hold it, eat it–it keeps its shape–and it actually tastes like pizza! This cauliflower crust pizza is gluten free, healthier than bread dough, and definitely worth trying.  And this recipe freezes well too so why not make 2 crusts?

All You Need To Make a Cauliflower Crust Pizza

2 cups of grated CAULIFLOWER
1 cup of freshly grated PARMESAN CHEESE
1 EGG beaten
PARCHMENT PAPER to line your baking sheet
PIZZA SAUCE, your choice   [see below for an easy, delicious tomato-based pizza sauce recipe]
PIZZA TOPPINGS, your choice

gluten free pizza crust
The best and easiest cauliflower crust pizza recipe. This cauliflower crust is delicious, holds its shape, and will not fall apart.

How To Cook A Cauliflower Crust Pizza Recipe

Cut And Dry Out The Fresh Cauliflower:

  • Grate fresh cauliflower florets into granules resembling “poprocks”
  • Heat the grated cauliflower in a skillet.  Don’t add oil or water–use medium heat, not too hot. Stir until the cauliflower has dried out somewhat. It won’t dry completely, but the dryer, the better. Heat at least 10 minutes, just enough to evaporate the moisture, not enough to color or cook down.
  • Remove skillet from burner and set aside to allow cauliflower to slightly cool.

Prepare and Cook the Naked Crust:

  • In a bowl, beat 1 egg.
  • Add grated Parmesan cheese to the egg. You can substitute, asiago or romano cheeses, just be sure you use a hard cheese for best results.
  • Add the cauliflower to the bowl and mix well with the egg and cheese and form into a ball.
  • Spread parchment paper onto a baking sheet. DEFINITELY USE PARCHMENT PAPER, otherwise your crust may tear when you try to pick it up. If you’re out of paper, here’s some current parchment paper prices on amazon.
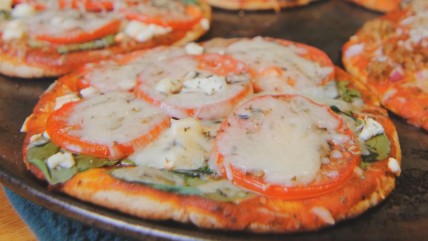
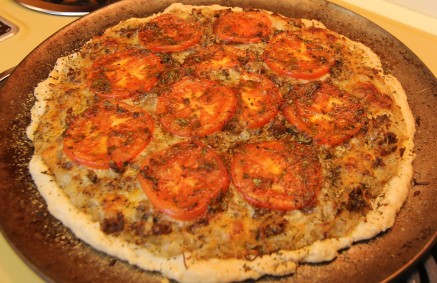
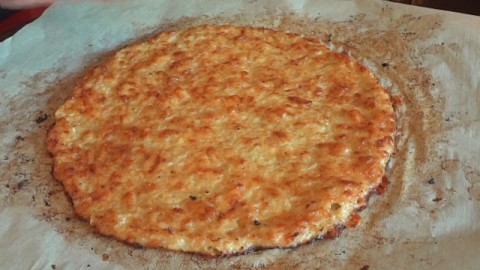
  • Place the balled cauliflower and cheese onto the parchment paper and spread out into a pizza shape about ¼ inch thick. The crust will be about 10″ across.
  • Do not make the edges of the crust too thin; keep the size of the crust uniform for even cooking. The cauliflower will darken quite rapidly around the edges if too thin.
  • Place crust into an oven preheated to 400 degrees Fahrenheit and cook approx. 15-20 minutes until the crust has colored and firmed up.

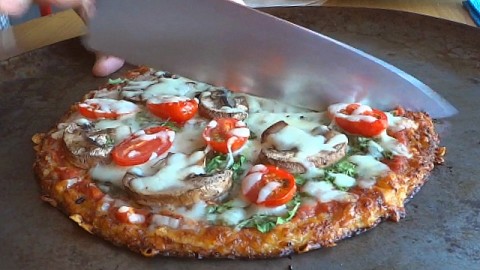
Add Your Favorite Pizza Toppings and Finish Cooking:

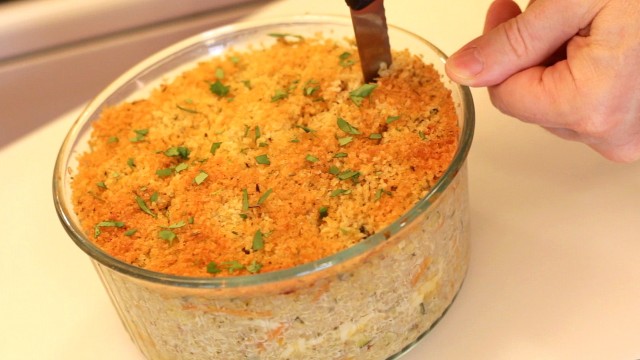
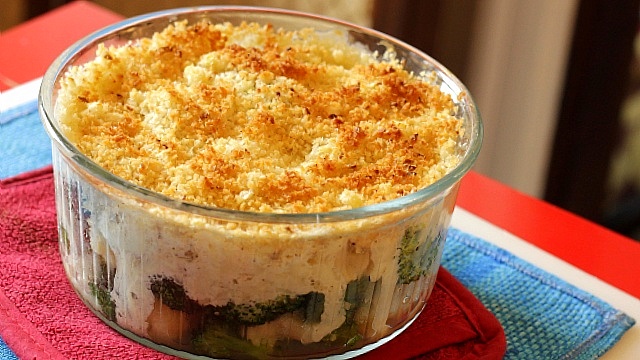
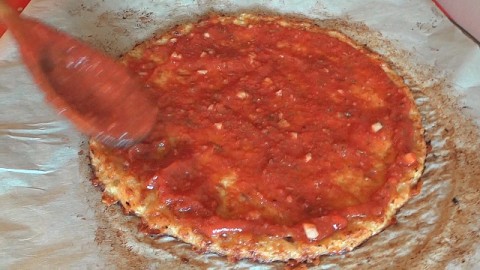
  • Remove cauliflower pizza crust from the oven and top with your favorite pizza sauce. Use a marinara sauce, pesto, white sauce, or whatever. Top with your favorite pizza toppings.
  • Return pizza to the oven and continue to cook at 400 F for about 10 minutes until the toppings are done, watch the edges of the cauliflower crust; the edges will darken too much if overcooked.
  • Remove the pizza from the oven and set on a cooling rack –or don’t– this step isn’t make or break.

And that’s it!  Eat and enjoy. Check here for current prices for a pizza pan on Amazon.

A cauliflower pizza crust will not rise since there is no yeast involved, and since the crust is entirely cauliflower, cheese, and egg, it will not achieve the same crispness as a thin dough pizza. But the pizza will stay together just fine, and will taste very much like a pizza.

cauliflower pizza crust
Cauliflower pizza crust after cooking about 20 mins. in a 400 F oven. Crust should be cooked firm with a nice, golden color.

Tips For Making A Cauliflower Pizza Crust That Will Not Fall Apart

  • Use fresh cauliflower, and only use the florets.
  • Don’t allow overly large pieces of cauliflower into the “dough” — keep the vegetable pieces reasonably uniform.
  • The dryer the cauliflower pieces the better, but don’t be obsessed!
  • Use only a hard cheese like Parmesan or Romano in the crust mixture, this helps make the crust stable.
  • Don’t make the crust too thick, around ¼” is ideal.
  • Make the crust a uniform size all the way to the edges so that it will cook evenly.
  • Cook the cauliflower crust on parchment paper! otherwise the crust will stick and break apart when you try to remove it from the pan.
  • Spread your pizza sauce almost to the outer edges of the crust; your pie will look better. The cauliflower pizza crust is a healthier choice, but it is not the prettiest pizza crust.
best cauliflower pizza crust
This cauliflower crust is healthier than a bread dough, with more nutrition and less empty calories.

Is A Cauliflower Pizza Crust Healthy ? …well

  • It provides more nutrition.
  • It adds less empty calories.
  • It’s gluten-free.
  • And it works. It’s a great alternative to a bready pizza crust that will satisfy your pizza needs.
pizza sauce recipe
Any pizza sauce will work with a cauliflower crust pizza, so use your favorite, but homemade is always best!

How to Make an easy Homemade Pizza Sauce

A good pizza needs a good sauce. It’s easy to make a simple pizza sauce at home that will suit your tastes exactly.

The key to a great homemade pizza sauce is making it at least a day in advance. Keep a jar of sauce in your fridge. You can use it on pizzas, but also on sandwiches, as a dip, or part of a marinara sauce for any Italian inspired dish.

You’ll need:
1 15oz can of TOMATO SAUCE
dried THYME dried OREGANO
dried BASIL
GARLIC POWDER or fresh chopped GARLIC
SALT and PEPPER
and for a little kick, add a little fresh or dried HOT PEPPER

Add the seasonings to taste. If you’re just getting started cooking at home, here are current prices for Spice Starter Sets on Amazon.

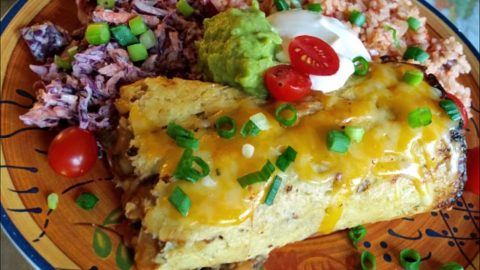
Are There Other Ways To Use A Cauliflower Pizza Crust?

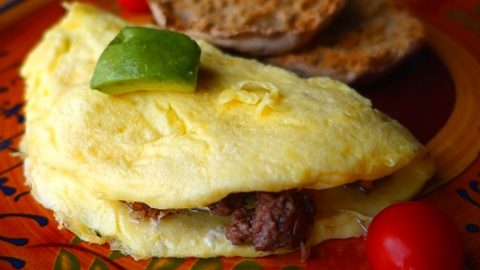
For a tasty twist on this pizza crust variation, try using it as a Cauliflower Crust Burrito. Seriously, a burrito has tons of flavor, so it’s a great way to use this kind of recipe.

cauliflower pizza crust recipe
This is a nice variation on a burrito recipe and a great way to use a cauliflower crust.

Thanks For Checking out our Recipes

We hope you love this cauliflower pizza crust recipe! Sign up for our mailing list so you’ll never miss a new recipe. Also click a button below and share the dishes with your friends. You can also follow Chef Buck on Youtube. We appreciate all the kind comments and support, and we’ll see you next time in the kitchen!

If you like what CG and I do, support us on Patreon, or throw us a tip in our Paypal Tip Jar. We’ll happily enjoy a coffee on the road – Thanks! We appreciate all the support, and we’ll see you next time in the kitchen!

We include affiliate links for products on our website. Making a purchase after clicking on our links and we may earn a commission which helps us produce more videos and drink more coffee :^) We participate in the Amazon Services LLC Associates Program, which is an affiliate advertising program. It provides a means for us to earn fees by linking to Amazon.com and affiliated sites, so we can make more videos.

Share and Enjoy !

Cook a Sirloin Steak Like a Restaurant Pro

american kobe top sirloin steak

Cooking the perfect steak is easy. Sear the outside of the steak in a hot skillet to add color and flavor, and then simply finish the steak to desired doneness in a hot oven. This cooking preparation is especially ideal for thick cuts of steak.

How To Cook The Perfect Steak Filet

  • Choose a good cut of beef. The perfect steak is never the cheapest steak!
  • I’m using a Top Sirloin Steak for this video, but any good cut of steak will do (and remember, marbled steak makes a juicy steak!)
  • Let the steak come to room temperature before cooking.
  • Season the steak well, on both sides, with coarse salt and pepper.
  • Preheat your oven to 500 degrees Fahrenheit.
  • On the stove top, heat a little oil in a heavy-bottomed, oven safe skillet. You’ll want a nice skillet that’s great on the stove top and in the oven, here’s a deal if you want to check current prices for a cast iron skillet on Amazon.
  • Add steak to the hot skillet.  The beef should sizzle when it hits the pan.
  • Sear on medium high heat for approx 2 minutes.
  • Turn steak with tongs and sear other side for 1 minute.
  • Slide the skillet into the oven and continue cooking steak to the desired temperature.
  • Test the doneness of the steak by pressing on it with your fingers. Steak becomes firm as it cooks. A well done steak is very firm, and a rare steak very malleable. Poking or slicing the steak to check for temperature will result in loss of juices, so this should be avoided.
  • When steak is almost cooked to desired doneness, remove the steak from the oven and skillet and place on a plate to rest for 5 minutes. The internal temperature of the steak will continue to rise for a few moments after leaving the oven.
  • Allowing the steak to rest for 5 minutes before serving will preserve the juiciness of the cut.

sirloin steak
For a simple steak preparation, always choose a great cut of beef

Best Steak Cuts for a Great Dinner

A simply prepared steak can taste terrific, but it requires a good cut of meat.  The cheapest meat never makes the best steak.  Less expensive cuts of beef can be great as roasts, in stews, fajitas, or marinated, but spending a little more will make all the difference when cooking a nice steak dinner.

  • Ribeye Steak – This is a well-marbled and tender cut of steak, and also my favorite.
  • New York Strip or Strip Steak – marbled and tender, but comes in 2nd behind the ribeye in my book.
  • T-Bone – This cut is a T-shaped bone with a strip steak on one side of the bone and a partial cut of the beef tenderloin, or filet mignon, on the other side of the bone. It’s a big steak, not as big as the porterhouse, but still more than I want to pay for.
  • Porterhouse – this steak is really two steaks, it includes the strip steak and the entire filet mignon hugging a T-shaped bone between them. It looks great and tastes great, but it’s pretty pricey, and since it includes even more of the tenderloin than the T-bone steak, it isn’t a cut of steak I buy unless it’s a crazy deal.
  • Top Sirloin Steak – sirloin steak can be divided into “top” and “bottom” cuts. TOP SIRLOIN steak like I cooked in the video above makes a nice steak, but anything less than top sirloin can be a little tough for a simple steak preparation.
  • Filet Mignon or Tenderloin – I almost hate to include this cut, since it’s the priciest steak by cost per pound, and also the steak I’m least likely to buy, but lots of people love it. It’s lean and tender, but too lean for my taste. In my book Fat = Flavor.

sirloin steak
Test the temperature of a steak with your finger. Steak becomes more firm as it cooks.

How To Test When A Steak Is Done

A steak is done when it’s done to your liking.
I like my steak cooked medium rare.
To test the doneness of a steak, simply press down on the beef with your fingers. The more give there is in the steak, the less cooked it is.
As a steak cooks it becomes firmer, so as the meat becomes more done, it becomes less pliable. This is something that is easy to figure out as you cook more steaks and test them for doneness in this manner.
It is the best way to check for doneness; avoid cutting the steak open or puncturing it to test for temperature. Slicing or poking the steak before it rests will result in a loss of juices, which is really another way of saying a loss of flavor, which defeats the entire point of buying a nice cut of steak

Try This Top Sirloin Steak preparation

american kobe top sirloin steak
Cook a thick steak filet on high heat. Sear the outside for awesome taste and color, and then finish to desired doneness in the oven.

Give this top sirloin steak a try, or any kind of steak you like, just keep it simple and buy a nice cut of beef.

If you liked the video and recipe info, click some of the buttons below to share this post with friends and family. And for another tasty dish, try this Fantastic Stove Top Pot Roast Recipe.

pot roast recipe
Throw your chuck roast in a pot on the stove and it practically cooks itself.

Thanks for checking out the recipes. Be sure and sign up for our mailing list so you’ll never miss a Chef Buck cooking video, and click a button below and share the dishes with your friends. We appreciate all the kind comments and support, and we’ll see you next time in the kitchen!
–Chef Buck

Share and Enjoy !


Mango Curry, Chana Masala, & Gobi Matar Indian Cooking

mango curry

Let’s cook a complete Indian meal in real time. For this dinner, I’m cooking chana masala, mango curry, and gobi matar. These dishes work well together. All recipes are posted below, but Indian cooking is all about flexibility and taste, so tweak these recipes and make them your own, or follow them exactly, and then experiment at a later time.

Ingredients for Mango Curry Recipe

4 large, very ripe and juicy MANGOES
1 cup YOGURT
1-2 Tbsp CUMIN SEEDS
dash of ASAFOETIDA
¼ cup CURRY LEAVES chopped well
4-5 Tbsp GINGER finely chopped
2-3 Tbsp CHICKPEA FLOUR a.k.a. besan
2 Tbsp OIL for cooking
SALT to taste

Check out current prices for Indian Cooking Spices on Amazon.

How to Make Mango Curry

Use super-duper ripe mangoes to make mango curry. The mangoes should be VERY RIPE, soft and juicy.
Peel and pit the mangoes and place the fruit in a bowl. Crush the mango until it’s a wet, semi-lumpy mess.

Add in about 1 cup of Greek-style yogurt and mix well.
In a large pot, heat oil on medium high heat.
Add cumin seeds and asafoetida and cook 30-40 seconds.
Add curry leaves, half of the ginger, and chickpea flour. Stir and continue cooking about 2 minutes.
Add mango mixture and 1 cup of water and stir well with ingredients in pot.

Bring to a bubble, then reduce the heat, cover and let simmer about 10 minutes.
Stir occasionally and add more water to the mango curry as desired.
After 10 minutes, add the remaining ginger, cover and let cook another 5 minutes.
That’s it! Serve mango curry over rice, and enjoy!

mango curry
A complete Indian meal with mango curry, chana masala, and gobi matar.

Chana Masala Recipe

Many chana masala (chickpea curry) recipes include onion; sometimes I use onion, sometimes I don’t, it mostly depends on the other dishes I’m serving with the chana masala.

I do often include asafoetida and chick pea flour. If not using besan, just add ½ cup of water instead of 1 cup. The asafoetida is wonderful. It stinks, but ti’s still wonderful. Asafoetida is also called “devil’s dung”, but that’s just when it’s raw, once you toss it into a simmering skillet, it transforms into a sharp, oniony weirdness that will pleasantly remind you of your favorite Indian restaurant.

I’ve only been able to find asafoetida at international food markets, but it’s worth acquiring, especially if you want to make a habit of cooking great Indian dishes at home. If skipping the asafoetida, try adding 1 finely chopped medium-sized onion between the cumin seeds and the tomatoes.

Chana Masala Ingredients:
1 15 oz can CHICKPEAS (or 2 cups)
1 15 oz can DICED TOMATOES (or 2 fresh diced)
1 tsp GARLIC (minced)
1 tsp GINGER (minced)
1 HOT PEPPER (minced)
1-2 Tbsp OLIVE OIL
1 Tbsp CHICK PEA FLOUR (also called besan)
1 tsp CUMIN SEEDS
1 tsp CHILI POWDER
1 tsp GARAM MASALA
1/8 tsp ASAFOETIDA (optional, also called hing)
½ tsp TURMERIC
SALT (to taste)

Check out current prices for Indian Cooking Spices on Amazon.

In a skillet, heat oil on medium high heat. When the oil is heated, add the cumin seeds and asafoetida. Stir and allow to simmer for just a few moments. Once the seeds begin to crack, add the chick pea flour and continue stirring. The flour will absorb the oil. Stir for approx. 1 minute and then add the diced tomatoes. Mix well and allow the tomatoes to bubble.

As the tomatoes cook down, you can crush them with your stirrer for a smoother chana massala. Add the minced ginger and garlic and hot pepper. Add the chili powder and turmeric. After the tomatoes have cooked 4-5 minutes, add the chick peas, garam masala, and salt to taste. Mix well and add 1 cup of water. Bring the dish to a bubble, then reduce to a simmer, cover, and allow cooking for 10 minutes.

After 10 minutes, the chick peas will be soft. Use a fork or potato masher to smash some of the chick peas, this will help thicken the chana masala along with the chick pea flour added earlier. Simmer uncovered to the desired consistency, remove and serve. Garnish with fresh coriander leaves. Serve with rice or on its own.

Gobi Matar Recipe

Cauliflower is good and good for you, especially if you curry it up–and this Indian-style cauliflower curry recipe will help.

Ingredients:
1 med CAULIFLOWER (cut into florets)
1 15 oz can DICED TOMATOES (or 2 med tomatoes)
1 8 oz can GREEN PEAS
1/8 tsp ASAFOETIDA (optional, also called Hing)
1 large ONION (chopped)
1 HOT PEPPER (finely chopped)
1 tsp GINGER (finely chopped)
1 Tbsp GARLIC (finely chopped)
1 tsp CHILI POWDER (sub cumin powder for less heat)
1 tsp CUMIN SEEDS
½ tsp TURMERIC POWDER
1 tsp CORIANDER POWDER
1 tsp GARAM MASALA
2-3 Tbsp OLIVE OIL
¼ cup WATER
SALT (to taste)

How to Make Indian Gobi Matar

In a skillet, heat olive oil on medium high heat. Add cumin seeds and asafoetida. Seeds will brown and crack quickly. Add onion and stir. Cook 1 minute and then add ginger, garlic, and hot pepper. Continue cooking until onions are soft. Add turmeric, chili, and coriander powder and mix well.

Stir in tomatoes and continue cooking 4-5 minutes. Add salt to taste. As the tomatoes cook down I like to crush them with a spoon. Stir in cauliflower florets. Add water and bring dish to a bubble, then reduce heat to a simmer, cover, and let cook 4-5 minutes. I say 4-5 minutes, but cook it however long you like…I should say 1-10 minutes.

I don’t want to cook all the nutrients out of the cauliflower, and I like my florets to still have a bit of crunch to them, so I simmer my cauliflower for only a few minutes. When the cauliflower is almost cooked to your liking, add garam masala and green peas. Mix and continue cooking until peas are heated through. And that’s it—your cauliflower and peas will be transformed into something delicious (I know it’s hard to believe, but trust me).

Make these dishes and try them out. The mango curry is a sweet, delicious treat, the chana masala is an Indian foods must, and the gobi matar tastes great and is great for your health.
Give Indian cooking a go, and bon appétit!

If you’re new to home cooking, get a bunch of spices, pots and pans, and start experimenting with different recipes. It’s a healthy hobby that will save you money in the long run. Check out current prices for Complete Kitchenware Sets on Amazon as well as Complete Starter Spice Kits. Or go to a thrift store! I’ve found some of my favorite kitchen gear at second-hand stores.

For another Indian favorite, try this Indian spinach recipe called Chole Palak.

chole palak chickpea spinach

Thanks for Watching Our Indian Cooking Videos!

Be sure and sign up for our mailing list to never miss a new cooking video, and also click a button below and share the dishes with your friends, and follow Chef Buck on Youtube. We appreciate all the kind comments and support, and we’ll see you next time in the kitchen!

If you like what CG and I do, support us on Patreon, or throw a tip in our Paypal Tip Jar We’ll happily enjoy a coffee on the road, or maybe even pay a bill or two!–Thanks! We appreciate all the support, and we’ll see you next time in the kitchen!

We include affiliate links for products on our website, so if you make a purchase after clicking on our links, we may earn a commission which helps us produce more videos and drink more coffee :^) We participate in the Amazon Services LLC Associates Program, which is an affiliate advertising program providing a means for us to earn fees by linking to Amazon.com and affiliated sites, so we can make more videos.

Share and Enjoy !

Make the Best Bean Soup Today !

bean soup

This bean soup recipe is super tasty and easy to make. Doesn’t bean soup sound delicious? Especially if you’re a kid. I use cannellini beans and black beans in this recipe, but you can use whatever beans you like. Ham or sausage is great in bean soup, too, and it doesn’t have to be a lot; just a little meat adds great flavor to bean soup. If going meat free, be sure to add lots of spice and maybe and extra veggie or two…beans need all the excitement they can get.

Bean Soup Recipe Ingredients:

2 15oz cans CANNELLINI BEANS
1 15oz can BLACK BEANS
2 medium sized ONIONS chopped
4-5 cloves GARLIC finely chopped
some leftover SAUSAGE or HAM (cooked)
32 oz BROTH (or ½ water ½ broth)
a little HALF AND HALF if you want
1 tsp CHIPOTLE POWDER
(or use some other kinda heat)
SALT and PEPPER to taste
1-2 Tbsp Oil
chopped PARSLEY if you want

bean soup
adding a mix of beans will add color and texture to your soup

Bean Soup Recipe Directions:

Heat 1 to 2 Tbsp of oil in a soup pot.
Add the onion and garlic and saute for several minutes.
If you’ve got fresh chili or jalapeno peppers, dice and add a little of that, too…if you want.
Add seasoning. I use salt, pepper, and chipotle powder in this recipe. Chipotle is awesome in bean soup. It adds great flavor
and a little heat. Don’t have chipotle powder? Add chili powder or chili/garlic paste instead, or anything you like, soup is all about
improvising.
Cook the spices and onions together for a few minutes and then add broth (meat or veggie broth, whatever, dude).
Toss in a bay leaf and bring the pot to a bubble.
Add in beans. I like to use a mix of cannellini and black beans.

If you have some sausage or ham on hand, chop and toss a little into the soup.
Reduce the heat down to a low simmer, cover and let cook 30-45 minutes.
After simmering, remove the bay leaf.
Use a hand blender to blend the soup to desired consistency. Check here for current prices on Hand Blenders at Amazon.

bean soup
use a hand blender to make a soup creamier

I like to add a little half and half for added creaminess; not a lot, just a little does the trick, around ½ a cup.
Turn off the heat and stir in a little chopped parsley or cilantro, and that’s it!
If you can make it a day ahead, all the better; soup only gets tastier with time!
Hope you love it!
Give Bean Soup recipe a try and let me know what you think, and bon appétit.

And for more bean fun, check out this crazy awesome Vegetarian Chili Recipe that even the meat lovers in your family will enjoy.

vegetarian chili
pot o’ meatless chili for good times

Thanks for Watching our Videos!

Thanks for checking out our bean soup recipe. Sign up for our mailing list so you’ll never miss a new recipe. Also click a button below and share the dishes with your friends. You can also follow Chef Buck on Youtube. We appreciate all the kind comments and support, and we’ll see you next time in the kitchen!

If you like what CG and I do, support us on Patreon, or throw us a tip in our Paypal Tip Jar. We’ll happily enjoy a coffee on the road – Thanks! We appreciate all the support, and we’ll see you next time in the kitchen!

We include affiliate links for products on our website. Making a purchase after clicking on our links and we may earn a commission which helps us produce more videos and drink more coffee :^) We participate in the Amazon Services LLC Associates Program, which is an affiliate advertising program. It provides a means for us to earn fees by linking to Amazon.com and affiliated sites, so we can make more videos.

Share and Enjoy !

Baked Tomatoes Recipe with Basil, Cheese, and Walnut

baked tomatoes recipe

This is a terrific baked tomatoes recipe. I love tomatoes roasted and topped with garlic, bread crumbs, and butter, but I think this toasted walnut, basil, and cheese topping has it beat. These roasted plum tomatoes make an awesome vegetarian dish with more than enough substance to satisfy even the most carnivorous craving.

Baked Tomatoes Recipe Ingredients:

4 PLUM TOMATOES (roma is a type of plum tomato)
½ cup toasted WALNUTS
½ cup fresh BASIL
½ cup ROMANO CHEESE (or sub Parmesan cheese)
2-3 cloves GARLIC
some OLIVE OIL, dude
SALT and PEPPER (to taste)

baked tomatoes
Slice off the bottom of the tomatoes so they sit flat on the baking sheet.

Baked Tomato Recipe Directions:

Slice tomatoes lengthwise in half, and then slice a sliver off of the rounded backside so that the tomatoes rest flat.

Using a fork, tenderize the tops of the tomato halves, but do not poke the fork all the way through.
Arrange tomatoes on a baking sheet.

Season tomato tops with salt and pepper, and then coat the tomato tops lightly with olive oil.
Bake in an oven preheated at 500 degrees Fahrenheit for 10-15 minutes, or until the edges of the tomatoes begin to brown.

While the tomatoes bake, place chopped basil, toasted walnuts, shredded cheese, fresh ground pepper, and garlic in a food processor and pulse conservatively until the topping ingredients resemble tabouli. Check current prices for food processors on amazon.

baked tomatoes
Use about equal parts of toasted walnut, cheese, and basil…and garlic to taste.

Remove tomatoes from the oven. Add any oil and juices on the baking sheet into the blended basil/walnut/cheese topping. Also add ½ to 1 tsp olive oil if desired. Mix ingredients and then mound the topping evenly over each tomato.

Return tomatoes to the oven and continue baking at 500 degrees F for another 5 minutes.

After 5 minutes, turn oven to broil and let tomatoes broil 1-2 minutes longer, or until tops have browned; watch them closely!

And that’s it. Let them cool for a few minutes and serve. It’s a great appetizer, side, or can even be the main course of a vegetarian meal. The blended topping has a terrific, meaty texture. The baked tomatoes are quite filling, and delicious. I hope you like it!

Baked Tomatoes
This baked tomato recipe is beyond delicious…definitely give it a try!

Definitely give this Baked Tomatoes Recipe a try and let me know what you think, and bon appétit!

And for another great vegetarian dish, try this Baked Jalapeno Poppers Recipe.
jalapeno poppers

Thanks for Watching our Baked Tomatoes Recipe

Sign up for our mailing list so you’ll never miss a new recipe. Also click a button below and share the dishes with your friends. You can also follow Chef Buck on Youtube. We appreciate all the kind comments and support, and we’ll see you next time in the kitchen!

If you like what CG and I do, support us on Patreon, or throw us a tip in our Paypal Tip Jar. We’ll happily enjoy a coffee on the road – Thanks! We appreciate all the support, and we’ll see you next time in the kitchen!

We include affiliate links for products on our website. Making a purchase after clicking on our links and we may earn a commission which helps us produce more videos and drink more coffee :^) We participate in the Amazon Services LLC Associates Program, which is an affiliate advertising program. It provides a means for us to earn fees by linking to Amazon.com and affiliated sites, so we can make more videos.

Share and Enjoy !

Egg Bake Recipe … or giant oven omelette!

egg bake recipe

Give this easy Egg Bake Recipe a try. Or is it an oven omelette recipe? Or just a fancy-pants egg casserole? Whatever you want to call it, it’s delicious and nutritious and super easy to prepare.
The leftovers make a terrific breakfast on the go, and it’s a great recipe for using up odds and ends in your refrigerator, so definitely give this brunch / breakfast dish a try.

Egg Bake Recipe Ingredients:

10 EGGS
1 cup MILK
1 cup GREEN ONION chopped
3-5 cloves GARLIC finely chopped
1-2 cups shredded CHEESE …I like gruyere and monterey jack best
1 cup MUSHROOMS sliced
½ cup BELL PEPPERS chopped
½ cup ARTICHOKE HEARTS chopped
½ cup TOMATOES
HOT PEPPERS chopped, to taste
SALT and PEPPER to taste
OIL for cooking
add CILANTRO, PARSLEY,
or any chopped HERBS
you like!

Egg Bake Recipe Directions:

My favorite part of this dish is the leftovers. It’s great cold for a tasty and nutritious breakfast on the go, so make a batch at the beginning of your week, and you’ll have a quick snack whenever you like.

Step 1:
Saute your veggies. Use the suggestions in my recipe, or better yet, use whatever you have on hand. I NEVER make this dish with the same ingredients, because it’s the perfect opportunity to clean out the refrigerator. Add salt and pepper as desired.

egg bake recipe
use lots of fresh veggies –and ham or cooked sausage if you’re feeling carnivorous.

Step 2:
In a bowl, whisk together the eggs and milk. Add some fresh herbs if you like. Chives and basil are awesome in this mix.

Step 3:
Lightly grease an oven safe baking dish, about 8 X 10. Check here for current prices on a Pyrex Baking Dish on Amazon.

Step 4:
Line the bottom of the dish with freshly shredded cheese. I like gruyere and monterey jack the best, but use your favorite cheese.

egg bake recipe
layer a lightly greased baking dish with cheese

Step 5:
Evenly spread the sauteed veggies over the cheesy bottom. If you have extra cheese, sprinkle on top.

egg bake recipe
spread sauteed veggies evenly over cheesy bottom.

Step 6:
Pour the egg/milk mix gently over the veggies. The egg will soak to the bottom and cover the top.

egg bake recipe
Completely cover dish with egg mix.

Step 7:
Bake in an oven preheated to 350 degrees Fahrenheit for 40-50 minutes. Add a sprinkling of cheese to the top during the last 10 minutes, if desired.
Remove from the oven and allow the egg bake to rest 10 minutes before slicing.

egg bake recipe
Serve hot or cold, and make a bunch, because the leftovers are twice as good!

This dish makes a terrific breakfast for a family gathering, it’s awesome over salad greens, and the leftovers are perfect for a quick snack or breakfast on the go.

Give this easy egg bake recipe a try and let me know what you think…and bon appétit!

And for another tasty breakfast recipe, check out this Complete Huevos Rancheros from Scratch Recipe.

huevos rancheros
Huevos Rancheros is a flavorful, classic mexican dish…delicious!

Thanks for checking out the recipes. Be sure and sign up for our mailing list so you’ll never miss a Chef Buck cooking video, and click a button below and share the dishes with your friends. We appreciate all the kind comments and support, and we’ll see you next time in the kitchen!
–Chef Buck

Share and Enjoy !


Canned Salmon Recipes — Salmon Meatballs

canned salmon

Canned salmon is one of my favorite ingredients. It’s perfect for making salmon burgers and salmon salad, but it also can be used to make an easy meatball recipe.

What you need for Canned Salmon Meatballs

14 oz canned SALMON check canned salmon prices online
2 EGGS
2-3 cloves GARLIC (crushed)
in this recipe I use:
1 tsp CURRY POWDER
½ tsp CHILI POWDER
SALT and PEPPER (to taste)
…but use whatever spices you like

How to Make Canned Salmon Meatballs

For this recipe, I bake the hell out of the salmon balls. I generally make them to use in curry and stew dishes, so I want them dense and sturdy and tasty. For a juicier meatball to eat all on it’s
own, add diced onion and garlic and bake for a shorter cooking time.

Salmon in the can is already cooked, in fact it is part of the canning process that cooks the salmon.

  • Open the the can and drain off the liquid. Traditional canned salmon will come with skin and bones still intact . The skin and bones are soft and edible.
    You can remove the skin and bones if you like; I used to remove them, but now I’m too cheap, and I don’t want to miss out on the extra nutrition, either.
  • Place drained salmon in a bowl.
  • Add ALL of the other ingredients and mix together well.
  • Shape salmon mixture into ping pong-sized balls.
    I get about 12 meatballs out of this recipe.
  • Place meatballs on a baking sheet and bake at 400 degrees Fahrenheit for 20-30 minutes.
    The longer they bake, the firmer they will become, which is what you want if you’re
    going to use them in a stew or curry dish.
  • Remove the meatballs from the oven and then use them for whatever you want.

Make a double batch and freeze half of them for later!
I love salmon meatballs in curries.

canned salmon
Salmon Meatball dish in a rich curry sauce.

Ingredients for Salmon Meatball Curry

1 Lg ONION (chopped)
12 SALMON “meatballs”
6-8 cloves GARLIC (finely chopped)
1 Tbsp GINGER (finely chopped)
2 Tbsp CHILI GARLIC SAUCE check current prices online
1 tsp TURMERIC
1 tsp CUMIN
2 tsp CORIANDER POWDER
1½ Lg BELL PEPPERS
14 oz can diced TOMATOES
14 oz can COCONUT MILK
2-3 Tbsp OLIVE OIL
SALT (to taste)
top with chopped CILANTRO

How to Make Salmon Meatball Curry

Heat a large skillet on medium high heat and add olive oil. When oil is hot, add in onions, garlic, ginger, and something hot, like fresh chili peppers! Or red pepper flakes! Or chili sauce!
Anything hot will do, but add something spicy; it’s not a curry without a little zing, plus the spiciness will be a nice balance for the cooling coconut and tomato.

Saute ingredients for 3-5 minutes.

Add in the chopped bell pepper. I like nice, big, chopped pieces. A variety of sizes and textures always makes for a more interesting curry, soup, or stew.

Add in the turmeric, cumin, and coriander powders and mix well. Cook for 4-5 minutes.

Add tomato, and salt to taste. Mix and allow to simmer for 5 minutes; add a little water if needed, but not too much.

Add in the coconut milk and salmon balls.
Mix well and bring the dish back to a bubbling simmer.
Simmer for 5 minutes, and that’s it!
Stir in a little chopped cilantro if you like, or just top with cilantro as a garnish.
Serve this curry over rice or quinoa.
Hope you like it!

Give this canned salmon meatball recipe a try and let me know what you think, and bon appétit!

Here’s some current prices for canned salmon if you like to do your fishing on the internet.

salmon burger recipe
Canned Pink Salmon …traditional style means skin and bones are still intact

And for another canned seafood idea, try this Delicious Mackerel Stew Recipe.

fish stew recipe
canned mackerel stew

Thanks for checking out our canned salmon recipe, and all of our recipes. Be sure and sign up for our mailing list and never miss a new Chef Buck cooking video, and also click a button below and share the dishes with your friends. We appreciate all the kind comments and support, and we’ll see you next time in the kitchen!

Thanks for watching our recipe videos!

We include affiliate links for products on our website, so if you make a purchase after clicking on our links, we may earn a commission which helps us produce more videos and drink more coffee :^)                                                                                                We participate in the Amazon Services LLC Associates Program, which is an affiliate advertising program providing a means for us to earn fees by linking to Amazon.com and affiliated sites, so we can make more videos.

Share and Enjoy !

The Best Garlic Shrimp Recipe You’ll Ever Eat

garlic shrimp recipe

Try this super-quick and delicious garlic shrimp recipe. Lots of olive oil and garlic add great flavor, especially when served with fresh sliced bread. Cook the shrimp quickly in a hot skillet, but don’t overcook, because over cooked shrimp get rubbery. The total cooking time for this dish start to finish should be about 5-7 minutes.

What you need for Garlic Shrimp

2 lbs SHRIMP
½ cup OLIVE OIL
½ cup GARLIC …or as much as you like (finely chopped)
½ tsp RED PEPPER FLAKES
½ tsp PAPRIKA
SALT and PEPPER to taste
3-5 Tbsp LEMON JUICE
some PARSLEY (chopped)
sliced BREAD for sure!

How to make this Garlic Shrimp Recipe

  • Peel and devein the shrimp (save the shells and heads to make a stock!)
  • Heat olive oil in a skillet on medium high heat. Check current prices for a non-stick skillet on Amazon.
  • When oil is hot, add red pepper flakes. Red pepper flakes add a nice heat, but substitute fresh peppers, or even a little cayenne if you like.
  • Add garlic and saute for 1 minute. Use as much garlic as you like. I prefer lots of garlic. I literally used an entire bulb. It seems like a lot, but the oil and garlic taste great with thick slices of fresh bread.
  • Add the shrimp, and continue sautéing on medium heat.
  • The shrimp only take about 3-5 minutes to cook depending on the size of your shrimp. Don’t overcook the shrimp; they will become rubbery if cooked overly long.
  • Add paprika, and salt and pepper to taste. If you’re just getting into home cooking, here are current prices for starter spice sets on Amazon.
  • Saute shrimp until JUST cooked, when shrimp begin to color and curl, then remove the skillet from the heat.
  • Add lemon juice and fresh chopped parsley.
  • Mix well and serve in a bowl with thick slices of fresh bread. Or serve over rice…but this oily, garlicky shrimp is GREAT with thick slices of tasty bread.
garlic shrimp recipe
lots of garlic + lots of shrimp = delicious

Give this garlic shrimp recipe a try and let me know what you think…and bon appétit!

If you want another tasty shrimp idea, one of my favorites is this Spicy Tempura Shrimp Recipe.

spicy fried shrimp

Thanks For Watching Our Recipe Videos!

Thanks for checking out this cool carrot soup recipe, and all of our recipes. Sign up for our mailing list so you’ll never miss a new recipe. Also click a button below and share the dishes with your friends. You can also follow Chef Buck on Youtube. We appreciate all the kind comments and support, and we’ll see you next time in the kitchen!

If you like what CG and I do, support us on Patreon, or throw us a tip in our Paypal Tip Jar. We’ll happily enjoy a coffee on the road – Thanks! We appreciate all the support, and we’ll see you next time in the kitchen!

We include affiliate links for products on our website. Making a purchase after clicking on our links and we may earn a commission which helps us produce more videos and drink more coffee :^) We participate in the Amazon Services LLC Associates Program, which is an affiliate advertising program. It provides a means for us to earn fees by linking to Amazon.com and affiliated sites, so we can make more videos.

Share and Enjoy !

Fish Chowder Recipe …New England Style

fish chowder recipe

Try this creamy, New England-style Fish Chowder recipe. I use half and half in this dish, but use heavy cream if you like. I also use cod as the primary ingredient, but add additional seafood and you’ve got seafood chowder!

Fish Chowder Recipe Ingredients:

2½ lbs. COD…or some kinda fish (skinless, boneless, and chopped into chunks)
3 med. POTATOES (peeled/cut into ½ inch pieces)
4-5 slices BACON (chopped)
1 Lg ONION (chopped)
1 cup CELERY (chopped)
½ cup CARROT (chopped)
HOT PEPPER (as desired)
8oz CLAM JUICE
2 Tbsp FLOUR
1 tsp dried OREGANO
1 tsp dried THYME
1 BAY LEAF
1 Tbsp BLACK PEPPER (fresh ground)
SALT (to taste)
½ cup HALF N HALF or HEAVY CREAM (add more for more creaminess)

fish chowder recipe
New England-style Fish Chowder

Fish Chowder Recipe Directions:

Heat a large pot on medium heat. Check current pricing for a soup pot on Amazon.

Add bacon. When bacon is cooked, add onion, celery, and hot pepper (optional) and saute for 2-3 minutes. Add black pepper (fresh cracked is ideal), oregano, and thyme. Mix ingredients and cook another minute.

Add chopped potato and carrot, cover with water (use half water half chicken or veggie stock if desired), and add bay leaf. Stir, cover and raise pot to a boil, then reduce and simmer approx. 10 minutes, or until the potatoes soften (but not mushy!).

Add fish (or a variety of seafood if you like). Cod or halibut are commonly used fish in chowders.
Return pot to boil, then reduce and simmer about 5 minutes.
In a small mixing bowl, add clam juice and flour and mix well.
Stir this into the pot and cook 2 minutes until chowder thickens.

Turn off the heat and add half and half or heavy cream. I don’t put too much in myself, cause I don’t like my chowder too milky,but add a little extra if you like.

And that’s it. Top with a sprinkle of parsley or chives and serve with crackers or thick-sliced bread.
Ideally it’ll sit a few hours before you eat it, or even the next day–soups and stews are always better the next day,although I rarely plan that far ahead–still it’s a lot of chowder and you might have leftovers since it’s a big pot.

And for a less creamy seafood dish, try this Seafood Stew Recipe.

seafood stew

Thanks for checking out the recipes. Be sure and sign up for our mailing list so you’ll never miss a Chef Buck cooking video, and click a button below and share the dishes with your friends. We appreciate all the kind comments and support, and we’ll see you next time in the kitchen!
–Chef Buck

Share and Enjoy !


Israeli Couscous Recipe for Pasta Salad

pasta salad

This Israeli couscous recipe, also called pearl couscous or ptitim, makes a great pasta salad. It’s called “couscous”, but isn’t what I think of when I think of couscous, because it boils up into tiny pasta balls about the size of a blueberry. Toss pearl couscous into a salad with your favorite dressing and some fresh veggies and it makes a quick and healthy side dish, or even a full meal if you throw it on a bed of greens.

Israeli Couscous Pasta Salad Ingredients

1 pkg ISRAELI COUSCOUS (8.8 oz)
1 lg ENGLISH CUCUMBER (sliced)
1 CARROT (strings?…whatever, man)
2 cups PARSLEY (chopped)
TOMATO (sliced)
….and whatever’s in the fridge you need to get rid of.
dressing:
¼ cup OLIVE OIL
3 Tbsp LEMON JUICE (or vinegar)
2 tsp LEMON ZEST
2 tsp GARLIC (minced)
2 tsp GINGER (minced)
SALT and PEPPER to taste
(plus whatever you want)

pasta salad
Israeli couscous is also called pearl couscous or ptimim.

Israeli Couscous Recipe

Bring 3 cups of water to a boil and add in the Israeli couscous. Check current prices for Israeli Couscous on Amazon. Salt and oil are not needed. Reduce heat down to a simmer, cover, and let cook for 10 minutes. After 10 minutes, remove the pot from the heat and strain the couscous. Rinse with cold water to halt the cooking process and to keep the pasta from becoming too soft.

Slice fresh veggies. Use the ones I have listed above or use your favorites; and especially use whatever veggies you have in the fridge that you need to get rid of. Whenever I make a big salad, it’s almost always to utilize ingredients that are gonna go bad if I don’t do something with them soon–it’s a win-win, I end up not wasting food and getting something healthy to eat.

pasta salad
uncooked Israeli couscous

In a small bowl, combine the dressing ingredients. I like to use fresh lemon juice because it’s awesome. but it’s also great to keep lemons on hand for the fresh zest–lemon zest adds a nice zing to salads and dressings. If you don’t have fresh lemon on hand, substitute vinegar.

In a bowl, toss together the couscous, veggies, and dressing. If you’re going to be serving and eating it all right away, go ahead and add tomato, but if you’re going to refrigerate some or all of the salad for later, just wait and add the tomato when you’re serving (refrigerated tomatoes are no fun).

Israeli (pearl) couscous is great in these kinda salads. I often use quinoa in these types of dishes, but this couscous makes a nice change of pace, so give it a go if you’re regularly eating salads and need to mix things up a bit.

Give this Israeli couscous recipe a try and let me know what you think, and bon appétit!

And for another tasty salad idea, try this Southwestern-Style Quinoa Salad Recipe.

southwestern quinoa salad
a southwestern quinoa salad makes a tasty and healthy dinner choice.

Thanks for Watching our Couscous Recipe Video!

Click a button below and share the dishes with your friends. You can also follow Chef Buck on Youtube. We appreciate all the kind comments and support, and we’ll see you next time in the kitchen!

If you like what CG and I do, support us on Patreon, or throw us a tip in our Paypal Tip Jar. We’ll happily enjoy a coffee on the road – Thanks! We appreciate all the support, and we’ll see you next time in the kitchen!

We include affiliate links for products on our website. Making a purchase after clicking on our links and we may earn a commission which helps us produce more videos and drink more coffee :^) We participate in the Amazon Services LLC Associates Program, which is an affiliate advertising program. It provides a means for us to earn fees by linking to Amazon.com and affiliated sites, so we can make more videos.

Share and Enjoy !

Thai Rice Recipe …but with Quinoa!

thai rice

What is more awesome than a Thai rice recipe? Thai quinoa! Quinoa provides a complete protein, so you’ll get more bang for your buck by substituting quinoa in this simple, yet delicious Thai-style dish.

>

Quinoa Thai Rice Recipe Ingredients:

1 cup QUINOA …check quinoa prices on Amazon
1 can COCONUT MILK
1 ONION (chopped)
2 Tbsp GINGER (minced)
1 Tbsp CHILI-GARLIC SAUCE
1-2 tsp LEMONGRASS (minced)
4-6 cloves GARLIC (finely chopped)
2 Tbsp OLIVE OIL
½ tsp TURMERIC
CILANTRO (chopped)
ENGLISH CUCUMBER (chopped)
ROMA TOMATO (chopped)
2-3 Tbsp RICE VINEGAR
SALT and PEPPER to taste

thai rice
Thai-Style Quinoa Recipe

Quinoa Thai Rice Recipe Directions:

Heat olive oil in a large skillet on medium high. Add chopped onion, garlic, and ginger. Saute for 3-4 minutes until ingredients begin to soften. Add chili-garlic sauce, turmeric, and salt to taste. Mix well and continue sautéing for another minute.
Add quinoa and stir well. Check here for current prices for quinoa on Amazon.

In a measuring cup, add one can of coconut milk, and then add additional water to bring the liquid to 2½ cups. Pour the coconut/water mixture into the skillet and mix well with the quinoa.
Stir in the minced lemongrass.

Raise the skillet temperature and bring ingredients to a boil.
Reduce heat to a simmer, cover, and let dish cook undisturbed for 15 minutes.

Thai rice
Pair a simple salad with Thai Quinoa for a complete meal.

While the quinoa cooks, chop cucumber and tomato into a bowl.  Use a cucumber with a thin, edible skin, it’s a great texture for this dish. Add fresh chopped ginger and cilantro, salt and pepper to taste, and a generous amount of rice vinegar; the tartness of the vinegar adds a great contrast to the coconut creaminess of the quinoa. Thoroughly mix the salad ingredients and set aside.

Once the quinoa has simmered for 15 minutes, remove from the heat and let sit 5 to 10 minutes. Fluff the quinoa with a fork and add fresh chopped cilantro; if you’re not a fan of cilantro, basil makes an excellent substitute.
Serve quinoa in a bowl with the cucumber/tomato salad.

It’s a crazy creamy and awesome recipe. So simple and delicious, and makes a great meal. Definitely give this Thai rice quinoa recipe a try and let me know what you think, and bon appétit!

And for another healthy Thai-inspired recipe, try this Quinoa Thai Curry Recipe.
quinoa thai curry

Thanks for Watching Thai-Style Quinoa Recipe

Click a button below and share the dishes with your friends. You can also follow Chef Buck on Youtube. We appreciate all the kind comments and support, and we’ll see you next time in the kitchen!

If you like what CG and I do, support us on Patreon, or throw us a tip in our Paypal Tip Jar. We’ll happily enjoy a coffee on the road – Thanks! We appreciate all the support, and we’ll see you next time in the kitchen!

We include affiliate links for products on our website. Making a purchase after clicking on our links and we may earn a commission which helps us produce more videos and drink more coffee :^) We participate in the Amazon Services LLC Associates Program, which is an affiliate advertising program. It provides a means for us to earn fees by linking to Amazon.com and affiliated sites, so we can make more videos.

Share and Enjoy !

French Toast with Cream Cheese Filling

french toast

Why have Plain French Toast when you can have French Toast with a cream cheese filling? A little creamy cheese and cinnamon ginger apples can transform your breakfast into a 10-year old’s dream breakfast.

French Toast Ingredients:

BREAD (sliced, stale)
1½ cups MILK
4 EGGS
BUTTER for frying, and apples
APPLES (peeled, sliced)
CANDIED GINGER (sliced)
WALNUTS (toasted)
8 oz CREAM CHEESE (soft)
15 oz RICOTTA CHEESE
CINNAMON (to taste)
optional: sugar and vanilla

french toast
Stale bread makes the best french toast! –slice ahead of time!

French Toast Directions:

Stale bread makes great French toast, so slicing bread ahead of time is a great idea; at least a few hours ahead of time, but ideally overnight. Stale bread will soak up the French toast batter without becoming overly soggy and falling apart, especially if you’re using thinner slices of bread, and the thinner or thicker the slices will depend on your particular tastes. This French toast recipe doesn’t need thicker slices, since you’re basically building a French toast sandwich; I’m using thicker slices of challa bread for this video, but I often use regular slices of Hawaiian sweet bread, which works great.

Mix the cream cheese and ricotta cheese together. Be sure to set your cream cheese out ahead of time to soften, this will make mixing it with the ricotta cheese much easier. I’ll often mix these ingredients ahead of time. If making a smaller amount, the cheese mix is about a 2 to 1 ratio of ricotta to cream cheese. I sometimes add a tsp. or two of sugar to the cheese mix, but this is optional; I prefer it without the added sugar, since the apple mix will be quite sweet.

Any leftover cream/ricotta mix can be used as dessert topping, and makes a tasty filling for omelets. I generally make too much apple mix, but that’s a good thing, too. I’m generous with the apple topping, and any leftover apple mix is a perfect topping for oatmeal or ice cream.

french toast
Creamy cheese filled French Toast

To make the apple mix, peel, slice, and remove the cores of the apples. Apples vary quite a bit in size, but I usually end up with about 4-6 cups of apple slices, and I generally use gala or Fuji apples, which take little time to cook down.

Melt about 2 Tbsp of butter in a pot and add apples. Mix with butter and cook over medium heat. Add candied ginger slices; I think ½ to 1 cup is a good amount of candied ginger, but there is no wrong amount, follow your gut. Add 1-2 Tbsp of sugar and cinnamon to taste, Mix and cover and cook about 20 minutes, until apples soften and get juicy. For extra liquidy goodness, stir in about ¼ cup water. You want the apples to be a little syrupy, that way you won’t have to use any maple syrup with the French toast. Once the apples are cooked to your liking, cover and set aside.

Mix the French toast batter. A basic batter is eggs and milk, and I’m also adding cinnamon, but often folks will add a little sugar or vanilla extract. I don’t add vanilla or sugar to the batter with this particular dish, because the creamy cheese center and apple-ginger topping will add more than enough flavor. In a bowl, combine the milk, eggs, and cinnamon to taste (½ tsp is a good amount). Whisk together well and then pour some into a shallow bowl–or all–it depend on the size of your shallow bowl; you don’t want the batter to be so deep that it runs into the cheesy part of your French toast sandwich.

To build the French toast sandwich, simply spread the cheese mixture onto a slice of bread and top with another slice, making a basic cheese sandwich.

You can also add toasted walnuts into the sandwich for a nice crunch, or simply top the toast later with toasted nuts, but definitely add nuts at some point, cause the crunchy contrast makes the dish perfect, and toasted walnuts are awesome.
To toast the walnuts: spread walnuts on a baking sheet and roast at 350 degrees Fahrenheit for 5-7 minutes. It won’t take long. As soon as the nuts begin to color up, remove them from the oven; they will burn if ignored, so set a timer and watch them closely. Taking the time to toast the walnuts is well worth the effort…it’s a great taste.

Once you’ve constructed the cheesy French toast sandwich, heat a little butter in a non-stick skillet on medium heat. Check current prices for a Non-Stick Skillet on Amazon.
Place the sandwich in the batter and let soak a moment and then turn and batter the other side.
Place sandwich in the skillet and cook on medium heat until golden brown, turn and cook other side and remove from the heat.
Slice French toast and then top with apples and walnuts (a dusting of powdered sugar is optional). For a splash of color, add fresh berries or mint.

Serve this cheese stuffed French toast with maple syrup, or without–I find the cooked apples to be syrupy enough, and the warm cheesy center keeps the French toast from being too dry.

It’s a super delicious dish and a great treat for company.

Give this fancy pants Cream Cheese French Toast recipe a try and let me know what you think, and bon appétit!

And for another fancy pants breakfast dish, try this Pancake Recipe.

Fancy pancakes are easy to make.
Fancy pancakes are easy to make, and better looking, too.

Thanks for Watching our French Toast Recipe Video!

Click a button below and share the dishes with your friends. You can also follow Chef Buck on Youtube. We appreciate all the kind comments and support, and we’ll see you next time in the kitchen!

If you like what CG and I do, support us on Patreon, or throw us a tip in our Paypal Tip Jar. We’ll happily enjoy a coffee on the road – Thanks! We appreciate all the support, and we’ll see you next time in the kitchen!

We include affiliate links for products on our website. Making a purchase after clicking on our links and we may earn a commission which helps us produce more videos and drink more coffee :^) We participate in the Amazon Services LLC Associates Program, which is an affiliate advertising program. It provides a means for us to earn fees by linking to Amazon.com and affiliated sites, so we can make more videos.

Share and Enjoy !

New York Strip Steak Recipe with Cream Sauce

steak recipe

Cook up a New York strip steak recipe French bistro-style with this easy, creamy, peppercorn steak recipe. Use fresh cracked peppercorns for ultimate satisfaction!–it seems like a lot of pepper, but the cream sauce balances it out nicely.

New York Strip Steak Recipe Ingredients

NEW YORK STRIP (10-12 oz)
1 Tbsp PEPPERCORNS (crushed)
1 Tbsp BUTTER
2 Tbsp OIL
¼ cup WINE (red or white wine)
¾ cup HEAVY CREAM
1 clove GARLIC (minced)
SALT to taste

steak recipe

How To Cook a New York Strip Steak

I’m using a New York Strip Steak for this dish, but any good cut of steak will work.

  • First thing, trim the steak of excess fat and coat both sides of the steak with fresh cracked and crushed peppercorns. Use a course grinder, rolling pin, or something out of the toolbox. Check here for current prices for a pepper grinder on Amazon. It seems like a lot of pepper, but the rich and creamy sauce will balance the dish out nicely.
  • Add salt to taste and set the steak aside.
  • Heat a skillet on medium heat and add butter and oil. Ideally you want to not use a non-stick skillet.
  • Once the skillet is hot, add the steak. It should sizzle straight away, sealing in the flavors.
  • Cook steak to desired doneness, turning halfway through the cook time. I think medium rare (pink inside) is perfect.
  • When the steak is cooked to your liking, remove it from the skillet and cover on a plate to rest.
  • Leave the skillet with juices, butter, and oil on medium heat.
  • De-glaze thee skillet with wine.
  • Add the cream and garlic and continue stirring 3-4 minutes. Be sure to return any juices from the plate with the resting steak!
  • Stir sauce until it reduces to a creamy thickness. Add salt as desired.
  • Pour sauce onto a plate and top with steak and desired sides–steamed broccoli or asparagus are my favorites.

Serve with thick slices of bread to sop up the delicious, creamy sauce!
Give this New York Strip Steak Recipe a try and let me know what you think, and bon appétit!
And for another tasty entree, check out this delicious Pork Loin Chop Recipe.

pork loin chop

Thanks for Watching our NY Strip Steak Video!

Click a button below and share the dish with your friends. You can also follow Chef Buck on Youtube. We appreciate all the kind comments and support, and we’ll see you next time in the kitchen!

If you like what CG and I do, support us on Patreon, or throw us a tip in our Paypal Tip Jar. We’ll happily enjoy a coffee on the road – Thanks! We appreciate all the support, and we’ll see you next time in the kitchen!

We include affiliate links for products on our website. Making a purchase after clicking on our links and we may earn a commission which helps us produce more videos and drink more coffee :^) We participate in the Amazon Services LLC Associates Program, which is an affiliate advertising program. It provides a means for us to earn fees by linking to Amazon.com and affiliated sites, so we can make more videos.

Share and Enjoy !

Pork Tenderloin Recipe with Beans

pork tenderloin

You’re gonna love this pork tenderloin recipe. As the name suggests, pork tenderloin is a very tender cut of meat. It’s super flavorful, moist, and delicious, and easy to prepare. Leftover tenderloin is perfect on a sandwich, so cook up enough to leave leftovers…you’ll be glad you did. I’m cooking this pork tenderloin with onions and beans and it’s a great dish –definitely give it a try.

Pork Tenderloin Recipe Ingredients:

2½ lbs PORK TENDERLOIN
1½ Lg ONION
15oz can PINTO BEANS
5-7 cloves GARLIC
fresh HOT PEPPERS to taste (or use red pepper flakes, or nothing…it’s all optional, baby!)
OLIVE OIL (as you like…I oil the meat, the skillet, and then throw a little olive oil on the onions)
SEASONING for meat
(1 tsp salt, ½ tsp black pepper, 1 tsp cumin, 1 tsp chili powder,
1 tsp Italian seasonings, etc…experiment, or use your own favorites)
½ cup dry WHITE WINE (optional)
½ cup CHICKEN BROTH

pork tenderloin
trim silver skin from tenderloin and sear 3 minutes each side before roasting in oven

Pork Tenderloin Recipe directions:

  • Trim the pork tenderloin of the sinewy silver skin.
  • Coat the pork in olive oil and seasonings. I’m using a rub of chili powder, cumin, salt, pepper, and Italian seasonings…but use whatever flavors you like, or just keep it simple with basic salt and pepper–there’s no wrong way to do it; as long as you don’t overcook the pork, it’ll be awesome!
  • Pre-heat your oven to 425 F. Cooking the tenderloin at a high temperature for a short time will keep it from drying out.
  • While the oven heats, sear the tenderloin on the stove top. In a heavy, oven safe skillet, heat a little olive oil on medium high heat. After the skillet and oil are hot, add the tenderloin–it should sizzle and cook right away. Check current prices online for an oven safe skillet.
  • Sear for 3 minutes and then turn and sear the other side.
  • Add thick sliced onion to the skillet. Do this after the tenderloin has been turned.
  • Add a little oil and seasonings to the onion.
  • After 3 minutes, remove the skillet from the stove top and place in the oven at 425 F. (be sure to use an oven-safe skillet!)
  • Cook for approx. 20 minutes. If using a meat thermometer, cook until the internal temperature of the pork is 145 F.
  • Remove the skillet from the oven and return to the stove top.
  • Remove the pork loin from the skillet and set aside 10 minutes to rest. It is very important to rest the meat before slicing. This will preserve the juiciness and flavor of the pork. If you slice the tenderloin right away, the thin juices will run and much of the flavor and moisture will be lost!
pork tenderloin
let pork tenderloin rest before slicing

While the pork tenderloin rests, we’ll complete the onion and bean side dish.

  • On medium heat, continue cooking the onions in the skillet. The liquid in the pan will reduce as it cooks. Add garlic–a lot is good!–and if desired, throw in a little fresh chopped hot peppers.
  • Add the pinto beans
  • After a few minutes, if you like, add a little wine. It’s optional, but adds a great flavor.
  • Simmer about 2 minutes and let the wine cook off.
  • Add chicken broth and continue simmering until the liquid cooks down. And that’s it!
pork tenderloin
pinto beans and caramalized onion

By now the pork tenderloin has rested enough and is ready to slice.
Serve the tenderloin with the beans and onion side, and maybe a little steamed broccoli or salad–and boom!–you got a complete fancy-pants pork tenderloin dinner!

pork tenderloin
Pork tenderloin dinner with caramelized onion and beans

Give this pork tenderloin recipe a try and let me know what you think, and bon appétit!

And for another great meal idea, try this Delicious Cornish Hen Dinner.

cornish game hen

Thanks for checking out our pork tenderloin recipe, and all of our recipes. Be sure and sign up for our mailing list and never miss a new Chef Buck cooking video, and also click a button below and share the dishes with your friends. We appreciate the kind comments and support, and we’ll see you next time in the kitchen!

Thanks for watching our recipe videos!

We include affiliate links for products on our website, so if you make a purchase after clicking on our links, we may earn a commission which helps us produce more videos and drink more coffee :^) We participate in the Amazon Services LLC Associates Program, which is an affiliate advertising program providing a means for us to earn fees by linking to Amazon.com and affiliated sites, so we can make more videos.

Share and Enjoy !

Beet Greens Great over Quinoa or Rice

beet greens recipe

Try this easy beet greens recipe. I almost always buy beets with the beet greens still attached–you’re getting two great ingredients in one! Beet greens are quick to cook up, full of nutrients, taste great, and look great, too. Serve this recipe over rice or quinoa as an entree, or serve it all on it’s lonesome as a side dish.

Beet Greens Recipe Ingredients:

1 bunch BEET GREENS
1 bunch GREEN ONIONS (chopped)
1 can diced TOMATOES
4-5 cloves GARLIC (finely chopped)
2 Tbsp VINEGAR
1-2 Tbsp OLIVE OIL
SALT and PEPPER to taste
HOT PEPPERS (chopped, to taste)
serve over QUINOA or RICE

beet greens

How to cook Beet Greens

Wash beet greens well and then separate the stalk from the leaves. Chop the stalk into bite-sized peices, and then rough chop the greens.
Heat olive oil in a skillet on medium heat. Check prices for a new skillet on Amazon.
Add garlic and, if desired, a little fresh hot pepper.

Let these ingredients cook for about a minute, and then add chopped green onion bottoms (reserve chopped green onion tops to add later)
Cook for 2 minutes and then add the chopped beet stalks.
Saute for 1-2 minutes and then add diced tomato. Bring the skillet back up to a simmer. Add salt and pepper and simmer for approx. 5 minutes.

Add in a little vinegar. I’m throwing in 2-3 Tbsp by the time the dish is complete, but adjust to taste. Add vinegar incrementally–it’s a lot easier to put in than to take out!
Simmer dish another 2 minutes.

Add in the leafy greens and most of the green onion tops–I reserve a little of the green onion tops for a garnish.
Cover and simmer 2 minutes.

And that’s it! Adjust the seasoning as desired, and get it off the heat. Serve the greens over rice or quinoa as an entree, or a side dish. Check current prices for quinoa on Amazon.

Give this beet greens recipe a try and let me know what you think, and bon appétit!

For another great greens dish, try this Creamed Kale Recipe.

kale
A lot of kale isn’t always a lot, kale contains a high water content and will cook down quite bit.

Thanks for checking out our beet greens recipe, and be sure and sign up for our mailing list so you’ll never miss a Chef Buck cooking video, and also click a button below and share the dishes with your friends. We appreciate all the kind comments and support, and we’ll see you next time in the kitchen!

We appreciate you watching our recipe videos!

We include affiliate links for products on our website, so if you make a purchase after clicking on our links, we may earn a commission which helps us produce more videos and drink more coffee :^) We are a participant in the Amazon Services LLC Associates Program, which is an affiliate advertising program that provides a means for us to earn fees by linking to Amazon.com and affiliated sites.

Share and Enjoy !

Cook Quinoa with Roasted Vegetables Recipe

how to cook quinoa

How to cook quinoa with beets; a simple recipe that pairs quinoa with delicious roasted root vegetables. For this quinoa recipe, I roasted beets, carrot, and onion, but any root vegetable will do. I also added a little RAW ginger and garlic, to provide a flavor punch along with excellent nutrition. A complete protein, quinoa makes this dish an ideal vegetarian recipe. It’s a perfect side dish or main course.

Quinoa and Root Vegetable Recipe Ingredients:

1 cup QUINOA
2 med. BEET ROOTS
1 med. ONION
1-2 Lg CARROTS
2 Tbsp GARLIC (minced)
2 Tbsp GINGER (minced)
½ cup PARSLEY (chopped)
HOT PEPPER (to taste)
2 Tbsp OLIVE OIL
4-6 Tbsp VINEGAR
SALT and PEPPER to taste

how to cook quinoa
Chop root veggies into bite-size pieces (but big bites!)

How to Cook Quinoa and Root Vegetable Recipe

Wash and then chop beet bulbs and carrots into roughly ½ inch pieces–bite size, but not too small.
Chop onion into similar sizes. Place chopped veggies in a bowl and toss with olive oil, salt and pepper.

On an ungreased baking sheet, spread veggies out into a single layer and then roast approx. 30 minutes in an oven pre-heated at 400 degrees Fahrenheit. Halfway through the roasting, give the veggies a stir and return to the oven.
While the root vegetables roast, prepare the quinoa.

If you’ve ever wondered how to cook quinoa …it’s just like rice: 1 part quinoa to 2 parts water. Most quinoa sold in stores throughout the USA has been pre-washed, but check packaging for details. (Check current prices for quinoa on Amazon.)

If desired, add a little chopped hot pepper in with the quinoa. Bring the pot to a boil, reduce heat, cover and simmer quinoa for about 15 minutes, or until all of the water is absorbed. Remove pot from the heat and set aside for 5 minutes. Fluff with a fork.

Transfer quinoa to a bowl and season with salt, pepper, and vinegar to taste. Mix well, and then add the roasted vegetables. Add the raw, minced ginger and garlic, and the parsley. Toss until all of the ingredients are well combined. Taste and adjust seasoning as needed.

This recipe makes an awesome side, but it also works well as an entree. Give this quinoa and beet recipe a try and let me know what you think, and bon appétit!

For another recipe featuring beets, Check out this Fresh Beet Greens Recipe.

beet greens recipe
Buy beet roots with the greens for two great ingredients.

Thanks For Watching Our Recipe Videos!

Thanks for checking out our beet and quinoa recipe, and all of our recipes. Be sure and sign up for our mailing list so you’ll never miss a new recipe. Also click a button below and share the dishes with your friends. You can also follow Chef Buck on Youtube. We appreciate all the kind comments and support, and we’ll see you next time in the kitchen!

If you like what CG and I do, you can also support us on Patreon, or throw us a tip in our Paypal Tip Jar. We’ll happily enjoy a coffee on the road – Thanks! We appreciate all the support, and we’ll see you next time in the kitchen!

We include affiliate links for products on our website. So, if you make a purchase after clicking on our links, we may earn a commission which helps us produce more videos and drink more coffee :^) We participate in the Amazon Services LLC Associates Program, which is an affiliate advertising program. It provides a means for us to earn fees by linking to Amazon.com and affiliated sites, so we can make more videos.

Share and Enjoy !

Salmon Burger Recipe Using Canned Salmon

salmon Burger recipe

Use canned salmon to create this simple and satisfying salmon burger recipe. Canned salmon is perfect for making salmon patties, and salmon patties are an ideal stand-in for a hamburger when you’re hamburgered out –plus it’s a healthier choice.

Salmon Burger Recipe Ingredients:

14oz canned SALMON (red or pink)
¼ – ½ cup ONION (finely chopped)
HOT PEPPER (finely chopped, to taste)
2 EGGS (beaten)
SALT and PEPPER to taste
OIL for sauteing (3-4 Tbsp…salmon will soak up the oil)
1 Tbsp CURRY POWDER (optional, check current curry prices online)

salmon Burger recipe
Canned Salmon makes tasty burgers!

Salmon Burger Recipe Directions:

I love canned salmon–red or pink–although I prefer pink canned salmon when making burgers since the pink salmon is much cheaper to buy. I use the more expensive red salmon for making salmon salad.

Salmon in the can is already cooked–in fact it is part of the canning process that cooks the salmon.
Open the the can and drain off the liquid–you don’t want the salmon patties to be too wet when you form them.

salmon burger recipe
Canned Pink Salmon …traditional style means skin and bones are still intact

Traditional canned salmon will come with skin and bones still intact . The skin and bones are soft and edible. You can remove the skin and bones if you like; I used to remove them, but now I’m too cheap, and I don’t want to miss out on the extra nutrition, either.

  • Place drained salmon in a bowl.
  • Add ¼ – ½ cup onion depending on how much you like onion. Make sure the onion is finely chopped; smaller pieces will help keep the patties from falling apart. If desired, add some finely chopped hot pepper. If you don’t have fresh pepper, add a little chili powder or hot sauce.
  • Add salt and pepper to taste.
  • Add one or two beaten eggs. I like to use two beaten eggs because it helps to keep the patties together better; I don’t like my burgers to fall apart while I’m eating them.
  • Mix all the ingredients together well.
  • Shape into patties. I usually get 4 patties out of a 14oz can, but make as many as you like–bigger or smaller–depending on how big you want your burger to be. Here’s some current prices for canned salmon if you like to do your fishing on the internet.
  • Heat oil in a skillet. I like medium heat. You want the oil to be hot enough to sizzle when you add the patties, but not so hot that the patties will cook too quickly; you want the patties to get a nice cooked side before turning them, this will keep then from breaking apart.
  • Cook 5-7 minutes and then turn gently when the patties are golden brown.
  • Cook another 3-4 minutes and then remove from skillet and drain salmon patties on a paper towel.

I like to serve salmon patties on a toasted bun with sliced tomato, onion, lettuce and mayo.
It’s a nice break from hamburgers, and just as tasty.
Sometimes I’ll add a Tbsp of curry powder into the mix to make Curried Salmon Burgers, which you should definitely try sometime.

Give this salmon burger recipe a try and let me know what you think, and bon appétit!

And for another alternative take on a burger dish, try one of my favorite vegetarian burger ideas, A Super Eggplant Burger Recipe.

veggie burger recipe
Best veggie burger? Looks like it.

Thanks For Checking out our Recipes

We hope this info is helpful for the next time you’re out buying crab meat at the supermarket. Sign up for our mailing list so you’ll never miss a new recipe. Also click a button below and share the dishes with your friends. You can also follow Chef Buck on Youtube. We appreciate all the kind comments and support, and we’ll see you next time in the kitchen!

If you like what CG and I do, support us on Patreon, or throw us a tip in our Paypal Tip Jar. We’ll happily enjoy a coffee on the road – Thanks! We appreciate all the support, and we’ll see you next time in the kitchen!

We include affiliate links for products on our website. Making a purchase after clicking on our links and we may earn a commission which helps us produce more videos and drink more coffee :^) We participate in the Amazon Services LLC Associates Program, which is an affiliate advertising program. It provides a means for us to earn fees by linking to Amazon.com and affiliated sites, so we can make more videos.

Share and Enjoy !

Biscuit Recipe – Best Southern Biscuits

It’s easy to make friends with this easy, awesome tasting biscuit recipe. You biscuits in all manner of meals. Serve them alone as a breakfast side, pile them up into the perfect breakfast sandwich, ladle them with gravy for a wholesome entree, or top them with whipped cream and strawberries for a decadent dessert!

Buttermilk Biscuit Recipe Ingredients

4 cups ALL PURPOSE FLOUR
1 Tbsp BAKING POWDER
1 tsp BAKING SODA
1 tsp SALT
1 Tbsp SUGAR
1 cup BUTTER (diced, chilled)
1½ cups BUTTERMILK (chilled)
(plus buttermilk for brushing biscuit tops)

Buttermilk Biscuit Recipe Directions

In a bowl, combine flour, baking powder, baking soda, salt, and sugar (optional). Mix ingredients together well. Add diced butter. For best results use chilled butter –keep the diced butter in the refrigerator until needed. Cut butter into the flour using a pastry cutter or knives. Check here for current prices for a pastry cutter on Amazon.

Butter should be cut into pea-sized bits, but there’s no reason to be militant about it…nice chunks of butter are nice. Once the butter is cut into the flour, add buttermilk. Keep the buttermilk chilled until you are ready to use it–cold butter and buttermilk are best for this recipe.

Pour the buttermilk into the bowl, and using a spatula (or your hand), roll the flour around the edge of the bowl until the buttermilk is absorbed and the dry flour begins sticking together. Roll until there is very little loose flour…add a drop more buttermilk if needed, but do so sparingly–you don’t want the flour to be “wet”.

On a lightly floured surface, empty the bowl and press the flour together, knead once or twice and then spread the dough out into a flat, ½ inch thickness. Do not knead or “handle” the dough too much.

Flour the edges of a biscuit cutter or drinking glass and cut out biscuits. I like my buttermilk biscuit about 2″-3″ across, but make whatever size you like. Giant biscuits can be fun :^) Cut the biscuits closely and get as many out of the first press as you can. Once all of the biscuits are cut from the first press, bring the dough together again and cut out remaining biscuits–again trying to handle the dough as little as possible.

Arrange the biscuits touching side by side on a lightly greased pan or on parchment paper. Lightly brush the tops of the biscuits with buttermilk or melted butter–this will help them to brown nicely. Place biscuits in the oven and bake at 425 degrees Fahrenheit for approximately 15 minutes, or until biscuits are golden brown to your liking.

Give these biscuit recipes a try and let me know what you think, and for another breakfast bread dish, try this Egg Bread Recipe.

egg bread
Fancy baked eggs to impress friends and family

Thanks for checking out our biscuit recipe, and all of our recipes. Be sure and sign up for our mailing list and never miss a new Chef Buck cooking video, and also click a button below and share the dishes with your friends. We appreciate all the kind comments and support, and we’ll see you next time in the kitchen!
–Chef Buck

Thanks for watching our recipe videos!

We include affiliate links for products on our website, so if you make a purchase after clicking on our links, we may earn a commission which helps us produce more videos and drink more coffee :^) We participate in the Amazon Services LLC Associates Program, which is an affiliate advertising program providing a means for us to earn fees by linking to Amazon.com and affiliated sites, so we can make more videos.

Share and Enjoy !

Baby Bok Choy Recipe with Quick and Easy Sauce

baby bok choy recipe

Try this simple baby bok choy recipe with a super tasty sauce that’s ready in minutes. This dinky cabbage can be steamed or sautéed to create many healthy and tasty dishes. Bok choy is easily found in markets and is sold in several shapes and sizes under the name bok choy, ranging from tiny baby bok choy to the larger size cabbages that are perfect for soups.

What You Need To Make A Baby Bok Choy Recipe

15-20 BABY BOK CHOY
HOT PEPPERS (finely chopped, to taste)
2 Tbsp GINGER (finely chopped)
5-7 cloves GARLIC (finely chopped)
½ cup HOISIN SAUCE
1-2 Tbsp OLIVE OIL for sauteing

baby bok choy recipe
fresh baby bok choy

How To Cook Baby Bok Choy

Wash the bok choy; bok choy tends to hold dirt around the stem bottoms, so soak and wash thoroughly.
Slice the bok choy lengthwise into even halves.

Steam bok choy for 3-4 minutes. Do not overcook. The stalks are fairly thin and do not require much steaming to soften them, and you don’t want the leafy tops to become overdone; by not
over cooking, you’ll preserve a crunchy texture in the stalk as well as more of the nutritional value.

In a skillet, heat olive oil on medium heat. Add hot peppers, ginger, and garlic and saute for 1-2 minutes. Add the hoisin sauce and mix well.

Add steamed bok choy to the skillet and toss with the sauce until well coated.

If desired, top with toasted sesame seeds or crushed peanuts–it’s very tasty that way–but I like it just as well without.
This dish makes a complete meal when served with a rice or quinoa side.

Hope you like it! It’s well worth giving baby bok choy recipe a try.
Give this dish a go and let me know what you think, and bon appétit!

And for another delicious bok choy dish, try this Bok Choy Soup Recipe.

bok choy recipe
Bok Choy Soup

Thanks for checking out the recipe! If you enjoyed it, click some of the buttons below and share it.
I appreciate it!
–Chef Buck

Share and Enjoy !


Pesto Recipe and Perfect Pesto Pasta

pesto recipe

This pesto recipe is crazy delicious, and makes a perfect sauce for pasta. I like my pesto pasta to have a thick sauce with lots of flavor!–a thin, watery pesto pasta is not for me; if you feel the same way, then give this pasta dish a go–and use a hearty pasta that will hold lots of pesto sauce, something like a penne or rotini pasta.

What You Need for Pesto Recipe

¾ cup PINE NUTS, toasted (or substitute almonds or walnuts)
2-3 cloves garlic
2 cups (packed) fresh BASIL leaves (or substitute 1 cup for SPINACH leaves)
[4oz grocery basil = approx 2 cups]
zest & juice from 1 small LEMON
½ – ¾ cup OLIVE OIL (darker the better)
½ tsp SALT and ¼ tsp PEPPER to taste
¼ tsp crushed RED PEPPER FLAKES
½ cup (to taste) freshly grated PARMESAN CHEESE (or asiago or Pecorino)

16oz PASTA (I prefer pene or rotini for this dish)

pesto recipe
Fresh ingredients make the best pesto

How to Make Pesto Recipe

Toast the pine nuts at 400 degrees Fahrenheit for approx 3 minutes–but watch them like a hawk!–they will toast fast and you DO NOT WANT TO OVER-TOAST OR BURN them ’cause they cost way TOO MUCH MONEY! Check here for current pine nut prices on Amazon.

Place pine nuts and garlic in a food processor and pulse/chop.
Season with salt and pepper and red pepper flakes.
Into the processor, add basil (when buying basil, choose basil that has NOT flowered yet–or only a little–basil loses sweetness as the plant flowers), spinach, lemon juice and zest.

Process until the greens are shredded.
Add olive oil incrementally and process until fully incorporated and to desired smoothness and consistency.

Transfer the pesto to a serving bowl and mix in the freshly grated Parmesan cheese.

And that’s it–your pesto sauce is complete! Use it however you see fit!

For pesto pasta:
In a pot, cook 16oz of pasta according to package directions.
I recommend a pasta that is thick and hearty, with lots of surface area for the pesto sauce to cling to; I lprefer a penne or rotini pasta.

When pasta is cooked to desired consistency–al dente is best, I think–reserve 1 cup of the pasta water, then drain the pasta–DO NOT RINSE!–this washes away flavor.

Immediately return drained pasta to the pot and add in the pesto. Mix with the noodles. Add some of the reserved pasta water until the sauce is as desired. Add pasta water SLOWLY! You DO NOT want to make your pesto sauce TOO THIN! Or at least I don’t–I like a lot of pesto flavor with my pasta.

Top with freshly grated Parmesan cheese and serve.

pesto recipe
Pesto Pasta Recipe

Give this pesto pasta recipe a go and let me know what you think, and bon appétit!

And for another fantastic pasta dish that’s incredibly healthy and NOT EVEN PASTA, try this Spaghetti Squash Pasta Recipe.

best spaghetti squash
just a few simple flavors and ingredients will make the best spaghetti squash recipe

Thanks for checking out the pesto pasta recipe. Be sure and sign up for our mailing list so you’ll never miss a Chef Buck cooking video, and click a button below and share the dishes with your friends. We appreciate all the kind comments and support, and we’ll see you next time in the kitchen!
–Chef Buck

Share and Enjoy !


Bok Choy Recipe for Healthy Bok Choy Soup

bok choy recipe

This bok choy recipe is one of my favorites. Bok choy is a type of cabbage, and quite versatile. It’s easily found in markets and is sold in several shapes and sizes under the name bok choy ranging from dinky baby bok choy to the larger size cabbages that I like to use for soups.

Bok Choy Recipe Ingredients

1 large BOK CHOY (rough chopped)
2 medium SWEET POTATOES (cubed)
1 medium ONION (chopped)
CHILI PEPPERS (to taste)
2 Tbsp GINGER (sliced, minced)
5-7 cloves GARLIC (chopped)
1 Tbsp CORIANDER POWDER
1 tsp MANGO POWDER
1 tsp LEMONGRASS POWDER (or fresh lemongrass)
1 can COCONUT MILK
½ cup fresh BASIL (chopped)
SALT and PEPPER to taste
WATER enough to cover ingredients

bok choy recipe
bok choy cabbage

How to make Bok Choy Soup

If you need a nice soup pot for your kitchen, you can check here for current pricing for a soup pot on Amazon.

In a soup pot, heat oil on medium high heat and add the ginger, garlic, chili peppers (or jalepenos, or whatever your favorite heat is–or no heat if you wanna skip the bite), and onion.
Saute for a minute or two and then add in the coriander, mango powder, and lemongrass powder (if using fresh lemongrass, add in with onions). Mix well and saute for another minute.

Add in sweet potatoes, skinned and cubed into ½ inch peices.
Add one 13.5 oz can of coconut milk and 1 can of water.
Bring pot to a boil, then reduce to a simmer and let cook for 5-6 minutes.

While pot simmers, separate the bok choy stalks from the leaves and wash well.
When the 5-6 minutes are up, add in the bok choy stalk bottoms and mix well. Add more water if needed. The water should be just enough to cover the soup ingredients, add sparingly.
Bring pot back to a simmer, cover and let cook for another 2 minutes.

Add salt and pepper to taste.
Stir in the bok choy leaves and cook for 1 minute.
Stir in the fresh chopped basil and remove from the heat.
And that’s it.

Soup is a great opportunity to clean out the fridge, so experiment with adding other veggies. I often add carrots and bell pepper. Give this bok choy recipe a try and let me know what you think, and bon appétit!

And for another Asian inspired dish, try this Spicy Chinese Eggplant Recipe.

Chinese Eggplant Recipe with Sweet Sauce

Thanks for checking the recipes out! Subscribe to our mailing list and never miss a new recipe video, we appreciate it.
–Chef Buck

Share and Enjoy !


Fried Quinoa Recipe — Quinoa Fried “Rice”

fried quinoa recipe

This fried quinoa recipe is a quick and tasty take on Chinese fried rice. Quinoa makes a great substitute for rice in many recipes, especially quinoa fried “rice”. Quinoa is a complete protein, which makes this dish a complete meal, even if you leave out the egg–which is an easy way to make this a vegetarian recipe. Of course you can go the other route and throw in a little diced pork chop or ham if you like, but I’m quite happy with just a couple scrambled eggs thrown in.

Fried Quinoa Recipe Ingredients:
1 cup QUINOA (before cooking)
1 cup PEAS
1 CARROT (diced)
4-6 GREEN ONIONS (chopped, tops separate)
3-5 cloves GARLIC (finely chopped)
2 Tbsp GINGER (finely chopped)
HOT PEPPERS (as desired, finely chopped)
2 EGGS (scrambled)
2-3 Tbsp OIL for sautéing
SOY SAUCE as desired
SESAME OIL 1-2 tsp
SALT and PEPPER to taste

fried quinoa recipe
Quinoa Fried “Rice”

Fried Quinoa Recipe Directions:
This is a great dish for leftover quinoa. The next time you’re making a pot of quinoa for another recipe, just make a little extra for this fried rice recipe knockoff! But if you don’t have any leftover
cooked quinoa handy, just prepare this quinoa a little ahead of time to give it time to cool down–this will keep the quinoa from easily overcooking and becoming mushy.

Quinoa is easy to prepare–just like rice, in fact! Rinse the quinoa if needed (many brands come pre-rinsed). In a pot, add 1 cup quinoa to 2 cups water. Bring the pot to a boil, reduce pot to a
simmer, and then cover and let cook 13 minutes (this will result in slightly al-dente quinoa, which is what you want for frying). Remove the quinoa from the heat and let sit for 10 minutes.
Then fluff with a fork and allow to cool completely (salt if desired).

For fried rice, I like to scramble my eggs first and then set aside. I Use two eggs for this recipe, but feel free to use 1, or 3, or none if you want a vegetarian fried quinoa. Whisk the eggs (add a
splash of milk if desired–makes scrambled eggs smoother). Heat oil in a skillet and quickly scramble eggs on med-high heat and then set aside for later.

In a large skillet, heat 2-3 Tbsp oil on medium.

Add raw, diced carrots (should be about pea size). Add chopped hot peppers, too–if desired. I like adding a little fresh red chili peppers for taste, but jalapenos would work just as well, or red
pepper flakes, or even just a little sriracha later, if desired–or no heat at all–it’s up to your tastes; follow your heart, but spicy food is good for you, right?

Sauté the carrot and peppers for a minute and then add the ginger, garlic, and chopped green onion bottoms (reserve the chopped tops for a flavorful garnish).

Continue sautéing another minute and then add in the quinoa. Stir fry until heated through, this won’t take very long.

Add sesame oil and peas. I like to use frozen peas (thawed), because they hold their texture better than canned peas. Stir until mixed. Add soy sauce to taste. Add fish sauce if desired. The
sauces will provide plenty of salt, but if you want a little black pepper, go ahead and throw that in now.

Mix up and then add the scrambled egg. Mix and fry for another minute and then remove from the heat.

That’s it.

This dish is ready pretty quick. Top the fried quinoa with chopped green onion, crushed peanuts, or both. Serve fried quinoa it’s own or with a veggie side (broccoli or bok choy or Thai eggplant
are nice).

Give this Fried Quinoa recipe a try and let me know what you think, and bon appétit!
And for more tasty quinoa dishes, check out my Quinoa Video Playlist.

quinoa salad

Share and Enjoy !


Buffalo Chicken Pizza Recipe — Quick and Easy

buffalo chicken pizza

I love buffalo chicken dishes whether they’re wings, casseroles, salads, and especially if it’s a buffalo chicken pizza. The combo of chicken, hot sauce, celery, and blue cheese is absolutely perfect, and a buffalo chicken pizza can be prepared super quick, especially if you’re lazy like me and skip the making a pizza crust part. I prefer flat bread for a pizza crust. If you’ve got leftover chicken and you’re the kinda person who likes hot wings with blue cheese, then you’ll probably enjoy this buffalo chicken pizza recipe.

Buffalo Chicken Pizza Recipe Ingredients

I won’t suggest specific amounts…it’ll all depend on the size of your pizza!
FLAT BREAD (pita bread, etc.)
leftover CHICKEN (cooked, chopped)
HOT SAUCE (whatever)
BLUE CHEESE DRESSING (good kind…don’t be cheap)
BLUE CHEESE CRUMBLES (crumbled)
CELERY (chopped)
MOZZARELLA CHEESE (shredded)

Spicy Buffalo Chicken Pizza
Buffalo Chicken Pizza …quick and easy!

Buffalo Chicken Pizza Recipe Directions

As far as the amounts of ingredients goes…just follow your heart. I suggest going heavy on the toppings. A lot of celery doesn’t sound fun, but the overall contrast of tastes and textures is what makes this pizza delicious, so use lots of everything–including hot sauce–the hotter the better! The dairy in the blue cheese chunks and dressing will balance the heat.

Chop up some cooked chicken–use leftovers or just cook up a breast or two for topping. I like nice chicken chunks, about ½” square–but shred it if you like–it’s your pizza, man.

Drench the chopped chicken in hot sauce and set aside.

Chop up celery into ¼” thick pieces.

In a bowl combine a nice blue cheese dressing with blue cheese crumbles, about a 50/50 mixture. The result should be the consistency of a cottage cheese.

If you wanna make a pizza dough from scratch, God bless you. CG does, and it’s nice. I’m too lazy, and I actually prefer flat bread. I like pita bread–or any kind of flat bread. I’ve never tried naan, but it sounds good to me.

Spread the blue cheese dressing/crumbles over the flat bread. Spread it thick and even, almost to the edge–leave about a ¼” for a crust.

Generously top pizza with the hot sauce chicken chunks and celery, and cover with shredded mozzarella cheese.

Place on an ungreased baking sheet and cook in a pre-heated oven at 400 degrees Fahrenheit for 10-12 minutes, or until the edges of the flat bread are crisped to your liking. You can check here for current prices for baking sheets on Amazon. And that’s it! Hope you like the pizza!

For another party foods recipe idea, try these Crispy Baked Chicken Wings.

wings recipe
Oven baked wings are healthier than deep fried, and less messy to make!

Thanks for Watching our Buffalo Chicken Pizza Recipe Video!

Click a button below and share the dishes with your friends. You can also follow Chef Buck on Youtube. We appreciate all the kind comments and support, and we’ll see you next time in the kitchen!

If you like what CG and I do, support us on Patreon, or throw us a tip in our Paypal Tip Jar. We’ll happily enjoy a coffee on the road – Thanks! We appreciate all the support, and we’ll see you next time in the kitchen!

We include affiliate links for products on our website. Making a purchase after clicking on our links and we may earn a commission which helps us produce more videos and drink more coffee :^) We participate in the Amazon Services LLC Associates Program, which is an affiliate advertising program. It provides a means for us to earn fees by linking to Amazon.com and affiliated sites, so we can make more videos.

Share and Enjoy !

Buttermilk Biscuit Recipe with Country Gravy

Easy Homemade Buttermilk Biscuits Recipe

Buttermilk biscuit and gravy are pretty easy to make at home, and biscuits are great for any meal–not just for breakfast. I’m using mushrooms for this gravy recipe, but sausage can easily be substituted if you’re in a meaty mood.

What you need to make Biscuits

4 cups ALL PURPOSE FLOUR
1 Tbsp BAKING POWDER
1 tsp BAKING SODA
1 tsp SALT
1 Tbsp SUGAR
1 cup BUTTER (diced, chilled)
1½ cups BUTTERMILK (chilled)
(plus buttermilk for brushing biscuit tops)

Buttermilk Biscuit Recipe
Easy Buttermilk Biscuit Recipe

How to make a Buttermilk Biscuit

In a bowl, combine flour, baking powder, baking soda, salt, and sugar (optional). Mix ingredients together well.

Add diced butter. For best results use chilled butter –keep the diced butter in the refrigerator until needed. Cut butter into the flour using a pastry cutter or knives. Butter should be cut into pea-sized bits, but there’s no reason to be militant about it…nice chunks of butter are nice.

Once the butter is cut into the flour, add buttermilk. Keep the buttermilk chilled until you are ready to use it–cold butter and buttermilk are best for this recipe.

Pour the buttermilk into the bowl, and use a spatula (or your hand), roll the flour around the edge of the bowl until the buttermilk is absorbed and the dry flour begins sticking together. Roll until there is very little loose flour…add a drop more buttermilk if needed, but do so sparingly–you don’t want the flour to be “wet”.

On a lightly floured surface, empty the bowl and press the flour together, knead once or twice and then spread the dough out into a flat, ½ inch thickness.

Do not knead or “handle” the dough too much!

Flour the edges of a biscuit cutter or drinking glass and cut out biscuits. I like my buttermilk biscuit about 2″-3″ across, but make whatever size you like. Giant biscuits can be fun :^) Cut the biscuits closely and get as many out of the first press as you can.

Once all of the biscuits are cut from the first press, bring the dough together again and cut out remaining biscuits–again trying to handle the dough as little as possible.

Arrange the biscuits touching side by side on a lightly greased pan or on parchment paper. Check Parchment Paper prices on Amazon

Lightly brush the tops of the biscuits with buttermilk or melted butter–this helps them to brown nicely. Place biscuits in the oven and bake at 425 degrees Fahrenheit for approximately 15 minutes, or until biscuits are golden brown to your liking.

Easy Homemade Buttermilk Biscuits Recipe
Homemade Buttermilk Biscuits

Mushroom Gravy Recipe Ingredients

oil/butter for sauteeing onion/mushrooms
½ cup chopped ONION
8 oz sliced MUSHROOMS
½ cup BUTTER
½ cup ALL-PURPOSE FLOUR
2 cups MILK
about 2-3 tsp SALT (or to taste)
1 tsp BLACK PEPPER (or to taste)
½ tsp ground SAGE
2 tsp WORCESTERSHIRE SAUCE
1 tsp HOT SAUCE
1 tsp dried THYME
….experiment with whatever seasonings you like

Mushroom Gravy Recipe Directions

Heat 1-2 Tbsp oil in a skillet on medium high heat. Add onions and saute for 2 minutes. Add mushrooms and continue sauteeing until browned. Stir in a little salt and pepper. Remove onions and mushrooms from skillet and set aside for later.

Return skillet to the heat and add ½ cup butter and melt. Once melted, add in a little of the ½ cup flour. Stir until smooth, and then continue to slowly add and stir the flour into the butter until the entire ½ cup of butter and ½ cup of flour have been incorporated –this is a roux, a traditional thickener for sauces.

Continue stirring the roux and slowly add milk over several minutes until the the gravy is smooth and creamy. I use almond milk in this recipe, but most any kind of milk will work. Return the mushrooms and onion to the mix and continue stirring with the burner still on med to med-high heat.

Biscuits with Gravy
Biscuits with Mushroom Gravy

Add sage, thyme, worcestershire sauce, salt, pepper, and hot sauce –or anything else you’d like to try. Add more milk as needed to achieve the desired consistency. And that’s it.

If the gravy sits around for a bit, just heat and stir in more milk–you can do this the next day, too, if you have gravy leftover.

This gravy is great over a buttermilk biscuit, but it can also be used for many entrees.

This gravy is great on country fried steak or meatloaf. If you’d rather have sausage gravy than mushroom gravy, then make it exactly the same way, but substitute sausage for mushrooms, and be sure to thoroughly drain the grease from the cooked sausage before adding it back into the skillet.

Give this Buttermilk Biscuit and Gravy recipe a try and let me know what you think, and bon appétit!

And for another awesome breakfast dish, try this fancy-pants Omelet Recipe.

omelet recipe
Lamb and Cream Cheese Omelet

Thanks for Watching our Biscuit Recipe Video!

Click a button below and share the dishes with your friends. You can also follow Chef Buck on Youtube. We appreciate all the kind comments and support, and we’ll see you next time in the kitchen!

If you like what CG and I do, support us on Patreon, or throw us a tip in our Paypal Tip Jar. We’ll happily enjoy a coffee on the road – Thanks! We appreciate all the support, and we’ll see you next time in the kitchen!

We include affiliate links for products on our website. Making a purchase after clicking on our links and we may earn a commission which helps us produce more videos and drink more coffee :^) We participate in the Amazon Services LLC Associates Program, which is an affiliate advertising program. It provides a means for us to earn fees by linking to Amazon.com and affiliated sites, so we can make more videos.

Share and Enjoy !

Baby Back Ribs Recipe Slow Cooked in the Oven

Baby back ribs recipe in the oven

This baby back ribs recipe is super easy to prepare at home in the oven. This rib recipe takes a little time, but slow cooking pork ribs is always a tasty idea. The oven does the real work and before you know it, you’ll be up to your elbows in moist, delicious baby back ribs.

What you need to make this Baby Back Ribs Recipe

3 lbs PORK LOIN RIBS
some BBQ SAUCE
rub ingredients:
2 tsp SALT
2 tsp PAPRIKA
2 tsp GARLIC POWDER
2 tsp CHILI POWDER
1 tsp BLACK PEPPER
½ tsp CAYENNE PEPPER

baby back ribs recipe
Baby Back Ribs and rice…mmmm!

How to make this Baby Back Ribs Recipe

Take your ribs out of the fridge and let them sit for about 15 minutes.
Pre-heat oven to 250 degrees Fahrenheit.
While the ribs sit, make your rub.

Baby back ribs benefit from a generous rub. Use the ingredients I have listed above–or make your own with your favorite seasonings. I used to put brown sugar in my rub, but I don’t anymore. I find that the BBQ sauce makes the ribs more than sweet enough for my taste, but use a little brown sugar in your rub if you like.

Before applying the rub, remove the filmy skin from the bone side of the rack. Using a knife, cut the thin membrane away from the bone at the narrow end of the rack. Lift the silvery skin away from the bone and pull it off in a long strip. This step only takes a moment and it will help your ribs to reach their maximum flavor potential!

Now generously apply the rub to the entire surface of the rib rack –top, bottom and sides.

Wrap the ribs tightly in aluminum foil and place bone side up on a baking pan.
Slide the ribs into the oven at 250 degrees and let them cook for 2½ hours.
After 2½ hours, remove the ribs from the oven.

Raise oven temperature to 350 degrees F.

Carefully remove the foil from the ribs and drain the liquid from the pan.
Place the ribs on a baking rack, meat side down.Generously apply BBQ sauce to the bone side and along the edges of the rack.  You can use a spoon, or check current prices for a silicone basting brush on Amazon.

Turn the rack over so that the bone side is down, and generously apply BBQ sauce to the meat side, and edges.

Return the ribs to the oven (now heated to 350 degrees F). Let cook for 15 minutes.

Remove ribs from the oven and apply more BBQ sauce to the meat side and edges (no need to apply more to the bottom bone side). Return to the oven for a final time and allow to cook another 15 minutes.

After 15 minutes, remove from the oven, slice, and serve with your favorite sides –for me that means white rice, white bread, and maybe a salad –plus extra BBQ sauce for the rice!

This recipe is for 3 lbs. of pork loin ribs–adjust the cooking time a little more or less depending on how much ribs you’re cooking.  For 2lbs of ribs, I usually cut the cooking time to 2 hours at 250 degrees F, plus another 30 minutes at 350 degrees as I apply the BBQ sauce.

You’re going to love this ribs recipe, so definitely give it a try!

For another meaty meal, check out this tasty Beef Tenderloin Recipe.

pot roast recipe
try a juicy pork tenderloin for your nexy great family meal.

Thanks for checking out the baby back ribs recipe. Be sure and sign up for our mailing list so you’ll never miss a Chef Buck cooking video, and click a button below and share the dishes with your friends. We appreciate all the kind comments and support, and we’ll see you next time in the kitchen!
–Chef Buck

We appreciate you watching our videos! We include affiliate links for products. If you make a purchase after clicking on our links, we may earn a commission which helps us produce more videos and drink more coffee :^)
We are a participant in the Amazon Services LLC Associates Program, an affiliate advertising program designed to provide a means for us to earn fees by linking to Amazon.com and affiliated sites.

Share and Enjoy !

How to make a Fancy Herb Omelet

How to make an omelette

This is how to make an omelette recipe the easy way…it’s simple and cheap, and throwing in a few chopped herbs makes it super delicious –a fancy-pants omelette! Do you spell it omelet or omelette ? it’s a perfect egg dish for breakfast, brunch or a lazy man’s dinner. I like to use tarragon, parsley, and chives, but sage and basil are great choices, too.

Omelette Recipe Ingredients:

2 EGGS
1 Tbsp PARSLEY (chopped)
1 tsp CHIVES (chopped)
½ tsp TARRAGON (chopped)
¼ cup HAVARTI CHEESE (shredded)
BUTTER enough to cover the bottom of the pan
SALT and PEPPER to taste
—the cheese and herb measurements are
just suggestions…follow your heart.

Omelette Recipe Directions:

In a skillet, heat butter on medium heat. Check here for current pricing for a non-stick skillet on Amazon. Use enough butter to coat the bottom of the skillet. Medium is a good heat–not too hot, not too cold–enough to allow the eggs to cook and set without overcooking; an omelet should be soft, not crusty and overcooked–avoid too high a heat and browning the eggs!–that’s my preference of course, but give it a try. Don’t rush an omelet!–hell, it doesn’t take long anyway.

In a small bowl, crack two eggs. Add chopped herbs. I like to use tarragon, parsley, and chives, but sage and basil are great choices, too. Mix and match herbs and amounts and find your favorite combo. Adding fresh herbs to an omelet is great way to add flavor without adding complication to the omelet making process, which is especially nice if you’re making multiple omelets for hungry folks looking for breakfast.

How to make an omelette
omelet recipe

Whisk the herbs and eggs together and pour into the skillet. Give the skillet a shake to spread the egg out.
And then leave it alone.
The eggs should cook gently.
Sprinkle salt and pepper to taste.
Let the eggs set and cook around the edges until the eggs move easily in the pan–this will take 1-2 minutes depending on how hot your skillet is.

Once the omelet can be moved easily, flip or turn the eggs over gently with a spatula. Immediately turn off the heat, the pan will be hot enough to finish off the omelet.

Add a little shredded cheese to one side and fold the eggs in half over the cheese, making a half moon. I prefer havarti cheese, but any creamy, easily meltable cheese will be ideal.
And that’s it–a super easy and delicious omelet!

Give this omelette recipe a try and let me know what you think, and bon appétit!

And for another eye-popping breakfast dish, try this Fancy-Pants Baked Eggs Recipe.

baked eggs
Baked eggs are an easy way to impress folks for breakfast.

Thanks for checking out the recipes. Be sure and sign up for our mailing list so you’ll never miss a Chef Buck cooking video, and click a button below and share the dishes with your friends. We
appreciate all the kind comments and support, and we’ll see you next time in the kitchen!
–Chef Buck

Share and Enjoy !


Best Burrito Recipe – Family Style

Cheesy baked burritos

Try this family-style burrito recipe–it’s enough for a family or perfect for anyone who loves leftovers. We like to use roasted peppers in the filling, which is optional, but well worth the effort.

What You Need To Make The Best Burrito Recipe

TORTILLAS (about 7″ diameter)
2 cups SHREDDED CHEESE
¾ lb GROUND BEEF
1 can KIDNEY BEANS (15oz)
1 can REFRIED BEANS (15oz)
3 Lg ROASTED PEPPERS (chopped)
2 cups ONION (chopped)
4-5 cloves GARLIC (finely chopped)
1 Tbsp CHILI POWDER
2 Tbsp CUMIN
SALT and PEPPER (to taste)
OIL (for greasing pans)
1 cup SALSA for topping
and some HOT SAUCE (optional)

Is this the best burrito recipe ever? It sure looks like it!

Baked burrito recipe
Family-Style Baked Burritos

How to Make A Family-Style Burrito Recipe

You don’t HAVE TO roast peppers for this recipe–but it’s tasty if you do.

We like to use 3 large peppers, get whatever kind you like–we usually use two poblano and one green bell pepper for a mix of flavors. Slice the peppers in half lengthwise and remove the ribs and seeds. Place the peppers cut side down on a greased pan and bake uncovered in the oven at 400 degrees F for 30 minutes. As the peppers roast, they will darken and begin to bubble.

After half an hour, remove the peppers from the oven and cover the pan while the peppers are still hot. Let the peppers steam in their own heat for 10-15 minutes–this will loosen the skin and make it easy to peel away. Once the skin is removed you’ll have roasted peppers! They’re a tasty ingredient for many dishes; since we’re using all three peppers for the burrito filling, dice them all and set aside.

Heat a large skillet on medium heat and brown the ground beef. As the beef begins to cook and release it’s fat, add the onion and garlic (if it’s too fatty, drain a little of the grease). Stir until the beef is lightly browned–no need to overcook, ’cause the beef will continue to cook in the oven.

Remove the skillet from the heat and add the kidney beans and re-fried beans. Add ¾ of the diced roasted peppers and reserve ¼ to use later as a topping.

Add the salt, pepper, cumin and chili powder–and if you want some heat, throw in a little hot sauce to taste.

Mix ingredients well, and that’s the burrito filling!

Cheesy baked burritos
Awesome Burrito Recipe

Grease an oven safe baking dish.  If you don’t have a good-sized dish, here are some current prices for Pyrex baking dishes on Amazon.

We use medium size tortillas, about 7″. Put as much filling as you think is appropriate–we like two heaping spoonfuls–top the filling with cheese and roll the burrito up and place in the baking dish; repeat until the baking dish is full.

If you have any filling remaining, spoon it thinly over the top of the burritos. Spoon hearty salsa over the top of the dish–chunky salsa!–not too wet. Sprinkle the top with the remaining roasted peppers and some shredded cheese (a mix of monterey jack and cheddar is best).

Bake uncovered in a 400 degree F oven for 30-40 minutes, or until the edges of the burritos begin to brown.

Turn the oven to broil and finish by toasting the top of dish for 3-5 minutes–be careful not to burn it!–keep an eye on the dish and remove it when it reaches toasty-cheesy perfection.

Spoon burritos onto a plate and serve with sides of sour cream, guacamole, and salsa. It pairs great with rice!

Give this burrito recipe a try and let me know what you think.

If you enjoyed the dish, hit some of the buttons below and share this slice of burrito heaven with friends and family. Thanks for watching, and bon appétit!

And for another tasty Mexican inspired recipe, why not try the best Nachos Grande Recipe in the world.

nachos supreme
World’s Best Nachos Recipe

Thanks for checking out the recipes. Be sure and sign up for our mailing list so you’ll never miss a Chef Buck cooking video, and click a button below and share the dishes with your friends. We
appreciate all the kind comments and support, and we’ll see you next time in the kitchen!
–Chef Buck

Share and Enjoy !


Teriyaki Chicken Recipe Japanese Style!

chicken teriyaki

This Teriyaki Chicken recipe is easy to make, and the teriyaki sauce can be used in many kinds of dishes. This sauce is a semi-traditional Japanese variation using sake and mirin–it’s sweet, but not overly so–for a sweeter sauce, just add a little more brown sugar.

Teriyaki Chicken Ingredients

1½ lb. CHICKEN (cut into pieces)
2 Tbsp OIL (for cooking chicken)
1 tsp HOT PEPPER (optional, finely chopped)
GREEN ONION TOPS (sliced for garnish)
2 Tbsp CORN STARCH
SALT and PEPPER (to taste)

Teriyaki Sauce:
¼ cup MIRIN
¼ cup SAKE
¼ cup SOY SAUCE (light sodium)
1 tsp GINGER (finely chopped)
1-2 Tbsp BROWN SUGAR

How to make Teriyaki Chicken

In a bowl, combine mirin, sake, and soy sauce. Add 1 tsp minced ginger and 1 or 2 Tbsp of Brown sugar, depending on how sweet you like your teriyaki sauce. Mix ingredients well and set aside.

I’m using boneless and skinless chicken thighs, but if you prefer chicken breasts, use those. I like to cut my chicken up before cooking, that way it cooks quicker and gets more of an all around sear. I cut the chicken into about 1″ pieces. In a bowl, lightly season the chicken pieces with salt and pepper. Add the corn starch and mix until the chicken is well coated.

In a skillet, heat oil on medium heat. When the oil is hot, add the chicken. Let the chicken cook about 3 minutes and then turn the pieces and let them cook an additional 3 minutes…adjust this time depending on the size of the chicken; you want the chicken to be almost done, but not quite. If you like your dish to have a bit of spicy heat, add some finely chopped hot pepper to taste.

When the chicken is near completion, drain off any excess oils and chicken fat (there won’t be much if you’re using skinless chicken).

Raise the skillet temperature to high and add the teriyaki sauce.
The sauce will begin to bubble quickly. Allow it to cook on high for a couple of minutes to reduce the mirin and sake. After a couple of minutes, reduce the heat to med/low and continue cooking until the sauce is the consistency you like. You can check prices for pre-made Teriyaki Sauces on Amazon.

If the sauce cooks too long and gets too thick, add a little water to thin it, and for a thicker sauce, mix 1 teaspoon cornstarch with water and add to skillet and stir until thickness desired.

And that’s it– chicken teriyaki! or is it teriyaki chicken? Does it really matter?
Serve the chicken teriyaki over rice and top with chopped green onion. For extra sauce, double the sauce ingredients–extra sauce is great on rice.
Give this Teriyaki Chicken recipe a try and let me know what you think, and bon appétit!

For another Asian inspired recipe, try this fantastic Thai Beef Salad Recipe.

thai beef salad
thai beef salad recipe

Thanks for Watching our Teriyaki Chicken Recipe

Sign up for our mailing list so you’ll never miss a new recipe. Also click a button below and share the dishes with your friends. You can also follow Chef Buck on Youtube. We appreciate all the kind comments and support, and we’ll see you next time in the kitchen!

If you like what CG and I do, support us on Patreon, or throw us a tip in our Paypal Tip Jar. We’ll happily enjoy a coffee on the road – Thanks! We appreciate all the support, and we’ll see you next time in the kitchen!

We include affiliate links for products on our website. Making a purchase after clicking on our links and we may earn a commission which helps us produce more videos and drink more coffee :^) We participate in the Amazon Services LLC Associates Program, which is an affiliate advertising program. It provides a means for us to earn fees by linking to Amazon.com and affiliated sites, so we can make more videos.

Share and Enjoy !

Jalapeno Popper Recipe Cheeseburger Style

jalapeno poppers stuffed with ground beef

Try this twist on a jalapeno popper recipe. CG thinks traditional poppers are too cream cheesy –she prefers these less cream cheesy, more meaty cheeseburger jalapeno poppers. They taste fantastic with blue cheese, but use lean ground beef and whatever cheeses you like.

Ingredients for Cheeseburger Jalapeno Poppers

10 JALAPENO PEPPERS
½ cup ONION (chopped)
8 oz CREAM CHEESE
8 oz GROUND BEEF (lean)
¼ cup CHEDDAR CHEESE (shredded)
¼ cup BLUE CHEESE (crumbled)
1 cup PANKO BREAD CRUMBS
1 Tbsp WORCESTERSHIRE
SALT and PEPPER to taste
and extra CHEDDAR and BLUE CHEESE
for topping

How To Make a Jalapeno Popper

Remove cream cheese from the fridge to soften for half an hour

In a skillet on medium heat, brown 8oz of lean ground beef–the leaner the better–you don’t want your poppers to be overly greasy! As the beef browns add onions, Worcestershire sauce, and salt and pepper to taste. As soon as the beef browns, take the skillet off the heat and allow it to cool, because you don’t want to add hot beef to your cheese mixture…it’ll just be a mess.

While your seasoned beef cools, prepare the poppers. Carefully slice off the very end of the stems, leaving the interior off the jalapeno intact. Slice the pepper legthwise in half. Using a small spoon, scoop out the seeds and ridges, being careful to leave the end of the jalapeno intact–it’ll make a kind of canoe shape.

In a bowl, combine the softened cream cheese, the cooled beef, and ½ cup of your favorite shredded cheeseburger cheeses (we like using blue cheese, cheddar, and monterey jack…although I think blue cheese is best!). Thouroughly mix. It’ll be a semi-unattractive bowl of meat-cheese…but that’s okay, it’ll look better in the pepper.

jalapenos for poppers
sliced jalapenos for poppers

Using a spoon, stuff the jalapeno halves with the cheese and beef mix. Don’t overstuff, just to the top of the pepper.

Spread breadcrumbs on a flat surface, and press the cheesy side of the stuffed pepper into the breadcrumbs to form a coating. Check current prices for PANKO BREADCRUMBS on Amazon.

Arrange poppers on a baking sheet and bake in a 400 degree F oven for about 25 minutes.

After about 25 minutes, after once some of the breadcrumb toppings have begun to brown, remove the poppers from the oven and top with additional cheese. I love using blue cheese for this part! –it is delicious–but feel free to use whatever cheese you love (although blue cheese is seriously the best). Return poppers to the oven for 5-10 minutes or until cheese is melted, and then serve. Hope you like it!

Give this jalapeno popper recipe a try and let me know what you think, and bon appétit!

And for a more traditional jalapeno popper recipe, try this cream cheesy BAKED JALAPENO POPPERS.

jalapeno poppers

Thanks for Watching our Videos!

Thanks for checking out our jalapeno popper recipe. Sign up for our mailing list so you’ll never miss a new recipe. Also click a button below and share the dishes with your friends. You can also follow Chef Buck on Youtube.

We appreciate all the kind comments and support, and we’ll see you next time in the kitchen!If you like what CG and I do, support us on Patreon, or throw us a tip in our Paypal Tip Jar. We’ll happily enjoy a coffee on the road – Thanks! We appreciate all the support, and we’ll see you next time in the kitchen!

We include affiliate links for products on our website. Making a purchase after clicking on our links and we may earn a commission which helps us produce more videos and drink more coffee :^) We participate in the Amazon Services LLC Associates Program, which is an affiliate advertising program. It provides a means for us to earn fees by linking to Amazon.com and affiliated sites, so we can make more videos.

Share and Enjoy !

Okra Curry Recipe – Spicy Indian Bhindi

okra curry

This okra curry makes a great side dish or awesome entree when served over rice. Okra is a hearty, tasty, versatile vegetable which is relatively cheap and usually found in markets year-round. I like to cook okra whole in the pod, but for spicier dishes, I like to cut up okra and saute it with tomato and onion. This Indian bhindi recipe is easy and delicious, so give it a try.

Okra Curry Ingredients:

1 lb. OKRA (cut)
4-5 ROMA TOMATOES (chopped)
½ ONION (sliced)
3 Tbsp OLIVE OIL
1 tsp FENNEL SEEDS
1 tsp CUMIN SEEDS
1 tsp HOT PEPPER (finely chopped)
5-7 cloves GARLIC (finely chopped)
2 Tbsp GINGER (finely chopped)
2 tsp CORIANDER
1 tsp TURMERIC
¼ CHILI PEPPER (or to taste)
SALT and PEPPER (to taste)

okra pods
Okra is a versatile vegetable and tasty whole or cut.

How to make Okra Curry

Select okra pods 1″ to 2″ in length. Okra gets huge if left overlong on the plant, but big okra can be woody and tough, so bigger isn’t always better. Choose firm, green pods–okra will blacken around the edges as it gets older, so use within a few days.

Wash and dry okra thoroughly. Slice off the ends and cut into uniform sizes for even cooking.
Heat oil in a skillet on medium high.

Once oil is hot, add cumin and fennel seeds. The seeds will begin to crack after about 30 seconds. Add garlic and ginger and saute another 1-2 minutes. Add onion slices and continue cooking another 2-3 minutes. If you want a little more spice, also add some fresh chopped chili peppers.

Add in coriander, turmeric, and chili powder. Stir well for 1 minute and add tomato. I use 4 cut roma tomatoes, but use 1 can diced tomatoes if preferred. Add salt to taste.
Reduce heat to medium. You can check prices for Indian Spices on amazon.

Let tomatoes cook about 5 minutes.
Add okra.
The acid in the tomato helps to cut down on the natural “gooeyness” of okra. Some folks call it slime, but it’s just the juices in the okra. The gooeyness will reduce the longer the okra is cooked, so cook uncovered another 5-10 minutes depending on how well you like your okra done.

I cook mine about 8 minutes.
Sometimes I finish off the dish with a little garam masala for a more “Indiany” flavor, but this time I didn’t. Garam masala adds a little sweetness.
Serve this okra curry on its own as a side dish or serve over rice as an entree. It makes a nice vegetarian meal with a salad.

Give this okra curry recipe a try and let me know what you think, and bon appétit!

And for another great Indian-style vegetarian dish, check out this meatless version of a “Chicken” Tikka Masala Recipe.

jackfruit recipe
Seasoned and baked Jackfruit makes a convincing faux chicken when added to this rich Indian inspired tikka masala.

If you crave okra info, here’s more in depth nutritional info than you’ll ever want about okra.

Thanks for checking out our okra recipes, and all of our cooking videos. Sign up for our mailing list and never miss a new Chef Buck cooking video, and click a button below and share the dishes with your friends. We appreciate all the kind comments and support, and we’ll see you next time in the kitchen!

Thanks for Watching our Okra Recipe

Sign up for our mailing list so you’ll never miss a new recipe. Also click a button below and share the dishes with your friends. You can also follow Chef Buck on Youtube. We appreciate all the kind comments and support, and we’ll see you next time in the kitchen!

If you like what CG and I do, support us on Patreon, or throw us a tip in our Paypal Tip Jar. We’ll happily enjoy a coffee on the road – Thanks! We appreciate all the support, and we’ll see you next time in the kitchen!

We include affiliate links for products on our website. Making a purchase after clicking on our links and we may earn a commission which helps us produce more videos and drink more coffee :^) We participate in the Amazon Services LLC Associates Program, which is an affiliate advertising program. It provides a means for us to earn fees by linking to Amazon.com and affiliated sites, so we can make more videos.

Share and Enjoy !

Thai Eggplant Recipe — Spicy Thai Curry!

Thai Eggplant Recipe

What is a Thai eggplant? It’s a dinky little eggplant, man, and if you lop off the top and quarter them, they make a great ingredient in many dishes. Try this simple and delicious Thai eggplant recipe.

Thai Eggplant Recipe Ingredients

8-10 THAI EGGPLANT (quartered)
1½ cup ONION (chopped)
1 cup RED BELL PEPPER (chopped)
4 cloves GARLIC (finely chopped)
1 Tbsp GINGER (finely chopped)
1 Tbsp LEMON GRASS (finely chopped)
1 tsp CHILI PEPPERS (finely chopped)
1-2 Tbsp OLIVE OR COCONUT OIL
1 14 oz CAN COCONUT MILK
2 tsp CORIANDER POWDER
2 tsp CHILI POWDER
1 tsp TURMERIC
½ cup THAI BASIL
1-2 Tbsp LIME JUICE
SALT to taste

how to cook eggplant
how to cook Thai eggplant

How to Make Thai Eggplant Recipe

Heat oil in a large skillet on medium high heat. We use coconut oil in this recipe, but substitute olive oil if you like. When oil is heated, add the onion, bell pepper, garlic, ginger, lemon grass, and hot peppers. Add as much or little hot pepper as your taste buds desire.

Saute these ingredients for 2-3 minutes and then stir in the coriander, turmeric, chili powder, and salt (salt to taste, as they say). Continue sauteing 1-2 minutes and then add the quartered Thai eggplant. If you’re just getting into home cooking, you can check out current pricing for a Complete Starter Spice Set on Amazon.

Stir 1 can of coconut milk into the mix. Allow dish to come to a bubble, and then reduce heat to a simmer, cover, and let cook away for 10-15 minutes, or until the eggplant is cooked to desired doneness; the eggplant skin adds a nice texture to the dish.

When the eggplant is cooked, turn off the heat and add chopped Thai basil and lime juice; substitute lemon juice if you like–but I prefer lime juice with this dish.

And that’s it.
It’s a yummy curry, pretty easy to make, and tastes great served over rice. Hope you like it.
Give this Thai eggplant recipe a try and let me know what you think, and bon appétit!

And for another Thai inspired dish, try this Vegetarian Pad Thai Recipe made with spaghetti squash “noodles”.

Thanks for Watching our Thai Eggplant Recipe Video!

Click a button below and share the dishes with your friends. You can also follow Chef Buck on Youtube. We appreciate all the kind comments and support, and we’ll see you next time in the kitchen!

If you like what CG and I do, support us on Patreon, or throw us a tip in our Paypal Tip Jar. We’ll happily enjoy a coffee on the road – Thanks! We appreciate all the support, and we’ll see you next time in the kitchen!

We include affiliate links for products on our website. Making a purchase after clicking on our links and we may earn a commission which helps us produce more videos and drink more coffee :^) We participate in the Amazon Services LLC Associates Program, which is an affiliate advertising program. It provides a means for us to earn fees by linking to Amazon.com and affiliated sites, so we can make more videos.

Share and Enjoy !

Pancake Recipe for Fancy-Pants Pancakes

pancakes!

Pancakes are easily made from scratch and can be transformed into a fancy pancake recipe by adding a few favorite fillings. Some of my favorite combos are cranberry / walnut, chocolate chip / pecan, and banana / walnut. Nuts are always a great addition – they make a great bite!

Pancake Recipe Ingredients

(makes 5 good-size cakes or 8-10 sissy cakes):
1 EGG
3 Tbsp BUTTER
1¼ cup MILK
1½ cups ALL PURPOSE FLOUR
3½ tsp BAKING POWDER
1 Tbsp SUGAR
1 tsp SALT
CRANBERRIES
CHOCOLATE CHIPS
WALNUTS
PECANS

pancake recipe
Fancy Pancakes are yummier than regular pancakes, and better looking, too.

How to Make Pancakes

In a bowl, combine melted butter, milk, and egg. Stir until well blended. In another bowl, combine and mix flour, baking powder, sugar, and salt. Add the dry ingredients to the wet, or the wet ingredients to the dry (who cares? it’s no big deal either way), and stir until smoothish…if there are a few lumps, it doesn’t matter.

Heat a lightly oiled skillet or griddle on medium to medium high heat. Pour or ladle batter onto the skillet. Try not to make the first pancake too big, since often the first cake is the least pretty–although it wil still taste pretty good. Add pancake toppings into the batter–as much or as little as you like–a lot of folks use blueberries, but I prefer cranberries, chocolate chips, or bananas with nuts. Nuts are a great addition to a pancake–makes for a much better bite.

It will only take a minute or two for the pancake to be ready to flip. Once air begins bubbling and opening tiny holes into the top of your cake, flip. It will only take half as much time for the other side to cook. Just peek under the cake and remove it when you’re happy. Serve with syrup and butter…and bacon is always a good idea, too.

Give this fancy-pants pancake recipe a try and let me know what you think, and bon appétit!

And if you enjoy this fancy pancake recipe, then try this fancy-pants Salmon and Poached Eggs Recipe.
poached egg salmon spinach
Thanks for checking out the video and recipe. If you liked it, why not share it? All the cool kids are!
Thanks.
–Chef Buck

Share and Enjoy !


Edamame Brown Rice Recipe –A Great Vegetarian Dish

edamame

This edamame brown rice recipe is super flavorful, filling, a great side dish, and delicious hot or cold. If you buy frozen soy beans for this dish, make sure they are thawed before using –and shelled!– shelled edamame is called mukimame.

Edamame Brown Rice Recipe

2 inch GINGER, finely chopped
4-5 cloves GARLIC, finely chopped
16 oz bag MUKIMAME (shelled edamame)
¾ cup LONG-GRAIN BROWN RICE
2Tbsp fresh LIME JUICE
2 Tbsp RICE VINEGAR
2 tsp SOY SAUCE
2 tsp SESAME OIL
½-1 tsp SUGAR
3-4 GREEN ONIONS
5 Tbsp CILANTRO, chopped
2 Tbsp SESAME SEEDS, toasted
SALT and PEPPER to taste

edamame
Mukimame with Brown Rice Recipe

How to make Make Edamame with Brown Rice

  • In a saucepan, heat olive oil over medium-high heat. Check current prices for a sauce pan on amazon.
  • Sauté ginger and garlic for 1-2 minutes until fragrant.
  • Remove garlic and ginger from pan and set aside (I’ve tried skipping this step, and just continued cooking the garlic and ginger along with the rice, but it’s not as flavorful, so it’s definitely worth setting the garlic and ginger aside to add to the dish later).
  • In same pan (without rinsing), bring 1½ cups lightly salted water to a boil. Add rice, reduce to a low simmer; cover and cook, 30 minutes.
  • After 30 minutes, stir in thawed, shelled edamame (mukimame!); cover and cook until rice is tender and mukimame is heated through, about 15 to 20 minutes.
  • In a small bowl, combine lime juice, vinegar, soy sauce, sesame oil, and sugar and stir until sugar is dissolved.
  • Remove rice and beans from the stove and add ginger, garlic, lime juice mixture, scallions, cilantro and sesame seeds.
  • Mix well and add additional salt and pepper as desired.


Give this edamame brown rice recipe a try and let me know what you think, and bon appétit!

edamame
Frozen Mukimame (shelled edamame)

And for another great vegetarian dish, try this easy, awesome Quinoa Salad Recipe.

southwestern quinoa salad
a southwestern quinoa salad makes a tasty and healthy dinner choice.

Thanks For Watching Our Recipe Videos!

Thanks for checking out this edamame recipe, and all of our recipes. Be sure and sign up for our mailing list so you’ll never miss a new recipe. Also click a button below and share the dishes with your friends. You can also follow Chef Buck on Youtube. We appreciate all the kind comments and support, and we’ll see you next time in the kitchen!

If you like what CG and I do, you can also support us on Patreon, or throw us a tip in our Paypal Tip Jar. We’ll happily enjoy a coffee on the road – Thanks! We appreciate all the support, and we’ll see you next time in the kitchen!

We include affiliate links for products on our website. So, if you make a purchase after clicking on our links, we may earn a commission which helps us produce more videos and drink more coffee :^) We participate in the Amazon Services LLC Associates Program, which is an affiliate advertising program. It provides a means for us to earn fees by linking to Amazon.com and affiliated sites, so we can make more videos.

Share and Enjoy !

Baked Quinoa with Celery Root

Quinoa Vegetable Gratin

This baked quinoa recipe is tasty and versatile, and an terrific way to use celery root. I use zucchini and carrots in this video, but I’ve made the same dish using broccoli as the main veggie, so experiment with whatever you have on hand, just make sure to cut the veggies into smaller pieces to spread evenly.

Baked Quinoa Recipe Ingredients

1 cup QUINOA
1 CELERY ROOT (thinly sliced)
1 cup CARROT (shredded)
1 cup ZUCHINNI (diced well)
1-2 tsp HOT PEPPER (finely chopped)
½ ONION (chopped)
3-4 cloves GARLIC (finely chopped)
1 cup BLUE CHEESE
2 Tbsp BUTTER
½ cup ALMOND MILK (or Half N Half)
2 Tbsp ITALIAN SEASONING
1 tsp MUSTARD SEEDS
½ cup BREAD CRUMBS
1-2 Tbsp OLIVE OIL
SALT and PEPPER (to taste)

Quinoa Vegetable Gratin

How to make a Quinoa Bake

In a pot, heat olive oil on med. high heat. Add mustard seeds, garlic, and a little hot pepper, if desired. Give these ingredients about a 30 second head start, and then add the onion. Stir and let cook for 2-3 minutes until onions begin to soften. Stir in salt.

Add quinoa and water and stir. Cover pot and allow the ingredients to come to a boil. Reduce the heat to a simmer, and allow the pot to cook for about 10 minutes.

Remove pot from the heat, if there is a little water left, that’s okay. Add Italian seasonings (or experiment with different seasonings!). Add in the zucchini and carrot (or experiment with different veggies!). Stir in the milk and mix all ingredients together well.

Butter a deep 1.5 quart baking dish. Check here to see current prices for a casserole baking dish on Amazon.

Spoon in and spread a layer of the quinoa/veggie mix along the bottom of the dish, about a ½” to 1″ thick. Top this layer with a single layer of thinly sliced celery root (celeriac). Add a sprinkling of cheese–as cheesey as you like it. I use blue cheese in the video, but try feta cheese and ricotta cheese, too (I’ve used all and any crumbly/melty white cheese is gonna work well with this dish).

Add and spread another layer of the quinoa mixture, and continue building the quinoa, celery root, cheese layers until the dish is almost full. Make the top layer quinoa/veggie.

In a small bowl, combine bread crumbs w/ olive oil, Italian seasoning, salt, and pepper. Mix, and spread over the top of the quinoa dish.
Cover with aluminium foil and bake for about 55 minutes in an oven pre-heated to 375 degrees F.

After 55 minutes, remove the foil and continue to cook another 5 minutes or until the bread crumb topping is golden brown.

The dish is finished when a knife can pass easily through the sliced celerey root layers.
Let rest for 5-10 minutes, and then serve.
Give this baked quinoa vegetable recipe a try and let me know what you think, and bon appétit!

And for another casserole-style recipe idea, try this Broccoli Cheese and Cauliflower Gratin Recipe.

broccoli cheese
An easy, semi-healthy broccoli and cauliflower gratin recipe.

Thanks for Watching our Baked Quinoa Recipe Video

Sign up for our mailing list so you’ll never miss a new recipe. Also click a button below and share the dishes with your friends. You can also follow Chef Buck on Youtube. We appreciate all the kind comments and support, and we’ll see you next time in the kitchen!

If you like what CG and I do, support us on Patreon, or throw us a tip in our Paypal Tip Jar. We’ll happily enjoy a coffee on the road – Thanks! We appreciate all the support, and we’ll see you next time in the kitchen!

We include affiliate links for products on our website. Making a purchase after clicking on our links and we may earn a commission which helps us produce more videos and drink more coffee :^) We participate in the Amazon Services LLC Associates Program, which is an affiliate advertising program. It provides a means for us to earn fees by linking to Amazon.com and affiliated sites, so we can make more videos.

Share and Enjoy !

Spinach Salad Recipe with Pear and Cheese

Best Spinach Salad

This is the easiest, best spinach salad recipe in the world. We first had one of these spinach, pear, blue cheese, walnut, raspberry dressing salads years ago at a little tapas place in Key West, and we’ve been making them ever since–especially if we have a pear on the edge–the riper, softer, and juicier the pear, the better the salad is gonna taste.

What You need for the Best Spinach Salad

SPINACH
1 PEAR (ripe, diced)
WALNUTS (toasted) current WALNUT prices on Amazon
BLUE CHEESE (crumbled)
dressing:
2 Tbsp OLIVE OIL
1 Tbsp RASBERRY JAM
1 Tbsp VINEGAR
½ tsp ITALIAN SEASONING
SALT and PEPPER to taste

Best Spinach Salad
Best Spinach Salad

How to Make a Pear Spinach Salad

Crumble and spread your walnut pieces on a baking sheet and toast at 300 degrees F for 5-10 minutes until the nuts are toasted to your liking. Keep an eye on them–nuts are easy to over-toast and it’s usually worth setting a timer so they’re not forgotten.
While your nuts toast, throw together your salad dressing–basically and oil and vinegar dressing with a little jam added for flavor.

I make this dressing with all kinds of jams, but raspberry and strawberry are my favorites–although definitely give raspberry a try with this recipe. Combine your oil, vinegar, jam, salt, and Italian seasonings. Mix well. Taste and adjust as needed to your liking. A little sugar can be added if desired, but I usually find that the jam adds plenty of sweetness, plus the pear will add sweetness to the salad as well.

Toss the dressing with your spinach leaves until all are well-coated. Divide spinach into serving bowls. Chop pear into nice chunks and add to salad. An overly-ripe pear works best. Sprinkle the toasted walnuts over the salad, then sprinkle with blue cheese crumbles. Lots of blue cheese. Or less. I like blue cheese. There are no ratios with this salad. Check prices for WALNUTS on amazon

And that’s it. This is the best spinach salad in the world. So it is written, so it shall be done.
Give this Spinach Salad recipe a try and let me know what you think, and bon appétit!

For another tasty salad idea, try this Kale and Beet Dish!

kale beet salad

Thanks for Checking Out Our Spinach Salad

Click a button below and share the dishes with your friends. You can also follow Chef Buck on Youtube. We appreciate all the kind comments and support, and we’ll see you next time in the kitchen!

If you like what CG and I do, support us on Patreon, or throw us a tip in our Paypal Tip Jar. We’ll happily enjoy a coffee on the road – Thanks! We appreciate all the support, and we’ll see you next time in the kitchen!

We include affiliate links for products on our website. Making a purchase after clicking on our links and we may earn a commission which helps us produce more videos and drink more coffee :^) We participate in the Amazon Services LLC Associates Program, which is an affiliate advertising program. It provides a means for us to earn fees by linking to Amazon.com and affiliated sites, so we can make more videos.

Share and Enjoy !

Baked Eggs Recipe with Spinach and Tomato

baked eggs

This baked eggs recipe is a delicious treat for breakfast or brunch, and it’s easy to prepare even though it looks super fancy. I’m throwing spinach, tomato, and Roman cheese in this baked eggs recipe, but it’s a versatile dish, and anything that’ll work in an omelet will work in this preparation. For a spicier version, add a dash or two of hot sauce as the tomatoes cook.

What you need for a Baked Eggs Recipe

(this recipe serves 2)
4 EGGS
OIL for sauteing
2 cup fresh SPINACH
2-4 GREEN ONIONS (chopped)
2 small ROMA TOMATOES (chopped)
3-4 GARLIC cloves (finely chopped)
1-2 tsp dried ITALIAN SEASONING
chopped JALAPENO (optional)
freshly grated PARMESAN or ROMANO CHEESE
4 Tbsp HALF N HALF
SALT and PEPPER to taste
½ cup chopped PARSLEY (optional)
sprinkle of PAPRIKA and fresh herb for GARNISH (optional)

baked eggs
Baked eggs are an easy way to impress folks for breakfast.

How to Make Oven Baked Eggs

  • Heat oil on medium high heat in a small saute pan.
  • Add garlic and chopped bottoms of the green onion. Saute for 1 minute and then add the tomato.
  • Continue to saute for 2 minutes and then add salt, pepper, and Italian seasoning. Mix and cook for 1 minute.
  • Add green onion tops and spinach, and any fresh herbs you desire.
  • Saute until spinach is wilted.
  • Lightly grease an oven-safe dish. If you like the dishes I used in the video, you can check out current prices for au gratin baking dishes on Amazon.
  • Add a layer of cheese to bottom of the if you like, but this is optional.
  • Spoon and spread the spinach and tomato mixture into the bottom of the dish.
  • Drizzle Half n Half or cream over top and then sprinkle shredded Parmesan or Romano cheese.
  • Carefully crack eggs and top the dish with them.
  • Place in an oven preheated to 375 degrees Fahrenheit. If the baking dish/ramekins are small, place on a baking sheet for easy handling
  • Bake 15-20 minutes, or until the eggs are set and cooked as desired.
  • When eggs are finished baking, top with additional cheese if desired. Sprinkle with paprika or garnish with fresh parsley, or basil, or cilantro, or whatever, but a touch of freshly chopped green will make this dish quite lovely.

Serve right away, because eggs are best hot, dude.
Give this baked eggs recipe a try and let me know what you think, and bon appétit!

For another fancy pants breakfast dish, try this tasty Huevos Rancheros Recipe.

huevos rancheros
Huevos Rancheros is a flavorful, classic mexican dish…delicious!

Thanks for checking out his baked eggs recipe. If you liked it, then click a button or two below and share it with friends and family. I appreciate it!
–Chef Buck

Share and Enjoy !


Mini Meatloaf Recipe – Packed with Flavor!

meatloaf recipe

Here’s a meatloaf recipe for folks who like their meatloaf to look like meatballs. These mini meatloaf meatballs are super flavorful and cook up quickly. I like to blend up some of the ingredients for this recipe, so a food processor is helpful for this dish, and you can check current prices for food processors at amazon.

Mini Meatloaf Recipe Ingredients

Meatloaf:

1½ lbs. lean ground BEEF
½ RED BELL PEPPER
1 sm ONION (or ½ lg)
4 cloves GARLIC
1 Tbsp CHILI POWDER
½ cup OATS
1 CARROT
1 EGG
2 tsp ITALIAN SEASONING
SALT and PEPPER to taste
1 Tbsp WOOSTERSHISTERSHIRE SAUCE

Meatloaf Sauce:

1/3 cup KETCHUP
1 Tbsp WOOSTERSHISTERSHIRE SAUCE
2 tsp MUSTARD
1 Tbsp CHILI POWDER
1 tsp CHILI PASTE or hot sauce to taste

meatloaf recipe
Mini meatloaves make moist meatballs…mmmmm

How to make Yummy Mini Meatloaf Balls

  • Blend oats in food processor until finely chopped.
  • In the processor also finely chop the red pepper, onion, carrot, and garlic.
  • In a large bowl, combine processed oats and veggies.
  • Add seasonings, Worcestershire sauce and egg. Mix well.
  • Does it smell awesome? Add additional seasoning, if desired.
  • Add the ground beef and use your hands to combine. Do not overmix the ingredients, over mixing can make the meatloaf dense and heavy.
  • Lightly roll the meat mixture into 12 balls with your hands.  Dividing the mixture into 4 parts makes the distribution a little more even.
  • Place rolled loaves in a lightly greased baking pan. If you need an oven-safe pan, you can check here for current prices for baking sheets on Amazon. 
  • In a small bowl, combine all of the sauce ingredients. I use chili paste to add a little heat, but use hot sauce or whatever you like–or nothing at all if you don’t want the dish too spicy hot. Stir until smooth and spoon over top each dinky meatloaf.
  • Bake, uncovered, at 450 degrees F for 15-18 minutes. If desired, finish under the broiler to get a bit of brown/burnt on top.

And that’s it! Give this meatloaf recipe a go and let me know what you think. Bon appétit!

Of course, the key to many ground beef recipes is the seasoning. For another delicious recipe using ground beef, try The Best Nachos Supreme Recipe ever.

best nachos recipe
This is a fantastic Nachos Supreme dish, and a giant pizza pan makes a great dish for cooking and serving.

Thanks for Watching our Meatloaf Recipe Video!

Click a button below and share the dishes with your friends. You can also follow Chef Buck on Youtube. We appreciate all the kind comments and support, and we’ll see you next time in the kitchen!

If you like what CG and I do, support us on Patreon, or throw us a tip in our Paypal Tip Jar. We’ll happily enjoy a coffee on the road – Thanks! We appreciate all the support, and we’ll see you next time in the kitchen!

We include affiliate links for products on our website. Making a purchase after clicking on our links and we may earn a commission which helps us produce more videos and drink more coffee :^) We participate in the Amazon Services LLC Associates Program, which is an affiliate advertising program. It provides a means for us to earn fees by linking to Amazon.com and affiliated sites, so we can make more videos.

Share and Enjoy !

Quinoa Salad Recipe – Vietnamese Bánh Mì Style

A quinoa salad recipe inspired by the tasty flavor combinations found in a Vietnamese bánh mì sandwich. Quinoa provides a complete protein, making this dish an ideal vegetarian recipe.

Quinoa Salad Recipe Ingredients

1 cup QUINOA (uncooked)
2 cups DAIKON/CARROT RELISH (chopped)
2-3 JALAPENOS (finely chopped)
2 cups SALAD CUCUMBER (diced)
1 cup chopped CILANTRO
3 Tbsp MAYONNAISE
1 small LEMON (zest and juice)
2 Tbsp rice VINEGAR
SALT and PEPPER to taste
SALAD GREENS (I use a combo of Spinach and Red Leaf Lettuce, but use your favorite)

How to make a Bánh Mì Quinoa Salad

Cook up the quinoa just like rice: 1 part quinoa to 2 parts water, bring to a boil, reduce heat, cover and simmer for 15 minutes or until the water is absorbed. Fluff the quinoa and then set aside uncovered to cool.

Prepare the veggies: Dice 1 large salad cucumber, also called an English cucumber; these are great in a salad because the skin is thin and quite enjoyable to eat, and also adds a nice texture. Finely chop 2-3 whole jalapeno peppers, seeds and all. Chop 1 bunch of cilantro, including the stems. Chop 2 cups of pickled daikon and carrot.

Quinoa Salad -- Banh Mi Style
Quinoa Salad — Banh Mi Style

Prepare the dressing: Remove and mince the zest from 1 small lemon and place in a small bowl. Add the juice from the lemon, rice vinegar, mayonnaise, and salt and pepper. Mix well until the dressing is smooth.

In a large bowl, place the cooled quinoa. Add ½ of the dressing, the jalapenos, cilantro, and daikon/carrot, and mix well. Add the diced cucumbers and toss. Add salt and pepper, and more dressing as desired. I also add a bit of the pickling solution from the daikon/carrot pickle.
Serve the quinoa salad over a bed of leafy greens and garnish with cilantro.

Give this banh mi quinoa salad recipe a try and let me know what you think!

If you’re new to home cooking, get a bunch of spices, pots and pans, and start experimenting with different recipes. It’s a healthy hobby that can save a lot of money in the long run. Check out current prices for Complete Kitchenware Sets on Amazon as well as Complete Starter Spice Kits. Or try a thrift store! I’ve found some of my favorite kitchen gear at second-hand stores.

For another Asian inspired vegetarian dish, try this Ramen Noodle Crunchy Slaw Recipe.

crunchy slaw
Crunchy coleslaw or noodle salad? What sounds tastier?

Thanks For Watching Our Recipe Videos!

Thanks for checking out this quinoa salad recipe, and all of our recipes. Be sure and sign up for our mailing list so you’ll never miss a new recipe. Also click a button below and share the dishes with your friends. You can also follow Chef Buck on Youtube. We appreciate all the kind comments and support, and we’ll see you next time in the kitchen!

If you like what CG and I do, you can also support us on Patreon, or throw us a tip in our Paypal Tip Jar. We’ll happily enjoy a coffee on the road – Thanks! We appreciate all the support, and we’ll see you next time in the kitchen!

We include affiliate links for products on our website. So, if you make a purchase after clicking on our links, we may earn a commission which helps us produce more videos and drink more coffee :^) We participate in the Amazon Services LLC Associates Program, which is an affiliate advertising program. It provides a means for us to earn fees by linking to Amazon.com and affiliated sites, so we can make more videos.

Share and Enjoy !

Country Fried Steak with Rich Gravy

Country Fried Steak is easy to prepare and a terrific way to cook up an inexpensive cut of meat. This country fried steak recipe, also called chicken fried steak, uses cube steak, a cut of meat that has been run through a mechanical tenderizer, generally it’s a round or top sirloin cut of meat.

Country Fried Steak Ingredients

1 lb CUBE STEAK
¾ cup all-purpose FLOUR use enough to coat steaks and extra for making gravy
1 EGG (about one for every two cuts of meat)
COOKING OIL enough to cover the bottom of the skillet, add some butter if desired
1½ cups MILK (add as needed for desired gravy consistency)
SALT and PEPPER to taste

How to Make Country Fried Steak

  • Bread the cube steak. For about 1 lb. of meat, place approx. ¾ cup all-purpose flour in a shallow dish. This is more flour than you’ll need for the breading, but you’ll use whatever is leftover for making the gravy.
  • Season the flour simply with salt and pepper.
  • In another shallow dish, beat 1 egg.
  • Lay each side of the steak in the flour, breading each side, then lay the floured steak in the egg dish on each side to coat the steak in egg, then return the steak to the flour dish and re-coat each side in flour again; once fried, this double flouring will create a thick, decadent breading.
  • Heat oil in a skillet on med-high. Make sure the oil is HOT before adding the steaks!
  • Carefully lay the steaks in the pan. The breaded cuts should begin bubbling and cooking straight away. Because cube steak is pounded and thin, it takes very little time to cook–approx 2-3 minutes each side.
  • Once the breading has fried and turned golden, carefully turn the steaks. Be careful of the hot grease. Once both sides are crisp and golden, remove steak from the oil and place on a paper towel to drain.
  • Pour off excess grease from the pan so that only enough remains to make the gravy–this might be a couple of tablespoons or a ¼ cup, depending on how much gravy you wish to make. If there are bits and pieces left in the skillet from the frying steak, that’s great–it will make the gravy even more delicious.
  • Into the skillet, add about as much flour as there is grease. You can just eyeball it, it isn’t rocket science.
  • Stir the flour and grease together for about a minute. The flour will absorb the grease and thicken.
  • Slowly pour in milk, constantly stirring. Add the milk incrementally. Over the course of a few minutes, the gravy will smooth and thicken. Add milk until the gravy is the consistency you desire. Taste and season with additional salt and pepper if desired.
country fried steak

And that’s it. Pour the gravy over the steaks or serve on the side. And if you don’t want gravy, then skip the whole gravy part of this recipe entirely. Country fried steak, also called chicken fried steak, tastes great with or without gravy. And if you have leftovers, then cube steak is fantastic on a sandwich.

If you need a nice skillet, check current prices for a non-stick skillet on Amazon.

Give this country fried steak recipe a try and let me know what you think, and for another budget friendly southern favorite, try this Fried Chicken Livers Recipe.

fried chicken livers

Thanks for checking out our country fried steak recipe, and all of our recipes. Be sure and sign up for our mailing list and never miss a new Chef Buck cooking video, and also click a button below and share the dishes with your friends. We appreciate all the kind comments and support, and we’ll see you next time in the kitchen!

Thanks for watching our cooking videos!

We include affiliate links for products on our website, so if you make a purchase after clicking on our links, we may earn a commission which helps us produce more videos and drink more coffee :^)                                                                                                We participate in the Amazon Services LLC Associates Program, which is an affiliate advertising program providing a means for us to earn fees by linking to Amazon.com and affiliated sites, so we can make more videos.

Share and Enjoy !

Kung Pao Chicken Recipe Just Like Take-out!

Kung Pao Chicken

Kung Pao Chicken tastes great and cooks up super quick, so next time you feel like ordering Chinese take-out, try cooking this Chinese favorite at home instead.

Kung Pao Chicken Ingredients

1 lbs CHICKEN (boneless/skinless)
1 med-sized ZUCCHINI
1 stalk CELERY
½ RED BELL PEPPER
4-5 GREEN ONIONS
3-4 GARLIC minced
2 tsp GINGER minced
RED PEPPER FLAKES (to taste)
1 Tbsp SESAME OIL
1 Tbsp CORN STARCH
1 Tbsp SOY SAUCE
¾ cup PEANUTS
3 Tbsp OIL for skillet
Salt and Pepper (to taste)
Sauce Ingredients:
3 Tbsp SOY SAUCE
2 Tbsp RICE VINEGAR
2 tsp SESAME OIL
2 TBSP HOISIN SAUCE
(or sub brown sugar)
1 Tbsp CHILI PASTE
1 Tbsp CORN STARCH
½ cup WATER

Kung Pao Chicken
Serve Kung Pao Chicken with rice.

How to make Kung Pao Chicken

Cut 1 lb. of boneless, skinless chicken into ½”-1″ pieces and place in a bowl. Season meat with salt and pepper to taste, then add a splash of sesame oil, 1 Tbsp soy sauce, and 1 Tbsp cornstarch. Toss chicken with ingredients until the chicken pieces are coated, then set aside in the fridge.

In a small bowl, combine all of the ingredients listed above for the sauce. Stir until all ingredients are mixed well, and then set aside.

In a large skillet heat 3 Tbsp of oil on medium heat. You can check here for current pricing for a non-stick skillet on Amazon.

Add the coated chicken. Stir and allow the chicken to cook quickly. Brown all sides and cook until chicken is nearly done.

Add red pepper flakes (or fresh chopped hot peppers), minced garlic, and minced ginger, and stir for a few moments while the garlic colors.

Add chopped bottoms from green onions, diced red pepper (red or orange bell peppers look very nice with this dish), chopped celery, and diced zucchini. Stir with chicken for 2 minutes and then add sauce.

Keeping the skillet on med. high, the sauce will bubble and thicken quickly; stir 1-2 minutes and then add peanuts. Stir 1 more minute, then mix in green onion tops.

Remove from heat and serve over rice.
And that’s it–an Americanized version of a classic Chinese Kung Pao Chicken Recipe. Give this dish a try and let me know what you think…and bon appétit!

For another Chinese take-out style dish, try this General Tso’s Chicken Recipe.

general tso chicken

Thanks for Watching our Videos!

Thanks for checking out our kung pao chicken recipe. Sign up for our mailing list so you’ll never miss a new recipe. Also click a button below and share the dishes with your friends. You can also follow Chef Buck on Youtube. We appreciate all the kind comments and support, and we’ll see you next time in the kitchen!

If you like what CG and I do, support us on Patreon, or throw us a tip in our Paypal Tip Jar. We’ll happily enjoy a coffee on the road – Thanks! We appreciate all the support, and we’ll see you next time in the kitchen!

We include affiliate links for products on our website. Making a purchase after clicking on our links and we may earn a commission which helps us produce more videos and drink more coffee :^) We participate in the Amazon Services LLC Associates Program, which is an affiliate advertising program. It provides a means for us to earn fees by linking to Amazon.com and affiliated sites, so we can make more videos.

Share and Enjoy !

Stamppot Boerenkool Dutch Meat and Potatoes

kale and potato hash

This kale hash recipe is a hearty and healthy way to get a tasty kale dish on the table for dinner. It’s based on a Dutch dish called Stamppot Boerenkool.

Kale Hash Ingredients

1½ bunches KALE
3 lbs POTATOES
1 lb SMOKED SAUSAGE (sliced)
1 bunch GREEN ONIONS (chopped)
2-3 cloves GARLIC (finely chopped)
2 Tbsp BUTTER
½ cup MILK
1 tsp CELERY SEEDS
1 BAY LEAF
SALT and PEPPER to taste

How to make Stamppot Boerenkool

Clean your potatoes and get them cooking. I like to use red potatoes since it’s a nice contrast with the kale, and the skin is thin and tasty (but if you’re not a fan of potato skin, you can peel them). In a large pot, cover the potatoes with cool tap water (about an inch over the potatoes).

stamppot boerenkool
Use lots of kale! –And red potatoes work great for this dish.

Add salt and a bay leaf and bring potatoes to a boil until they are cooked through–cooking time will vary depending on the size of the potatoes–the potatoes I used in the video took approx. 25 minutes to cook; potatoes are cooked through once you can pierce them easily with a fork and the
potato slides off. While the potatoes cook, wash and cut the kale. Remove the kale stems and cut or tear the leaves into bite-size pieces. For three pounds of potatoes, use 1 to 2 bunches of kale, the kale will cook down quite a bit, so don’t be shy with it–ideally, you want an even kale/potato ratio.

Heat a large skillet on med. high heat and add the sausage (or for a vegetarian dish–just leave the sausage out…isn’t that genius?) . Saute for a a few minutes until the sausage begins to color. Add finely chopped garlic and chopped green onion bottoms. Mix with sausage and continue cooking 2 minutes. Add kale to the skillet. This will be a lot of kale, so don’t bother mixing the kale in at this point–just add ½ cup water and cover and allow the kale greens to wilt for 2 minutes.

kale and potato hash
Kale Hash Recipe (boerenkool)

Once the kale has began reducing and softening, add salt to taste and then mix with sausage, garlic, and onion. Add a little more water if needed, but be conservative, as the kale will continue to release water of it’s own. Cover and continue steaming 3-5 minutes, or until it is cooked to your taste.

When the potatoes are cooked through, drain off the hot water (reserve a small amount). Remove the bay leaf and mash the potatoes. Add butter, celery seeds, milk (optional–you can use the reserved hot potato water instead, or a mixture of the two), and add salt and black pepper to taste.

Mash the potatoes as smooth or chunky as desired and then add the kale/sausage mix. Add the green onion tops. Combine well…and that’s it, dinner is ready! We serve stamppot boerenkool with a side of mustard and it is fantastico!

Try new dishes! Get a bunch of spices, pots and pans, and begin experimenting with different recipes. Home cooking is a healthy hobby that will save you tons of money in the long run.
Check out current prices for Complete Kitchenware Sets on Amazon as well as Complete Starter Spice Kits. Or go to a thrift store! I’ve found some of my favorite kitchen gear at second-hand stores.

For a classic meat and potato dish, try this Hearty Beef Stew Recipe.

beef stew recipe

Thanks for checking out the recipes and I hope you give this stamppot boerenkool a try. Be sure and sign up for our mailing list so you’ll never miss a Chef Buck cooking video, and click a button below and share the dishes with your friends. We appreciate all the kind comments and support, and we’ll see you next time in the kitchen!
–Chef Buck

Share and Enjoy !


Kale Salad – Tips for Using Raw Kale Greens

fresh kale

Why eat raw kale salad? Kale is a so-called SUPERfood chock full of big-time nutrition and very fashionable in salad circles, so if you wanna be one of the cool kids, ya gotta eat it. If the Popeye franchise is ever re-booted, I’m sure our vegetable-friendly sailor will be shunning spinach and downing kale by the bunches–not that there’s anything wrong with spinach, but at the moment the kale lobby is a juggernaut.

Check out this video for tips on making a raw kale salad:

Kale Nutrition and Fun Facts

Kale belongs to the same family as cabbage, Brussels sprouts, and collards.
Kale is packed with antioxidants, which help neutralize harmful free radicals in the body.
One cup of chopped raw kale provides more than 100% of the daily value of vitamins A, C, and K.
In fact, Kale has more vitamin C than an orange.
Free Radicals are a thing scientists made up to sound smart.
Baked kale becomes crispy and can be substituted for potato chips.
Kale freezes well for future use.
Kale is a great addition to a soup.
Kale is believed to promote cell repair and may block the growth of cancer cells.

Wow…doesn’t that sound terrific? Who could pass up on that! Too bad kale doesn’t taste like a slice of coconut cream pie, but you can’t have everything. It is a tasty addition to a salad, though–and utilizing raw kale will insure the greatest health benefit from this leafy superfood.

kale salad
Raw kale salad with olives, artichoke, red leaf lettuce, and a carrot/daikon slaw.

Prepare fresh foods at home and have fun in the kitchen. Get a bunch of spices, pots and pans, and begin experimenting with different recipes. home cooking is a healthy hobby that will save you tons of money in the long run. Check out current prices for Complete Kitchenware Sets on Amazon as well as Complete Starter Spice Kits. Or go to a thrift store! I’ve found some of my favorite kitchen gear at second-hand stores.

Green is the way to go for a healthy lifestyle. Check out this simple recipe trick for Getting Raw Broccoli Into Your Diet.

raw broccoli
Raw broccoli is high in vitamins and nutrients and is great for digestive health.

Thanks for checking out the recipes. Be sure and sign up for our mailing list so you’ll never miss a Chef Buck cooking video, and click a button below and share the dishes with your friends. We
appreciate all the kind comments and support, and we’ll see you next time in the kitchen!
–Chef Buck

Share and Enjoy !


Chicken Curry Recipe a classic Indian dish

chicken curry

Chicken curry is delicious and easy to make. I throw a little yogurt in for a tad creaminess, but that’s optional, and it’ll be tasty either way. Chicken Curry is one of the most popular dishes in the world, and for good reason.

Chicken Curry Ingredients

2 lbs CHICKEN (boneless/skinned)
2 Tbsp OLIVE OIL
1 tsp BUTTER
1 lg ONION (chopped)
4-5 cloves GARLIC (finely chopped)
1 HOT PEPPER (finely chopped)
1 tsp TURMERIC
1 tsp CHILI POWDER
1 Tbsp CORIANDER
1 Tbsp CUMIN (plus seasoning for chicken)
1 Tbsp GARAM MASALA
1 28oz can CRUSHED TOMATO
¼ cup YOGURT
½ cup CILANTRO (chopped)
SALT and PEPPER to taste
(plus a little SALT, CORIANDER, CUMIN, and CHILI POWDER to season the chicken before cooking)
Check out current prices for Indian Spices on Amazon.

How to make Chicken Curry

Use 2 lbs of skinless, boneless chicken. You can use dark or light meat as you prefer. For this recipe, I like to cut the meat into approx. 1″ pieces and then season generously with salt, cumin, coriander, and chili powder.

Heat oil in a skillet on med. high heat and add seasoned chicken pieces. Sear chicken 5-7 minutes, turning once, and then remove chicken to a plate. Pour off excess fluid in the skillet and add butter. Add finely chopped garlic and hot pepper. Saute for 30 seconds and then add onion. Continue cooking for a couple of minutes.

Indian-style chicken curry recipe
Indian-style Chicken Curry

When onions begin to soften, add turmeric, chili powder, coriander, and cumin. Mix well and continue cooking 2 minutes. Stir in crushed tomato. Add salt and a little water, if needed (but not too much water at one time–you don’t want the dish to be too wet). Allow the sauce to come to a bubble, reduce the heat, cover and let simmer for 10 minutes.

After 10 minutes, return chicken to the skillet. Mix in Garam Masala, which is a blend of flavors (clove, cinnamon, cardamom, cumin, etc.). You can also spoon in a little plain yogurt, if you like–if I have some yogurt on hand I add it, and if I don’t, I don’t–it’s tasty either way (but yogurt adds a nice touch of creaminess). Add Fresh chopped cilantro and stir well.
And that’s it.

Serve the curry over rice with a little flat bread and you’ve got a delicious Indian-style entree. Give this chicken curry recipe a try and let me know what you think…and bon appétit!

For another super tasty chicken dinner, try this Asian inspired General Tso’s Chicken recipe.

general tso chicken

Thanks for Watching our Chicken Curry Recipe

Sign up for our mailing list so you’ll never miss a new recipe. Also click a button below and share the dishes with your friends. You can also follow Chef Buck on Youtube. We appreciate all the kind comments and support, and we’ll see you next time in the kitchen!

If you like what CG and I do, support us on Patreon, or throw us a tip in our Paypal Tip Jar. We’ll happily enjoy a coffee on the road – Thanks! We appreciate all the support, and we’ll see you next time in the kitchen!

We include affiliate links for products on our website. Making a purchase after clicking on our links and we may earn a commission which helps us produce more videos and drink more coffee :^) We participate in the Amazon Services LLC Associates Program, which is an affiliate advertising program. It provides a means for us to earn fees by linking to Amazon.com and affiliated sites, so we can make more videos.

Share and Enjoy !

Cook Chinese Eggplant Recipe with General Tso’s Sauce

Chinese Eggplant Recipe with Sweet Sauce

Cook Chinese Eggplant for a terrific vegetarian meal that will not having you missing the meat. For this Chinese eggplant dish, I use a sauce similar to one I use making General Tso’s Chicken, so it’s a rich and filling eggplant dish, hearty and vegetarian at the same time.

ingredients to cook Chinese Eggplant Recipe

1½ lbs CHINESE EGGPLANT
4-6 Tbsp OLIVE OIL
3 cloves GARLIC (finely chopped)
1-2 RED CHILIES (thinly sliced)
½ cup whole CASHEW NUTS
1 bunch GREEN ONIONS
1 Tbsp SESAME OIL
sauce ingredients:
1/3 cup SOY SAUCE
2 Tbsp HOISIN SAUCE
1 tsp SESAME OIL
2 Tbsp RICE VINEGAR
2-3 Tbsp BROWN SUGAR
1 Tbsp GINGER (minced)
2 Tbsp CORN STARCH
1½ cups WATER

cook Chinese Eggplant
Chinese Eggplant with Cashew Nuts and Sweet Sauce

how to cook Chinese Eggplant Recipe with General Tso’s Sauce

In a small bowl, combine all of the sauce ingredients. The fresh minced ginger is optional, but if you love ginger, why not? I also use 2 heaping Tbsp of brown sugar, but you can use more or less sugar depending on how much sweet you like–but the sweet is good with this recipe. Mix the sauce ingredients well and then set aside.
Cut your Chinese eggplant. You should buy firm eggplant with glossy, unblemished skins. Cut into pieces approx. 2″ long and ½” wide.
In a skillet or wok, heat olive oil on med. high heat. When the oil is hot, add eggplant. Saute eggplant 5-7 minutes. The eggplant will soak up the oil, so add more oil as needed or desired. Saute until the eggplant colors and begins to soften and then remove eggplant from the skillet. In the same hot skillet, add sesame oil and heat. Add garlic, hot pepper, and cashew nuts (or sub peanuts). Saute for 1 minute or until garlic colors. Add sauce and green onion bottoms. Stir sauce slowly. Because of the added corn starch, the sauce will quickly heat through, darken, and thicken. When the sauce has thicken to a a gravy/syrup consistency, return the eggplant to the skillet. Mix well, then cover the skillet and allow to simmer until the eggplant has finished cooking, 3-5 minutes depending on the size of the eggplant pieces. Stir in green onion tops. Fresh chopped cilantro also adds an excellent taste and garnish.
And that’s a very tasty way to cook Chinese eggplant.
Serve with rice, or without rice…and enjoy.
And for a tasty General Tso’s Chicken Recipe, click the pic below.

general tso chicken
click pic for recipe

Thanks for checking the recipe out. If you liked it, click a few buttons below and share it with your friends, I appreciate it.
–Chef Buck

Share and Enjoy !


Chorizo Recipe — Cazuela de Chorizo!

Chorizo Sausage recipe

This spicy chorizo sausage recipe is a Spanish inspired meat and potato stew that is super-flavorful and delicious–and hearty, too.

What you need for this Chorizo Sausage Recipe

1 lb CHORIZO LINKS
3-4 Tbsp OLIVE OIL
1 lg ONION (chopped well)
4-5 cloves GARLIC (thinly sliced)
3 ROMA TOMATOES (diced)
3 lg POTATOES (cut into approx 1″ pieces)
14 oz can BROTH (add water as needed)
1 BAY LEAF
1 tsp SMOKED PAPRIKA
1 Tbsp CHILI POWDER
¼ tsp CAYENNE PEPPER
½ tsp ground THYME
SALT and PEPPER to taste

Chorizo Sausage recipe
Fresh Chorizo Sausage Links

How to make Cazuela de Chorizo

  • Heat olive oil on medium high heat in a deep skillet or wide-bottom pot.
  • Add onion and garlic and saute.
  • As the onion begins to soften, add bay leaf, salt, chili powder, cayene pepper, and paprika.
  • Stir well and continue sauteing ingredients for 4-5 minutes.
  • Add chorizo sausage–use UNCOOKED chorizo links; slice the links in the casing, about ½ inch wide pieces.
  • Cook the sausage with the onions for 5 minutes and then add tomato (3 diced roma tomatoes or 14oz can diced tomatoes).
  • Mix tomato with onion and then add potato. I like to leave the skin on the potato mainly because it tastes GOOD. And then you don’t have to peel the potatoes either, which is good, too. The potato should be cut up into good sizes, about 1″ pieces, so that you’ll have some good chunks of potato after the dish stews.
  • Cover the skillet and bring the dish up to a bubble.
  • Reduce the heat to a simmer and add dried thyme.
  • Cover, and let simmer for about 30 minutes or until the potatoes are cooked through–stirring occasionally as needed.

Give it a taste and add a little more salt and seasoning as desired. Garnish this chorizo recipe with fresh chopped parsley, cilantro, or green onion…and enjoy!

Chorizo Sausage recipe
Spicy Chorizo Sausage Stew

If you don’t have a big skillet or pot, here’s a link to check out check out current prices for a BIG STEW POT on Amazon.

For another great stew idea, check out this vegetarian alternative, a Meatless Chili Recipe that even meat lovers will love.

vegetarian chili
pot o’ meatless chili for good times

Thanks for Watching our Chorizo Sausage Recipe Video!

Click a button below and share the dishes with your friends. You can also follow Chef Buck on Youtube. We appreciate all the kind comments and support, and we’ll see you next time in the kitchen!

If you like what CG and I do, support us on Patreon, or throw us a tip in our Paypal Tip Jar. We’ll happily enjoy a coffee on the road – Thanks! We appreciate all the support, and we’ll see you next time in the kitchen!

We include affiliate links for products on our website. Making a purchase after clicking on our links and we may earn a commission which helps us produce more videos and drink more coffee :^) We participate in the Amazon Services LLC Associates Program, which is an affiliate advertising program. It provides a means for us to earn fees by linking to Amazon.com and affiliated sites, so we can make more videos.

Share and Enjoy !

Creamy Shrimp Curry Recipe –quick and easy with a yogurt sauce

creamy shrimp curry

Try this quick, creamy shrimp curry recipe for a change of taste. It’s super fast to prepare and kinda/sorta healthy–I usually serve this shrimp curry with rice and top with fresh chopped cilantro. Don’t be shy adding hot peppers, since the yogurt sauce and rice will absorb a lot of any heat added.

SHRIMP CURRY RECIPE
ingredients:
1 to 1½ lbs SHRIMP (peeled/deveined)
2-3 Tbsp OLIVE OIL
2 tsp MUSTARD SEEDS
2 chili peppers (chopped, or sub red pepper flakes)
1 cup plain Greek YOGURT
¼ tsp ground CINNAMON
¼ tsp ground CLOVE
½ tsp CARDAMOM
1½ tsp MANGO POWDER
2 tsp CORIANDER
½ tsp CORN STARCH
SALT to taste
CILANTRO (chopped)
serve w/ RICE

shrimp curry recipe
Creamy Shrimp Curry Recipe

In a small bowl, combine Greek yogurt with cinnamon, clove, cardamom, mango powder, coriander, and corn starch. Mix ingredients well until the yogurt is smooth. Heat olive oil in a skillet and add mustard seeds and finely chopped peppers. Use as much or little pepper as you like–if you’ve got fresh peppers that’s great, but red pepper flakes make a decent substitute. After 1 minute, add yogurt sauce to the skillet. Stir well and bring to a light bubble and let simmer 2 minutes. Adjust stovetop temperature as needed. Add shrimp, already peeled and deveined. Mix with sauce and return skillet to a simmer. Let cook 4-5 minutes, stirring as needed, until shrimp are pink and done–try not to overcook your shrimp ’cause that’s sad.
Salt dish as desired and remove from heat. Garnish with fresh chopped cilantro and serve with rice. It’s best to cook your rice ahead of time, since this creamy shrimp curry takes very little time to prepare. Give it a try and let me know what you think, and bon appetit!

For another tasty shrimp dish, give SPICY FRIED SHRIMP a try.

Share and Enjoy !


Artichoke Heart Recipe for Creamy Caper Pasta

canned artichoke hearts

This canned artichoke heart recipe is quick and tasty and easily prepared. And if you use quick-cook Chinese flat noodles, from start to finish–including prep time–this dish only takes about 10 minutes to make.

Ingredients for Artichoke Heart Recipe

14 oz can quartered ARTICHOKE HEARTS
¼ cup BUTTER
¼ cup OLIVE OIL
1 lg ONION (chopped)
5 cloves GARLIC (finely chopped)
2-3 Tbsp CAPERS
8 oz PASTA
2-3 Tbsp LEMON JUICE (optional)
SALT and PEPPER to taste

How to make Artichoke Heart Pasta

In a large skillet on medium-high heat, add olive oil and most of the butter. When oil is hot, add onion and garlic and saute until onions begin to soften (for a spicier dish, add a minced chili pepper in with the onion).

Add artichoke hearts, capers and salt to taste and continue sauteing for 2-3 minutes. Occasionally I’ll add the juice and zest of ½ a lemon, which is a pretty tasty option, so definitely give it a try sometime. Add any remaining butter to the skillet.

Add cooked pasta to the skillet. I like to use quick-cook Chinese flat noodles since it’s easy to time with the cooking of the sauce, but use any kind of pasta you like, just allow enough time for cooking. And for a wetter sauce, add a little bit of the pasta water to the skillet.

Mix pasta and sauce in skillet and then serve immediately. Garnish with fresh chopped parsley or thyme–or just add a few more capers. Serve with Parmesan cheese if desired. It’s a quick, easy artichoke heart recipe and a great use of canned artichoke hearts. Check on current prices for Canned Artichokes on Amazon.

Give the recipe a try and let me know what you think, and bon appetit!

artichoke hearts
canned artichoke hearts

For another super creamy and delicious pasta dish, Try this Decadent Pasta Carbonara Recipe.

spaghetti carbonara

Thanks for checking out the recipes. Be sure and sign up for our mailing list so you’ll never miss a Chef Buck cooking video, and click a button below and share the dishes with your friends. We
appreciate all the kind comments and support, and we’ll see you next time in the kitchen!
–Chef Buck

Share and Enjoy !


Thai Beef Salad Recipe Quick and Easy

thai beef salad

Thai Beef Salad is an easy recipe to prepare with lots of room for nuance, i.e., using whatever the hell you have in the fridge. I like to use sirloin steak since it’s a good piece of meat that doesn’t cost an arm and a leg and you can generally buy a nice cut that makes for good slicing. Season your steak up well, don’t overcook it, and let it rest well before slicing–these 3 steps are key for a great steak salad.

Ingredients for Thai Beef Salad

¾ lb SIRLOIN STEAK
1 Tbsp OLIVE OIL
2-3 cups SALAD GREENS (don’t use so much green that the steak is lost!)
3 GREEN ONIONS (chopped)
½ CUCUMBER (matchstick cuts are nice)
½ CARROT (thin cut–cut into strings is nice, dude)
1 Tbsp CHILI PASTE (more or less, depending on desire for heat)
1 tsp LEMON GRASS (minced) (sub extra ginger if lemon grass is not used)
1 tsp GINGER (minced)
1 LIME JUICE
½ cup CILANTRO (chopped) …thai basil and mint leaves are nice, too.
1 tsp CHILI POWDER
SALT and PEPPER to taste

How to Make a Thai Beef Salad

I’ve never bought lemon grass online, but it’s apparently a thing. Look here if you want to check current prices for fresh lemon grass on Amazon.

First, mix up your dressing. Lemon grass is a key component in many Thai dishes and makes a nice addition to this steak salad. Cut off the upper leaves of the stalk and the very bottom,leaving about 5-6 inches. This is generally the only part of the lemon grass used in recipes and is sometimes sold already cut into these sections in grocery stores. The outer part of the stalk is often very tough, so cut away the outer layers to reveal the softer core.

Mince about an inch of the lemon grass core and add it into a bowl. Add finely chopped ginger, chili paste, lime juice, salt, and mix ingredients well. Set dressing aside and season sirloin steak.

Season both sides of the steak well–I like salt, pepper, and chili powder–but use whatever seasonings you desire (and season it well!).

Heat oil in a skillet and cook the steak quickly on high heat, turning once and sealing the juices inside. Do not overcook the steak or puncture it with a knife or fork. Set the steak aside to rest at least 10-15 minutes, this will keep the juices from running when the steak is sliced.

While the steak rests, preare the salad. Use whatever greens you desire, but don’t use so much salad that the steak becomes just another component–allow the steak to be the star of the dish.
Tear salad greens into a bowl and add thinly cut carrots, cucumber matchsticks, chopped green onions, and chopped cilantro (also try fresh chopped basil and mint). Add salad dressing and toss.

Cutting against the grain of the meat, slice steak into thin strips and add to the salad. Add any juices from the steak and toss salad.
Garnish with toasted sesame seeds. Enjoy!

thai beef salad
thai beef salad recipe

If you’re new to home cooking, just get a bunch of spices, pots and pans, and start experimenting with different ingredients and recipes. It’s a healthy hobby that can save a lot of money in the long run. You can check out current prices for Complete Kitchenware Sets on Amazon as well as Complete Starter Spice Kits. Or just go to a thrift store! I’ve found some of my favorite kitchen gear at second-hand stores.

For another great healthy meal, try this Vietnamese Bánh Mì Style Quinoa Salad Recipe.

Quinoa Salad -- Banh Mi Style
Quinoa Salad — Banh Mi Style

Thanks for taking a peek at the video and recipes. If you like it, click a button or two below and share with your friends! I appreciate it!
–Chef Buck

Share and Enjoy !


Tilapia Recipe –Easy Baked Panko-Crusted Fish

This easy, baked tilapia recipe will make even those big boring bags of tilapia fillets taste great –or any other less than stellar fillet of fish. Tilapia is not an exciting fish, but it’s often a pretty good buy relative to everything else in the seafood department. This recipe will turn tilapia–or any bargain fillet–into a super tasty, super moist side of aquatic splendor (too much?). Breading and frying always helps tilapia, but breading and baking will do the same, and it’s a lot less messy and a lot more moist–and healthier, too.

Tilapia Recipe Ingredients

2 FISH FILLETS (about 8oz each)
½ ONION (sliced or chopped)
½ cup PANKO BREADCRUMBS
½ tsp GARLIC POWDER
SALT and PEPPER to taste
2 Tbsp fresh DILL (or 2 tsp dried dill)
¼ cup MAYONNAISE
1 tsp DIJON MUSTARD
1 clove GARLIC (minced)
1 Tbsp fresh LEMON JUICE (add zest for extra lemony-ness)

How to Bake Tilapia

Preheat oven to 450 degrees F.
In a small cup, combine panko crumbs (or any breadcrumbs–panko just happens to be best, I think) with garlic powder, salt, pepper and 1/2 of the dill and mix.
In a separate bowl, combine the remaining dill, mayonnaise, Dijon mustard (not yellow mustard!) and lemon juice and stir until smooth.
Rinse and pat the fish fillets dry with paper towels. Spray a baking pan with cooking spray. Lay onion slices in pan and place fillets over
onions. Evenly brush the tops and sides of the fish with the mayonnaise mixture. Sprinkle and press the crumbs into the mayonnaise.
Place pan in oven and bake about 15 minutes until the crumb topping has turned a nice, golden brown. Serve with rice and veggies.
Give this tilapia recipe a try and let me know what you think, and bon appetit!

For another tasty fish dish, try this Crispy Skin Salmon Recipe.

crispy salmon recipe
For the best fresh fish recipes…keep it simple

Have fun in the kitchen. Get a bunch of spices, pots and pans, and begin experimenting with different recipes. home cooking is a healthy hobby that will save you tons of money in the long run. Check out current prices for Complete Kitchenware Sets on Amazon as well as Complete Starter Spice Kits. Or go to a thrift store! I’ve found some of my favorite kitchen gear at second-hand stores.

Thanks for checking out the recipes. Be sure and sign up for our mailing list so you’ll never miss a Chef Buck cooking video, and click a button below and share the dishes with your friends. We
appreciate all the kind comments and support, and we’ll see you next time in the kitchen!
–Chef Buck

Share and Enjoy !


Chicken Tikka Masala Indian Restaurant Favorite

Chicken Tikka Masala is one of the most popular Indian recipes in the world, and for good reason.

I like chicken tikka masala with a rich, creamy sauce–plenty to mix in with the rice and scoop up with some warm flatbread. Give this dish a try and let me know what you think–it’s one of my favorites.

Ingredients for Chicken Tikka Masala

2 lbs boneless, skinless CHICKEN
1 cup plain YOGURT
1 tsp GARLIC (minced)
1 tsp GINGER (minced)
2 Tbsp LEMON JUICE
1 Tbsp CORIANDER POWDER
1 Tbsp GARAM MASALA
1 Tbsp CUMIN
SALT

Ingredients for Masala Sauce

1 ONION (chopped well)
2 tsp GARLIC (minced)
2 tsp GINGER (minced)
1 JALAPENO PEPPER (finely chopped, optional)
or ½ tsp RED PEPPER FLAKES (optional)
1 Tbsp TOMATO PASTE
1 28oz can CRUSHED TOMATOES
1 pint HEAVY CREAM
½ cup CILANTRO (chopped)
2 tsp CORIANDER POWDER
½ tsp CHILI POWDER
1 tsp TURMERIC
1 tsp CUMIN
1 tsp GARAM MASALA
Check out current prices for Indian Spices on Amazon.

Use 2 lbs of skinless, boneless chicken. You can use dark or light meat as you prefer. For this recipe, I like to cut the meat into strips that are easier to handle while marinating and cooking–later I’ll cut the chicken into bite-sized pieces to add into the creamy masala.

Mix a marinade of plain yogurt, ginger, garlic and lemon juice. Season the chicken strips with garam masala, cumin, coriander, and salt and coat with the marinade. Set in the fridge to marinate for at least a few hours, ideally overnight.

After the chicken has marinated, lightly coat a baking pan with oil. Remove as much of the marinade from the chicken as possible and arrange on the pan. Bake the chicken in a 400 degree F oven for 15-20 minutes or until nearly cooked through–adjusting the cooking time as needed depending on the size of the chicken strips; finish the chicken under the broiler to add a slight char to the outside. While the chicken is cooking, prepare the creamy masala.

In a skillet, on med high heat, heat 2 Tbsp of oil and 1 Tbsp of butter. Add minced ginger and garlic and saute 1 minute. Then add onion–also a fresh hot pepper, or red pepper flakes if you want to add a little heat to the dish. The onion and pepper should be chopped up well for a smoother sauce.

Continue sauteing for 5-6 minutes. Add coriander, cumin, turmeric, and chili powder; stir into the onion mixture. Add tomato paste (or don’t–it’ll be good either way–just a little more or less rich and tomatoey, so adjust according to your personal taste).

jackfruit recipe
Use young green jackfruit for a tasty meatless “chicken” tikka masala recipe.

Add 28oz can of crushed tomatoes.
Add salt to taste and mix ingredients thoroughly. Allow ingredients to come to a bubble, then reduce heat, cover, and let simmer for 15 minutes, stirring occasionally.

After 15 minutes, stir in garam masala and heavy cream and continue cooking on low heat for 5 minutes.
Add chopped cilantro.
Chop the cooked chicken strips into bite-sized pieces and stir into the masala.
Remove from heat and serve over rice.

I hope you give this chicken tikka masala recipe a try, I think you’ll love it.

To learn how to cook an entire Indian meal, check out my Complete Indian Dinner Cooking Lesson.

how to cook indian food

Thanks for Watching our Chicken Tikka Masala

Click a button below and share the spinach curry with your friends. You can also follow Chef Buck on Youtube. We appreciate all the kind comments and support, and we’ll see you next time in the kitchen!

If you like what CG and I do, support us on Patreon, or throw us a tip in our Paypal Tip Jar. We’ll happily enjoy a coffee on the road – Thanks! We appreciate all the support, and we’ll see you next time in the kitchen!

We include affiliate links for products on our website. Making a purchase after clicking on our links and we may earn a commission which helps us produce more videos and drink more coffee :^) We participate in the Amazon Services LLC Associates Program, which is an affiliate advertising program. It provides a means for us to earn fees by linking to Amazon.com and affiliated sites, so we can make more videos.

Share and Enjoy !

Quinoa Curry Recipe meets Thai Curry

quinoa curry recipe

Try this quinoa curry recipe with a tasty Thai influence. This is a helpful quinoa recipe to make when you’ve got a lot of vegetable odds and ends to out of the fridge.

Quinoa Curry Recipe Ingredients

½ cup QUINOA …check quinoa prices on Amazon
1 15 oz can COCONUT MILK
1 lg ONION (chopped)
1 inch GINGER (thinly sliced)
2 cloves GARLIC (finely chopped)
1 Hot Pepper (chopped, as desired)
1 RED BELL PEPPER (sliced)
¼ cup fresh BASIL (or CILANTRO) (chopped)
2 CARROTS (sliced)
½ small CAULIFLOWER (florets)
1 cup CABBAGE (chopped)
2 Tbsp OLIVE OIL
1 tsp CORIANDER POWDER
½ tsp CUMIN
½ tsp CHILI POWDER
½ tsp TURMERIC
OR, INSTEAD OF THE ABOVE SPICE COMBINATION, USE 1-2 Tbsp OF A PRE-MIXED CURRY
SALT and PEPPER, to taste
…and garnish with finely chopped PEANUTS

quinoa curry recipe

How to make a Quinoa Curry Recipe

  • In a small pot, bring 1/2 cup quinoa and 1 cup water to a boil.
  • Reduce heat and allow to simmer 13-15 minutes until water is absorbed.
  • Remove from heat, fluff with fork, and set aside. Check here for current prices for quinoa on Amazon.
  • In a large skillet, heat olive oil on medium high heat and then add onion, garlic, and hot pepper and saute for 3-4 minutes.
  • Add spices and mix well, and if you are a slave to the spice, don’t be afraid to add a little more.
  • Add a can of coconut milk and stir thoroughly, mixing completely with the spices and onion.
  • Let the coconut milk heat through, and then add ginger, carrot, cauliflower, and bell peppers. Continue stirring, adding salt and pepper to taste.
  • Bring the ingredients to a bubble, then reduce heat, cover, and allow skillet to simmer for 5 minutes.
  • After 5 minutes, uncover and add in the cabbage.
  • Add in the cooked quinoa.
  • Stir and allow another minute or two until veggies are cooked to your liking.
  • Add in fresh basil or cilantro and remove the skillet from heat.
  • Garnish with ground peanuts and serve immediately.

And that’s a quinoa curry recipe with a little taste of Thai thrown in for good measure. Give the recipe a try and let me know what you think, and bon appetit!

For another tasty twist on a Thai recipe, try this Pad Thai Recipe made with spaghetti squash.

pad thai recipe
pad thai recipe with spaghetti noodles

Thanks for Watching our Quinoa Curry Recipe

Click a button below and share the dishes with your friends. You can also follow Chef Buck on Youtube. We appreciate all the kind comments and support, and we’ll see you next time in the kitchen!

If you like what CG and I do, support us on Patreon, or throw us a tip in our Paypal Tip Jar. We’ll happily enjoy a coffee on the road – Thanks! We appreciate all the support, and we’ll see you next time in the kitchen!

We include affiliate links for products on our website. Making a purchase after clicking on our links and we may earn a commission which helps us produce more videos and drink more coffee :^) We participate in the Amazon Services LLC Associates Program, which is an affiliate advertising program. It provides a means for us to earn fees by linking to Amazon.com and affiliated sites, so we can make more videos.

Share and Enjoy !

Best Stuffed Squash Recipe –looks fancy, tastes great!

squash recipe

This stuffed squash recipe is easy to cook, yummy as hell, and looks pretty fancy-pants when you stuff it full of delectable goodies.

Try out the recipe below and let me know what you think. Hope you like it!

Stuffed Squash Recipe Ingredients:

2 ACORN SQUASH (halved, seeds removed)
2 tsp OLIVE OIL
3 cloves GARLIC (minced)
1/2 inch fresh GINGER (minced)
1 CARROT (peeled and chopped)
1 cup GARBANZO BEANS (drained)
1/3 cup RAISINS (or dried currants)
1 tsp ground CUMIN
1/2 tsp ground CINNAMON
[1/4 tsp ground GINGER, if didn’t use fresh]
SALT and freshly GROUND PEPPER, to taste
1 cup BROTH
3/4 cup instant COUSCOUS
1/2 cup SLIVERED ALMONDS (toasted)
2-3 GREEN ONIONS (white and green parts, chopped)
1/2 golden delicious APPLE (cored and chopped)

squash recipe
A squash recipe to impress!.

How to Make Stuffed Squash:

Preheat the oven to 400.
Toast the almonds.
Place the squash halves, cut side down, on a shallow pan with ¼ inch of water. Roast until the squash is easily pierced with a fork, about 30 – 40 minutes.
In a medium saucepan, heat the olive oil over medium heat. Stir in the garlic, ginger, and carrots, and cook 5 minutes. Mix in the garbanzo beans and raisins. Season with cumin, cinnamon, salt, and pepper, and continue stirring for another minute.
Add broth, simmer 5 minutes.
Stir in couscous, cover pot, and turn off heat. Allow couscous to absorb liquid for 5 minutes.
Stir in the almonds, green onions, and apple. Spoon the filling into the roasted squash, mounding generously and serve.
You can freeze leftovers (or make extras). Freeze by mashing the squash on the bottom of the container then adding the couscous mixture on top.
And that’s that.
Give this stuffed squash recipe a try and let me know what you think, and bon appétit!

Also, try this TERRIFIC SPAGHETTI SQUASH RECIPE!
stuffed squash recipe

Thanks for watching and sharing and subscribing, I appreciate it!

Share and Enjoy !


Bánh Mì Hamburger – Best Burger in the World?

banh mi hamburger

What makes a bánh mì taste like a bánh mì? The toppings! This bánh mì hamburger is a fusion of Thai and American styles to create a truly awesome burger experience–one of the best hamburgers I’ve ever eaten!

I whipped up a couple versions of this delicious French/Vietnamese sandwich using ground beef and cha lua (Vietnamese ham). It was fantastic–this combo of ingredients is soooo addictive. Use fresh toppings, and don’t be shy about piling them on. Give it a go and let me know what you think.

Stuff for a Bánh Mì Hamburger

1 lb. ground BEEF …or whatever meat you like
hamburger BUN
DAIKON (shredded)
CARROTS (shredded)
salad CUCUMBER (sliced)
fresh CILANTRO
1/4 cup ONION (minced)
JALAPENO (sliced)
1 cup VINEGAR
1/2 cup WATER
1/3 cup SUGAR
2 Tbsp SOY SAUCE
MAYONNAISE
SALT and PEPPER to taste

banh mi hamburger
Best Burger Bánh Mì

Make a Bánh Mi Burger

First things first, throw together a daikon/carrot pickle. This is a great combo that you can use on all kinds of sandwiches and salads.

Heat a small sauce pan on low heat and add vinegar, water, and sugar. Stir until sugar dissolves, then set aside to chill in the fridge. Cut or shred equal parts carrot and daikon into strings. Place veggies in container and cover with chilled pickling solution. The longer the daikon and carrot pickle, the more flavorful it will be. This pickle will last for a couple of weeks in the fridge.

Cut any variety of salad cucumber into thin, sandwich slices. A salad cucumber has a thin skin that is quite edible with little to no seeds. Thinly slice a jalapeno–or thickly slice–if that’s your thing…be sure to add a few pepper seeds for heat, the cool of the cucumber will balance it out. Wash a bunch af fresh cilantro–a fistful on each burger is a good idea.

Mix 1 lb. of ground beef with minced onion, garlic powder, salt and pepper to taste, and 2-3 Tbsp of soy sauce. Shape into patties and cook in a skillet on med-high heat. I like to use a fatty grind of beef, not too fatty, but not too lean. A juicy burger is best and expensive, lean ground beef will cook up too dry, so don’t be afraid of the “cheap meat” it’s your hamburger’s friend. Cook burgers to doneness desired. Try turning the patties one time only, and don’t punish the patties with the spatula, squeezing away all the juicy goodness into the pan!

Pile everything on a burger bun with creamy mayonnaise and enjoy the bánh mì goodness.

I made bánh mì burgers using ground beef and also thick cuts of cha lua, or Vietnamese ham and both were awesome. I love salmon patties and often eat them on a bun. Next time I think I’ll try a bánh mì variation of a salmon patty burger. Try making your favorite sandwich using traditional bánh mì fixings and see how you like it, I bet you’ll be happy.

Take a look inside a traditional Bánh Mì Sandwich.
bahn mi

For another Banh mi inspired dish, try this healthy Quinoa Salad Recipe – Vietnamese Bánh Mì Style.

Quinoa Salad -- Banh Mi Style
Quinoa Salad — Banh Mi Style

I Hope You Like The Bánh Mì Hamburger

Sign up for our mailing list so you’ll never miss a new recipe. Also click a button below and share the dishes with your friends. You can also follow Chef Buck on Youtube. We appreciate all the kind comments and support, and we’ll see you next time in the kitchen!

If you like what CG and I do, support us on Patreon, or throw us a tip in our Paypal Tip Jar. We’ll happily enjoy a coffee on the road – Thanks! We appreciate all the support, and we’ll see you next time in the kitchen!

We include affiliate links for products on our website. Making a purchase after clicking on our links and we may earn a commission which helps us produce more videos and drink more coffee :^) We participate in the Amazon Services LLC Associates Program, which is an affiliate advertising program. It provides a means for us to earn fees by linking to Amazon.com and affiliated sites, so we can make more videos.

Share and Enjoy !

Vegetarian Chili Recipe EVERYONE Will Love

vegetarian chili

Try this vegetarian chili recipe for folks who don’t like vegetarian chili!

It’s tatsy and easy to make, too; once you’ve chopped up the ingredients, you’re 90% done. Or at least 85% done. Give it a try and let me know what you think.

What You Need For This Vegetarian Chili Recipe

2 15 oz cans CHICK PEAS
2 15 oz cans KIDNEY BEANS
2 BELL PEPPERS (chopped)
1 ONION (chopped)
1 HOT PEPPER (diced)
6 cloves GARLIC (finely chopped)
2 SQUASH (cut into large pieces)
1 ZUCHINNI (cut into large pieces)
2 lg or 4 sm TOMATOES (chopped)
1 28 oz can CRUSHED TOMATOES
3-6 oz TOMATO PASTE
1/2 cup CILANTRO (chopped)
1 heaping Tbsp OREGANO
2 Tbsp OLIVE OIL
1 Tbsp CUMIN
1/2 tsp CAYENNE PEPPER
2 Tbsp CHILI POWDER
SALT and PEPPER, to taste
WATER as needed…add slowly

Vegetarian Chili Recipe
Don’t let the word “vegetarian” keep you from trying this recipe!

How To Make Vegetarian Chili

Heat olive oil in large pot on medium high heat. Add onions, hot pepper, and garlic and saute 4-5 minutes. Add bell peppers and continue sauteing. Add chili powder, cumin, salt, and cayenne pepper. Mix ingredients well. Add beans and continue cooking. Add zuchinni and squash and oregano. Continue cooking 2-3 minutes and then add fresh tomatoes. Add canned crushed tomatoes. Slowly add water–not too much–as the vegetables will begin to release water as they cook. Cover and bring pot to a boil. Reduce heat and stir in the cilantro. Cover and allow to simmer approx. 45 minutes.
That’s it man. If you can make it a day ahead, then you’re lucky–chili aways taste best on the day after! But it’s good right away, too. Top with shredded cheese, or a dollop of sourcream, or a handful of corn chips–or all three–it’s gonna be delicioso!
Give this vegetarian chili recipe a try and I bet you’re gonna love it–and it’s a healthy chili choice, too.
Bon appetit!

For more vegetarian comfort food, try this Gluten-Free Tofu Lasagna.
gluten free tofu lasagna

Thanks for checking this vegetarian chili recipe out! If you liked it, click some of the buttons below and share it with your friends and family, I appreciate it.
–Buck

Share and Enjoy !


Baked Jalapeno Poppers for Party People

jalapeno poppers

Baked jalapeno poppers are quick and cheesy and absolutely delicious. Check out this poppers recipe to see how easy it is to bake picture perfect stuffed jalapenos.

Thanks for watching, give it a go, and let me know what you think.

Ingredients for Baked Jalapeno Poppers

6 large JALAPENO peppers
8oz CREAM CHEESE
1 cup shredded CHEESE
4-5 cloves GARLIC (finely chopped)
about 1/4 cup CILANTRO (chopped)
1 tsp smoked PAPRIKA
1 tsp ONION POWDER
SALT and PEPPER, to taste
(dill, cumin, cayenne, and cajun mix
go well in poppers–experiment
with your favorite seasonings)

jalapenos for poppers
sliced jalapenos for poppers

How to Make Baked Jalapeno Poppers

  • Set cream cheese out from fridge for at least 1/2 hour to allow time to soften.
  • Cut stems from peppers, but not enough to open the back of the pepper entirely, this shallow cut will leave enough of the top of the pepper in place to form a “wall” that will hold the cheese as it bakes.
  • With a spoon, scoop out the seeds and ribs; your jalapeno should look like a little rowboat (without oars or life jacket).
  • In a bowl, thoroughly mix cream cheese, shredded cheese, cilantro, and seasonings together.
  • Spoon cheese mixture into pepper boats. Fill each pepper entirely, but do not overfill–just to the top of each pepper–mounded cheese will only make a mess and disrupt the optimal cheese to pepper ratio.
  • In a skillet, on medium heat, melt 2-3 Tbsp butter.
  • Add garlic and stir 1 minute.
  • Turn off heat and add bread crumbs.
  • Stir until butter is absorbed and garlic is mixed well with bread crumbs. Or, if you don’t want to fool with garlic cloves–just substitute garlic powder.
  • Press peppers cheese side down into the crumb mixture, then turn over and mound extra crumb topping on the peppers.
  • Place peppers on a baking sheet and cook 20-25 minutes at 400 degrees F.
  • When the crumb topping is baked golden, remove and allow peppers to rest 5 minutes.

After that, you can do whatever your heart desires.
Give this baked jalapeno poppers recipe a try and let me know what you think, and bon appetit!
baked jalapeno poppers

If you’re new to home cooking, just get a bunch of spices, pots and pans, and start experimenting with different ingredients and recipes. It’s a healthy hobby that can save a lot of money in the long run. You can check out current prices for Complete Kitchenware Sets on Amazon as well as Complete Starter Spice Kits. Or just go to a thrift store! I’ve found some of my favorite kitchen gear at second-hand stores.

If you liked these baked jalapeno poppers, then try a healthier Baked Chicken Tender Recipe. It’s less mess and a great appetizer or main meal.

chicken tenders


Thanks for Watching our Videos!

Thanks for checking out our jalapeno popper recipe. Sign up for our mailing list so you’ll never miss a new recipe. Also click a button below and share the dishes with your friends. You can also follow Chef Buck on Youtube.

We appreciate all the kind comments and support, and we’ll see you next time in the kitchen!If you like what CG and I do, support us on Patreon, or throw us a tip in our Paypal Tip Jar. We’ll happily enjoy a coffee on the road – Thanks! We appreciate all the support, and we’ll see you next time in the kitchen!

We include affiliate links for products on our website. Making a purchase after clicking on our links and we may earn a commission which helps us produce more videos and drink more coffee :^) We participate in the Amazon Services LLC Associates Program, which is an affiliate advertising program. It provides a means for us to earn fees by linking to Amazon.com and affiliated sites, so we can make more videos.

Share and Enjoy !

Chard Recipe with Sweet Potato

chard

Fresh rainbow or swiss chard greens are similar to beet greens, nutritious and very tasty prepared in this healthy chard recipe. Sweet potatoes are high in fiber and antioxidants and a healthier choice for your blood sugar levels than white potatoes.

Healthy Sweet Potato Chard Recipe:

2 large SWEET POTATOES
1 15 oz can CHICKPEAS, drained (or 1½ cups cooked)
4 cups CHARD (w/ spinach mixed, if desired)
1 15 oz can BROTH
1 15 oz can DICED TOMATOES
1 large ONION (chopped)
6 GARLIC cloves (chopped fine)
1 inch fresh GINGER (minced)
2 Tbsp OLIVE OIL
1 tsp PAPRIKA
1 tsp ground CUMIN
1 Tbsp ground CORIANDER
1 tsp ground TURMERIC
1/2 tsp ground CINNAMON
1/2 tsp SALT
1 tsp ground BLACK PEPPER
— Optional Accompaniments —
COUSCOUS, QUINOA
garnish of CUCUMBER, fresh CILANTRO and LEMON ZEST

chard with sweet potato
Chard and sweet potato make an excellent vegetarian meal.

How to make a Healthy Chard and Sweet Potato Dish

Heat olive oil in a large skillet or pot. Saute the onion for a few minutes minutes then add garlic, ginger, and stalk (if using chard), and saute a few minutes more until onions soften.
Stir in paprika, cumin, coriander, turmeric, cinnamon, salt, and black pepper.
Add diced tomatoes and broth.
Bring to a boil, then add sweet potato and chickpeas. Simmer 25 to 30 minutes, until the potatoes are tender. Stir in roughly chopped chard leaves for last 10 minutes (if using spinach, add leaves last 2 minutes).
Serve over couscous, quinoa, or all on its lonesome with a garnish of cucumber, chopped cilantro, and lemon zest.
It’s especially good over quinoa, and the protein in the quinoa makes this recipe a great main dish for a vegetarian meal.

Check the current price for a Saute Pan on amazon.

chard
Fresh Rainbow Chard is a beautiful, healthy, leafy green.

Health benefits Of Chard

  • Chard is a source of vitamin C, A, and K, potassium, magnesium, fiber and iron.
  • A single serving contains more than 300% of your daily vitamin K needs.
  • Swiss chard is high in antioxidants.
  • It is low in calories.
  • This leafy green belongs to the same family as beets, chard, spinach, and quinoa.
  • helps regulate the blood sugar levels in our body.

And if you want to try another green, what about Beet Greens?

beet greens recipe
Buy beet roots with the greens for two great ingredients.

Thanks for Watching our Chard Recipe Video!

Click a button below and share the dishes with your friends. You can also follow Chef Buck on Youtube. We appreciate all the kind comments and support, and we’ll see you next time in the kitchen!

If you like what CG and I do, support us on Patreon, or throw us a tip in our Paypal Tip Jar. We’ll happily enjoy a coffee on the road – Thanks! We appreciate all the support, and we’ll see you next time in the kitchen!

We include affiliate links for products on our website. Making a purchase after clicking on our links and we may earn a commission which helps us produce more videos and drink more coffee :^) We participate in the Amazon Services LLC Associates Program, which is an affiliate advertising program. It provides a means for us to earn fees by linking to Amazon.com and affiliated sites, so we can make more videos.

Share and Enjoy !

Pork Loin Chop Recipe Perfect Every Time

pork loin chop

Cook a delicious, juicy pork loin chop recipe perfect every time.

Use a lot of onion and garlic – especially garlic – those two ingredients are actually good for you, so why not use a lot? Also, this dish goes well with whatever beer is on sale.

Pork Loin Chop Recipe Ingredients

PORK LOIN CHOP
2 Tbsp OLIVE OIL
1 lg ONION (sliced)
6-8 cloves GARLIC (rough chopped)
fresh ROSEMARY
SALT and PEPPER, to taste

How to Cook a Pork Loin Chop

Season both sides of pork loin chop before cooking–and don’t be timid with the seasoning–it’ll make all the difference! I often use just salt and pepper (black pepper AND cayenne), but experiment with your favorite seasonings, too–every now and then I’ll season up pork chops with ground ginger and saute them with onion and sliced, fresh ginger–it’s so good!

Heat oil in a skillet. Not smoking hot, but pretty damn hot–we want to sear the pork and seal in the flavor. The skillet should be suitable for cooking on the stove top and in the oven. Check current price for a Cast Iron Skillet on Amazon. Place chops in the skillet, and they should sizzle when they hit the pan.

Add fresh rosemary sprigs. Cook chops 3-4 minutes on one side and then turn. This is for chops approx. 1″ thick–adjust cooking times according to the size of the chop you use. Move chops in pan to mix with oil and rosemary.

Add sliced onion and garlic. Cook chop 3-4 minutes on second side, then remove skillet from stove top and slide skillet into oven preheated to 350 degrees F. Cook another 4-5 minutes and return to stove top. Remove chops from skillet and set aside to rest.

Continue cooking onion and garlic with rosemary on medium/low heat to desired doneness.
Top chops with onion and garlic and serve.

And if you’re still in a carnivorous mood, here’s a method to Cook Up A Steak like a restaurant pro.

american kobe top sirloin steak
Cook a thick steak filet on high heat. Sear the outside for awesome taste and color, and then finish to desired doneness in the oven.

Thanks for checking out our pork loin chop recipe, and all of our recipes. Be sure and sign up for our mailing list and never miss a new Chef Buck cooking video, and also click a button below and share the dishes with your friends. We appreciate the kind comments and support, and we’ll see you next time in the kitchen!

Thanks for Watching our Pork Loin Chop Recipe

Click a button below and share the dish with your friends. You can also follow Chef Buck on Youtube. We appreciate all the kind comments and support, and we’ll see you next time in the kitchen!

If you like what CG and I do, support us on Patreon, or throw us a tip in our Paypal Tip Jar. We’ll happily enjoy a coffee on the road – Thanks! We appreciate all the support, and we’ll see you next time in the kitchen!

We include affiliate links for products on our website. Making a purchase after clicking on our links and we may earn a commission which helps us produce more videos and drink more coffee :^) We participate in the Amazon Services LLC Associates Program, which is an affiliate advertising program. It provides a means for us to earn fees by linking to Amazon.com and affiliated sites, so we can make more videos.

Share and Enjoy !

Tofu Lasagna Recipe — Gluten Free Edition

gluten free tofu lasagna

The only thing that sounds worse than a tofu lasagna recipe is a gluten-free tofu lasagna recipe. However, this recipe is actually pretty tasty, and still gluten-free.

Camera Girl whipped up this dish and it was damned tasty. I’m not ready to start driving the tofu train, but I am enjoying the ride.

Tofu Lasagna Recipe Ingredients

The sauce:
1 Tbsp OLIVE OIL
1/2 tsp RED PEPPER FLAKES (crushed)
1/2 large ONION (chopped)
3 cloves GARLIC (chopped)
15 oz can DICED TOMATOES
8 oz can TOMATO SAUCE
1 CARROT (chopped well)
1 stalk CELERY (chopped well)
2 tsp OREGANO
1/2 tsp BASIL
1 BAY LEAF
SALT & PEPPER, to taste
….or substitute 25 oz jar store-bought marinara sauce, but don’t do that :^(
The filling:
1 pkg gluten-free, rice LASAGNA NOODLES (you do not cook them prior to baking)
2 Tbsp extra-virgin OLIVE OIL
1/2 large ONION (chopped)
6 cloves GARLIC (minced)
16 ounce package EXTRA-FIRM, WATER-PACKED TOFU (not silken tofu)
3 cups fresh SPINACH (chopped)
1/2 cup PARMESAN CHEESE (shredded)
1/2 cup part-skim MOZZARELLA CHEESE (shredded)
2 Tbsp Kalamata OLIVES (finely chopped)
2 tsp dried OREGANO
1/2 tsp dried THYME
SALT & PEPPER, to taste

gluten free tofu lasagna

How to Make Tofu Lasagna

First thing, start making the sauce. Now, don’t buy pre-made sauce!–or do…maybe you’re busy, I don’t know.
Next, heat olive oil and red pepper in a saucepan over medium-high heat. Add onion and garlic and saute 2 to 4 minutes. Add carrot and celery and continue sauteing.
Mix in the remaining sauce ingredients and bring to a boil. Reduce heat to low and simmer 30 minutes or longer, until flavors are blended, stirring routinely.

While sauce is simmering, heat oil in a large skillet and saute garlic and onion for lasagna filling. Add tofu and spinach to skillet and stir until spinach wilts and the mixture is heated through (2 to 3 minutes). Transfer skillet contents to a bowl and stir in parmesan, olives, seasonings, and 2/3 of the marinara sauce.

Spread half of the remaining sauce on bottom of 9 x 13 baking pan. If you need a decent oven-safe baking dish, check out some current pricing for a Pyrex dish on Amazon. Next, place a layer of lasagna noodles over sauce–if using the gluten-free rice lasagna, the noodles will not have to be cooked before using. Spread half of the tofu mixture over noodles. Repeat layers of noodle and tofu mixture. Top with remaining marinara sauce and shredded mozzarella cheese.

Cover dish and bake in a 350 degree F oven for about an hour.
Remove from oven and allow to rest 10 minutes.

Give this tofu lasagna recipe a try and let me know what you think, and bon appetit!

If you like thinking outside of the box, try this vegetarian version of pulled pork Jackfruit BBQ Recipe

jackfruit pulled pork
Jackfruit BBQ is great over rice, on a sandwich, or all on its own.

Thanks for checking the recipes out! Click some of the buttons below and share it with your friends and family, I appreciate it.
–Buck

Share and Enjoy !


Baked Falafel Recipe – healthy and delicious

baked falafel

This baked falafel recipe is a tasty and nutritious way to enjoy chickpeas (garbanzo beans).

Falafel is traditionally fried, but a baked falafel can make a tasty, healthy, and easy alternative to the tried and true oil-splatter-fest.

Baked Falafel Recipe Ingredients:
1 15oz can CHICKPEAS
1/4 cup CILANTRO
1/4 cup PARSLEY
1/4 cup ONION
2-3 cloves GARLIC
2 Tbsp OLIVE OIL
CAYENNE PEPPER, to taste
1 tsp CORIANDER
1 tsp CUMIN
1/4 tsp BAKING POWDER
1 Tbsp BREAD CRUMBS (or flour)
1 Tbsp LEMON JUICE
SALT, to taste
— Optional garnishes —
HUMMUS, YOGURT, VEGGIES, PITA SLICES

Drain and rinse 15oz can of chickpeas (garbanzo beans). Combine in a food processor with all ingredients (except 1 Tbsp olive oil and bread crumbs). Mix roughly–pulse–DO NOT puree into a smooth consistency. Place mixture into a bowl and combine with dried bread crumbs (or substitute flour). Form into discs–I like to get 10 out of this recipe because they cook up well and fit nicely into a pita pocket–but make them as big as you like, and adjust the cooking time accordingly.
(Refrigerate 1-2 hours before cooking if you have the time–they’ll bake better, maybe, but it’s not the end of the world if you don’t. I actually prefer putting them in the fridge for a bit, but sometimes I don’t, and the difference is negligible.)
Place on a flat baking sheet and lightly drizzle or brush with olive oil.
Bake at 400 degrees F for 20 minutes, then turn falafel and bake for 10 more minutes to brown each side (a total cooking time of 30 minutes).
Serve with hummus, yogurt, veggies, and pita slices–or stuff inside a pita to make a delicious falafel sandwich.
And that’s it, man. Give this baked falafel recipe a try and let me know what you think and bon appetit!

And if you wanna make your own hummus try this Easy Hummus Recipe.
hummus

Share and Enjoy !


Beef Stew Recipe for a Hearty Meal

beef stew

This beef stew recipe is a classic meat and potato dish, a stick to your ribs meal that hits the spot on a cool day, or any day. A stew is a great way to clean out the fridge, so add any odds or ends you have hanging around. Adjust the seasonings as you like. I tend go do lighter on the seasonings just to keep it mild and meaty, but sometimes I do just the opposite. Many times I’ll add a ¼ cup of BBQ sauce just to jazz things up. There are no rules when it comes to beef stew, so go for it.

This will make you feel like a manly man if you’re a man, and if you’re a woman, you’ll likely take ownership of your own feelings and not need a bowl of food to direct your inner emotional understanding.

What you need for this Beef Stew Recipe

1½ lbs STEW BEEF
¼ cup ALL-PURPOSE FLOUR
1 GREEN BELL PEPPER (chopped)
1 15oz can DICED TOMATOES
2 lg CARROTS (chopped)
2 POTATOES (chopped)
1 lg ONION (sliced)
3-4 cloves GARLIC (sliced)
1 14oz can BROTH (chicken or beef)
CELERY? why not?
3 Tbsp OLIVE OIL
1 tsp CORIANDER
1-2 tsp CUMIN
1 BAY LEAF
1 tsp CHILI POWDER
(optional) ¼ cup of BBQ sauce …so good…give it a try
1 Tbsp BUTTER
SALT and PEPPER, to taste

beef stew

How to make Beef Stew

  • Chop up your veggies, dude.
  • In a bowl, season your stew beef with salt and pepper.
  • Add 1/4 cup flour and toss the meat until coated.
  • In a large pot, heat oil on medium high heat and add beef. Sear beef and turn to cook each side.
  • Remove beef from pot and set aside.
  • Return the pot to the stove and onions and butter.
  • Melt butter and then add garlic and bell pepper.
  • Sauté onions, garlic, and pepper 8-10 minutes.
  • Add cumin and coriander (add chili powder if desired, or mustard powder, cayene pepper, etc.–I tend to go light on the seasonings for a simple flavor).
  • Return meat to the pot and add 1 can of diced tomatoes.
  • Simmer for 5 minutes and then add 1 can of broth (chicken or beef or veg–whatever’s handy and floats your boat).
  • Add carrots, celery, and a bay leaf. Cover and bring to a boil, then reduce heat and simmer for 30 minutes.
  • After 30 minutes, add potatoes. Your potatoes should be cut into big, ping-pong-ball sizes so they don’t cook down to nothing. Add water as needed, just enough to cover your ingredients in the pot–don’t add too much water–we want a nice, thick stew when we’re done.
  • Cover, and continue to simmer for another 45-50 minutes.
  • Give it a taste and adjust seasoning as needed.

Serve stew with a thick slice of buttered bread and enjoy being the King or Queen of the castle.
And that’s it, man. Give this hearty beef stew recipe a try and let me know what you think, and bon appetit!

If you don’t have a big pot, here’s a link to check out current prices for a BIG STEW POT on Amazon.

Thanks for checking out this classic beef stew recipe. For another meaty stew with a spicy twist, try this Chorizo Sausage Stew Recipe. 

Chorizo Sausage recipe
Spicy Chorizo Sausage and Potato Stew

Thanks for Watching our Beef Stew Recipe Video!

Click a button below and share the dishes with your friends. You can also follow Chef Buck on Youtube. We appreciate all the kind comments and support, and we’ll see you next time in the kitchen!

If you like what CG and I do, support us on Patreon, or throw us a tip in our Paypal Tip Jar. We’ll happily enjoy a coffee on the road – Thanks! We appreciate all the support, and we’ll see you next time in the kitchen!

We include affiliate links for products on our website. Making a purchase after clicking on our links and we may earn a commission which helps us produce more videos and drink more coffee :^) We participate in the Amazon Services LLC Associates Program, which is an affiliate advertising program. It provides a means for us to earn fees by linking to Amazon.com and affiliated sites, so we can make more videos.

Share and Enjoy !

Spicy Spanish Spaghetti Squash Recipe w/ Sausage

spaghetti squash spanish

Spaghetti squash tastes great with a little Spanish chorizo thrown into the mix.

When buying, choose a firm spaghetti squash that seems heavy for its size. Avoid squash with overly glossy or with greenish rinds–this may indicate the squash is not quite ripe enough. The stem of a spaghetti squash should be dry. Moisture around the stem may mean the squash is not fresh.

Ingredients:
1 SPAGHETTI SQUASH
4-5oz Spanish style CHORIZO (diced)
1 lg ONION (chopped)
4-5 cloves GARLIC (finely chopped)
1/2 cup PARMESAN or ASIAGO CHEESE (shredded)
1/2 cup CILANTRO (chopped)
2 Tbsp OLIVE OIL
SALT and PEPPER, to taste

Preheat oven to 350 degrees F.
Slice 1 spaghetti squash lengthwise into halves. Remove seeds and place cut side down in a baking pan. Pour a small amout of water in the pan to keep the squash from sticking. Place in the oven and bake for 45 minutes. The squash is ready when a fork will slide easily into the flesh.
In a skillet, heat oil on medium high heat. Add onions and saute a few minutes (add red pepper flakes for heat, if desired). Add garlic and chorizo and continue sauteing. Add salt and pepper to taste. You don’t need a lot of seasoning for this dish–the chorizo will add plenty of flavor. Take a fork and scrape the squash away fromm its skin and into the skillet; the squash will separate easily in spaghetti-like strands…which is why it’s called what it’s called. The squash is already cooked, so this is more about mixing the ingredients than cooking them. Add cilantro and cheese, mix well, and remove the skillet from the heat. It’s a delicious dish, and hearty enough to make a terric main course. Serve with a salad and bread and you’ll have a more than enough.
Enjoy!

And try this delicious vegetarian Mediterranean-Style Spaghetti Squash Recipe

mediterrean spaghetti squash

Share and Enjoy !


Chana Masala Recipe w/ Quinoa -a High-Protein Meal

chana masala quinoa

A Chana masala recipe with a quinoa twist! It’s already a great tasting chickpea curry, and adding quinoa into the mix will turn this Indian favorite into a complete protein. This dish is easy to prepare and a perfect vegetarian entree.

Ingredients:
15oz can CHICKPEAS
15oz can DICED TOMATOES
1 lg ONION (chopped)
½ cup QUINOA
1 HOT PEPPER (finely chopped)
4-5 cloves GARLIC (finely chopped)
½ cup CILANTRO (chopped)
1 tsp CUMIN SEEDS
1 tsp CUMIN
1 tsp CORIANDER
½ tsp CHILI POWDER
½ tsp TURMERIC
1 tsp GARAM MASALA
2 Tbsp OLIVE OIL
1/8 tsp ASAFOETIDA (optional–really OPTIONAL!!!–don’t NOT make this dish because you don’t have this ingredient.)
SALT and PEPPER, to taste
1½ cups WATER
Check out current prices for Indian Spices on Amazon.

In a skillet, heat your oil on med. high heat. Add cumin seeds and asafoetida–the asoafoetida (also called “hing”) is OPTIONAL. Stir until seeds brown and crack–this will happen really fast, so don’t walk away from the skillet. Add garlic and continue stirring. Add chopped onions and hot pepper. Saute ingredients for 3-5 minutes.
Add turmeric, coriander, cumin, and chili powder. Stir thoroughly into onion mix.
Add quinoa and diced tomatoes.
Stir and allow skillet to come to a simmer.
Add chickpeas (rinsed and drained), salt to taste, and 1½ cups water. Bring skillet to a boil, then reduce heat to a simmer, cover and let simmer for 15 minutes (without stirring).
After the 15 minutes, stir in the garam masala. Using a fork, smash half the chickpeas in the skillet–this will add a nice texture to the dish.
Stir in the chopped cilantro.
And that’s it. Chana Masala with a quinoa twist.
Hope you like it.

And for another tasty Indian inspired dish, try this Eggplant Curry Recipe.

baingan bharta eggplant

Share and Enjoy !


Best General Tso’s Chicken Recipe

general tsos chicken

General Tso’s Chicken is a delicious dish you’ll find at most Chinese restaurants–and you can make the very same dish in your own kitchen at home.

The chicken in this recipe is baked instead of deep fried, which is a little healthier and a lot less messier, if you’re into that kinda thing. Give this recipe a try and let me know what you think.

Ingredients for General Tsos Chicken

3 cups crushed CORN FLAKES (or panko crumbs)
1 1/2 lbs boneless, skinless CHICKEN
1/2 cup ALL-PURPOSE FLOUR
2 EGGS, whisked
2 tsp SESAME OIL
5-6 GARLIC cloves (minced)
1 Tbsp GINGER (minced)
1/4 tsp RED PEPPER FLAKES
1/3 cup SOY SAUCE
1/4 cup APRICOT JAM
3 Tbsp HOISIN SAUCE (check current price for hoisin sauce on Amazon)
2 Tbsp CORNSTARCH
1 Tbsp BALSAMIC VINEGAR
1 2/3 cups WATER
SESAME SEEDS and GREEN ONION for garnish

How to make General Tso’s Chicken

Toast sesame seeds (make extra, ’cause they’re a great addition to all kinds of dishes).
You’ll need about 1 1/2 pounds of chicken cut into roughly 1″ pieces–dark or white, whichever you prefer. We’re gonna bread and bake the chicken ’cause it’s healthier and less messy than frying.

Set up a breading station:
In a bowl, season 1 cup of flour with salt and pepper.
In another bowl, whip 2 eggs.
And in a third bowl set out your breading–use panko flakes or crushed cereal.
Coat each piece of chicken in flour, then egg, and then roll and coat with bread crumbs
and arrange on a greased baking sheet.

When all the chicken is breaded and arranged on the pan, coat the top lightly with an oil spray. Slide the chicken into an oven heated at 400 degrees F and allow to bake 20 minutes. When the chicken is golden and crispy, remove from oven and set aside.

general tso chicken

In a bowl, combine soy sauce, hoisin sauce, vinegar, cornstarch and water. Mix well.

Heat sesame oil in a skillet on medium high heat. Add pepper flakes, garlic and ginger. Saute for 2 minutes and then add sauce. Constantly stirring, allow the sauce to come to a simmer. When the sauce begins to bubble, continue stirring a few minutes until the sauce thickens into a syrupy consistency–this will happen quite quickly.

Add the chicken and stir, tossing the chicken until it is well coated with sauce.
Transfer chicken and sauce to a serving dish and garnish with toasted sesame seeds and chopped green onion. Serve with rice or noodles.

If you’re just getting into home cooking, you can check out current pricing for a Complete Starter Spice Set on Amazon.

For another Asian inspired chicken dish, try a Japanese style Teriyaki Chicken recipe.

chicken teriyaki recipe
teriyaki chicken recipe

Thanks for watching. Give this General Tso’s Chicken recipe a try and let me know what you think, if you like it, click a button and share it with your friends.

Thanks for Watching our Chinese Chicken Recipe

Sign up for our mailing list so you’ll never miss a new recipe. Also click a button below and share the dishes with your friends. You can also follow Chef Buck on Youtube. We appreciate all the kind comments and support, and we’ll see you next time in the kitchen!

If you like what CG and I do, support us on Patreon, or throw us a tip in our Paypal Tip Jar. We’ll happily enjoy a coffee on the road – Thanks! We appreciate all the support, and we’ll see you next time in the kitchen!

We include affiliate links for products on our website. Making a purchase after clicking on our links and we may earn a commission which helps us produce more videos and drink more coffee :^) We participate in the Amazon Services LLC Associates Program, which is an affiliate advertising program. It provides a means for us to earn fees by linking to Amazon.com and affiliated sites, so we can make more videos.

Share and Enjoy !

Salmon Cake Recipe Quick and Easy

salmon cakes

Can you get a fancy-pants dinner out of a can of cheap pink salmon? Sure you can! This salmon cake recipe is easy to make and ready any time you like by using convenient canned salmon from the cupboard. Mmmmmm, I likes me some salmon cakes!

Salmon Cake Recipe Ingredients:
Patties:
1 can PINK SALMON (or red salmon, if you’re feeling luxurious)
1 large EGG
1/4 cup ONION (diced)
1/4 cup RED PEPPER (diced)
BLACK PEPPER, to taste
CREOLE PEPPER, to taste
GARLIC POWDER, to taste

Sauce (optional):
CREOLE MUSTARD (or any kind of fancy-pants mustard…check online prices)
YOGURT (plain Greek-style)
DILL WEED
LEMON JUICE (optional)

For the cakes, mix ingredients and shape into cakes. Fry in oil –I usually use extra light olive oil, but any will do. Cook on medium heat 4-5 minutes each side until golden brown).  Allow the cakes to cook well on one side before you turn, this will keep them from falling apart.
If you are making the sauce, mix ingredients to taste. I tend to go a little ‘mustardy’. Also, you might try adding a little lemon juice to the sauce.
Give this salmon cake recipe a try and let me know what you think. Check current prices for canned salmon online.

And for another tasty, nutrition-packed fish recipe, try Mackerel Stew.

fish stew recipe
canned mackerel stew

Thanks for checking out our salmon cake recipe, and all of our recipes. Be sure and sign up for our mailing list and never miss a new Chef Buck cooking video, and also click a button below and share the dishes with your friends. We appreciate all the kind comments and support, and we’ll see you next time in the kitchen!

Thanks for watching our recipe videos!

We include affiliate links for products on our website, so if you make a purchase after clicking on our links, we may earn a commission which helps us produce more videos and drink more coffee :^)                                                                                                We participate in the Amazon Services LLC Associates Program, which is an affiliate advertising program providing a means for us to earn fees by linking to Amazon.com and affiliated sites, so we can make more videos.

Share and Enjoy !

Maki Sushi – Step-by-Step How to Make Sushi

sushi

Maki sushi is my favorite sushi (makizushi), or sushi wrapped in dried seaweed (nori). Check out the video for step-by-step instructions on how to make sushi quick and easy.

Maki sushi is one of the healthiest and most entertaining foods you can put on the table…and pretty easy to prepare. You will need a SUSHI ROLLER to easily make this recipe. They are available at many supermarkets, most health food stores and every Asian market. You can get one for around $2 to $4.

Maki Sushi Ingredients:
6 to 7 NORI (dried seaweed sheets)
2 cups RICE (do not use long grain rice! Japanese sushi rice can be used, but I prefer short-grain brown rice.)
1/2 cup VINEGAR (apple cider or rice)
SALT (to taste, I use very little)
Assortment of SLICED VEGETABLES, FISH, etc
Feel free to experiment with your choices. I generally use a mix of the following: AVOCADO, CUCUMBER, CARROT, GREEN ONIONS, RED PEPPERS, SALMON (I buy 3oz pre-packaged smoked salmon for convenience, since I use so little). I’ve also used SHRIMP, CRAB, CREAM CHEESE and ASPARAGUS (lightly steamed). Mix and match and find combos you enjoy. I find that I almost always use avocado.
Desired condiments e.g. SOY SAUCE, WASABI, PICKED GINGER SLICES
Optional: I like to sprinkle TOASTED SESAME SEEDS over my finished sushi—it adds a great taste and looks nice, too.

Prepare rice according to directions. Remove from stove and add vinegar. Gently mix and set aside to cool. Slice desired ingredients for filling. For a full dinner for two, I generally use 6-7 nori. Place nori shiny side down on your sushi roller. When rice is cool, spread desired amount over nori. I like heaps of rice in my maki sushi, approx. ¾ to1 cup. Spread so that the rice covers the nori leaving ¼ inch on the two sides and on the end closest to you. Leave 1 inch open on the far end of the seaweed sheet. Pull the nori flush with the back end of the roller. Lay the sliced fillings across the rice and, holding the ingredients in check with your fingers, use the roller to roll the seaweed over the ingredients and then press gently along the top and sides. The seaweed should form a nice wrap around the ingredients. Pull the seaweed roll to the back of the roller and roll forward once more until the nori is shaped entirely around the fillings. Use a sharp knife to slice into sushi, and wipe the knife frequently for a cleaner cut. I usually get 6-7 pieces per roll.
After I plate my sushi, I sprinkle lightly with toasted sesame seeds (optional) and serve with wasabi, soy sauce, plum sauce, and pickled ginger slices.
It’s an amazingly easy dish to prepare and a great way to impress a date or get yourself out of the doghouse (if you’re at that stage in your relationship). It kicks ass at parties and your friends will think you are more hip than you probably are –but only if you USE CHOPSTICKS!!!

For a great maki sushi recipe side, try a Calamari Salad Recipe.
calamari salad squid

Share and Enjoy !


Fish Stew Recipe with Canned Mackerel

fish stew recipe

Here’s a great fish stew recipe idea: ever wonder what to do with those cheap cans of mackerel you see on the grocery aisle shoved in between the canned tuna and salmon? It can be used to create a delicious, nutritious seafood stew!

Fish Stew Recipe Ingredients

2 cans MACKEREL (check current canned mackerel prices on Amazon)
2 medium ONIONS (chopped)
1 to 2 cups CELERY (chopped)
32 oz. STOCK (chicken or veg—or use 1/2 stock 1/2 water
1 can TOMATO PASTE (I use only 2/3 can)
1-2 Tbsp LEMON JUICE
2 Tbsp OLIVE OIL
1 Tbsp PARSLEY (chopped)
1 tsp RED PEPPER FLAKES
SALT & PEPPER (to taste)
Optional: RED PEPPER (cajun seasoning, to taste) DRIED JALAPENOS (to taste)

fish stew recipe

How to make this Fish Stew Recipe

  • Drain mackerel, break fish apart, and set aside in a bowl(I remove some of the less attractive bits of skin and bone, but I’m not militant about it).
  • Heat olive oil in a pot and sauté onions and celery for 2-3 minutes.
  • Add the tomato paste and stock. A full can of tomato paste can be used, but I usually just use 2/3 of the can (it all depends on how tomato-ee you like it). Use two cans of stock (32 oz) or just use 1 can stock and 1 can water.
  • Bring pot to a boil and cook for 2 minutes, stirring as needed.
  • Add fish and return pot to boil, then reduce heat to low and simmer for 10 minutes.
  • While simmering, add lemon juice and seasonings. Stir occasionally and add water if needed. Serve over rice or with crackers or bread, or all on its lonesome.

Cook Mackerel Stew in Real-Time

If you want to watch me cooking up a version of this fish stew in real time, check out the longer video below.

Give this awesome canned mackerel fish stew recipe a try and let me know what you think…and bon appétit!

And if canned mackerel isn’t your thing, take a look at this Seafood Stew Recipe.

seafood stew

Thanks For Watching Our Recipe Videos!

Thanks for checking out our fish stew recipe, and all of our recipes. Be sure and sign up for our mailing list so you’ll never miss a new recipe. Also click a button below and share the dishes with your friends. You can also follow Chef Buck on Youtube. We appreciate all the kind comments and support, and we’ll see you next time in the kitchen!

If you like what CG and I do, you can also support us on Patreon, or throw us a tip in our Paypal Tip Jar. We’ll happily enjoy a coffee on the road – Thanks! We appreciate all the support, and we’ll see you next time in the kitchen!

We include affiliate links for products on our website. So, if you make a purchase after clicking on our links, we may earn a commission which helps us produce more videos and drink more coffee :^) We participate in the Amazon Services LLC Associates Program, which is an affiliate advertising program. It provides a means for us to earn fees by linking to Amazon.com and affiliated sites, so we can make more videos.

Share and Enjoy !

Pizza Sauce and quick flatbread pizza recipe

pita pizza

You can make a delicious pita pizza with homemade pizza sauce super fast. Flatbread pizza is cheap, and healthier than store-bought pizza, and Movie Night wouldn’t be Movie Night without it. It’s easy to make and easy to clean up and tastes great, so that’s perfect, right?

Pizza Sauce Recipe Ingredients:

1 15oz can TOMATO SAUCE
2-3 Tbsp dried OREGANO
1 Tbsp dried BASIL
2 tsp dried THYME
2 tsp GARLIC POWDER (more if you love garlic)
SALT and PEPPER to taste (also, a little dried jalapeño can give the sauce a nice kick)

–The sauce you make at home will be tastier than the sauce you buy in the jar at the store; you can make it your own, add the herbs you like, as much or as little as you like.

PITA BREAD – Any kind of pita or flatbread will do, we use whole wheat. Rubbing olive oil around the edges of the pita will make a tasty edge (I like it that way!), but it isn’t necessary to do so. One pita makes a nice personal pizza size. For two people, we usually make 4 or 5 assorted pita pizzas, cut them in half, and have a mini-buffet.

TOPPINGS?…there’s no end to the possibilities. Pita pizzas are a great way to experiment with topping ideas.

Pour tomato sauce into a bowl and add oregano, thyme, basil, and garlic powder (salt and pepper can be added if desired…but check can to see if tomato sauce is already salted). For sauce with a kick, add some dried jalapeño. Mix ingredients well.

Rub olive oil around the edges of your pita for a tasty crust (optional). Spread sauce over pitas and then add toppings. It’s usually a good idea to start with a little cheese on the bottom and end with more cheese on the top –what goes in between is up to you (leftovers in the fridge often make great pizza toppings! Ever have a meatloaf pizza?).

Bake at 350 degrees for 15 to 20 minutes (this is a good cooking time if you like to pile on the toppings…for faster cooking, bake at 400 degrees for 10 minutes…it’s quicker, but quicker isn’t always better)

buffalo chicken pizza
buffalo chicken pizza recipe

Pizza Topping Ideas:

Chef Buck loves –
SPINACH (this topping should go on first, so it doesn’t dry out), FETA CHEESE, TOMATO SLICES, MOZARELLA CHEESE, and extra HERB topping.
Camera Girl loves –
MOZZARELLA CHEESE, RED PEPPERS, ARTICHOKES, PEPPERONI, and FAKE SAUSAGE.

ARTICHOKE is a great topping (just keep a can in the cabinet). SHRIMP makes a nice change-up. And trying different CHEESES is always a good idea. HAVARTI and RICOTTA are two cheeses we use often—they can bring a fresh taste to the PEPPERONI blues.
Keep a jar of PIZZA SAUCE in the fridge and some PITAS in the freezer and dinner is always only moments away.

Give this simple pizza sauce and pita pizza idea a try and let me know what you think, and bon appétit!
If you’re new to home cooking, get a bunch of spices, pots and pans, and start experimenting with different recipes. It’s a healthy hobby that will save you money in the long run. Check out current prices for Complete Kitchenware Sets on Amazon as well as Complete Starter Spice Kits. Or go to a thrift store! I’ve found some of my favorite kitchen gear at second-hand stores.

For another tasty movie night type dish, try this Ultimate Nachos Supreme Recipe.

best nachos recipe
This is a fantastic Nachos Supreme dish, and a giant pizza pan makes a great dish for cooking and serving.

Thanks for checking out the recipes, sharing, and commenting, I appreciate it!
–Chef Buck

Share and Enjoy !


Easy Shrimp Linguine Recipe

shrimp linguine

A quick and tasty shrimp pasta dinner recipe for two!

Shrimp LinguineIngredients:

1 pound SHRIMP (20-30, peeled and deveined)
8oz LINGUINE (about ½ box)
1-2 cups BROCCOLI florets (or substitute ½ cup PARSLEY if you’re not into broccoli)
6-8 GARLIC cloves (minced)
½ large ONION (finely chopped)
½ stick BUTTER
3-5 Tbsp OLIVE OIL
SALT to taste
(add OREGANO or ITALIAN HERBS if desired–I like just the extra garlicky taste)
serve with PARMESAN CHEESE

Shrimp Linguine Directions

Prep your ingredients first, then get your pasta cooking.  I like to add a Tbsp of olive oil to my pasta water as well as a 2-4 tsp salt.  Cook the pasta according to the package directions and whatever firmness you desire.  I’m using whole grain wheat linguine for this recipe, which takes about 12 minutes to cook–a bit longer than most linguine.  The cooking time for the skillet ingredients should be around 7-9 minutes, so try to time your pasta to finish with the shrimp–overcooked shrimp is rubbery and overcooked pasta is mushy, so timing is everything!!!

In your skillet, heat 2 Tbsp olive oil and 1/4 butter on medium heat.  When hot, add garlic and cook for 1 minute.  Add onions and continue to cook a couple more minutes.  Add broccoli florets, and add more butter and oil as needed.  If you don’t want to add broccoli, substitute 1/2 cup chopped parsley instead.  Sauté  florets, garlic, and onions another 2 minutes and then add shrimp.  Throw in some Italian herbs if you want to get all herby.

The shrimp will be done when they turn pink–don’t overcook or they’ll turn rubbery!!  Remove the cooked pasta from water and add directly to the skillet.  Don’t drain or strain the pasta!!–you’re just throwing away good flavor.  Add the remainder of your original 1/2 stick butter.  Mix pasta and ingredients.  Add some pasta water to the mix (about 1/2 cup or so).  I find that the salt in the water and butter is plenty for me, but salt a little more if desired.  Remove the skillet from the heat and serve.  Fresh Parmesan cheese and toasted garlic bread are nice accompaniments!!  Maybe some wine?
Bon appétit!

Share and Enjoy !


Cornish Hen Recipe – Easy One-Pot Meal

cornish game hen

Give this Cornish hen recipe a try. A Cornish hen is a classy bird, and a complete meal for two when cooked up with potatoes and carrots.

What you need for this Cornish Hen Recipe

1 CORNISH HEN …for this recipe I’m using a 1.5 lb. size hen, adjust cooking time for a smaller bird
2 POTATOES cut into 1 inch pieces
4 CARROTS chopped into ½-1 inch pieces
1 ONION large onion, cut into large pieces
1 GARLIC BULB chopped
4-5 sprigs ROSEMARY finely chopped
¼ cup BUTTER melted–substitute olive oil, if desired
SALT and PEPPER to taste
This is a great dish to load up with extra seasonings…try CUMIN, SEASONING SALT, CAYENNE PEPPER, CAJUN SEASONINGS, etc.

How to Cook Cornish Hen

  • If you’re using a frozen hen, allow the bird to thaw overnight in the fridge.
  • Cut hen through the breast and into two halves.
  • Rub both sides of hen with salt, pepper, garlic, and rosemary.
  • Lightly oil a baking dish and place the hen halves skin side up. Check current prices for a baking dish on Amazon.
  • Cover hens with potatoes and carrot and additional seasoning.
  • Top with chopped onion and melted butter and cover dish.
  • Cook in 400 degree F oven for 30 minutes.
  • Remove dish, mix ingredients, cover and return to the oven for 15 minutes more.
  • Remove dish and uncover. Mix ingredients, place hen halves on top of vegetables and return to the oven and cook for an additional 10 minutes.
  • At this point (dish has cooked 55 minutes total) I like to turn on the broiler and broil each side of the hen for 2-3 minutes, making the skin crispy and tasty. Keep an eye on the hens and do not overbroil!
  • Remove the dish from the oven and serve. I like to rub dried oregano between my palms and coat the plate and serve with sliced tomatoes.

For another poultry dish, try this crispy Baked Chicken Recipe that you’ll love more than fried chicken.
baked curry chicken

Thanks for checking out our Cornish hen recipe, and all of our recipes. Be sure and sign up for our mailing list and never miss a new Chef Buck cooking video, and also click a button below and share the dishes with your friends. We appreciate all the kind comments and support, and we’ll see you next time in the kitchen!
–Chef Buck

Thanks for watching our recipe videos!

We include affiliate links for products on our website, so if you make a purchase after clicking on our links, we may earn a commission which helps us produce more videos and drink more coffee :^) We participate in the Amazon Services LLC Associates Program, which is an affiliate advertising program providing a means for us to earn fees by linking to Amazon.com and affiliated sites, so we can make more videos.

Share and Enjoy !

Sausage Tomato Pie Recipe

sausage tomato pie

This sausage tomato pie might look like a pizza, but it’s definitely not a pizza! The crust has a flaky pastry quality and the onions act the part of a pie filling. This is a rich dish, bordering on decadent; it’s super filling and super flavorful. For a meatless alternative, try faux sausage—or no sausage at all—this dish works well just as a Tomato Pie.

Ingredients:
3 large ONIONS
2 medium TOMATOES
8-10 oz SAUSAGE
8 oz MOZZARELLA CHEESE (shredded)
5-7 GARLIC CLOVES (finely chopped)
2 cups ALL PURPOSE FLOUR
¾ stick BUTTER (soft)
DIJON MUSTARD
¼ VEGETABLE OIL (plus oil for sauteing)
2 Tbsp OLIVE OIL
2 Tbsp TOMATO SAUCE
2 Tbsp PARSLEY (chopped)
CHILI POWDER, CUMIN, SALT (for sausage seasoning, to taste)
DRIED ITALIAN HERBS (thyme, oregano, basil, etc.)

Heat 2 Tbsp oil in a skillet and add GARLIC. Sauté for 1 minute and add SAUSAGE. Continue cooking, adding CHILI POWDER, CUMIN, and SALT for seasoning. Cook meat to completion and set aside in a bowl. Slice 3 large ONIONS into strips. Add oil to pan and add onions. Cook onions down until soft and caramelized; this may take some time, but the more completely the onions are cooked down, the tastier the final dish will be! Remove onions from heat and set aside.

In a bowl, combine 2 cups ALL PURPOSE FLOUR and ¾ stick softened BUTTER. Mix butter into flour thoroughly. Add ¼ cup VEGETABLE OIL and continue to mix. Add ½ cup Water. Mix until the dough is smooth. Spoon onto ungreased pizza pan and spread (use the spoon!). Spread evenly into the size of a large pizza and leave a raised edge for the crust. Place in pre-heated oven and cook at 375 F for 10 minutes. Remove dough from oven and top with DIJON MUSTARD. Spread a layer of mustard evenly and cover dough completely except for the outer edge—just like spreading mustard on a sandwich. Add cooked onions and spread evenly over the mustard. Top with SEASONED MEAT and MOZZARELLA CHEESE. Top dish with sliced TOMATOES and sprinkle liberally with dried ITALIAN HERBS: oregano, thyme, basil, etc..

In a small bowl, combine 2 Tbsp OLIVE OIL, 2 Tbsp TOMATO SAUCE, and 1-2 Tbsp fresh chopped PARSLEY. Brush mixture over each tomato slice. Return pie to the oven and continue to bake at 375 F for 30-40 minutes until edge of crust is brown.

Bon appétit!

Share and Enjoy !


Fried Shrimp Recipe with spicy tempura

spicy fried shrimp

I love a tasty fried shrimp recipe, and “tempura” is just a fancy pants word for “fried”. This dish is a knock-off of a dish I love to order at a Chinese restaurant when I’m down in Tampa, but since I don’t live in Tampa, I had to figure out how to make this fried shrimp recipe for myself—and I’ve done it!

The key is cilantro, and lots of it—also lots of garlic and a little hot pepper, too! Be sure to use a non-stick pan to cook up the spicy pepper mix, otherwise you’ll be setting yourself up for a headache and burned garlic!

What you need for Spicy Fried Shrimp

1 lb SHRIMP (peeled and deveined, tail on)
1 bunch CILANTRO (1 to 2 cups chopped)
10-12 cloves GARLIC (chopped)
1 or 2 hot PEPPERS (chopped)
1/2 cup GREEN ONION (chopped)
1 tsp RED PEPPER FLAKES (or two tsp!—optional)
1 cup ALL PURPOSE FLOUR
1 EGG
1 cup ice-cold WATER
frying OIL
SALT (to taste)

How to make Spicy Fried Shrimp

  • Chop up 1 bunch of cilantro, stems AND leaves.
  • Chop 2 green onions and dice peppers, I like to use 2 green chili peppers, but use whatever peppers you like depending on how much heat you want in the dish.
  • Chop 10-12 cloves of garlic.
  • Heat a non-stick skillet with 2 Tbsp of oil—definitely use a non-stick skillet! If you don’t have a decent skillet, here’s a link to check out some current skillet prices on Amazon.
  • Add peppers to skillet and allow to cook 1 minute, then add garlic and red pepper flakes (adjust pepper flakes to taste).
  • Cook for 1 minute and then add green onions. Be sure to keep ingredients stirring, reduce heat as necessary to prevent garlic from burning.
  • As garlic browns, add the cilantro and continue to stir ingredients, cooking out the moisture. It’s okay if the garlic browns well, as long as it’s not burned; the dryer the ingredients get the better. Cook the ingredients down and then remove the skillet from the heat and set aside.
  • Heat up the oil for the shrimp.
  • While the oil heats, prepare the tempura batter. It’s best not to prepare the batter ahead of time. In a bowl, beat 1 egg, add 1 cup of ice-cold water, then add 1 cup of all purpose flour.
  • Mix together into a thin batter, but don’t over mix—it’s okay if there are some lumps.
  • Test the batter in the frying oil; the batter will sizzle and float if it is ready.
  • Use peeled and deveined shrimp with the tail still attached—the tail makes a perfect handle.
  • Dip shrimp in batter and then shake off the excess.
  • Lay shrimp in the hot oil and cook 3-4 minutes, turning once. DO NOT cook too many shrimp at the same time because they will stick together and not crisp and brown evenly.
  • When the shrimp are golden, remove from oil and drain on a paper towel (the 1st batch I put into the pepper mix to drain).
  • When all the shrimp are fried, add them to the pepper mix and return the skillet to the burner on low heat.
  • Salt to taste and toss the shrimp GENTLY and thoroughly with the spice mix.
  • Remove from heat and serve immediately.

I like to serve this dish with sticky rice and a sautéed green, something like cabbage or bok choy. Give fried shrimp recipe a try a let me know what you think, and bon appétit!

If you want another tasty shrimp idea, one of my favorite is this fancy Shrimp Pancake Recipe.

shrimp pancake
Korean style Haemul Pajeon with shrimp

Thanks for checking out our shrimp recipe, and all of our recipes. Be sure and sign up for our mailing list and never miss a new Chef Buck cooking video, and also click a button below and share the dishes with your friends. We appreciate all the kind comments and support, and we’ll see you next time in the kitchen!
–Chef Buck

Thanks for watching our recipe videos!

We include affiliate links for products on our website, so if you make a purchase after clicking on our links, we may earn a commission which helps us produce more videos and drink more coffee :^) We participate in the Amazon Services LLC Associates Program, which is an affiliate advertising program providing a means for us to earn fees by linking to Amazon.com and affiliated sites, so we can make more videos.

Share and Enjoy !

Chicken Quiche Recipe with a Perfect Crust

chicken pecan quiche

Camera Girl is cooking up one of my favorites, a pecan chicken quiche recipe! It’s super easy and super delicious. Definitely take the time to make this crust, because it’s not much time at all, and well worth the effort! This is a great way to use leftover chicken (for best results, avoid canned chicken with this recipe—why would you want to do that to yourself?))

What you need for this Chicken Quiche Recipe

Quiche crust:
1 cup ALL PURPOSE FLOUR
1 cup CHEDDAR CHEESE (shredded)
3/4 cup PECANS (chopped)
1/2 tsp SALT
1/4 tsp PAPRIKA
1/3 cup OIL

Quiche filling:
1 cup SOUR CREAM
1/2 cup CHICKEN BROTH
1/4 cup MAYONNAISE
3 Lg EGGS (lightly beaten)
2 cups CHICKEN (cooked, chopped)
1/2 cup CHEDDAR CHEESE (shredded)
1/4 cup ONION (minced)
1/4 tsp DILLWEED (dried)
HOT SAUCE (to taste)
1/4 cup PECANS (chopped)

How to Make Chicken-Pecan Quiche

Make the crust first. Combine all the dry ingredients and mix well. Add vegetable oil and mix thoroughly. Press into a 9” pie plate and bake at 350 degrees Fahrenheit for 12 minutes. Check current prices for pie plates on Amazon.

After baking, remove from the oven and allow the crust to cool completely. While the crust takes its sweet time, whip up the quiche filling.

In a bowl, combine the sour cream, mayonnaise, chicken broth, and eggs and mix together until smooth. Add the chicken (already cooked and chopped well). This is a great way to use leftover chicken, or simply cook up and chop 3-4 thighs, which is what we usually do.

Add shredded cheese, dried dill weed, minced onion, and hot sauce to taste. Mix well and pour into cooled pie crust. Top with chopped pecans and bake at 350 degrees F for 50-60 minutes. The pie will set and be golden brown when finished. Remove from heat and allow to rest 10-15 minutes before serving.

Give this awesome pecan chicken quiche recipe a try and let me know what you think, and bon appétit!

For another baked bird in the oven, try this Turkey Pot Pie Recipe.

turkey pot pie casserole

Thanks for checking out the quiche recipe. Be sure and sign up for our mailing list so you’ll never miss a Chef Buck cooking video, and click a button below and share the dishes with your friends. We appreciate all the kind comments and support, and we’ll see you next time in the kitchen!
–Chef Buck

Share and Enjoy !


Linguine with Clam Sauce Recipe – White Sauce

linguine with clam sauce

Throw together a quick linguine with clam sauce recipe. This dish is super flavorful and very easy to prepare. Give it a try–everyone will love you!

Linguine with White Clam Sauce Ingredients

1 pkg LINGUINE (about 13oz)
3 cans chopped CLAMS (approx. 20 oz., drain and reserve liquid)
½ stick BUTTER
½ cup OLIVE OIL
½ cup ONIONS (chopped)
4-6 cloves GARLIC (finely chopped)
1 cup WHITE WINE (dry, not sweet)
½ qt CHICKEN BROTH
RED PEPPER FLAKES to taste (2-3 tsp is what I use)
1 tsp dried OREGANO
1 tsp BLACK PEPPER
1 Tbsp PARSLEY (fresh chopped or dried)
¾ to 1 cup PARMESAN CHEESE (grated)

linguine with clam sauce

How to make Linguine with Clam Sauce

  • Open canned clams and separate liquid from clams. Check current prices for canned chopped clams on Amazon.
  • Heat a large skillet on medium and begin melting butter, add olive oil.
  • When all is melted, add onion and garlic. Cook until garlic begins to color, mind cooking temperature to avoid burning (lower temp if needed).
  • Add white wine and simmer 5-10 minutes to reduce.
  • Add chicken broth, clam juice reserved from cans (an additional 8oz bottle of clam juice can also be added, if extra clamminess is desired). Add red pepper flakes, oregano, parsley, and black pepper.
  • Reduce heat to low and simmer for 20 minutes.
  • While sauce is simmering, prepare linguine according to package directions.
  • After sauce has cooked for 20 minutes, stir in clams and turn off heat.
  • Add linguine noodles to sauce (don’t drain and rinse noodles, just take them right from the pot and mix them with the sauce).
  • Stir in the grated Parmesan cheese and serve. If desired, top with fresh parsley to add a little color.

And toast up some garlic bread, too.
Give this linguine with clam sauce recipe a try and let me know what you think, and bon appétit!

For another seafood dish, checkout this delicious Seafood Stew Recipe.

seafood stew

Thanks for Watching our Videos!

Thanks for checking out this puttanesca recipe, and all of our recipes. Sign up for our mailing list so you’ll never miss a new recipe. Also click a button below and share the dishes with your friends. You can also follow Chef Buck on Youtube. We appreciate all the kind comments and support, and we’ll see you next time in the kitchen!

If you like what CG and I do, support us on Patreon, or throw us a tip in our Paypal Tip Jar. We’ll happily enjoy a coffee on the road – Thanks! We appreciate all the support, and we’ll see you next time in the kitchen!

We include affiliate links for products on our website. Making a purchase after clicking on our links and we may earn a commission which helps us produce more videos and drink more coffee :^) We participate in the Amazon Services LLC Associates Program, which is an affiliate advertising program. It provides a means for us to earn fees by linking to Amazon.com and affiliated sites, so we can make more videos.

Share and Enjoy !

Best Seafood Pancake Recipe — Korean Haemul Pajeon

seafood pancake dipping sauce

Try out this seafood pancake recipe, haemul pajeon! It’s a tasty Korean twist on a pancake, and pretty damn tasty. A pancake for dinner is a good idea as long as it’s a cool pancake, and seafood is always a good idea.

What You Need For This Seafood Pancake Recipe

Pancake:
6 oz SEAFOOD (shrimp, scallops, squid, etc.)
5-6 GREEN ONIONS (cut into 1” lengths)
1 tsp HOT PEPPER (finely chopped)
½ cup ALL PURPOSE FLOUR
½ cup cold WATER
1 EGG (beaten)
2-3 Tbsp cooking OIL
Sauce:
2 Tbsp SOY SAUCE
1 Tbsp RICE VINEGAR
1 tsp SESAME SEEDS
–optional 1 tsp HOT SAUCE (chili garlic, pepper sauce, etc.)

seafood pancake recipe
Korean-style haemul pajeon is a delicious seafood pancake –and fun to make, too.

How To Make A Seafood Pancake

Mix sauce ingredients in a small dish and set aside.
Cut green onions in half and then lengthwise, then cut into 1” pieces. Finely chop 1 tsp of hot red pepper—a hot green pepper will do—but a red pepper makes the dish look yummier (also, add a little red bell pepper for color, if desired).
Chop seafood (seafood is ideal for this dish because it cooks quickly—use shrimp, squid, scallops, clams, etc.).
In a bowl, mix flour with cold water. Mix well until a thin batter is formed (add a drop more water if needed—the batter should be thin enough to coat the veggies and seafood thoroughly and spread evenly when poured into the skillet).
Add onions, peppers, and seafood to the batter and mix well.
Heat a skillet on medium high heat and add oil. When oil is heated, add batter and spread evenly. Cook for 4-6 minutes until the edges of the cake begin to brown—but before the edges brown, add 1 well-beaten egg to the top of the cake (tip: shake the skillet to spread the egg evenly over the cake). When the cake has cooked to a light brown on one side, turn and cook approx. 2 minutes on the other side (it won’t take long—be mindful to not burn the egg, but a light crispness makes this dish delicious)
Remove and serve immediately with the dipping sauce.
Give this seafood pancake recipe a try and let me know what you think, and bon appétit!

For another awesome and easy seafood dish, try this Seafood Stew Recipe.
seafood stew

Thanks for checking out the seafood pancake recipe. If you enjoyed it, click some of the clickables below to share the recipe with your friends. I appreciate it!
–Chef Buck

Share and Enjoy !


Spaghetti Carbonara Recipe w/ Chef Buck

spaghetti carbonara

A delicious super-simple spaghetti carbonara recipe.

Ingredients for Spaghetti Carbonara

13 oz SPAGHETTI
8 oz PANCETTA or thick cut BACON
1 EGG
3 EGG YOLKS
1/2 cup PECORINO ROMANO (grated)
(or just romano, what’s the big deal?)
(even a little parmesan won’t hurt)
PEPPER (as much as you can handle)
SALT (very little)
PARSLEY (optional)

How to Make a Spaghetti Carbonara Recipe

Combine 3 egg yolks and 1 whole egg into a bowl and mix well. Stir in ½ to ¾ cup grated Pecorino Romano cheese—a Romano cheese is “pecorino” if it is made from sheep milk—but if you use Romano made from the milk of a cow or a goat, it won’t be the end of the world (and parmesan wouldn’t kill you either—although the pecorino is nice). Set this mixture aside.
Prepare pasta according to package directions. Add a pinch of salt to the water, but sparingly—there will be plenty of salt in the other ingredients. While pasta cooks, prepare the meat.
Cut 8oz of pancetta or thick-cut bacon into small squares. Pancetta is Italian bacon that is not smoked—most other bacon you find at the market will be smoked; again, it’s not the end of the world choosing one over the other, the main difference will be in the “smokiness” of the dish. In a large skillet, prepare the bacon. Add a generous helping of fresh cracked pepper (generous is whatever amount you like). Make sure the bacon is cooked through, but do not cook it to a crisp! Remove skillet from the heat and pour off the excess bacon grease. When spaghetti is ready, remove directly from the water (do not rinse!) and mix the pasta with the bacon in the skillet. Add the cheese/egg mixture to the hot pasta and continue mixing thoroughly. Initially it will not look like a lot of sauce, but as you stir the mixture into the pasta, it will become quite creamy (and delicious). Add a splash of pasta water if needed. Throw in a little chopped parsley for color and serve immediately.
Give this spaghetti carbonara recipe a try and let me know what you think, and…
Bon appétit!

Want to try another fantastic pasta dish? Watch Chef Buck cook this Linguine w/ Clam Sauce Recipe.
linguine with clam sauce

Thanks for Watching our Videos!

Thanks for checking out this spaghetti carbonara recipe, and all of our recipes. Sign up for our mailing list so you’ll never miss a new recipe. Also click a button below and share the dishes with your friends. You can also follow Chef Buck on Youtube. We appreciate all the kind comments and support, and we’ll see you next time in the kitchen!

If you like what CG and I do, support us on Patreon, or throw us a tip in our Paypal Tip Jar. We’ll happily enjoy a coffee on the road – Thanks! We appreciate all the support, and we’ll see you next time in the kitchen!

We include affiliate links for products on our website. Making a purchase after clicking on our links and we may earn a commission which helps us produce more videos and drink more coffee :^) We participate in the Amazon Services LLC Associates Program, which is an affiliate advertising program. It provides a means for us to earn fees by linking to Amazon.com and affiliated sites, so we can make more videos.

Share and Enjoy !

Seafood Stew Recipe for Winners

seafood stew

A simple and delicious seafood stew recipe for winners*.
*also appropriate for non-winners

Seafood Stew Recipe Ingredients

1 lb MIXED SEAFOOD
1 HOT PEPPER (finely chopped)
3-4 cloves GARLIC (finely chopped)
1 medium ONION (chopped)
½ cup CELERY (sliced)
2 Tbsp TOMATO PASTE
1 13 oz can DICED TOMATOES
1 cup CHICKEN STOCK
2 cups WATER (substitute 1 cup CLAM JUICE if desired)
1 cup WHITE WINE
2 Tbsp LEMON JUICE
1 BAY LEAF
1 Tbsp OREGANO
1 tsp THYME
1 tsp BASIL
SALT/PEPPER to taste
1 Tbsp OLIVE OIL

How to make this Seafood Stew

Heat olive oil on medium heat and add onion and celery and hot pepper.
Give these ingredients a minute head start and then add the garlic and salt.

Cook until the onion begins to soften and then add the tomato paste. Push the paste around with the vegetables—spread it around the bottom of the pan and let it cook up a minute or two—if the paste sticks a little, that’s cool—because now we’ll add white wine which will deglaze any stuck on paste.

Add a bay leaf, oregano, thyme, basil—throw some red pepper flakes in as well if you like it hot. Let the mix simmer for about 5 minutes.

Add diced tomatoes, 1 cup of broth (I use chicken broth, but any broth will do), and 2 cups of water—you can substitute 1 cup of clam juice for 1 of the cups of water, if desired. Bring to a boil and then reduce to a simmer, cover, and allow to cook 30 minutes.

After 30 minutes, add 1 lb. of miscellaneous seafood—a variety of big-bite pieces make a nice presentation. Cover and simmer for another 7-8 minutes. Stir in some lemon juice and remove from heat and serve.

It looks tasty in a bowl with a nice pyramid of rice in the middle.
it’s easy peezey and puts a nice glow in your belly, so give this seafood stew recipe a try.

Bon appétit!

Hey!!!  ….what about a Beef Stew Recipe?

beef stew

Thanks for checking the seafood stew recipe out! Click some of the buttons below and share it with your friends and family, I appreciate it.
–Buck

Share and Enjoy !


Baked Chicken Recipe better than fried chicken

baked curry chicken

It’s not fried chicken, but just barely. This is a simple and delicious recipe for folks who like juicy chicken more than greasy chicken, so give this baked chicken recipe a try.

What you need for this Baked Chicken Recipe

2½ lbs. CHICKEN (skin removed)
1 cup MILK (I use almond milk, but buttermilk is cool)
HOT SAUCE (to taste)
1 cup BREAD CRUMBS
3 tsp CURRY POWDER
1 tsp GARLIC POWDER
1 tsp ONION POWDER
1 tsp ONION SALT (or regular salt, adjust to taste)
½ tsp GROUND MUSTARD
1 tsp PAPRIKA
*add ½ tsp red pepper if you want a kick

baked curry chicken

How to “Bake” Fried Chicken

Buy skinless or remove the skin and clean and rinse 2-2½ lbs. of chicken pieces. I love the dark meat, so I usually use thighs, but use whatever cuts you like and adjust the cooking time accordingly.

Spread the chicken out in a shallow bowl and dash with hot sauce to taste. Add one cup of milk. I like to use almond milk, but my mama always used buttermilk. Allow the chicken to soak 30-60 minutes.

In a ziplock bag, add the remainder of ingredients and mix.

2 pieces at a time, add chicken to the ziplock bag and turn until coated. Sealing plenty of air in the bag will help coat the chicken pieces easily and evenly.

Place pieces on a non-stick or lightly-oiled baking pan and bake at 350 degrees Fahrenheit for about 30 minutes.
Periodically check on the pieces as oven cooking times will vary.
After 30 minutes, or when the pieces are well on their way to cooking, turn them, and continue cooking for another 15-20 minutes.

Curry gives the chicken a wonderful color, and it looks very much like fried chicken, although not as crunchy as fried chicken. For extra crunchiness, broil the pieces for 1-2 minutes on each side.

Give this baked chicken recipe a go and let me know what you think!

If you’re new to home cooking, just get a bunch of spices, pots and pans, and start experimenting with different ingredients and recipes. It’s a healthy hobby that can save a lot of money in the long run. You can check out current prices for Complete Kitchenware Sets on Amazon. Or just go to a thrift store! I’ve found some of my favorite kitchen gear at second-hand stores.

And when you’re tired of chicken, try this Juicy Pork Loin Recipe.

pork loin chop

Thanks for checking out our baked chicken recipe, and all of our recipes. Be sure and sign up for our mailing list and never miss a new Chef Buck cooking video, and also click a button below and share the dishes with your friends. We appreciate all the kind comments and support, and we’ll see you next time in the kitchen!
–Chef Buck

Thanks for watching our recipe videos!

We include affiliate links for products on our website, so if you make a purchase after clicking on our links, we may earn a commission which helps us produce more videos and drink more coffee :^) We participate in the Amazon Services LLC Associates Program, which is an affiliate advertising program providing a means for us to earn fees by linking to Amazon.com and affiliated sites, so we can make more videos.

Share and Enjoy !

Lentil Soup Recipe with Ginger

lentil ginger soup

A lentil soup recipe! Doesn’t that sound like all of your dreams are coming true? Pick up some brightly colored lentils and give this lentil soup recipe a try.

What you Need for this Lentil Soup Recipe:

1 ½ cups LENTILS
5-6 cups WATER (or ½ water ½ broth)
1 large ONION (finely chopped)
2 Tbsp fresh GINGER (finely chopped)
1 hot PEPPER (finely chopped)
2 Tbsp OLIVE OIL
1 tsp CUMIN SEEDS
½ tsp TUMERIC POWDER
1 tsp CORIANDER POWDER
1 14 oz can DICED TOMATOES (or 2 Lg tomatoes, diced)
SALT and BLACK PEPPER to taste
CILANTRO LEAVES for garnish (coriander leaves)

How to Make the Soup:

If you need a nice soup pot for your kitchen, you can check here for current pricing for a soup pot on Amazon.

  • In a large pot, heat olive oil on medium heat. When oil is hot, add the cumin seeds and allow cooking for about 1 minute. After a minute the seeds will begin to open, at this point add the onion and hot pepper and allow cooking until the onions soften and become translucent.
  • Now, add ginger, coriander, and turmeric and continue mixing ingredients over medium heat.
    Add tomatoes, mix, and cook with ingredients for 2 minutes.
  • Add lentils (be sure to wash and rinse first). Red or yellow lentils will make this dish look extra yummy. Darker lentils will taste equally as good—the dish just won’t win a beauty contest—but use whatever kind you have, ultimately, your stomach won’t know the difference.
  • Add water, or a combination of water/broth.
  • Next, bring the pot to a boil, reduce heat, then cover the pot loosely and allow ingredients to simmer for 30 minutes.
  • After 30 minutes, add salt and pepper to taste. Add more water as needed, but sparingly—you don’t want your soup to be too thin. Cover pot loosely and continue cooking another 15-20 minutes.

Final Steps:

  • When the lentils are soft and completely cooked, lightly blend the soup to add a creamy consistency. A hand-held stick blender works great—a few quick pulses and voilà! If a stick blender is not handy (rim shot), simply remove a few cups of the soup to a table top blender, smooth, and return to the pot. This step isn’t necessary, but do it; just do it.
  • If the soup is thinner than you like, continue to simmer briefly—but remember, the lentils, like rice, will continue to absorb water and thicken the soup on their own.
  • Garnish with cilantro (coriander leaves) and serve with French bread for optimal taste satisfaction.

Keep Coming Back To See What’s New!

Bon appétit!

And, if you like bread with your soup, you might love trying this Fancy Egg Bread Recipe, it’s one of my favorites.

egg bread
baked egg bread with rosemary seasoning

Thanks for checking the recipes out! If you liked it, click some of the buttons below and share it with your friends and family, I appreciate it.
–Buck

Share and Enjoy !

Calamari Salad Recipe …easy squid dish!

calamari salad squid

Calamari salad makes a great addition to any potluck! Also, Dr. Freud theorized the squid to be the unconscious driver underlying all human action. This recipe builds on that theory, and adds carrots.

What you need for a Calamari Salad

1 lb SQUID
½ cup CARROT (strings)
½ cup CUCUMBER (sticks)
1/3 cup CILANTRO or BASIL LEAVES (chopped)
1 tsp GINGER (minced)
1 tsp SESAME OIL
1 Tbsp extra virgin OLIVE OIL
1 Tbsp RICE WINE VINEGAR
1 tsp CHILI GARLIC SAUCE (or sub hot sauce to taste)
1 Tbsp LEMON JUICE
SOY SAUCE (to taste)
½ tsp SESAME SEEDS
SALT (to taste)

How to make Calamari Salad

Start with 1 lb. of cleaned squid. I’ve used fresh and frozen squid for this recipe and both work well—and smaller squid work best for salad—which is something to think about when choosing your squid; buying them frozen and already cleaned is much nicer than cleaning a dozen dinky cephalopods.

Cut squid into thin rings (1/4 inch max) and boil in salted water for 25 seconds (yep—they’ll cook up that fast). Drain, then rinse under cold water to prevent overcooking (over-boiled squid can be quite rubbery).

In a large bowl, combine sesame oil, olive oil, vinegar, chili garlic sauce, and ginger (also salt to taste—or dress with soy sauce). Mix well.

Add squid, carrot, cucumber, and cilantro and toss with dressing.
Add lemon juice (or substitute lime juice). Add soy sauce to taste.

Mix all, top with sesame seeds, and serve over a bed of mixed greens.
It’s light, tasty, and suctioncupalicious.

Wanna try squid in another dish? One of my favorite uses for calamari is in a Seafood Pancake Recipe, which sounds weird, but try it, you’ll like it.

shrimp pancake
Korean style Haemul Pajeon seafood pancake

Thanks for checking out the calamari salad recipe. If you enjoyed it, click some of the clickables below to share the recipe with your friends. I appreciate it!
–Chef Buck

Share and Enjoy !


Parsnip Soup with a curry twist…you’ll love it

curry parsnip soup

If you’ve never tried parsnips before, this parsnip soup recipe is an easy introduction.  Blended up, this dish is super creamy without a drop of cream, which is a healthy low-cal option and makes my belly happy on several levels. Parsnips are available year-round. They resemble carrots, but are paler and have a stronger flavour. Give this parsnip soup recipe a try—it’s guaranteed super delicious or your money back.

What You Need For This Parsnip Soup Recipe

1 lb PARSNIPS (chopped for soup)
1 large POTATO (chopped for soup)
1 medium ONION (chopped)
2 Tbsp OLIVE OIL
1 Tbsp CURRY POWDER
1 tsp CUMIN POWDER
1 tsp CORIANDER POWDER
2 cups BROTH (chicken or vegetable)
2 cups WATER
SALT (to taste)
CORIANDER LEAVES (chopped, garnish)

How to Make Parsnip Soup

  • In a soup pot, heat olive oil on medium high heat and add onions and cook for 1 minute.
  • Add parsnips and potatoes and continue cooking until the onions are soft.
  • Add curry, cumin, and coriander powder and mix well. Add 4 cups of liquid— ½ broth and ½ water .
  • Bring contents to a boil, add salt, then reduce heat to low, cover, and simmer for 30 minutes.
  • After a half hour the parsnips and potato should be quite tender. For a creamy texture, blend soup as desired—no milk or cream are needed. I like to leave a few chunks of potato unblended, and garnish with chopped coriander leaves.

And that’s it…give this parsnip soup recipe a try and let me know what you think!

If you’re new to home cooking, get a bunch of spices, pots and pans, and start experimenting with different recipes. It’s a healthy hobby that can save a lot of money in the long run. Check out current prices for Complete Kitchenware Sets on Amazon as well as Complete Starter Spice Kits. Or try a thrift store! I’ve found some of my favorite kitchen gear at second-hand stores.

Parsnip Fun facts:

In Roman times parsnips were believed to have been an aphrodisiac.
In Scotland parsnips are still known as White Carrots.
Are a favourite with gardeners because of the short growing season.
People used to believe that eating parsnips could relieve a toothache or tired feet.
Half of the carbohydrates in parsnips are sugar, and the rest is starch.
Parsnips were once used to sweeten jams and cakes before sugar was widely available.

For another super vegetarian recipe idea, try this No-Meat Vegetarian Chili Recipe.

Thanks For Watching Our Recipe Videos!

Thanks for checking out this quinoa salad recipe, and all of our recipes. Be sure and sign up for our mailing list so you’ll never miss a new recipe. Also click a button below and share the dishes with your friends. You can also follow Chef Buck on Youtube. We appreciate all the kind comments and support, and we’ll see you next time in the kitchen!

If you like what CG and I do, you can also support us on Patreon, or throw us a tip in our Paypal Tip Jar. We’ll happily enjoy a coffee on the road – Thanks! We appreciate all the support, and we’ll see you next time in the kitchen!

We include affiliate links for products on our website. So, if you make a purchase after clicking on our links, we may earn a commission which helps us produce more videos and drink more coffee :^) We participate in the Amazon Services LLC Associates Program, which is an affiliate advertising program. It provides a means for us to earn fees by linking to Amazon.com and affiliated sites, so we can make more videos.

Share and Enjoy !

Chana Masala Indian Chickpea Curry Recipe

chana masala chickpea curry

Chana masala is a delicious Indian chickpea curry. It’s easy to make and a great introduction to Indian cooking.

What You Need to Make the Best Chana Masala

1 15 oz can CHICK PEAS (or 2 cups)
1 15 oz can DICED TOMATOES (or 2 fresh diced)
1 tsp GARLIC (minced)
1 tsp GINGER (minced)
1 HOT PEPPER (minced)
1-2 Tbsp OLIVE OIL
1 Tbsp CHICK PEA FLOUR (also called besan)
1 tsp CUMIN SEEDS
1 tsp CHILI POWDER
1 tsp GARAM MASALA
1/8 tsp ASAFOETIDA (optional, also called hing)
½ tsp TUMERIC
SALT (to taste)
Check out current prices for Indian Spices on Amazon.

Many chana masala recipes include onion, but I think it’s fine with or without; I make so many Indian dishes with onions, it’s nice to have a few that are onion-free if desired. I do include asafoetida (hing) and besan (chick pea flour), but those can be optional, too.

Chana masala is a very flexible dish. If not using besan, just add ½ cup of water instead of 1 cup. The asafoetida is wonderful. It stinks, but it’s still wonderful. It’s also called “devil’s dung”, but that’s just when it’s raw, once you toss it into a simmering skillet, it transforms into a sharp, oniony weirdness that will pleasantly remind you of your favorite Indian restaurant.

I’ve only been able to find asafoetida at international food markets, but it’s worth acquiring—especially if you want to make a habit of cooking great Indian dishes at home. If skipping the asafoetida, try adding 1 finely chopped medium-sized onion between the cumin seeds and the tomatoes. Coriander powder is great in this dish, too. But the way I usually prepare it is like this:

chole masala
Make chana masala a side dish or your main meal

How to Make a Chana Masala Recipe

  1. In a skillet, heat oil on medium high heat.
  2. When the oil is heated, add the cumin seeds and asafoetida. Stir and allow to simmer for just a few moments.
  3. Once the seeds begin to crack, add the chick pea flour and continue stirring. The flour will absorb the oil.
  4. Stir for approx. 1 minute and then add the diced tomatoes. Mix well and allow the tomatoes to bubble.  As the tomatoes cook down, you can crush them with your stirrer for a smoother chana massala.
  5. Stir in the minced ginger and garlic and hot pepper.
  6. Add the chili powder and turmeric.
  7. After the tomatoes have cooked 4-5 minutes, add the chick peas, garam masala, and salt to taste.
  8. Mix well and add 1 cup of water. Bring the dish to a bubble, then reduce to a simmer, cover, and allow cooking for 10 minutes.
  9. After 10 minutes, the chick peas will be soft. Use a fork or potato masher to smash some of the chick peas, this will help thicken the chana masala along with the chick pea flour added earlier.
  10.  Simmer uncovered to the desired consistency, remove and serve.

Garnish with fresh coriander leaves. Serve with rice or on its own.
Give this chana masala recipe a try and let me know what you think, and bon appétit!

Want to make another easy Indian Recipe? Try Baingan Bharta, a delicious Eggplant Curry recipe.

baingan bharta eggplant

Thanks for checking out the chana masala recipe, and all of our recipes. Be sure and sign up for our mailing list to never miss a new cooking video, and also click a button below and share the dishes with your friends, and follow Chef Buck on Youtube. We appreciate all the kind comments and support, and we’ll see you next time in the kitchen!

If you like what CG and I do, support us on Patreon, or throw a tip in our Paypal Tip Jar We’ll happily enjoy a coffee on the road, or maybe even pay a bill or two!–Thanks! We appreciate all the support, and we’ll see you next time in the kitchen!

Thanks for watching our Chana Masala recipe

We include affiliate links for products on our website, so if you make a purchase after clicking on our links, we may earn a commission which helps us produce more videos and drink more coffee :^) We participate in the Amazon Services LLC Associates Program, which is an affiliate advertising program providing a means for us to earn fees by linking to Amazon.com and affiliated sites, so we can make more videos.

Share and Enjoy !

Spicy Couscous Recipe …how to make a quick side dish

spicy couscous

Anyone up for a spicy couscous recipe? Couscous is a quick and simple dish, so naturally I love it. It makes a great pairing with fish, and both can be cooked up quickly. I usually start with plain couscous and spice it up myself, it is simple to do and much yummier than any overpriced pre-made couscous mix you’ll buy at the market.

What You Need To Make This Spicy Couscous Recipe

1 cup COUSCOUS
2 Tbsp OLIVE OIL
1 medium ONION (chopped)
3 cloves GARLIC (finely chopped)
1 HOT PEPPER (finely chopped)
1 tsp MUSTARD SEEDS
1 tsp CHILI POWDER
1 tsp PAPRIKA
½ tsp TURMERIC POWDER
1 tsp TOMATO PASTE
1 ½ cup WATER (or broth)
SALT (to taste)

couscous recipe
Spicy couscous makes a tasty side dish, and it is fast and easy to prepare …and did I mention cheap?

How To Make Spicy Couscous

Heat olive oil on medium high heat and then add onions.
Stir for 1 minute and add mustard seeds, hot pepper, and garlic.
Continue sautéing for a couple more minutes.
Stir in chili powder, paprika, and turmeric.
Add salt and tomato paste and mix well.

Pour in 1 ½ cups of water, stir, cover pot and turn up the heat and bring the pot to a boil.
After ingredients come to a boil, stir in the couscous and mix well. Cover and remove from heat and allow pot to sit for 5 minutes.

After 5 minutes the couscous will have completely absorbed all the water.
Uncover and immediately fluff with a fork; this will keep the couscous for overcooking and becoming a sticky, starchy mess; couscous should be light and fluffy, and in this case, nice and spicy, too.
Give this spicy couscous recipe a try, and I hope you like it.
Bon appétit!

This couscous recipe goes great with this DELICIOUS BLACKENED FISH RECIPE!

blackened fish mahi mahi
Click image to watch this easy Blackened Fish recipe

Thanks for watching my couscous recipe video. If you liked it, then used the buttons below to share the recipe with your friends. Thanks!
-Chef Buck

Share and Enjoy !


Gobi Matar Cauliflower Curry Recipe

gobi matar

Try this flavorful Indian gobi matar recipe with cauliflower and green peas. I use a mix of spices to create my own masala for this vegetarian recipe, but you can substitute a store-bought pre-made curry spice mix. This spicy vegan cauliflower curry makes a great side dish or entrée.

What You Need To Make Gobi Matar

1 CAULIFLOWER (cut into florets)
1 15oz can DICED TOMATOES (or 2 med tomatoes)
1 8oz can GREEN PEAS
1 large ONION (chopped)
1 HOT PEPPER (finely chopped)
1 Tbsp GINGER (finely chopped)
5-7 GARLIC cloves (finely chopped)
1 Tbsp CHILI POWDER (sub cumin powder for less heat)
1 Tbsp CUMIN SEEDS
1 Tbsp TURMERIC POWDER
1 Tbsp CORIANDER POWDER
2 tsp GARAM MASALA (optional)
3 Tbsp OIL for cooking
¼ cup WATER
SALT (to taste)

Check out current prices for Indian Cooking Spices on Amazon.

gobi matar
Is it gobi matar or gobi mattar? However you want to spell it, it’s a delicious Indian dish.

How To Make Cauliflower Curry

  • In a skillet or pot, heat oil on medium high heat.
  • Add cumin seeds. Seeds will brown and crack quickly, so almost immediately add onion.
  • Add onion and stir.
  • Cook 1 minute and then add ginger, garlic, and hot pepper.
  • Continue cooking until onions are soft.
  • Add turmeric, chili, and coriander powder and mix well.
  • Stir in tomatoes and continue cooking 4-5 minutes.
  • Add salt to taste.
  • Add tomatoes. If using fresh tomato, as tomatoes cook down I like to crush them with a spoon.
  • Stir in cauliflower florets.
  • Add water and bring dish to a bubble, then reduce heat to a simmer, cover, and let cook 4-5 minutes. I don’t want to cook all the nutrients out of the cauliflower, and I like my florets to still have a bit of crunch to them, so I simmer my cauliflower for only a few minutes.
  • When the cauliflower is almost cooked to your liking, add garam masala and green peas.
  • Mix and continue cooking until peas are heated through.

And that’s it, your cauliflower and peas are transformed into a delicious vegetable curry.

Check out a variation on this Indian gobi matar recipe and watch me cook a complete Indian dinner.

how to cook indian food

Thanks for checking out our gobi matar recipe, and all of our recipes. Be sure and sign up for our mailing list and never miss a new Chef Buck cooking video, and also click a button below and share the dishes with your friends. We appreciate all the kind comments and support, and we’ll see you next time in the kitchen! Check out the Chef Buck Youtube Channel.

Thanks for watching our Indian curry recipe!

We include affiliate links for products on our website, so if you make a purchase after clicking on our links, we may earn a commission which helps us produce more videos and drink more coffee :^) We participate in the Amazon Services LLC Associates Program, which is an affiliate advertising program providing a means for us to earn fees by linking to Amazon.com and affiliated sites, so we can make more videos.

Share and Enjoy !

Blackened Fish Recipe Quick and Easy

A blackened fish recipe is delicious and super simple to prepare. You take any filet of fish, coat it in butter and lots of spice, and then cook the fish quickly in a very hot skillet.

What you need for this Blackened Fish Recipe

FISH
BUTTER
SEASONING
…and a hot skillet; blackened fish is quick and easy and delicious

How to Blacken Fish

You can use almost any fish for this blackened fish recipe, just be mindful of the size of the filet and adjust the cooking time as needed. Fish is easy to cook, and even easier to overcook, which you’ll want to avoid.

blackened fish recipe

If frozen, allow the fish to thaw completely, and pat it dry. Let the fish sit at room temperature at least 15-20 minutes before cooking, don’t take the fish right out of the fridge and throw it into the skillet.

Melt just enough butter to coat all the fish, then dredge the filets in the butter. Season both sides of the fish well. Many seasonings will work great, but some of my favorite spices for blackening fish are paprika, Italian seasoning, chili powder, garlic powder, black pepper, and salt. There is no wrong amount of spice; if it sticks to the fish, it’s enough.

Heat a lightly oiled skillet on medium heat and then when the skillet is hot, add in the fish. The filet should sizzle when it hits the pan. How long the fish cooks will depend on the size and thickness of the filet. Leave the fish alone and allow it to cook undisturbed for 3-5 minutes, depending on the size of the fillet. Adjust the stove temperature as needed.

You can make due with any skillet, but a cast iron skillet is ideal. I travel with a Lodge brand cast iron skillet which works well and is priced well, too. Check current prices for a cast iron skillet on Amazon.

Turn the fish once and continue to cook on the other side for 2-4 minutes as needed. If the fish filets are especially thick, sear the sides of the fish as well.

Serve this blackened fish recipe away. Fish is a quick entree to prepare and makes a nice main course for yesterday’s leftover side dishes. Whether you’re serving salmon, tuna, swordfish steaks, mahi mahi, etc., you can whip up a fancy feast in quick time with this quick blackening technique.

If you enjoyed this fish recipe, then you might like this Baked Fish dish.

baked fish recipe
Tilapia and cod are great fish fillets for baking

Thanks for checking out our blackened fish recipe video. Sign up for our mailing list and never miss a new Chef Buck recipe, and also click a button below and share the dishes with your friends. We appreciate all the kind comments and support, and we’ll see you next time in the kitchen!

Thanks for watching our recipe videos!

And if you like our food videos, then take a look at Buck and CG’s travel videos.

We include affiliate links for products on our websites, so if you make a purchase after clicking on our links, we may earn a commission which helps us produce more videos and drink more coffee :^) We participate in the Amazon Services LLC Associates Program, which is an affiliate advertising program providing a means for us to earn fees by linking to Amazon.com and affiliated sites, so we can make more videos.

Share and Enjoy !

Chole Palak Chickpea and Spinach Recipe

chole palak

Chole Palak is an Indian-style spinach and chickpea recipe that’s super flavorful and a breeze to make.  With a few ingredients in the cabinet, this tasty dish is always just a few minutes away.

What You Need to Make Chole Palak

SPINACH  (13 oz can or frozen, or 3 cups chopped fresh)
CHICKPEAS  (15 oz can, rinsed and drained)
TOMATOES  (diced, 14 oz can—or 2 fresh tomatoes
HOT PEPPER  (1 or 2, minced)
GINGER  (1 Tbsp, minced)
OLIVE OIL  (2-3 Tbsp)
CUMIN SEEDS  (1 tsp)
ASAFOETIDA  (¼ tsp)
CORIANDER  (1 Tbsp)
CHILI POWDER  (1 tsp)
TURMERIC  (½ tsp)
GARAM MASALA  (1 tsp)
SALT (to taste)
Check out current prices for Indian Spices on Amazon.

chole palak chickpea spinach
Chole Palak is a popular Spinach and Chickpea dish

How to Make Chole Palak

Heat olive oil on medium high heat and add cumin seeds and asafoetida.  The seeds should sizzle when they hit the pan and will brown and crack quickly.  Add the tomatoes, ginger, and peppers.  Mix well and then add the coriander, chili, and turmeric powder. 

Mix and allow the tomatoes to cook down 3-4 minutes.  Add the spinach and salt and stir well.  Add ¼ – ½ cup water—I like less water, but add as desired throughout the recipe.  Cover and let cook 3-4 minutes. 

Uncover and mix in chickpeas (also called garbanzo beans).  Add another ¼ cup of water, reduce heat to simmer, cover and cook for 5-6 minutes.  At this point the chickpeas will be soft enough to smash easily with a fork, which you don’t have to do, but I prefer the consistency of the dish if I mush about half of them. 

Add the garam masala and stir another minute or two, also adding more water if desired.  And that’s it! Enjoy! When I prepare an Indian meal, I almost always serve this dish; it’s easy, healthy, and delicious, so why not? Give chole palak a try, let me know what you think, and bon appétit!

For another fantastic dish, try Baingan Bharta, an Indian-style Eggplant Recipe.

baingan bharta eggplant

Thanks for Watching our Chole Plak Recipe Video!

Click a button below and share the spinach curry with your friends. You can also follow Chef Buck on Youtube. We appreciate all the kind comments and support, and we’ll see you next time in the kitchen!

If you like what CG and I do, support us on Patreon, or throw us a tip in our Paypal Tip Jar. We’ll happily enjoy a coffee on the road – Thanks! We appreciate all the support, and we’ll see you next time in the kitchen!

We include affiliate links for products on our website. Making a purchase after clicking on our links and we may earn a commission which helps us produce more videos and drink more coffee :^) We participate in the Amazon Services LLC Associates Program, which is an affiliate advertising program. It provides a means for us to earn fees by linking to Amazon.com and affiliated sites, so we can make more videos.

Share and Enjoy !

Shrimp Remoulade Recipe …Best Shrimp Salad Ever!

shrimp remoulade salad
Shrimp remoulade salad is one of my all-time favorite dishes.  I used to eat this all the time when I lived in New Orleans—and I never go back without making a stop at the Gumbo Shop for a taste.  I don’t know exactly how the Gumbo Shop prepares shrimp remoulade sauce, but this recipe is how I throw it together.   A lot of ingredients go into the sauce, but it’s worth the effort.  Give it a try!

What You Need to Make Shrimp Remoulade

TOMATO PUREE (½ cup)
MUSTARD (¼ cup –creole, stone ground, or dijon)
HORSERADISH (2 tsp –prepared)
GREEN ONION (1 tsp, minced)
PARSLEY (1 Tbsp, finely chopped)
WORCESTERSHIRE SAUCE (½ tsp)
MAYONNAISE (3-5 Tbsp)
CELERY (1 Tbsp, minced)
GARLIC (1 clove, minced)
CHILI POWDER (1 tsp)
PAPRIKA (1 tsp, smoked)
SUGAR (1 tsp, optional
SALT (to taste)
HOT SAUCE (½ tsp)
LEMON JUICE (1 Tbsp)
OLIVE OIL (1 Tbsp)
VINEGAR (1 tsp)
Salad Ingredients:
SHRIMP (1 lb, boiled)
SALAD GREENS
TOMATO SLICES
GREEN ONION (chopped, optional)

shrimp remoulade
Shrimp Remoulade is a New Orleans classic

How to Make Shrimp Remoulade

The Remoulade Sauce:

To make the sauce, just mix all the sauce ingredients together (really?!).  I’m using tomato puree in this version, but I’ve also made this dish using ketchup or tomato sauce; it will be thinner if you use those two, but that can be a good thing, especially if you want to toss the greens in the remoulade sauce.  Sugar is optional and definitely not needed if you’re using ketchup, which is usually sweet enough.  Sometimes I’ll add a teaspoon of onion powder.  This is a great recipe to play with, but be judicious with the mayonnaise!  Using fresh ingredients like parsley, garlic, green onion, and celery will really make this sauce shine.  You can definitely make and serve the sauce immediately, but making it hours ahead or even the day before will embolden the flavors.  Embolden the flavors?  I’m not sure if that’s the right way to say that, but you know what I mean.

The Shrimp:

I’m using 1 pound of deveined shrimp in the shell. For this salad, the bigger the shrimp the better, but I usually get whatever’s on sale—any kind of shrimp is gonna be delish in this dish. Before boiling, prepare a bowl of ice water to cool the shrimp after cooking—this will keep the shrimp from becoming overdone (tough and rubbery).
Put a pot of water on the stove and add 2 bay leaves and a generous amount of salt. Bring the pot to a boil and add the shrimp. I find a pound of shrimp takes about 2 minutes, but this will vary depending on the size of the shrimp and the amount of water in the pot. For sure, they will cook fast. Do not ignore them—it’s not a good time to multi-task. When the shrimp turn pink, they’re done. Get ’em out of the hot water and into the ice bath—this will halt the cooking process, and your shrimp will be perfecto (and now that they’re cooked, they’ll be super easy to peel).
Toss the shrimp in the remoulade sauce and serve over a bed of fresh greens. I like to garnish the salad with green onion and fresh tomato. Serve with saltines or a loaf of French bread and soft butter. Let the salivating begin.
And bon appétit!

calamari salad squid
Be adventurous and TRY A CALAMARI SALAD!

Thanks for checking out the recipe. To never miss a video, subscribe to Chef Buck! Click some of the buttons below and share this awesome Shrimp Remoulade with your friends. Thanks!
–Chef Buck

Share and Enjoy !


Baingan Bharta Roasted Eggplant Curry Recipe

eggplant curry

Roasted eggplant curry is easy to prepare and super-flavorful with this simple, classic Indian dish. Give this Baingan Bharta eggplant curry a try and let me know what you think.

What You Need to Make Eggplant Curry

Ingredients:
1 large EGGPLANT (roasted)
1 med/lg ONION (chopped)
3-4 cloves GARLIC (finely chopped)
1 hot PEPPER (finely chopped)
1 14 oz can diced TOMATOES (or 2 fresh tomatoes)
1 cup chopped CILANTRO (coriander leaves)
1 tsp MUSTARD SEEDS
1 tsp CUMIN SEEDS
1 tsp CORIANDER POWDER
½ tsp TURMERIC
½ tsp GARAM MASALA
5-6 Tbsp OLIVE OIL
Check out current prices for Indian Spices on Amazon.

baingan bharta eggplant curry
Baingan bharta eggplant curry, a classic Indian dish.

How to Make Baingan Bharta

  • Slice the eggplant lengthwise down the middle into two halves, brush all surfaces with olive oil, place on a baking pan flat side down, and bake at 400 degrees F for 30 minutes.
  • Remove from oven. The eggplant will be very hot, so set aside to cool.
  • In a skillet, heat olive oil on medium high heat. Add mustard and cumin seeds and cook 20-30 seconds—not too long or they will overcook. A pinch of asafetida can be added as well, if desired.
  • When cumin seeds begin to open, add onions and sauté for a couple of minutes.
  • Add garlic and hot pepper and continue sautéing. Add coriander and turmeric powder and mix well. I like to go light on the spices, but feel free to add more if desired. If you like a spicier dish, add 1 tsp of chili powder. I like to take it easy on the spices so as not to overpower the flavor of the eggplant. Add salt to taste and continue cooking a couple more minutes.
  • Stir in tomatoes, reduce heat, and simmer 4-5 minutes. While tomatoes simmer, return to the eggplant.
  • At this point the roasted eggplant will be much easier to handle (although it may still be hot, so use care). Using a spoon, the meat of the eggplant can be easily scooped away from the skin. Discard the skin. Roughly chopped the eggplant and add to the skillet, mixing well with the tomato mixture. Cook for 3-4 minutes and then add garam masala. Mix and continue cooking another couple of minutes.
  • Add 1 cup of chopped cilantro (coriander leaves). Mix and remove from heat.

And that’s it. Give this eggplant curry recipe a try, let me know what you think.

And for another great indian dish, try this Chicken Tikka Masala Recipe.

chicken tikka masala
Click image to check out Chicken Tikka Masala

Thanks for Watching our Baingan Bharta Recipe

Click a button below and share the spinach curry with your friends. You can also follow Chef Buck on Youtube. We appreciate all the kind comments and support, and we’ll see you next time in the kitchen!

If you like what CG and I do, support us on Patreon, or throw us a tip in our Paypal Tip Jar. We’ll happily enjoy a coffee on the road – Thanks! We appreciate all the support, and we’ll see you next time in the kitchen!

We include affiliate links for products on our website. Making a purchase after clicking on our links and we may earn a commission which helps us produce more videos and drink more coffee :^) We participate in the Amazon Services LLC Associates Program, which is an affiliate advertising program. It provides a means for us to earn fees by linking to Amazon.com and affiliated sites, so we can make more videos.

Share and Enjoy !

Quinoa Recipe — Spicy Spanish Style Quinoa

spanish quinoa

Try this spicy Spanish-style quinoa recipe; it’s vegetarian heaven. Quinoa is a versatile ingredient and an excellent source of protein. Quinoa is a grain-like superfood and a great substitute for rice, and just as easy to prepare. I use it often as an alternative to rice–even in rice pudding. Give this quinoa recipe a try; I’m sure you’ll be eating a whole lot less rice in the future, and not missing it at all.

What You Need For This Quinoa Recipe

  • 1 Tbsp OLIVE OIL
  • 1 ½ cups QUINOA (check current prices for quinoa on Amazon)
  •  ½ cup RED ONION (minced, separated)
  • 3-5 cloves GARLIC (finely chopped)
  •  ½ large RED BELL PEPPER (minced, separated)
  • 1 14 oz can DICED TOMATO (reserve juice)
  • 1 15 oz can KIDNEY BEANS (drained, rinsed)
  • 1 tsp CUMIN powder
  • 1 tsp CHILI powder
  • 2 cups WATER, including drained tomato liquid
  • ½ cup CILANTRO (fresh, chopped)
  • 1 small CUCUMBER (diced, peeled if waxed)
  • 1 AVOCADO (seeded, peeled, diced)
  • 1/3 cup LIME JUICE (freshly squeezed)
  • SALT and PEPPER to taste

quinoa recipe
uncooked quinoa…looks like a grain, but it’s a seed.

How to Make Spanish Quinoa

  • Open the canned tomato and drain the tomato liquid into a measuring cup. Add enough water to equal 2 cups.
  • Heat oil on medium high. Saute garlic, 2/3 of the onion and 1/3 of the red pepper for 2-3 minutes. [the rest of the onion and red pepper will be added raw at the end.]
  • Add quinoa.
  • Stir in tomatoes with green chilies, kidney beans, cumin and chili powder and water/tomato juice mixture.  Bring the pot to a boil. Reduce to medium low and cook approx. 15 minutes. The liquid will be absorbed.
  • Remove from the heat and let sit for about 10 minutes and then fluff with a fork. Allow quinoa to cool some, you want it to be warm, not piping hot when you add the rest of the ingredients.
  • After quinoa has cooled some, add in the remaining onion and pepper pieces, and the chopped cilantro.  Mix. Then add cucumber and avocado and lime juice (or sub lemon juice). Toss gently.
  • And then serve.
  • Give this spicy Spanish quinoa recipe a try and let me know what you think, and…

Bon appétit!

For another tasty vegetarian recipe, try this Easy Eggplant Burger Recipe.

veggie burger recipe
Veggie burger recipe with blackened eggplant

Thanks for watching and subscribing –And hit those buttons below to share this recipe. I appreciate it!

Share and Enjoy !


Spaghetti Squash Recipe — Mediterranean Style

mediterrean spaghetti squash

I love this Mediterranean spaghetti squash recipe; its super tasty, and I can eat way too much without feeling too guilty. Watch the video and learn how to easily cook this squash. It’s a terrific ingredient; delicious and healthy. This Mediterranean style recipe is just one of many ways to use this versatile vegetable. Give it a try!

Spaghetti Squash Recipe Ingredients:

1 medium SPAGHETTI SQUASH
1 Tbsp OLIVE OIL
1 large ONION (chopped)
4-6 cloves GARLIC (finely chopped)
½ RED BELL PEPPER (sliced)
1 14 oz can ARTICHOKE HEARTS in water (chopped)
1 cup OLIVES, and olive juice to taste (chopped)
¾ to 1 cup PARMESAN CHEESE (shredded or grated)
1 tsp OREGANO
½ tsp THYME
1 tsp BASIL
SALT and PEPPER to taste

Mediterranean spaghetti squash recipe
Mediterranean spaghetti squash makes a great vegetarian meal

How to Make this Spaghetti Squash Recipe

Preheat oven to 350.
Cut spaghetti squash in half, lengthwise (a good, sharp knife will be nice).  Place each side, cut side down, in a shallow pan with about ¾ c water. Bake, uncovered for 45 minutes. Set aside to cool squash halves–enough to handle without causing death to the handler–but not completely cool.
You have time to chop up all your ingredients while the squash cooks.   For the artichoke, you may want to remove some of the outer, tougher leaves.
For each half, use a spoon to scrape out and discard the seeds and dark center strings.  Use a fork to scrape out the squash into ‘spaghetti-like’ strands.
Heat oil over medium high heat.  Saute onion and garlic 4-6 minutes.  Add bell pepper. Turn heat to low, stir and cover for 2-4 minutes.  Uncover, stir in spaghetti squash and remaining ingredients.  Cover and cook til all ingredients are warm, about 7-10 minutes
Add 1 Tbsp of olive juice and any other seasonings to taste. Serve warm. And a little toasted bread on the side won’t hurt.
Give this spaghetti squash recipe a try and let me know what you think, and…
Bon appétit!
And for another great spaghetti squash recipe, try this Spanish-style Spaghetti Squash.

spaghetti squash recipe
click image to check out this recipe

Thanks for watching, sharing, and subscribing to my videos, I appreciate it!

Share and Enjoy !


Turkey Pot Pie Recipe with leftover turkey

turkey pot pie casserole

Make this turkey pot pie recipe! This dish will stick to your ribs; it’s simple, delicious comfort food like you like it, and a great way to use leftover turkey. Or substitute chicken for a chicken pot pie recipe.

Ingredients for Turkey Pot Pie Recipe

  • 2 to 3 lbs. of cooked TURKEY  (or chicken)
  • 1 large RED ONION (chopped)
  • 5 cloves GARLIC (minced)
  •  2 cups BROCCOLLI FLORETS
  • 1 med ZUCHINNI (chopped)
  • 1 14 oz can ARTICHOKE HEARTS (chopped)(or experiment using veggies you love)
  • White Sauce:
  • 2 Tbsp BUTTER
  • 2 Tbsp all-purpose FLOUR
  • 1/4 tsp SALT
  • 1 cup MILK
  • 2 cups CHICKEN BROTH
  • Casserole Topping:
  • 1  tsp black PEPPER
  • 1 ½ cup BUTTERMILK
  • 1 ½ cup SELF-RISING FLOUR
  • 1 ¼ stick BUTTER (melted)

pot pie recipe
A pot pie is a perfect way to use leftover turkey or chicken.

How to Make Turkey Pot Pie

Cook turkey (or chicken) your favorite way, then allow to cool. Remove skin and bones and chop into casserole friendly pieces.  If you have left-over turkey or chicken, then this is a great dish to utilize that extra bird when you’re fed up with eating sandwiches (definitely keep this dish in mind after Thanksgiving).

Chop veggies into casserole friendly pieces—definitely experiment with the types of veggies you use—whatever is on hand will usually work; isn’t cleaning out the fridge what a casserole does best?

Make the white sauce:
In a sauce pot, melt 2 Tbsp butter on low heat and slowly add 2 Tbsp flour, mixing until mixture is smooth.  Add ¼ tsp salt.  Slowly add 1 cup milk, stirring until all is smooth.  Turn burner heat up to medium high and add 2 cups broth.  Continue stirring until mixture is heated through, but do not bring to a boil. Cover and remove from heat.

Arrange turkey on the bottom of a casserole dish and cover with the white sauce. Check here for current prices on a Pyrex Casserole Dish on Amazon.  

Top turkey with the chopped veggies.  Add additional seasonings if desired, but keep in mind that the broth may already be well salted.

In a bowl, combine 1 ½ cups buttermilk, 1½ cups self-rising flour, 1¼ stick melted butter, and black pepper.  Mix into a smooth batter.

Pour batter over the veggies; spread evenly over the casserole to form a smooth top layer.

Place Casserole in an oven pre-heated to 425 degrees F and cook approx. 35 minutes.  Cook an additional 5-10 minutes under the broiler to brown the top crust.

Allow casserole to rest 10-15 minutes before serving, and then follow your heart.

That’s it, dudes. Giive this pot pie recipe a try and let me know what you think, and…

For another family-style recipe, try this Complete Roast Chicken Dinner.

roast chicken
Coat the chicken in butter for a golden roast chicken

Thanks for checking out the pot pie recipe. Be sure and sign up for our mailing list so you’ll never miss a Chef Buck cooking video, and click a button below and share the dishes with your friends. We appreciate all the kind comments and support, and we’ll see you next time in the kitchen!
–Chef Buck

Share and Enjoy !


Try the Best Moroccan Chicken Stew Recipe

moroccan chicken tagine

Wow! This is super flavorful Moroccan chicken stew recipe. The combo of lemon and olive add a tangy richness to the broth and add a nice twist to your expectations of a chicken stew. Chef Bill cooked up this wonderful Chicken tagine and we had the camera running to catch it all. Give this delicious recipe a try and you will not be disappointed.

Ingredients for Chicken Stew:

2 1/2 lbs CHICKEN Pieces (skinned)
1 Tbsp OLIVE OIL
1 cup ONION (chopped)
2-3 cloves GARLIC (finely chopped)
1 cup CHICKEN BROTH
2 cups pitted WHOLE GREEN OLIVES
1 tsp ground CINNAMON
1/2 tsp CUMIN
1/2 inch GINGER (minced–or substitute 1/2 teaspoon ground ginger)
1-2 tsp LEMON ZEST
1/4 cup LEMON JUICE
1 Tbsp CILANTRO (chopped)
SALT and PEPPER to taste

chicken stew
Moroccan inspired Chicken Stew

How to Make This Chicken Tagine

Heat olive oil in a pot over high heat. Season chicken with salt and pepper and then place in pot. Brown chicken appox. 3 minutes each side and then remove from pot.
Add onion and garlic and saute in juices for a couple of minutes. Return chicken to pot and add Chicken Broth.
Add olives. Add cinnamon, cumin, and ginger. Stir, and bring pot to a boil. Reduce heat, cover, and simmer for 45 minutes.
After 45 minutes, uncover, turn chicken, and let cook 15 more minutes.
Using a slotted spoon, remove chicken and olives from pot and place in a serving dish. To the broth in the pot, add lemon juice, zest, and cilantro.
Serve the chicken and olives over rice or couscous and top with broth as desired. The olives are fantastic.
And the chicken is, too!
Give this terrific chicken stew a try and let me know what you think, and…
Bon Appétit!

And try this tasty Cornish Hen Recipe, too.

cornish game hen

Share and Enjoy !


Follow Me!