Puttanesca with Chickpeas

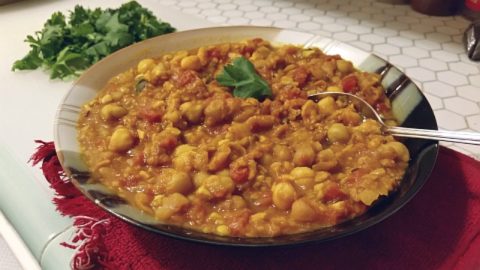
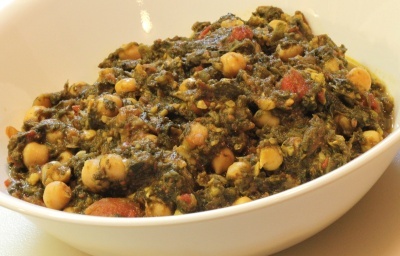
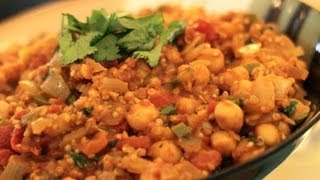
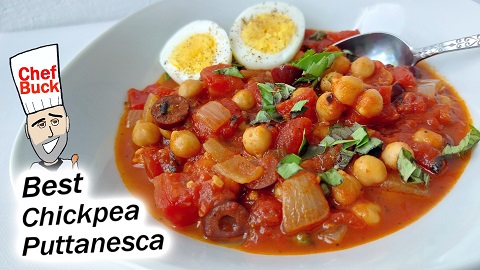
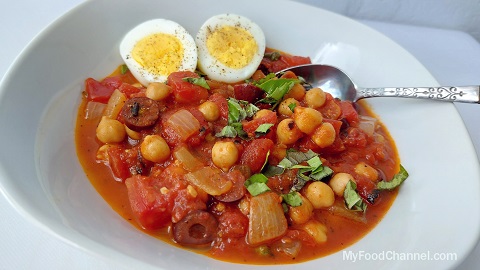
Puttanesca with chickpeas is a flavorful, quick and versatile twist on a classic Italian dish. A puttanesca recipe calls for anchovies, which is an ingredient some folks are not excited about–including myself!–but anchovy is perfect in this recipe. Like your favorite spaghetti sauce, puttanesca is great right when you cook it, and even more delicious the next day.

Ingredients for Chickpea Puttanesca

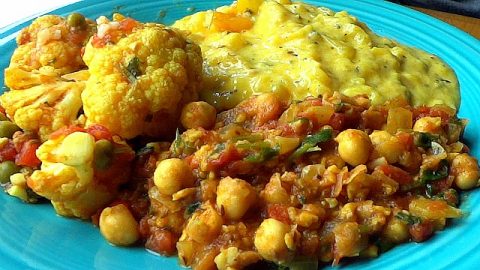
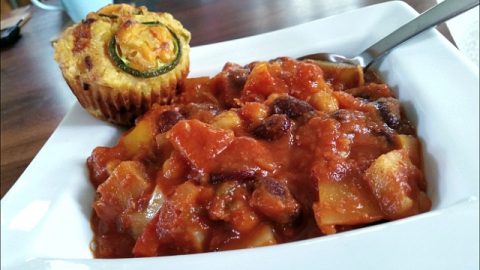
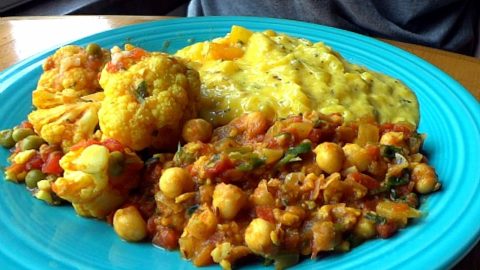
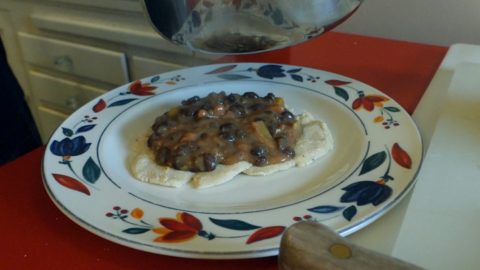
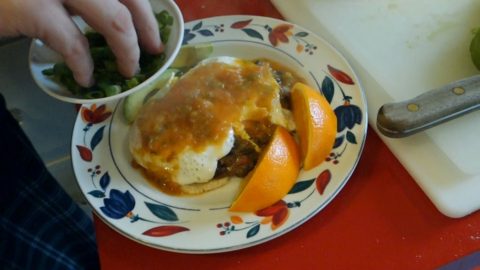
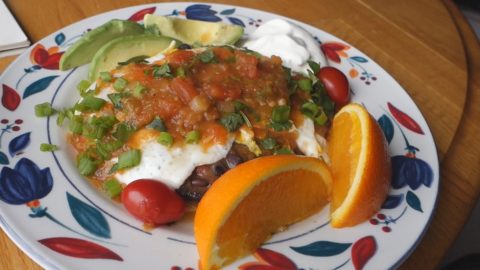
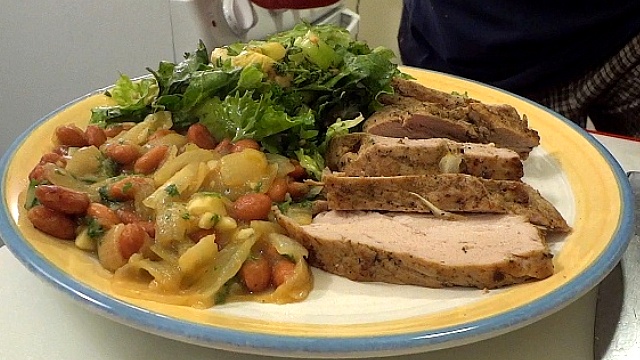
Optional: top your puttanesca with a protein e.g. boiled egg, Italian sausage, fish, poultry.

1 Tbsp oil
1/2 tsp dried chili pepper flakes
1 tsp cumin seeds (optional)
1 tsp fennel seeds (optional)
Large onion (about a cup), cut in bite-sized chunks
1 Tbsp garlic cloves, finely chopped
3 anchovy fillets (about 1 oz), drained and finely chopped
1 Tbsp tomato paste
1/2 cup white wine
28 oz can diced tomatoes (in the video we used fire roasted)
1 tsp Italian seasoning
1/2 tsp black pepper
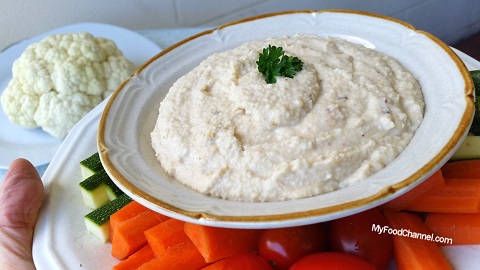
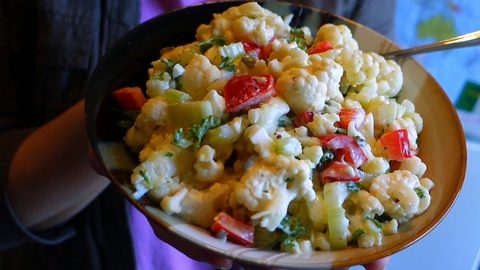
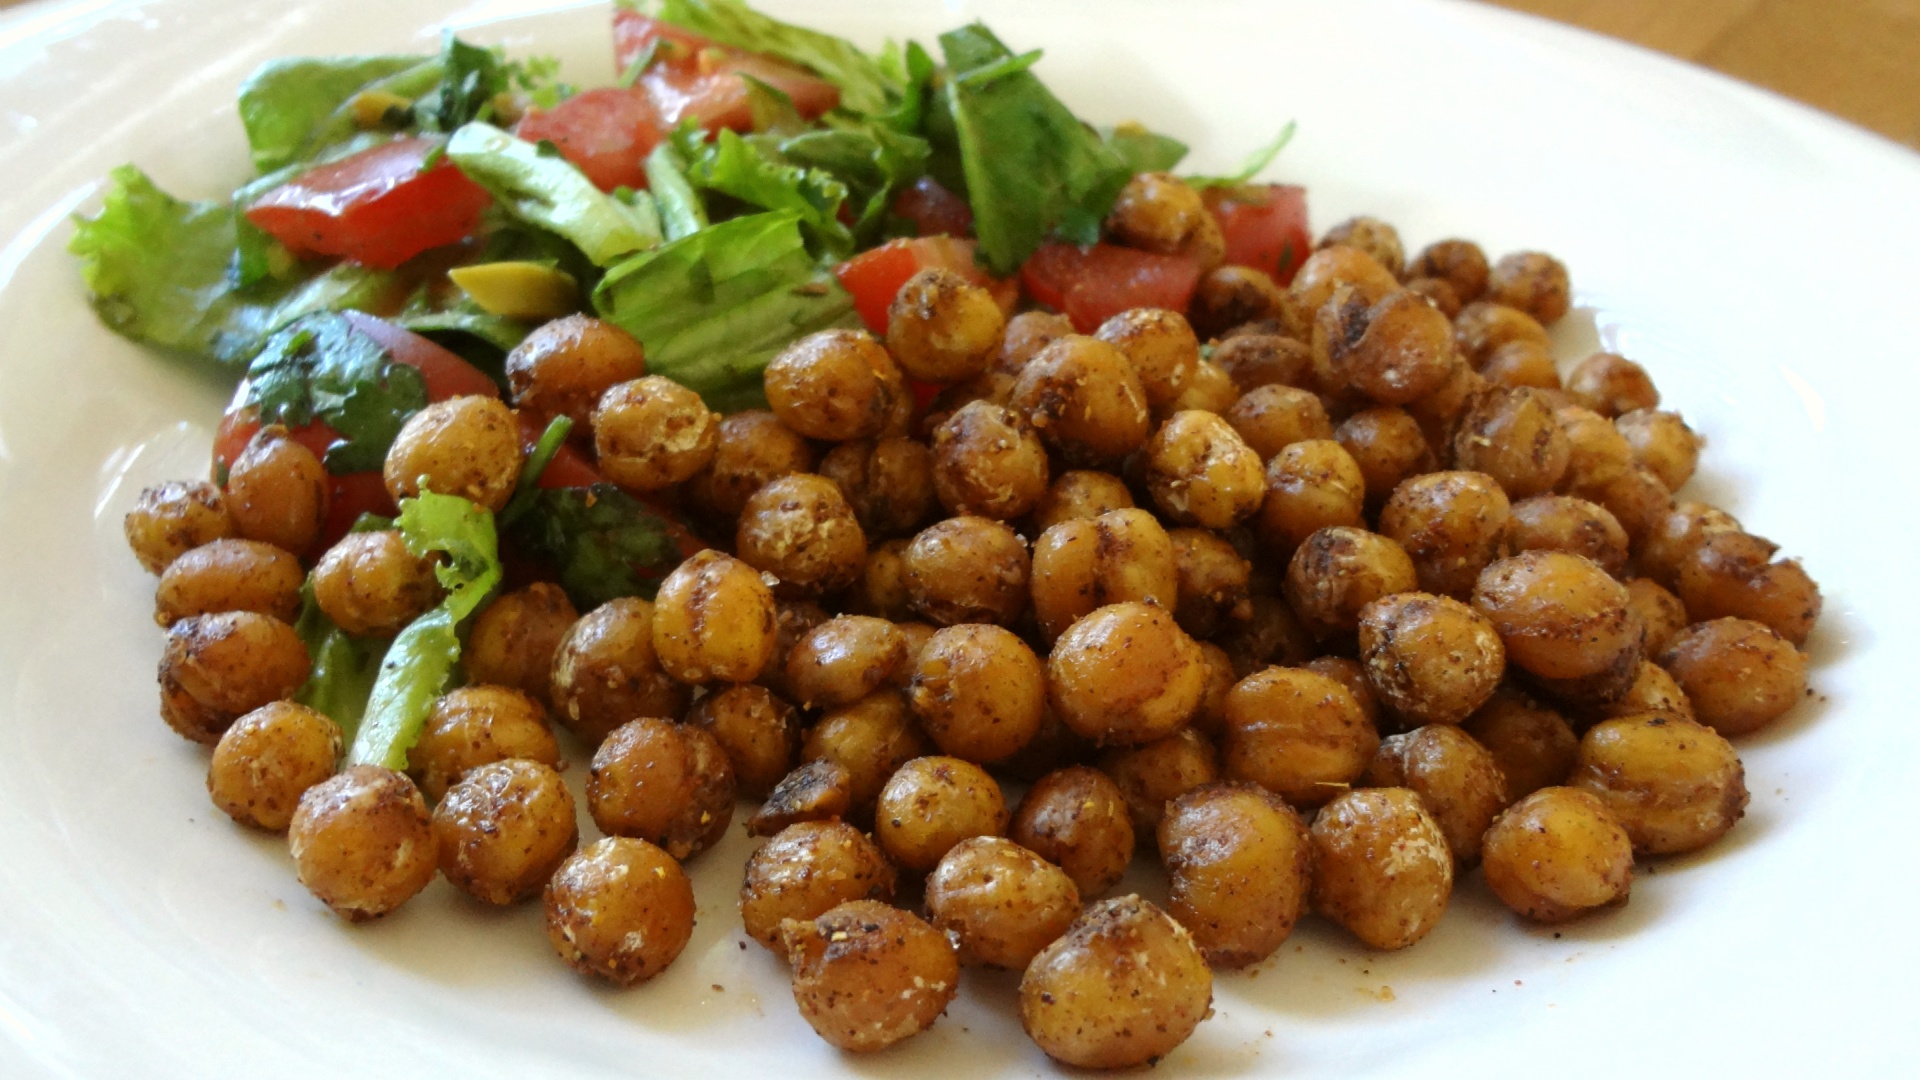
1 15 oz can of chickpea, drained and rinsed
1/3 cup sliced Kalamata olives
2 Tbsp capers, drained

Optional garnish: 1/4 cup choppped fresh basil (or parsley)

puttanesca with chickpeas

How to Make Puttanesca with Chickpeas

Note: You will want to pay extra attention to the heat of your skillet with this dish because you’re working with seeds and because you want some lightly brown bits….not a pan of burnt seeds, garlic and/or anchovies.

Prep some ingredients:
Drain and rinse chickpeas.
Peel and chop onions.
Peel garlic. Dab excess moisture from anchovies. Mince garlic and anchovies.
Open your cans of tomato paste, tomatoes
Measure and drain your olives and capers.
Decide if you want to have some protein on the top of your puttanesca. In the video, we served the puttanesca with boiled eggs.  Here are two ways to make the perfect boiled eggs every time.

Prepare a flavorful base:
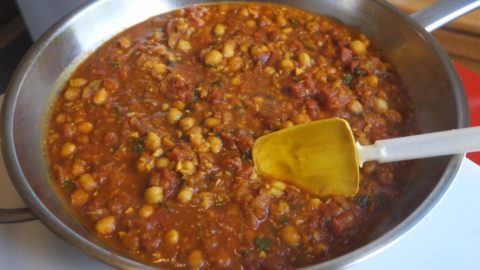
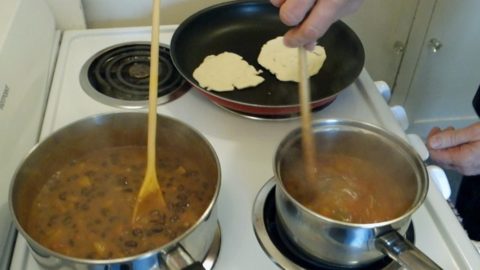
Heat oil over medium high heat in a large skillet. Saute chili flakes, cumin seeds and fennel seeds onions for 30 seconds, stirring constantly. Add onions and cook for about 4 minutes.  Add anchovies and garlic, stir constantly for 30 seconds more, until fragrant. Turn heat to medium. Add tomato paste and stir in for 30 seconds more. Add wine and stir for another minute, scraping up any small bits that have stuck to the pan.  A stainless steel skillet is ideal for this recipe. Check current prices for stainless steel skillets on Amazon.

Complete your puttanesca:
Add the tomatoes and juice, Italian seasoning and black pepper. Cook until the liquid is reduced by half, about 10 minutes. Add your chickpeas, olives and capers. Heat through.

Serve with basil and/or protein.

Experiment with your Puttanesca

Instead of white wine, you can use 1/4 cup white wine vinegar + 1/4 cup water.

Experiment with the seasonings.  In one version, instead of the Italian seasoning and pepper flakes, we used Olde Thompson Italian Seasoning (now called ‘Pinch of Rome’ seasoning) – that is actually more like a great pizza topping.

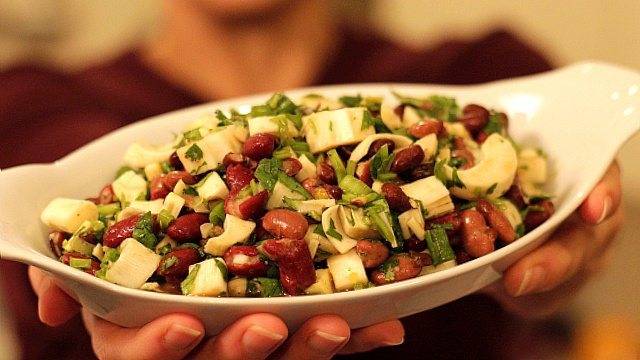
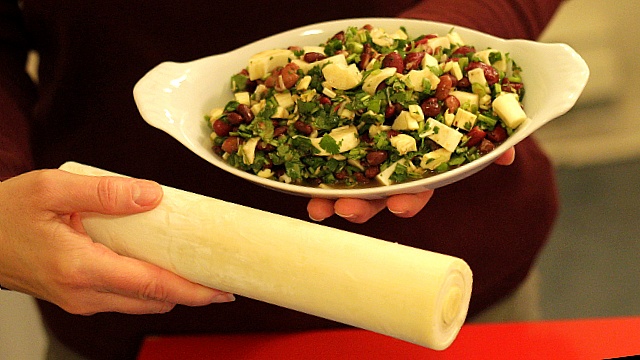
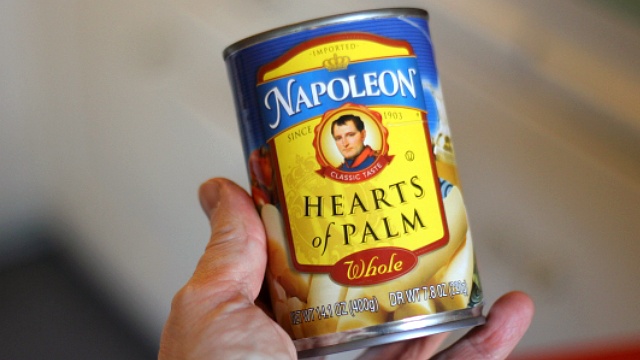
Try a different bean!

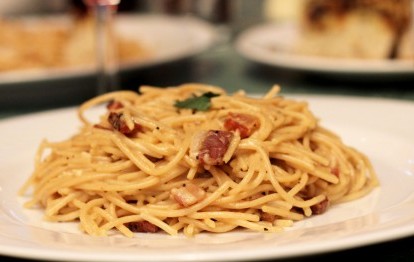
For another tasty Italian-inspired dish, try this easy Spaghetti Carbonara Recipe.

spaghetti carbonara

Thanks for Watching our Videos!

Thanks for checking out this puttanesca recipe, and all of our recipes. Sign up for our mailing list so you’ll never miss a new recipe. Also click a button below and share the dishes with your friends. You can also follow Chef Buck on Youtube. We appreciate all the kind comments and support, and we’ll see you next time in the kitchen!

If you like what CG and I do, support us on Patreon, or throw us a tip in our Paypal Tip Jar. We’ll happily enjoy a coffee on the road – Thanks! We appreciate all the support, and we’ll see you next time in the kitchen!

We include affiliate links for products on our website. Making a purchase after clicking on our links and we may earn a commission which helps us produce more videos and drink more coffee :^) We participate in the Amazon Services LLC Associates Program, which is an affiliate advertising program. It provides a means for us to earn fees by linking to Amazon.com and affiliated sites, so we can make more videos.

Share and Enjoy !

White Bean Gravy with Cannellini Beans

white bean gravy

Make a rich white bean gravy with canned beans. I prefer cannellini beans for this gravy recipe, but most white beans will do the trick. When eating a low-fat diet, two of the things I miss most are biscuits and gravy, but there are healthy alternatives for these cravings, and a white bean gravy is super satisfying if you season it up just right.

white bean gravy

Ingredients for White Bean Gravy

15oz can WHITE BEANS
1 med ONION
1-2 cloves GARLIC
BROTH as needed
fresh ROSEMARY (or SAGE is nice!)
½ tsp FENNEL SEED
1 Tbsp FLOUR
1 tsp SALT
1 tsp PAPRIKA
1 tsp GARLIC POWDER
½ tsp BLACK PEPPER
HOT PEPPER (optional) I use Costena Chipotles check current prices on Amazon
1 Tbsp OIL Optional: fresh herbs or chopped green onion for garnish

How to Make White Bean Gravy

  • Heat about 1 Tbsp of oil in a pot on medium heat.
  • When the skillet is hot, add chopped onion and saute for 2 minutes.
  • Add garlic and hot pepper and all seasoning and continue cooking for 2 minutes more.
  • Stir in flour.
  • Add canned beans and about half a can of broth. Stir, and bring the skillet up to a simmer, then cover and let simmer for 10 minutes.
  • Using a hand blender, blend the pot contents into a smooth gravy. Be careful of hot bean splatter! Check current prices for Hand Blenders on Amazon.
  • If needed, reduce the gravy farther on the stove, or add more broth or water if desired.
  • Use this bean gravy just like you would your favorite fat and flour gravy! And garnish with fresh green herbs or green onion for a picture perfect meal.

If you enjoy this white bean gravy recipe, then check out a breakfast bean favorite, Eggs and Beans!

beans and eggs

Thanks for checking out our white bean gravy recipe, and all of our recipes. Be sure and sign up for our mailing list so you’ll never miss a new recipe. Also, click a button below and share the dishes with your friends. You can also follow Chef Buck on Youtube. We appreciate all the kind comments and support, and we’ll see you next time in the kitchen!

If you like what CG and I do, support us on Patreon. Or throw a tip in our Paypal Tip Jar. We’ll happily enjoy a coffee on the road – Thanks! We appreciate all the support, and we’ll see you next time in the kitchen!

Thanks for watching our recipe videos!

We include affiliate links for products on our website. So, if you make a purchase after clicking on our links, we may earn a commission which helps us produce more videos and drink more coffee :^) We participate in the Amazon Services LLC Associates Program, which is an affiliate advertising program. It provides a means for us to earn fees by linking to Amazon.com and affiliated sites, so we can make more videos.

Share and Enjoy !

Beans and Eggs One-Skillet Recipe

Try a delicious one-skillet breakfast recipe for beans and eggs. This egg recipe is easily adjustable for any family meal; just add as many eggs to the recipe as you have folks to feed! I like to spice up this bean dish with hot pepper and lots of seasoning, because beans and tomato can handle a lot of added flavor.

beans and eggs

Ingredients for Beans and Eggs

4 EGGS …add more eggs for more mouths!
15oz can BEANS …white beans are my favorite
15oz can diced TOMATOES
1 finely chopped ONION
2 cloves minced GARLIC
fresh chopped HOT PEPPER
or try La Costena Chipotle like I use in the video recipe
a little OIL for cooking
seasonings like:
½ tsp SALT
½ tsp BLACK PEPPER
1 tsp PAPRIKA
1 tsp GARLIC POWDER
…adjust seasonings to taste

Optional: fresh herbs or chopped green onion for garnish

How to Make One-Skillet Beans and Eggs

  • Heat about 1 Tbsp of oil in a skillet on medium heat.
  • When the skillet is hot, add chopped onion and saute for 2 minutes.
  • Add garlic and hot pepper and seasoning and continue cooking for 2 minutes more. I use La Costena Chipotle pepper in the recipe video. Check the current price for this Chipotle on Amazon.
  • Add canned beans and tomato and a little water. Stir, and bring the skillet up to a simmer, then cover and let simmer for about 10 minutes.
  • Uncover and stir until liquid reduces to saucey, but not too wet.
  • Crack eggs into the skillet, leaving space between them.
  • Cover and let cook 4-6 minutes more until the eggs are done to your liking…cook for a bit more than this if you like the yolks hard.
  • Turn off the heat, and serve the eggs and beans immediately. Garnish with fresh green herbs or green onion for a picture perfect meal.

If you like this egg recipe, check out another spicy favorite, Huevos Rancheros!

huevos rancheros
Huevos Rancheros is a flavorful, classic Mexican dish…delicious!

Thanks for checking out our beans and eggs recipe, and all of our recipes. Be sure and sign up for our mailing list to never miss a new cooking video, and also click a button below and share the dishes with your friends, and follow Chef Buck on Youtube. We appreciate all the kind comments and support, and we’ll see you next time in the kitchen!

If you like what CG and I do, support us on Patreon, or throw a tip in our Paypal Tip Jar We’ll happily enjoy a coffee on the road, or maybe even pay a bill or two!–Thanks! We appreciate all the support, and we’ll see you next time in the kitchen!

Thanks for watching our recipe videos!

We include affiliate links for products on our website, so if you make a purchase after clicking on our links, we may earn a commission which helps us produce more videos and drink more coffee :^) We participate in the Amazon Services LLC Associates Program, which is an affiliate advertising program providing a means for us to earn fees by linking to Amazon.com and affiliated sites, so we can make more videos.

Share and Enjoy !

Miso Soup Recipe – Vegetable Soup with Yellow Miso

Miso is a fermented soybean paste perfect for a quick miso soup recipe. I find this popular Asian seasoning in a refrigerated case at my local big box grocery. There are 3 main varieties of miso: white, yellow, and red miso. White miso has the mildest flavor while red miso is the strongest; I generally choose yellow miso which is in the middle and use it primarily for making soups and dressings.

Ingredients for this Miso Soup Recipe

3 tsp YELLOW MISO
2 cups WATER
1 CARROT sliced
1 small ONION chopped (or use green onions)
1 stick CELERY chopped
handful of fresh SPINACH roughly chopped
dried SEAWEED to taste (we use versatile seaweed sheets)
1 Tbsp OIL
¼ tsp BLACK PEPPER
RED PEPPER FLAKES

miso soup recipe

How to Make Miso Soup with Vegetables

  • Heat a pot with oil on medium heat.
  • When oil is hot, add in the onions and red pepper flakes and sauté for 2-3 minutes.
  • Add in the carrots and celery and continue to sauté another 2 minutes.
  • Season with black pepper then pour in the water, cover the pot and let it come to a boil.
  • Once the pot is boiling, turn off the heat and stir in the miso until it dissolves.
  • Add in the remaining ingredients, stir, and serve hot.

We generally buy seaweed sheets, which is what I use in the video recipe. Dried seaweed sheets are versatile and easily used for making sushi rolls or simply adding to salads and soups. Check current prices for DRIED SEAWEED on Amazon.

miso soup recipe

Interested in a heartier soup? One of my favorite and easiest recipes is for this Healthy Mackerel Stew. Any time of year is great for a hearty, healthy soup or stew, but like miso soup, this dish is especially tasty when the cool weather arrives.

fish stew recipe

Thanks for checking out this vegetable miso soup recipe, and all of our recipe videos. Miso has a Wikipedia page if you’d like to discover more details about this Japanese soybean paste.

Be sure and sign up for our mailing list and never miss a new Chef Buck cooking video, and also click a button below and share the dishes with your friends. We appreciate all the kind comments and support, and we’ll see you next time in the kitchen!

Thanks for watching our recipe videos!

We include affiliate links for products on our website, so if you make a purchase after clicking on our links, we may earn a commission which helps us produce more videos and drink more coffee :^) We participate in the Amazon Services LLC Associates Program, which is an affiliate advertising program providing a means for us to earn fees by linking to Amazon.com and affiliated sites, so we can make more videos.

Share and Enjoy !

Cauliflower Hummus Recipe for Health Nuts

Hummus is healthy enough, so isn’t a Cauliflower Hummus recipe just a little silly? Cauliflower hummus is very tasty, just like regular old delicious hummus, and it has cauliflower in it, so why not? Let’s do it.

What you need for a Cauliflower Hummus Recipe

1 15oz can WHITE BEANS
2 cups of fresh CAULIFLOWER
3 cloves GARLIC
3-4 Tbsp EXTRA VIRGIN OLIVE OIL
3-4 Tbsp TAHINI
3 Tbsp LEMON JUICE
SALT to taste …but about ½ tsp is cool
LEMON ZEST optional
additional SEASONING optional

cauliflower hummus recipe

How to make Cauliflower Hummus

Put everything in a food processor and blend it until smooth. That’s it. Wadja think?

Check current prices for tahini on Amazon. If you’re buying tahini from a brick and mortar store, look around in the various departments such as the “international” foods, health foods, and peanut butter section; different brands market tahini to different types of buyers, and the price can vary greatly, so definitely shop around to avoid over-priced tahini.

Serve hummus with warm pita bread, pita chips, crackers, or raw fruit and vegetables.

Is cauliflower hummus too healthy for you? Are you a risk taker? Like it on the wild side? Try this very dangerous Onion Dip Recipe…dangerously delicious.

onion dip recipe

Thanks for checking out our cauliflower hummus recipe video, and all of our recipes. Be sure and sign up for our mailing list and never miss a new Chef Buck cooking video, and also click a button below and share the dishes with your friends. We appreciate all the kind comments and support, and we’ll see you next time in the kitchen!

Check out this overly scientific article about chickpeas and hummus if you want to nerd out on some hummus nutritional info.

Thanks for watching our recipe videos!

We include affiliate links for products on our website, so if you make a purchase after clicking on our links, we may earn a commission which helps us produce more videos and drink more coffee :^) We participate in the Amazon Services LLC Associates Program, which is an affiliate advertising program providing a means for us to earn fees by linking to Amazon.com and affiliated sites, so we can make more videos.

Share and Enjoy !

Spinach Curry with Chickpeas

This spinach curry recipe is one of my favorite Indian dishes. When you see spinach and chickpea curry at an Indian restaurant, it’s called Chole Palak. There are many versions of this dish. One of my favorite versions is here, but that spinach curry recipe calls for asafoetida and garam masala. If you wish to explore Indian cooking, I highly recommend you seek those ingredients out, but with the recipe below, you can make a delicious spinach curry with ingredients you might already have in the kitchen.

Ingredients for Spinach Curry Recipe

1 pack frozen or canned SPINACH thawed, 10 to 15 oz
½ to 1 cup ONION chopped
HOT PEPPER to taste, chopped, optional
15oz can diced TOMATOES or 2 fresh tomatoes
2-4 cloves GARLIC finely chopped
1 Tbsp minced GINGER
15 oz can CHICKPEAS rinsed and drained
1-2 tsp CUMIN SEEDS
2 tsp CORIANDER POWDER
½ tsp TURMERIC POWDER
1 tsp CHILI POWDER
2-3 Tbsp OIL
SALT and PEPPER to taste

Check out current prices for Indian Cooking Spices on Amazon.

spinach curry

How to Make Chickpeas and Spinach Curry

  • Heat oil on medium-high heat and add cumin seeds. The seeds should sizzle when they hit the pan and will brown and crack quickly, so only leave them cooking on their own for a matter of seconds.
  • Add in the onions and peppers and stir for about 1 minute.
  • Add in the garlic and seasonings and continue to stir another 1-2 minutes.
  • Empty one can of diced tomatoes and the ginger into the skillet and mix well with the other ingredients. Adjust the stove top heat as needed throughout the cooking process.
  • Add the canned chickpeas, rinsed and drain, plus 1-2 cups of water. Stir well and bring the skillet up to a simmer, then cover and cook for about 10 minutes.
  • Uncover and crush about ½ on the dish with a potato masher or fork. This will thicken up the dish and make it creamier. You can “smoosh” the entire dish if you like, but I prefer leaving about half of the chickpeas whole. Continue to simmer the curry uncovered until the water has cooked away to your desired consistency.

And that’s it! Spinach curry is often served very wet, sometimes almost soupy, but I prefer the dish much drier. Try the dish both ways and see which version you prefer. This Indian-style recipe is delicious, and maybe a good tactic to sway non-spinach lovers into giving spinach another try.

For more Indian recipes, check out this real-time Indian cooking lesson featuring some of my favorite Indian dishes.

mango curry
A complete Indian meal with mango curry, chana masala, and gobi matar.

Thanks for checking out our spinach curry recipe, and all of our recipes. Be sure and sign up for our mailing list and never miss a new Chef Buck cooking video, and also click a button below and share the dishes with your friends. We appreciate all the kind comments and support, and we’ll see you next time in the kitchen!
–Chef Buck

Thanks for watching our recipe videos!

We include affiliate links for products on our website, so if you make a purchase after clicking on our links, we may earn a commission which helps us produce more videos and drink more coffee :^) We participate in the Amazon Services LLC Associates Program, which is an affiliate advertising program providing a means for us to earn fees by linking to Amazon.com and affiliated sites, so we can make more videos.

Share and Enjoy !

Baked Bean Salad instead of Potato Salad?

If you’ve got a can of baked beans in the cabinet you can quickly jazz it up to create a baked bean salad. It’s kinda like a potato salad recipe, but with beans.

What you need for a Baked Bean Salad

15oz canned BAKED BEANS
1 BOILED EGG
1-2 Tbsp MAYONNAISE
2 Tbsp finely chopped PICKLES
1 Tbsp finely chopped JALAPENOS (optional)
Fresh cracked BLACK PEPPER

…you can also add fresh chopped onion if serving the salad right away, but I wouldn’t add onion if making the dish in advance.

baked bean salad

How to make this Bean Salad Recipe

Use whatever brand of baked beans you like. Canned baked beans already have a lot of seasoning and flavor, so this recipe requires few ingredients. Check here for current baked beans prices on Amazon.

  • Open and drain the canned beans. Do not rinse the beans.
  • In a large bowl, add 1 Tbsp of mayonnaise and egg yolk. Start with 1 Tbsp of mayo, you can always add more later if desired. Whisk until smooth.
  • Add in the beans, chopped egg whites, pickles, jalapenos, and cracked black pepper.
  • Toss the ingredients, and adjust to taste.

Garnish with a sprinkling of fresh chopped parsley or paprika. This baked bean salad is a perfect picnic side dish, and it travels very well.

baked bean salad

The recipe is a close cousin to potato salad, and I truly love potato salad, but over the years I’ve gotten addicted to this Mock Potato Salad made with cauliflower. It’s a great alternative if you’re looking for lower carbs. And for another classic picnic dish, try out this Easy Coleslaw Recipe.

cauliflower potato salad
low carb cauliflower “potato” salad recipe

Thanks for checking out our baked bean salad recipe, and all of our recipes. Be sure and sign up for our mailing list and never miss a new Chef Buck cooking video, and also click a button below and share the dishes with your friends. We appreciate all the kind comments and support, and we’ll see you next time in the kitchen!
–Chef Buck

Thanks for watching our recipe videos!

We include affiliate links for products on our website, so if you make a purchase after clicking on our links, we may earn a commission which helps us produce more videos and drink more coffee :^) We participate in the Amazon Services LLC Associates Program, which is an affiliate advertising program providing a means for us to earn fees by linking to Amazon.com and affiliated sites, so we can make more videos.

Share and Enjoy !

Black Bean Corn Salsa is Good on Everything*

Black Bean Corn Salsa

Here’s a simple Black Bean Corn Salsa that will knock your socks off, or at least be very tasty on a chip, a fish, a salad, on or in an omelet…you get the idea. It’s an easy and versatile way to use beans, which are good for your heart, in fact the more you eat beans, the more you…crave more beans? Something like that, so definitely give this recipe a try. This salsa is super tasty and you can pack it with raw, healthy, and fresh ingredients to use as an accompaniment for types of recipe dishes.

What you need for Black Bean Corn Salsa

dressing:
1 Tbsp LEMON JUICE
1 Tbsp RED WINE VINEGAR or balsamic vinegar
1 Tbsp HONEY
1 tsp TURMERIC
1 tsp GARLIC POWDER or 1 Tbsp minced garlic
¼ tsp PAPRIKA
½ BLACK PEPPER
½-1 tsp SALT
salsa:
2 15 oz cans BLACK BEANS, drained and rinsed
1 15 oz can YELLOW AND WHITE CORN, drained or 2 cups frozen corn, thawed
12-16 sliced CHERRY TOMATOES
5-7 small GREEN ONIONS, finely sliced, or ½ cup red onion, finely diced.
1 Red or Orange BELL PEPPER, diced
1 bunch of chopped, fresh CILANTRO, or substitute parsley
1-2 AVOCADO peeled, pitted, and diced; add JUST before serving

Black Bean Corn Salsa
Salsa is great on a chip, as a topping for fish or salad, in an omelet, on ice cream…well, maybe not ice cream.

How to make the Black Bean Corn Salsa

  • In a small bowl, combine the dressing ingredients, mix well, and then set aside.
  • Drain and rinse the black beans and corn. In this recipe we use a mix of yellow and white whole kernel corn.
  • Slice and dice and chop tomatoes, onions, and other veggies you want to add; see other veggie suggestions below.
  • In a large bowl, combine and toss veggies and beans and corn.
  • Add dressing and mix well.
  • For best results, place overnight in the refrigerator. Remember that turmeric can stain some plastic containers. Ziplocs allow you to periodically flip salsa to distribute dressing more evenly.
  • Let marinate at least a couple of hours, preferably overnight.
  • Before serving, add diced avocados and gently mix.
  • Taste, adjust seasoning as needed.
  • Serve with chips, or as a topping or filling.

Options and Substitutions

  • ½ cup red onion, finely chopped
  • Pickled jalapeno slices
  • ½ tsp chili powder
  • 2 tsp cumin
  • Mango, diced

More Uses for Salsa

  • Use black bean corn salsa as a salad topping!
  • Fancy Slaw: add chopped cabbage, mayo/yogurt.
  • Fish topping: add mango and cumin and then warm.
  • Omelet filling or topping: add cheese, cumin, then garnish with sour cream and/or guacamole.
  • Use salsa as a filling for quesadillas, tortillas, etc..

If you’re new to home cooking, get a bunch of spices, pots and pans, and begin experimenting with different recipes. It’s a healthy hobby that will save you money in the long run. Check out current prices for Complete Kitchenware Sets on Amazon as well as Complete Starter Spice Kits. Or go to a thrift store! I’ve found some of my favorite kitchen gear at second-hand stores.

This black bean corn salsa goes great with a lot of dishes, and for another avocado-ee recipe try a Classic Homemade Guacamole Recipe.

easy guacamole recipe
guacamole recipe

Be sure and sign up for our mailing list and never miss a new Chef Buck cooking video, and also click a button below and share the dishes with your friends. We appreciate all the kind comments and support, and we’ll see you next time in the kitchen!
–Chef Buck

Thanks for watching our recipe videos!

We include affiliate links for products on our website, so if you make a purchase after clicking on our links, we may earn a commission which helps us produce more videos and drink more coffee :^) We participate in the Amazon Services LLC Associates Program, which is an affiliate advertising program providing a means for us to earn fees by linking to Amazon.com and affiliated sites, so we can make more videos.

*almost

Share and Enjoy !

Vegetarian Chili is not just for Vegetarians!

vegetarian chili

Here’s a satisfying and hearty vegetarian chili recipe that’ll put a little pep in your step. If you’re a die-hard carnivore, then your initial reaction is probably NOPE, but you should give meatless chili a try. I love a good meat chili, and when I get chili at a restaurant I generally order a meat and bean chili, but at home I’m vegetarian chili all the way. Vegetarian chili just tastes great, and I don’t miss the meat, plus it’s a perfect way to clean out all the veggie odds and ends in your fridge. The key to a hearty meatless chili is lots of seasoning, onions, and peppers. I like to add at least two kinds of beans, and the veggies can be whatever you like, so be creative!

What You Need to Make a Great Vegetarian Chili

15 oz can CHICK PEAS
15 oz can KIDNEY BEANS
1 BELL PEPPER (chopped)
Lg ONION (chopped)
JALAPENO PEPPER (diced, very optional)
2-3 cloves GARLIC (finely chopped)
1 ZUCHINNI (cut into large pieces)
1 cup CAULIFLOWER (chopped)
2 ROMA TOMATOES (chopped)
28 oz can CRUSHED TOMATOES
1 heaping Tbsp DRIED OREGANO
1 Tbsp CUMIN
1 tsp GARLIC POWDER
1 Tbsp CHILI POWDER
1 Tbsp SMOKED PAPRIKA
SALT and PEPPER, to taste
2 Tbsp OLIVE OIL for sauteing
WATER as needed…add slowly
I also add a little leftover RUTABAGA to this recipe, but that is very optional. A vegetarian chili is a great way to clean out the fridge of all those veggie odds and ends, so use what you have.

vegetarian chili
pot o’ meatless chili for good times

How to Make Easy Vegetarian Chili

  • Slice, dice, mince, and chop all your ingredients. Prepping this dish is the most labor intensive part of this recipe. Once your ingredients are ready, it’s pretty eazy peezy.
  • Heat some oil in a large pot on medium heat.
  • Add in the onion and hot pepper and saute for 4-5 minutes.
  • Add in the rest of the peppers, garlic, and seasoning, then mix and saute for another couple minutes.
  • Add in everything else, plus about ½ a can of water. Be conservative with the water. The dish might seem overly thick, but a lot of water will be released from the veggies as the chili cooks. You can always add more water later.
  • Cover and bring the pot to a bubble, reduce the heat down to a simmer, and cook covered for about 45 minutes, adding water as needed and desired.
  • After 45 minutes give the dish a taste test and adjust seasoning, but remember, the flavor of the chili will intensify on its own as it sits.

Like any soup or stew or chili, it’s ideal if you make the recipe ahead of time, because the dish will get exponentially better as the days pass, so be sure to make a big pot of chili so you’ll have plenty of leftovers.

vegetarian chili
hearty vegetarian chili recipe…try it!

That’s it! Hope you like it, and if you’ve got a bigger pot, CLICK HERE for a double-sized variation of this vegetarian chili recipe.

If you want jalapeno corn muffins to pair with chili, here’s a recipe that tastes great and is a breeze to make.

vegetarian chili
make a batch of corn muffins for a great chili sidedish

Jalapeno Corn Muffin Recipe

¾ cup cornmeal (whole, medium grind)
1¼ cup all-purpose flour
2½ tsp baking powder
½ tsp smoked paprika
½ tsp chipolte (or regular chili powder)
½ tsp salt…unless the corn or butter already contain salt
1 cup milk
2 Tbsp oil (alternative butter, melted)
3 Tbsp honey
1 large egg
1 cup canned corn kernels, drained
¼ cup pickled jalapenos, chopped
¼ onion, minced
1 cup shredded sharp cheddar cheese (plus ¼ cup for topping)
optional: 1 jalapeno (deseeded and sliced for topping)

Place rack in middle of the oven and preheat to 400°F.
Grease 12 muffin pan cups or line with parchment paper baking cups; set aside.
Combine dry ingredients in bowl.
Combine remaining ingredients in another bowl (minus topping, jalapeno). Add to dry ingredients and stir until ingredients are moistened.
Fill prepared muffin cups evenly.
Top with remaining jalapeno rings and cheese.
Bake 20-30 minutes or until toothpick inserted into center comes out clean and muffins are golden brown.
Allow to cool for 5 minutes before removing from muffin tins.
Serve warm or cold. Serve with butter or honey butter.
HONEY BUTTER:
½ cup butter, softened
2 Tbsp honey

I hope you like these recipe ideas. Give this healthy chili recipe a try and let me know what you think, and for more hearty meat-free options, try this very easy blackened eggplant Veggie Burger Recipe or this fantastic faux pasta made with Zucchini Zoodles.
Or visit my Vegetarian Recipe Playlist over on The Chef Buck Youtube Channel.

Thanks for Watching our Vegetarian Chli Recipe!

Click a button below and share the dishes with your friends. We appreciate all the kind comments and support, and we’ll see you next time in the kitchen!

If you like what CG and I do, support us on Patreon, or throw us a tip in our Paypal Tip Jar. We’ll happily enjoy a coffee on the road – Thanks! We appreciate all the support, and we’ll see you next time in the kitchen!

We include affiliate links for products on our website. Making a purchase after clicking on our links and we may earn a commission which helps us produce more videos and drink more coffee :^) We participate in the Amazon Services LLC Associates Program, which is an affiliate advertising program. It provides a means for us to earn fees by linking to Amazon.com and affiliated sites, so we can make more videos.

Share and Enjoy !

Chole Masala Recipe with the fewest ingredients!

chole masala

Chole masala is an Indian chickpea curry recipe. For this simple chole recipe, I’m using the fewest ingredients I can. I do add Garam masala and cilantro to this version of chickpea curry; for a super simple version of chole masala, these two ingredients can be optional, but certainly use them if you have them on hand. I’m leaving out the asoefetida and besan (chickpea flour), and also the onion, which I will often cook into a chana masala. Chickpea curry is a delicious Indian staple, and a great introduction to Indian cooking.

what you need to make Chole Masala

1 15oz can CHICKPEAS
1 15oz can DICED TOMATO
3-5 cloves GARLIC finely chopped
½ tsp CUMIN SEEDS
1 tsp CUMIN POWDER
½ tsp TURMERIC POWDER
1 tsp CORIANDER POWDER
1 tsp CHILI POWDER
SALT and PEPPER (to taste)
½ tsp GARAM MASALA (optional)
fresh chopped CILANTRO (optional)
OIL for sauteing
Check out current prices for Indian Spices on Amazon.

chole masala
Chana masala is a great introduction to Indian cooking

how to make Chole Masala

  • In a skillet, heat oil on medium high heat.
  • When the oil is heated, add the cumin seeds, stir and allow to simmer for about 20 seconds.
  • Once the seeds begin to crack, add the finely chopped garlic.
  • Stir for approx. 1 minute and then add the diced tomatoes. Mix well and allow the tomatoes to bubble.
    As the tomatoes cook down, you can crush them with your stirrer for a smoother chana massala.
  • Stir in the chili powder, turmeric, coriander, and cumin powders (or substitute a premade curry mix instead).
  • Mix in the chickpeas and add ½ can of water.
  • Bring the dish to a bubble, then reduce to a simmer, cover, and allow cooking for 10 minutes.
  • After 10 minutes, the chick peas will be soft. Use a fork or potato masher to smash some of the chick peas, this will help thicken the chana masala.
  • If desired, add garam masala and then simmer uncovered to the desired consistency, remove and serve.
  • Garnish with fresh coriander leaves.
    Serve with rice or on its own.

Give this easy chole masala recipe a try and let me know what you think, and bon appétit!

And for more easy Indian recipe ideas, check out my Indian Recipes Playlist.

chole masala
click pic for easy Indian cooking recipes

Thanks for checking the chole masala recipe out, if you like it, then click a button or two below and share the dish with your friends, I appreciate it.
Thanks,
–Chef Buck

Share and Enjoy !


Bean Dip Recipe for Healthy Snacking

bean dip

White bean dip is super versatile, and this easy dip recipe can be used in a variety of dishes. Bean dip makes a handy spread for a crostini or sandwich, a healthy dip for chips or vegetables, or as a bean puree to serve as a dinner side for meat, fish, or vegetarian meals.

Bean Dip Recipe Ingredients

2 15oz cans of WHITE BEANS (rinsed and drained)
16 oz MUSHROOMS (chopped)
5-10 cloves GARLIC (chopped)
½ cup ROMANO CHEESE (I like to use freshly grated Romano, Parmesan, or Asiago cheeses)
1 medium to large size LEMON, juice and zest
½ tsp RED PEPPER FLAKES (or use fresh peppers)
3-4 Tbsp WORCESTERSHIRE SAUCE
SALT and PEPPER to taste
2-3 Tbsp of dark, rich OLIVE OIL
Garnish dip with tomato, olives, capers, fresh herbs, etc.

bean dip
Add mushrooms and Worcestershire sauce for a bean dip recipe twist.

How To Make a Bean Dip Recipe

I like to use canned beans.
You can use your favorite beans, or a mixture of bean types.
I prefer white beans for this recipe, like Navy or Cannellini.

  • Heat oil in a pot on medium heat for sauteing.
  • Add in the chopped garlic and red pepper flakes; stir the garlic for a few minutes until it begins to color.
  • Add in a bit of black pepper, and the chopped mushrooms, and continue sauteing.
  • Add the Worcestershire sauce.
  • Continue cooking for 3 or 4 minutes; the mushrooms will cook down quite quickly.
  • Add in the beans and maybe ½ cup of water or broth. Be conservative when adding liquid; the finished bean dip will be best thicker, rather than thinner.
  • Raise the heat to medium high, cover, and simmer beans for about 5 minutes.
  • Uncover, reduce the heat, and continue simmering until the liquid has cooked down and the bean mix thickens.
  • Turn off the burner.
  • Stir in the cheese until it melts into the beans. Use freshly grated cheese for best results.
  • Add the zest and juice of one medium to large lemon, and 2-3 Tbsp of dark olive oil.
  • Mix into the beans and cheese.
  • Transfer to a blender or food processor and blend until the bean dip is smooth,
    or use a hand mixer and blend dip in the cooking pot. Check current prices for Hand Blenders at Amazon.
  • Give it a taste test and adjust seasoning as needed.
  • Set dip aside to cool a bit.
bean dip
White bean puree makes an excellent bean dip or spread.

This bean dip can be served warm or cold, although it’s especially tasty warm.
Use it as a dip for chips or sliced veggies; it pairs particularly well with thick tortilla chips.
Use this bean dip as a sandwich spread instead of mayonnaise, or as a crostini topping.
White bean dip will pair nicely as a puree for fish or meat entrees.
Great as a party or dinner appetizer or just as a movie watching snack.

Give this easy bean dip recipe a try and let me know what you think, and bon appétit!

And for another creamy, beany option, check out this Healthy Hummus Recipe.

hummus

Thanks For Watching Our Bean Dip Recipe!

Thanks for checking out our beet and quinoa recipe, and all of our recipes. Be sure and sign up for our mailing list so you’ll never miss a new recipe. Also click a button below and share the dishes with your friends. You can also follow Chef Buck on Youtube. We appreciate all the kind comments and support, and we’ll see you next time in the kitchen!

If you like what CG and I do, you can also support us on Patreon, or throw us a tip in our Paypal Tip Jar. We’ll happily enjoy a coffee on the road – Thanks! We appreciate all the support, and we’ll see you next time in the kitchen!

We include affiliate links for products on our website. So, if you make a purchase after clicking on our links, we may earn a commission which helps us produce more videos and drink more coffee :^) We participate in the Amazon Services LLC Associates Program, which is an affiliate advertising program. It provides a means for us to earn fees by linking to Amazon.com and affiliated sites, so we can make more videos.

Share and Enjoy !

Huevos Rancheros Recipe From Scratch

huevos rancheros

Huevos rancheros is a tasty way to add zing to your standard egg recipe. If you love beans and salsa for breakfast, then this dish is definitely your jam*. It’s a bit of upfront work, but once you’ve got the basic components prepared, it’s a quick and easy recipe to put together, so huevos rancheros is a smart idea if you’re feeding a crowd of folks for breakfast or brunch.

Ingredients for Huevos Rancheros Beans

2 15 oz cans BLACK BEANS
1 15 oz can REFRIED BEANS
2 cups BROTH or water
2-3 cloves chopped GARLIC
½ cup chopped ONION
½ chopped BELL PEPPER
chopped HOT PEPPER to taste
SALT and PEPPER (to taste)
1-2 Tbsp WORCESTERSHIRE
OIL for sauteing
a little MAPLE SYRUP if you like
…plus whatever spices you like

How to Make the Beans

  • Heat oil in a pot and then add the onions, peppers, and garlic and saute for 2-3 minutes.
  • While sauteing, add salt, pepper, and any other dried spices you like (I often add some chipotle powder).
  • Add 2 cans of black beans (rinsed and drained) and 1 can of refried beans.
  • Mix ingredients well and then stir in two cups of broth (or water).
  • Add in Worcestershire sauce (and a little maple syrup if you like sweet beans).
  • Bring the pot to a boil, and then reduce the heat to a simmer and let the beans cook down (uncovered).
  • Adjust seasonings to taste and cook until the beans reach a nice consistency for huevos rancheros (I like my beans runny, but not watery)
huevos rancheros
The key to the best huevos rancheros is well-seasoned beans

Ingredients for Huevos Ranchero Sauce

1 15 oz can DICED TOMATO
or 3 peeled ROMA TOMATO
1 15 oz can BROTH or water
1-2 cloves chopped GARLIC
½ cup chopped ONION
some GREEN CHILI PEPPERS
and chopped HOT PEPPER to taste
SALT and PEPPER to taste
…plus whatever spices you like

How to Make a Ranchero Sauce Recipe

(disclaimer…the easiest thing to do is just heat some salsa and add water or broth to thin it a bit…but for the ultimate huevos rancheros dish, you’ll want to make your own.)

  • In a pot, heat one 15oz can of diced tomatoes (or 3 skinned and chopped roma tomatoes)
  • Add onion, garlic, peppers and seasonings.
  • As the tomatoes begin to cook down, add in broth or water.
  • Bring pot to a boil and then reduce to a simmer.
  • Simmer for about 10 minutes, then turn off the heat.
  • Smooth out the ranchero sauce with a hand blender–this is optional, but it looks nice
huevos rancheros
Once you’ve got the components ready, huevos rancheros can be
put together quickly

How to Make Tortillas for Huevos Rancheros

(disclaimer…the easiest thing to do is buy a cheap pack of premade tortillas and heat them in a skillet,
but uglier and thicker homemade tortillas actually taste a little better in huevos rancheros)

  • Ugly tortillas are easy to make.
  • Mix an amount of corn flour with slightly less warm water to form a dough.
  • Half a cup of corn flour makes 4 small tortillas.
  • Form dough into a flat, palm sized tortilla shape.
  • Heat the tortillas in an ungreased non-stick skillet on medium high heat for about 90 seconds, turning several times.
  • And that’s it…corn tortillas cook fast.
  • Hold the tortillas in a covered container, or cover the tortillas on a plate until you’re ready to build the huevos rancheros.
Huevos rancheros
Huevos rancheros is an easy way to
impress your family in the morning

How to Make Huevos Rancheros

Once you’ve got the beans, tortillas, and ranchero sauce prepared, the rest of the dish is a breeze.
You’ve just got to cook the eggs and build the huevos rancheros.
Use whatever kind of eggs you like.
Some folks use poached eggs (too much trouble), and some folks like to use scrambled
eggs (crazy), but I prefer over easy eggs.
On a plate, place the tortilla. Top the tortilla with enough beans to cover the tortilla. Top the beans with the egg.
And then top the egg with the ranchero sauce.
I like to garnish the top of my huevos rancheros with chopped green onion tops and cilantro; it adds terrific flavor
and a nice look to the dish.
Serve your huevos rancheros with a side of sour cream and avocado slices (or guacamole).

huevos rancheros
Huevos Rancheros is a flavorful, classic mexican dish…delicious!

And that’s it. It can be a bit of work if you’re making the meal from scratch, but if you’re in a hurry, using a pre-made salsa and tortillas can save a lot of time.
Don’t skimp on the beans, though…well-seasoned beans make for a terrific huevos rancheros dish. And topping the dish with fresh green onion and cilantro will knock your breakfast out of the park!

If you’re new to home cooking, get a bunch of spices, pots and pans, and start experimenting with different recipes. It’s a healthy hobby that will save you money in the long run. Check current prices for Complete Kitchenware Sets on Amazon as well as Complete Starter Spice Kits. Or go to a thrift store! I’ve found some of my favorite kitchen gear at second-hand stores.

And for another fancy-pants breakfast idea, check out this SALMON EGG BENEDICT RECIPE.

salmon cakes
use leftover salmon cakes to make a terrific variation of Eggs Benedict!

Thanks for checking out our beans and eggs recipe, and all of our recipes. Be sure and sign up for our mailing list to never miss a new cooking video, and also click a button below and share the dishes with your friends, and follow Chef Buck on Youtube. We appreciate all the kind comments and support, and we’ll see you next time in the kitchen!

If you like what CG and I do, support us on Patreon, or throw a tip in our Paypal Tip Jar We’ll happily enjoy a coffee on the road, or maybe even pay a bill or two!–Thanks! We appreciate all the support, and we’ll see you next time in the kitchen!

Thanks for watching our recipe videos!

We include affiliate links for products on our website, so if you make a purchase after clicking on our links, we may earn a commission which helps us produce more videos and drink more coffee :^) We participate in the Amazon Services LLC Associates Program, which is an affiliate advertising program providing a means for us to earn fees by linking to Amazon.com and affiliated sites, so we can make more videos.

(*If you like jam, then this isn’t your jam…there’s no jam in huevos rancheros)

Share and Enjoy !

Pupusas Recipe — Gluten Free Corn Flour Pupusa

pupusas recipe

How to make a pupusas recipe.
This pupusas recipe is a traditional Latin American dish of corn tortilla filled with cheese, beans, peppers and meat, although you can use any combo of ingredients you like to cook pupusas. Corn flour is mixed with salt and water to make a corn dough, or masa, and wrapped around a center filling;
that filling can simply be cheese and peppers, but I like to make it a full meal by adding beans and meat as well.

What You Need To Make This Easy Pupusas Recipe

2 cups CORN FLOUR
about 1½ cups WATER
SALT and PEPPER to taste
1 tsp TURMERIC (optional)
here are some filling ideas…use any
combo, and substitute what you like:
leftover MEATS (minced)
REFRIED BEANS
CHEESE (grated)
pickled PEPPERS (like green chili or jalapeno)

pupusas recipe
Pupusas …inspired by a traditional Salvadorean recipe.

How To Make Pupusas

First thing, mix up your pupusa filling…this will allow time for the flavors to interact.
You can simply use cheese and peppers, but adding a little refried beans and leftover meat
into the mixture can turn your pupusas into a filling meal.
I often mince up leftover breakfast sausage to add into my filling, but any pork, beef, or chicken
will do, just be sure to use meat that is already cooked through; it’s a great way to use leftovers.
Combine the filling ingredients together in a bowl.
Mix well and set aside.
In another bowl, add corn flour (Maseca is a populer brand in the USA, but any corn flour will do).
Add in salt and pepper and turmeric.
Turmeric is not a traditional pupusa ingredient, but I find it adds a great color.
Mix dry ingredients together.
Add in warm tap water and mix into a dough …it mixes quite easily;
Use your hands to mix…this will give you a better sense of the dough consistency.
Mix until the dough is “doughy” and pliable–not too dry and not too wet–add additional water
or flour until reaches this consistency.
Tear off a handful of dough and roll it into a ball, then flatten the dough into a disc.
Place a ball of the cheese/bean/meat filling in the center of the disc, and then close up the edges
of the dough, sealing the filling inside a doughy ball.
Pinch off any excess dough from the top and return it to the bowl.
Flatten the dough filled ball into a disc shape, try to keep the disc intact, but if the filling leaks slightly,
it’s no big deal.
You can use more dough, or less filling, or be more careful folding the filling inside to make an absolutely
perfect pupusa…but why work that hard?
I like my pupusas to have a thin tortilla skin.
I like them to leak a little bit…I like the taste of the toasted cheese on the edges.
But that’s just me…follow your heart; but believe me, if your pupusas aren’t perfect,
they’ll taste just as good, or better.
Heat a lightly oiled griddle or skillet on med/med-high heat and cook the pupusas
about three minutes on each side.
And that’s it.
Serve as a snack or main meal. Top with sour cream, salsa, or even a cabbage slaw for a nicely balanced dish.

Give this pupusas recipe a try and let me know what you think, and bon appétit!

Ingredients For Curtido …pickled slaw topping for pupusas recipe

half a small CABBAGE (chopped)
2 CARROTS (shredded)
1 white ONION (sliced)
1 JALAPENO (thinly sliced)
1 Tbsp dried OREGANO
SALT and PEPPER to taste
mild VINEGAR (I like to use a rice or malt vinegar)

How to Make Curtido

Bring a pot of salted water to a boil; boil enough water to cover the veggies.
Once water is boiling, turn off and then add the veggies to the pot.
Add oregano and pepper.
Let soak for 3 minutes.
Drain the veggies from the pot, but reserve some of the water.
Put the strained veggies into a jar; ideally, use a size jar that will be completely filled.
Press the veggies into the jar until it is crammed full.
Add reserved water until the veggies are slightly more than halfway covered, then add
vinegar until the veggies are completely covered.
Allow to cool, and then cover jar with a lid and refrigerate.
The more ahead of time you make this, the more flavorful it will be.
It’s a simple and tasty topping or side for pupusas or sandwiches.

For more awesome recipes, take a look at my Chef Buck Recipe Playlists.

pupusas recipe
This is a fantastic Nachos Supreme dish, and a giant pizza pan makes a great dish for cooking and serving.

Thanks for checking out this pupusas recipe. If you like what you see, share it with your friends and family on social media, I appreciate it!
–Chef Buck

Share and Enjoy !


Best Southwestern Quinoa Salad Recipe

southwestern quinoa salad

Everywhere you turn, there’s a Southwestern quinoa salad, and for good reason.  It’s delicious, easy to make, and a great choice for a healthy meal. Since quinoa is a complete protein, this Southwestern inspired salad makes an ideal vegetarian recipe, doubly so since this quinoa is paired with black beans.

What you need to make a Southwestern Quinoa Salad

2 cups COOKED QUINOA (check current prices for quinoa on Amazon)
1 15 oz can BLACK BEANS
10-15 sliced CHERRY TOMATOES
1 AVOCADO
½ diced YELLOW BELL PEPPER
3-5 chopped GREEN ONIONS
¼ cup chopped, pickled JALAPENO
½ cup chopped CILANTRO
1 LEMON …juice and zest
2 Tbsp OLIVE OIL
SALT and PEPPER to taste

southwestern quinoa salad
southwest quinoa salad recipe

How to make a Southwest Quinoa Salad

Cook up the quinoa just like rice: 1 part quinoa to 2 parts water, bring to a boil, reduce heat, cover and simmer for 15 minutes or until the water is absorbed. Fluff the quinoa and then set aside uncovered to cool.

While the quinoa cools, prepare the veggies:

Dice ½ a yellow bell pepper, or any color pepper, but if you’re like me and you’re making a corn-free southwest quinoa salad, then using a yellow pepper will make your quinoa salad more lovely to look at. Slice some cherry tomatoes. Cherry tomatoes have a great flavor, and the hardiness of the tiny tomato makes it the perfect choice for a salad.

Remove and mince the zest from 1 small lemon, and then slice the lemon in half. Check current prices for a lemon zester on Amazon.

Chop up some green onions, and cilantro. If you like a little heat, chop up some pickled jalapeno, too, and reserve a Tbsp of the jalapeno pickling juice for added kick and flavor.

When the quinoa cools:

Add 2 cups of the cooked quinoa to a large mixing bowl.
Rinse and drain the black beans and add them to the bowl.
Add the yellow pepper, jalapeno pepper, onion, cilantro, lemon zest, olive oil, juice from half the lemon, and salt and pepper.
Mix ingredients thoroughly.
Add tomato.
Slice avocado and add to salad.
Take the remaining lemon half and squeeze its juice over the cut avocado, this will preserve the vibrancy of the avocado.

Gently mix the salad and serve.

This Southwestern quinoa tastes great on it’s own, as a healthy side dish, or served over a bed of fresh greens for a super salad topping.

Give healthy southwest quinoa salad recipe a try and let me know what you think, and bon appétit!

For another healthy option with a southwestern flair, check out out this meat-free Vegetarian Chili Recipe that even carnivores will love.

vegetarian chili
pot o’ meatless chili for good times

Thanks for checking out our Southwestern quinoa salad recipe, and all of our recipes. Be sure and sign up for our mailing list and never miss a new Chef Buck cooking video, and also click a button below and share the dishes with your friends. We appreciate all the kind comments and support, and we’ll see you next time in the kitchen!

Thanks for watching our cooking videos!

We include affiliate links for products on our website, so if you make a purchase after clicking on our links, we may earn a commission which helps us produce more videos and drink more coffee :^)                                                                                                We participate in the Amazon Services LLC Associates Program, which is an affiliate advertising program providing a means for us to earn fees by linking to Amazon.com and affiliated sites, so we can make more videos.

Share and Enjoy !

Mango Curry, Chana Masala, & Gobi Matar Indian Cooking

mango curry

Let’s cook a complete Indian meal in real time. For this dinner, I’m cooking chana masala, mango curry, and gobi matar. These dishes work well together. All recipes are posted below, but Indian cooking is all about flexibility and taste, so tweak these recipes and make them your own, or follow them exactly, and then experiment at a later time.

Ingredients for Mango Curry Recipe

4 large, very ripe and juicy MANGOES
1 cup YOGURT
1-2 Tbsp CUMIN SEEDS
dash of ASAFOETIDA
¼ cup CURRY LEAVES chopped well
4-5 Tbsp GINGER finely chopped
2-3 Tbsp CHICKPEA FLOUR a.k.a. besan
2 Tbsp OIL for cooking
SALT to taste

Check out current prices for Indian Cooking Spices on Amazon.

How to Make Mango Curry

Use super-duper ripe mangoes to make mango curry. The mangoes should be VERY RIPE, soft and juicy.
Peel and pit the mangoes and place the fruit in a bowl. Crush the mango until it’s a wet, semi-lumpy mess.

Add in about 1 cup of Greek-style yogurt and mix well.
In a large pot, heat oil on medium high heat.
Add cumin seeds and asafoetida and cook 30-40 seconds.
Add curry leaves, half of the ginger, and chickpea flour. Stir and continue cooking about 2 minutes.
Add mango mixture and 1 cup of water and stir well with ingredients in pot.

Bring to a bubble, then reduce the heat, cover and let simmer about 10 minutes.
Stir occasionally and add more water to the mango curry as desired.
After 10 minutes, add the remaining ginger, cover and let cook another 5 minutes.
That’s it! Serve mango curry over rice, and enjoy!

mango curry
A complete Indian meal with mango curry, chana masala, and gobi matar.

Chana Masala Recipe

Many chana masala (chickpea curry) recipes include onion; sometimes I use onion, sometimes I don’t, it mostly depends on the other dishes I’m serving with the chana masala.

I do often include asafoetida and chick pea flour. If not using besan, just add ½ cup of water instead of 1 cup. The asafoetida is wonderful. It stinks, but ti’s still wonderful. Asafoetida is also called “devil’s dung”, but that’s just when it’s raw, once you toss it into a simmering skillet, it transforms into a sharp, oniony weirdness that will pleasantly remind you of your favorite Indian restaurant.

I’ve only been able to find asafoetida at international food markets, but it’s worth acquiring, especially if you want to make a habit of cooking great Indian dishes at home. If skipping the asafoetida, try adding 1 finely chopped medium-sized onion between the cumin seeds and the tomatoes.

Chana Masala Ingredients:
1 15 oz can CHICKPEAS (or 2 cups)
1 15 oz can DICED TOMATOES (or 2 fresh diced)
1 tsp GARLIC (minced)
1 tsp GINGER (minced)
1 HOT PEPPER (minced)
1-2 Tbsp OLIVE OIL
1 Tbsp CHICK PEA FLOUR (also called besan)
1 tsp CUMIN SEEDS
1 tsp CHILI POWDER
1 tsp GARAM MASALA
1/8 tsp ASAFOETIDA (optional, also called hing)
½ tsp TURMERIC
SALT (to taste)

Check out current prices for Indian Cooking Spices on Amazon.

In a skillet, heat oil on medium high heat. When the oil is heated, add the cumin seeds and asafoetida. Stir and allow to simmer for just a few moments. Once the seeds begin to crack, add the chick pea flour and continue stirring. The flour will absorb the oil. Stir for approx. 1 minute and then add the diced tomatoes. Mix well and allow the tomatoes to bubble.

As the tomatoes cook down, you can crush them with your stirrer for a smoother chana massala. Add the minced ginger and garlic and hot pepper. Add the chili powder and turmeric. After the tomatoes have cooked 4-5 minutes, add the chick peas, garam masala, and salt to taste. Mix well and add 1 cup of water. Bring the dish to a bubble, then reduce to a simmer, cover, and allow cooking for 10 minutes.

After 10 minutes, the chick peas will be soft. Use a fork or potato masher to smash some of the chick peas, this will help thicken the chana masala along with the chick pea flour added earlier. Simmer uncovered to the desired consistency, remove and serve. Garnish with fresh coriander leaves. Serve with rice or on its own.

Gobi Matar Recipe

Cauliflower is good and good for you, especially if you curry it up–and this Indian-style cauliflower curry recipe will help.

Ingredients:
1 med CAULIFLOWER (cut into florets)
1 15 oz can DICED TOMATOES (or 2 med tomatoes)
1 8 oz can GREEN PEAS
1/8 tsp ASAFOETIDA (optional, also called Hing)
1 large ONION (chopped)
1 HOT PEPPER (finely chopped)
1 tsp GINGER (finely chopped)
1 Tbsp GARLIC (finely chopped)
1 tsp CHILI POWDER (sub cumin powder for less heat)
1 tsp CUMIN SEEDS
½ tsp TURMERIC POWDER
1 tsp CORIANDER POWDER
1 tsp GARAM MASALA
2-3 Tbsp OLIVE OIL
¼ cup WATER
SALT (to taste)

How to Make Indian Gobi Matar

In a skillet, heat olive oil on medium high heat. Add cumin seeds and asafoetida. Seeds will brown and crack quickly. Add onion and stir. Cook 1 minute and then add ginger, garlic, and hot pepper. Continue cooking until onions are soft. Add turmeric, chili, and coriander powder and mix well.

Stir in tomatoes and continue cooking 4-5 minutes. Add salt to taste. As the tomatoes cook down I like to crush them with a spoon. Stir in cauliflower florets. Add water and bring dish to a bubble, then reduce heat to a simmer, cover, and let cook 4-5 minutes. I say 4-5 minutes, but cook it however long you like…I should say 1-10 minutes.

I don’t want to cook all the nutrients out of the cauliflower, and I like my florets to still have a bit of crunch to them, so I simmer my cauliflower for only a few minutes. When the cauliflower is almost cooked to your liking, add garam masala and green peas. Mix and continue cooking until peas are heated through. And that’s it—your cauliflower and peas will be transformed into something delicious (I know it’s hard to believe, but trust me).

Make these dishes and try them out. The mango curry is a sweet, delicious treat, the chana masala is an Indian foods must, and the gobi matar tastes great and is great for your health.
Give Indian cooking a go, and bon appétit!

If you’re new to home cooking, get a bunch of spices, pots and pans, and start experimenting with different recipes. It’s a healthy hobby that will save you money in the long run. Check out current prices for Complete Kitchenware Sets on Amazon as well as Complete Starter Spice Kits. Or go to a thrift store! I’ve found some of my favorite kitchen gear at second-hand stores.

For another Indian favorite, try this Indian spinach recipe called Chole Palak.

chole palak chickpea spinach

Thanks for Watching Our Indian Cooking Videos!

Be sure and sign up for our mailing list to never miss a new cooking video, and also click a button below and share the dishes with your friends, and follow Chef Buck on Youtube. We appreciate all the kind comments and support, and we’ll see you next time in the kitchen!

If you like what CG and I do, support us on Patreon, or throw a tip in our Paypal Tip Jar We’ll happily enjoy a coffee on the road, or maybe even pay a bill or two!–Thanks! We appreciate all the support, and we’ll see you next time in the kitchen!

We include affiliate links for products on our website, so if you make a purchase after clicking on our links, we may earn a commission which helps us produce more videos and drink more coffee :^) We participate in the Amazon Services LLC Associates Program, which is an affiliate advertising program providing a means for us to earn fees by linking to Amazon.com and affiliated sites, so we can make more videos.

Share and Enjoy !

Make the Best Bean Soup Today !

bean soup

This bean soup recipe is super tasty and easy to make. Doesn’t bean soup sound delicious? Especially if you’re a kid. I use cannellini beans and black beans in this recipe, but you can use whatever beans you like. Ham or sausage is great in bean soup, too, and it doesn’t have to be a lot; just a little meat adds great flavor to bean soup. If going meat free, be sure to add lots of spice and maybe and extra veggie or two…beans need all the excitement they can get.

Bean Soup Recipe Ingredients:

2 15oz cans CANNELLINI BEANS
1 15oz can BLACK BEANS
2 medium sized ONIONS chopped
4-5 cloves GARLIC finely chopped
some leftover SAUSAGE or HAM (cooked)
32 oz BROTH (or ½ water ½ broth)
a little HALF AND HALF if you want
1 tsp CHIPOTLE POWDER
(or use some other kinda heat)
SALT and PEPPER to taste
1-2 Tbsp Oil
chopped PARSLEY if you want

bean soup
adding a mix of beans will add color and texture to your soup

Bean Soup Recipe Directions:

Heat 1 to 2 Tbsp of oil in a soup pot.
Add the onion and garlic and saute for several minutes.
If you’ve got fresh chili or jalapeno peppers, dice and add a little of that, too…if you want.
Add seasoning. I use salt, pepper, and chipotle powder in this recipe. Chipotle is awesome in bean soup. It adds great flavor
and a little heat. Don’t have chipotle powder? Add chili powder or chili/garlic paste instead, or anything you like, soup is all about
improvising.
Cook the spices and onions together for a few minutes and then add broth (meat or veggie broth, whatever, dude).
Toss in a bay leaf and bring the pot to a bubble.
Add in beans. I like to use a mix of cannellini and black beans.

If you have some sausage or ham on hand, chop and toss a little into the soup.
Reduce the heat down to a low simmer, cover and let cook 30-45 minutes.
After simmering, remove the bay leaf.
Use a hand blender to blend the soup to desired consistency. Check here for current prices on Hand Blenders at Amazon.

bean soup
use a hand blender to make a soup creamier

I like to add a little half and half for added creaminess; not a lot, just a little does the trick, around ½ a cup.
Turn off the heat and stir in a little chopped parsley or cilantro, and that’s it!
If you can make it a day ahead, all the better; soup only gets tastier with time!
Hope you love it!
Give Bean Soup recipe a try and let me know what you think, and bon appétit.

And for more bean fun, check out this crazy awesome Vegetarian Chili Recipe that even the meat lovers in your family will enjoy.

vegetarian chili
pot o’ meatless chili for good times

Thanks for Watching our Videos!

Thanks for checking out our bean soup recipe. Sign up for our mailing list so you’ll never miss a new recipe. Also click a button below and share the dishes with your friends. You can also follow Chef Buck on Youtube. We appreciate all the kind comments and support, and we’ll see you next time in the kitchen!

If you like what CG and I do, support us on Patreon, or throw us a tip in our Paypal Tip Jar. We’ll happily enjoy a coffee on the road – Thanks! We appreciate all the support, and we’ll see you next time in the kitchen!

We include affiliate links for products on our website. Making a purchase after clicking on our links and we may earn a commission which helps us produce more videos and drink more coffee :^) We participate in the Amazon Services LLC Associates Program, which is an affiliate advertising program. It provides a means for us to earn fees by linking to Amazon.com and affiliated sites, so we can make more videos.

Share and Enjoy !

Chocolate Cake Recipe – Gluten Free

chocolate cake recipe

This is a great gluten free chocolate cake recipe. It’s super easy, moist, and tasty; and kinda cool to bake, too, since the main ingredient is beans! What!? Garbanzo beans! Which are also called chick peas. So besides being a delicious cake, it’s a flour less, gluten-free cake. This cake is especially tasty with cream cheese frosting.

Chocolate Cake Recipe Ingredients:

2 15 oz cans GARBANZO BEANS
2 cups semi-sweet CHOCOLATE CHIPS
4 EGGS
1 cup SUGAR
¾ tsp BAKING POWDER
1 Tbsp VANILLA EXTRACT
2-3 Tbsp BUTTER
½ cup DRIED CHERRIES (or other dried fruit)
1 cup toasted NUTS (chopped)
POWDERED SUGAR (for dusting)
fresh BERRIES (for topping)

…or top with CREAM CHEESE frosting

Cream Cheese Frosting Ingredients:

8oz CREAM CHEESE, softened
¼ cup unsalted BUTTER, softened
2 cups POWDERED SUGAR
1 tsp VANILLA EXTRACT
1 Tbsp MILK

cream cheese frosting recipe
Cream cheese frosted cake

Chocolate Cake Recipe Directions:

  • Butter up a baking dish; 8X10 or 9X11…about the size of a human head. If you need a decent baking dish, check out some current pricing for a Pyrex dish on Amazon.
  • Rinse and drain garbanzo beans.
  • In a food processor, combine eggs and beans and blend until smooth.
  • Transfer beaten bean mixture to a large bowl and add baking powder and sugar and stir until well combined.
  • On the stove, set up a double boiler and melt the chocolate chips. Add butter to the chocolate as needed to keep the chocolate smooth.
  • Once melted, add the chocolate to the cake batter mix and stir until incorporated.
  • Stir in vanilla extract, your favorite dried fruit (I prefer cherries or cranberries), and chopped nuts.
  • Mix well and pour into buttered baking dish.
  • Bake for 45 minutes in an oven preheated to 350 degrees Fahrenheit.
  • After 45 minutes insert a knife or toothpick into the cake to check that it is done; if wet batter sticks to the toothpick, let it cook a few minutes longer.
  • Allow cake to set and firm up 10 minutes before removing from the baking dish.
  • After 10 minutes, turn cake onto a baking rack and continue to let cool.

Once the cake cools, it’s ready for the next step, whatever that is…
This chocolate cake recipe is a perfect match for a cream cheese frosting, but it tastes great with just a sprinkling of powdered sugar and fruit, or believe it or not,
it tastes great plain! It’s incredibly moist, and the nuts and fruit make it almost like a brownie.

Cream Cheese Frosting Directions:

  • About an hour ahead of time, set out the cream cheese and butter to soften.
  • In a bowl, combine cream cheese, butter, and vanilla extract and blend with hand mixer.
  • Once ingredients begin to come together, add in the powdered sugar. Add the sugar a bit at a time to avoid a sugary blending mess.
  • Mix until the frosting is smooth. To thin the frosting add a small amount of milk–no more than a Tablespoon at a time! For a thicker frosting, just add more powdered sugar.

And that’s it.
Spread on your dessert and eat away!

Give this flourless, chocolate cake recipe a go and let me know what you think!

And for another tasty dessert idea, check out my Death by Scone Recipe …it’s one of my favorite all-time treats.

scone recipe
best scone ever…really

Thanks for Watching our Chocolate Cake Recipe Video!

Click a button below and share the dishes with your friends. You can also follow Chef Buck on Youtube. We appreciate all the kind comments and support, and we’ll see you next time in the kitchen!

If you like what CG and I do, support us on Patreon, or throw us a tip in our Paypal Tip Jar. We’ll happily enjoy a coffee on the road – Thanks! We appreciate all the support, and we’ll see you next time in the kitchen!

We include affiliate links for products on our website. Making a purchase after clicking on our links and we may earn a commission which helps us produce more videos and drink more coffee :^) We participate in the Amazon Services LLC Associates Program, which is an affiliate advertising program. It provides a means for us to earn fees by linking to Amazon.com and affiliated sites, so we can make more videos.

Share and Enjoy !

Hearts of Palm Recipe with Beans …healthy and tasty!

hearts of palm

Hearts of palm are often used in salad recipes. Heart of palm is literally the edible core of a palm tree stem. It’s easily found sold in cans, but CG scored a fresh heart of palm, so we’ll take a look at this weirdo veggie and make a simple, but very tasty salad. Canned hearts of palm are not as crunchy as fresh heart, so be sure and add CELERY to this recipe when using canned hearts of palm.

Hearts of Palm Recipe Ingredients:

1 heaping cup sliced HEART OF PALM
15oz can MIXED BEANS
1 tsp GINGER (minced)
½ cup CILANTRO
½ cup GREEN ONIONS (chopped)
dressing:
2 Tbsp LEMON JUICE
½ tsp LEMON ZEST
1 Tbsp RICE VINEGAR
1 Tbsp heavy OLIVE OIL
2 tsp SOY SAUCE
SALT and PEPPER to taste
if using canned hearts of palm, add ½ cup chopped CELERY
(and toasted nuts are never a bad idea, either)

hearts of palm
Fresh heart of palm and salad.

Hearts of Palm Recipe Directions:

If using fresh heart of palm, slice away the bamboo-like outer hull and remove the heart. fresh heart of palm has a great texture, a little crunchy with a creamy after taste; this slight crunch makes fresh heart of palm ideal for salad–canned hearts of palm are not as firm, so be sure to add ½ cup celery to this recipe if using canned hearts of palm.
In a bowl, combine the beans, heart of palm, cilantro, ginger, and green onion. A mix of beans is ideal…different beans will add a variety of textures.
In a smaller bowl, combine the dressing ingredients and whisk well–super well!
Add the dressing to the salad and toss.
And that’s it.
We found this simple combo to be quite tasty. You can always add more ingredients, but sometimes simple is best.
Be sure to add celery for crunch if using canned hearts, and toasted nuts are always a great crunchy element for salads–plus they add protein to the dish as well.

Hearts of palm
Hearts of palm in a can

Give this heart of palm recipe a try and let me know what you think, and bon appétit!

And for another tasty salad idea, check out this Black-eyed Pea Salad.
black eyed pea salad
Click on Pic for Recipe

Share and Enjoy !


Black-Eyed Peas Recipe w/ Jalapeno and Bacon

black-eyed peas recipe

This Black-Eyed Peas Recipe is yummy anytime, and a particularly delicious way to get your black-eyed peas fix on New Years Day. Bacon, jalapeno, and black-eyed peas are a tasty combo that cooks up super simple, and adding a touch of flour gravies up the dish nicely. It makes a great side dish.

Black-Eyed Peas Recipe Ingredients:

15 oz can BLACK-EYED PEAS
3 slices BACON
JALAPENO SLICES (to taste)
1 tsp FLOUR
1 tsp BUTTER (if lean bacon)
¾ cup WATER

Black-Eyed Peas Recipe Directions:

First thing, fry up the bacon. I like to use 3 strips of bacon for each 15 oz can of beans (black-eyed peas are beans, dude).
Use only 2 strips if you like–but I like mine bacon-y, and I bet you will, too.
Once the bacon is cooked close to your liking, remove from the skillet and slice into bite sizes.
Return bacon to the skillet, and add jalapenos to taste. Saute bacon and jalapenos for about 1 minute.
If there is a tsp or more of bacon fat in the skillet, add flour…if the bacon is lean, with little grease, melt 1 tsp of butter and then add flour.
Stir ingredients for about 1 minute.
Add 15 oz. can of drained and rinsed black-eyed peas to the skillet. Mix with ingredients and let cook 1 minute.
Stir in ¾ cup water. Bring skillet to a bubble, then reduce to a simmer and cook uncovered for about 5 minutes.
Add additional water as needed, but not too much.
The flour will thicken into a gravy.
And that’s it!
This dish makes a great side for pork chops, fish,–you name it! I like to pair it up with liver and onions–super delicious!

This is a super simple dish to prepare. You can check here for current Black-Eye Pea Prices on Amazon. Canned beans are already cooked, but dried black eyed peas will have to be cooked before adding to the recipe, just prepare the beans according to the package directions.

Give this black-eyed peas recipe a go and let me know what you think, and bon appétit!

And for another tasty black-eyed peas recipe, try out this Black-Eyed Pea Salad Recipe.
black eyed pea salad

Thanks for checking out the black eyed peas recipe. Be sure and sign up for our mailing list so you’ll never miss a Chef Buck cooking video, and click a button below and share the dishes with your friends. We appreciate all the kind comments and support, and we’ll see you next time in the kitchen!
–Chef Buck

Thanks for watching our recipe videos!

Thanks for watching. We include affiliate links for products. If you make a purchase after clicking on our links, we may earn a commission which helps us produce more videos and drink more coffee :^)
We are a participant in the Amazon Services LLC Associates Program, an affiliate advertising program designed to provide a means for us to earn fees by linking to Amazon.com and affiliated sites.

Share and Enjoy !

Pork Tenderloin Recipe with Beans

pork tenderloin

You’re gonna love this pork tenderloin recipe. As the name suggests, pork tenderloin is a very tender cut of meat. It’s super flavorful, moist, and delicious, and easy to prepare. Leftover tenderloin is perfect on a sandwich, so cook up enough to leave leftovers…you’ll be glad you did. I’m cooking this pork tenderloin with onions and beans and it’s a great dish –definitely give it a try.

Pork Tenderloin Recipe Ingredients:

2½ lbs PORK TENDERLOIN
1½ Lg ONION
15oz can PINTO BEANS
5-7 cloves GARLIC
fresh HOT PEPPERS to taste (or use red pepper flakes, or nothing…it’s all optional, baby!)
OLIVE OIL (as you like…I oil the meat, the skillet, and then throw a little olive oil on the onions)
SEASONING for meat
(1 tsp salt, ½ tsp black pepper, 1 tsp cumin, 1 tsp chili powder,
1 tsp Italian seasonings, etc…experiment, or use your own favorites)
½ cup dry WHITE WINE (optional)
½ cup CHICKEN BROTH

pork tenderloin
trim silver skin from tenderloin and sear 3 minutes each side before roasting in oven

Pork Tenderloin Recipe directions:

  • Trim the pork tenderloin of the sinewy silver skin.
  • Coat the pork in olive oil and seasonings. I’m using a rub of chili powder, cumin, salt, pepper, and Italian seasonings…but use whatever flavors you like, or just keep it simple with basic salt and pepper–there’s no wrong way to do it; as long as you don’t overcook the pork, it’ll be awesome!
  • Pre-heat your oven to 425 F. Cooking the tenderloin at a high temperature for a short time will keep it from drying out.
  • While the oven heats, sear the tenderloin on the stove top. In a heavy, oven safe skillet, heat a little olive oil on medium high heat. After the skillet and oil are hot, add the tenderloin–it should sizzle and cook right away. Check current prices online for an oven safe skillet.
  • Sear for 3 minutes and then turn and sear the other side.
  • Add thick sliced onion to the skillet. Do this after the tenderloin has been turned.
  • Add a little oil and seasonings to the onion.
  • After 3 minutes, remove the skillet from the stove top and place in the oven at 425 F. (be sure to use an oven-safe skillet!)
  • Cook for approx. 20 minutes. If using a meat thermometer, cook until the internal temperature of the pork is 145 F.
  • Remove the skillet from the oven and return to the stove top.
  • Remove the pork loin from the skillet and set aside 10 minutes to rest. It is very important to rest the meat before slicing. This will preserve the juiciness and flavor of the pork. If you slice the tenderloin right away, the thin juices will run and much of the flavor and moisture will be lost!
pork tenderloin
let pork tenderloin rest before slicing

While the pork tenderloin rests, we’ll complete the onion and bean side dish.

  • On medium heat, continue cooking the onions in the skillet. The liquid in the pan will reduce as it cooks. Add garlic–a lot is good!–and if desired, throw in a little fresh chopped hot peppers.
  • Add the pinto beans
  • After a few minutes, if you like, add a little wine. It’s optional, but adds a great flavor.
  • Simmer about 2 minutes and let the wine cook off.
  • Add chicken broth and continue simmering until the liquid cooks down. And that’s it!
pork tenderloin
pinto beans and caramalized onion

By now the pork tenderloin has rested enough and is ready to slice.
Serve the tenderloin with the beans and onion side, and maybe a little steamed broccoli or salad–and boom!–you got a complete fancy-pants pork tenderloin dinner!

pork tenderloin
Pork tenderloin dinner with caramelized onion and beans

Give this pork tenderloin recipe a try and let me know what you think, and bon appétit!

And for another great meal idea, try this Delicious Cornish Hen Dinner.

cornish game hen

Thanks for checking out our pork tenderloin recipe, and all of our recipes. Be sure and sign up for our mailing list and never miss a new Chef Buck cooking video, and also click a button below and share the dishes with your friends. We appreciate the kind comments and support, and we’ll see you next time in the kitchen!

Thanks for watching our recipe videos!

We include affiliate links for products on our website, so if you make a purchase after clicking on our links, we may earn a commission which helps us produce more videos and drink more coffee :^) We participate in the Amazon Services LLC Associates Program, which is an affiliate advertising program providing a means for us to earn fees by linking to Amazon.com and affiliated sites, so we can make more videos.

Share and Enjoy !

Best Green Beans Recipe

green beans

I’m not a lover of green beans, but sometimes green beans insert themselves into your life and then you just have to deal with them. Seeds and garlic and ginger are 3 friends that will help in this fight. This is a quick recipe, very tasty, and an effective way to deal with the green bean “problem”.

Green Bean Recipe Ingredients:
1 lb. GREEN BEANS
3 ROMA TOMATOES (chopped, or substitute 15oz can diced tomatoes)
2 Tbsp GARLIC (finely chopped)
2 Tbsp GINGER (finely chopped)
HOT PEPPERS (finely chopped, to taste–sub chili paste, hot sauce, sriracha, etc.)
½ tsp FENNEL SEEDS
1 tsp CUMIN SEEDS
SALT and PEPPER to taste
2-3 Tbsp OLIVE OIL
1-2 Tbsp BALSAMIC VINEGAR

green beans
Choose green beans that are firm and crisp!

Check current prices for a Non-Stick Skillet on amazon.

Green Bean Recipe Directions:
When buying, choose green beans that are firm and crisp, meaning that when you snap off the ends, they’ll make an actual “snap”. Which is the first thing you’ll do–snap off the ends and discard them. Wash your beans–and then blanch them.
To blanch, place beans into a pot of salted, boiling water and let them cook for 3-4 minutes, then remove beans from the hot water and transfer to an ice bath. Blanching prepares the beans so that they will cook easier and more quickly in the skillet.
Drain the beans and set aside
In a skillet, heat olive oil on medium heat. Add cumin and fennel seeds and allow to cook for just a few moments (10-20 seconds). Seeds add great flavor and texture–do yourself a favor and stock your kitchen with seeds! Add garlic (lots of garlic!) and continue cooking. Add a little fresh, diced hot pepper if you like–jalapenos or chili peppers are nice–or if you like, just add some chili paste, or hot sauce later.
Cook garlic and peppers for about 1 minute and then add in the chopped tomatoes and ginger, and let cook another 2-3 minutes.
Stir green beans into the skillet.
Add salt and pepper to taste.
Cook 3-5 minutes until the green beans are cooked to your taste, and that’s it.
Add a splash of balsamic vinegar if you like–I do–the tang is quite nice with this dish.

Give these green beans a try and let me know what you think, and bon appétit!

And for a green beans with an Asian flair, try this Asian-style Green Bean Recipe.

Green Bean Recipe
Green Bean Recipe

Thanks for Watching our Bean Recipe Video!

Click a button below and share the dishes with your friends. You can also follow Chef Buck on Youtube. We appreciate all the kind comments and support, and we’ll see you next time in the kitchen!

If you like what CG and I do, support us on Patreon, or throw us a tip in our Paypal Tip Jar. We’ll happily enjoy a coffee on the road – Thanks! We appreciate all the support, and we’ll see you next time in the kitchen!

We include affiliate links for products on our website. Making a purchase after clicking on our links and we may earn a commission which helps us produce more videos and drink more coffee :^) We participate in the Amazon Services LLC Associates Program, which is an affiliate advertising program. It provides a means for us to earn fees by linking to Amazon.com and affiliated sites, so we can make more videos.

Share and Enjoy !

Best Burrito Recipe – Family Style

Cheesy baked burritos

Try this family-style burrito recipe–it’s enough for a family or perfect for anyone who loves leftovers. We like to use roasted peppers in the filling, which is optional, but well worth the effort.

What You Need To Make The Best Burrito Recipe

TORTILLAS (about 7″ diameter)
2 cups SHREDDED CHEESE
¾ lb GROUND BEEF
1 can KIDNEY BEANS (15oz)
1 can REFRIED BEANS (15oz)
3 Lg ROASTED PEPPERS (chopped)
2 cups ONION (chopped)
4-5 cloves GARLIC (finely chopped)
1 Tbsp CHILI POWDER
2 Tbsp CUMIN
SALT and PEPPER (to taste)
OIL (for greasing pans)
1 cup SALSA for topping
and some HOT SAUCE (optional)

Is this the best burrito recipe ever? It sure looks like it!

Baked burrito recipe
Family-Style Baked Burritos

How to Make A Family-Style Burrito Recipe

You don’t HAVE TO roast peppers for this recipe–but it’s tasty if you do.

We like to use 3 large peppers, get whatever kind you like–we usually use two poblano and one green bell pepper for a mix of flavors. Slice the peppers in half lengthwise and remove the ribs and seeds. Place the peppers cut side down on a greased pan and bake uncovered in the oven at 400 degrees F for 30 minutes. As the peppers roast, they will darken and begin to bubble.

After half an hour, remove the peppers from the oven and cover the pan while the peppers are still hot. Let the peppers steam in their own heat for 10-15 minutes–this will loosen the skin and make it easy to peel away. Once the skin is removed you’ll have roasted peppers! They’re a tasty ingredient for many dishes; since we’re using all three peppers for the burrito filling, dice them all and set aside.

Heat a large skillet on medium heat and brown the ground beef. As the beef begins to cook and release it’s fat, add the onion and garlic (if it’s too fatty, drain a little of the grease). Stir until the beef is lightly browned–no need to overcook, ’cause the beef will continue to cook in the oven.

Remove the skillet from the heat and add the kidney beans and re-fried beans. Add ¾ of the diced roasted peppers and reserve ¼ to use later as a topping.

Add the salt, pepper, cumin and chili powder–and if you want some heat, throw in a little hot sauce to taste.

Mix ingredients well, and that’s the burrito filling!

Cheesy baked burritos
Awesome Burrito Recipe

Grease an oven safe baking dish.  If you don’t have a good-sized dish, here are some current prices for Pyrex baking dishes on Amazon.

We use medium size tortillas, about 7″. Put as much filling as you think is appropriate–we like two heaping spoonfuls–top the filling with cheese and roll the burrito up and place in the baking dish; repeat until the baking dish is full.

If you have any filling remaining, spoon it thinly over the top of the burritos. Spoon hearty salsa over the top of the dish–chunky salsa!–not too wet. Sprinkle the top with the remaining roasted peppers and some shredded cheese (a mix of monterey jack and cheddar is best).

Bake uncovered in a 400 degree F oven for 30-40 minutes, or until the edges of the burritos begin to brown.

Turn the oven to broil and finish by toasting the top of dish for 3-5 minutes–be careful not to burn it!–keep an eye on the dish and remove it when it reaches toasty-cheesy perfection.

Spoon burritos onto a plate and serve with sides of sour cream, guacamole, and salsa. It pairs great with rice!

Give this burrito recipe a try and let me know what you think.

If you enjoyed the dish, hit some of the buttons below and share this slice of burrito heaven with friends and family. Thanks for watching, and bon appétit!

And for another tasty Mexican inspired recipe, why not try the best Nachos Grande Recipe in the world.

nachos supreme
World’s Best Nachos Recipe

Thanks for checking out the recipes. Be sure and sign up for our mailing list so you’ll never miss a Chef Buck cooking video, and click a button below and share the dishes with your friends. We
appreciate all the kind comments and support, and we’ll see you next time in the kitchen!
–Chef Buck

Share and Enjoy !


Edamame Brown Rice Recipe –A Great Vegetarian Dish

edamame

This edamame brown rice recipe is super flavorful, filling, a great side dish, and delicious hot or cold. If you buy frozen soy beans for this dish, make sure they are thawed before using –and shelled!– shelled edamame is called mukimame.

Edamame Brown Rice Recipe

2 inch GINGER, finely chopped
4-5 cloves GARLIC, finely chopped
16 oz bag MUKIMAME (shelled edamame)
¾ cup LONG-GRAIN BROWN RICE
2Tbsp fresh LIME JUICE
2 Tbsp RICE VINEGAR
2 tsp SOY SAUCE
2 tsp SESAME OIL
½-1 tsp SUGAR
3-4 GREEN ONIONS
5 Tbsp CILANTRO, chopped
2 Tbsp SESAME SEEDS, toasted
SALT and PEPPER to taste

edamame
Mukimame with Brown Rice Recipe

How to make Make Edamame with Brown Rice

  • In a saucepan, heat olive oil over medium-high heat. Check current prices for a sauce pan on amazon.
  • Sauté ginger and garlic for 1-2 minutes until fragrant.
  • Remove garlic and ginger from pan and set aside (I’ve tried skipping this step, and just continued cooking the garlic and ginger along with the rice, but it’s not as flavorful, so it’s definitely worth setting the garlic and ginger aside to add to the dish later).
  • In same pan (without rinsing), bring 1½ cups lightly salted water to a boil. Add rice, reduce to a low simmer; cover and cook, 30 minutes.
  • After 30 minutes, stir in thawed, shelled edamame (mukimame!); cover and cook until rice is tender and mukimame is heated through, about 15 to 20 minutes.
  • In a small bowl, combine lime juice, vinegar, soy sauce, sesame oil, and sugar and stir until sugar is dissolved.
  • Remove rice and beans from the stove and add ginger, garlic, lime juice mixture, scallions, cilantro and sesame seeds.
  • Mix well and add additional salt and pepper as desired.


Give this edamame brown rice recipe a try and let me know what you think, and bon appétit!

edamame
Frozen Mukimame (shelled edamame)

And for another great vegetarian dish, try this easy, awesome Quinoa Salad Recipe.

southwestern quinoa salad
a southwestern quinoa salad makes a tasty and healthy dinner choice.

Thanks For Watching Our Recipe Videos!

Thanks for checking out this edamame recipe, and all of our recipes. Be sure and sign up for our mailing list so you’ll never miss a new recipe. Also click a button below and share the dishes with your friends. You can also follow Chef Buck on Youtube. We appreciate all the kind comments and support, and we’ll see you next time in the kitchen!

If you like what CG and I do, you can also support us on Patreon, or throw us a tip in our Paypal Tip Jar. We’ll happily enjoy a coffee on the road – Thanks! We appreciate all the support, and we’ll see you next time in the kitchen!

We include affiliate links for products on our website. So, if you make a purchase after clicking on our links, we may earn a commission which helps us produce more videos and drink more coffee :^) We participate in the Amazon Services LLC Associates Program, which is an affiliate advertising program. It provides a means for us to earn fees by linking to Amazon.com and affiliated sites, so we can make more videos.

Share and Enjoy !

Green Bean Recipe for people who hate green beans

This green bean recipe reminds me of the green beans we sometimes get out at Chinese restaurants; I’m not a fan of green beans, but if I gotta eat them, I like them like this or in a green bean casserole.  This dish is pretty simple to make and has a lot of nice nutritional stuff in it–you can forego the butter if you want and just use oil–but you’re already eating green beans, so isn’t that punishment enough?

Green Bean Recipe ingredients

1 lb. GREEN BEANS
½ large ONION (sliced)
2 Tbsp GARLIC (finely chopped)
1 Tbsp GINGER (finely chopped)
CHILI PEPPERS to taste (finely chopped)
1 Tbsp BUTTER
1 Tbsp OLIVE OIL
2-3 Tbsp SOY SAUCE
½ tsp SESAME OIL …current sesame oil prices on Amazon
SALT and PEPPER to taste
garnish w/ toasted SESAME SEEDS

chinese green bean recipe
green beans

Green Bean Recipe Directions

I’m not a fan of green beans, but this recipe is a quick way to make them edible.
First, trim the green beans by “snapping” off the ends–fresh beans will snap easily, and if there is a fiborous, stringy seam along the bean, this can be pulled off as well.

Bring a pot of lightly salted water to a boil and add the green beans. Allow to cook 2-3 minutes, the longer the beans are in the water, the softer they will get, but why overcook them? They’re already awful green beans, so you might as well get some nutrition out of them.

Remove the beans from the hot water and place in an ice bath for 1 minute. This is called blanching–it stops the cooking process, keeps the beans crisp and maintains the bright, green color of the beans. After a minute, drain the beans.

While the beans drain, heat olive oil and butter in a skillet. Add sliced onion, garlic, ginger, and chili peppers and saute for 2 minutes. Add drained green beans and continue cooking another 2 minutes. To finish, add soy sauce and sesame oil and mix well, then remove skillet from the heat. Check here for current pricing for a non-stick skillet on Amazon.

That’s it! Serve them hot and garnish the dish with toasted sesame seeds for optimal flavor potential.
Enjoy.

For another nightmare ingredient from childhood, revisit a new and tasty way to eat raw The Horror That Is Broccoli!

raw broccoli
Raw broccoli is high in vitamins and nutrients and is great for digestive health.

Thanks for checking out our green bean recipe, and all of our recipes. Be sure and sign up for our mailing list and never miss a new Chef Buck cooking video, and also click a button below and share the dishes with your friends. We appreciate the kind comments and support, and we’ll see you next time in the kitchen!
–Chef Buck

Thanks for watching our recipe videos!

We include affiliate links for products on our website, so if you make a purchase after clicking on our links, we may earn a commission which helps us produce more videos and drink more coffee :^) We participate in the Amazon Services LLC Associates Program, which is an affiliate advertising program providing a means for us to earn fees by linking to Amazon.com and affiliated sites, so we can make more videos.

Share and Enjoy !

Nachos Recipe like Restaurant Nachos Supreme

best nachos recipe

Try this great Nachos Supreme Recipe. It’s a super grande-sized platter of nacho heaven.
We use ground beef for this nachos recipe, but if you skip the meat and just use beans–it’ll still be pretty damn tasty. The key to great nachos recipe is a great nacho filling, so spice up your bean and beef mixture just right and build your nacho castle on a tasty foundation.

What You Need to Make The Best Nachos Grande

1 lb. GROUND BEEF
1 ONION chopped
15oz can KIDNEY BEANS
16oz can LOW FAT REFRIED BEANS
CORN TORTILLA CHIPS (thick)
2 ROMA TOMATOES diced
½ cup JALAPENOS sliced and pickled
¼ cup BLACK OLIVES sliced
8-10oz CHEESE (shredded)
2-3 GREEN ONIONS chopped
¼ cup CILANTRO chopped
1 Tbsp BROWN SUGAR
1-2 Tbsp CUMIN
2-3 Tbsp CHILI POWDER
SALT and PEPPER to taste
serve with sour cream, salsa, guacamole

How to make this Nachos Recipe

  • In a large skillet on medium heat, add ground beef and begin browning meat.
  • Add chopped onion and continue browning.
  • Add some salt, cumin, chili powder, and black pepper to begin seasoning as the ground beef browns.
  • Once the meat is browned, drain the excess grease.
  • Add the kidney and refried beans and stir into the ground beef.
  • Add ¼ can water. Stir ingredients until well mixed.
  • Add brown sugar and more cumin and chili powder. Stir and simmer 5 minutes.
  • On a baking sheet spread out corn tortilla chips; thicker, sturdier chips work best. If you don’t have a larger baking sheet, then buy a giant pizza pan like this one on amazon or look at a local thrift store–that’s where we found our huge pizza pan.
  • Spoon and sprinkle the ground beef mixture over the chips.
  • Top nachos with diced tomato, sliced jalapenos, black olives, and the chopped bottoms of the green onions.
  • Sprinkle the top with cheese.
  • Slide the baking sheet into the oven (pre-heated at 400 degrees F) and let cook approx. 15 minutes
    or until the cheese is melted and the nachos heated through.
  • Remove from the oven and top with chopped green onion tops and cilantro.
  • Serve with sour cream, salsa, or guacamole and eat ’em while they’re hot.

World’s Best Nachos Recipe?

best nachos recipe
This is a fantastic Nachos Supreme dish, and a giant pizza pan makes a great dish for cooking and serving.

For another meaty meal, check out these Crispy Oven-baked Chicken Wings.

wings recipe
Oven baked wings are healthier than deep fried, and less messy to make!

Thanks for Watching our Nachos Recipe Video!

Click a button below and share the dishes with your friends. You can also follow Chef Buck on Youtube. We appreciate all the kind comments and support, and we’ll see you next time in the kitchen!

If you like what CG and I do, support us on Patreon, or throw us a tip in our Paypal Tip Jar. We’ll happily enjoy a coffee on the road – Thanks! We appreciate all the support, and we’ll see you next time in the kitchen!

We include affiliate links for products on our website. Making a purchase after clicking on our links and we may earn a commission which helps us produce more videos and drink more coffee :^) We participate in the Amazon Services LLC Associates Program, which is an affiliate advertising program. It provides a means for us to earn fees by linking to Amazon.com and affiliated sites, so we can make more videos.

Share and Enjoy !

Spicy Crispy Chickpea Recipe -great salad topping!

Here’s a quick, spicy chickpea recipe that makes a great salad topping and a so-so snack; it’s a lot easier on your teeth than baked chickpea snacks, which I find to be almost inedible (they tend to turn into tiny rocks).

ingredients:
15 oz can CHICKPEAS
2-3 Tbsp OLIVE OIL
½ tsp CURRY POWDER
½ tsp CUMIN
½ tsp PAPRIKA
dash CAYENNE PEPPER
SALT to taste

chickpea recipe

Rinse and drain a 15oz can of chickpeas (garbanzo beans). In a skillet, heat olive oil on medium heat. When the oil is hot, add chickpeas–be sure that they are drained well, since water and hot oil definitely do not mix. Saute chickpeas for 10-15 minutes; obviously, the longer they’re in the skillet, the crispier they will get, but it’ll take about 15 minutes to get them “crispy”. Once the chickpeas get near the doneness you desire, add salt, pepper, and spices. The spice combo in the recipe works well, but experiment with whatever spices you have–and don’t be shy with the spices–spice really makes this recipe work, and a good deal of the spice you use will remain in the skillet when you remove the chickpeas. Saute chickpeas and spices another 2-3 minutes and then remove from the heat.
Use them as a salad topping instead of croutons for a healthy crunch, or a just tasty snack, something to nibble on besides potato chips.
Enjoy!

Ever try Chickpea Curry(chana masala)? It’s a terrific Indian chickpea dish.

Share and Enjoy !


Edamame Recipe –Roasted Snack and Salad Topping

Try this roasted edamame recipe for a quick semi-healthy snack. The toasted Parmesan cheese will almost make you forget that you’re eating soybeans.

Roasted Edamame Recipe Ingredients:
10 oz frozen shelled EDAMAME (green soybeans)
1 Tbsp OLIVE OIL
1 tsp GARLIC POWDER (also add or substitute onion powder, chili powder)
SALT and PEPPER to taste
¼ cup shredded PARMESAN CHEESE

directions:
Preheat oven to 425 degrees F.
Mix frozen edamame beans (no need to thaw), olive oil, fresh-cracked black pepper, salt, garlic powder, and Parmesan cheese together in a large bowl. Try experimenting with different seasonings; substitute onion powder or chili powder for the garlic–or add them all–this is an easy snack food to change up for a little variety.
Spread mixture onto an ungreased baking sheet.
Place in oven and bake for 8-10 minutes and then remove from oven and stir. Spread edamame out again and cook another 8-10 minutes, until the cheese is toasted crispy and golden.
Add additional salt or garlic powder if desired.

Roasted edamame makes a great salad topping.

Eat as a quick snack–it is delicious hot out of the oven–or use as a topping for salads and whatnot.

Tastes great hot out of the oven--perfect for snacking.  Try it as a movie treat instead of popcorn.
Tastes great hot out of the oven–perfect for snacking. Try it as a movie treat instead of popcorn.

Give this roasted edamame recipe a try and let me know what you think, and bon appetit!

And for another quick and healthy salad topper, try this Spicy Chickpea Recipe.

chickpea snack recipe

Roasted edamame or chickpeas are both great components in a salad. A super-flavorful and healthy salad ingredient is kale. It’s extremely versatile and can be eaten raw or cooked. Click on the video link below to discover some simple tips on using raw kale in your next salad.

avocado kale w/ chickpeas
raw avocado kale salad

Share and Enjoy !


Coleslaw Recipe with a Curry Twist

coleslaw

Chickpea curry and coleslaw are two of my favorite foods, so combining them is a win-win. This dish makes a perfect side for a spicy meal or a fancy-pants hamburger, so give chickpea curry coleslaw a go and let me know what you think.

Curry Coleslaw Dressing Ingredients

1 tsp CORIANDER
½ tsp TURMERIC
½ tsp CUMIN
2 Tbsp SUGAR
1 tsp GINGER (minced)
1 tsp GARLIC (minced)
2 Tbsp VINEGAR (or substitute fresh lemon juice and zest–very tasty!)
¼ cup SOUR CREAM (or substitute plain yogurt)
¼ cup MAYONNAISE

Slaw:
14 oz can CHICKPEAS
½ small CABBAGE (shredded)
2 medium CARROTS (shredded)
½ cup CILANTRO (chopped)
SALT and PEPPER to taste

chickpea curry coleslaw

How to Make Coleslaw

In a small bowl, combine ingredients for dressing and whisk together until smooth. Be sure the ginger and garlic are minced well. I’ve sometimes substituted lemon juice for the vinegar and it tastes great; if using fresh lemon, also throw in a little (or a lot) of the zest.

In a larger bowl, combine cabbage, carrots, and a 14oz can of chickpeas (rinsed and drained). Add dressing and mix well. Add salt and pepper to taste (a dash of cayenne will add a little bite). Add cilantro.

Try this curry twist on a classic coleslaw, you’re going to love it.

For an Asian twist on slaw. try this Crunchy Ramen Noodle Slaw Recipe.

crunchy slaw
Crunchy coleslaw or noodle salad? What sounds tastier?

We Hope You like the Curry Coleslaw

Sign up for our mailing list so you’ll never miss a new recipe. Also click a button below and share the dishes with your friends. You can also follow Chef Buck on Youtube. We appreciate all the kind comments and support, and we’ll see you next time in the kitchen!

If you like what CG and I do, support us on Patreon, or throw us a tip in our Paypal Tip Jar. We’ll happily enjoy a coffee on the road – Thanks! We appreciate all the support, and we’ll see you next time in the kitchen!

We include affiliate links for products on our website. Making a purchase after clicking on our links and we may earn a commission which helps us produce more videos and drink more coffee :^) We participate in the Amazon Services LLC Associates Program, which is an affiliate advertising program. It provides a means for us to earn fees by linking to Amazon.com and affiliated sites, so we can make more videos.

Share and Enjoy !

Share and Enjoy !

Banh Tet Rice Cake — Let’s Try Vietnamese Bánh Tét

banh tet

What is Banh Tet rice cake? Let’s try this traditional Vietnamese rice cake.

What is Banh Tet Rice Cake

Banh tet rice cake is a staple dish served to celebrate the Lunar New Year in Vietnam. It’s a very popular dish in Vietnamese culture, and if you live near a Vietnamese market or deli, you’ll probably be able to give it a try–and I recommend you do. It’s pretty tasty, kind of addictive, and a bargain dish in the International District in Seattle. I’ve eaten many bánh tét rice cake since shooting this video, and I see many more in my future.

banh tet rice cake
Banh tet sticky rice cake filled with pork and mung bean paste

Making a bánh tét rice cake often begins the day before Tét. The ingredients are prepared then cooked for at least six hours in a pot of boiling water. Glutinous rice, mung bean paste, and cooked pork fat are the main ingredients. The ingredients are layered on top of banana leaves and then wrapped tightly together with string. Bánh tét are generally wrapped several times with a string before boiling in a large pot of water to prevent the banana leaf from coming apart during cooking. The cake is savory, but sometimes sweetened, and tastes great with chili sauce.

If you liked this banh tet rice cake video, check out my Cool Foods Playlist

kiwano melon
kiwano has hints of citrus and cucumber

Ever Try a Banh Mi sandwich?


What is in a Banh Mi? Lets take one apart and see what we got.
This is the best Banh Mi, so far–thanks to eastsidegirl1977 for the great Seattle recommendation. I’ve been eating lots of these Vietnamese/French fusion sandwiches–maybe too many–but it’s too great a taste and value to pass up.

Thanks for checking out the videos. If you liked it, then click a button or two below and share it with your friends. I appreciate it!
–Buck

Share and Enjoy !


Best Stuffed Squash Recipe –looks fancy, tastes great!

squash recipe

This stuffed squash recipe is easy to cook, yummy as hell, and looks pretty fancy-pants when you stuff it full of delectable goodies.

Try out the recipe below and let me know what you think. Hope you like it!

Stuffed Squash Recipe Ingredients:

2 ACORN SQUASH (halved, seeds removed)
2 tsp OLIVE OIL
3 cloves GARLIC (minced)
1/2 inch fresh GINGER (minced)
1 CARROT (peeled and chopped)
1 cup GARBANZO BEANS (drained)
1/3 cup RAISINS (or dried currants)
1 tsp ground CUMIN
1/2 tsp ground CINNAMON
[1/4 tsp ground GINGER, if didn’t use fresh]
SALT and freshly GROUND PEPPER, to taste
1 cup BROTH
3/4 cup instant COUSCOUS
1/2 cup SLIVERED ALMONDS (toasted)
2-3 GREEN ONIONS (white and green parts, chopped)
1/2 golden delicious APPLE (cored and chopped)

squash recipe
A squash recipe to impress!.

How to Make Stuffed Squash:

Preheat the oven to 400.
Toast the almonds.
Place the squash halves, cut side down, on a shallow pan with ¼ inch of water. Roast until the squash is easily pierced with a fork, about 30 – 40 minutes.
In a medium saucepan, heat the olive oil over medium heat. Stir in the garlic, ginger, and carrots, and cook 5 minutes. Mix in the garbanzo beans and raisins. Season with cumin, cinnamon, salt, and pepper, and continue stirring for another minute.
Add broth, simmer 5 minutes.
Stir in couscous, cover pot, and turn off heat. Allow couscous to absorb liquid for 5 minutes.
Stir in the almonds, green onions, and apple. Spoon the filling into the roasted squash, mounding generously and serve.
You can freeze leftovers (or make extras). Freeze by mashing the squash on the bottom of the container then adding the couscous mixture on top.
And that’s that.
Give this stuffed squash recipe a try and let me know what you think, and bon appétit!

Also, try this TERRIFIC SPAGHETTI SQUASH RECIPE!
stuffed squash recipe

Thanks for watching and sharing and subscribing, I appreciate it!

Share and Enjoy !


Vegetarian Chili Recipe EVERYONE Will Love

vegetarian chili

Try this vegetarian chili recipe for folks who don’t like vegetarian chili!

It’s tatsy and easy to make, too; once you’ve chopped up the ingredients, you’re 90% done. Or at least 85% done. Give it a try and let me know what you think.

What You Need For This Vegetarian Chili Recipe

2 15 oz cans CHICK PEAS
2 15 oz cans KIDNEY BEANS
2 BELL PEPPERS (chopped)
1 ONION (chopped)
1 HOT PEPPER (diced)
6 cloves GARLIC (finely chopped)
2 SQUASH (cut into large pieces)
1 ZUCHINNI (cut into large pieces)
2 lg or 4 sm TOMATOES (chopped)
1 28 oz can CRUSHED TOMATOES
3-6 oz TOMATO PASTE
1/2 cup CILANTRO (chopped)
1 heaping Tbsp OREGANO
2 Tbsp OLIVE OIL
1 Tbsp CUMIN
1/2 tsp CAYENNE PEPPER
2 Tbsp CHILI POWDER
SALT and PEPPER, to taste
WATER as needed…add slowly

Vegetarian Chili Recipe
Don’t let the word “vegetarian” keep you from trying this recipe!

How To Make Vegetarian Chili

Heat olive oil in large pot on medium high heat. Add onions, hot pepper, and garlic and saute 4-5 minutes. Add bell peppers and continue sauteing. Add chili powder, cumin, salt, and cayenne pepper. Mix ingredients well. Add beans and continue cooking. Add zuchinni and squash and oregano. Continue cooking 2-3 minutes and then add fresh tomatoes. Add canned crushed tomatoes. Slowly add water–not too much–as the vegetables will begin to release water as they cook. Cover and bring pot to a boil. Reduce heat and stir in the cilantro. Cover and allow to simmer approx. 45 minutes.
That’s it man. If you can make it a day ahead, then you’re lucky–chili aways taste best on the day after! But it’s good right away, too. Top with shredded cheese, or a dollop of sourcream, or a handful of corn chips–or all three–it’s gonna be delicioso!
Give this vegetarian chili recipe a try and I bet you’re gonna love it–and it’s a healthy chili choice, too.
Bon appetit!

For more vegetarian comfort food, try this Gluten-Free Tofu Lasagna.
gluten free tofu lasagna

Thanks for checking this vegetarian chili recipe out! If you liked it, click some of the buttons below and share it with your friends and family, I appreciate it.
–Buck

Share and Enjoy !


Baked Falafel Recipe – healthy and delicious

baked falafel

This baked falafel recipe is a tasty and nutritious way to enjoy chickpeas (garbanzo beans).

Falafel is traditionally fried, but a baked falafel can make a tasty, healthy, and easy alternative to the tried and true oil-splatter-fest.

Baked Falafel Recipe Ingredients:
1 15oz can CHICKPEAS
1/4 cup CILANTRO
1/4 cup PARSLEY
1/4 cup ONION
2-3 cloves GARLIC
2 Tbsp OLIVE OIL
CAYENNE PEPPER, to taste
1 tsp CORIANDER
1 tsp CUMIN
1/4 tsp BAKING POWDER
1 Tbsp BREAD CRUMBS (or flour)
1 Tbsp LEMON JUICE
SALT, to taste
— Optional garnishes —
HUMMUS, YOGURT, VEGGIES, PITA SLICES

Drain and rinse 15oz can of chickpeas (garbanzo beans). Combine in a food processor with all ingredients (except 1 Tbsp olive oil and bread crumbs). Mix roughly–pulse–DO NOT puree into a smooth consistency. Place mixture into a bowl and combine with dried bread crumbs (or substitute flour). Form into discs–I like to get 10 out of this recipe because they cook up well and fit nicely into a pita pocket–but make them as big as you like, and adjust the cooking time accordingly.
(Refrigerate 1-2 hours before cooking if you have the time–they’ll bake better, maybe, but it’s not the end of the world if you don’t. I actually prefer putting them in the fridge for a bit, but sometimes I don’t, and the difference is negligible.)
Place on a flat baking sheet and lightly drizzle or brush with olive oil.
Bake at 400 degrees F for 20 minutes, then turn falafel and bake for 10 more minutes to brown each side (a total cooking time of 30 minutes).
Serve with hummus, yogurt, veggies, and pita slices–or stuff inside a pita to make a delicious falafel sandwich.
And that’s it, man. Give this baked falafel recipe a try and let me know what you think and bon appetit!

And if you wanna make your own hummus try this Easy Hummus Recipe.
hummus

Share and Enjoy !


BBQ Beans Recipe – Tangy and Tasty Barbecue Flavor

bbq beans

A BBQ Bean Recipe with a spicy kick. This recipe is tangy and delicious and using a variety of beans gives this dish the illusion of grandeur, but it’s just beans, yummy tasty beans.

What You Need for BBQ Beans Recipe

4 15oz cans BEANS
1 large ONION (coarsely chopped)
1 GREEN PEPPER (coarsely chopped)
4 cloves of GARLIC (chopped)
1/3 cup light BROWN SUGAR
28oz can CRUSHED TOMATOES
14oz can BROTH
1/3 cup APPLE CIDER VINEGAR
1 Tbsp fresh ROSEMARY (minced)
1 tsp WORCESTERSHIRE SAUCE
1/2 tsp RED PEPPER FLAKES
1 1/2 tsp dried THYME
1/4 cup stone ground MUSTARD
1 Tbsp SOY SAUCE
1 BAY LEAF
3 Tbsp OLIVE OIL
SALT & PEPPER, to taste

How To Make Easy BBQ Beans

Heat olive oil in large skillet over medium high heat. Add onion, green pepper and sauté about 2 minutes. Add garlic and continue sautéing on med heat until begins to brown (3-5 more minutes).
Add rosemary, thyme and red pepper flakes and stir 1 minute.
Add tomatoes, prepared mustard, brown sugar, soy sauce, worcestershire sauce, stock, vinegar. Mix well. Bring to a bubble.
Stir in beans, bay leaf. Season with salt and pepper. Reduce heat and simmer on low for 60 minutes, stirring as needed.
Serve as a side–or a main dish–if you want your main dish to be beans.
And that’s it. Give this BBQ Beans recipe a try and let me know what you think, and bon appetit!

Wanna try another bean recipe? This Vegetarian Chili recipe is awesome!
vegetarian chili

Beans

-6 to 11 percent of a cooked bean’s weight is protein.
-Beans are one of the best things to eat for improving the stability of blood sugar levels in diabetics.
-Beans are low fat, contain no cholesterol or saturated fat, and are an excellent source of fiber, protein, calcium, iron,
folic acid and potassium.
-North Dakota produces more beans than any other state in the USA.

Thanks for Watching our BBQ Bean Recipe Video!

Click a button below and share the dishes with your friends. You can also follow Chef Buck on Youtube. We appreciate all the kind comments and support, and we’ll see you next time in the kitchen!

If you like what CG and I do, support us on Patreon, or throw us a tip in our Paypal Tip Jar. We’ll happily enjoy a coffee on the road – Thanks! We appreciate all the support, and we’ll see you next time in the kitchen!

We include affiliate links for products on our website. Making a purchase after clicking on our links and we may earn a commission which helps us produce more videos and drink more coffee :^) We participate in the Amazon Services LLC Associates Program, which is an affiliate advertising program. It provides a means for us to earn fees by linking to Amazon.com and affiliated sites, so we can make more videos.

Share and Enjoy !

Chana Masala Recipe w/ Quinoa -a High-Protein Meal

chana masala quinoa

A Chana masala recipe with a quinoa twist! It’s already a great tasting chickpea curry, and adding quinoa into the mix will turn this Indian favorite into a complete protein. This dish is easy to prepare and a perfect vegetarian entree.

Ingredients:
15oz can CHICKPEAS
15oz can DICED TOMATOES
1 lg ONION (chopped)
½ cup QUINOA
1 HOT PEPPER (finely chopped)
4-5 cloves GARLIC (finely chopped)
½ cup CILANTRO (chopped)
1 tsp CUMIN SEEDS
1 tsp CUMIN
1 tsp CORIANDER
½ tsp CHILI POWDER
½ tsp TURMERIC
1 tsp GARAM MASALA
2 Tbsp OLIVE OIL
1/8 tsp ASAFOETIDA (optional–really OPTIONAL!!!–don’t NOT make this dish because you don’t have this ingredient.)
SALT and PEPPER, to taste
1½ cups WATER
Check out current prices for Indian Spices on Amazon.

In a skillet, heat your oil on med. high heat. Add cumin seeds and asafoetida–the asoafoetida (also called “hing”) is OPTIONAL. Stir until seeds brown and crack–this will happen really fast, so don’t walk away from the skillet. Add garlic and continue stirring. Add chopped onions and hot pepper. Saute ingredients for 3-5 minutes.
Add turmeric, coriander, cumin, and chili powder. Stir thoroughly into onion mix.
Add quinoa and diced tomatoes.
Stir and allow skillet to come to a simmer.
Add chickpeas (rinsed and drained), salt to taste, and 1½ cups water. Bring skillet to a boil, then reduce heat to a simmer, cover and let simmer for 15 minutes (without stirring).
After the 15 minutes, stir in the garam masala. Using a fork, smash half the chickpeas in the skillet–this will add a nice texture to the dish.
Stir in the chopped cilantro.
And that’s it. Chana Masala with a quinoa twist.
Hope you like it.

And for another tasty Indian inspired dish, try this Eggplant Curry Recipe.

baingan bharta eggplant

Share and Enjoy !


Black Eyed Peas are a Healthy Salad Choice

black eyed peas

Try out this Black eyed peas recipe the next time you’re in the mood for a healthy and tasty salad. Black-eyed peas are beans, and beans are a great way to turn a salad into a meal, especially garbanzo and kidney beans, but give black eyed peas a try, I bet you’ll love them.

This salad is a nice complement to a spicy meal–in fact it’s based on a dish we get all the time at an Indian restaurant where it’s served to balance out the spiciness of other dishes.

What you need for a Black Eyed Peas Salad

2 15oz cans BLACK-EYED PEAS
3-4 GREEN ONIONS (chopped)
1 stalk CELERY (chopped)
1 CUCUMBER (sliced)
1 CARROT (shredded)
3 PLUM TOMATOES (cut)
zest and juice of 1 LEMON
1 cup CILANTRO (chopped)
4 Tbsp BALSAMIC VINEGAR
2 Tbsp OLIVE OIL
1 ½ tsp CUMIN
½ tsp CHILI POWDER
2-3 Tbsp HONEY
HOT SAUCE, to taste
SALT and PEPPER, to taste

black eyed peas

How to make Blacke Eyed Pea Salad

This is a super simple dish to prepare. You can check here for current Black-Eye Pea Prices on Amazon. Canned beans are already cooked, but dried black eyed peas will have to be cooked before adding to the salad, just prepare the beans according to the package directions.

  • In a small bowl, mix balsamic vinegar and olive oil. Season with spices.
  • Toss in the beans, onion, vegetables–EXCEPT the tomato!–tomato loses a lot of it’s flavor when refrigerated, so add tomato just before serving.
  • Gently toss the Ingredients.
  • Cover, and chill in the refrigerator at least 1 hour, or overnight. The longer the better.
  • Remove dish from fridge, mix in tomato, add additional seasonings if desired, and serve.

Folks traditionally eat black eyed peas on the first day of the new year for good luck, but these beans are pretty good on the other 364 days as well, so stock some blackeyed peas in your cupboard and try them out in some of your favorite bean dishes.

And for another great healthy beany salady kind of recipe, try this Hearty Black Bean Salsa Recipe it’s fantastic.

Black Bean Corn Salsa
Salsa is great on a chip, as a topping for fish or salad, in an omelet, on ice cream…well, maybe not ice cream.

Thanks for checking out the black eyed peas recipe. Be sure and sign up for our mailing list so you’ll never miss a Chef Buck cooking video, and click a button below and share the dishes with your friends. We appreciate all the kind comments and support, and we’ll see you next time in the kitchen!
–Chef Buck

Thanks for watching our recipe videos!

Thanks for watching. We include affiliate links for products. If you make a purchase after clicking on our links, we may earn a commission which helps us produce more videos and drink more coffee :^)
We are a participant in the Amazon Services LLC Associates Program, an affiliate advertising program designed to provide a means for us to earn fees by linking to Amazon.com and affiliated sites.

Share and Enjoy !


How to Make a Great Hummus Recipe

The hummus you buy at the market will never be as good as the hummus you make at home, so make it at home! Here is a no-frills, classic homemade hummus recipe.

Hummus Recipe Ingredients

A food processor is key for a creamy hummus. Check here for current prices on a food processor on Amazon.

2 Tbsp TAHINI
2 Tbsp LEMON JUICE
1 – 3 cloves GARLIC

1 15oz can CHICK PEAS also called Garbanzo Beans
2 Tbsp EXTRA VIRGIN OLIVE OIL
SALT to taste – I use about ¼ tsp

WATER as needed

How to Make Hummus

I use canned beans because it’s a lot less hassle and they’re fine in hummus.  Drain and rinse one 15oz can of chick peas, also called Garbanzo Beans.

IMPORTANT NOTE: For a creamier hummus, it makes a difference which ingredients you add first. Add only the tahini, lemon juice and garlic to the food processor and mix until creamy, usually around 30-45 seconds. Start with only 1 garlic clove because your friends and family will appreciate it.

Add the chick peas, extra virgin olive oil and salt to taste. Blend for another 30 seconds or so. [ The extra virgin olive oil has a richer flavor than the varieties used for sauteing. ]

Water can be added. The amount really depends on the consistency of the hummus you’re trying to make. Start with a ¼ cup and add more water if needed. Blend ingredients until desired chunkiness or smoothness is attained. Taste. Add more oil, salt and/or other ingredients (additional ideas provided below), according to your liking.

Garnish with extra virgin olive oil, paprika, parsley or cilantro, etc.

hummus

Make Different Hummus Recipes

All manner of ingredients can be added to the basic recipe above. ROASTED RED PEPPERS make a tasty addition, especially those from a jar as they blend readily, but forego adding water since the peppers will have plenty.

Also try adding cucumber, hot peppers, cumin, dill, curry, green onions, etc.
The subtle flavor of the chick peas will pair nicely with most ingredients.

Serve hummus with warm pita bread, pita chips, crackers, or raw fruit and vegetables. It’s great in wraps and sandwiches. Hummus on a hamburger? Why not. It’s inexpensive, easy to make, delicious, and a healthy dining choice. Hummus fits perfectly into a healthy Mediterranean diet.

For a twist on a classic hummus dish, try our sweet potato hummus recipe or this cauliflower hummus recipe.

cauliflower hummus recipe

Thanks for watching our recipe videos!

Thanks for checking out our homemade hummus recipe, and all of our recipes. Be sure and sign up for our mailing list and never miss a new Chef Buck cooking video, and also click a button below and share the dishes with your friends. We appreciate all the kind comments and support, and we’ll see you next time in the kitchen!

We include affiliate links for products on our website, so if you make a purchase after clicking on our links, we may earn a commission which helps us produce more videos and drink more coffee :^) 

We participate in the Amazon Services LLC Associates Program, which is an affiliate advertising program providing a means for us to earn fees by linking to Amazon.com and affiliated sites, so we can make more videos.

Share and Enjoy !

Lentil Soup Recipe with Ginger

lentil ginger soup

A lentil soup recipe! Doesn’t that sound like all of your dreams are coming true? Pick up some brightly colored lentils and give this lentil soup recipe a try.

What you Need for this Lentil Soup Recipe:

1 ½ cups LENTILS
5-6 cups WATER (or ½ water ½ broth)
1 large ONION (finely chopped)
2 Tbsp fresh GINGER (finely chopped)
1 hot PEPPER (finely chopped)
2 Tbsp OLIVE OIL
1 tsp CUMIN SEEDS
½ tsp TUMERIC POWDER
1 tsp CORIANDER POWDER
1 14 oz can DICED TOMATOES (or 2 Lg tomatoes, diced)
SALT and BLACK PEPPER to taste
CILANTRO LEAVES for garnish (coriander leaves)

How to Make the Soup:

If you need a nice soup pot for your kitchen, you can check here for current pricing for a soup pot on Amazon.

  • In a large pot, heat olive oil on medium heat. When oil is hot, add the cumin seeds and allow cooking for about 1 minute. After a minute the seeds will begin to open, at this point add the onion and hot pepper and allow cooking until the onions soften and become translucent.
  • Now, add ginger, coriander, and turmeric and continue mixing ingredients over medium heat.
    Add tomatoes, mix, and cook with ingredients for 2 minutes.
  • Add lentils (be sure to wash and rinse first). Red or yellow lentils will make this dish look extra yummy. Darker lentils will taste equally as good—the dish just won’t win a beauty contest—but use whatever kind you have, ultimately, your stomach won’t know the difference.
  • Add water, or a combination of water/broth.
  • Next, bring the pot to a boil, reduce heat, then cover the pot loosely and allow ingredients to simmer for 30 minutes.
  • After 30 minutes, add salt and pepper to taste. Add more water as needed, but sparingly—you don’t want your soup to be too thin. Cover pot loosely and continue cooking another 15-20 minutes.

Final Steps:

  • When the lentils are soft and completely cooked, lightly blend the soup to add a creamy consistency. A hand-held stick blender works great—a few quick pulses and voilà! If a stick blender is not handy (rim shot), simply remove a few cups of the soup to a table top blender, smooth, and return to the pot. This step isn’t necessary, but do it; just do it.
  • If the soup is thinner than you like, continue to simmer briefly—but remember, the lentils, like rice, will continue to absorb water and thicken the soup on their own.
  • Garnish with cilantro (coriander leaves) and serve with French bread for optimal taste satisfaction.

Keep Coming Back To See What’s New!

Bon appétit!

And, if you like bread with your soup, you might love trying this Fancy Egg Bread Recipe, it’s one of my favorites.

egg bread
baked egg bread with rosemary seasoning

Thanks for checking the recipes out! If you liked it, click some of the buttons below and share it with your friends and family, I appreciate it.
–Buck

Share and Enjoy !

Chana Masala Indian Chickpea Curry Recipe

chana masala chickpea curry

Chana masala is a delicious Indian chickpea curry. It’s easy to make and a great introduction to Indian cooking.

What You Need to Make the Best Chana Masala

1 15 oz can CHICK PEAS (or 2 cups)
1 15 oz can DICED TOMATOES (or 2 fresh diced)
1 tsp GARLIC (minced)
1 tsp GINGER (minced)
1 HOT PEPPER (minced)
1-2 Tbsp OLIVE OIL
1 Tbsp CHICK PEA FLOUR (also called besan)
1 tsp CUMIN SEEDS
1 tsp CHILI POWDER
1 tsp GARAM MASALA
1/8 tsp ASAFOETIDA (optional, also called hing)
½ tsp TUMERIC
SALT (to taste)
Check out current prices for Indian Spices on Amazon.

Many chana masala recipes include onion, but I think it’s fine with or without; I make so many Indian dishes with onions, it’s nice to have a few that are onion-free if desired. I do include asafoetida (hing) and besan (chick pea flour), but those can be optional, too.

Chana masala is a very flexible dish. If not using besan, just add ½ cup of water instead of 1 cup. The asafoetida is wonderful. It stinks, but it’s still wonderful. It’s also called “devil’s dung”, but that’s just when it’s raw, once you toss it into a simmering skillet, it transforms into a sharp, oniony weirdness that will pleasantly remind you of your favorite Indian restaurant.

I’ve only been able to find asafoetida at international food markets, but it’s worth acquiring—especially if you want to make a habit of cooking great Indian dishes at home. If skipping the asafoetida, try adding 1 finely chopped medium-sized onion between the cumin seeds and the tomatoes. Coriander powder is great in this dish, too. But the way I usually prepare it is like this:

chole masala
Make chana masala a side dish or your main meal

How to Make a Chana Masala Recipe

  1. In a skillet, heat oil on medium high heat.
  2. When the oil is heated, add the cumin seeds and asafoetida. Stir and allow to simmer for just a few moments.
  3. Once the seeds begin to crack, add the chick pea flour and continue stirring. The flour will absorb the oil.
  4. Stir for approx. 1 minute and then add the diced tomatoes. Mix well and allow the tomatoes to bubble.  As the tomatoes cook down, you can crush them with your stirrer for a smoother chana massala.
  5. Stir in the minced ginger and garlic and hot pepper.
  6. Add the chili powder and turmeric.
  7. After the tomatoes have cooked 4-5 minutes, add the chick peas, garam masala, and salt to taste.
  8. Mix well and add 1 cup of water. Bring the dish to a bubble, then reduce to a simmer, cover, and allow cooking for 10 minutes.
  9. After 10 minutes, the chick peas will be soft. Use a fork or potato masher to smash some of the chick peas, this will help thicken the chana masala along with the chick pea flour added earlier.
  10.  Simmer uncovered to the desired consistency, remove and serve.

Garnish with fresh coriander leaves. Serve with rice or on its own.
Give this chana masala recipe a try and let me know what you think, and bon appétit!

Want to make another easy Indian Recipe? Try Baingan Bharta, a delicious Eggplant Curry recipe.

baingan bharta eggplant

Thanks for checking out the chana masala recipe, and all of our recipes. Be sure and sign up for our mailing list to never miss a new cooking video, and also click a button below and share the dishes with your friends, and follow Chef Buck on Youtube. We appreciate all the kind comments and support, and we’ll see you next time in the kitchen!

If you like what CG and I do, support us on Patreon, or throw a tip in our Paypal Tip Jar We’ll happily enjoy a coffee on the road, or maybe even pay a bill or two!–Thanks! We appreciate all the support, and we’ll see you next time in the kitchen!

Thanks for watching our Chana Masala recipe

We include affiliate links for products on our website, so if you make a purchase after clicking on our links, we may earn a commission which helps us produce more videos and drink more coffee :^) We participate in the Amazon Services LLC Associates Program, which is an affiliate advertising program providing a means for us to earn fees by linking to Amazon.com and affiliated sites, so we can make more videos.

Share and Enjoy !

Chole Palak Chickpea and Spinach Recipe

chole palak

Chole Palak is an Indian-style spinach and chickpea recipe that’s super flavorful and a breeze to make.  With a few ingredients in the cabinet, this tasty dish is always just a few minutes away.

What You Need to Make Chole Palak

SPINACH  (13 oz can or frozen, or 3 cups chopped fresh)
CHICKPEAS  (15 oz can, rinsed and drained)
TOMATOES  (diced, 14 oz can—or 2 fresh tomatoes
HOT PEPPER  (1 or 2, minced)
GINGER  (1 Tbsp, minced)
OLIVE OIL  (2-3 Tbsp)
CUMIN SEEDS  (1 tsp)
ASAFOETIDA  (¼ tsp)
CORIANDER  (1 Tbsp)
CHILI POWDER  (1 tsp)
TURMERIC  (½ tsp)
GARAM MASALA  (1 tsp)
SALT (to taste)
Check out current prices for Indian Spices on Amazon.

chole palak chickpea spinach
Chole Palak is a popular Spinach and Chickpea dish

How to Make Chole Palak

Heat olive oil on medium high heat and add cumin seeds and asafoetida.  The seeds should sizzle when they hit the pan and will brown and crack quickly.  Add the tomatoes, ginger, and peppers.  Mix well and then add the coriander, chili, and turmeric powder. 

Mix and allow the tomatoes to cook down 3-4 minutes.  Add the spinach and salt and stir well.  Add ¼ – ½ cup water—I like less water, but add as desired throughout the recipe.  Cover and let cook 3-4 minutes. 

Uncover and mix in chickpeas (also called garbanzo beans).  Add another ¼ cup of water, reduce heat to simmer, cover and cook for 5-6 minutes.  At this point the chickpeas will be soft enough to smash easily with a fork, which you don’t have to do, but I prefer the consistency of the dish if I mush about half of them. 

Add the garam masala and stir another minute or two, also adding more water if desired.  And that’s it! Enjoy! When I prepare an Indian meal, I almost always serve this dish; it’s easy, healthy, and delicious, so why not? Give chole palak a try, let me know what you think, and bon appétit!

For another fantastic dish, try Baingan Bharta, an Indian-style Eggplant Recipe.

baingan bharta eggplant

Thanks for Watching our Chole Plak Recipe Video!

Click a button below and share the spinach curry with your friends. You can also follow Chef Buck on Youtube. We appreciate all the kind comments and support, and we’ll see you next time in the kitchen!

If you like what CG and I do, support us on Patreon, or throw us a tip in our Paypal Tip Jar. We’ll happily enjoy a coffee on the road – Thanks! We appreciate all the support, and we’ll see you next time in the kitchen!

We include affiliate links for products on our website. Making a purchase after clicking on our links and we may earn a commission which helps us produce more videos and drink more coffee :^) We participate in the Amazon Services LLC Associates Program, which is an affiliate advertising program. It provides a means for us to earn fees by linking to Amazon.com and affiliated sites, so we can make more videos.

Share and Enjoy !

Quinoa Recipe — Spicy Spanish Style Quinoa

spanish quinoa

Try this spicy Spanish-style quinoa recipe; it’s vegetarian heaven. Quinoa is a versatile ingredient and an excellent source of protein. Quinoa is a grain-like superfood and a great substitute for rice, and just as easy to prepare. I use it often as an alternative to rice–even in rice pudding. Give this quinoa recipe a try; I’m sure you’ll be eating a whole lot less rice in the future, and not missing it at all.

What You Need For This Quinoa Recipe

  • 1 Tbsp OLIVE OIL
  • 1 ½ cups QUINOA (check current prices for quinoa on Amazon)
  •  ½ cup RED ONION (minced, separated)
  • 3-5 cloves GARLIC (finely chopped)
  •  ½ large RED BELL PEPPER (minced, separated)
  • 1 14 oz can DICED TOMATO (reserve juice)
  • 1 15 oz can KIDNEY BEANS (drained, rinsed)
  • 1 tsp CUMIN powder
  • 1 tsp CHILI powder
  • 2 cups WATER, including drained tomato liquid
  • ½ cup CILANTRO (fresh, chopped)
  • 1 small CUCUMBER (diced, peeled if waxed)
  • 1 AVOCADO (seeded, peeled, diced)
  • 1/3 cup LIME JUICE (freshly squeezed)
  • SALT and PEPPER to taste

quinoa recipe
uncooked quinoa…looks like a grain, but it’s a seed.

How to Make Spanish Quinoa

  • Open the canned tomato and drain the tomato liquid into a measuring cup. Add enough water to equal 2 cups.
  • Heat oil on medium high. Saute garlic, 2/3 of the onion and 1/3 of the red pepper for 2-3 minutes. [the rest of the onion and red pepper will be added raw at the end.]
  • Add quinoa.
  • Stir in tomatoes with green chilies, kidney beans, cumin and chili powder and water/tomato juice mixture.  Bring the pot to a boil. Reduce to medium low and cook approx. 15 minutes. The liquid will be absorbed.
  • Remove from the heat and let sit for about 10 minutes and then fluff with a fork. Allow quinoa to cool some, you want it to be warm, not piping hot when you add the rest of the ingredients.
  • After quinoa has cooled some, add in the remaining onion and pepper pieces, and the chopped cilantro.  Mix. Then add cucumber and avocado and lime juice (or sub lemon juice). Toss gently.
  • And then serve.
  • Give this spicy Spanish quinoa recipe a try and let me know what you think, and…

Bon appétit!

For another tasty vegetarian recipe, try this Easy Eggplant Burger Recipe.

veggie burger recipe
Veggie burger recipe with blackened eggplant

Thanks for watching and subscribing –And hit those buttons below to share this recipe. I appreciate it!

Share and Enjoy !


Follow Me!